When you click on links to various merchants on this site and make a purchase, this can result in this site earning a commission. Affiliate programs and affiliations include, but are not limited to, the eBay Partner Network.
SInce I dont have time to locate the source of a battery drain that will flatten my battery after 2-3 weeks of not running I decided to get a CTEK charger from a friend of mine who is a distributor here.
As soon as I finish this huge project I am working on at my job I will track down the drain, but for the time being I hardly have time to drive the car, let alone spend a day hunting electrical gremlins.
I searched the posts on this and found that there seem to be 2 locations for mounting, one in the rear bumper direct to the battery and two in the engine compartment. What is the current thinking on the best location?
I believe Alan Moore, our 928 "Electrical Boffin", has installed a battery maintainer and he would be the best person to advise you where to permanently mount it in the best position.
Tails 1990 928 S4 Auto
From: Live Music Capital of the World - Austin, Texas
I hooked up the pigtail connector to mine to the terminal in the front of the engine bay. The actual unit is external (sorry but can't remember the brand) but I just rest that on the space by the front bumper with the hood up just a bit so I NEVER forget to unplug it.
Did mine also up there. Connected under the jump post for the positive, ran the ground to the chassis with the leads going to the front of the car. Pop the hood, pull out wire, plug in, good to go.
I guess I missed this in 2008.. But a topical find since my Schumacher battery maintainer stopped working a few days ago... after a long service life of at least 19 years of working well in reasonably frequent use - every few weeks.
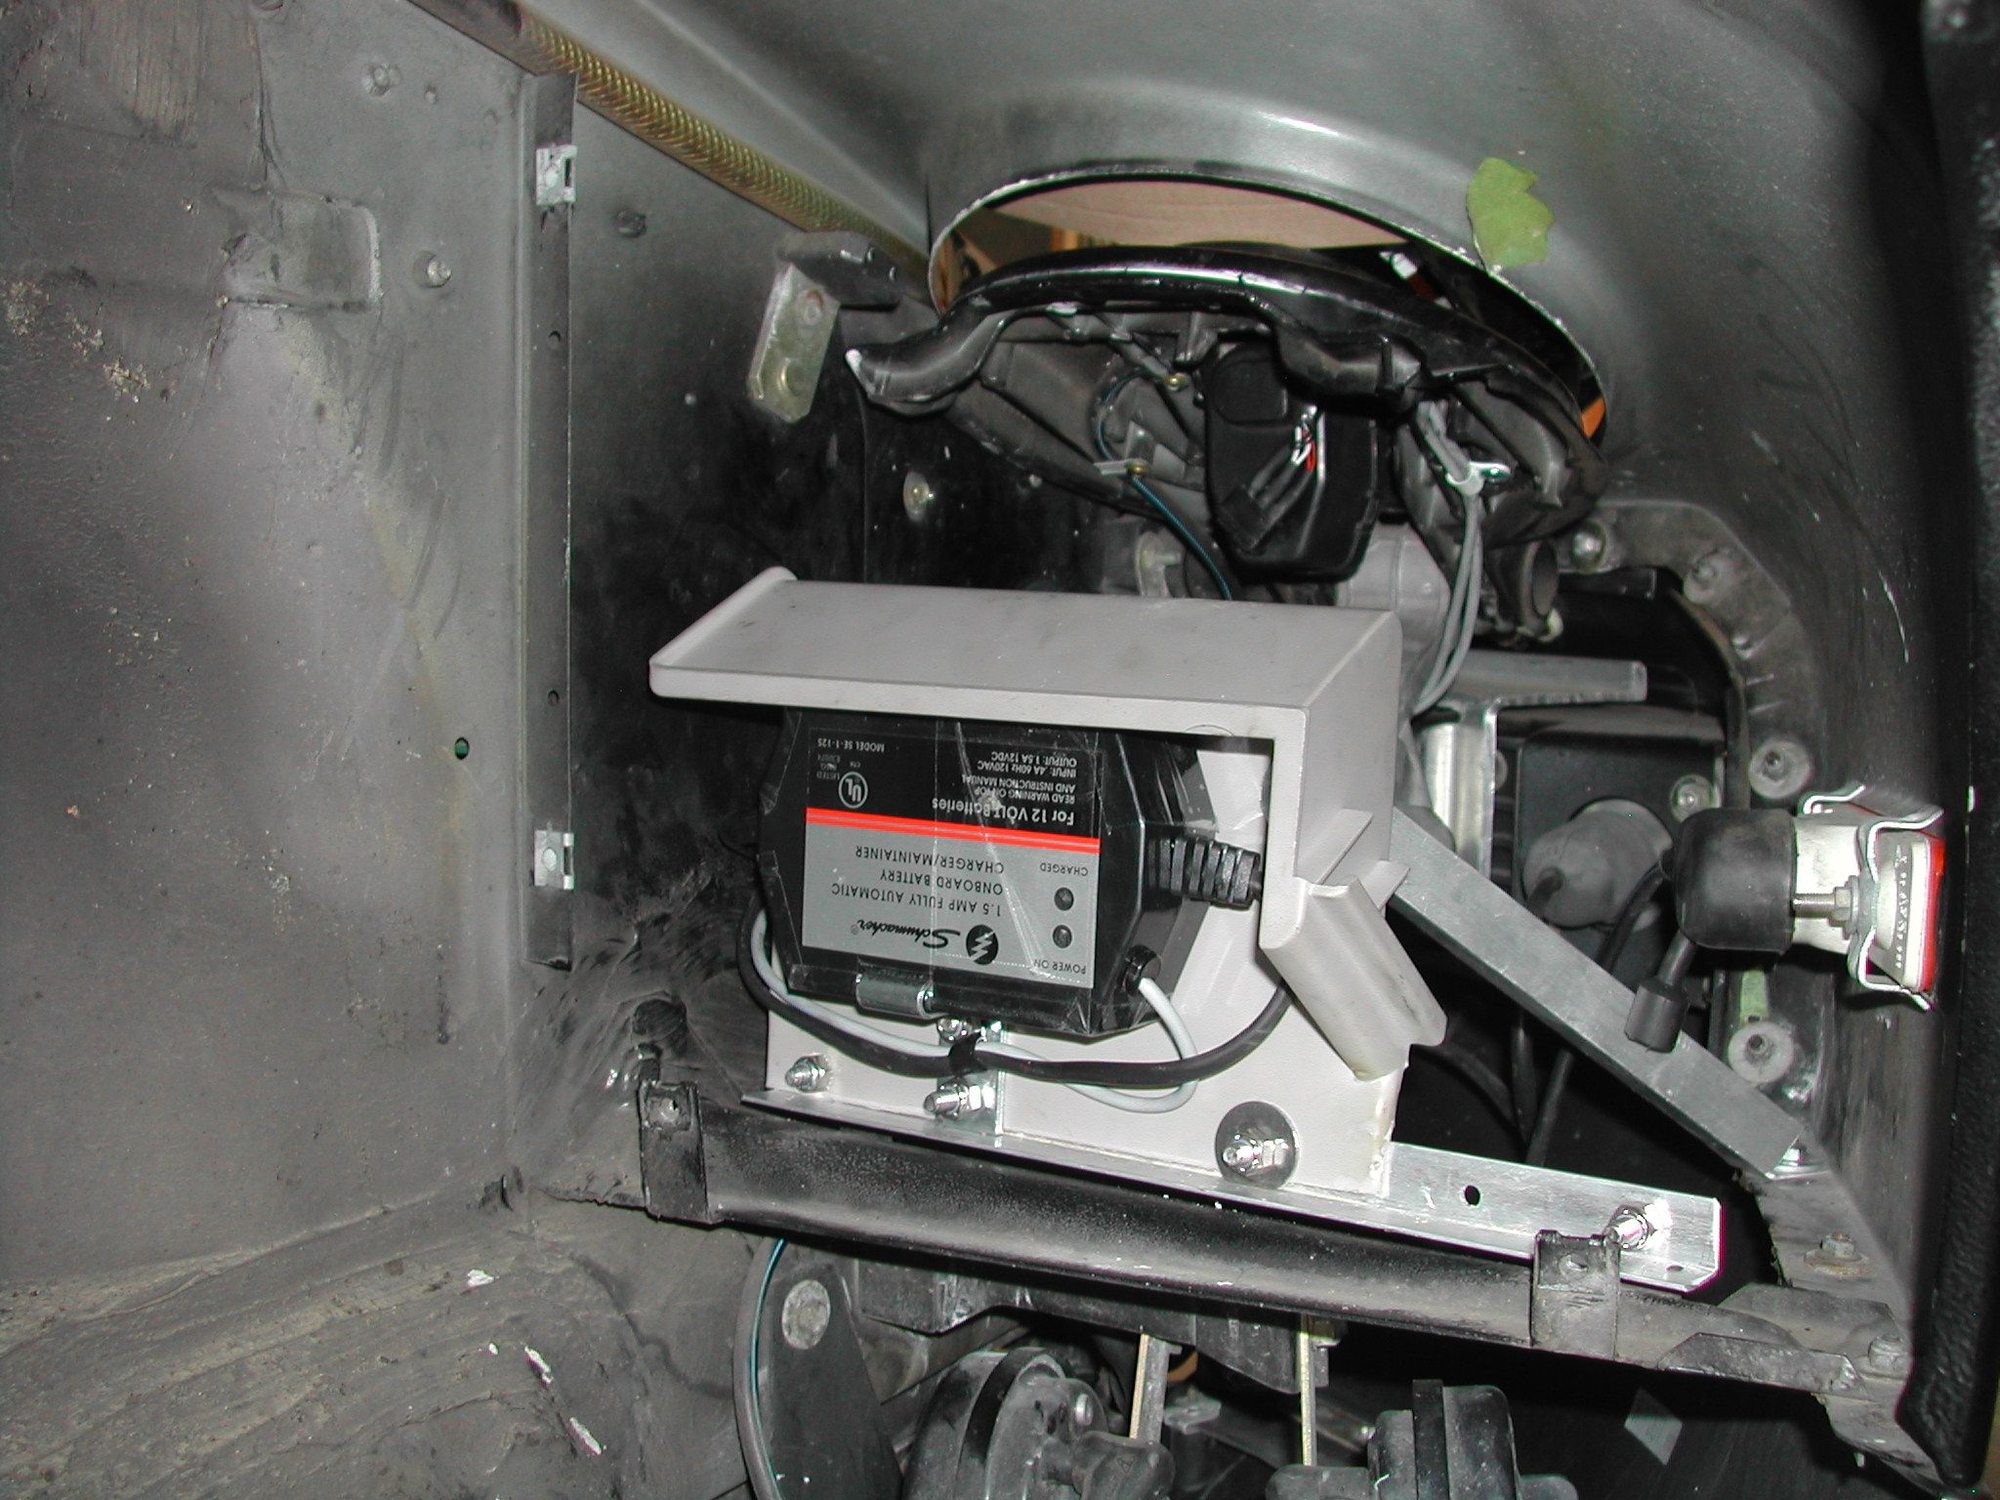
My install was in the passenger front fender area connected to the ground point in front of the radiator and the jump post via an inline fuse. I liked this install area because I can have plug in 120V power in the front grille - with an IEC C14 inlet in the grille connected to the maintainer and an IEC C13 plug to NEMA 5-15P for the power connection to the wall. This is great because if you should forget about it it just pulls out when you reverse out of the garage. I do have a bright orange cable/connector for it so this is less likely - but there was at least once...
In replacing this Schumacher there are new options and challenges. I have other designs on the space the Schumacher currently takes up, and I also have an additional AGM battery for the maintainer to charge (at least some of the time).Good news is that there are new options that can charge AGM automatically, that are a bit higher current than the Schumacher, and much smaller. I've selected the NOCO GENIUS2D - designed to be permanently mounted in the engine compartment. I'll mount it ahead of the radiator - roughly where the flap motor was on earlier models. In this location it will be relatively cool & generally dry when running (though it is IP65 rated) and will only see much heat when parked after a long run. As before I will connect to the jump post and passenger fender ground point. This time I will just use a pigtail and floating IEC C14 socket - since plugging into the fixed socket in the grille was actually difficult by feel - so laying down to see it was often needed - not great. Poking the IEC C13 through the grille into the bay in front of the radiator - connecting it to the C14 there then pulling both back through the grille is much easier and provides the same (or better) break-away safety feature. I'll use a dummy (un-wired) Screwed down C13 plug as a "keeper" and connector protector on the floor of the radiator bay to keep the C14 socket located. I'll post some more pictures when done - But I like the small size of this unit ands it gets very good reviews. I already have a NOCO Genius10 charger (10A model) and I like it for serious charging & recovery uses - so its a brand I have experience of. I'll probably add another pigtail for the NOCO quick connect for the Genius 10 in the front at the same time (I already have a plug in for it at the back - but its less convenient). Front passenger fender (LHD) Schumacher IEC C14 panel socket to go in grille area (with dummy plug w/ puller eyelet to keep out debris)
I hooked up the pigtail connector to mine to the terminal in the front of the engine bay. The actual unit is external (sorry but can't remember the brand) but I just rest that on the space by the front bumper with the hood up just a bit so I NEVER forget to unplug it.
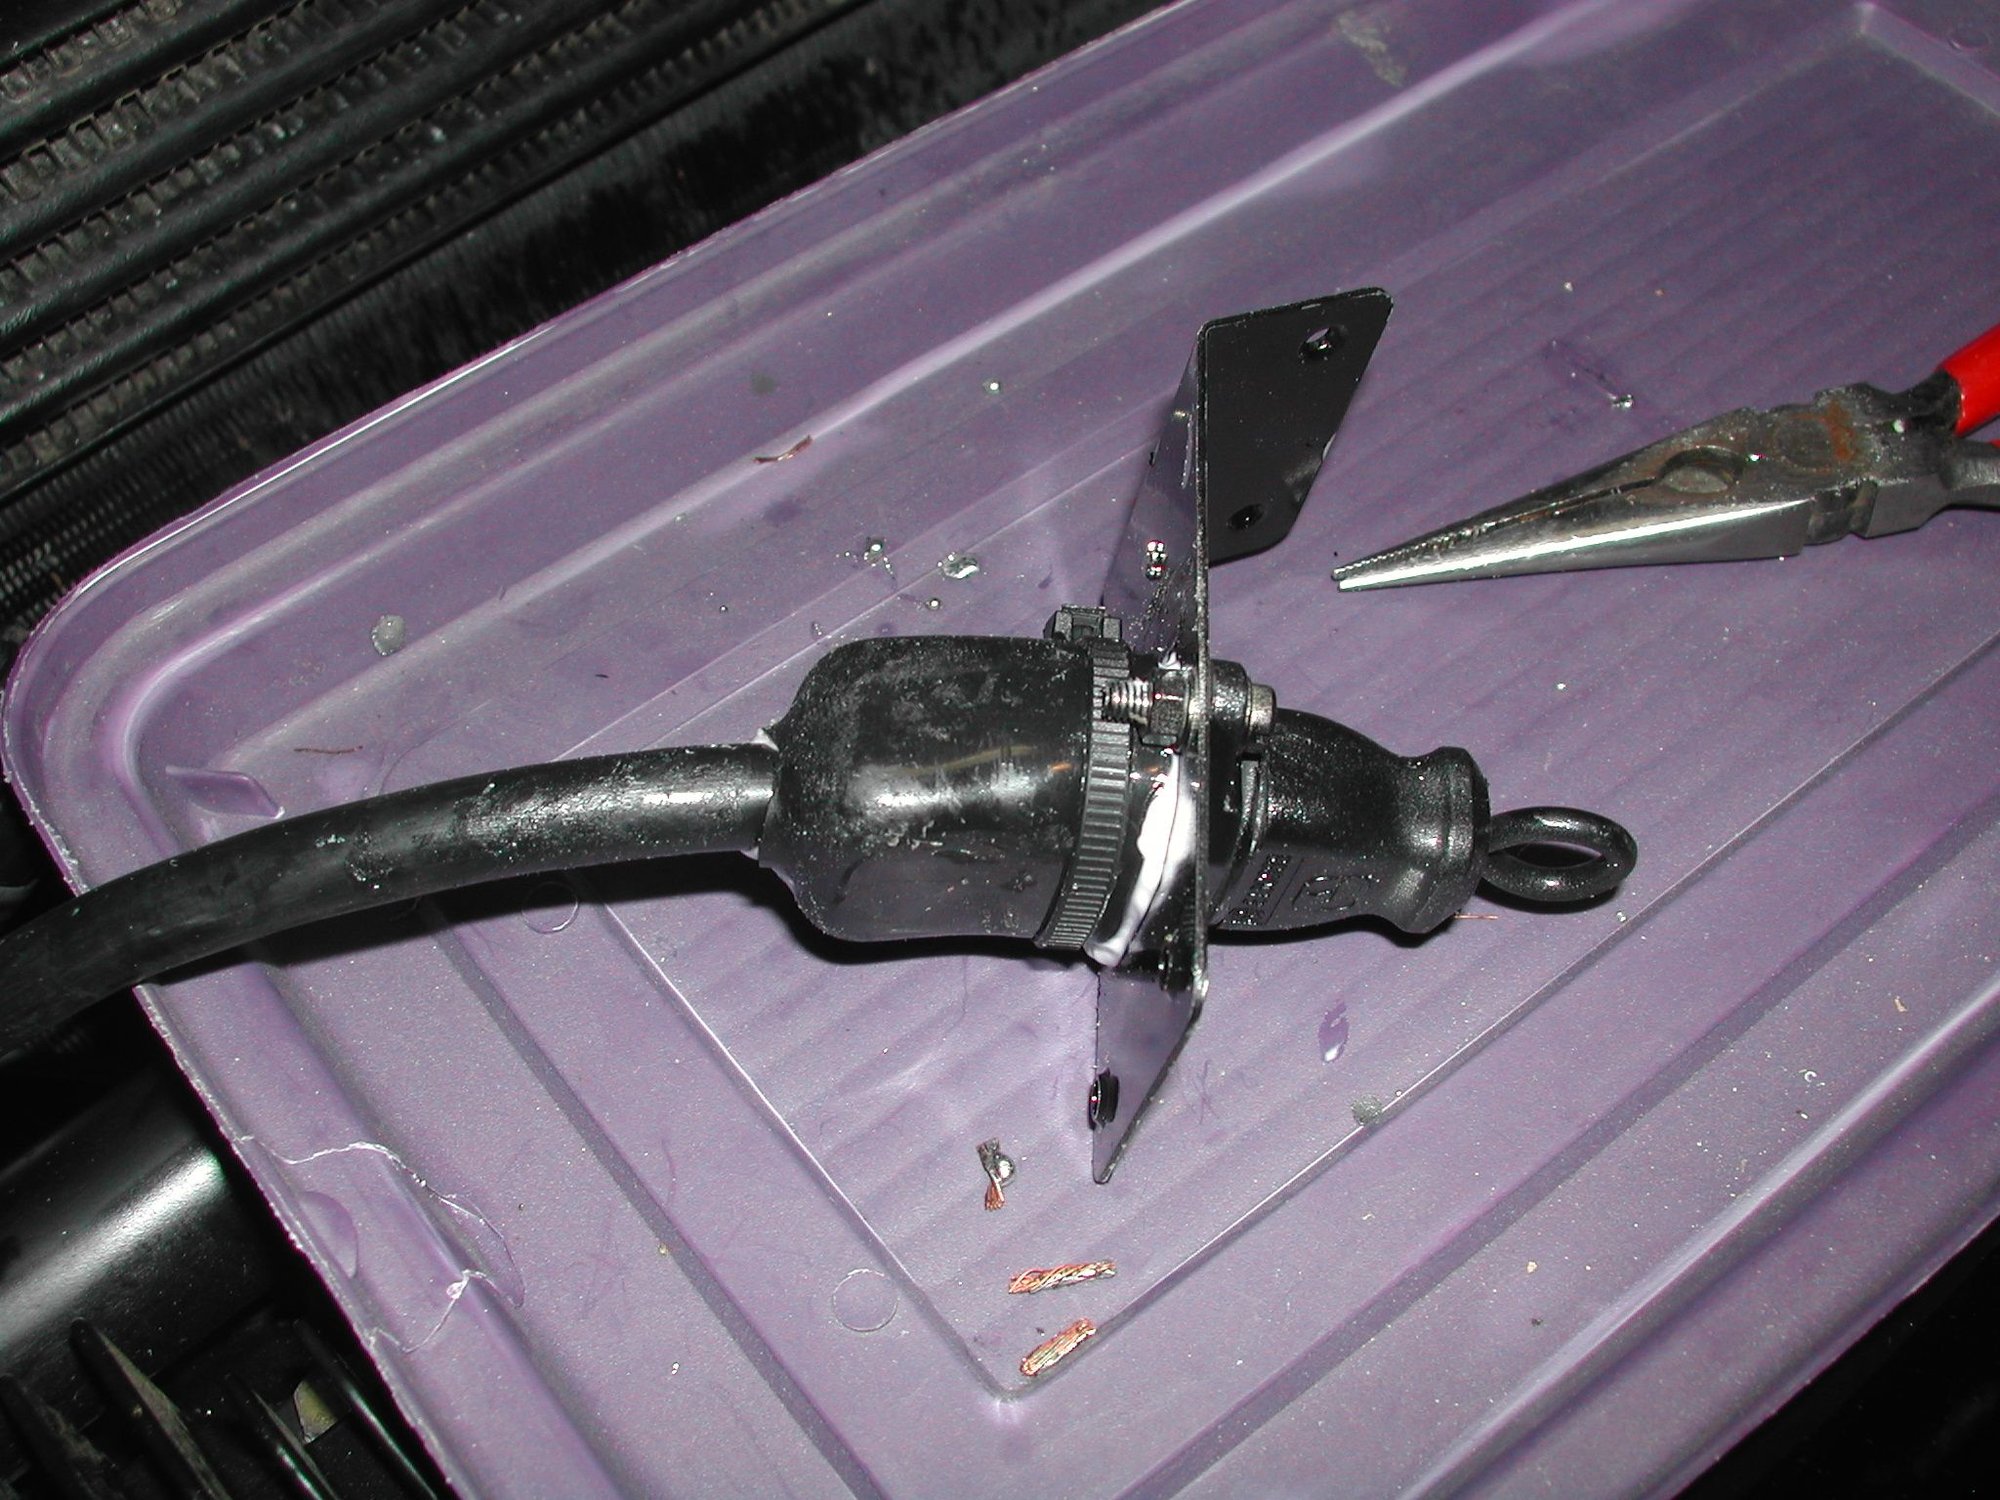
Be sure to fuse it, that's a constant hot connection.
I have both front and rear connections. The rear is wired to the battery, fused, but bypassing the ground strap. In winter when the car is hibernating, the ground strap is lifted and the maintainer still works. The front connection is also fused. Since the car sits under a cover whenever it's in the garage, the maintainer hangs on the wall rather than being mounted in the car. The CTEK units I use have status indicators, plus I can hear the little charge relays inside when they cycle open and closed. Mounted in the car, I'd lose those indications.
Pigtails with Molex connectors hide under the edge of the fender lip in the front, behind the tool panel in the rear when not deployed for use. These pull apart easily enough to prevent damage if I happen to try and drive off without disconnecting. The cable is pretty obvious, since it needs to be managed to get the cover on and off.
The 2A maintainer will be connected only to system power since its designed for that use and does not produce high voltages (just like the Schumacher it is replacing). Like with yours my existing high current charging at the rear connects direct to the battery - on the battery side of my battery isolation switch. For the new 10A unit front pigtail. I will run the ground back directly to the battery, so same as the existing high current configuration (I do have a spare connection already from the battery to the CE panel area). I always turn the battery switch off for fast charging (since in recovery mode the 10A unit can peak to ~20V pulses).
Talos Takes Your 991 Porsche 911 GT3 to the Next Level for a Cool $1.13 Million
Slideshow: Talos Vehicles has transformed the Porsche 911 GT3 RS into a carbon-bodied, race-inspired machine that costs well over $1 million before the donor car is even included.
9 Vehicles Porsche Helped Engineer that Aren't Porsches
Slideshow: Long before engineering consulting became trendy, Porsche was quietly helping other automakers build everything from supercars to economy hatchbacks.
9 Features and Characteristics That Only Porsche People Understand
Slideshow: Some brands build cars. Porsche builds traditions, obsessions, and a few habits that stopped making sense decades ago but somehow became part of the charm.
This Builder Is Turning Heads With Its Slantnose 911 Creation
Slideshow: A small Polish tuner has reimagined the Porsche 911 Slantnose for the modern era, blending 1980s nostalgia with widebody tuning culture and serious performance upgrades.
Porsche 911 GT3 Artisan Edition Pays Homage to Japanese Culture
Slideshow: Porsche has created a Japan-only 911 GT3 Artisan Edition that blends track-ready hardware with design cues inspired by traditional Japanese craftsmanship.
Porsche Reveals Coupe Variant of the Electric Cayenne With a Fresh Look
Slideshow: Porsche's latest electric Cayenne Coupe blends dramatic styling with supercar acceleration, turning the brand's midsize SUV into a 1,139-horsepower flagship.