When you click on links to various merchants on this site and make a purchase, this can result in this site earning a commission. Affiliate programs and affiliations include, but are not limited to, the eBay Partner Network.
The thread title at minimum must be changed to include "badass" in it.
Maybe if people keep writing Badass or Bad *** it will appear in the tags. I think the mods are the only ones who can change thread titles? Otherwise I have no clue how to do the change???
Anyway, the number 2 pipe was redone, it is a big improvement however it is shorter and now only weighs 584 grams which means it is the shortest pipe. Each inch weighs about 19 grams. So my variance in the pipes is no more than 2" Which is O.K I was told not to chase equal length when it was going to be a big compromise.
I did learn something while making the change. That is try to avoid joins on bends but if they can't be avoided for what ever reason. The pipe needs to be stretched and enlarged especially on the short side because when it is welded it can pull in and the weld is always a little sunken, which is exactly what happens when the pros do it. However they have the bending machines and would avoid bends on curves where they can however the welds and bends can out very well and most importantly No Holes or dags in the pipes
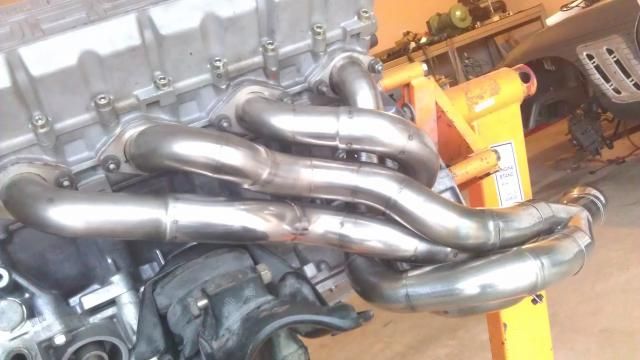
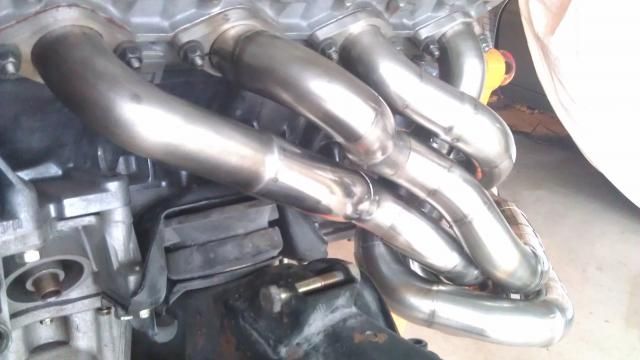
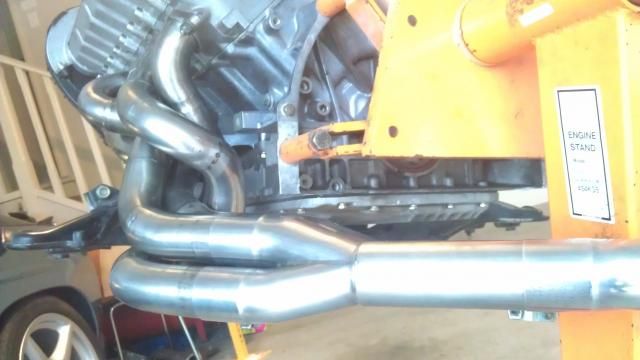
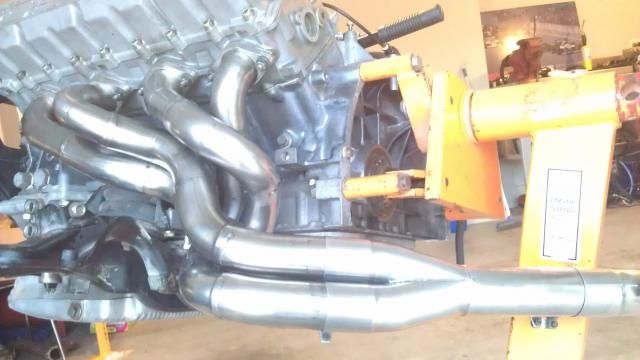
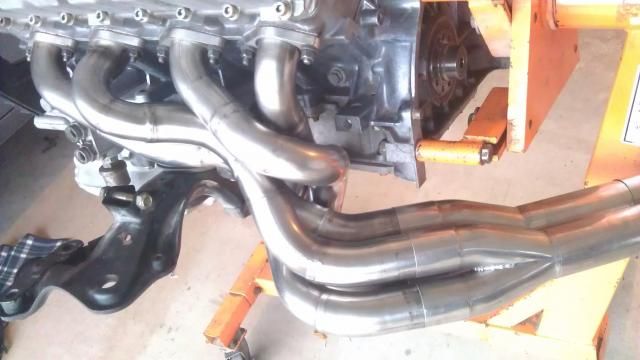
Forgive my crappy pics, the glare is hard to deal with on my camera phone.
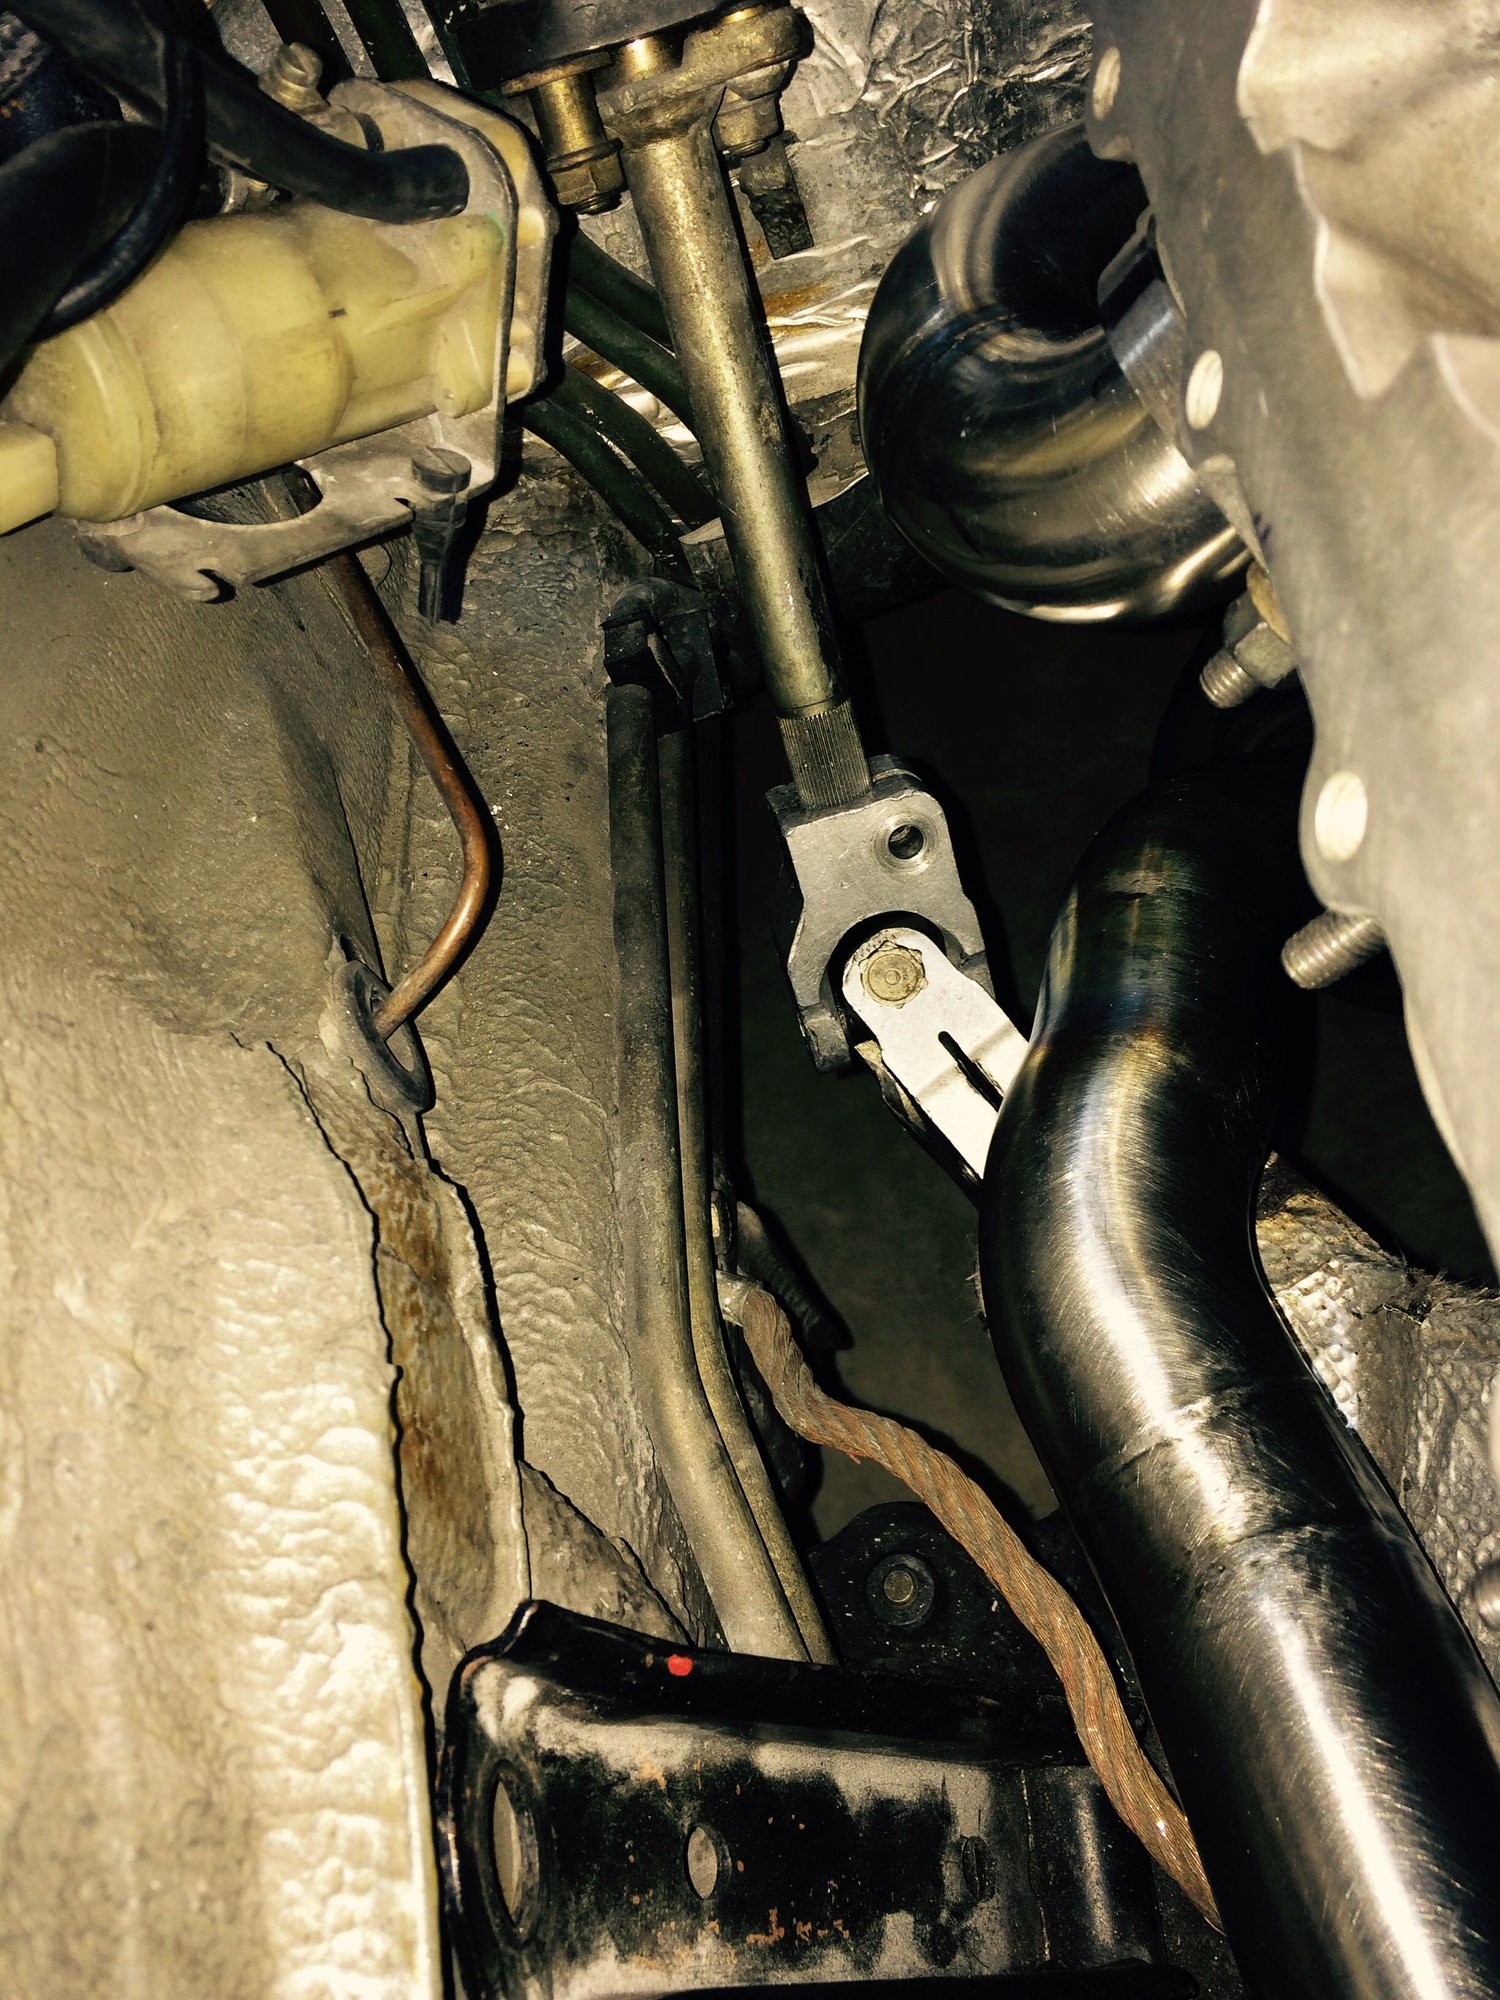
This pic shows the routing of the pipes.
This pic shows how the pipes suck in around pipe number 3. It gets tight around that area with the power steer lines in RHD models at least not sure about LHD. You can see how tight the pipes are packaged also.
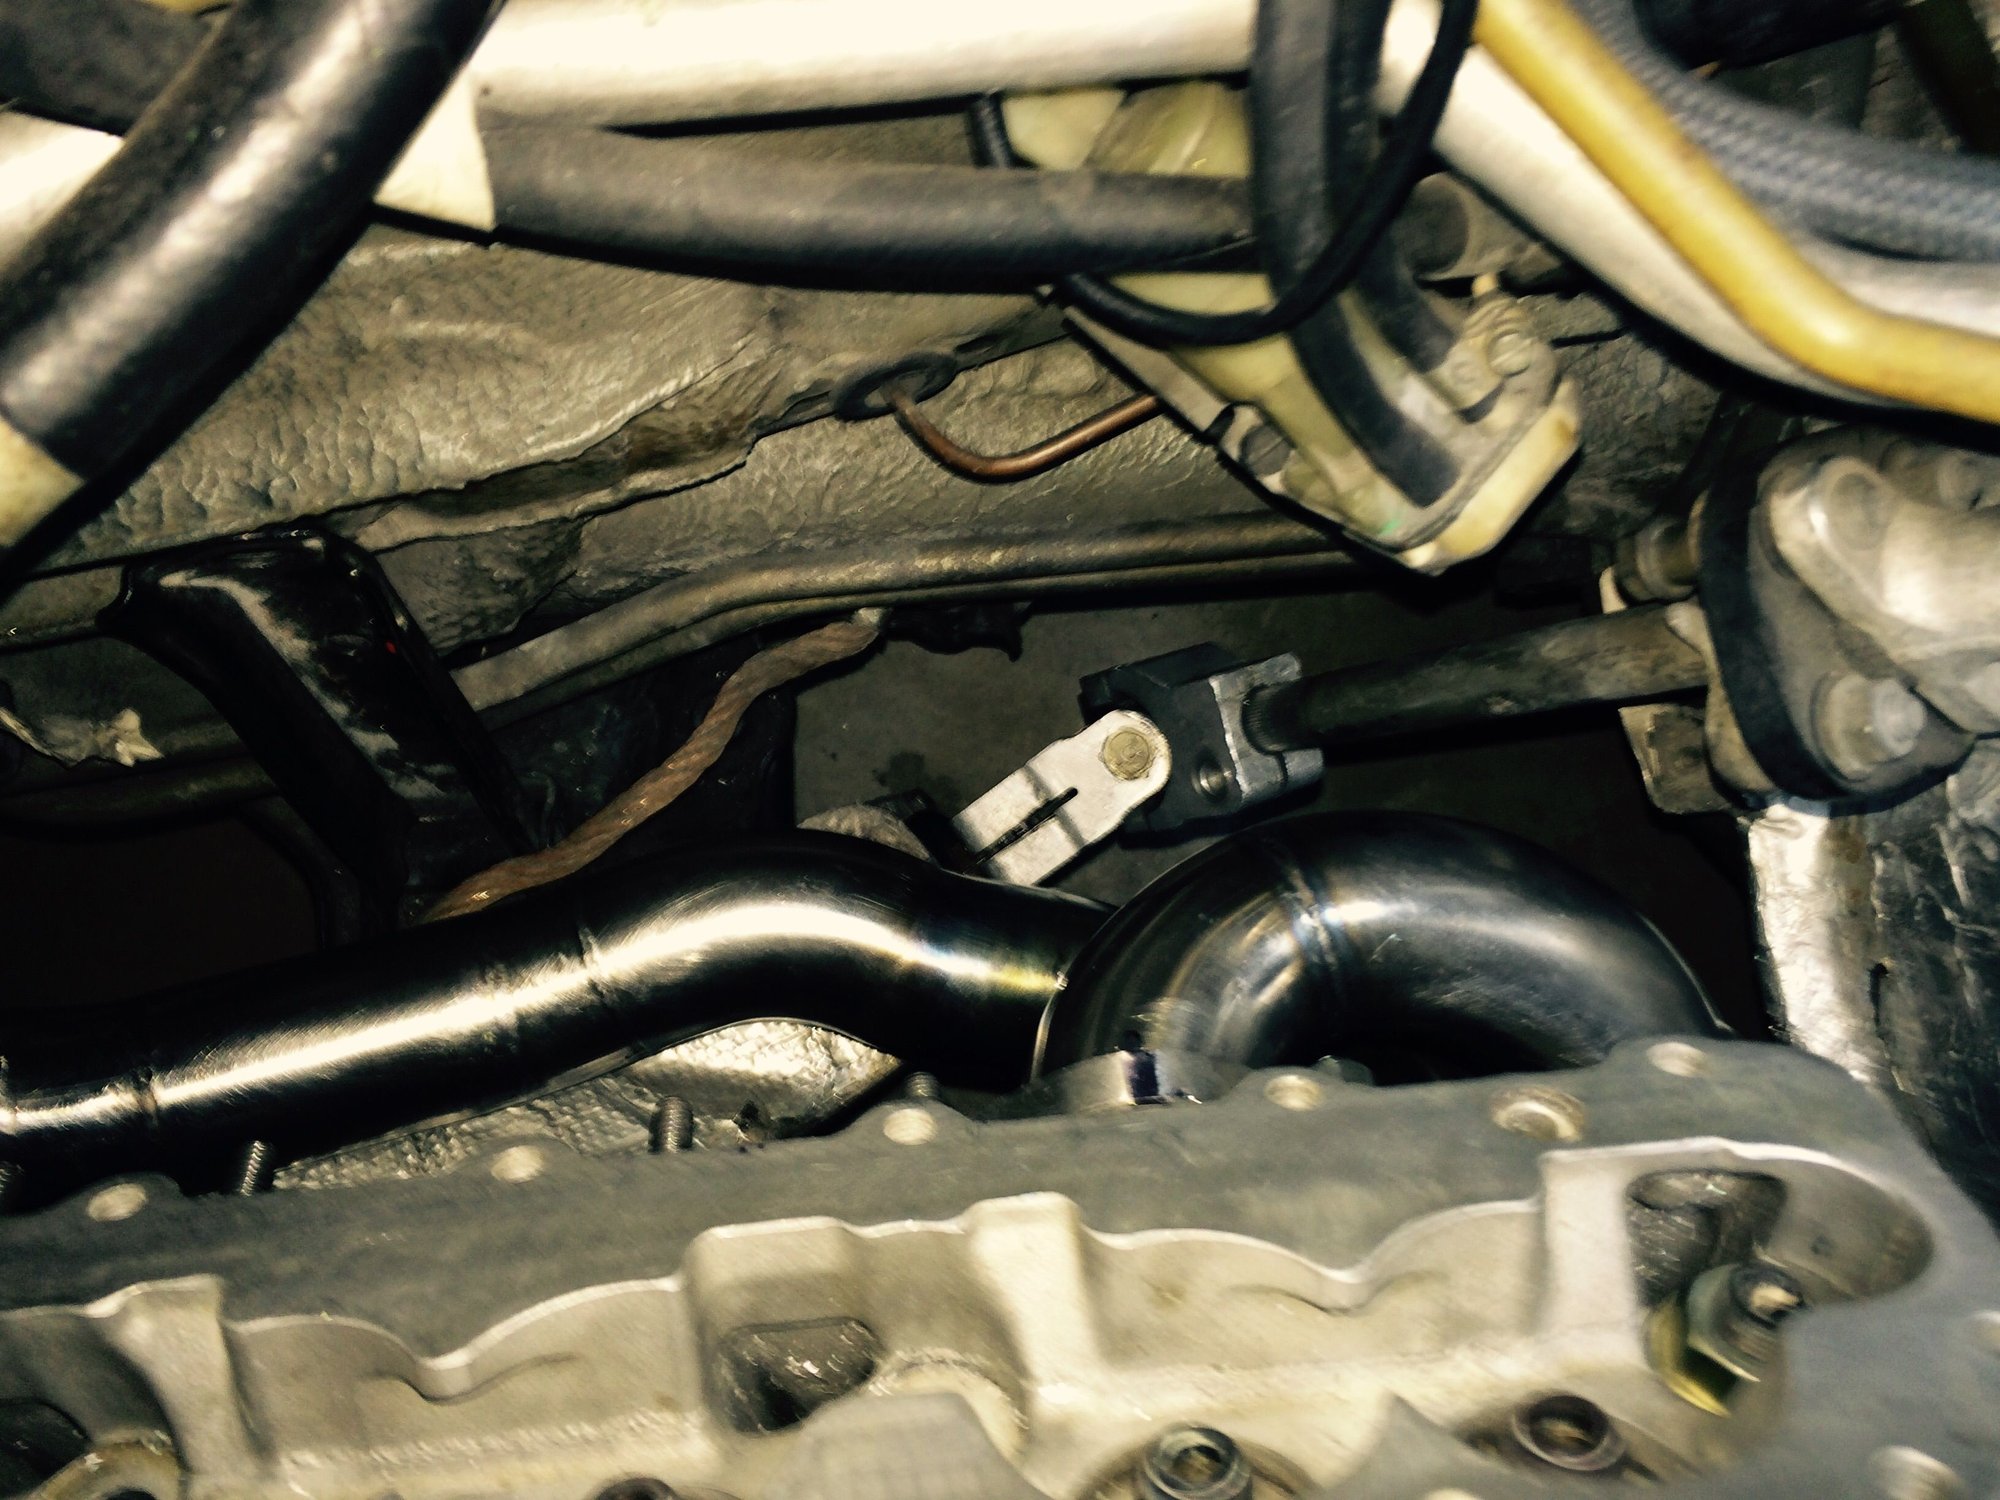
This pic shows where the length is gained for pipe number 2, It comes out from the head as there is plenty of room around number 2 pipe.
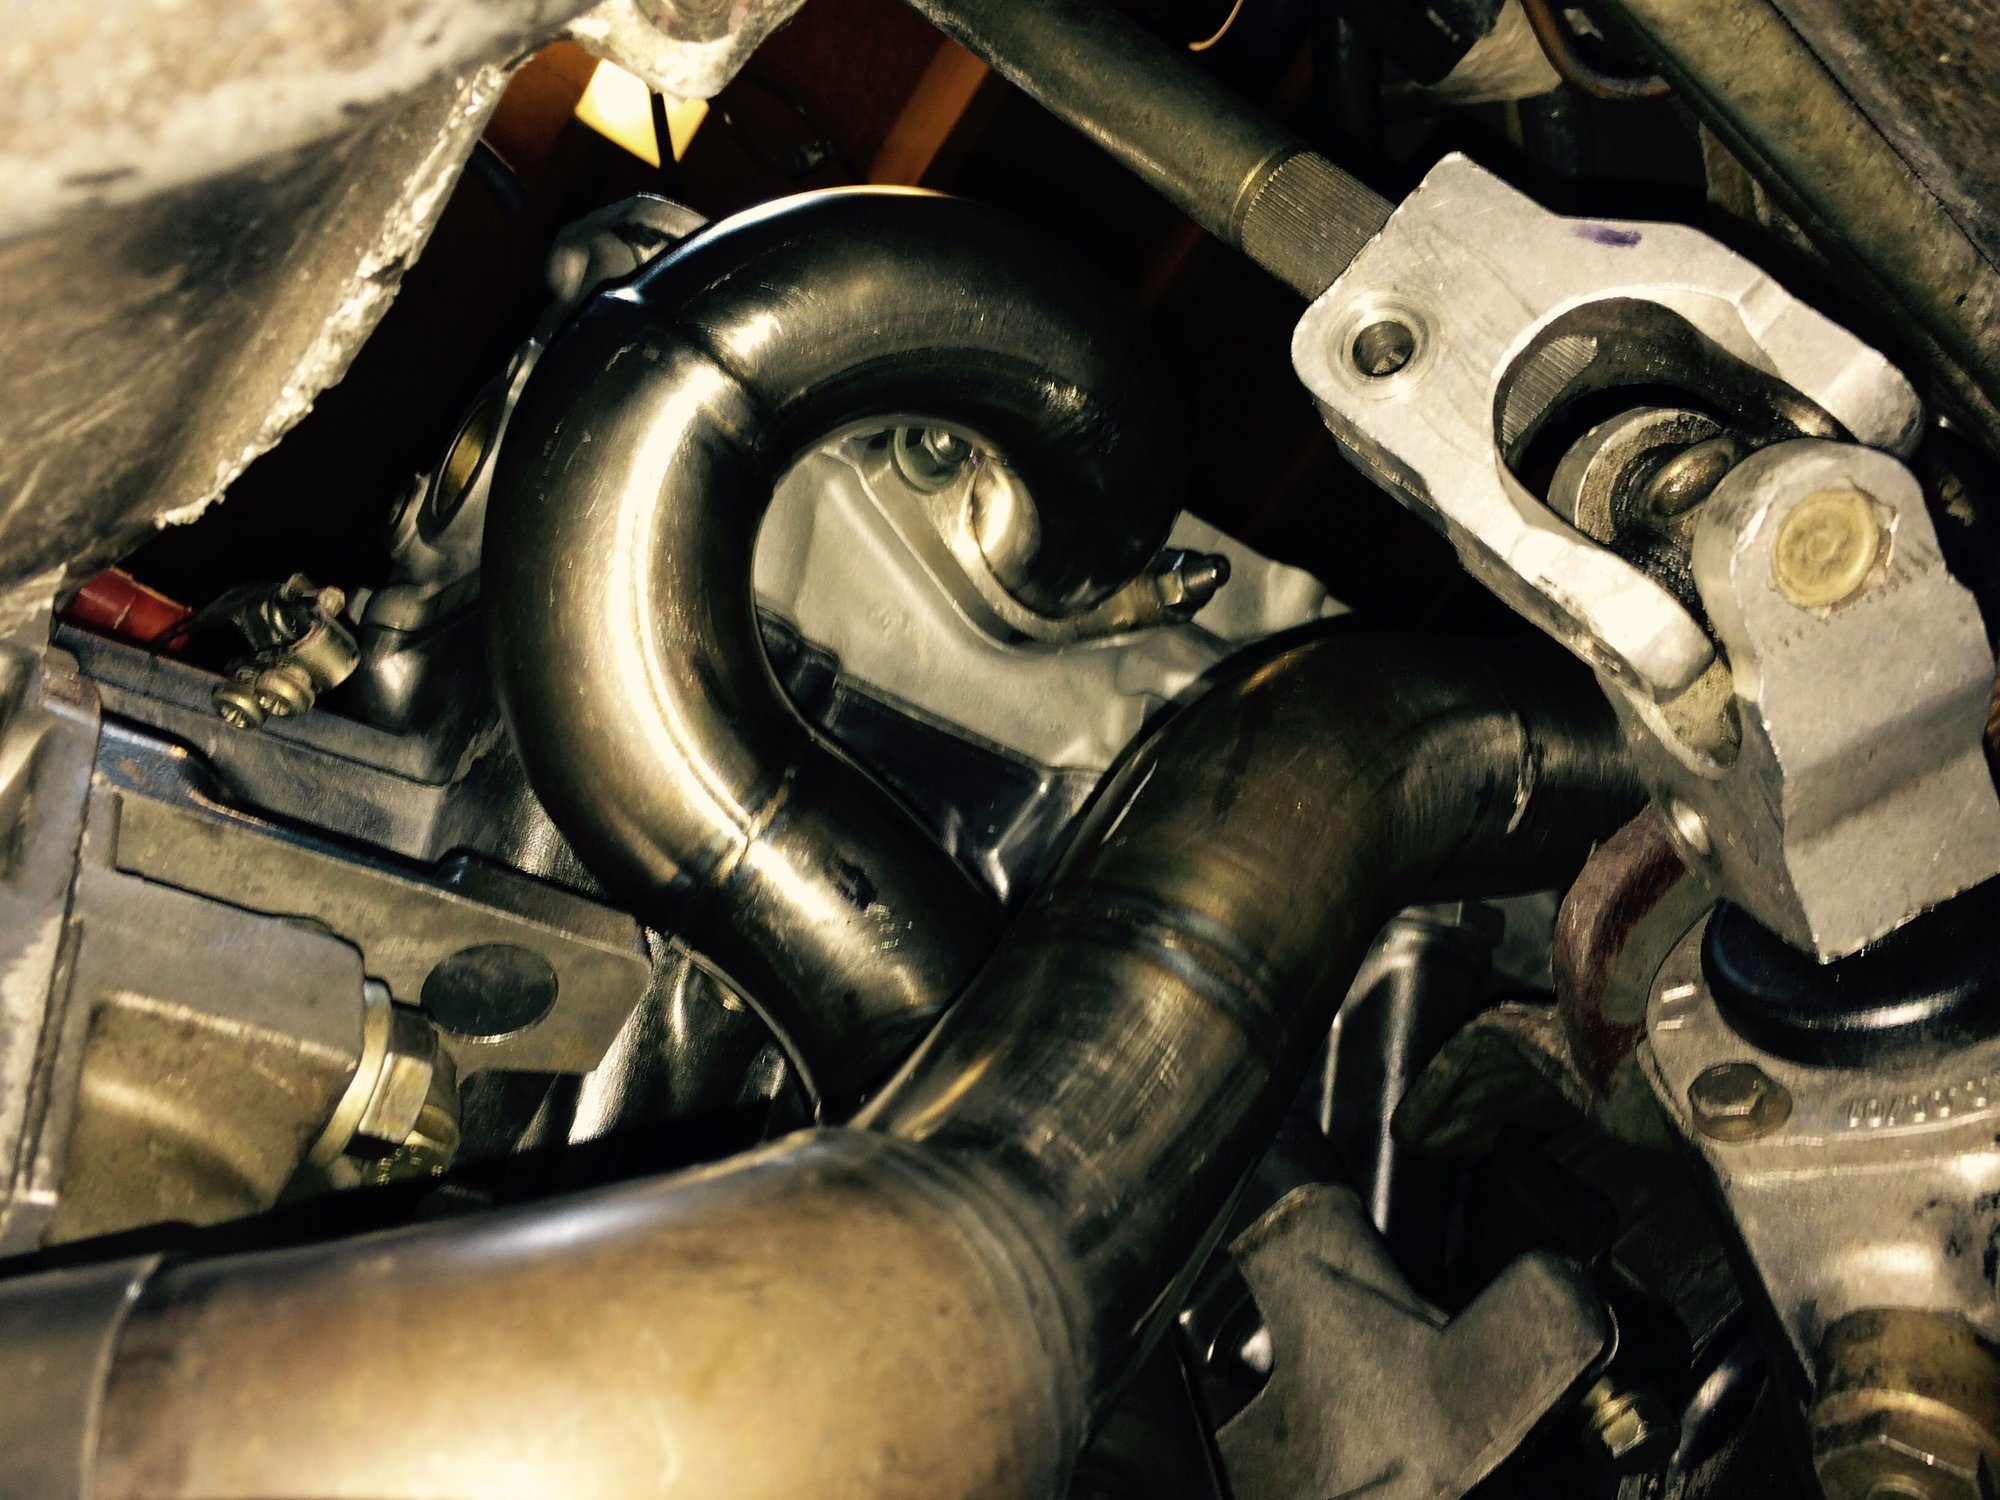
Left Hand Drive steering clearance
Different view of the steering clearance.
All the flanges need welding and most of the pipes however that is pretty quick, a bit like painting a car, all the work is in the prep.
Would the body need modification to fit these headers?
Hi Bilal,
I can understand you not reading the whole thread but if you go back one page or so you will see that this design doesn't require any mods and we will make so that it is easy to remove the bell housing cover for maintenance. Even if the next size up headers are built (using 2'' stepped to 2 1/4") I would be hopeful that no body mods would be needed although I might trim that block casting attachment off for those.
I haven't welded up the flanges as I am going to get the header flanges O-ringed to accept the S4 style exhaust steel O-ring.
If you wondered how long it takes to make custom inconel headers well this video may be helpful. At 1.45 they discuss this, so I can attest to this as they are super fiddly.
Last edited by slate blue; Dec 1, 2015 at 06:55 AM.
Reason: Spelling
Had to rework the pipes. To rotate the the No.1 pipe took 7 hours, luckily I am putting in 14 hour days, feeling worse for that but the hugs and kisses along with the tin lids will be back soon so I need to get as much done as possible.
Notice how pipe No.4 is run. Comes very close to the block.
Long day and I have a massive headache I suppose when you work in hot temperatures and spend endless hours staring through five times magnification what do you expect....
Anyway success with pipe four. It has good clearance regarding the steering shaft. I will measure it later but I guess it is around 35 mm at its closest.
Much appreciated Dave, tomorrow I will try to get pipe two done, it is partially complete and its route has been planned. I am redoing pipe three as because the rework to pipe four allows a better design with regards to length and distance from the steering rack.
It is a lot of extra work but can't let it go, also these headers form the basis of the other two sets of headers that need to be made and those headers both have bigger pipes.
The large capacity two valve engined car will use 1 7/8" off the head and then step to 2 1/8" with 2 1/2" secondaries. The four valve hipo engine is supposed to use 2 1/8" off the head and then step to 2 1/4"with 2 1/2" secondaries.
Both will use a two 3 1/2" system. I have the material for these exhausts so it will be great to get it out of the boxes. The twin 3" will be made from 1.25 mm inconel. The 3 1/2" systems are stainless 321 in 0.7 mm. Can anybody imagine how heavy a full gauge 3 1/2" system would be? My guess around 65 to 70 kgs.
Looks very nice. The problem of fitting it all in there is really challenging, especially when one goes up on pipe size. You're doing full length headers which are the most challenging. Short primary, long secondary tri-y headers that BMW engineers love in V8's would fit better but they are possibly otherwise a bit of a compromise.
Originally Posted by slate blue
Much appreciated Dave, tomorrow I will try to get pipe two done, it is partially complete and its route has been planned. I am redoing pipe three as because the rework to pipe four allows a better design with regards to length and distance from the steering rack.
It is a lot of extra work but can't let it go, also these headers form the basis of the other two sets of headers that need to be made and those headers both have bigger pipes.
The large capacity two valve engined car will use 1 7/8" off the head and then step to 2 1/8" with 2 1/2" secondaries. The four valve hipo engine is supposed to use 2 1/8" off the head and then step to 2 1/4"with 2 1/2" secondaries.
Both will use a two 3 1/2" system. I have the material for these exhausts so it will be great to get it out of the boxes. The twin 3" will be made from 1.25 mm inconel. The 3 1/2" systems are stainless 321 in 0.7 mm. Can anybody imagine how heavy a full gauge 3 1/2" system would be? My guess around 65 to 70 kgs.
Looks very nice. The problem of fitting it all in there is really challenging, especially when one goes up on pipe size. You're doing full length headers which are the most challenging. Short primary, long secondary tri-y headers that BMW engineers love in V8's would fit better but they are possibly otherwise a bit of a compromise.
You're right Tuomo, this is very challenging, I made the primaries as short as possible, and putting the collectors in the conventional location. For this engine they should work well but they would be too long for a hi revving engine. So that I don't confuse people which I know with my projects is easy to do, this is an engine and car I intend to use predominantly for street use. I need to get it back together so that I can focus on other jobs I have and fundamentally I just want to drive it after eight years off the road.
The secondary collectors will (at this stage) be placed just after the clutch bell housing and then a H-pipe and then into the Burns Stainless lightweight mufflers. There is no room for a X-pipe if I intend to use the mufflers. The weight up until and including the mufflers will be approx 10 kgs.
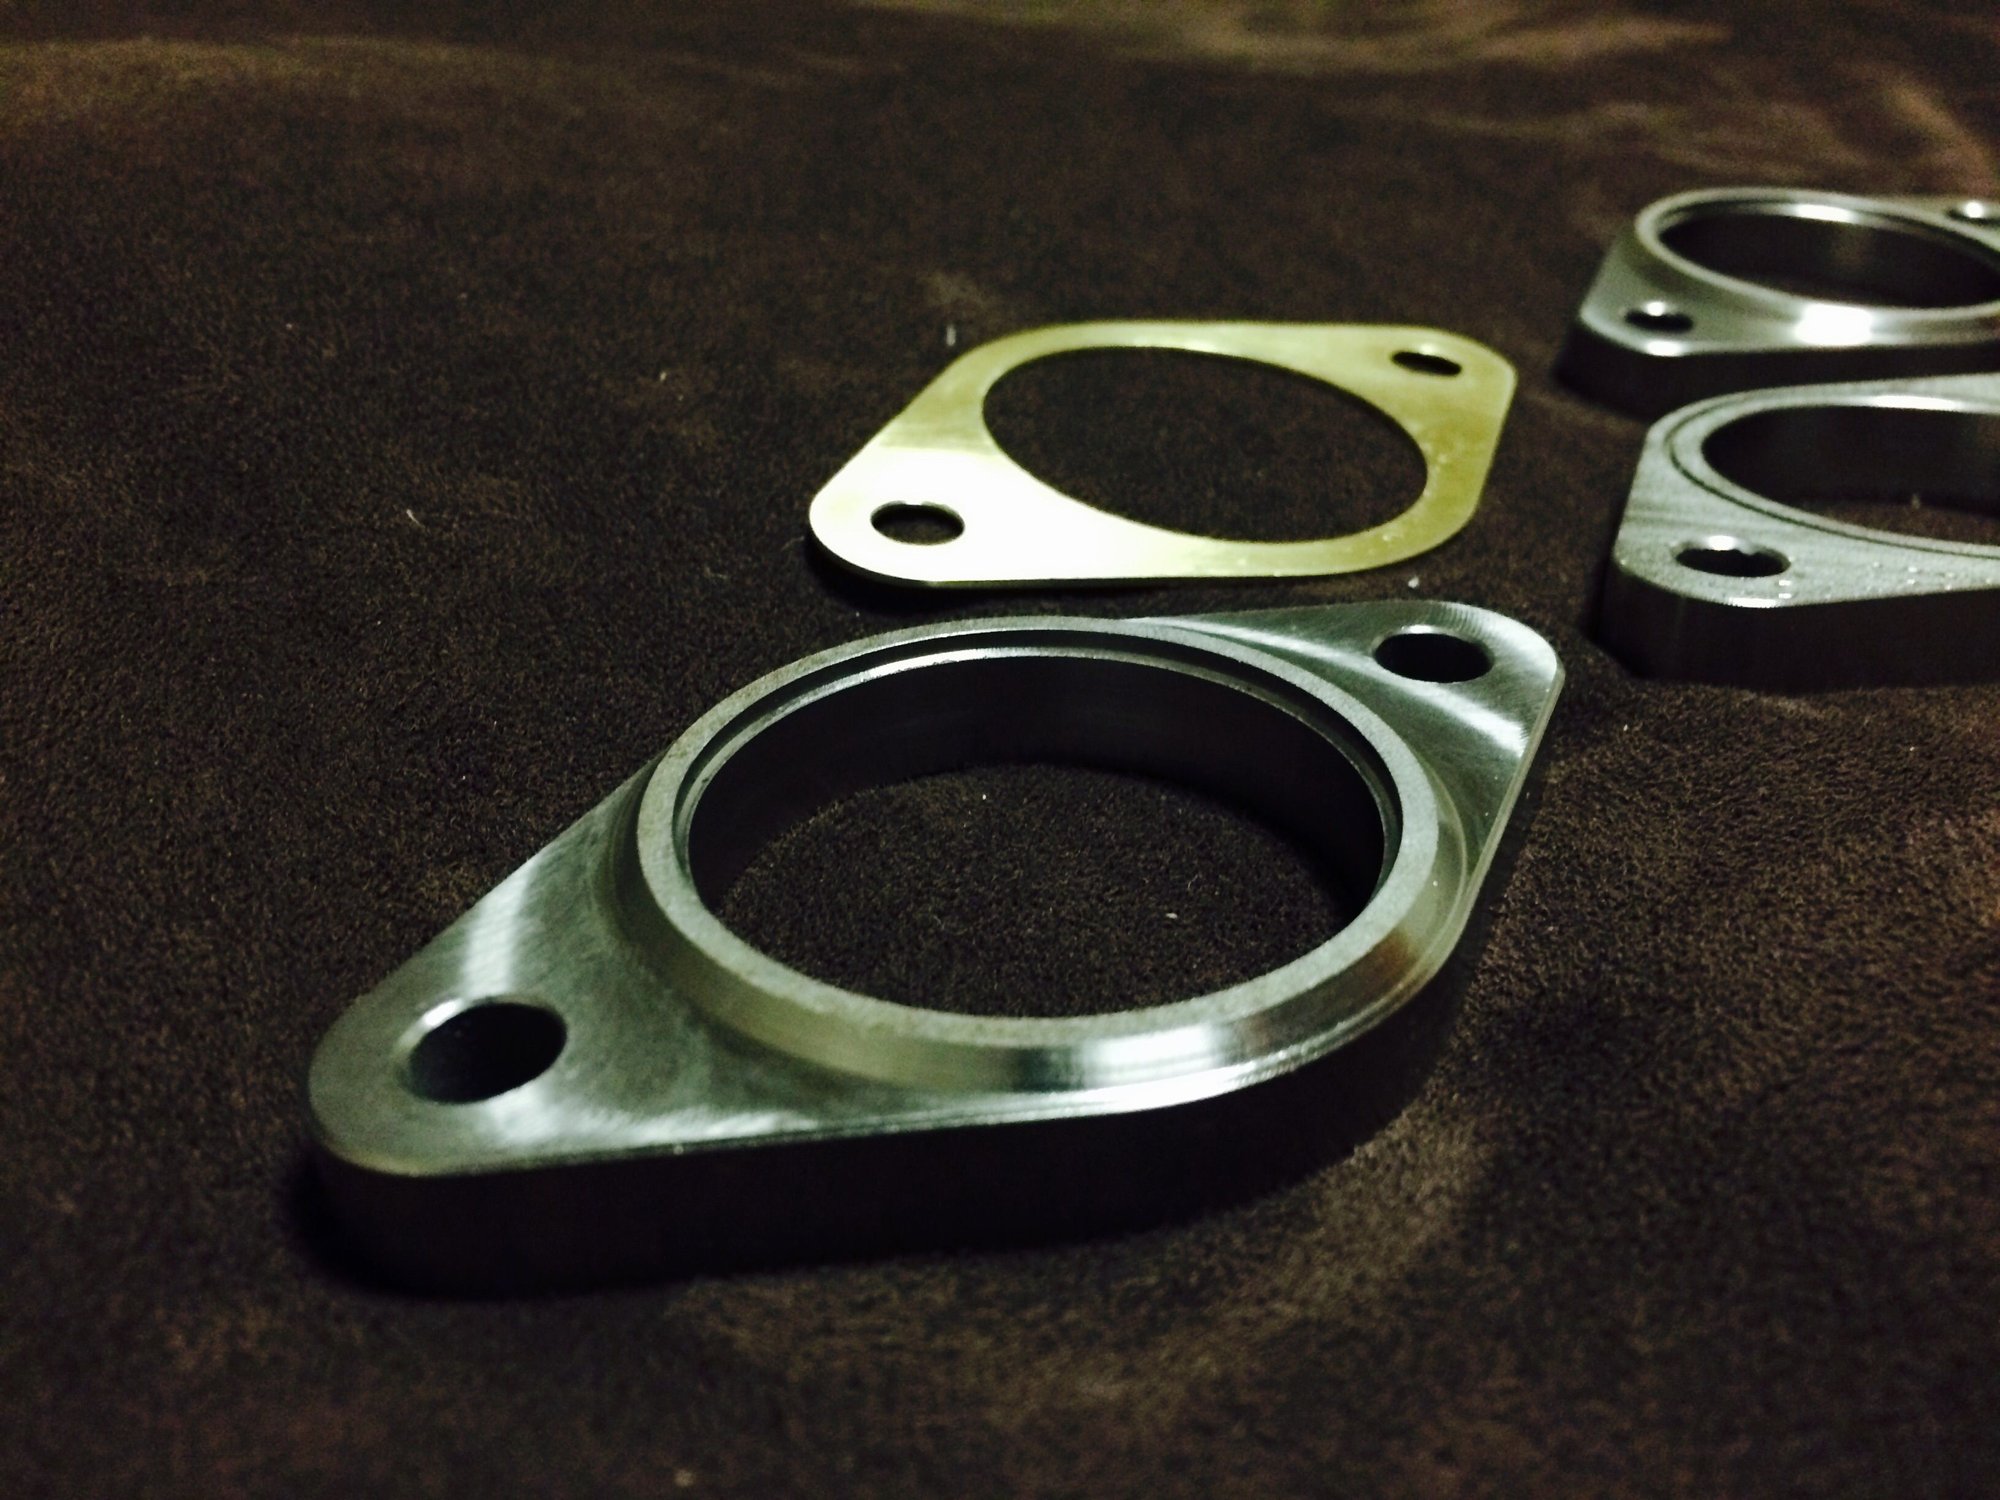
Just got the header flanges for the big two valve engine. These headers are 1 7/8" off the head and then step to 2 1/8". It's Tri-Y arrangement. The flanges are made from 321 stainless and are o-ringed to accept stainless mig wire as the o-ring.
It's a rather expensive groove to cut as the tool breaks every third flange and there has been 24 flanges made.
The gaskets are copper gaskets that are designed to compress at the point of contact for the wire o-ring as the wire is of course solid. The pipe is designed to press into the flange and have a lip to weld to. Some pics.


 luckily I am putting in 14 hour days, feeling worse for that but the hugs and kisses along with the tin lids will be back soon so I need to get as much done as possible.

 I suppose when you work in hot temperatures and spend endless hours staring through five times magnification what do you expect....