When you click on links to various merchants on this site and make a purchase, this can result in this site earning a commission. Affiliate programs and affiliations include, but are not limited to, the eBay Partner Network.
After completing the job a few weeks ago, I�ll share some experience:
1) the half shafts at the tranny sound be disconnected and suspended
2) the tail pipe tip (replaces the rear muffler) was easily removed to improve access to the driver side mount. I DID NOT need to drop any other part of the exhaust
3) the fasteners securing the emergency brake cable below the trans at the bottom of the cross member should be unfastened to ease access to the mount bottom bolts
4) wratchet extenders plus a u/j was necessary to facilitate retirqueing the mount bolts into the transmission
5) buy and use a trans jack. These can safely adjust and hold the trans elevation indefinitely during this type of job. A hydraulic jack is not the tool for this unless you don�t mind the risk of an unexpected hydraulic failure. Don�t say you don�t have a trans jack by now.
6) buy the assortment of wratcheting box end wrenches that you need before you start. Yes, I stopped the job midway to go and by some and thanked myself for less knuckle banging
Replaced mine last winter when I pulled the rear suspension to do main pump O-ring, torque converter seal, super bearings, super clamp, transmission lines kit form GB, and seals for the transmission output shafts on both sides. Did seem to get rid of the clunk when I hit a bump at low speeds.
Completed this today on my '87 Auto and offer the following observations:
* Make sure you have a 19mm ratcheting box wrench and a short 19mm socket (the socket I got at HD was ~1/4 shorter than the short socket I already had)
* As stated previously, disconnect both parking brake cable mounts at the crossmember - I also pulled the pin between the two to increase access to the lower trans mount bolts.
* Remove rear wheels. For the left side, that was all that is required for me remove/install the mount.
* For the right side, I removed the CV joint and tied it up to improve access. I did not need to mess with the exhaust at all.
If anyone is interested, I just replaced mine with the new set Roger is selling (good price). Turns out my original ones are in pretty good shape and weren't collapsed at all. They have 75K on them, but soft miles apparently (from my 85). I'll bring them to Frenzy if anyone wants them, they seek perfectly fine, or at least have more useful life left in them than the old collapsed ones some of you may have on your car now.
__________________
Does it have the "Do It Yourself" manual transmission, or the superior "Fully Equipped by Porsche" Automatic Transmission? George Layton March 2014
928 Owners are ".....a secret sect of quietly assured Porsche pragmatists who in near anonymity appreciate the prodigious, easy going prowess of the 928."
Just replaced mine with the mounts from Roger, nothing to add from the install side. The originals were nearly totally collapsed and some bad cracking on the underside. Driving impressions: thought it couldn't get any smoother, I was wrong! Well worth the minimal effort.
Thanks to Roger for getting these out there and to whomever helped.
Bonjour,
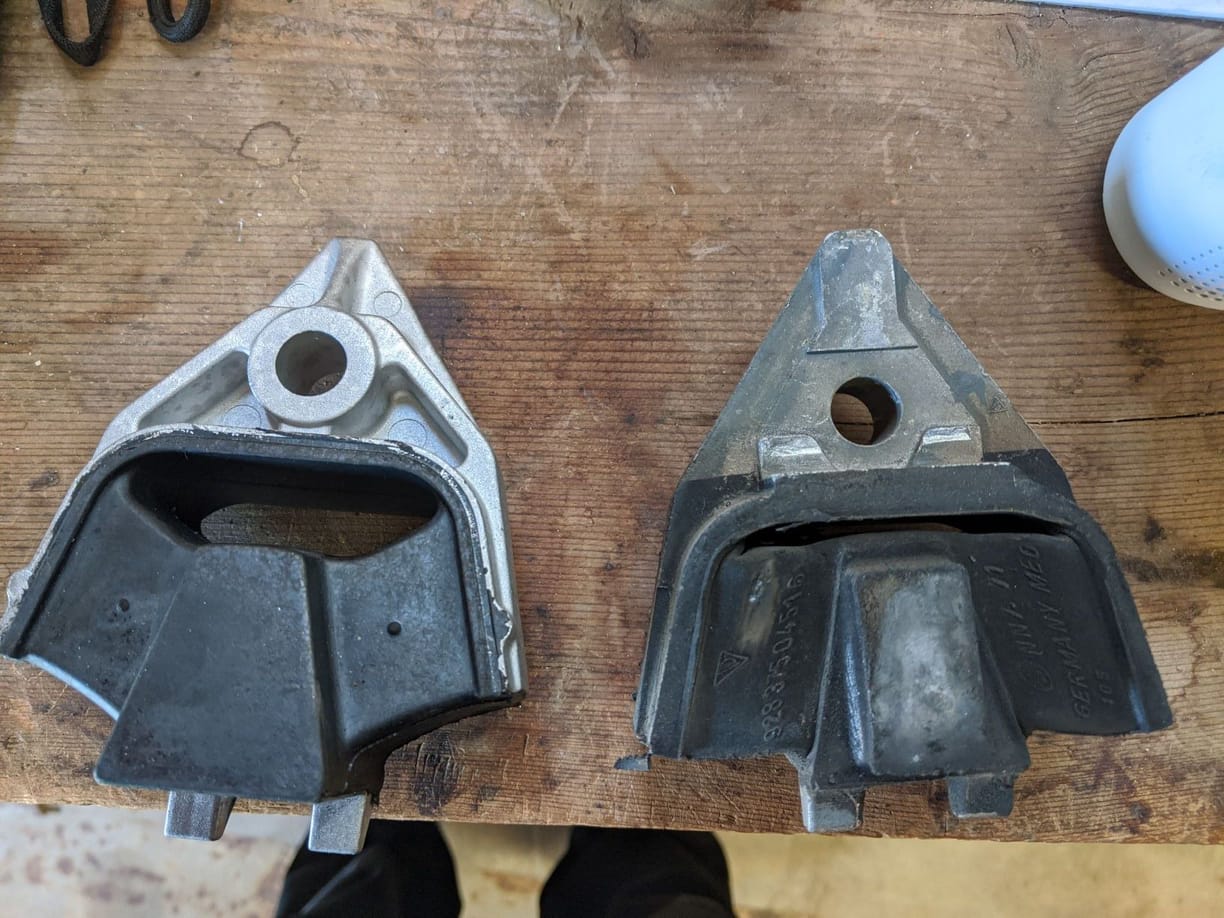
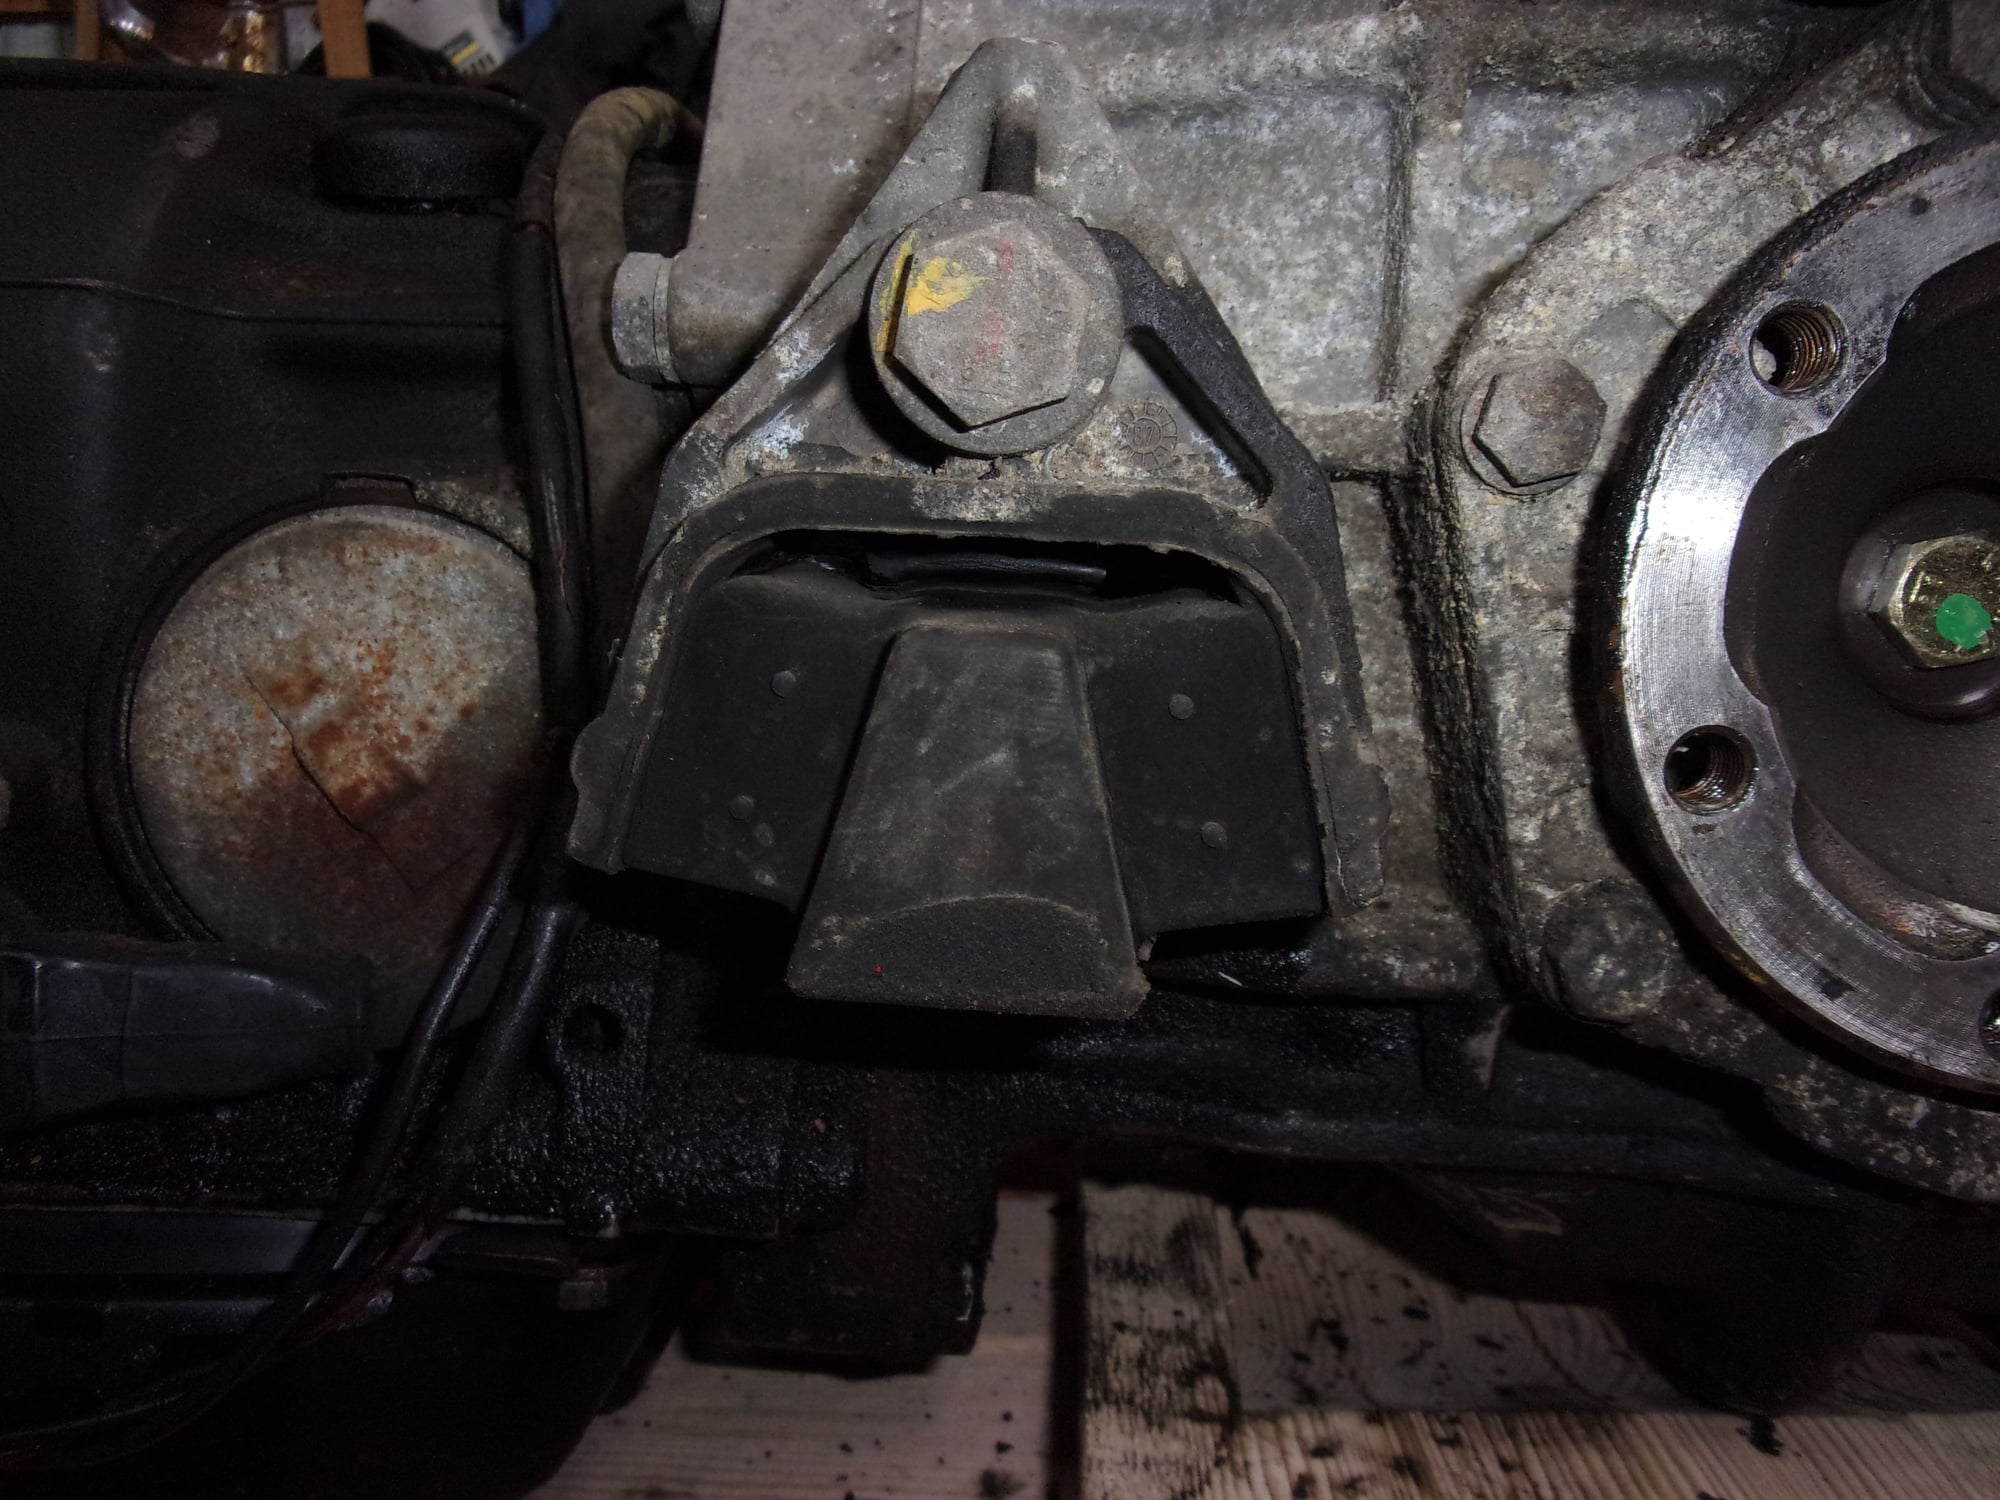
Reworking Gearbox... and then Torque Tube... I'm waiting for my spares... so I checked my GB mounts :
One of them, passenger side, looks correct : half an inch gap on top of the mount. Does not looks collapsed compared to pictures in this thread...
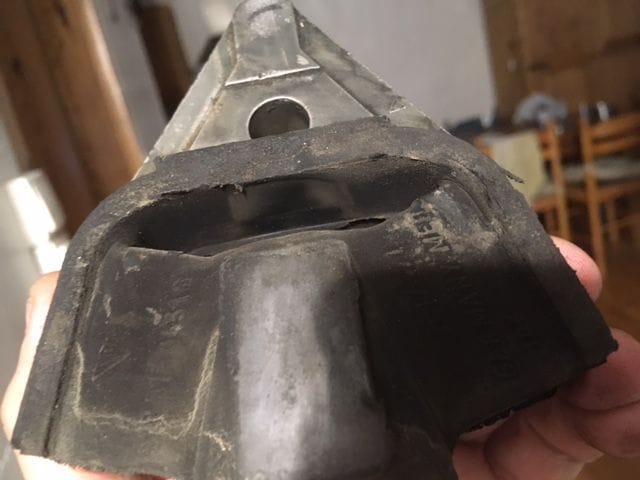
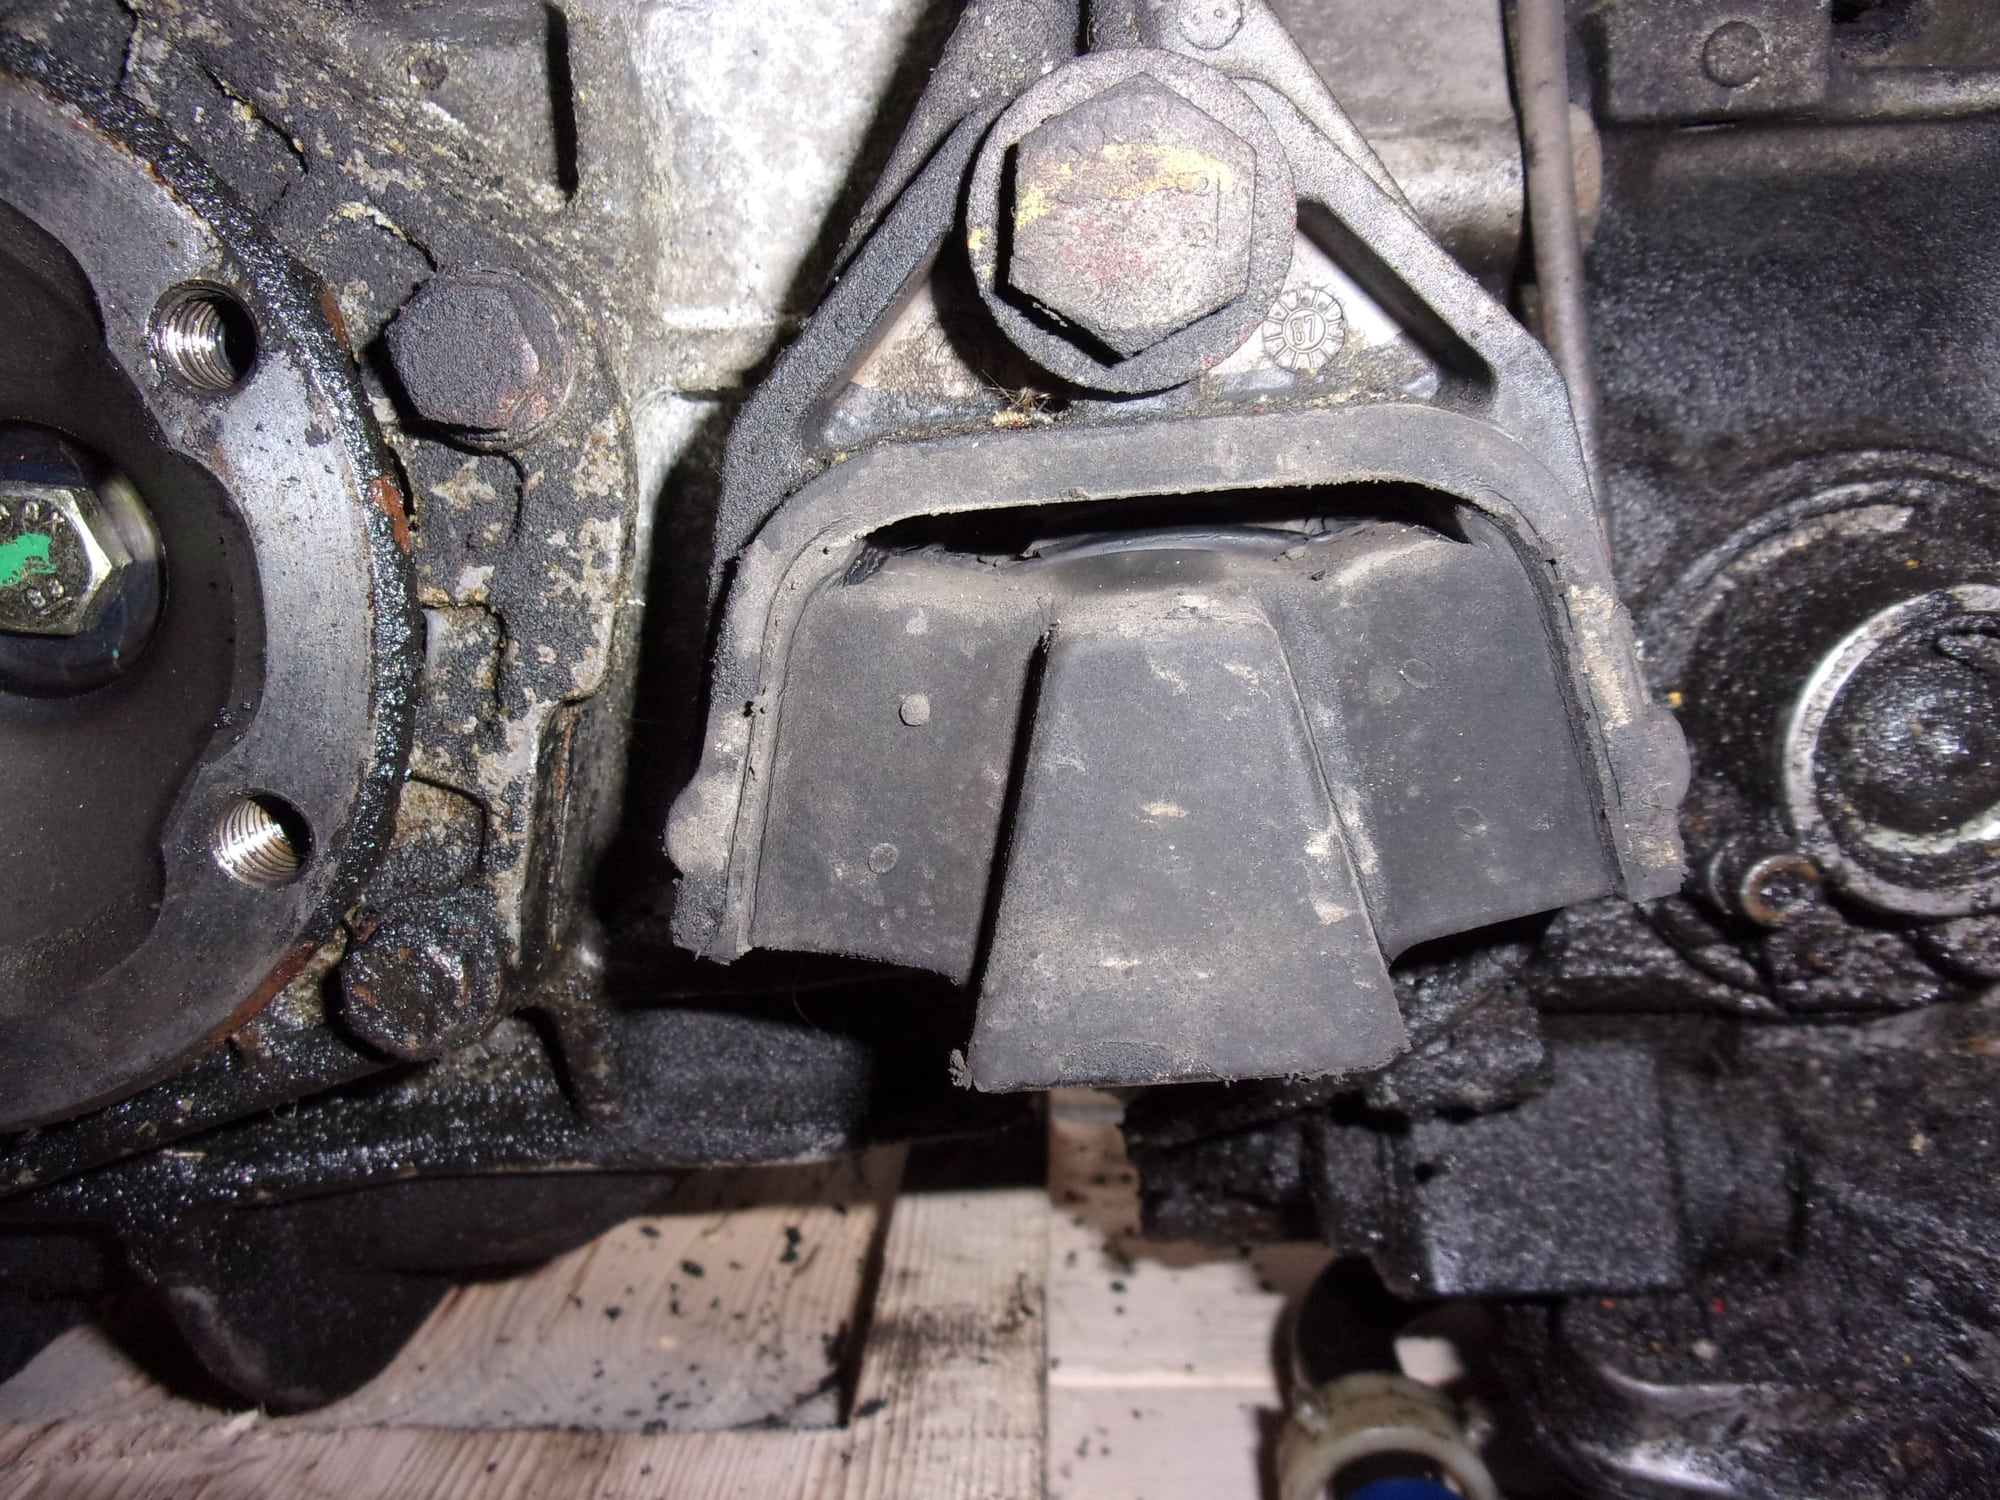
But on the driver side, the gap is 0,1" smaller and it seems that the mount bumped a lot : there is a mark as if the bottom has stamped a lot on the upper part of the mount :
Is is normal? the passenger side mount do not have this mark in it...
Could be the result of track days cession? High speed turns are on the right...
Anyway... changing engine mounts, reworking the GB, taking care of the damper in the TT and the carrier bearings... taking care of vibrations... let's doing things right : I ordered new ones...
but I would be interested in figuring out this point... looks strange to me that the GB may have bumped the mount so many times to stamp the mark inside the driver side mount... and I heard nothing?
Maybe I become too old or I enjoy too much the X-pipe + RMB sound at 6000RPM!!!
Or maybe I'm too slow on track and it was another guy that bumped the mount on a regular basis a long time ago????????????????!!!!!!!!!!!!!!!!!!!!!!!!!!!
lol
Rapha�l
Bonjour,
Reworking Gearbox... and then Torque Tube... I'm waiting for my spares... so I checked my GB mounts :
One of them, passenger side, looks correct : half an inch gap on top of the mount. Does not looks collapsed compared to pictures in this thread...
But on the driver side, the gap is 0,1" smaller and it seems that the mount bumped a lot : there is a mark as if the bottom has stamped a lot on the upper part of the mount :
Is is normal? the passenger side mount do not have this mark in it...
Could be the result of track days cession? High speed turns are on the right...
Anyway... changing engine mounts, reworking the GB, taking care of the damper in the TT and the carrier bearings... taking care of vibrations... let's doing things right : I ordered new ones...
but I would be interested in figuring out this point... looks strange to me that the GB may have bumped the mount so many times to stamp the mark inside the driver side mount... and I heard nothing?
Maybe I become too old or I enjoy too much the X-pipe + RMB sound at 6000RPM!!!
Or maybe I'm too slow on track and it was another guy that bumped the mount on a regular basis a long time ago????????????????!!!!!!!!!!!!!!!!!!!!!!!!!!!
lol
Rapha�l
Oh my.
"GB mounts" means "GearBox mounts".
Around here, "GB" has a somewhat different meaning.
I was wondering when Greg had started making Transmission mounts.
Duh.
... Yes... GB mounts for GearBox mounts...
Here there is so much acronyms... difficult to understand sometimes...
I have been contaminated Talking
Rapha�l


 10-09-2018, 01:38 PM


 George Layton March 2014