
V1 32V'r updated manual + alignment bar
 04-12-2007, 05:56 PM
#1
Inventor
Rennlist Member
Rennlist Member
Thread Starter
I updated the manual for the old school tool, and figured out an alignment bar for it too!
These brings the old tool up the V2 standards.
Right-click, and select 'Save Target As...': (32V'r V1 Manual)
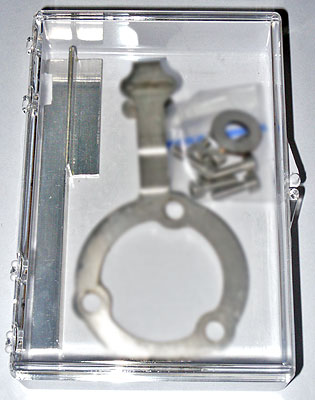
alignment bar

These brings the old tool up the V2 standards.
Right-click, and select 'Save Target As...': (32V'r V1 Manual)
alignment bar
 04-12-2007, 06:32 PM
#3
Inventor
Rennlist Member
Rennlist Member
Thread Starter
For the alignment tool, or for a description of the new version, V2, of the cam timing tool, click on the pic above, or (here).
The bar is made of two pieces of 1/2" aluminum angle, one 5-1/4", and 2-1/4" long. There is a notch in the longer piece, 5/8" long, 1/8" deep, 5/16" from the end to fit over the side of the tool. (I rough sanded the two pieces and used polyurethane glue to bond them together.)
The bar is made of two pieces of 1/2" aluminum angle, one 5-1/4", and 2-1/4" long. There is a notch in the longer piece, 5/8" long, 1/8" deep, 5/16" from the end to fit over the side of the tool. (I rough sanded the two pieces and used polyurethane glue to bond them together.)
04-12-2007, 09:27 PM
#5
Addict
Rennlist Member
Rennlist Member
Good going, Ken. I love my 32V'r tool for fine tuning, and for making sure that I put things back on the car the way they came off. It's a tool that is affordable and easy to use. I'll be using my Ver. 1 again next week when I pull the cam gear and replace the stuff behind it.
The next time I check the belt tension on my 968, I'll see if it might work there too.
Harvey
The next time I check the belt tension on my 968, I'll see if it might work there too.
Harvey
10-27-2009, 10:53 AM
#6
Supercharged
Rennlist Member
Rennlist Member
Join Date: May 2002
Location: Back in Michigan - Full time!
Posts: 18,925
Likes: 0
Received 60 Likes
on
34 Posts
Sorry to bring this up, as I remember this horse being beaten several times, but can't seem to find the thread that explains it.
In the updated manual for the 32V's V1 (this is the one I have), it says each hole represents 2 crank degrees.
It then says, a good factory setting is US Driver side = 2* advaced, and Passenger side 1* or zero.
Question: Is this crank degrees or cam degrees (manual doesn't say)? Actually a better way to ask is, Do I want the Driver side cam to line up with the 1st or 2nd hole left of center? Remeber I have the V1, not the V2.
10-27-2009, 11:44 AM
#7
Inventor
Rennlist Member
Rennlist Member
Thread Starter
In the updated V1 manual everything is crank degrees.
For 2� crank advance, and zero for a cold engine with a V1 32V'r*:
Cyls 1-4, zero hole
Cyls 5-8, first hole left of center (when looking at tool)
For future reference, I suggest you write a '+' sign on the left and a '-' on the right sides of the zero hole with a Sharpie to indicate advance and retard.
*The V2 'zero' is 2� advanced compared to the V1, so the instructions are different.
Trending Topics
10-27-2009, 11:55 AM
#8
Rennlist Member
I have the V1 also but its been a while since I used it.
IIRC the factory settings are crank degrees.
IIRC the factory settings are crank degrees.
Last edited by the flyin' scotsman; 10-27-2009 at 11:55 AM. Reason: correction
10-27-2009, 12:15 PM
#9
Supercharged
Rennlist Member
Rennlist Member
Join Date: May 2002
Location: Back in Michigan - Full time!
Posts: 18,925
Likes: 0
Received 60 Likes
on
34 Posts
Thanks guys. That's what I thought, but wanted to make sure.
I already drew a picture of the indicator with the + and - to remind me to mark it with a sharpie.
I already drew a picture of the indicator with the + and - to remind me to mark it with a sharpie.
10-28-2009, 12:53 AM
#10
Addict
Rennlist Member
Rennlist Member
This is a great tool that PorKen built. Anyone who changes T-belts and does a little messing with engines should have one. It's one of my most treasured acquisitions...along with the easy to use belt tension tester that the dealers sell.
H2
H2