When you click on links to various merchants on this site and make a purchase, this can result in this site earning a commission. Affiliate programs and affiliations include, but are not limited to, the eBay Partner Network.
Jerry since you have more than one car ( year) ,
I would suggest to get a few different console panels to see what the differences are .
you may find that the later model S4 will be the easiest part to make and possibly retrofit to earlier models
Jerry since you have more than one car ( year) ,
I would suggest to get a few different console panels to see what the differences are .
you may find that the later model S4 will be the easiest part to make and possibly retrofit to earlier models
That is, of course, an excellent suggestion, Stan.
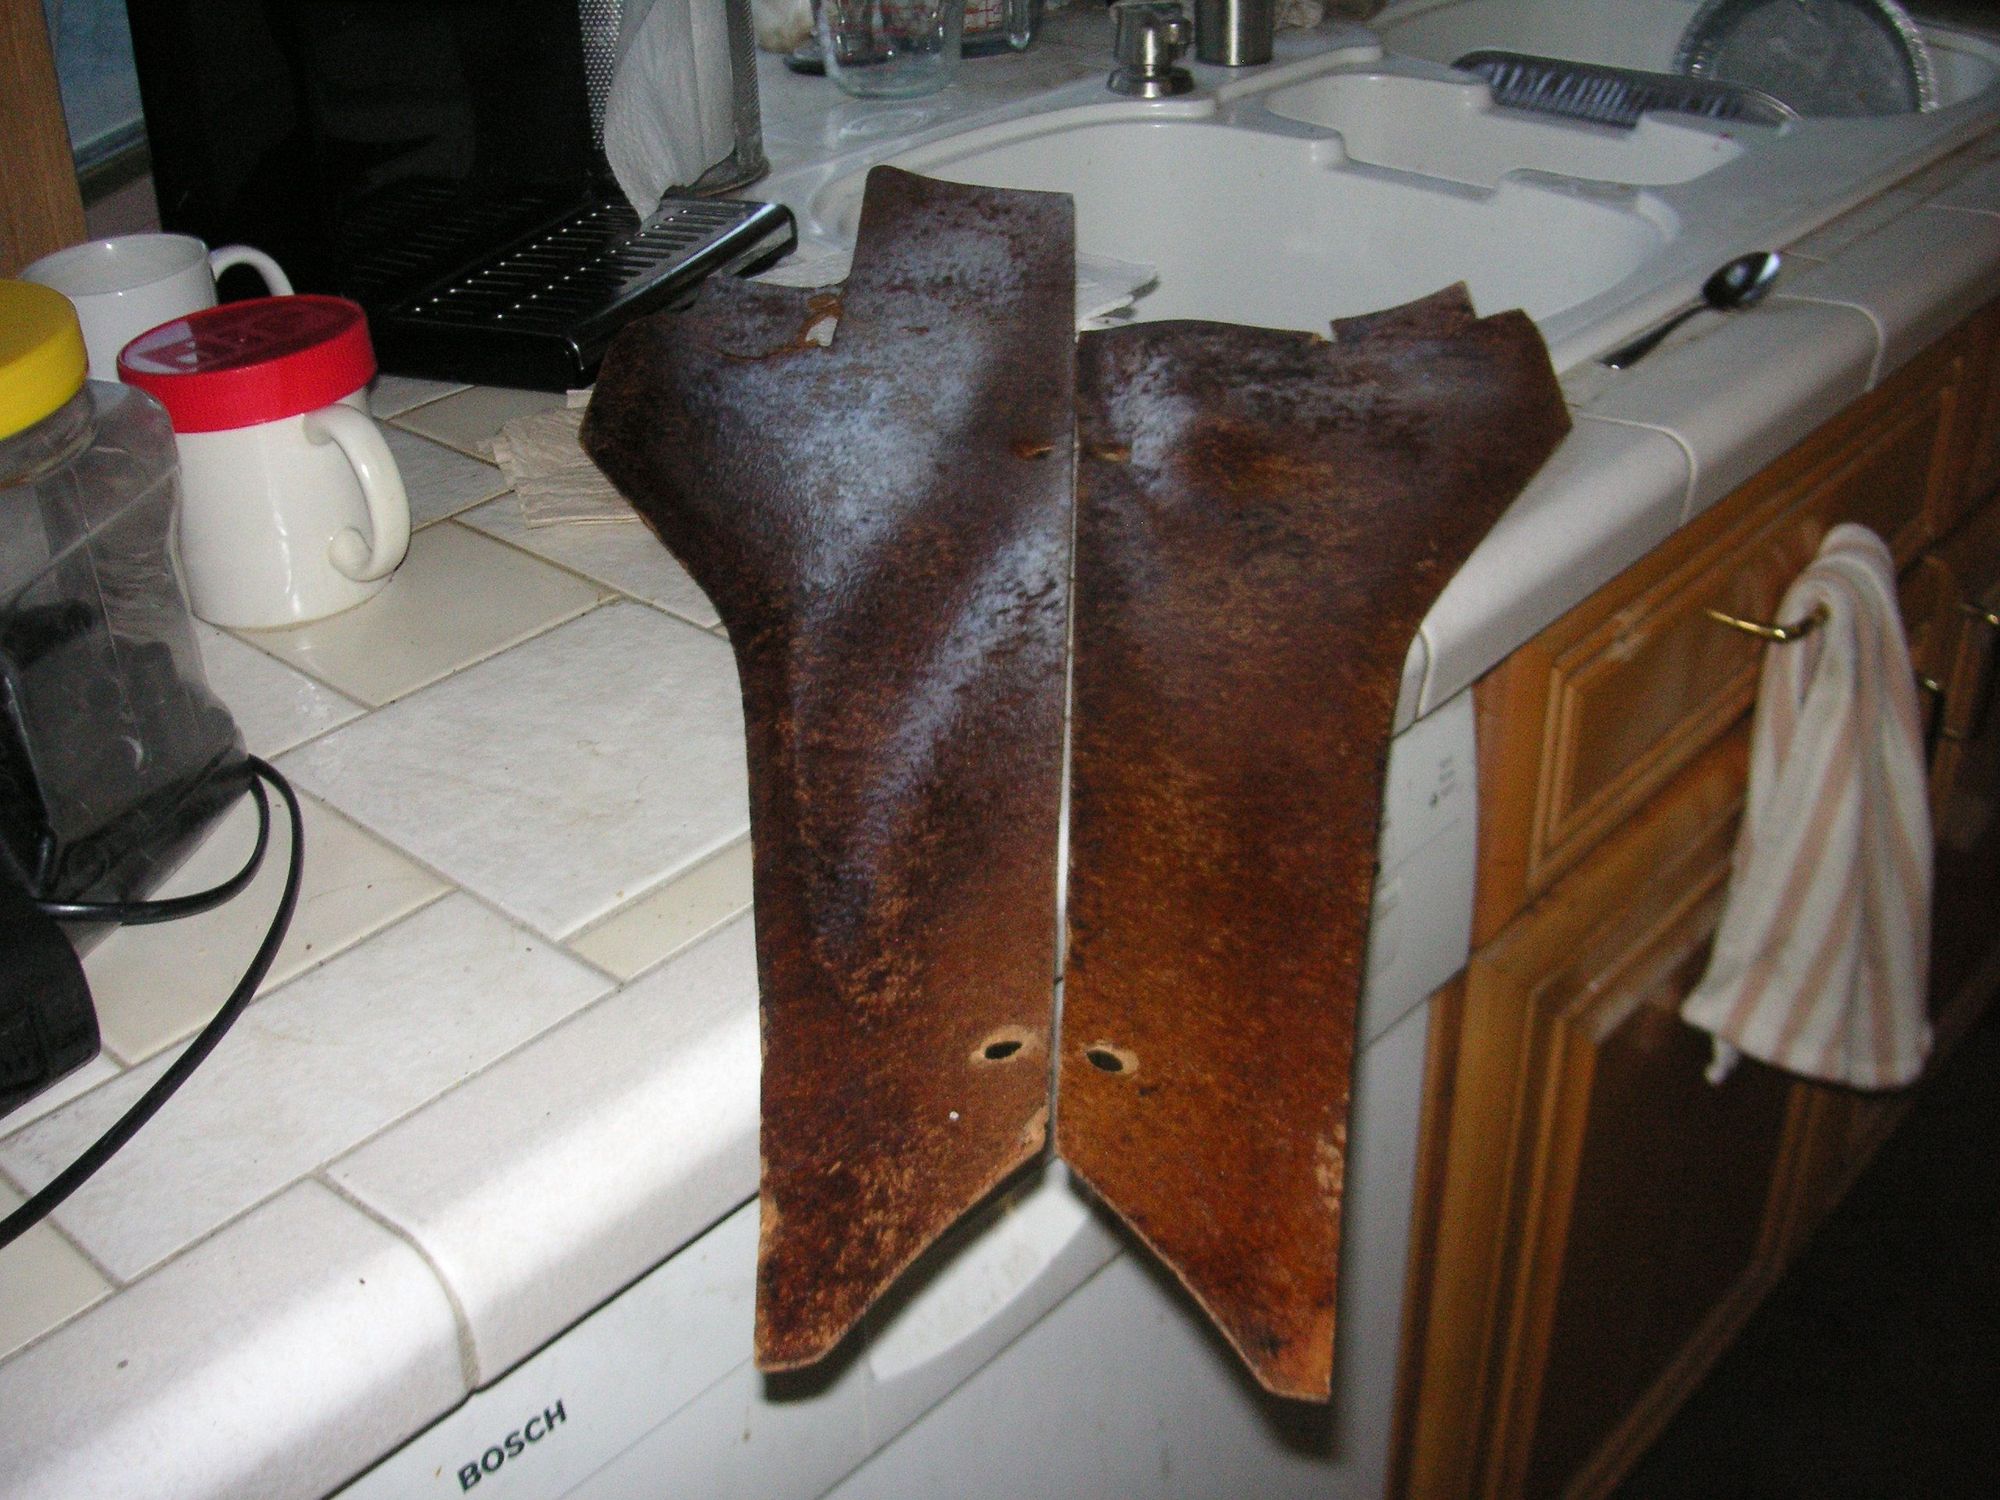
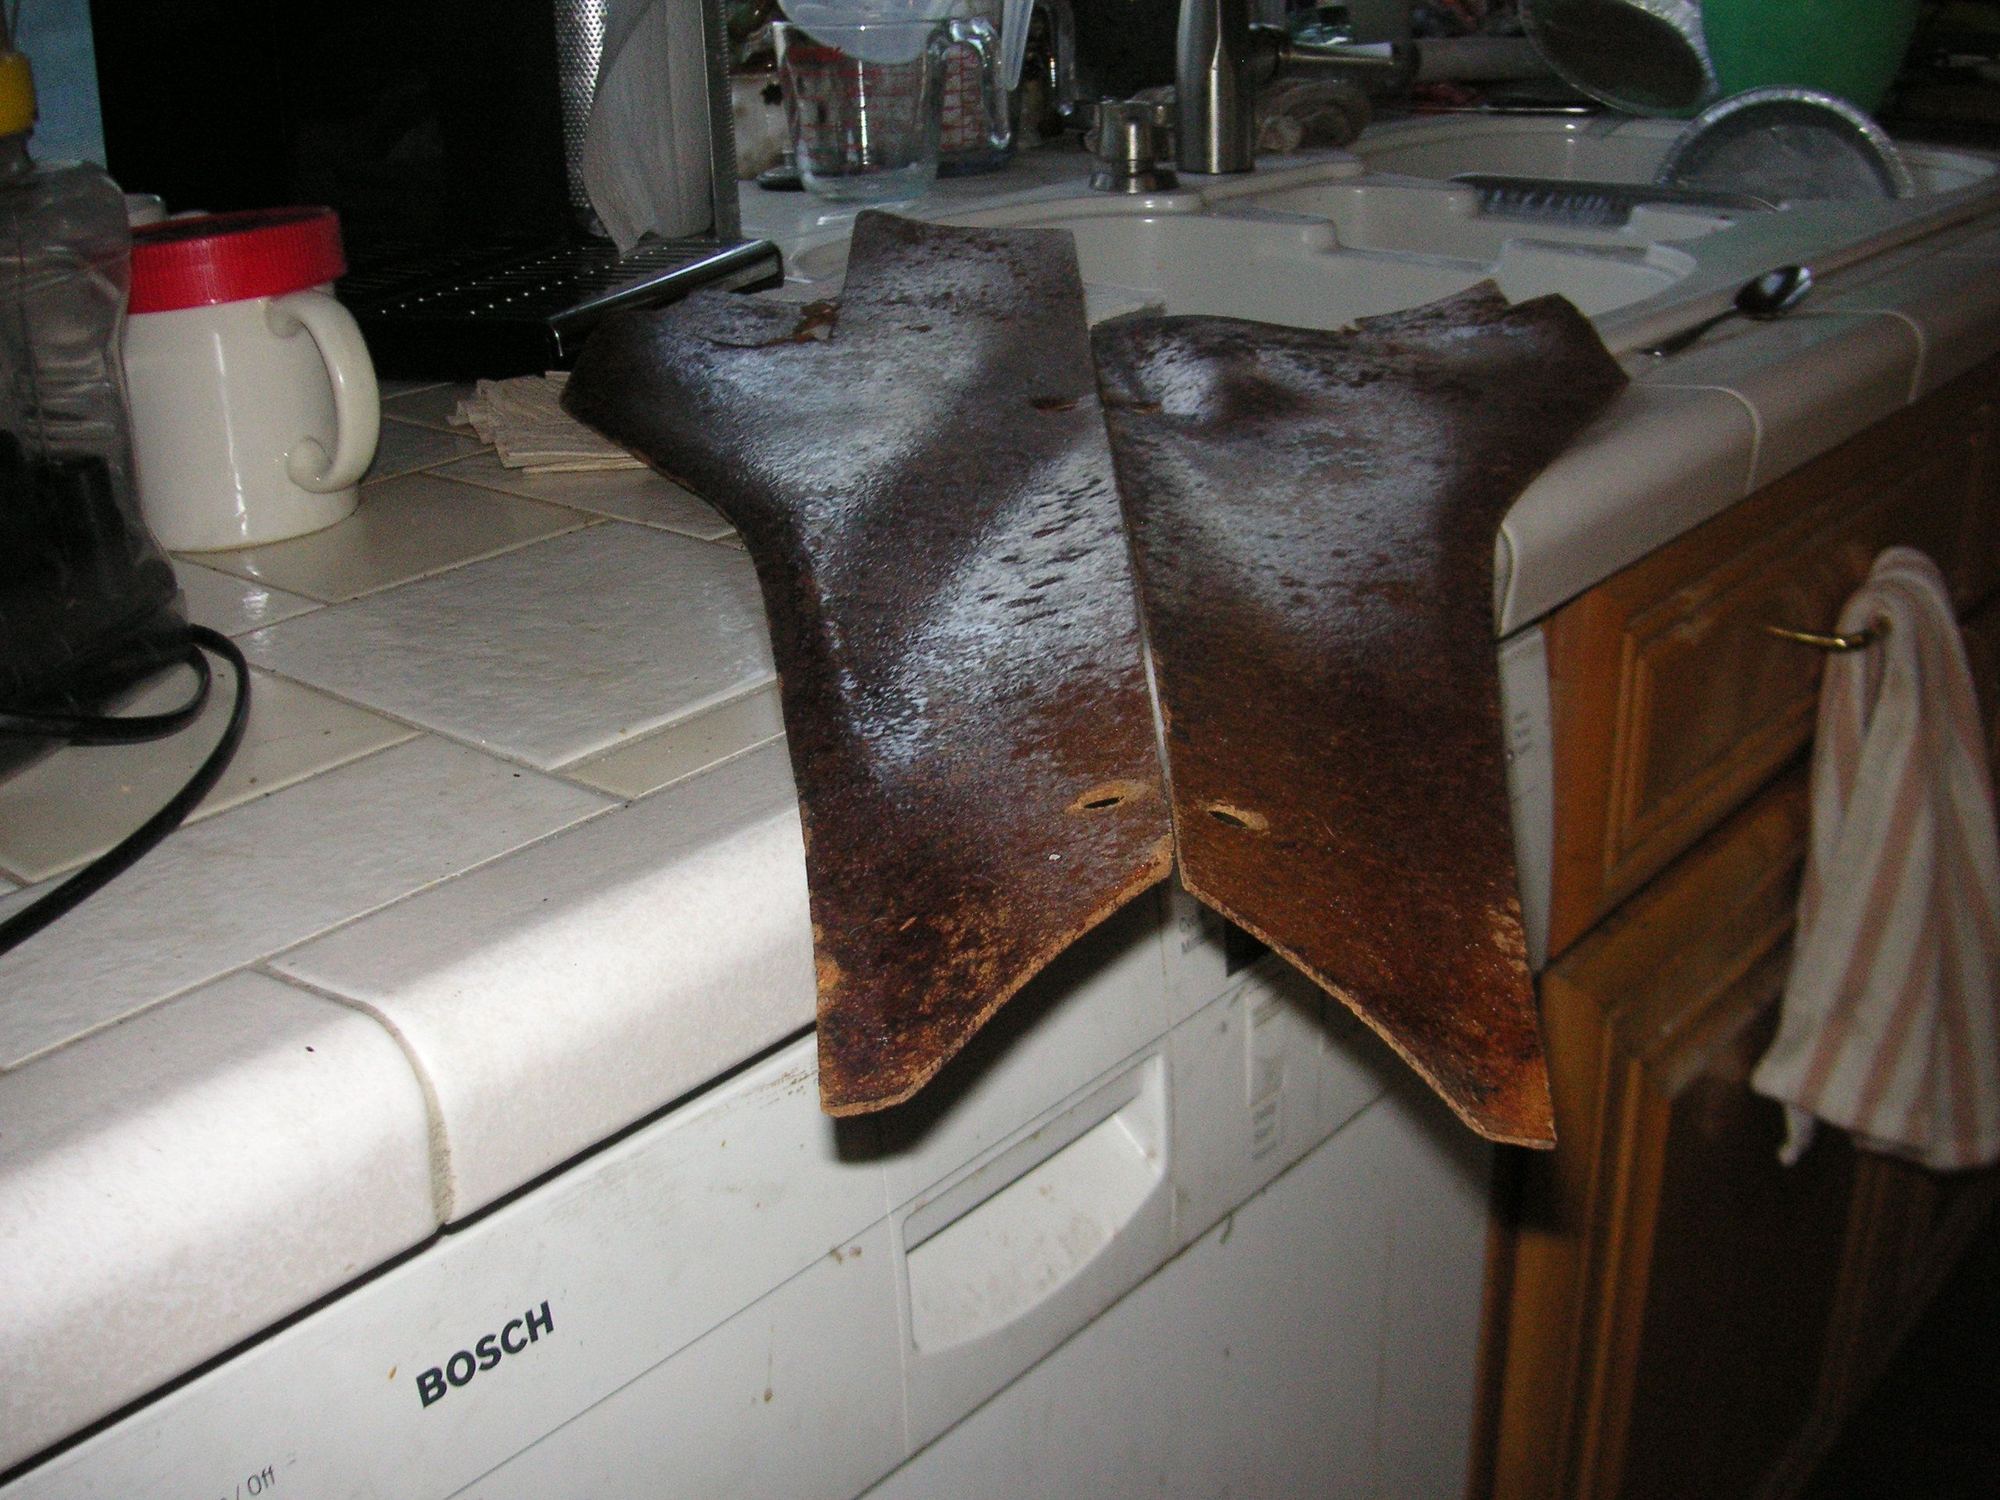
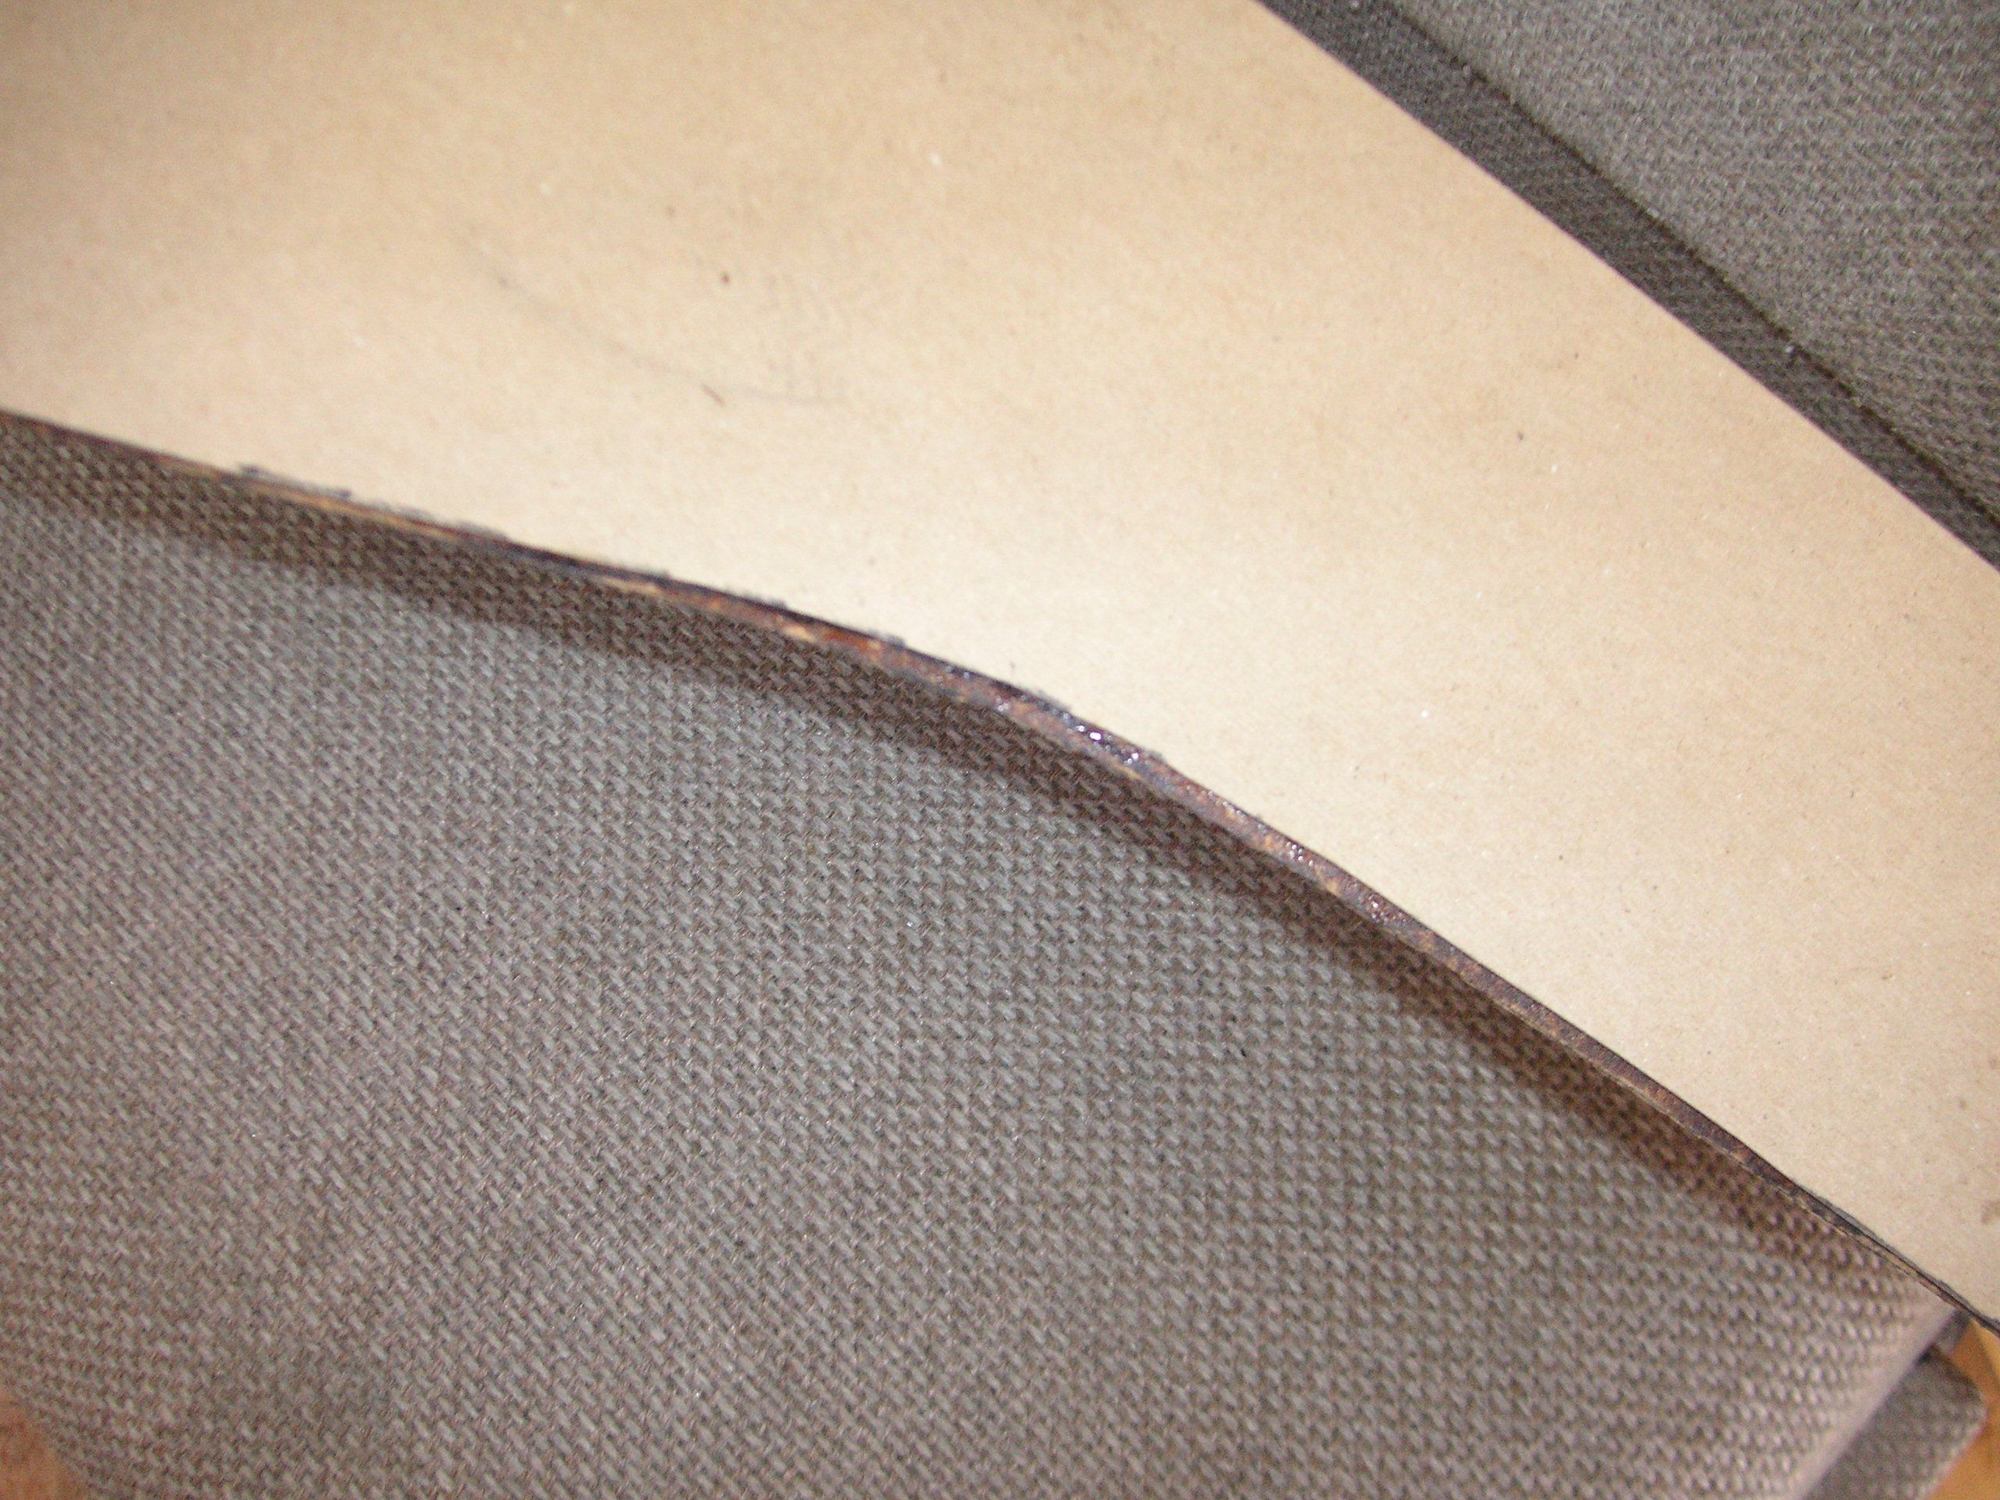
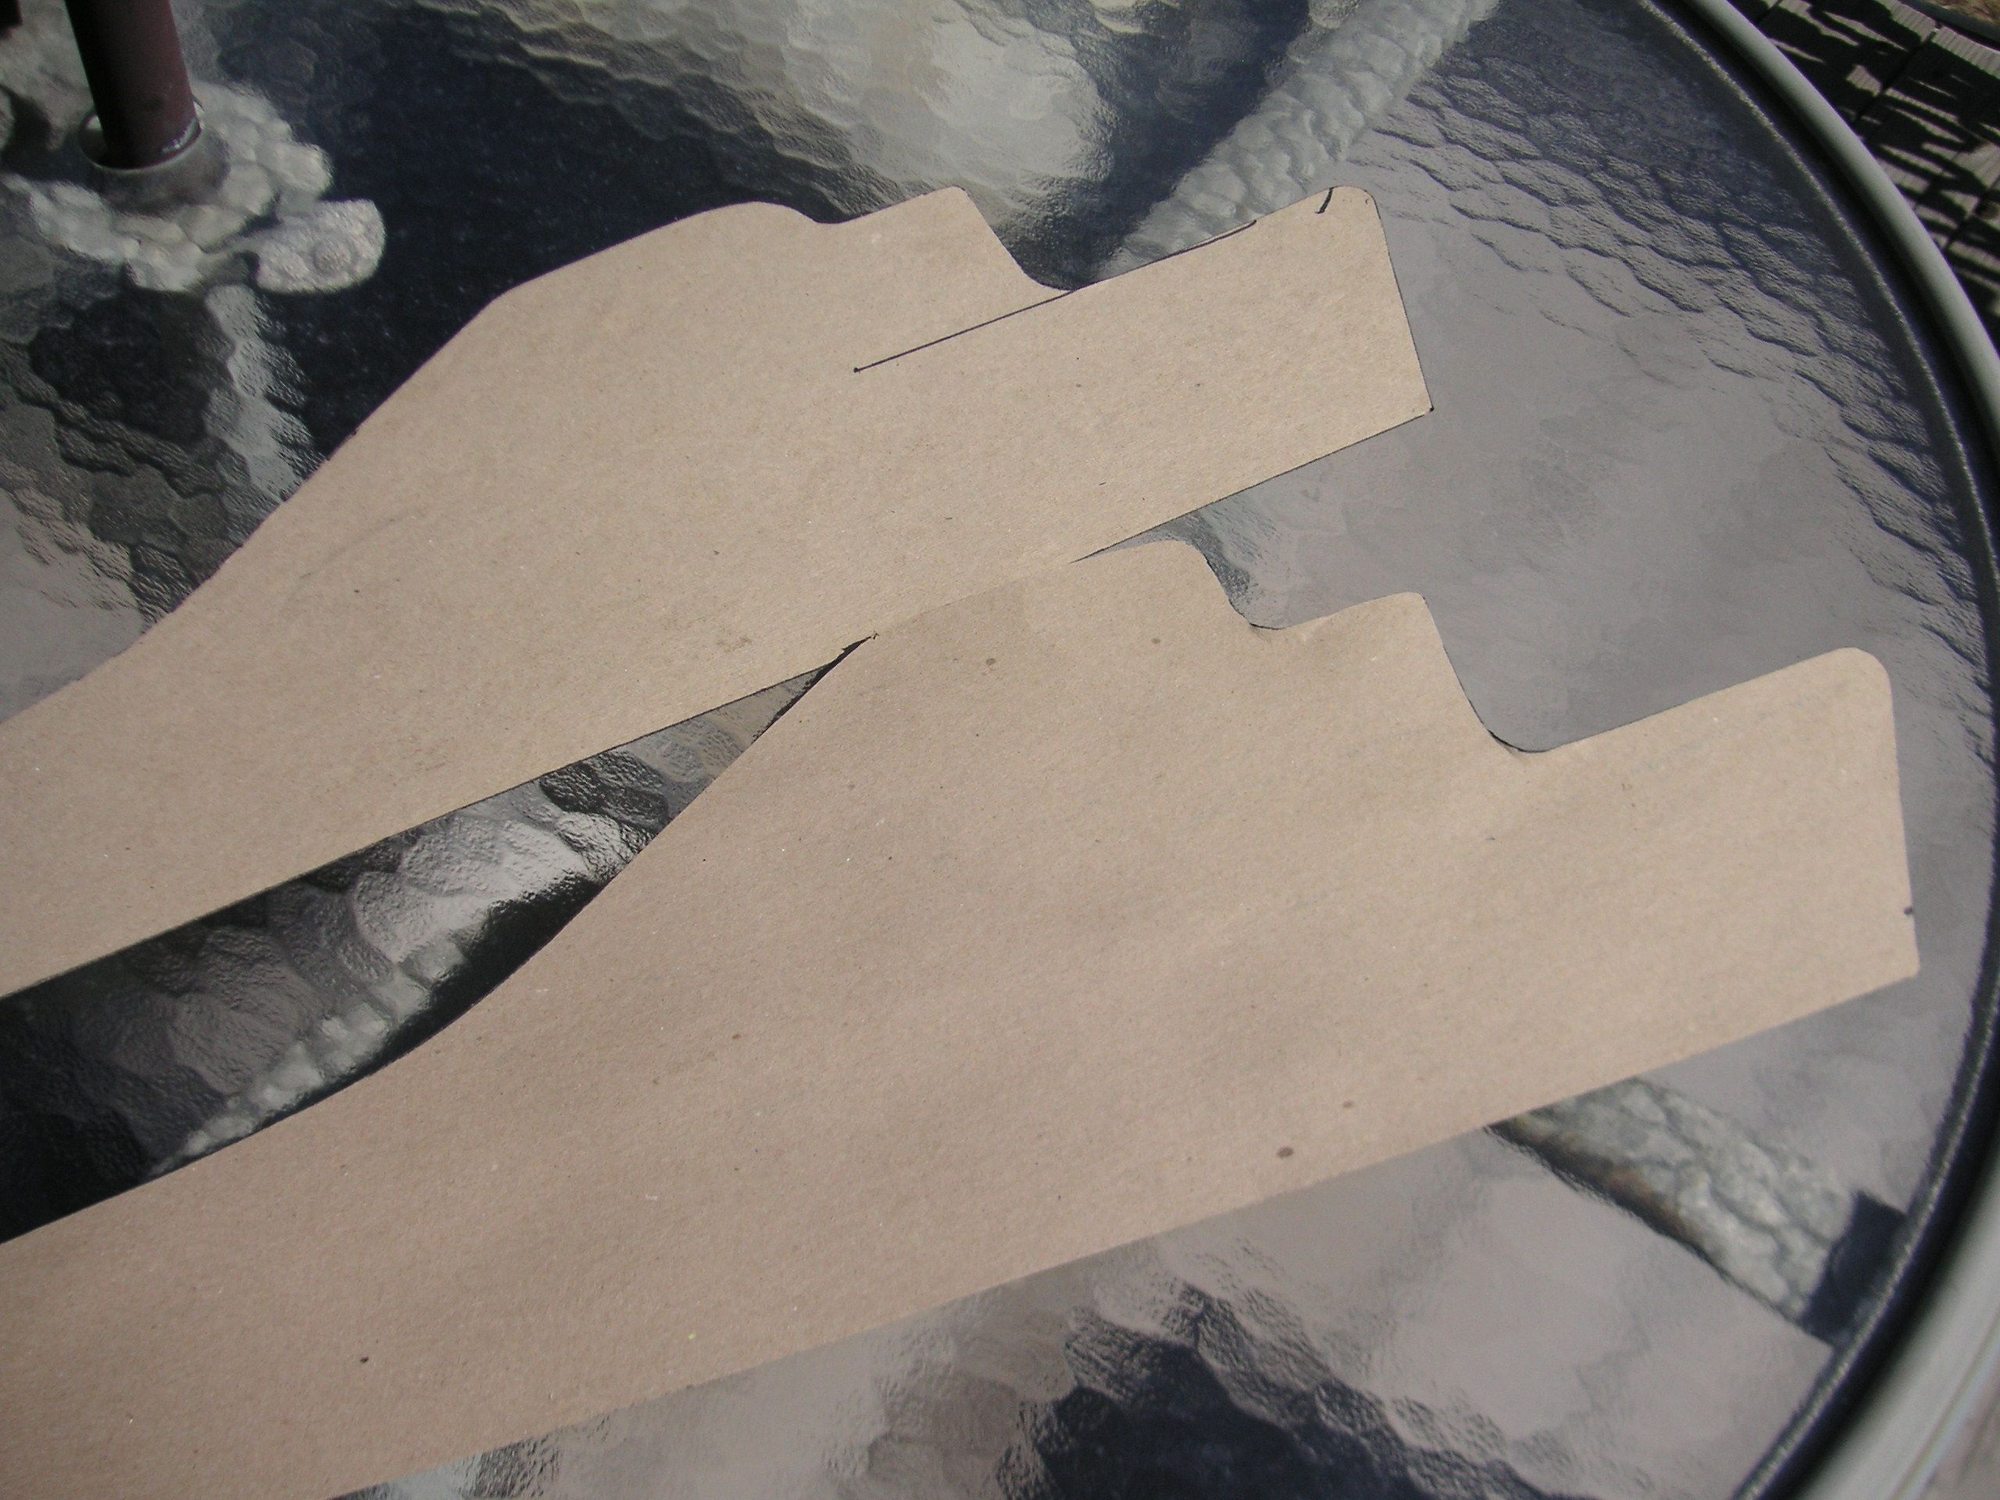
I have stripped my two panels from the 82 and have taken these two pictures in some reflective daylight to kind of show what I think is a pretty good hint of what the factory put into them for shape.
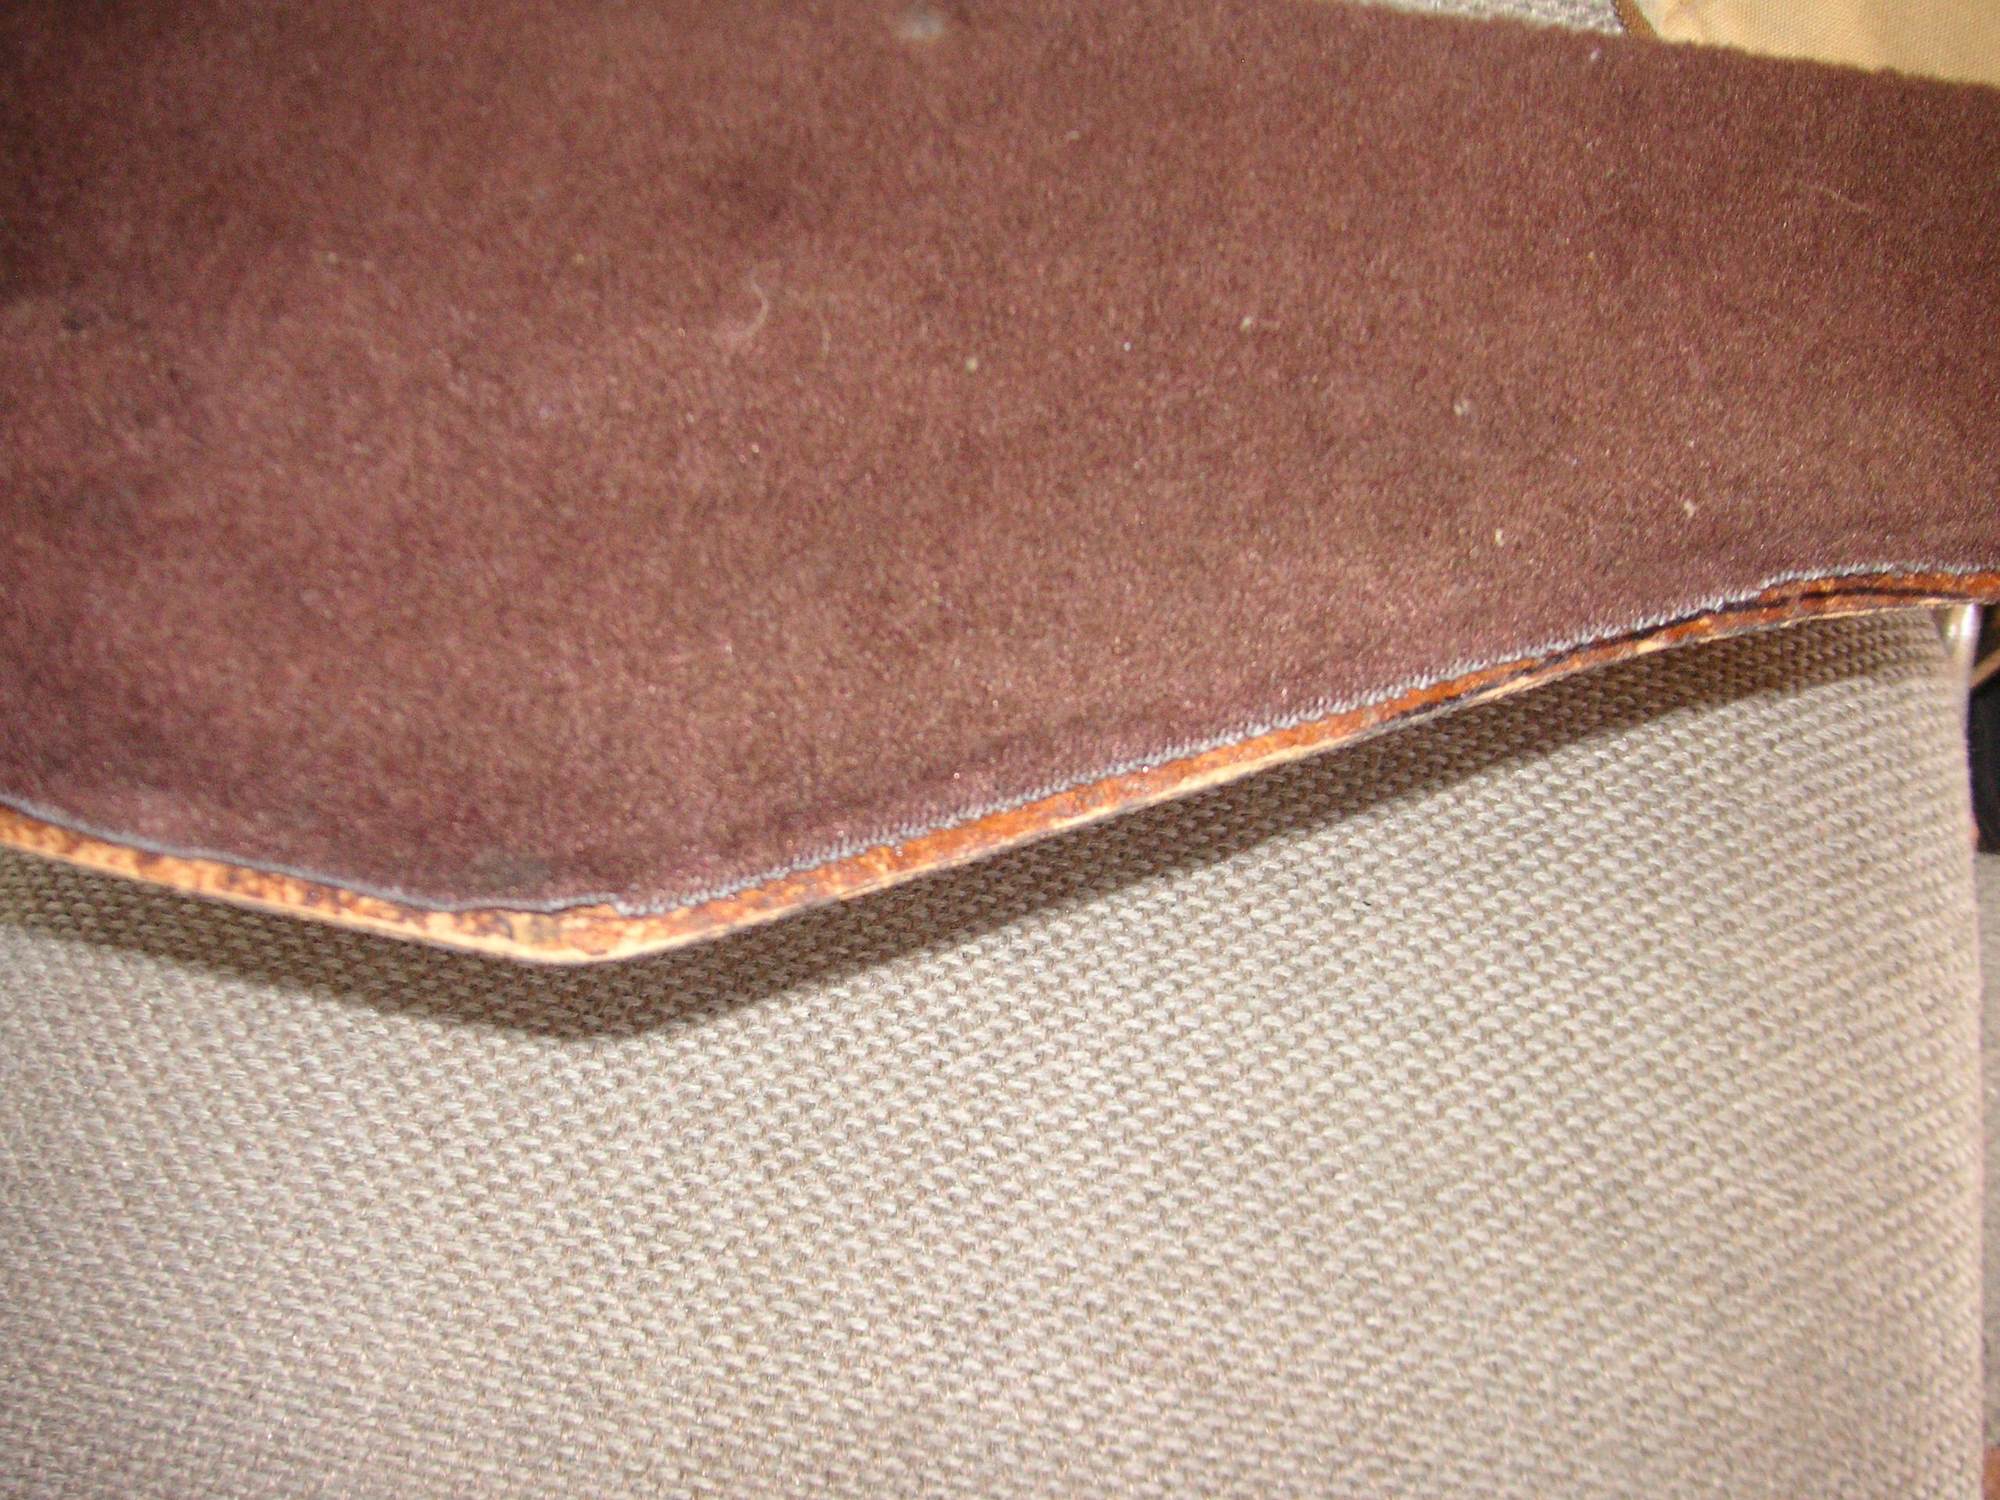
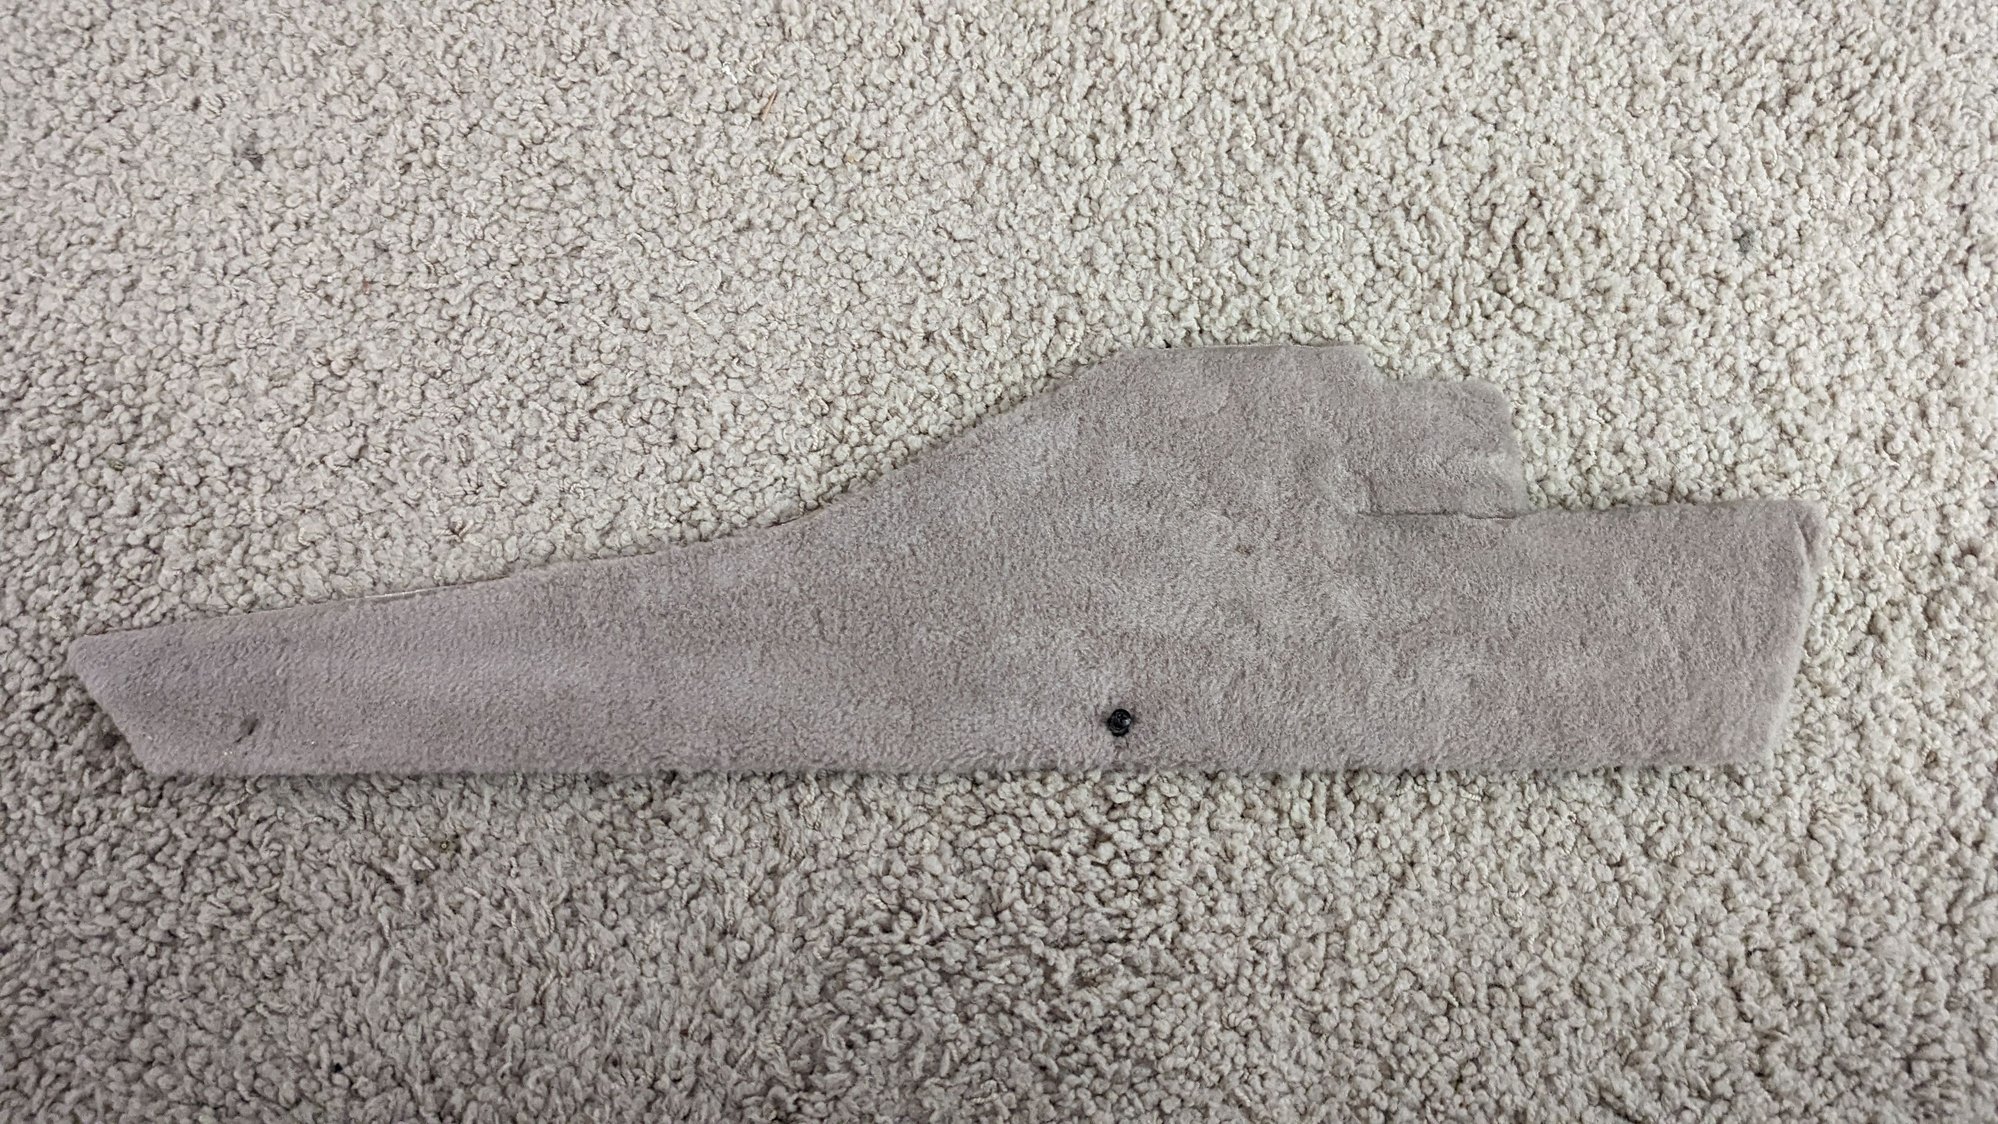
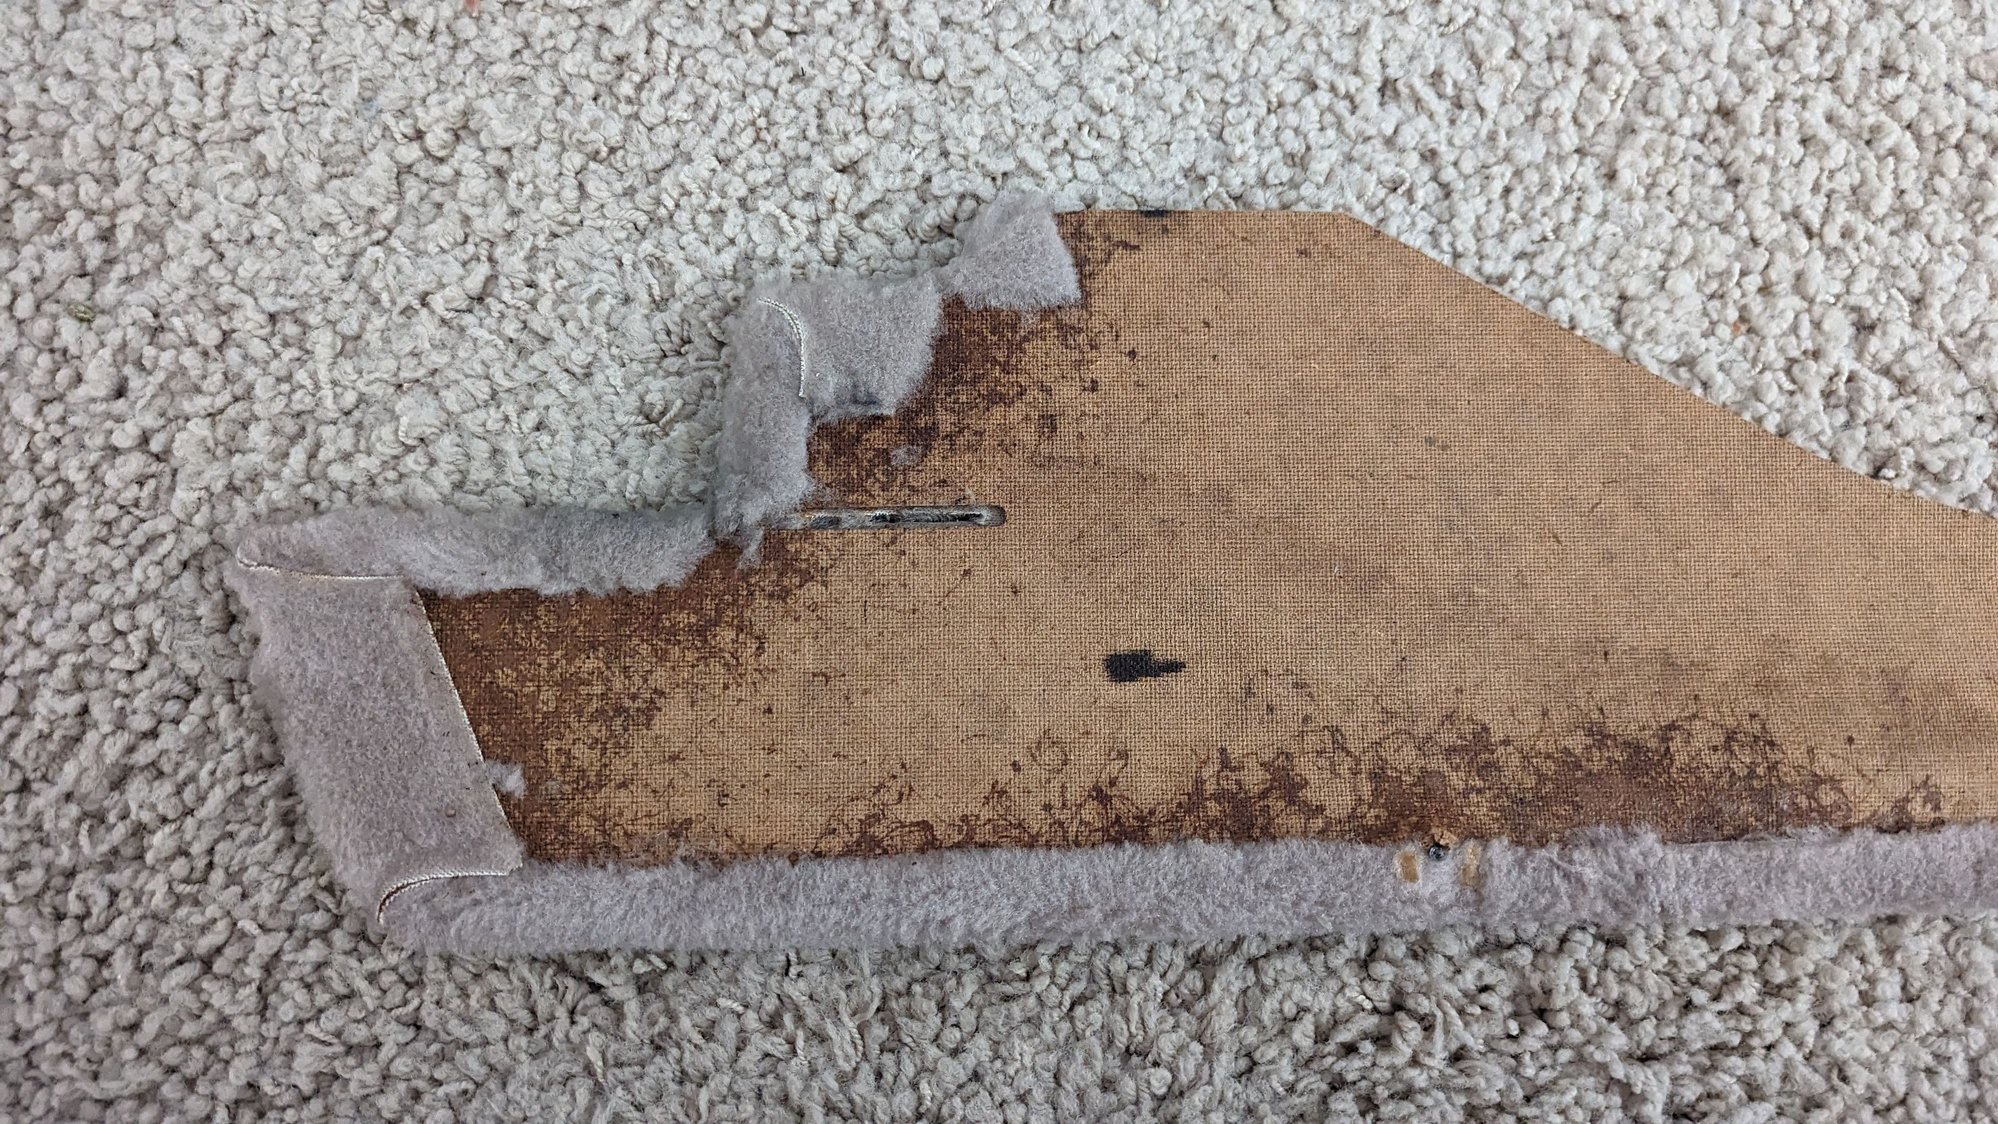
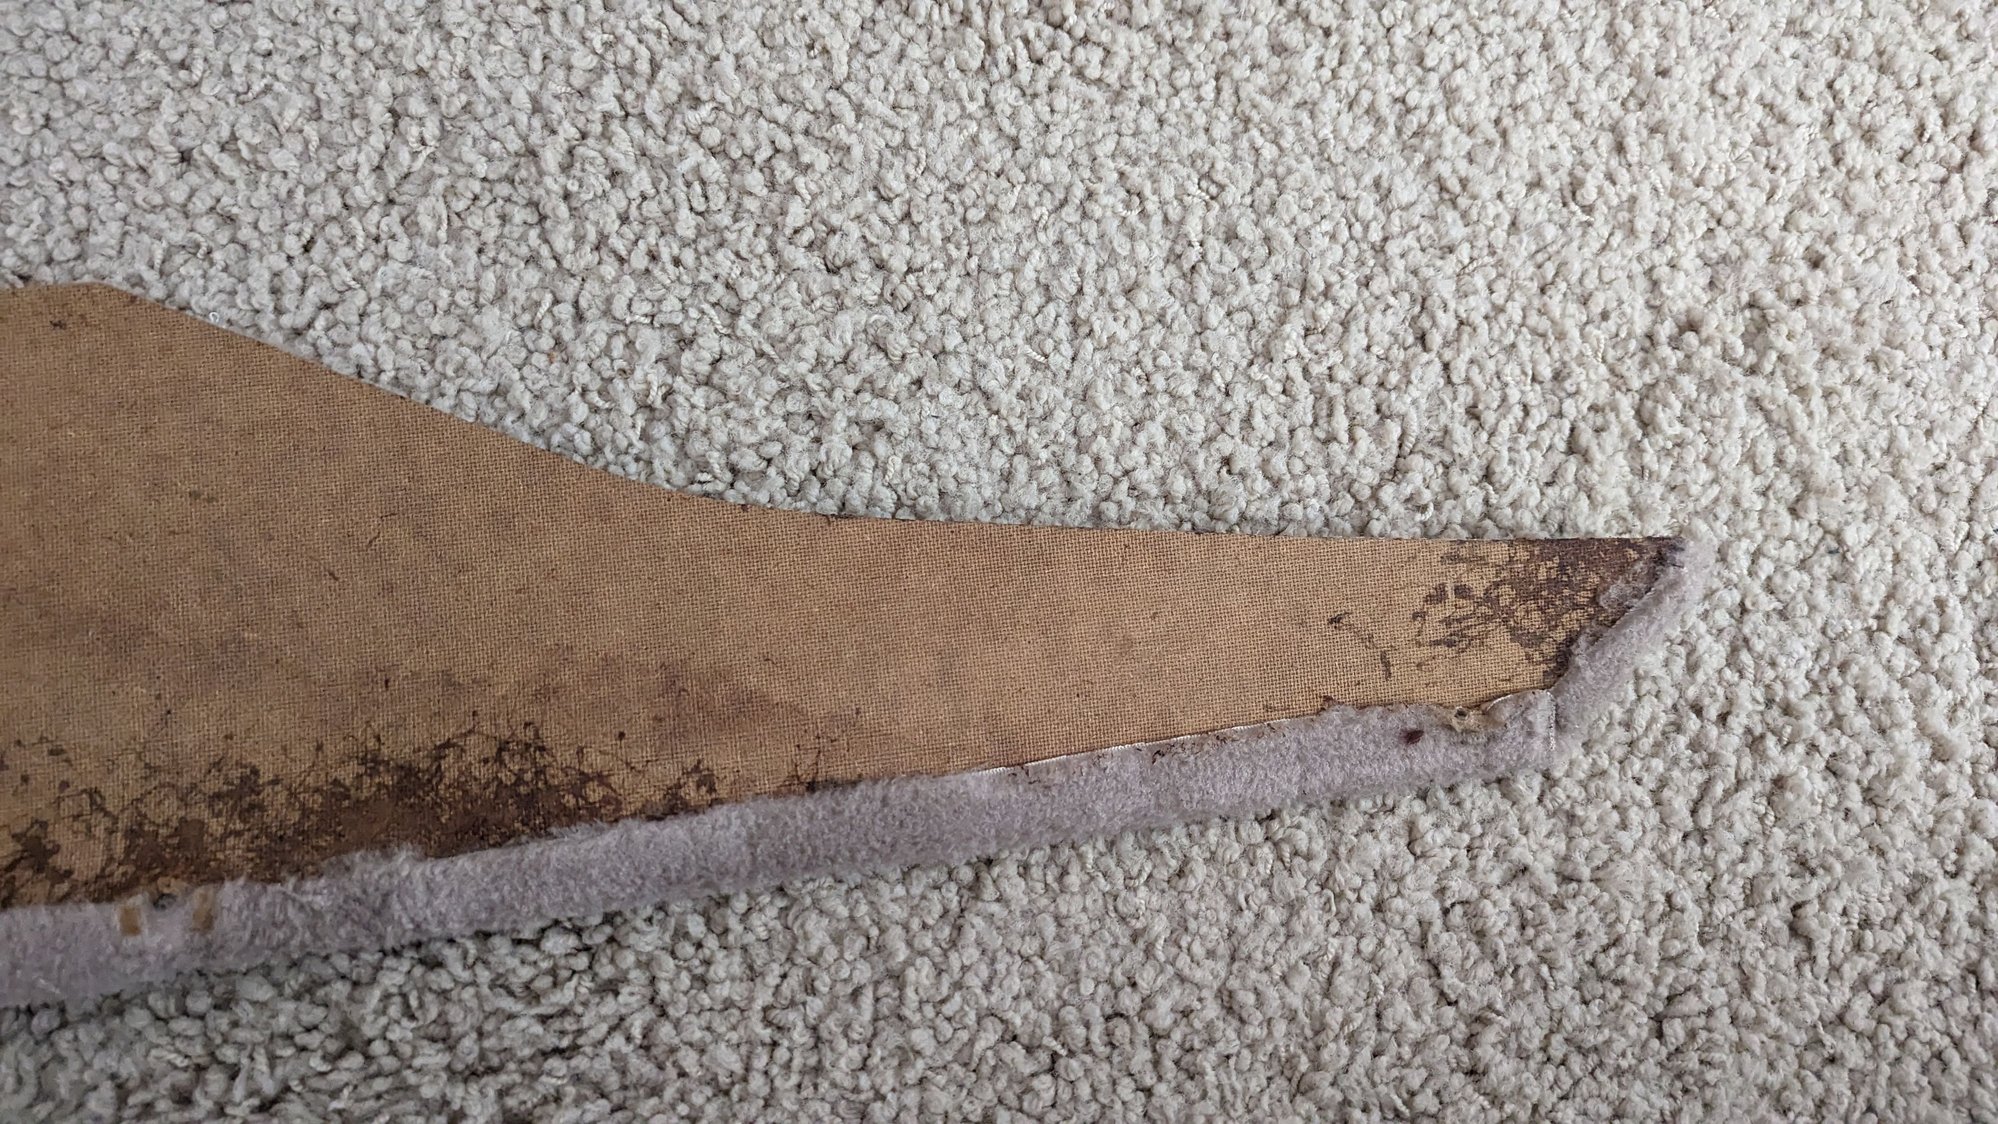
Just a reminder they can't be too thick as the top edge needs to fit into the grove on the center console.
This is very important because if you wrap the carpet over the top and glue it down on the back side of the panel you end up with too much thickness to fit in the grove. I found on my 82 panels that the carpet was glued down on the front of the panels and then trimmed off along the top edge of the panels with none of it going over the top to be glued on the back.
Last edited by Jerry Feather; 05-26-2024 at 12:10 PM.
This is very important because if you wrap the carpet over the top and glue it down on the back side of the pane you end up with too much thickness to fit in the grove. I found on my 82 panels that the carpet was glued down on the front of the panels and then trimmed off along to top edge of the panels with none of it going over the top to be glued on the back.
My 86 was the same, I'm going try and pull my passenger side off because it's not in the groove, I'll take a pic.
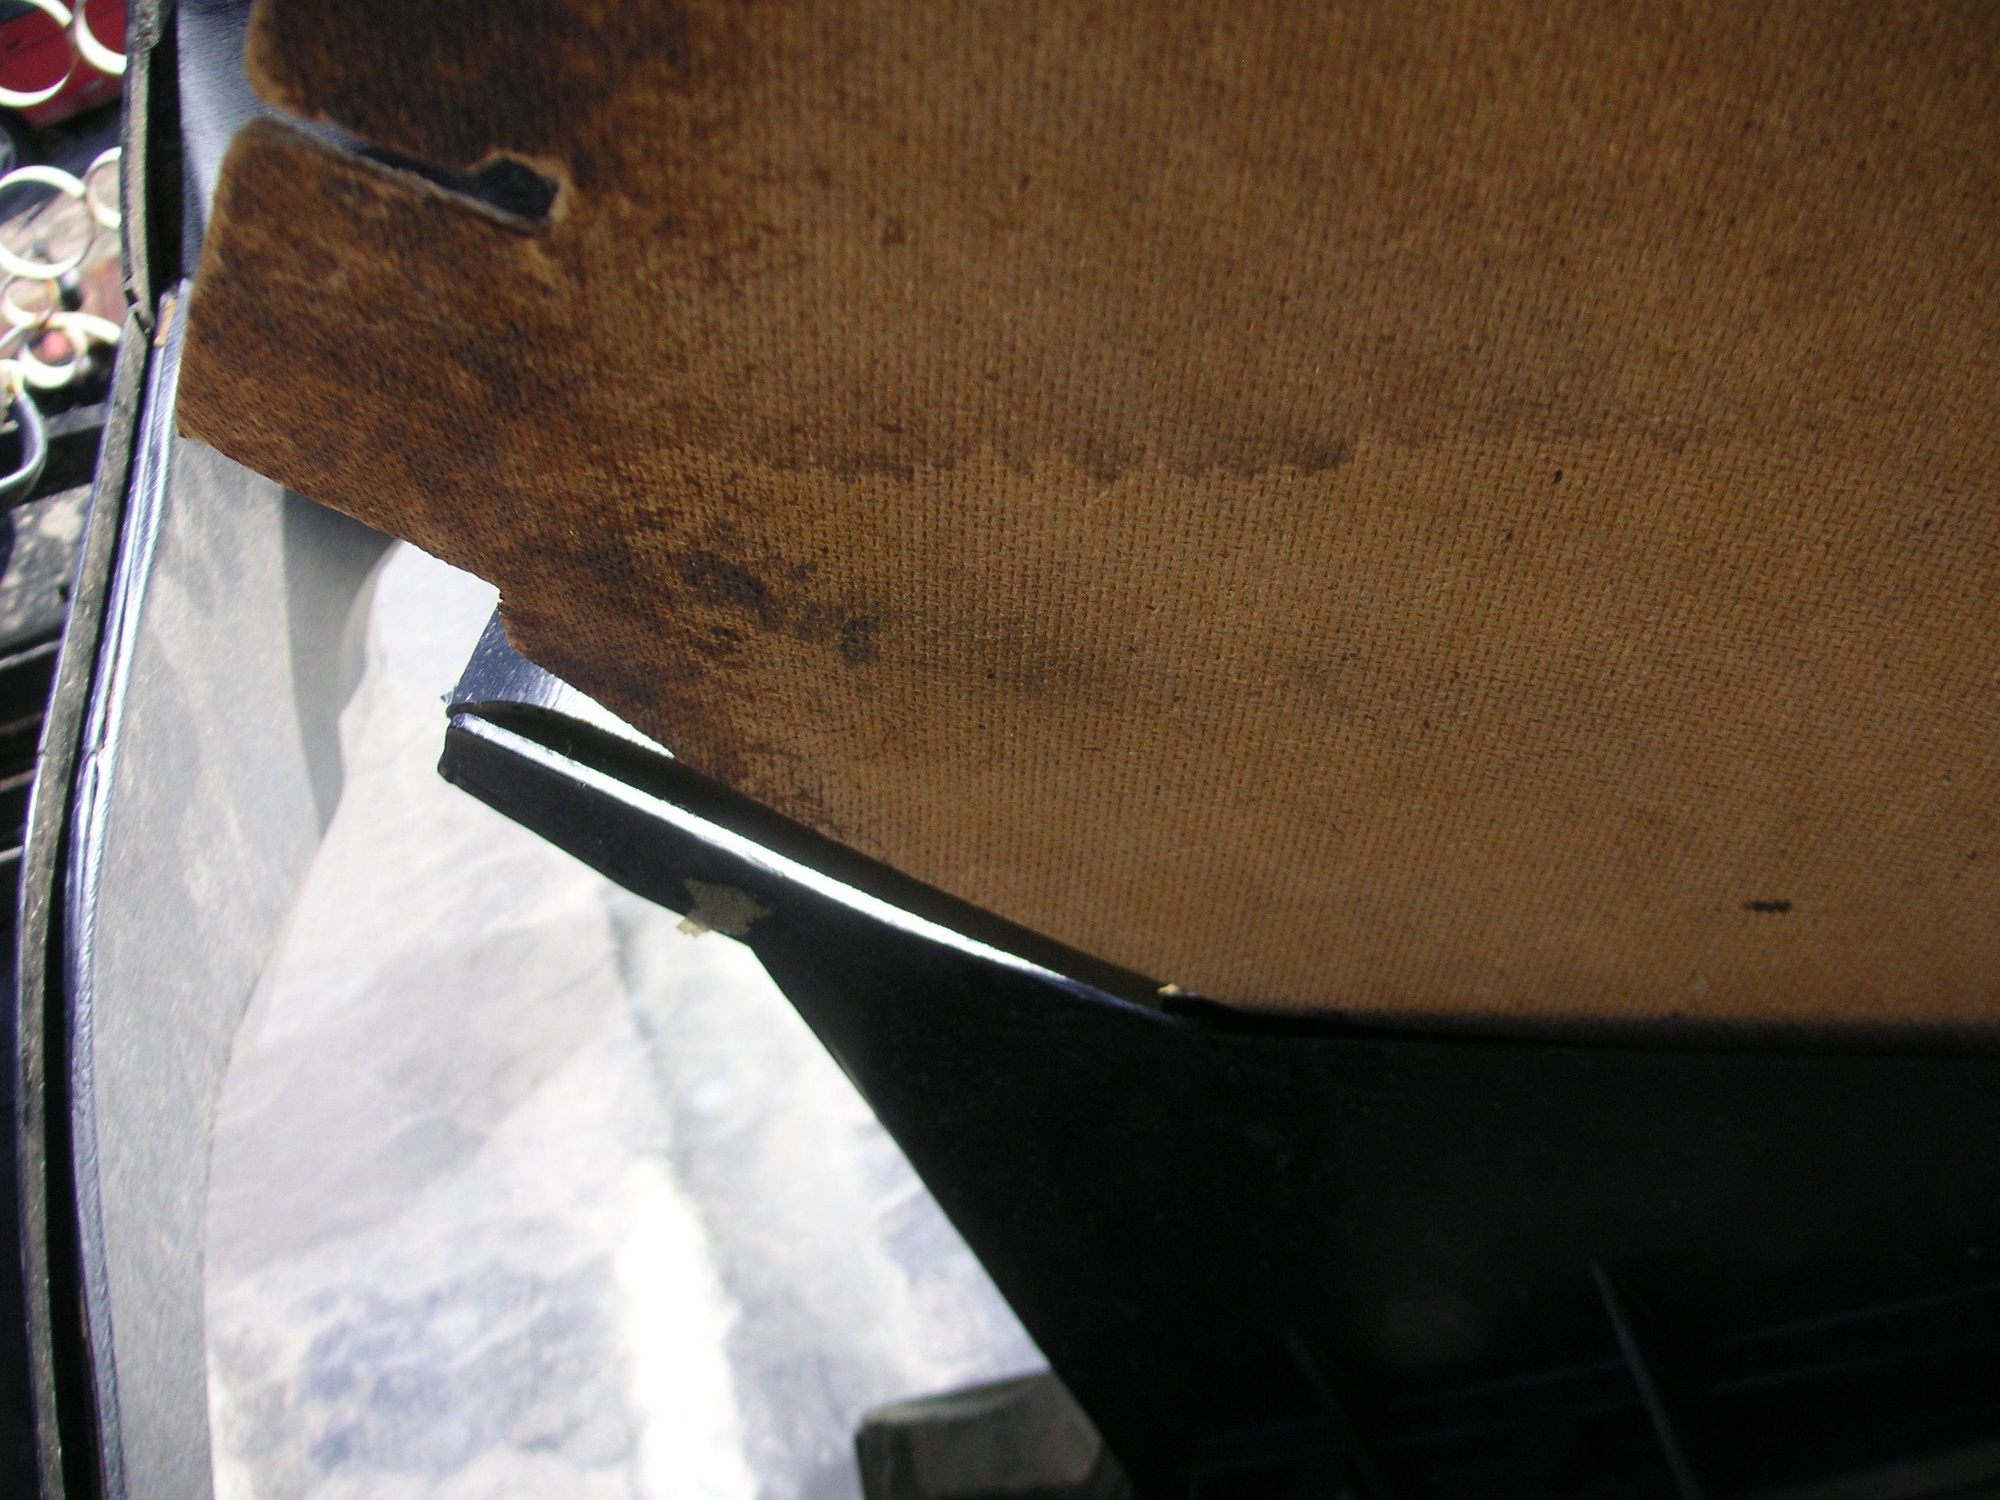
I had noticed in Pete's pictures that his installed new panel appears to have a small gap at the very top. It is not too noticeable, and now I wonder if perhaps all of them have it. I thought that one thing I might do with my new panels is to extend the top edge up about a quarter inch or so to help eliminate that gap. Then I made some cardboard patterns from my panels and since I have several spare consoles, I turned a couple of them upside down to study the grooves in their bottoms. (That sound a little off.) What I find is that the basic groove on each side actually extends to the very front of the consoles and does not end at the top of the curvature along the top edge. The grooves level off and turn slightly outboard. So, I fit one of my patterns in the groove to see just how much I might extend the top edge to be able to reach the groove.. What I found was that my pattern did not fit the groove very well at all. It tended to rock back and forth in the groove from a kind of fulcrum right at the bend in the curve. Then I tried my panels in the grooves, and find the same thing.
The panels do not match the grooves very well. So, I trimmed a little bit out of the corner of the curve in my pattern and found that the panel will fit the groove very well with only about an eighth of an inch taken out of the corner. The panel will now fit the groove all the way to the front if cut correctly. None of them are, I am pretty sure. With the panels cut correctly there is no need to extend the top edge to fill the gap. The panels will fill the gap perfectly with the corrected shape of the top edge.
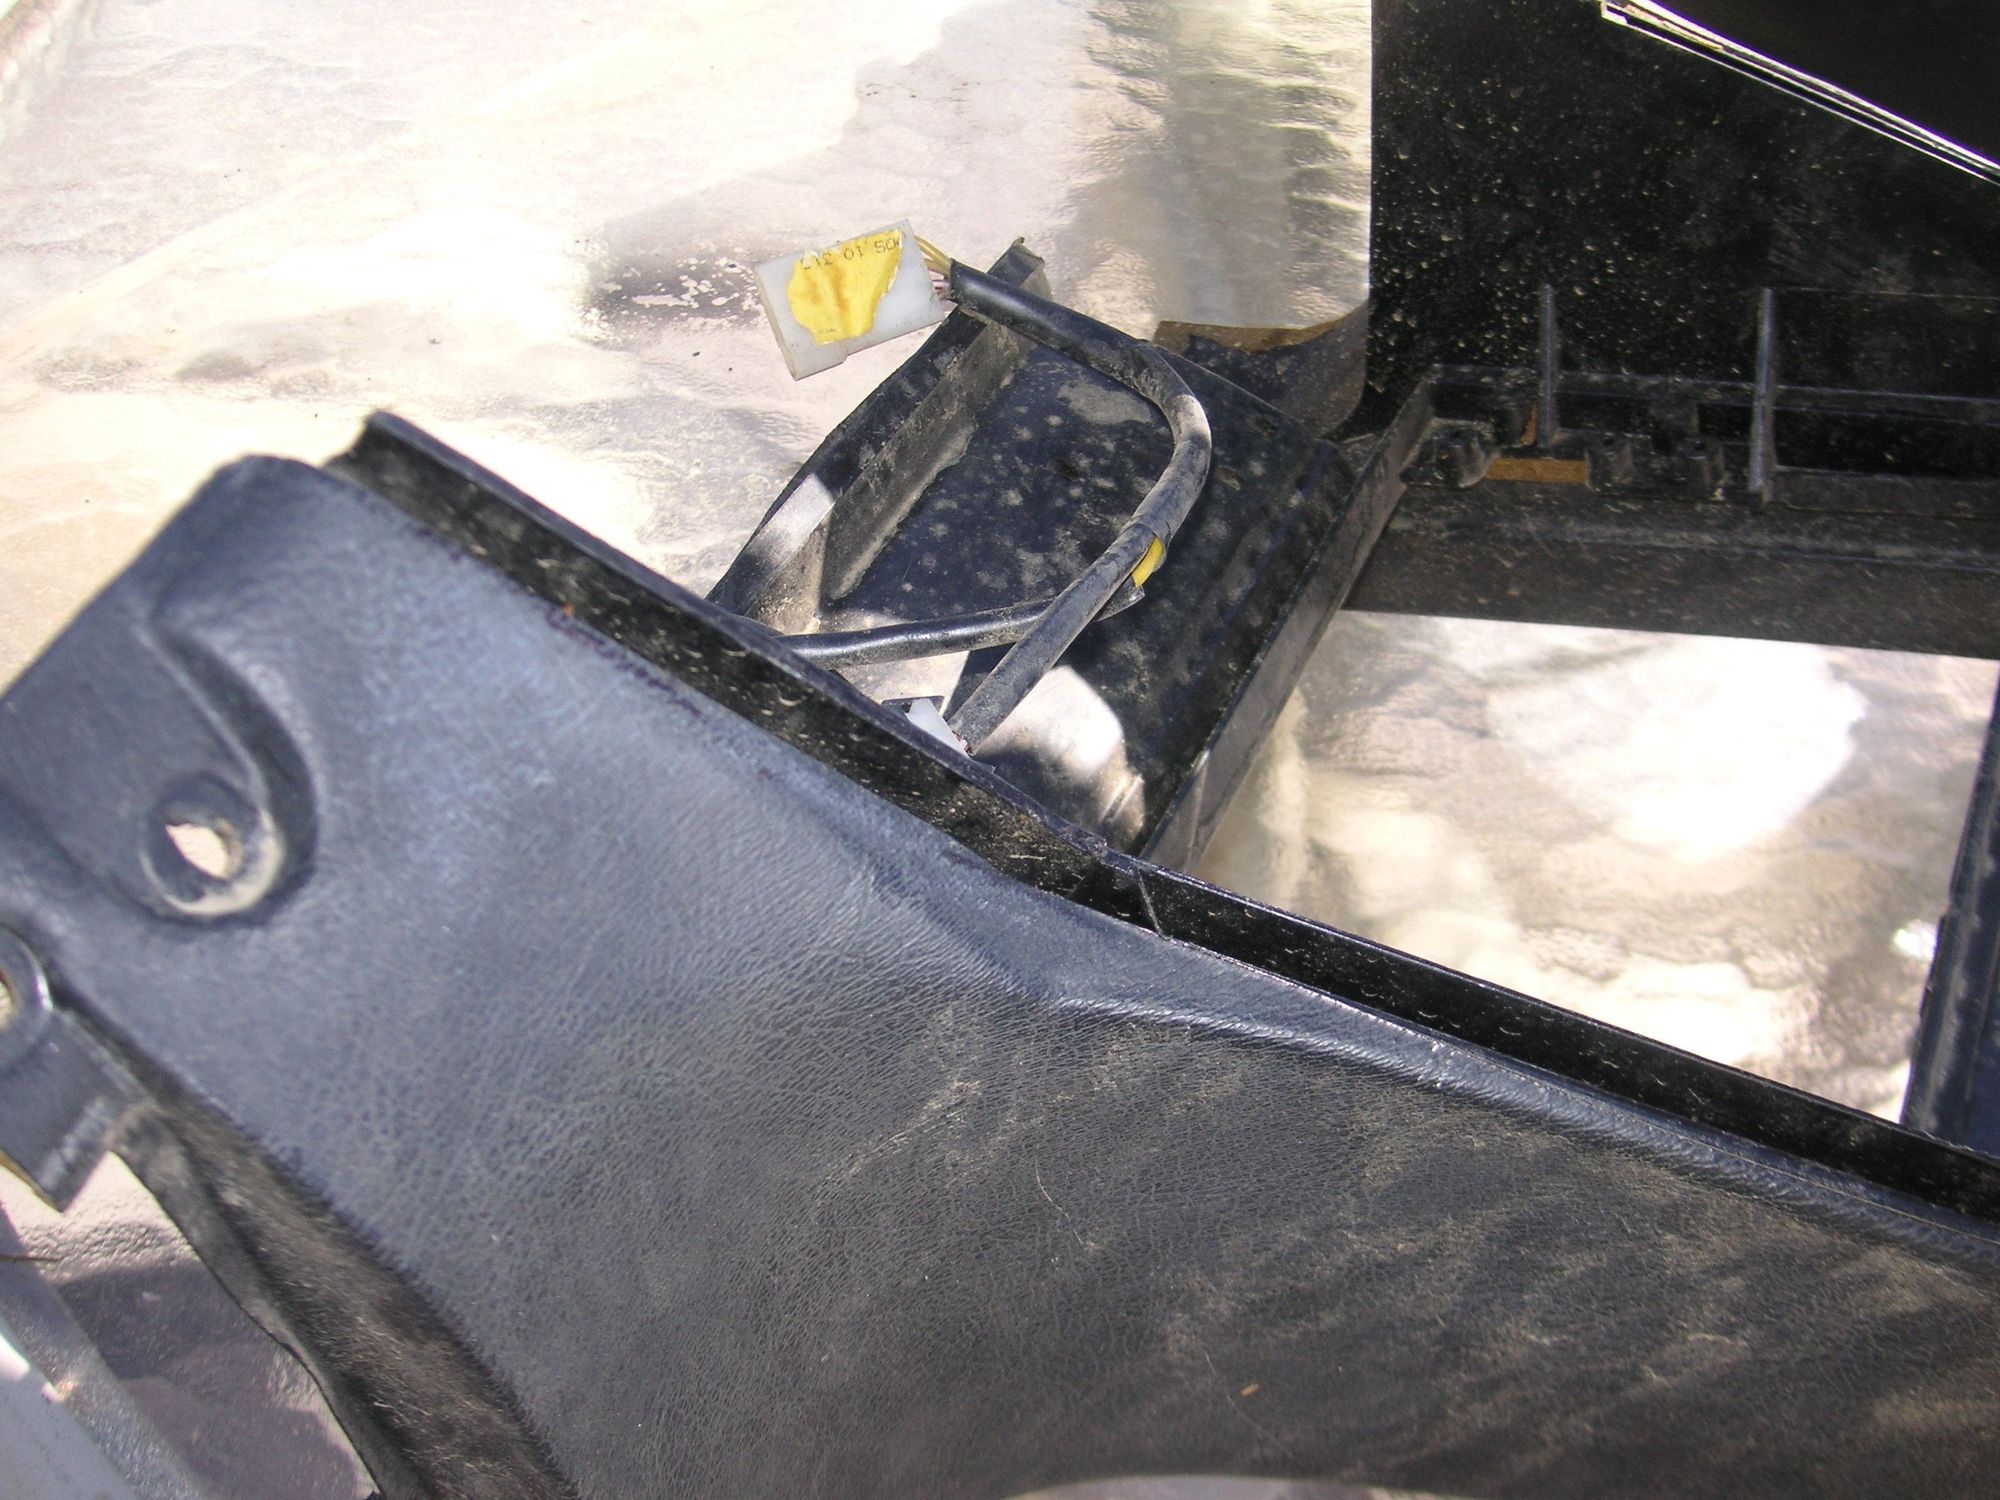
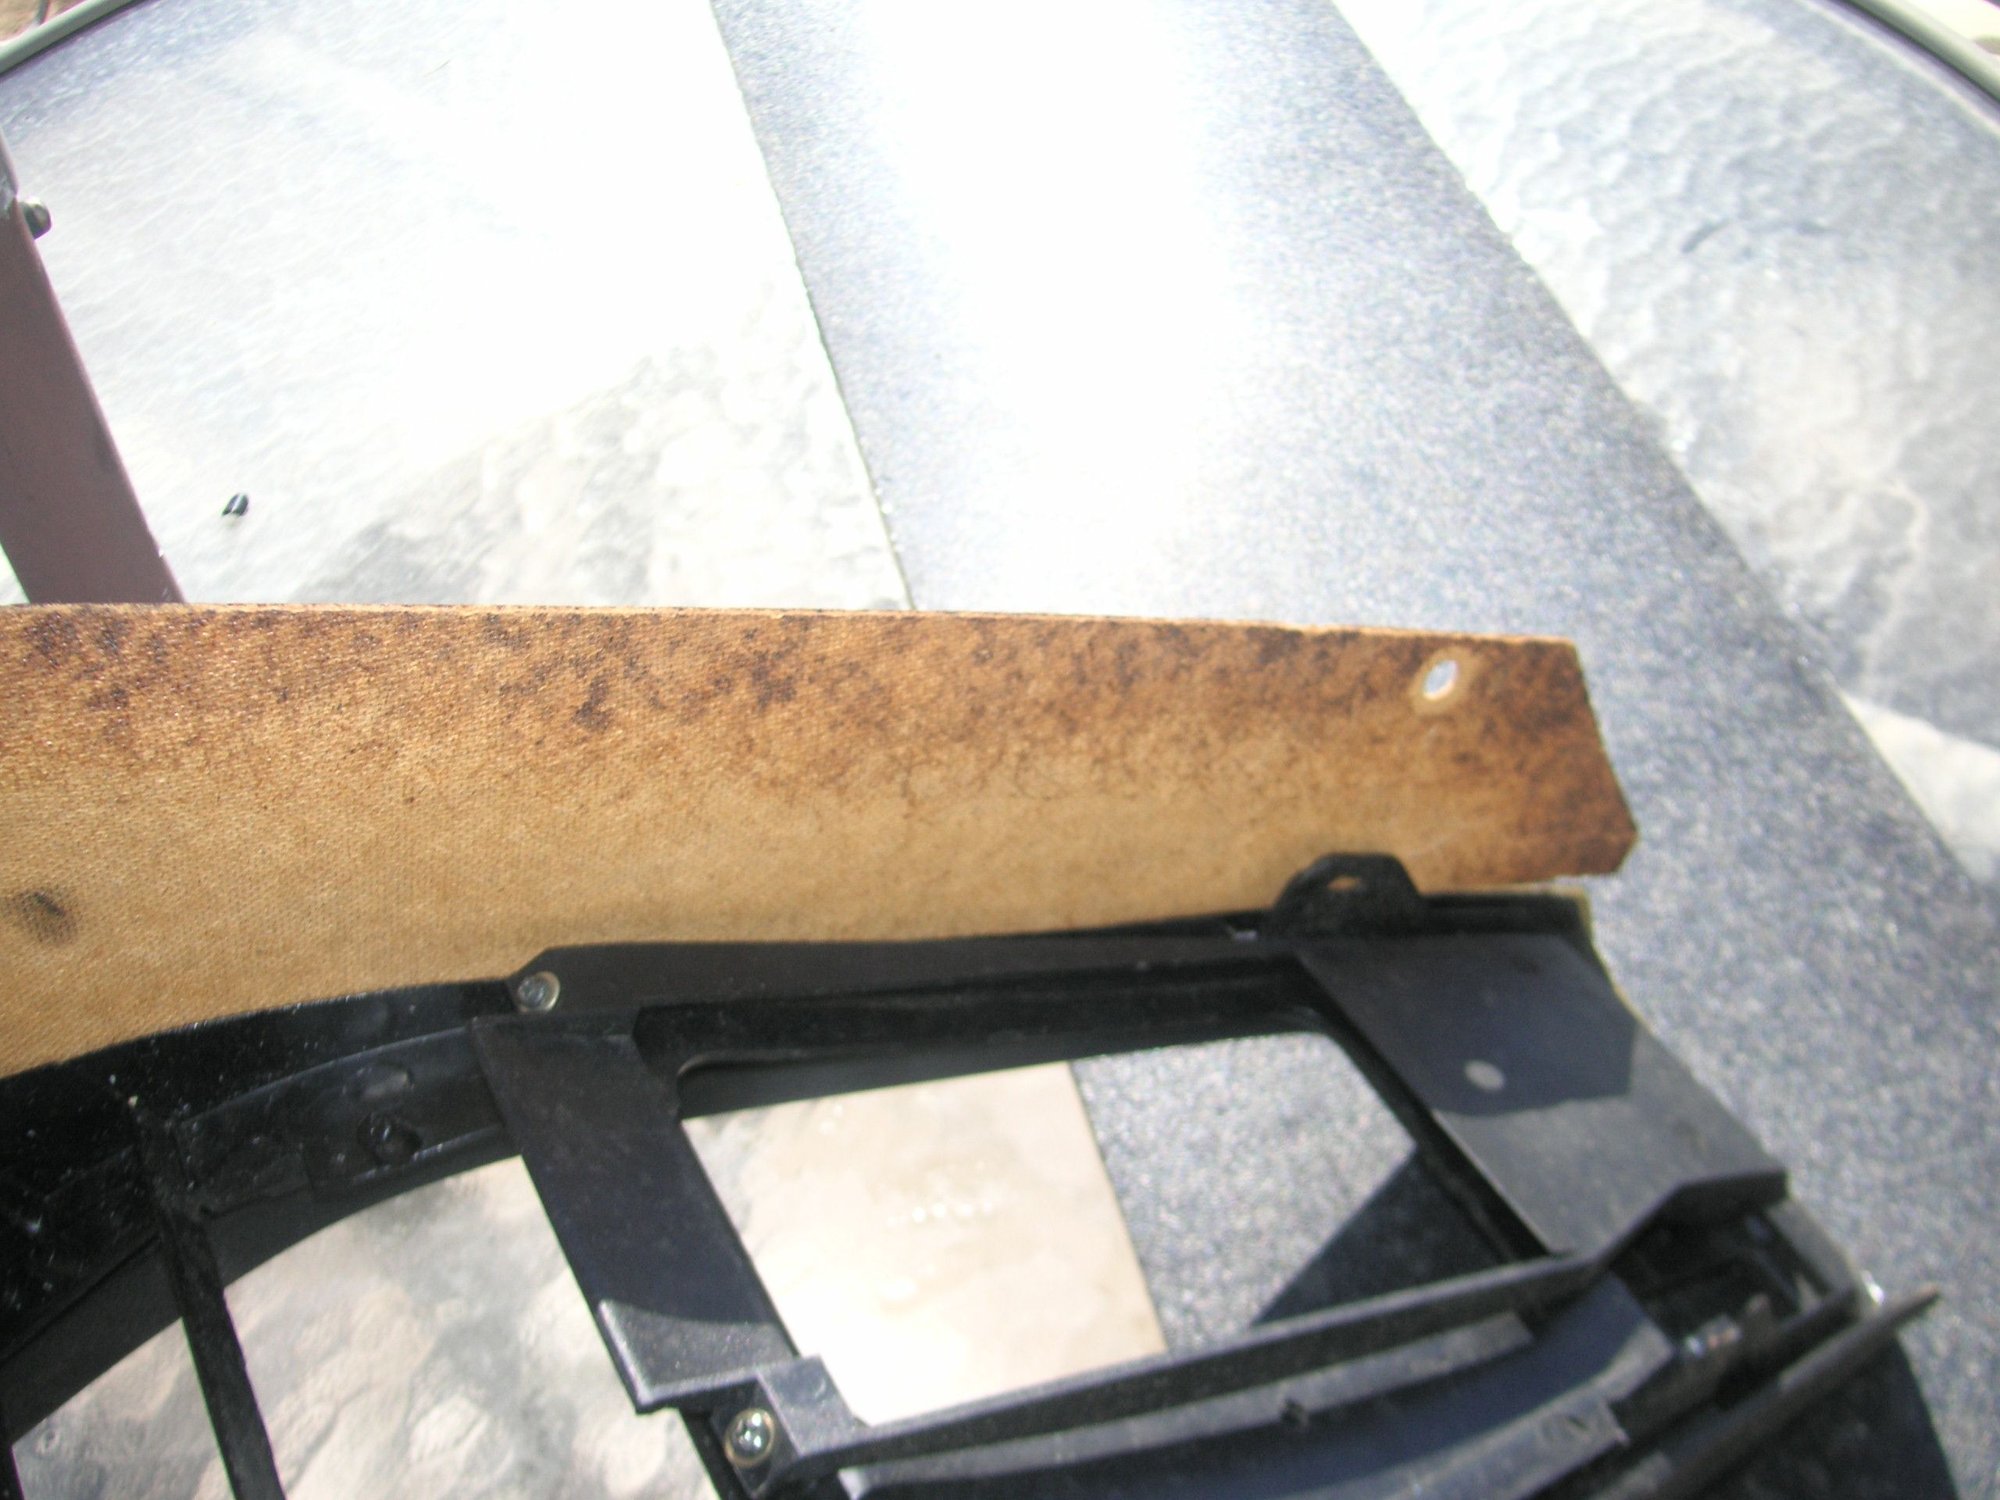
This picture shows the gap at the front of the original panel when the tail of it is in the groove.
Last edited by Jerry Feather; 06-03-2024 at 11:39 AM.
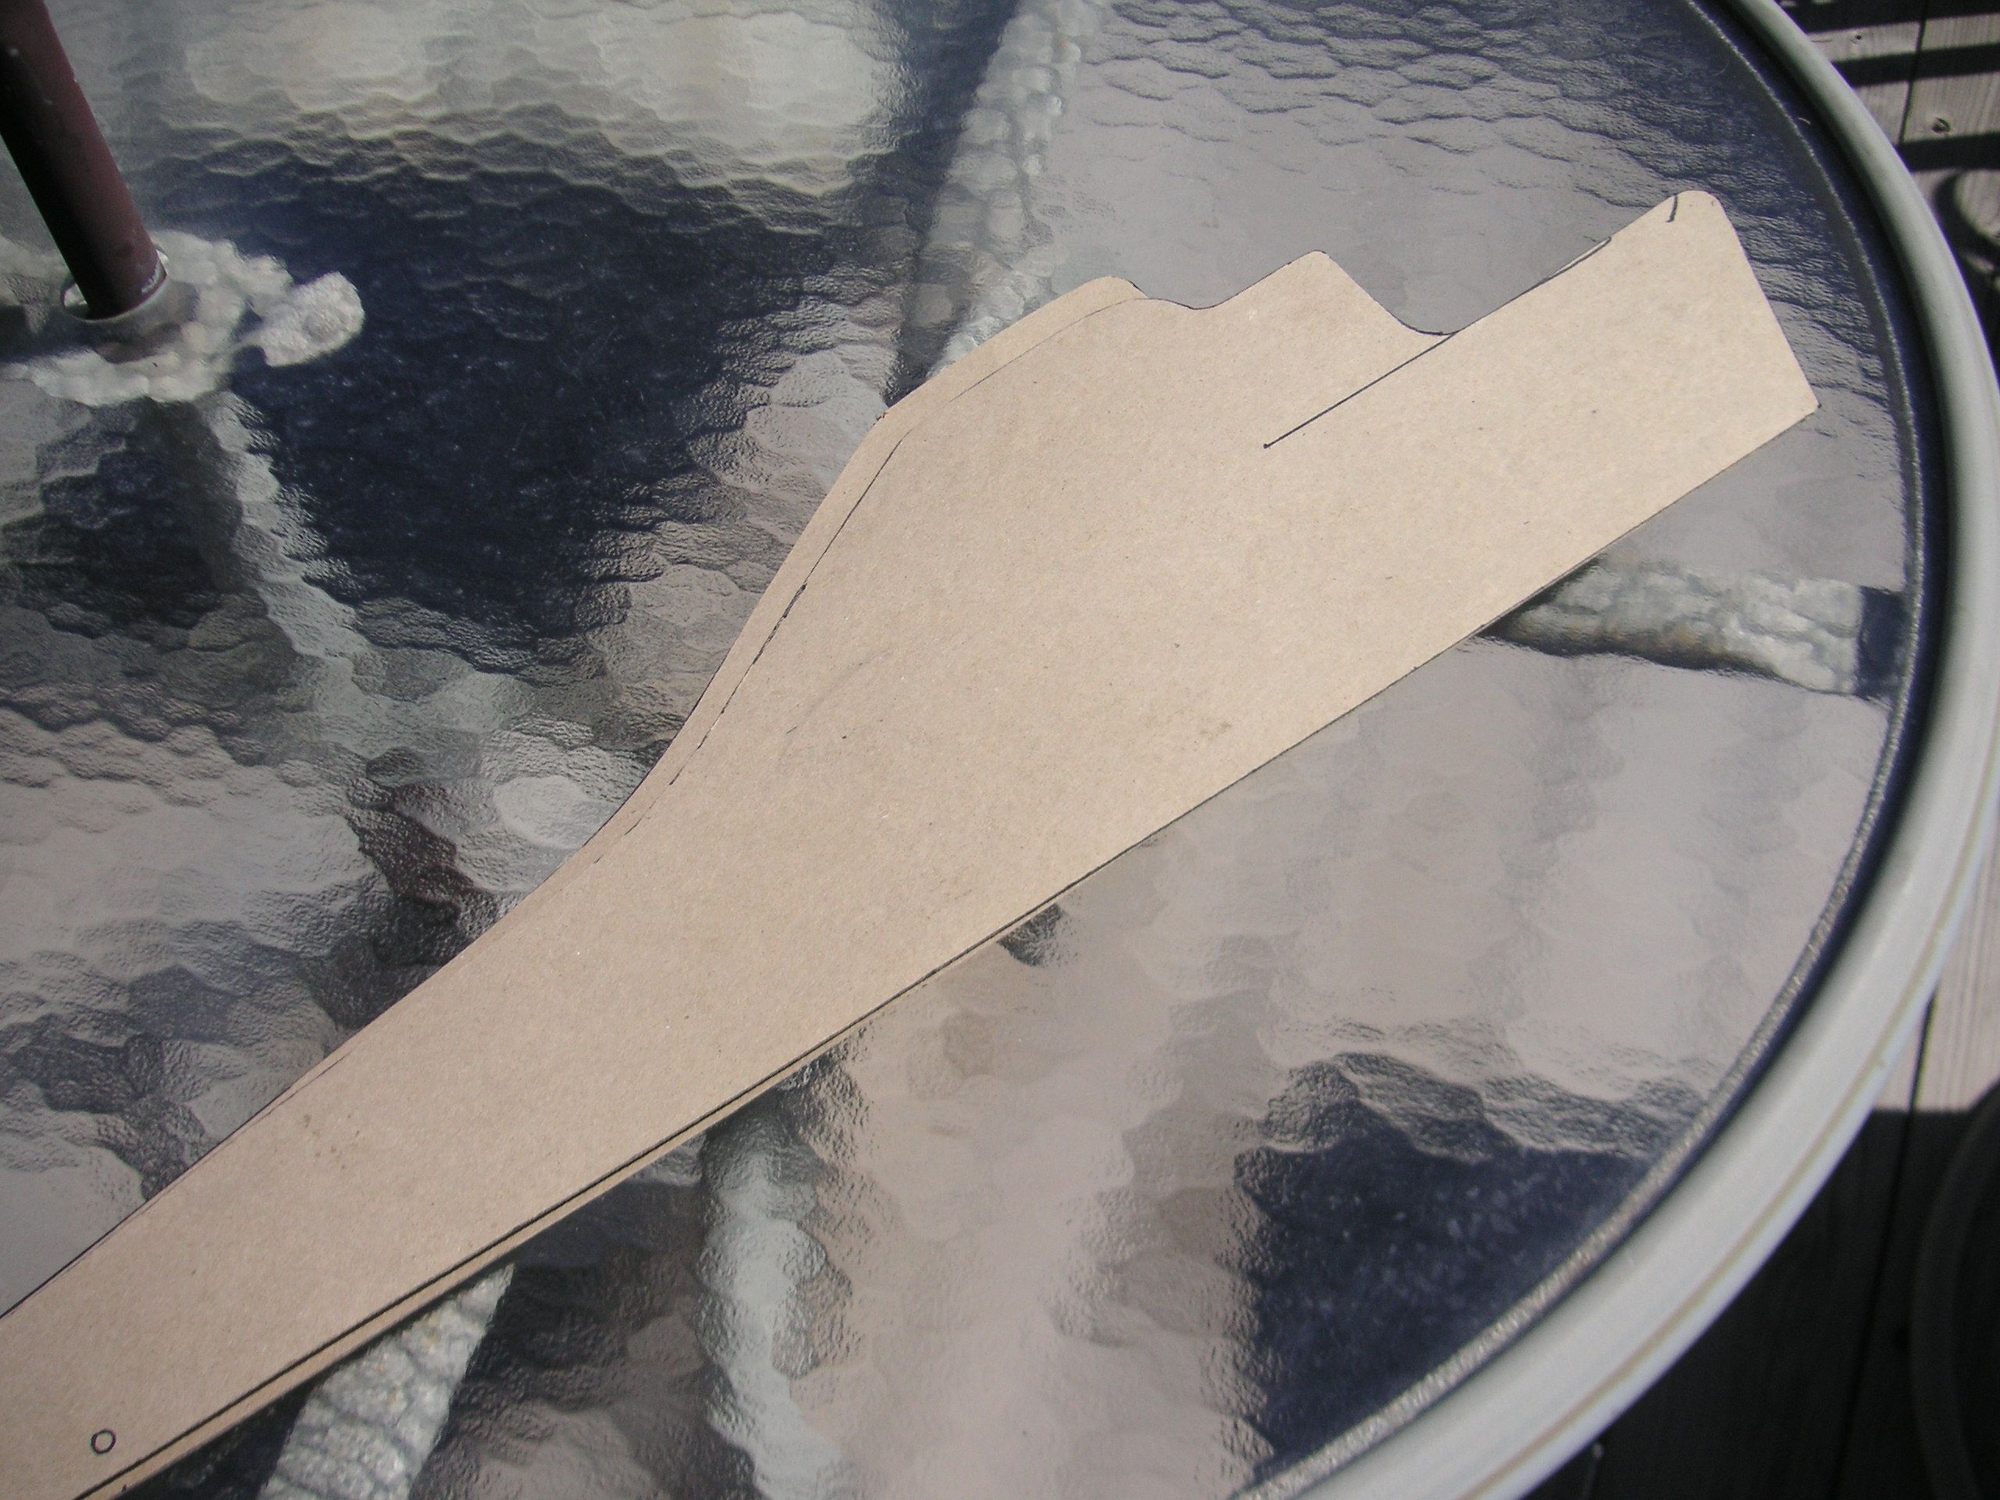
As I think thru this very small design change I begin to see that it may very will give rise to a slightly major (is that a conflict?) change in the whole panel. One thing I see as needing to take place is to move the slot or opening for the shelf bracket down and probably quite a bit. With about 1/8 inch adjustment up at the bend in the top edge that gives rise to a very much larger movement away from that corner, probably about a half inch or quite a bit more. Then that movement may also require moving the central screw hole down some. In fact, I think that that all is going to drop the bottom edge of the panel toward the front by as much as 3/4 inch or even 1 inch.
This may very well become the new shape of these panels. It is the pattern underneath that may be the new design. The pattern on the bottom is the new possible design.
I tried my theory about the shape of the panel by making one off of the patterns out of some of the ABS, and it didn't work out. The top edge fits the groove every well, but the lower slot for the shelf is too far down. I guess I need to fix the curve on the top edge in the original panel and simply give that a try.
Last edited by Jerry Feather; 05-26-2024 at 12:13 PM.
Reason: Dupe Post.
I have stripped my two panels from the 82 and have taken these two pictures in some reflective daylight to kind of show what I think is a pretty good hint of what the factory put into them for shape.
I've done 3D printing with ABS and it's pretty malleable with a little heat. Couldn't ABS side panels be cut flat, then formed in situ with a heat gun before covering with carpet?
I made another test panel out of the ABS and did not add any vertical depth to it. It fits perfectly. In test fitting the panel to the groove in the bottom of my two consoles that I am using for fitting the top curved edge, I do find that my panel does not fit both sides exactly the same. When the panel is in the groove on one side it is fits perfectly, but it will only fit the other groove about an eighth of an inch shorter. It is the same with both of my test consoles, one being the early version and the other the later air-bag version. Then the other thing that I think I am finding, that may very well have a lot to do with some overall ill-fitting with all of them, is that I think the mounting holes are off, and by quite a bit. I'm going to have to do some patterning of the hole locations and then compare that with my test panel and the original panels.
There is quite a bit going on with what now amounts to a redesign of these panels. I have changed the line of the top edge a bit, and when I do that it also puts the tail end of the panels back even with the tail end of the console, where I think they were intended. I think that installed the factory panels are mounted a bit forward of the tail end of the console. That can kind of be noticed in the latest picture above of one of them installed, but I can't tell about the black one installed as shown earlier in this thread. I now think that is why the mounting holes now appear off, at least for me.
One of the kind of lessons that I learned earlier in my 928 endeavors is that it might be a mistake to design something using the factory installed item as a pattern. With my redesign of the Cowl Covers, I had first worked up my forms, at least part way, from an original factory item and then I discovered that the originals do not fit very well. I had to modify my forms to match the car rather than an original Cover. I am beginning to think that that is what is going on now with these panels.
Another factor that I think is coming into play in regard to the mounting and the mounting holes, is that I think the mounting bracket in the car might be bent out of shape or position. I'm going to have to look into that when I do the patterning of the mounting hole locations for this new pattern I'm working up.
Last edited by Jerry Feather; 06-03-2024 at 11:47 AM.


 05-15-2024, 10:22 PM