When you click on links to various merchants on this site and make a purchase, this can result in this site earning a commission. Affiliate programs and affiliations include, but are not limited to, the eBay Partner Network.
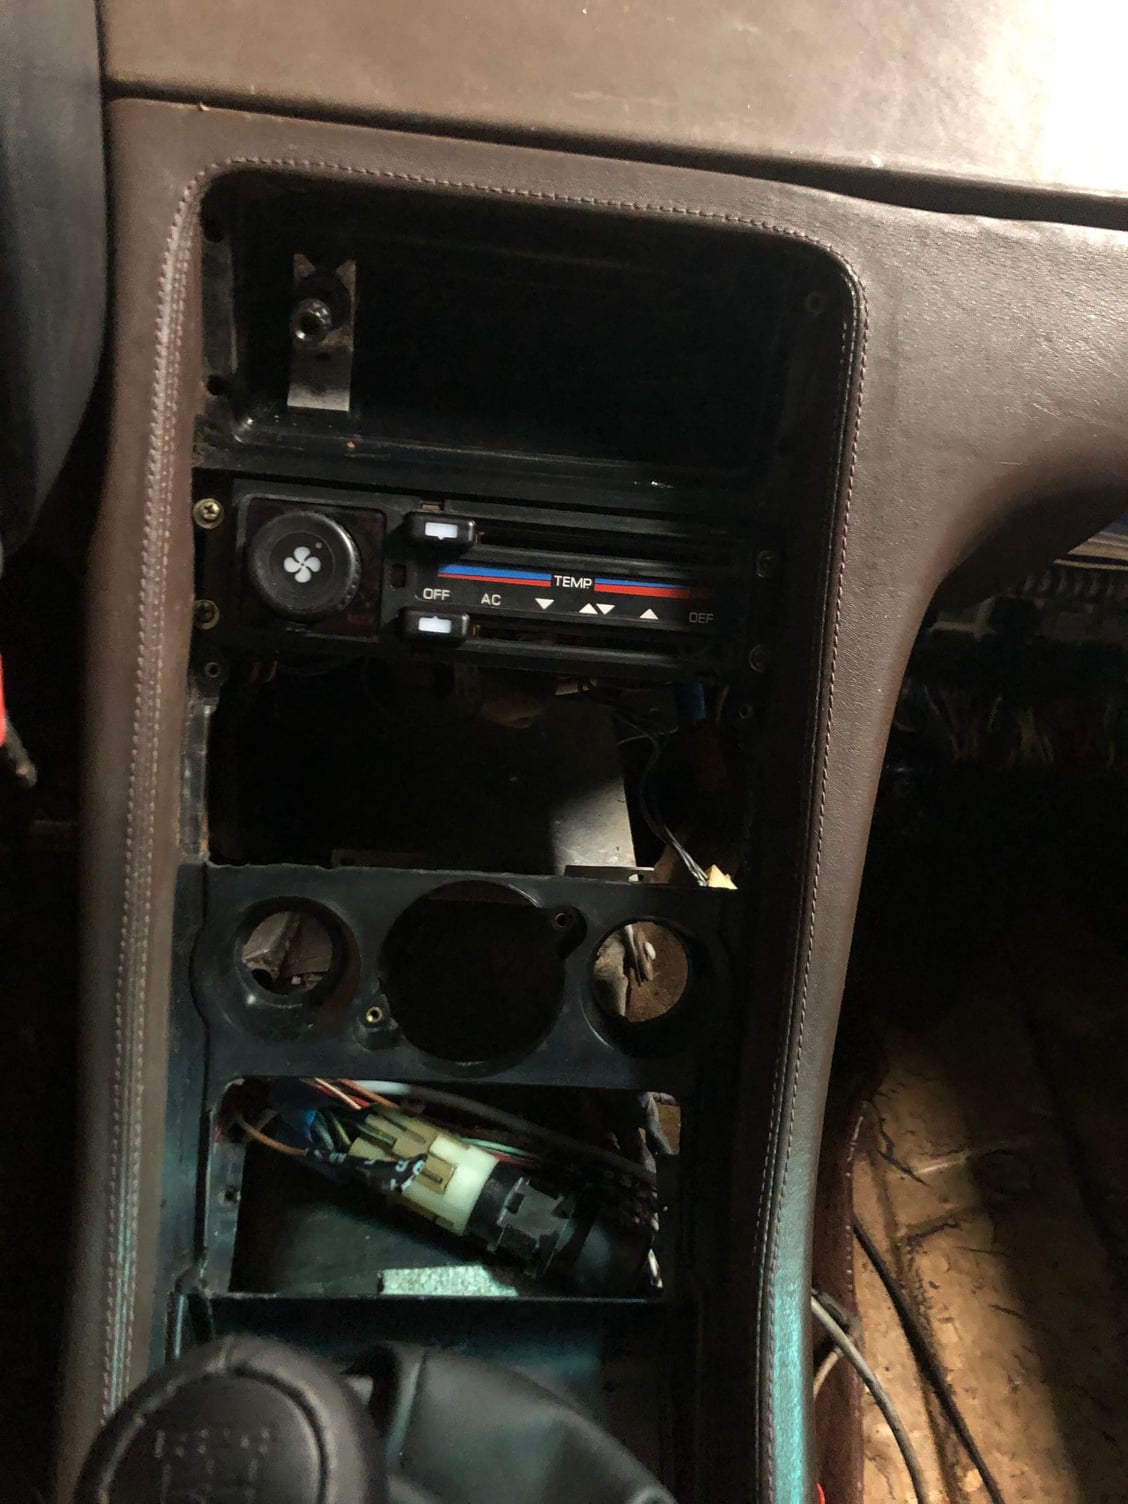
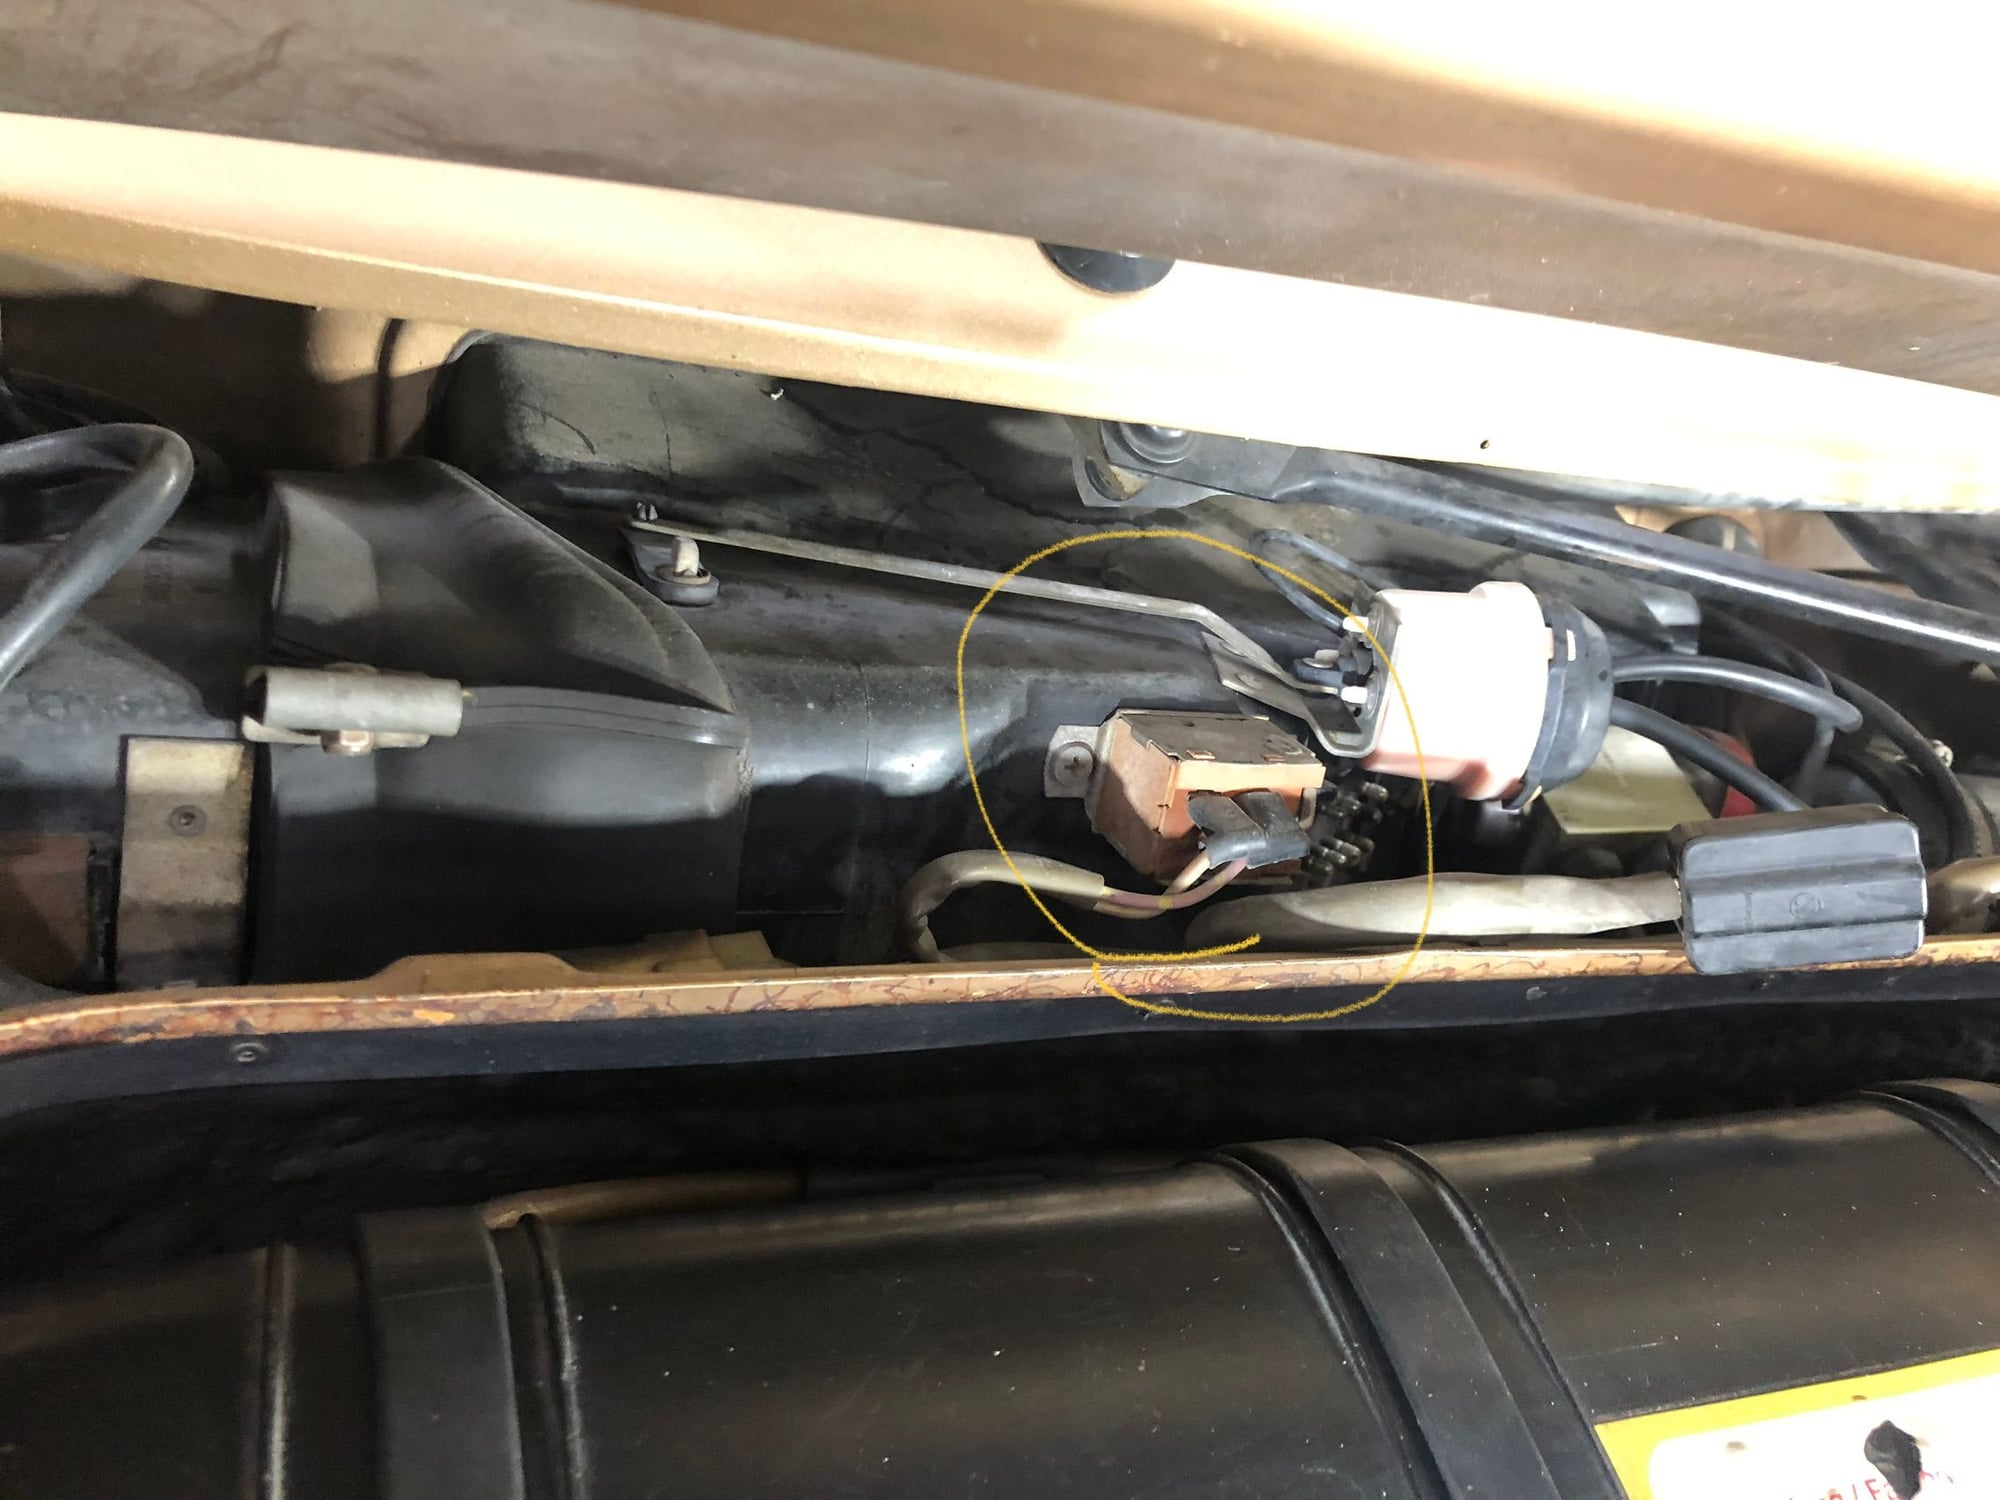
So, prior to sending the ‘79 for the interior I’m trying to finish all the things I was working on prior to doing the top end refresh. One of those is the HVAC system. I believe I have all the vacuum lines run correctly and installed a new “switch” on the rear of the unit, cleaned up and lubed the slides, got the fiber optic lines run, and have goodies coming to hopefully fix the blower resistor pack. What other things should I be checking? I have my doubts that the a/c has been converted but am praying the compressor is still. I’m hoping to take it to a local a/c shop that has been around forever to get his thoughts. I picked up a few small parts I was going to give him and some WSM printouts as well as look at Griffith’s website. There is only one wire that runs to the compressor, correct? Last but not least, what does the below circled part do? I looked it up in the PET and believe it is a temp sensor if I remember correctly? Is there a way to test it.
I’m getting excited to get this interior like new again…except in a little pasha.
So is this the correct conversion kit for the ‘79. I can’t get my car in until late next week so I thought I’d try to get the conversion kit in the meantime. Thx
The compressor only has one wire to power the coil. It grounds using the engine block.
The circled thing in your pic is the freeze switch. It has a capillary tube that goes into the evaporator to cycle the compressor when the evaporator starts to freeze.
They have a brass diaphragm inside that eventually work hardens and fails. It is worth it to replace it at this point.
You should also replace all o rings. the expansion valve, and all soft lines with new barrier hose to keep all the r134 in the system.
You didn't link a conversion kit but if you use a Griffiths kit just be sure to flush the system extremely thoroughly as the oils used with the 2 different refrigerants turn into goo upon contact and will destroy your compressor.
Do you have rear AC? A great deal of oil accumulates in the sub-chassis lines to the rear AC evap. Flushing forward from the rear pressure/suction lines (after they’ve been disconnected from the rear evap) does NOT remove quite-a-bit of old oil. You need to drop the sub-chassis AC lines and flush them separately then then one can visualize what I’m referring to.
Old o-rings are likely to be just plain leaky. If not now then well, pretty soon.
if no rear AC, it’s simpler. But rear AC is not necessarily a delete item. Dr Bob and others describe that sealing the rear evap copper pipes to aluminum junctions with JBWeld usually fixes most problems.
Oh yeah, pressure test the system with enough pressure so you can listen for leaks with a stethoscope at all the junctions. Nitrogen is the favored way to test a completed system. It won’t interfere with the integrity of the drier.
Or….pressure test the system with 2-stage dry air which should accomplish the same thing. Your drier will (considered to) be sacrificial and fortunately Roger can affordably provide replacements.
Thank you for the advice. No rear A/C, so hopefully that helps simplify things a little. Was the Griffiths like in my previous post the correct one I'm looking for? I was going to give them a call today.
It’s best to visually examine any differences between your drier and the one pictured in Griffiths.
I’m going to advise based on what I’ve learned from my still-ongoing AC refresh.:
Unless you’re an AC service ninja, don’t order that kit from Griffiths, unless you know if each o-ring is labeled with a Porsche catalog part number. You’ll need to match up each o-ring with the specific junction where it goes.
The best way to get it all correct is to go to the parts catalog, identify each o-ring, part number and where each goes in the AC system.
send the list of quantity plus spares to Roger plus the catalog part number of the drier.
Roger sends you back orings in bags labeled by part number.
Now it’s down to reassembling the AC system using labeled o-rings, based on where the parts catalog indicates the orings should go.
Advise for Roger only after my piece meal order likely caused him an addiction to advil: Create a full AC oring parts lists with catalog numbers, quantities and in some instances replacement part numbers, for model year groups and send that sheet of paper out with all oring parts purchases, with the suggestion, “You might need all these. You might add spares as well”. The customer’s next order might actually be complete.

 02-28-2023, 09:32 PM