When you click on links to various merchants on this site and make a purchase, this can result in this site earning a commission. Affiliate programs and affiliations include, but are not limited to, the eBay Partner Network.
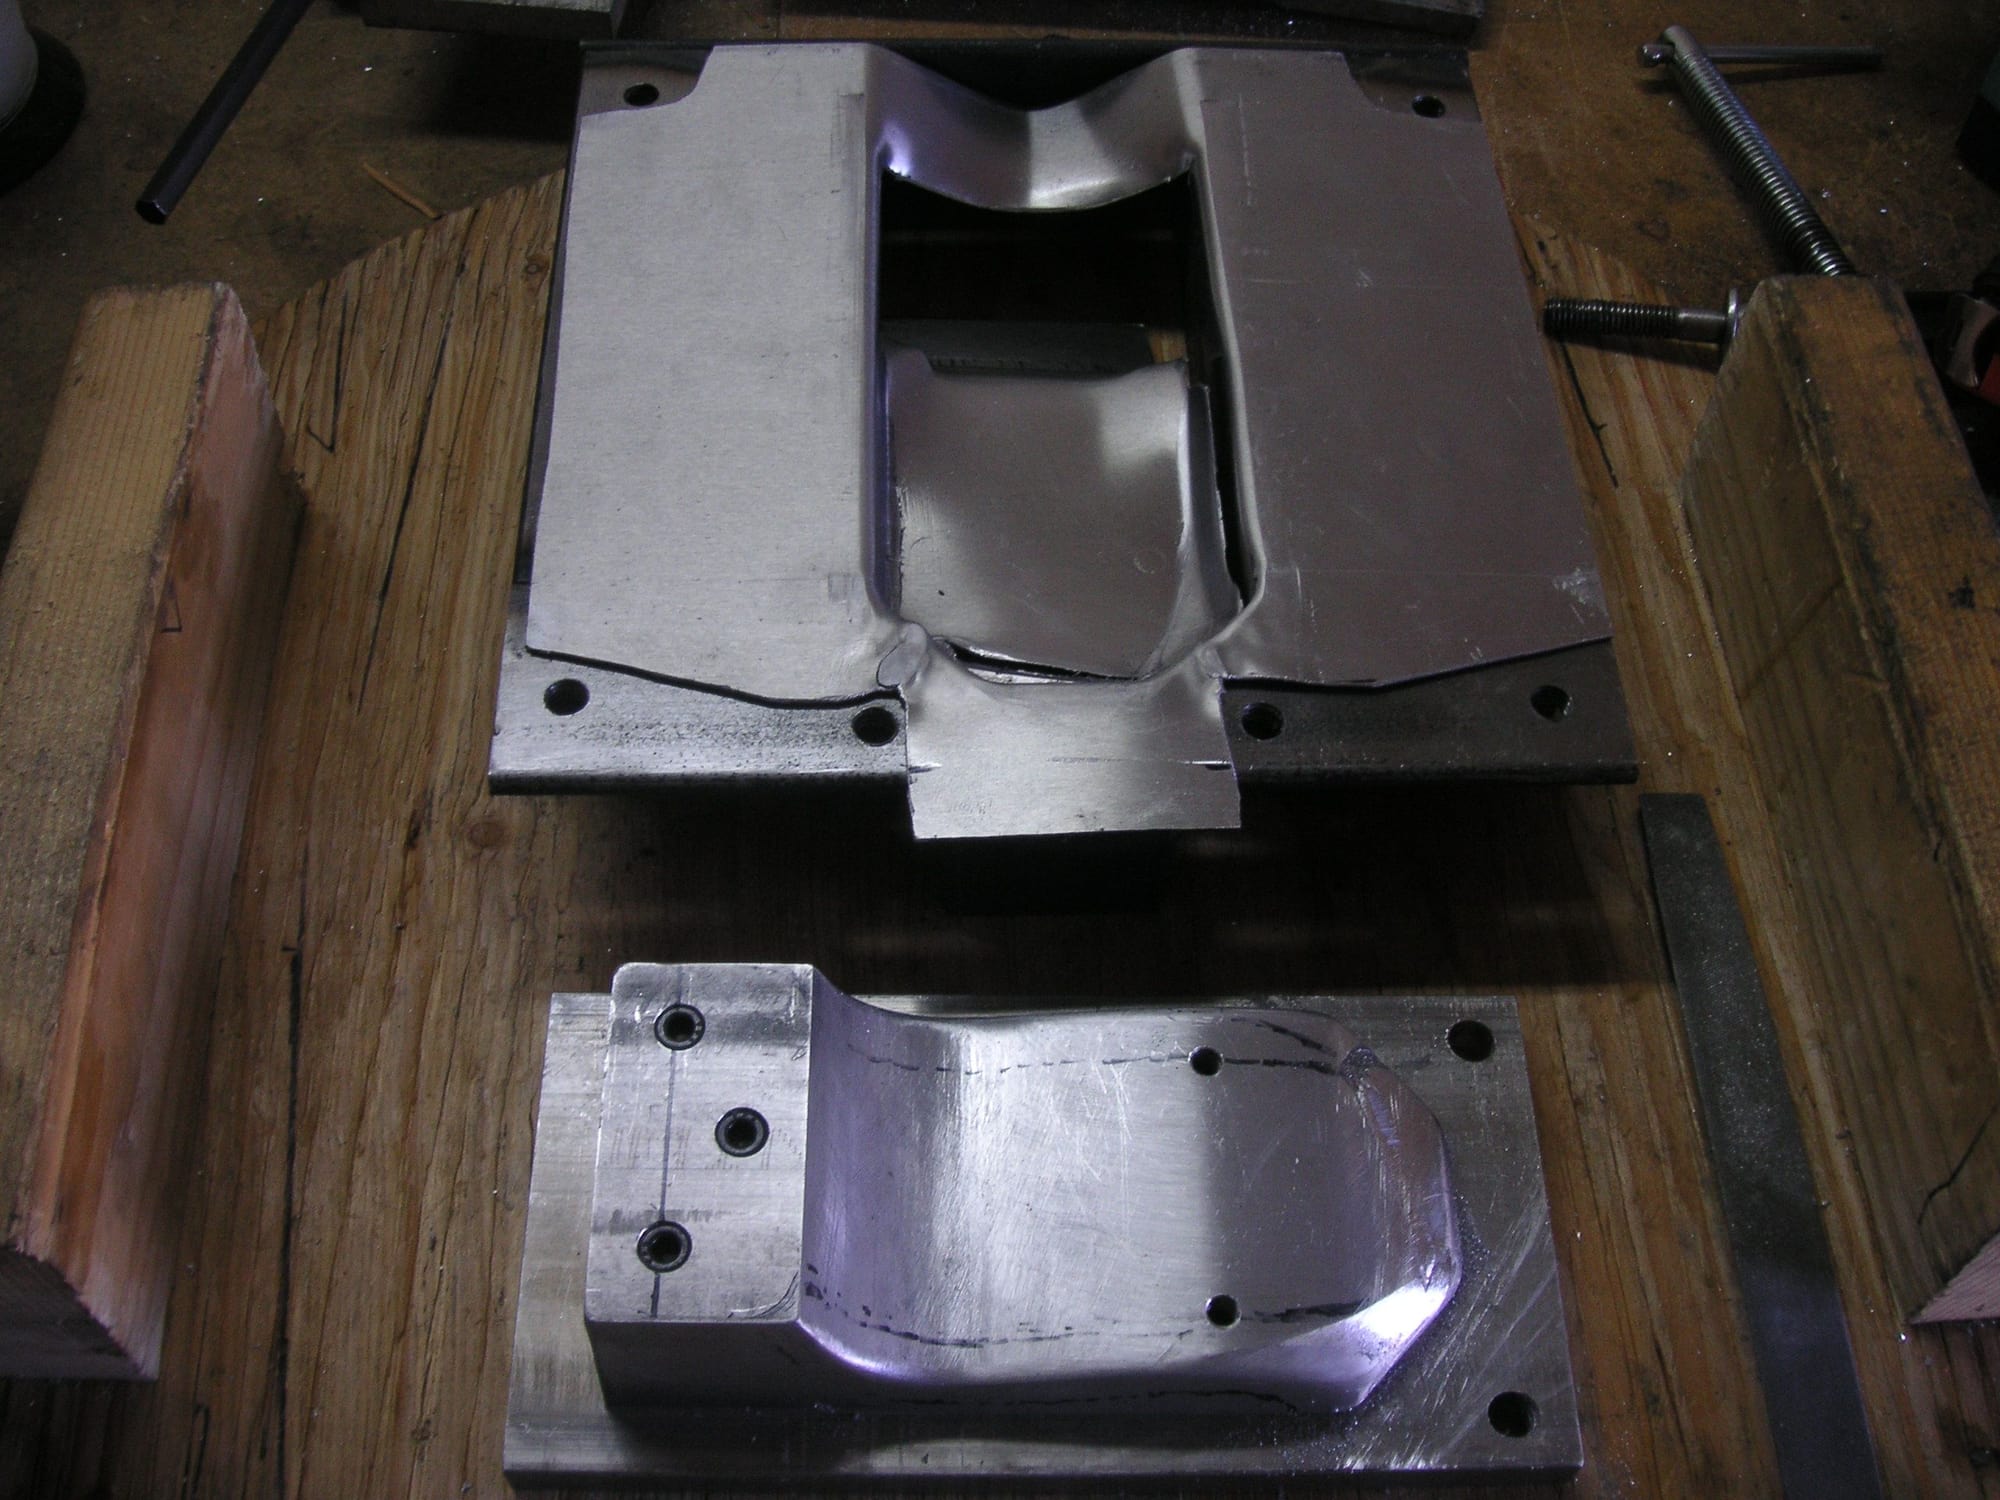
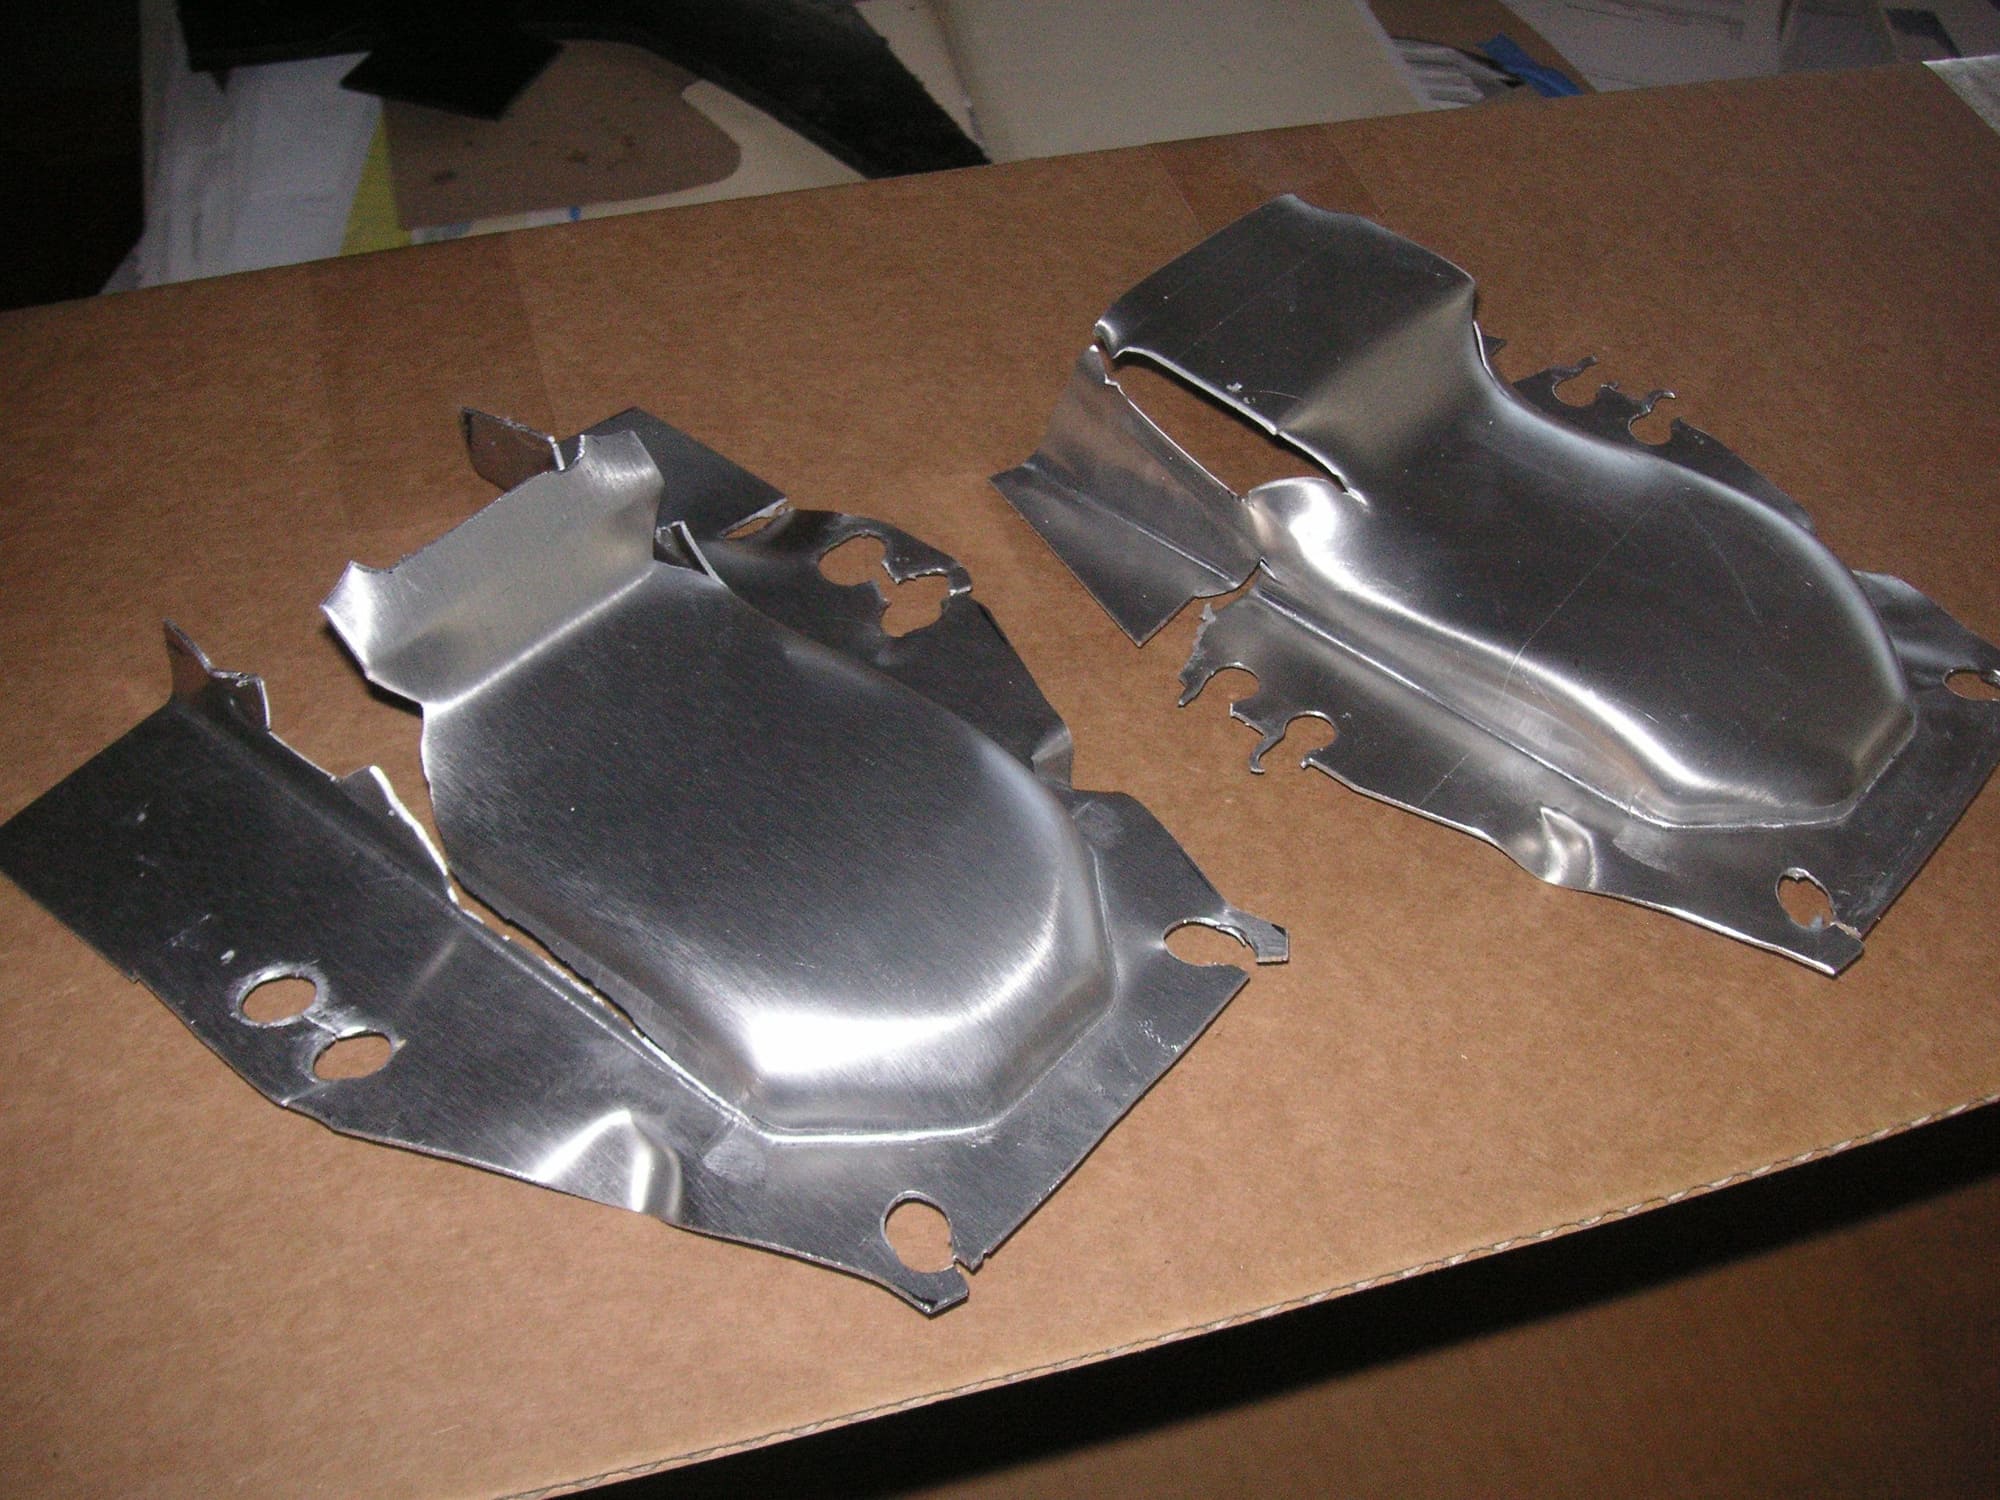
I found the dies for the previous effort I had made for my version of the vents for the later belly pans. I worked up the dies a bit to allow for a forming effort and it did not turn out too well. It is nevertheless a start. I can see from his effort where I might get it to form better.
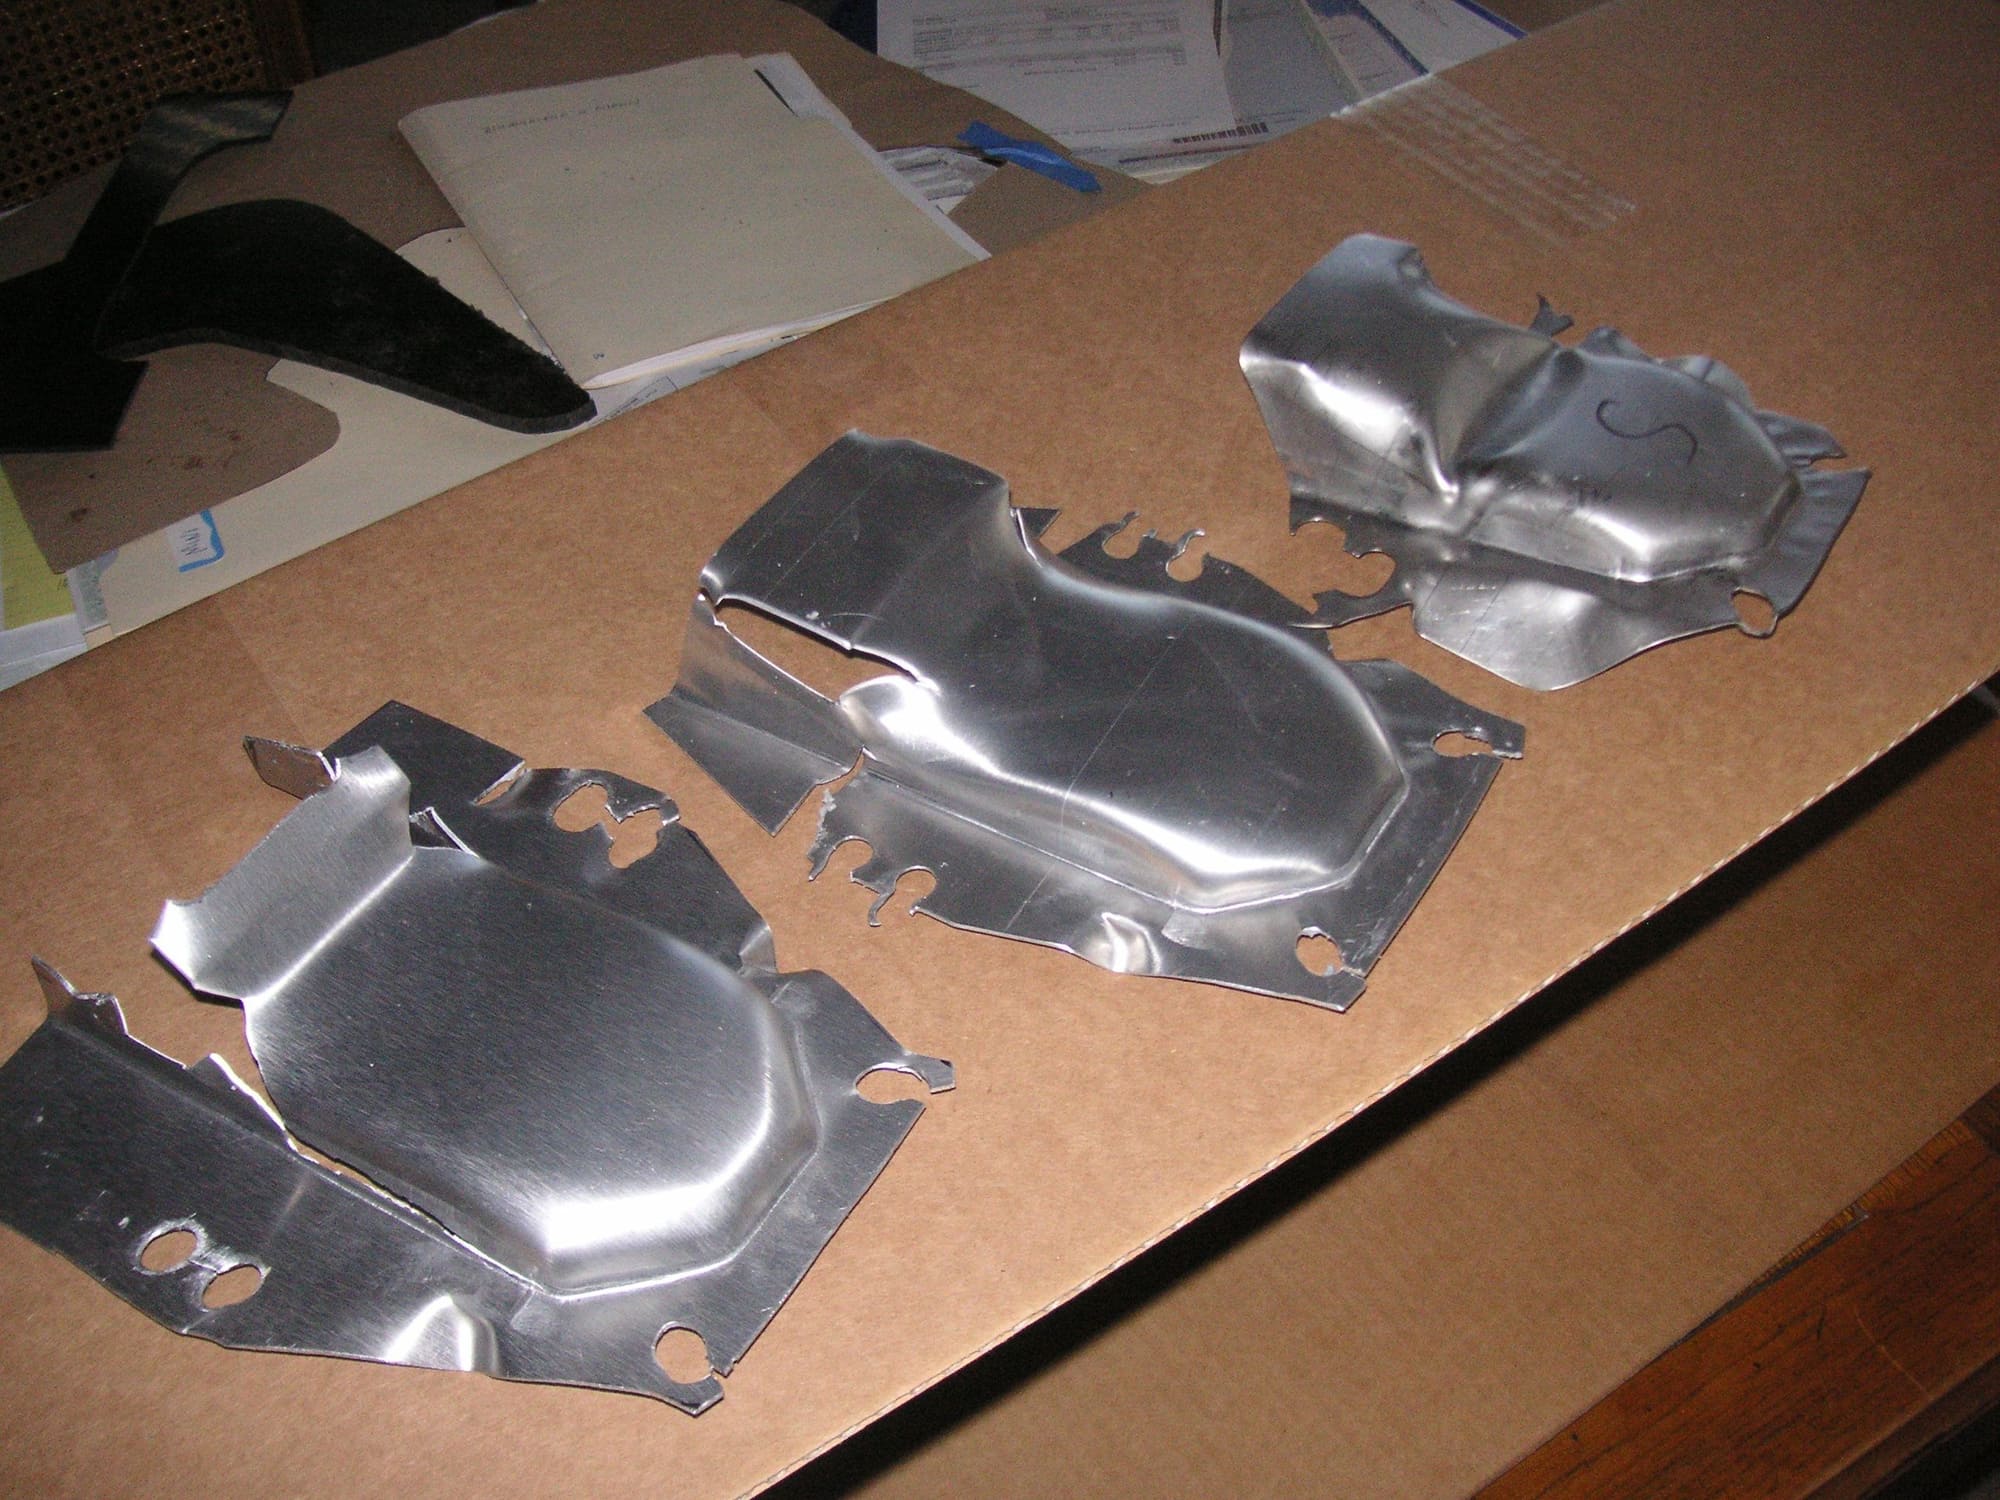
Well, here I am involved in another silly metal forming project. I was very glad to have found the dies I worked up so long ago and was able to work them up a bit further to see what they might form like. I really needed to have this failure so that I can begin to put myself in the place of the metal being formed to see just what is going to be needed to get the correct result. Here I find that the metal stretched only about a half inch or a bit more befofe it broke. I don't think that I really need much more stretch than that and in fact much less.
I think I could even just put a flat sheet of aluminum over the opening in the female die and press the male die into it and have it form at least most of the way without breaking; and it probably would not even stretch much if any. The problem with that is that at the end of the push the flat rim around the male die needs to form the flat flange around the workpiece and at that point the edges of it will pe pointing straight up and will not form correctly. So, I still need to have something kind of guiding the free metal sideways into the forming process so that the flange will get formed. I think I have that figured out.
You can see that the large amount of metal on the sides of what I formed this first time are still very large. They were intended to pull into the dies for forming but I find that there is too much material there and I had it clamped too tight so that it moved only about an eighth of an inch. I'm going to reduce that metal and then not even clamp it but still have it guided sideways so it can be formed flat at the end. Then it will likely be trimmed off in the final assembly. I could leave the flange and spot weld it but I think I am going to trim most of it off and tig weld the two pieces together using a small amount of the flanges as the fill material.
When I can get this die to form then I'll be able to work up the die for the back side of the vents. They will likely be formed in the same female die as the fronts.
Last edited by Jerry Feather; 09-17-2022 at 09:33 AM.
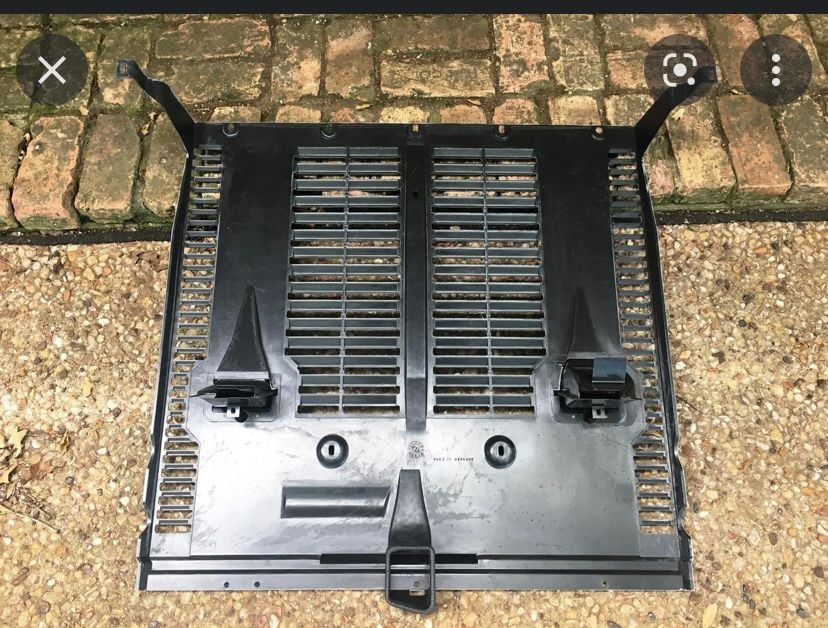
For what it might be worth in this venture, I think I have finally figured out just what the little square opening forward is for on the RH vent. I think it has to be for cooling air to the AC compressor. And, i think that is maybe kind of important. However, I have kind of designed that out of my Vents. On the other hand, I think my vents are a bit larger than the left hand one even if smaller that the RH one. With that i think that a similar opening might be accomodated in the RH Vent to meet the requirement for the AC Compressor. That may become an option in whatever I might be able to produce here. Then, I have to figure out how to cut it out.
For what it might be worth in this venture, I think I have finally figured out just what the little square opening forward is for on the RH vent. I think it has to be for cooling air to the AC compressor. And, i think that is maybe kind of important. However, I have kind of designed that out of my Vents. On the other hand, I think my vents are a bit larger than the left hand one even if smaller that the RH one. With that i think that a similar opening might be accomodated in the RH Vent to meet the requirement for the AC Compressor. That may become an option in whatever I might be able to produce here. Then, I have to figure out how to cut it out.
I remember that about the vents now you mention it - yes AC Compressor/Clutch cooling feed!
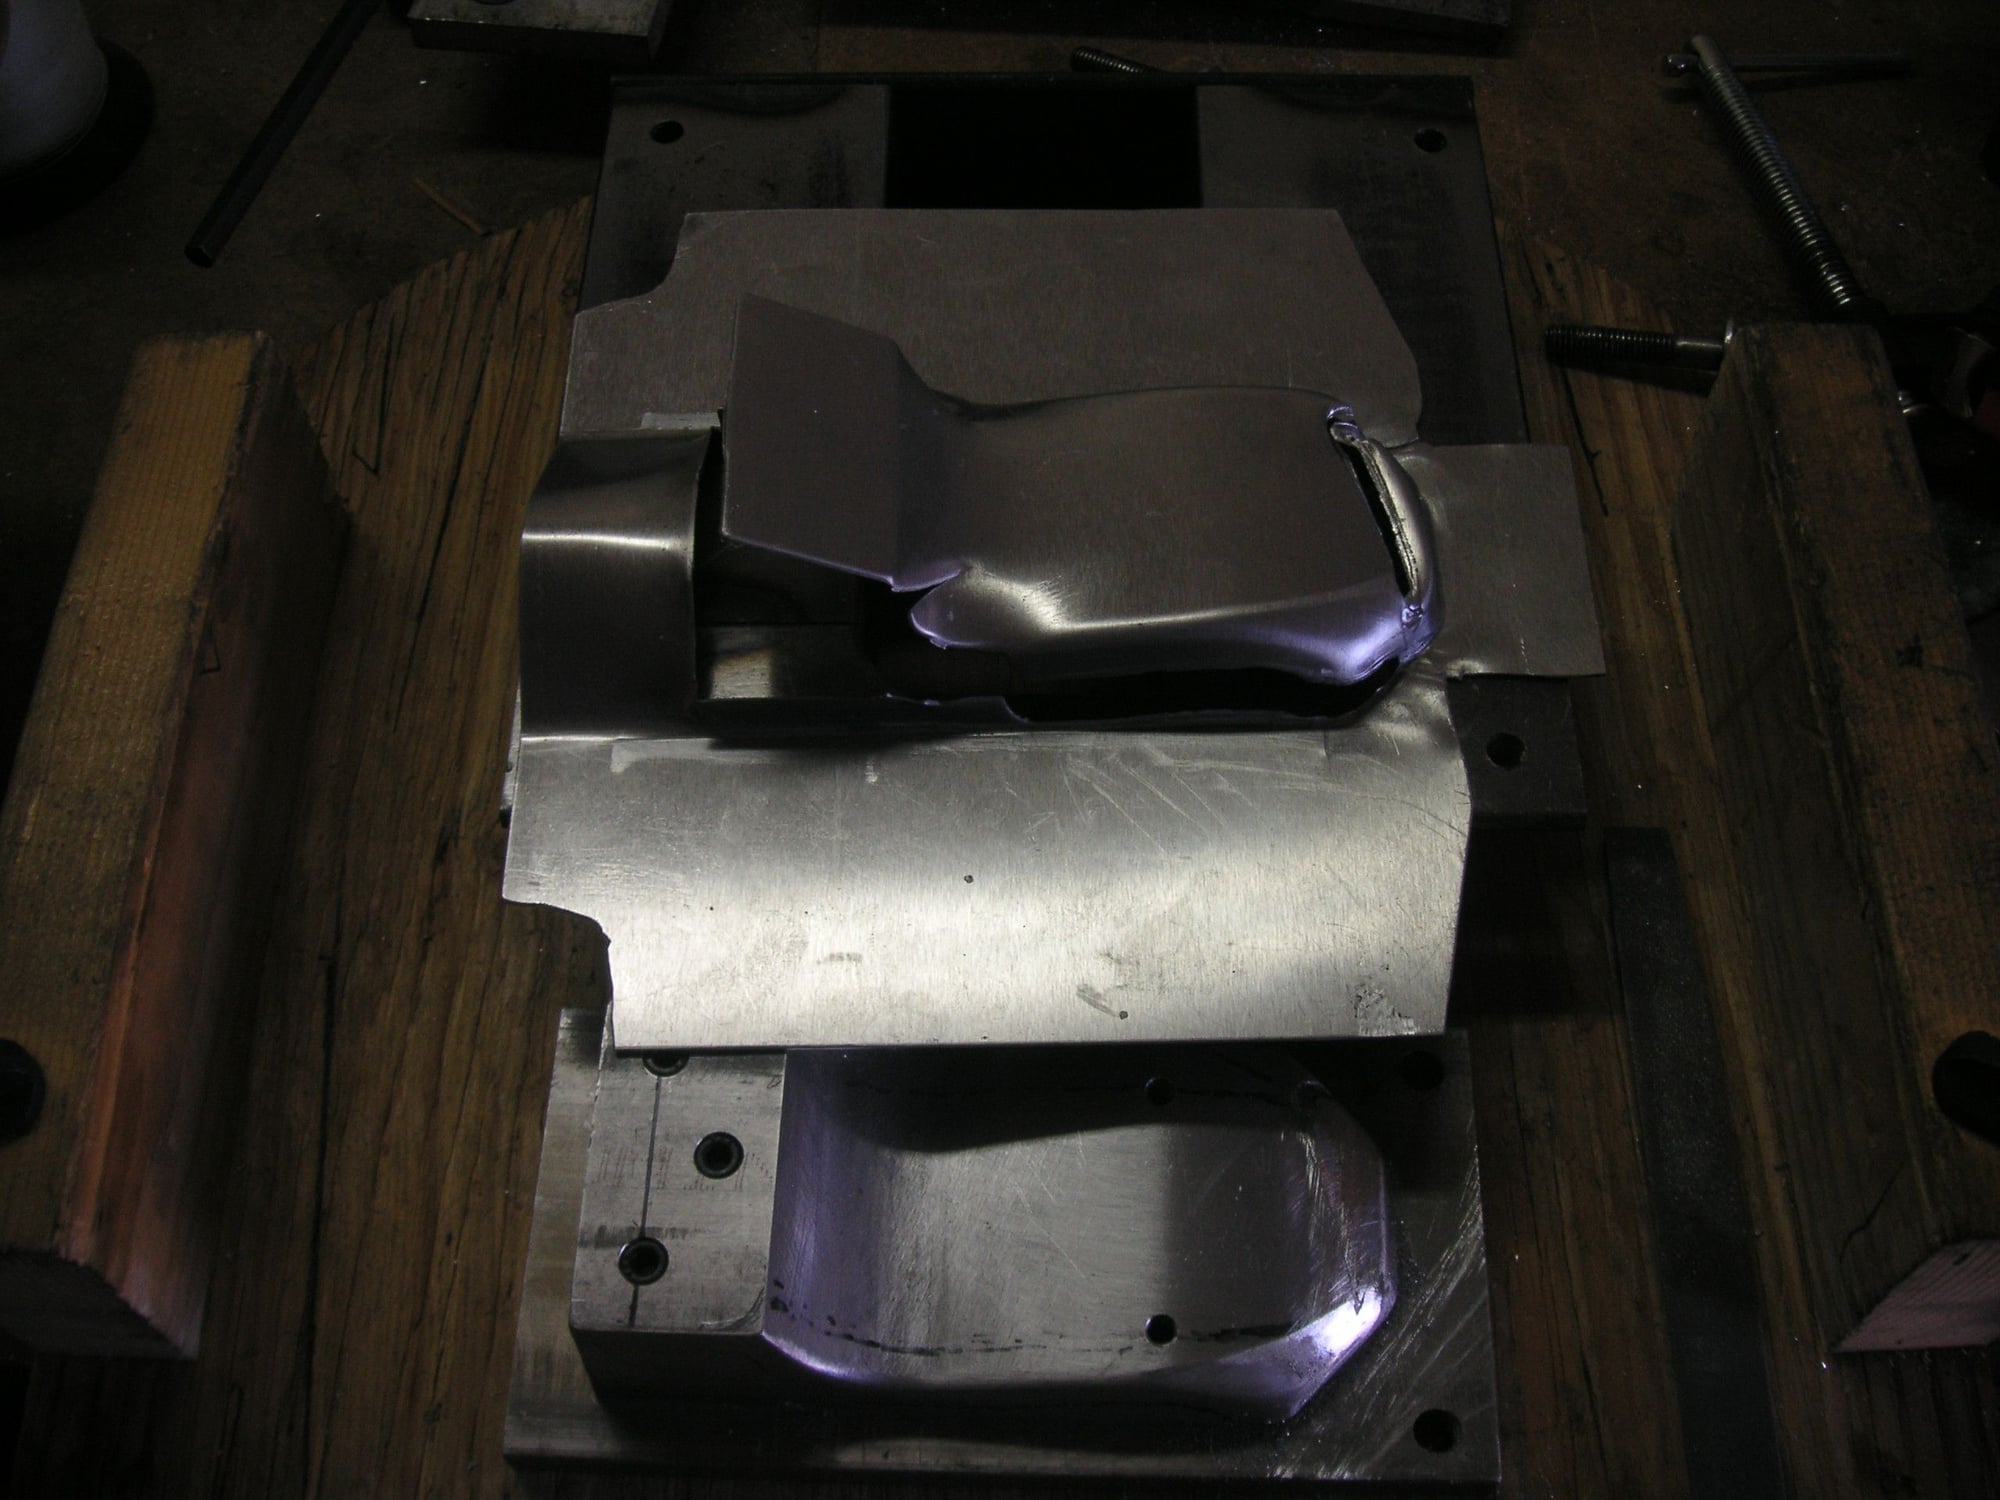
I pressed another one of these last evening and it too failed, but it is about 20 percent better than the first one. I can see that the metal is pulling in a little better but still not enough. I think the sharp edges are causing some problem and I may need to do something with one of the dies to try to solve that. I can also see that the vent is not forming very well at all in the middle that I call the saddle area and quite a bit of metal is actually pulling in there - more than is needed. I'm not sure yet how best to deal with that.
Last edited by Jerry Feather; 09-17-2022 at 09:40 AM.
I lube the dies and the workpiece when working with aluminum with Lard. When I work with steel I use Bag Bahlm. I have, however, found that for the most part it really does not make much difference - with or without. The limitation is really just how much you can get the metal to move, one way or the other. It needs to either stretch or pull in to make the product being formed, and it will stretch without regard to the lubrication and I think also pull in more depending on how it is held rather than how it might be lubed.
I use almost no lubrication when forming the early Belly Pans.
Last edited by Jerry Feather; 09-13-2022 at 05:14 PM.
I think I have the next step in this development process figured out. It too may not be completely successful, but I'm pretty sure that it will get me about another 20 or 25 percent closer, or maybe even more. I am going to change the die set-up quite a bit and will be using two different elements of the process each at close to their extreme. That means that in respect to the metal stretching to form the item I am going to have to use that to the extreme to get the metal to form over the kind of saddle area in the middle of the item where it is not even close to forming so far. Then in respect to the need to have metal pulled in to the forming process I am going to use that at the extreme at both the top and bottom of the item. To do that I am simply going to eliminate the two hold-down plates that I have so far been using. I have to work the female die over some to provide the holes for the hold down bolts at the saddle area.
I really hope to be able to form these vents out of aluminum for some reason. Maybe because that is what the belly pans are now made of. However, if I can only get close to the process I think I can shift to stainless steel and probably be successful since that material has so much more tension strength. I have at least two or three more tries before I shift the material.
Last edited by Jerry Feather; 09-17-2022 at 09:49 AM.
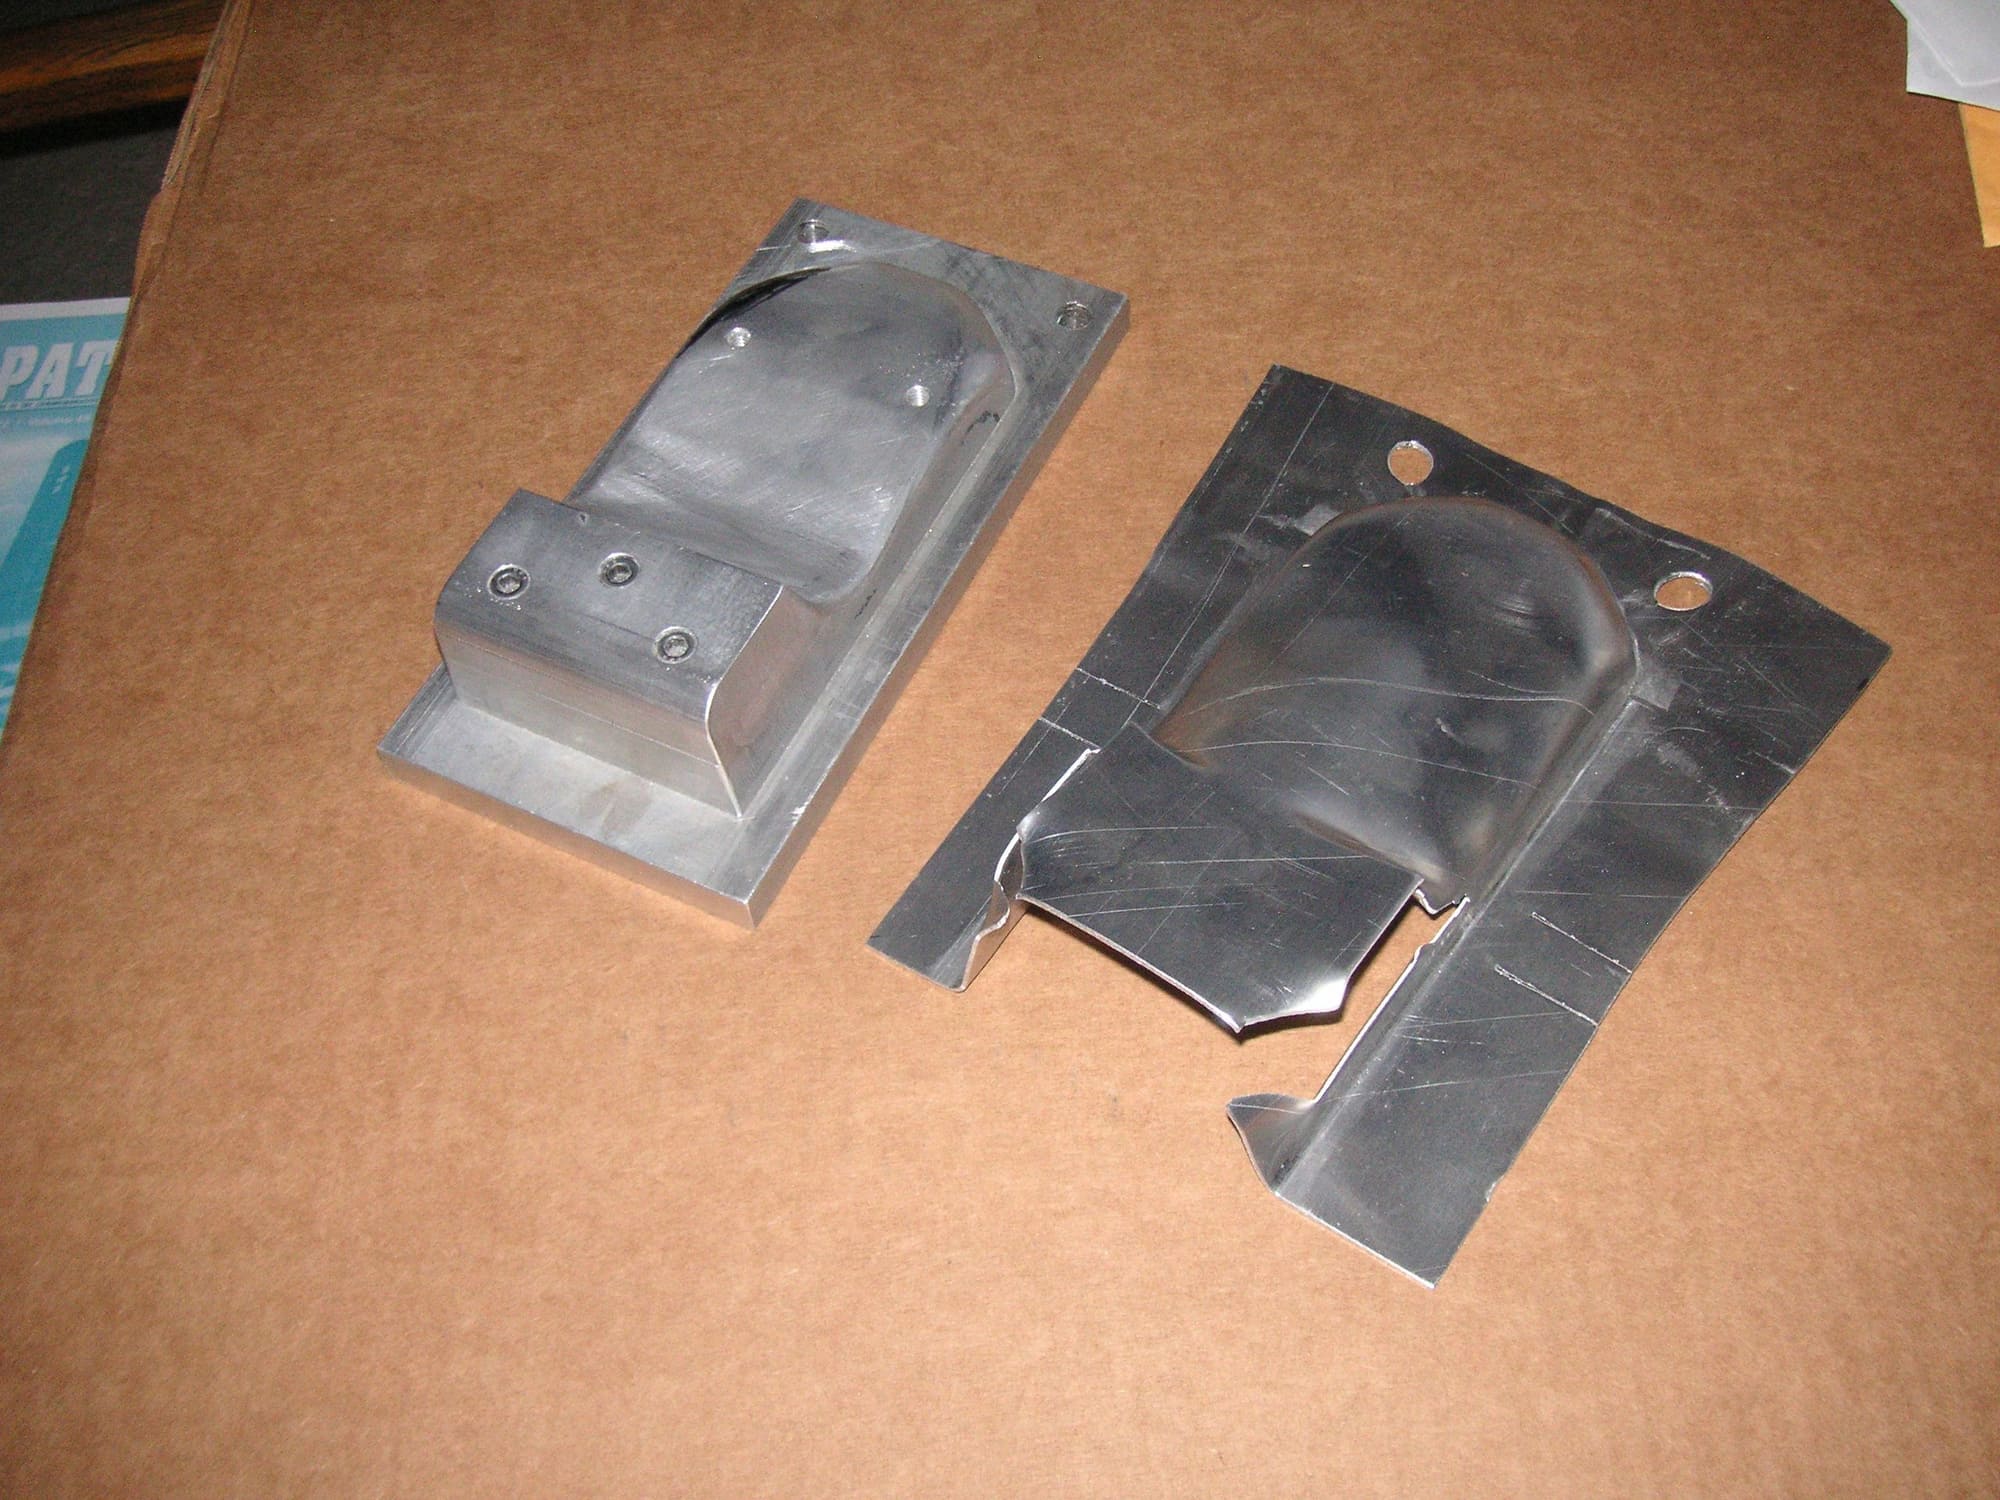
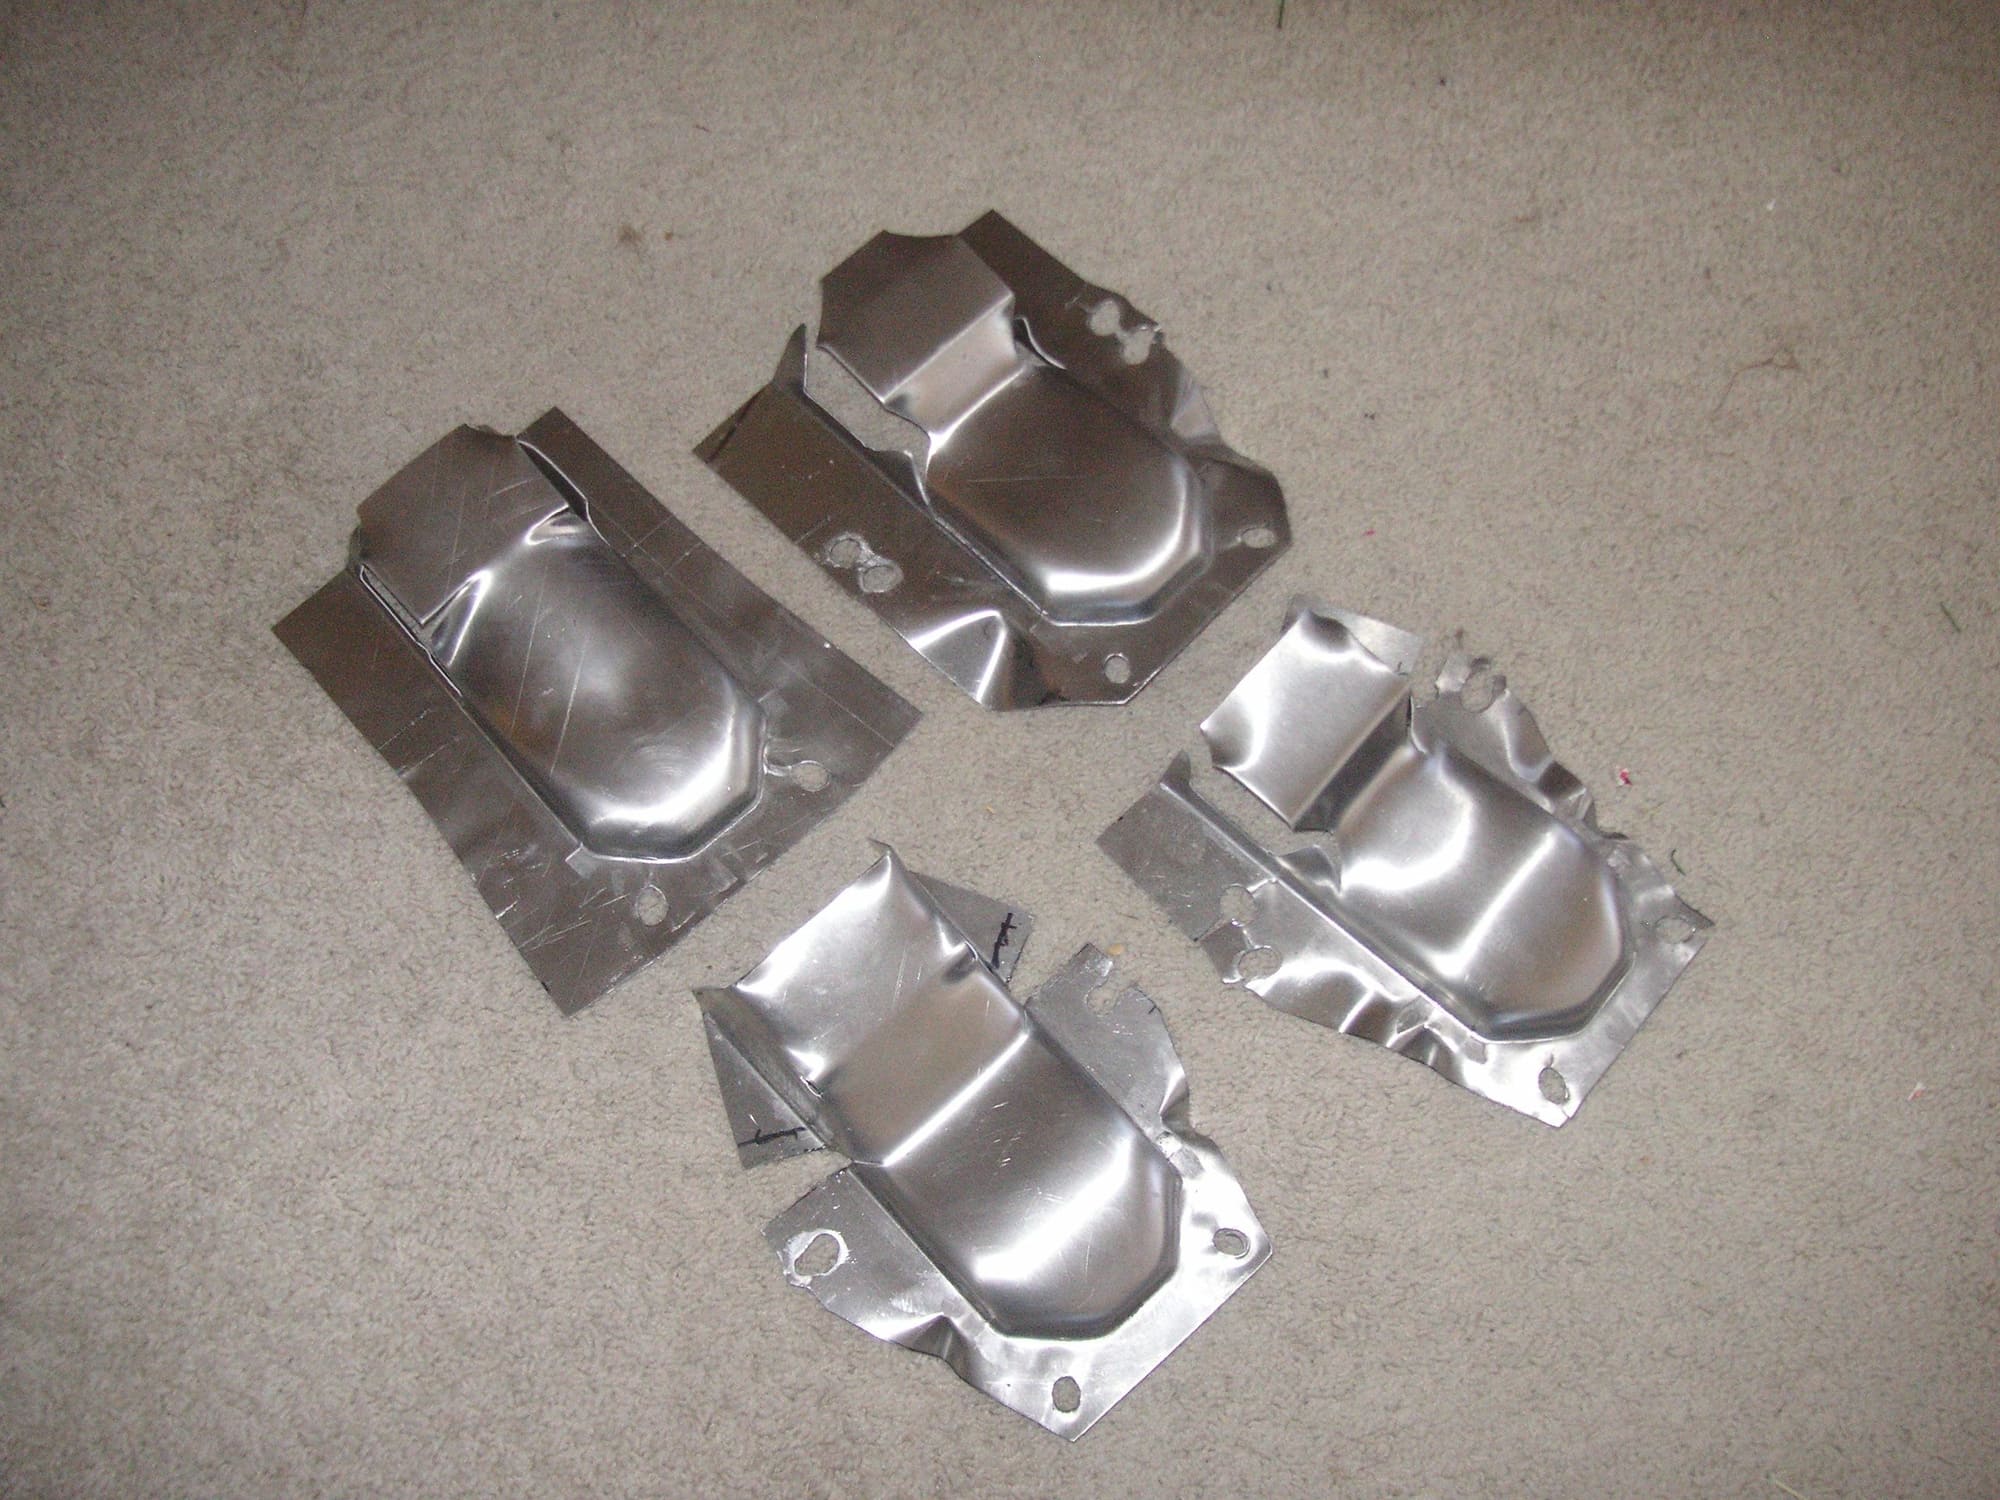
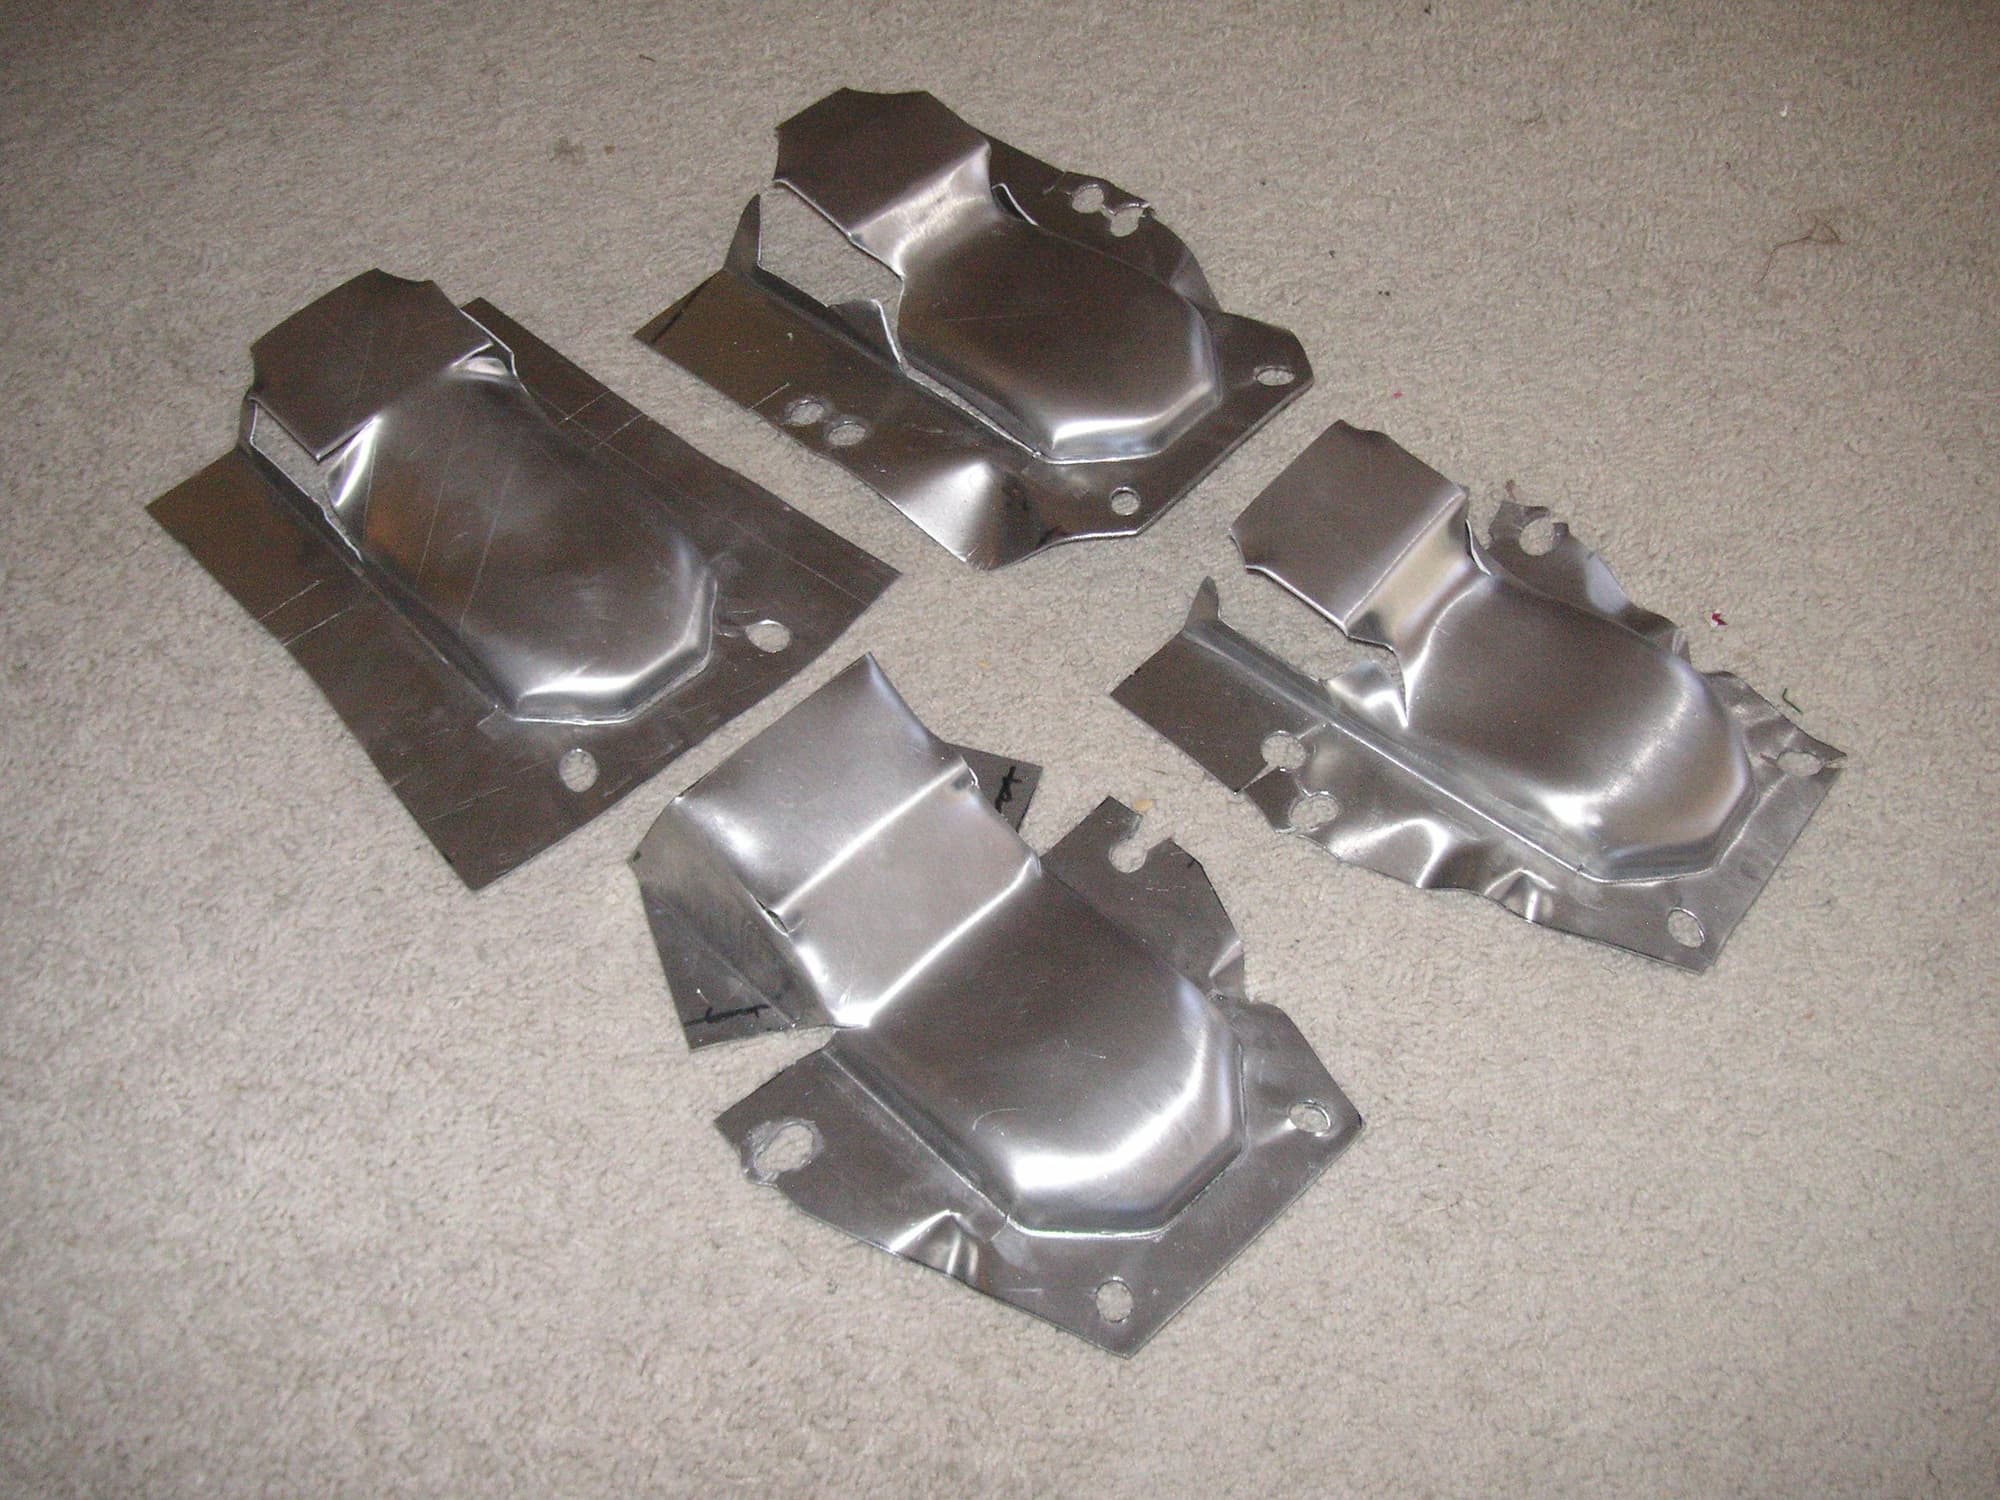
I pressed three more of these today and none of them were much success. There is some improvement; and I think I can see what else I might do to help this process out. The four in these pictrure are with the previous last one I did in the upper left and then left to right in order. Accually the second one today appears to have the most promise. I have a new idea of what to do to the process next to see if I can make any improvement.
Last edited by Jerry Feather; 09-17-2022 at 08:24 PM.
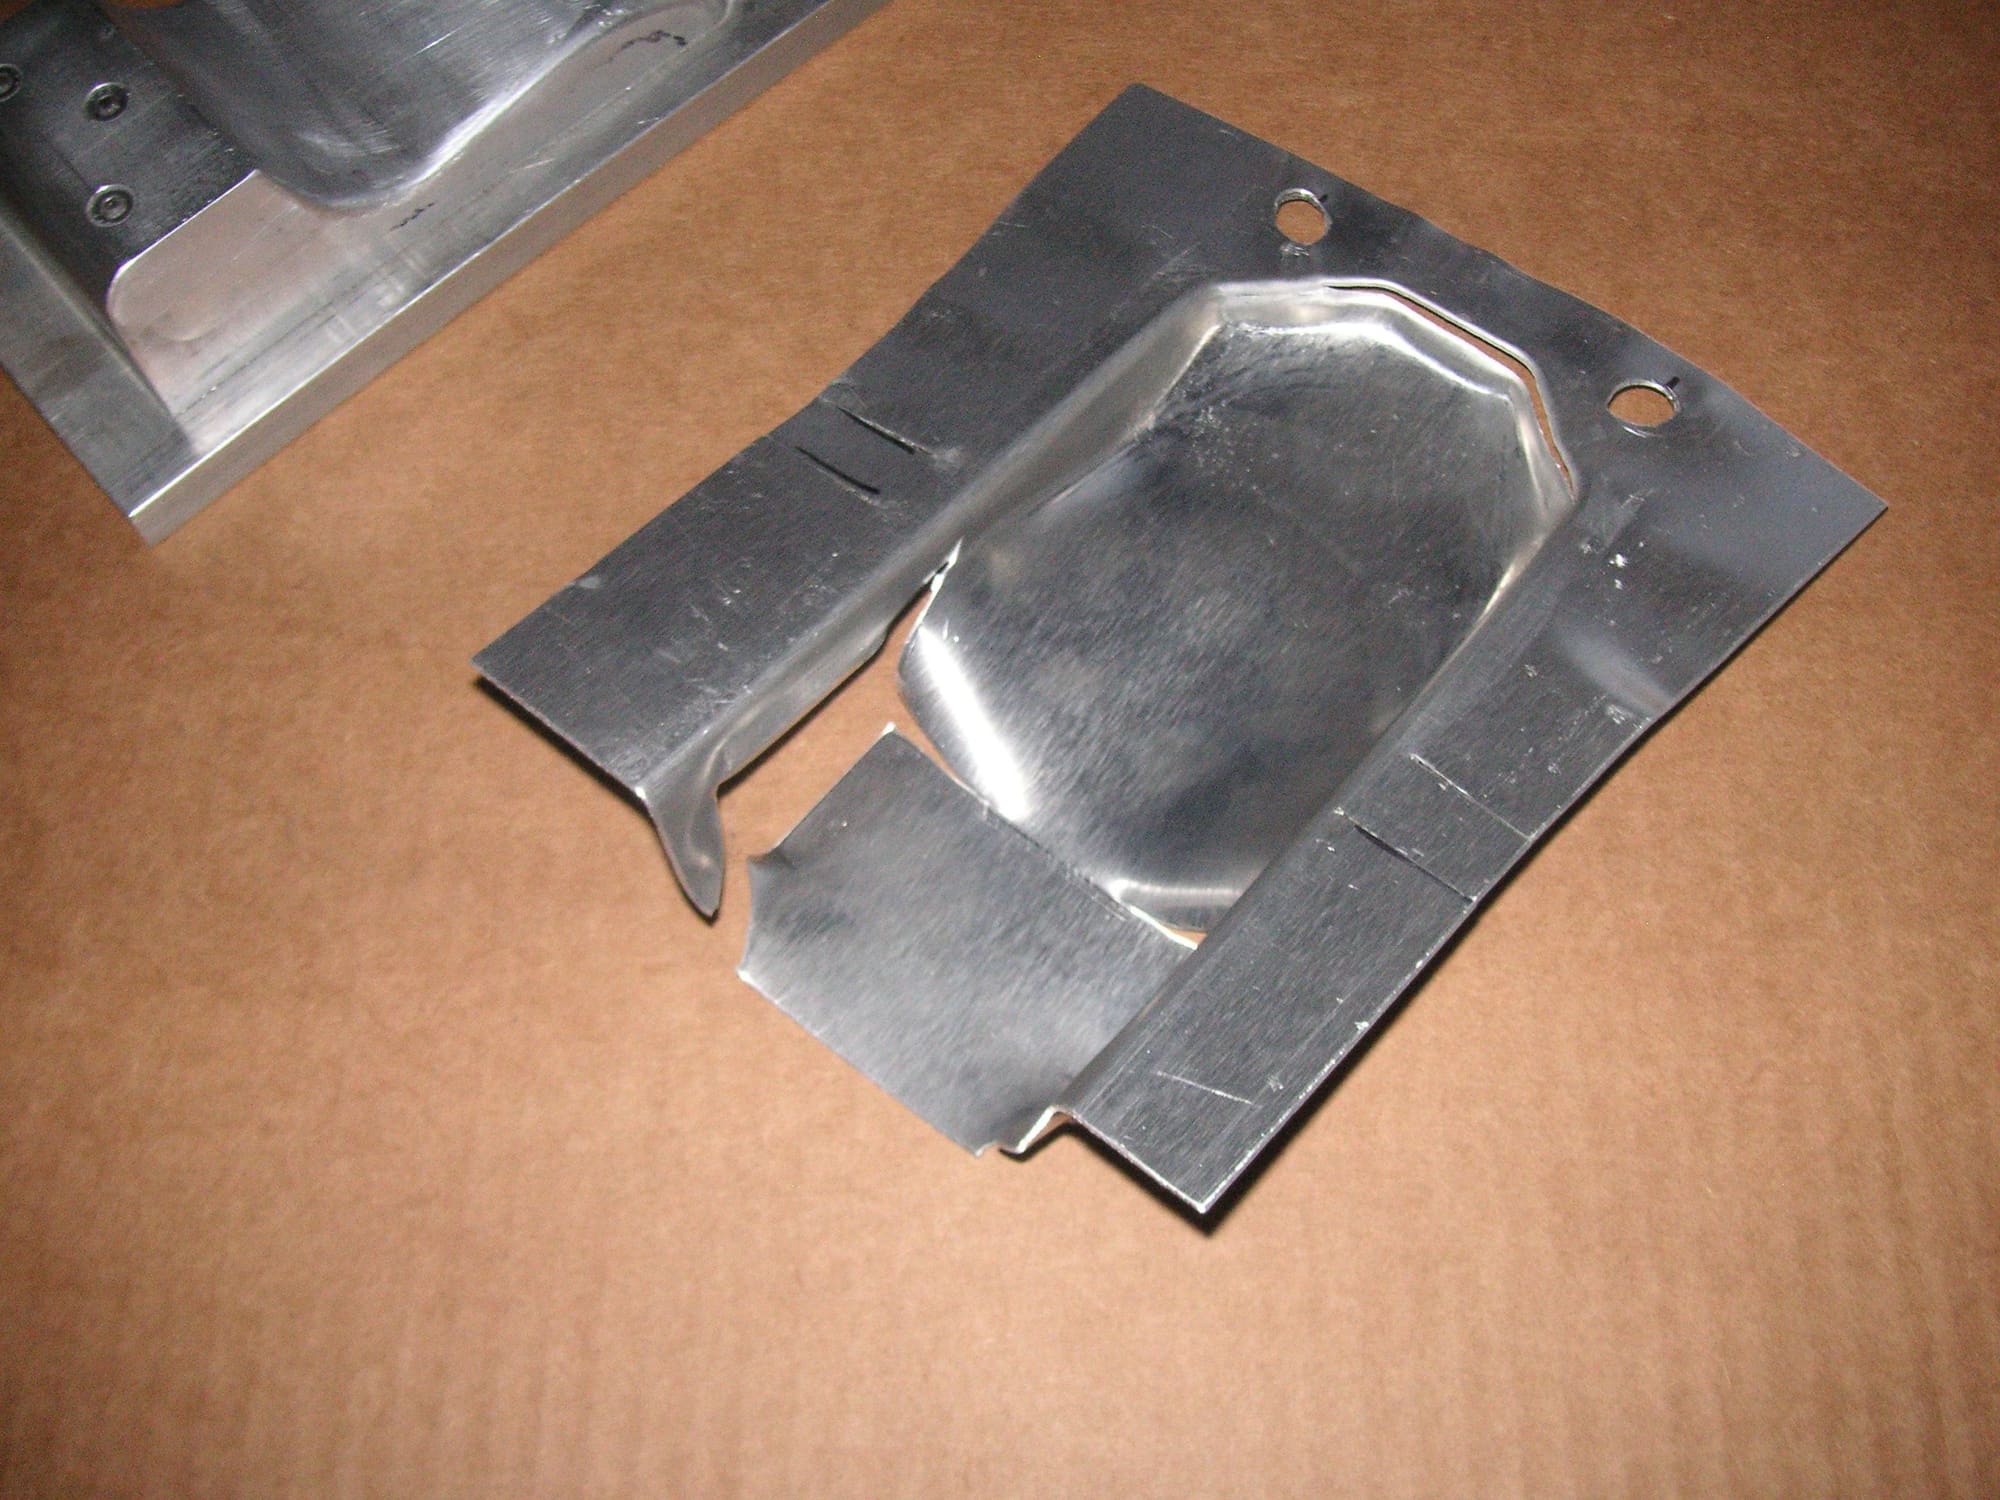
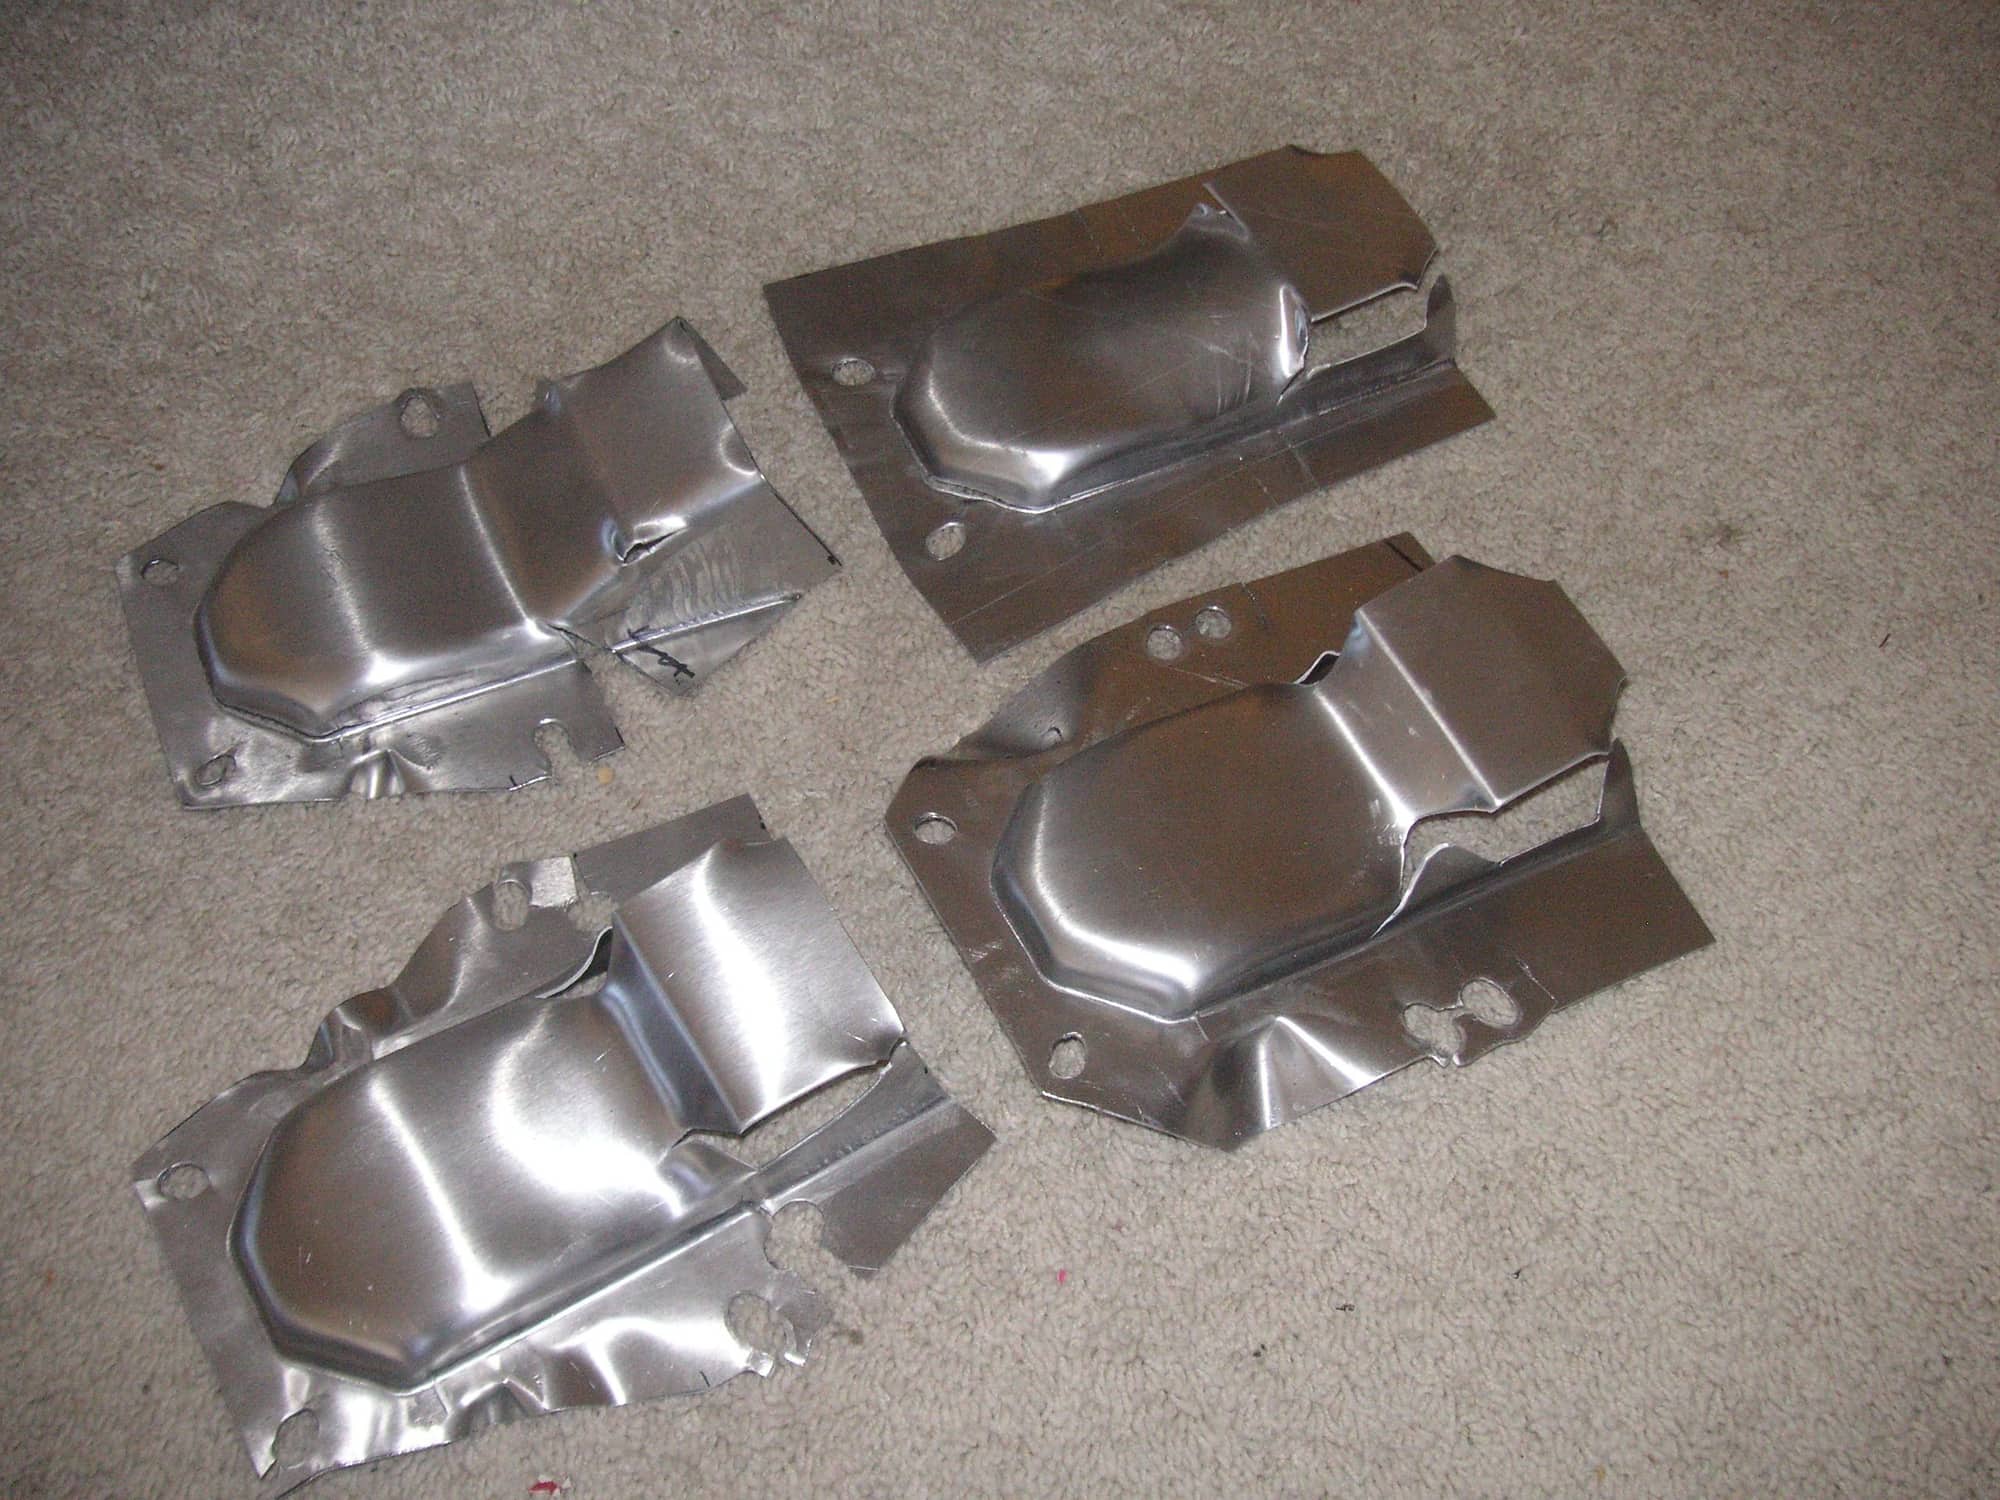
I pressed three more of these failures on Sunday including one of them in a small piece of Stainless that I had available from a previous project. It was not cut the the correct shape for forming, but I needed to see how it might act under the press in these dies. It did only a little bit better. I think I am going to stick with aluminum.
My original plan or hope was to make the left vent out of just two pieces, the front and the back, and the right side out of three pieces, the front, the back and then an extension on the front to reach the shorter NACA duct. Now I think I am going to have to make them out of a couple more pieces and weld then together in that fachion.
So, next I need to see if I can form these in a more minimal way so that the extra pieces, which will be more extensive than originally planned, can be welded on as they are also welded together.
Another modification in my plan is to add a forward opening on both of these vents. The one on the left will be available to provide some air to the Alternator which I think might be inportant for those guys with after-market Alternators that do not utilize the original air vent/duct for air from out of behihd the headlight. I still need to figure out just how to cut them out.
Have you ever considered not trying to duplicate the factory vent exactly?
I mean it�s really just a vent-
Do you feel the factory set up is doing something unique?
Perhaps a fresh design on the vent could improve on what the engineers were trying to cool from below-
The factory ones do look a bit over engineered.
(shocking on a 928)
just a thought
Have you ever considered not trying to duplicate the factory vent exactly?
Perhaps a fresh design on the vent could improve on what the engineers were trying to cool from below-
How would you test the original design against a prospective improved design?
Otherwise: good luck Jerry. Hope you figure it out.

 09-11-2022, 08:44 PM