When you click on links to various merchants on this site and make a purchase, this can result in this site earning a commission. Affiliate programs and affiliations include, but are not limited to, the eBay Partner Network.
google 928 14 pin connector diagram.
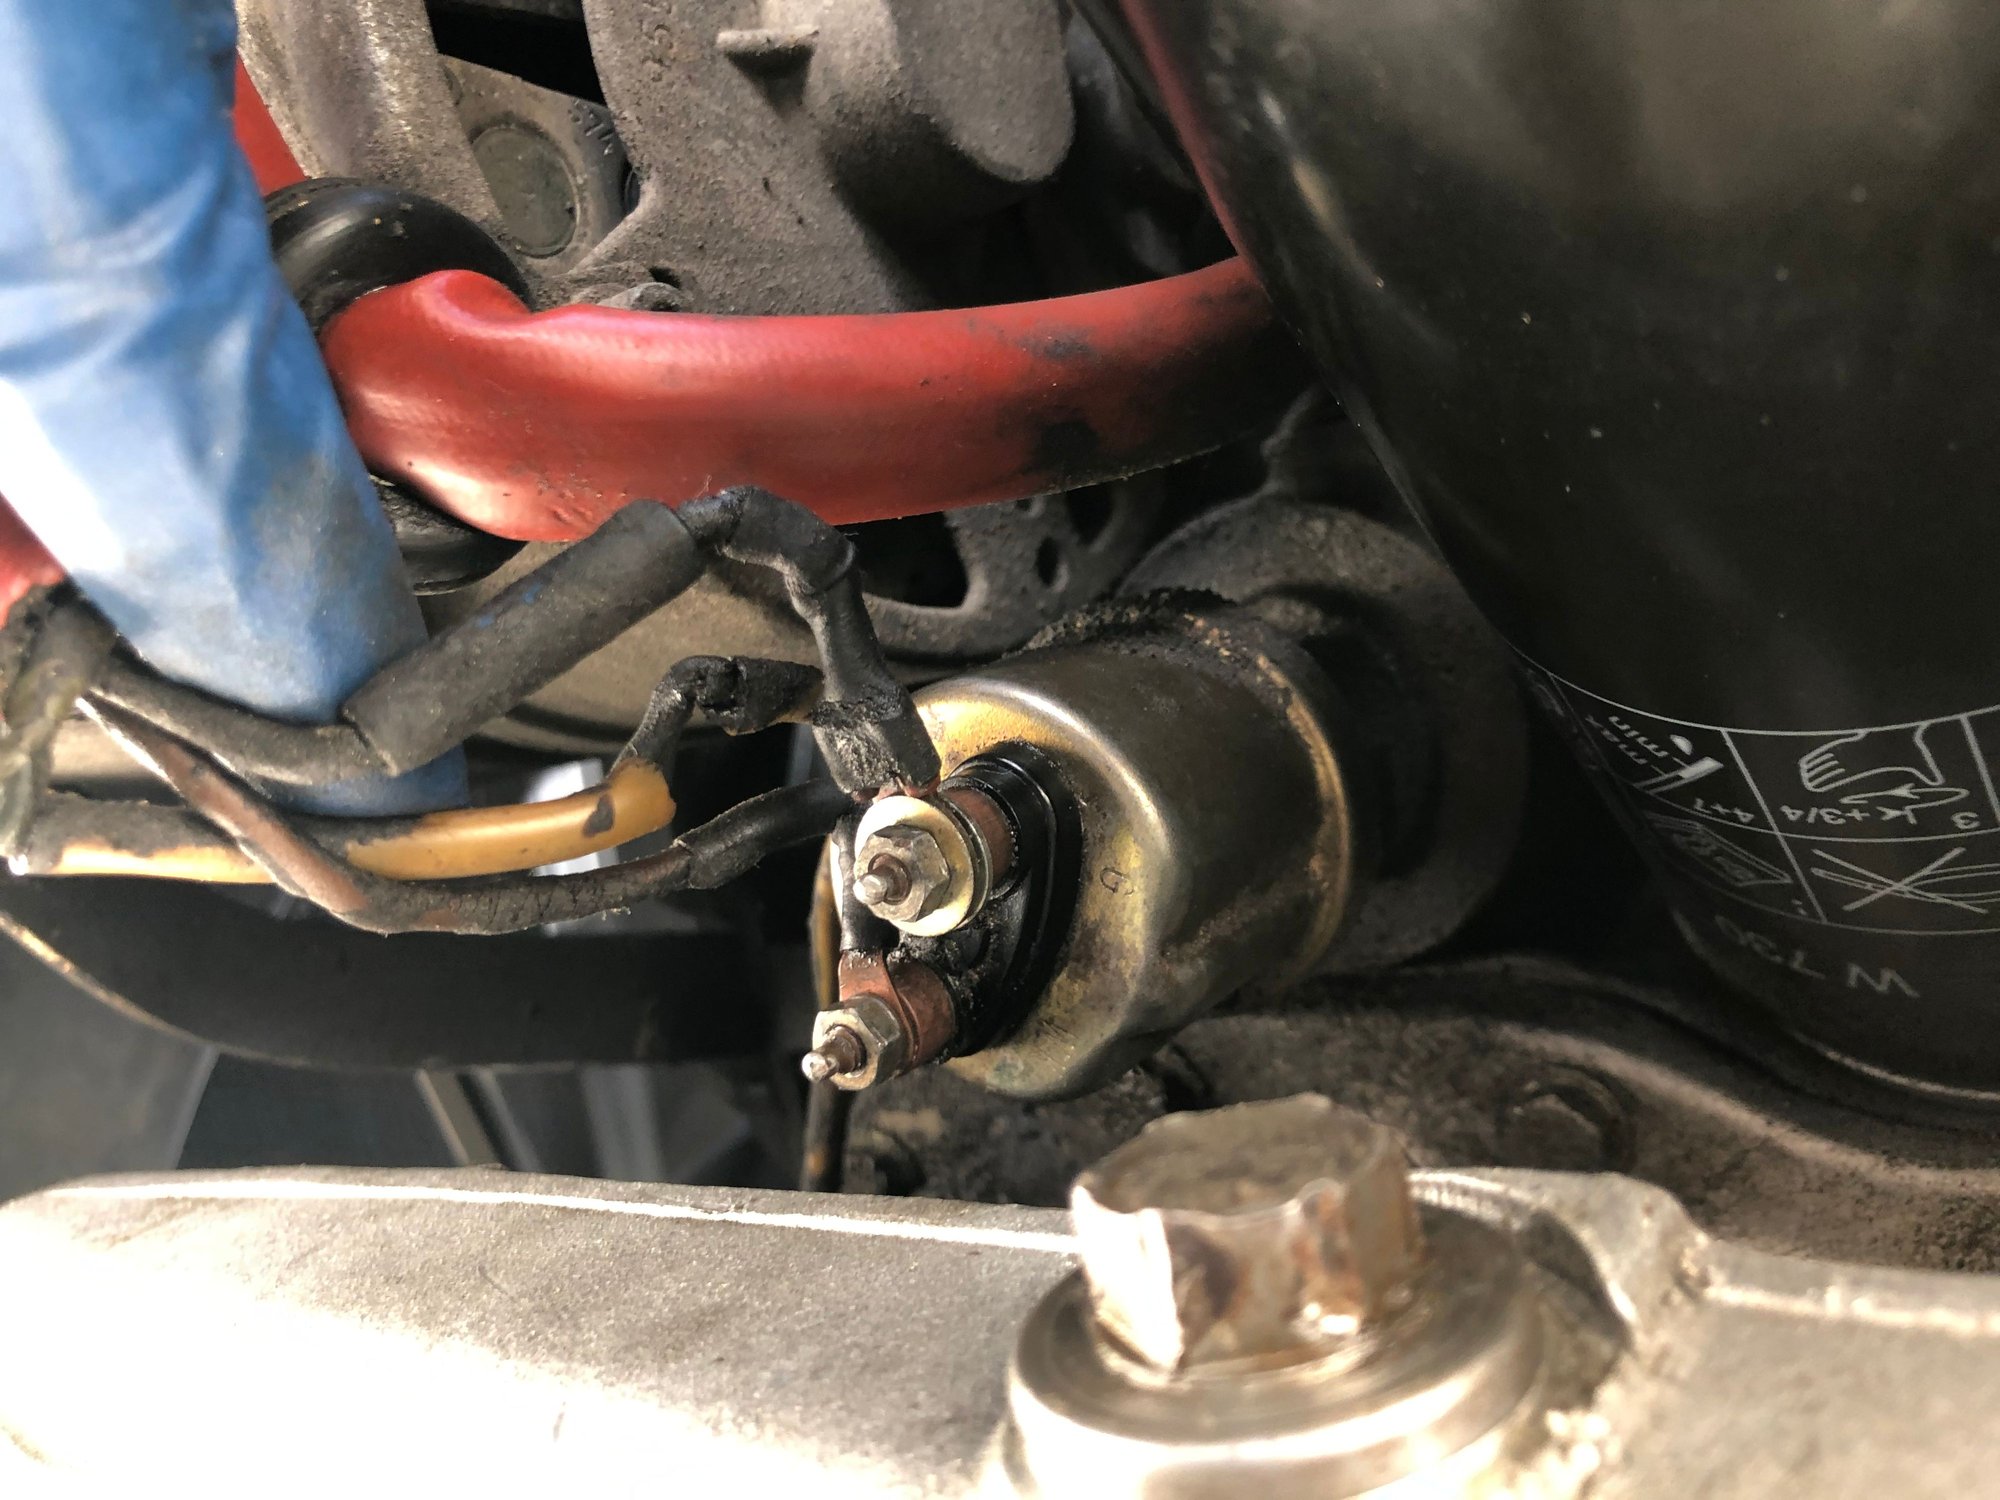
this is under the hood in front of the rt shock tower.
pull the connector apart id the exciter wire on the top and bottom of the connectors,
the top goes to the engine/ alternator.
The bottom comes from the CE panel .
NOTE use the volt meter selection to test for exciter current from the bottom connector.
Use the continuity selector to check that the blue wire from the back of the alternator to the top of the 14 pin connector pin is infact connected.
Disconnect the blue wire from the back of the alternator,
your gonna connect one lead to the the end of the blue wire, and the other end to the correct pin of the 14 pin connector,
to see if its broken.
NOTE the insulation may look good but the wire breaks inside the insulation about 4 inches up from the airduct.
SO dont let the alternator hang from its harness use a coat hanger to hold while you work on it
google 928 14 pin connector diagram.
this is under the hood in front of the rt shock tower.
pull the connector apart id the exciter wire on the top and bottom of the connectors,
the top goes to the engine/ alternator.
The bottom comes from the CE panel .
NOTE use the volt meter selection to test for exciter current from the bottom connector.
Use the continuity selector to check that the blue wire from the back of the alternator to the top of the 14 pin connector pin is infact connected.
Disconnect the blue wire from the back of the alternator,
your gonna connect one lead to the the end of the blue wire, and the other end to the correct pin of the 14 pin connector,
to see if its broken.
NOTE the insulation may look good but the wire breaks inside the insulation about 4 inches up from the airduct.
SO dont let the alternator hang from its harness use a coat hanger to hold while you work on it
So I had a "conversation" with Bryan Lutz on the Lutz Boards. Phenomenal customer service BTW. Had some issues because of the year of the car. Long story but he got everything taken care of. Anyway, he recommended that I try to reposition the resistor on the back of the board. (I had to remove it and send it to him because it needed longer prongs) He thought that it may not be making a good connection and he was correct. After repositioning the resistor, the alternator excited at startup. I let the car run for a bit while I monitored the volts. It remained constant while testing under various loads. That is at least a good win for today.
Next onto the oil pressure sensor and brake pad light. The oil pressure doesn't necessarily bother me, as the way I understand it, many owners have this same predicament. Thank you all for the continued help and patience. I'll report back.
So I got the connections all cleaned and then swapped the connections. It did not have an effect. Interestingly enough, I unhooked one of them and checked the gauge. Surprising to me, the gauge was reading the same. Shouldn’t have been not reading anything?
@Mrmerlin i snapped quick pick of the alternator. One of the wires didn’t look so good.

 07-21-2022, 09:05 PM