When you click on links to various merchants on this site and make a purchase, this can result in this site earning a commission. Affiliate programs and affiliations include, but are not limited to, the eBay Partner Network.
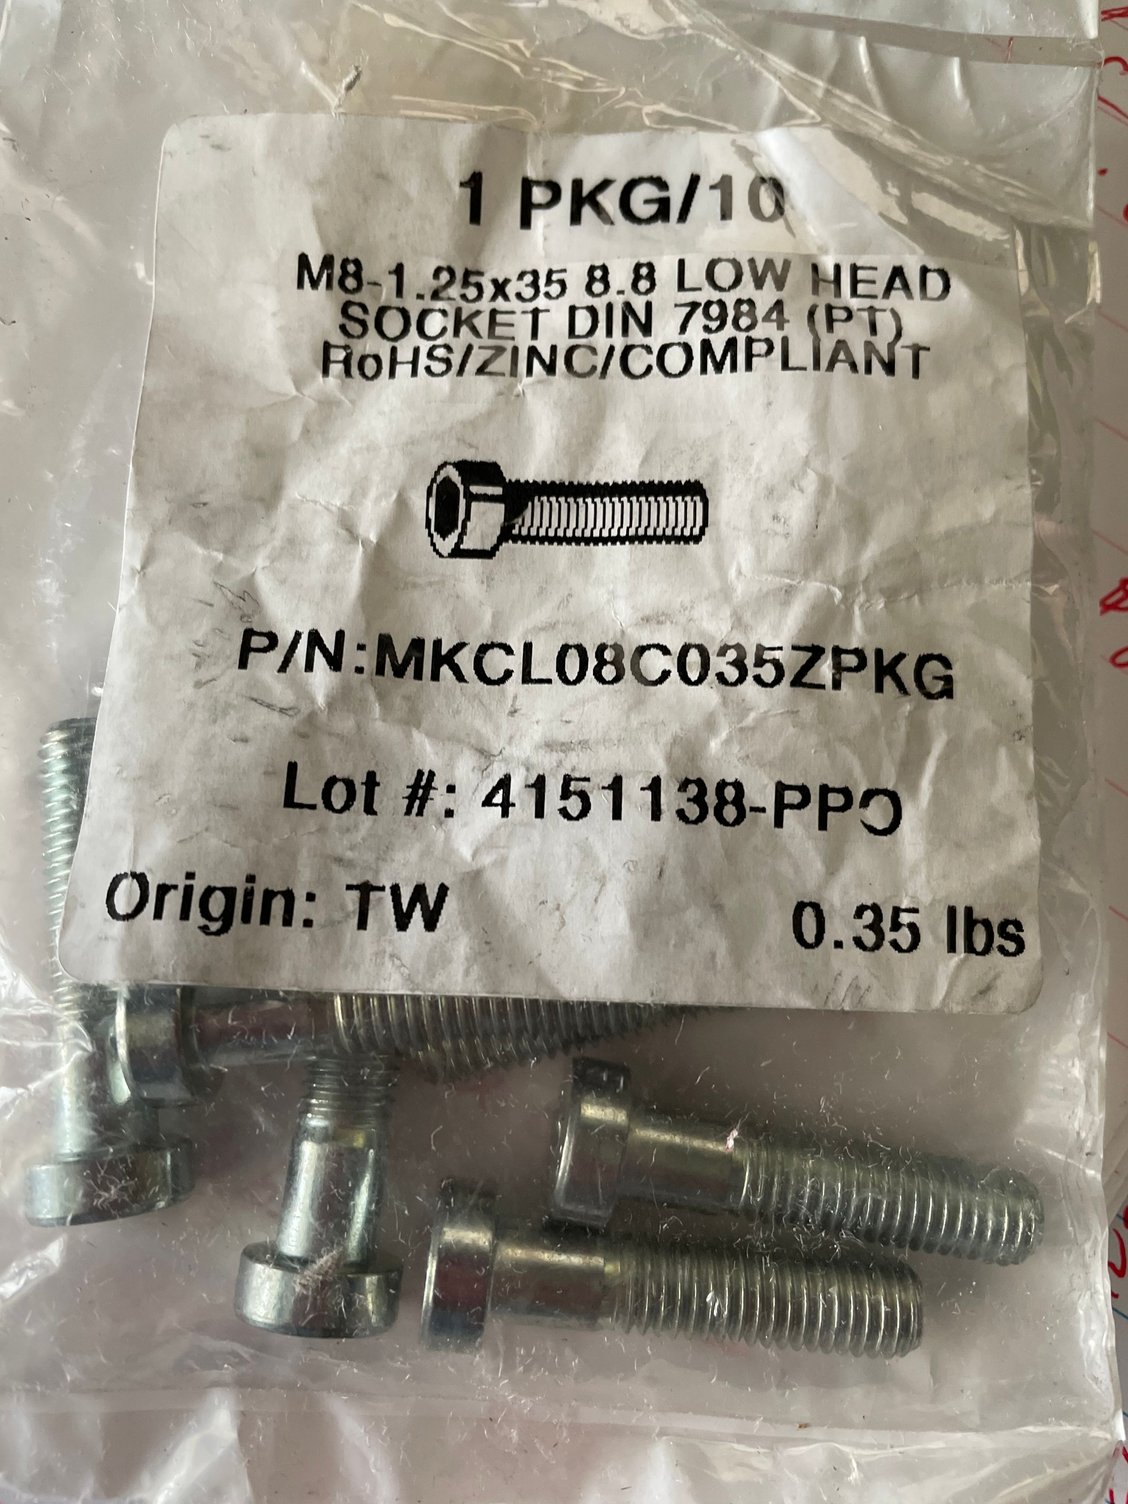
So, I was getting ready to start it up for the first time and do the break in and starter wouldn’t turn the engine.Immediately I thought something seized up inside when I torque down the crank bolt. Further inspection revealed that there are two M8 socket head bolts that attach the starter bracket to the block that were incorrect. Apparently on an 87 they have heads that are half the size. I had to drill them off of the other engine so I have never seen them before.
I then had to figure out if I could get the fly wheel removed with the engine in the car. It took a while but it was doable.
Remove the bolts from bell housing
disconnect starter harness clamp at steering rack.
disconnect ground straps
Push transmission assembly back
disconnect the exhaust at manifolds
Remove the bolts from the motor mounts
push engine forward
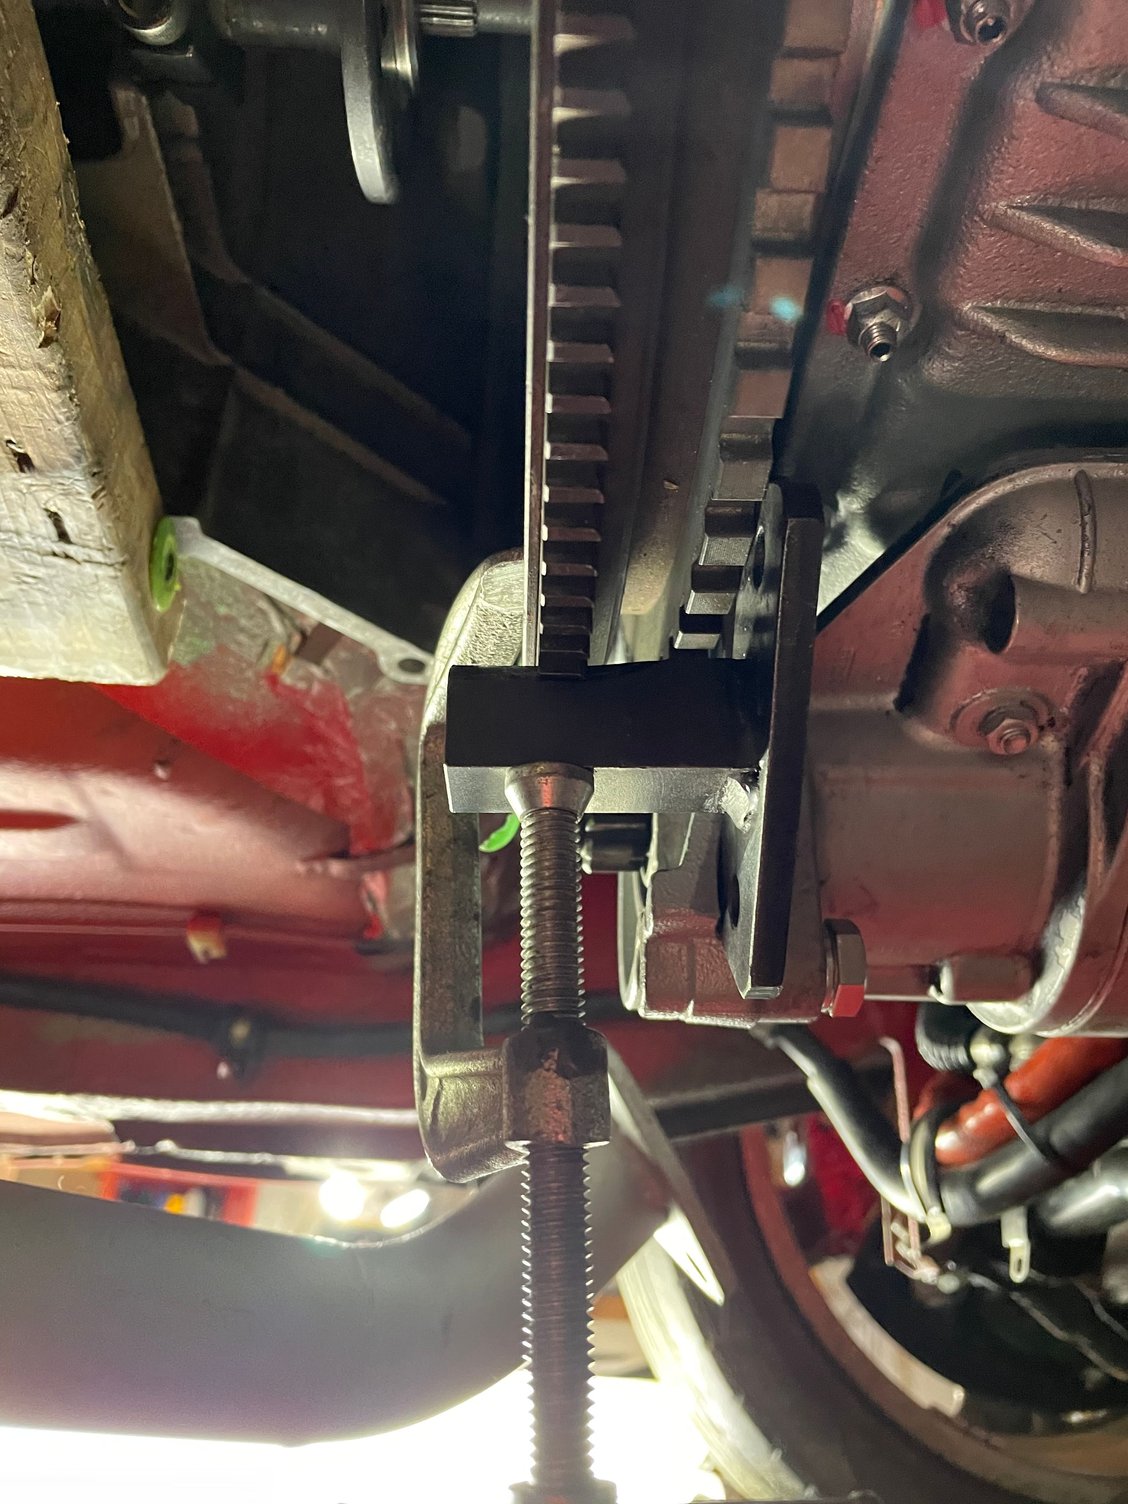
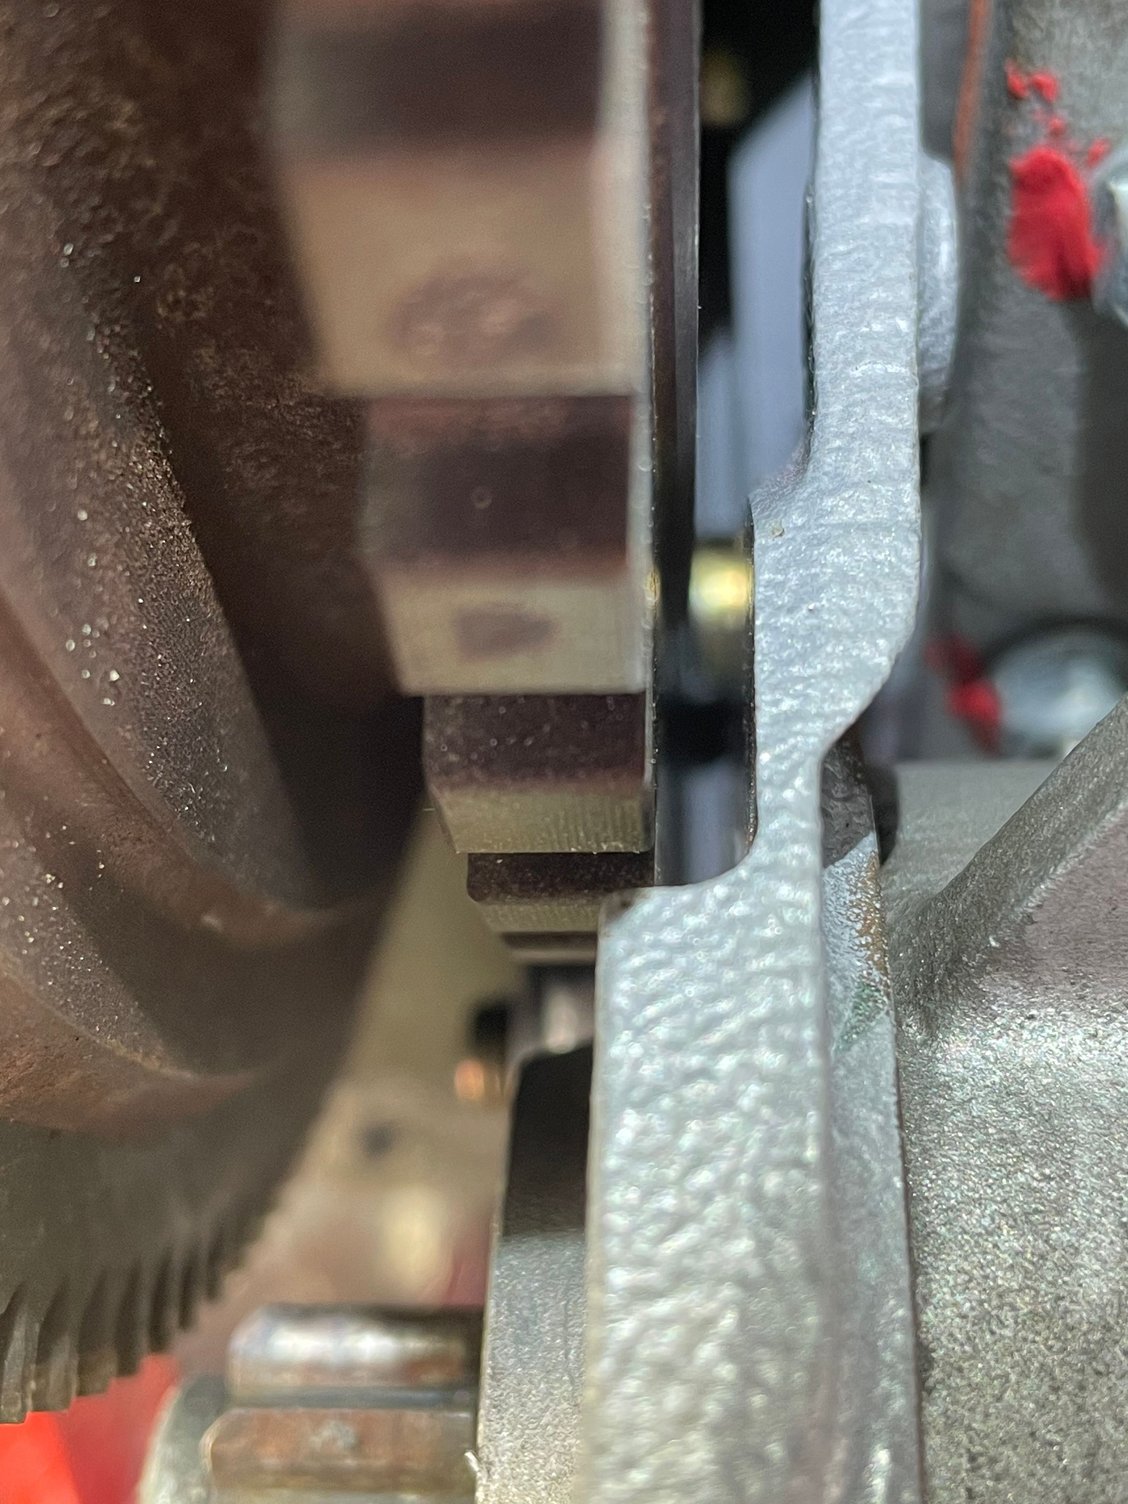
cut the cheese head tool down to fit in front of the coupling with a wrench on it.
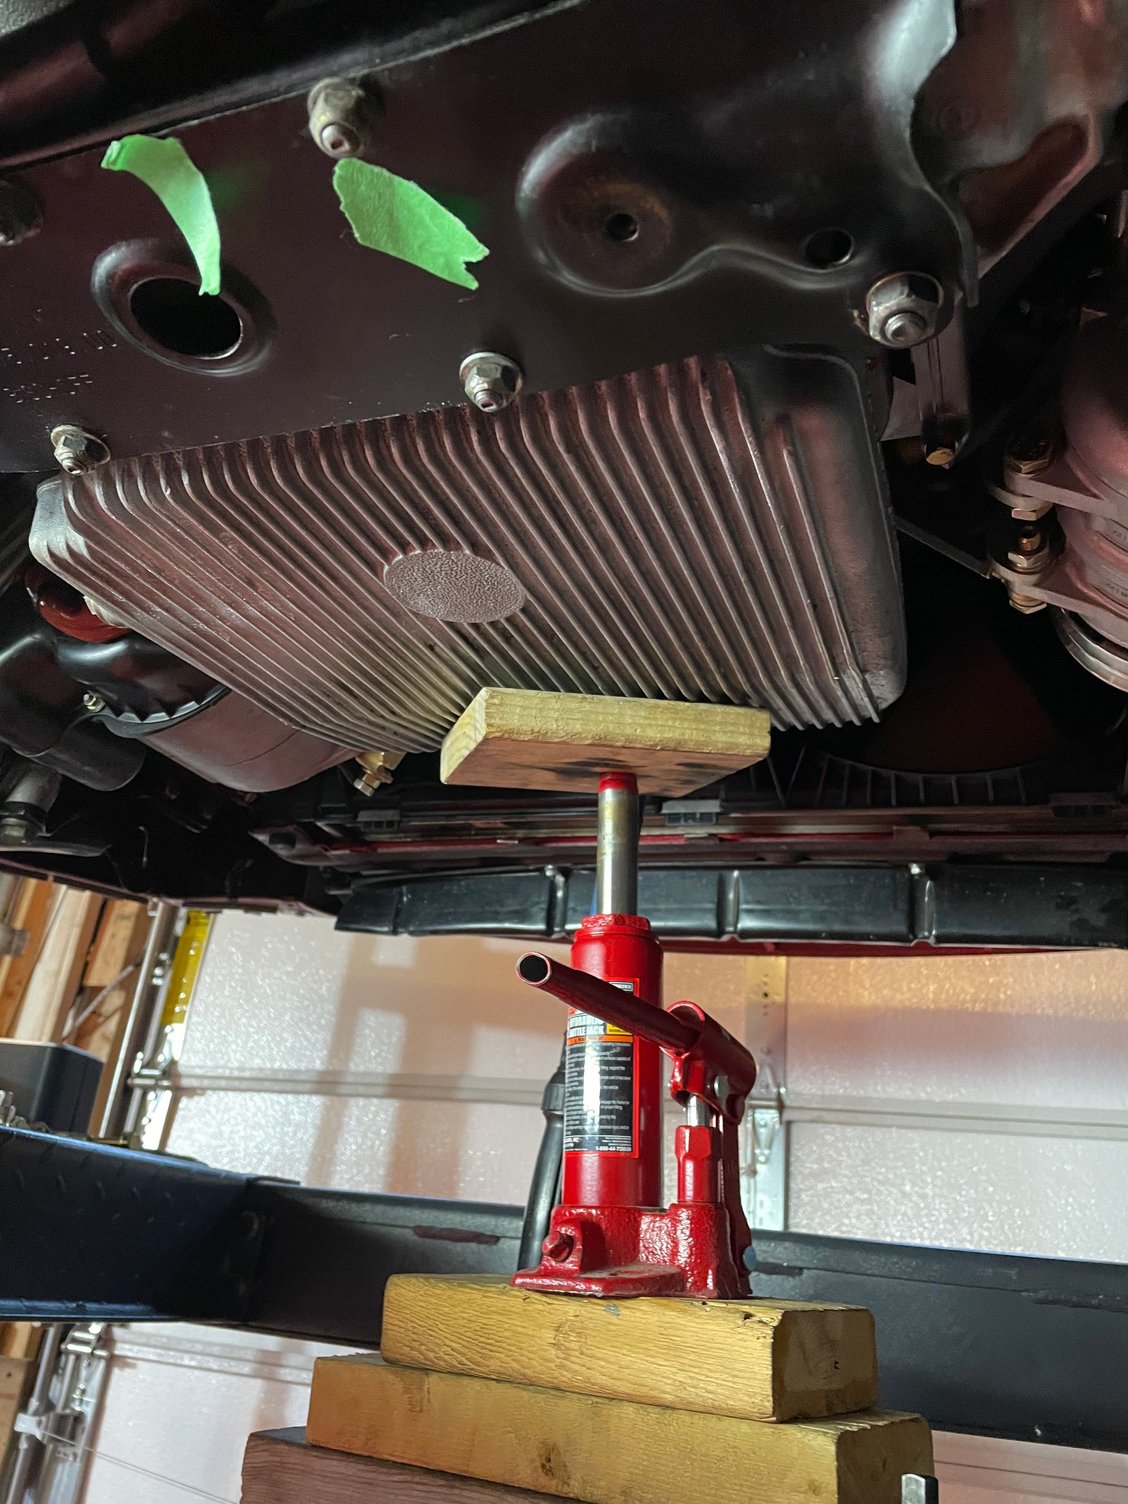
Then alternate using bottle jacks to raise the bell housing and another one on the front of the engine. It takes a while but the flex plate needs to come off first and then the fly wheel.
After not finding the short head bolts in my stash, and realizing that it would be a week plus to get them, I tried to grind down the heads to gain clearance. I quench them continually. However, when I went to torque they stripped out.
The bolts are designated as DIN7984. McMaster-Carr had 10 of them for six dollars. I learned this from The female sales rep at Belmetric. She is on my Christmas card list now too.
I got them in less than two days.
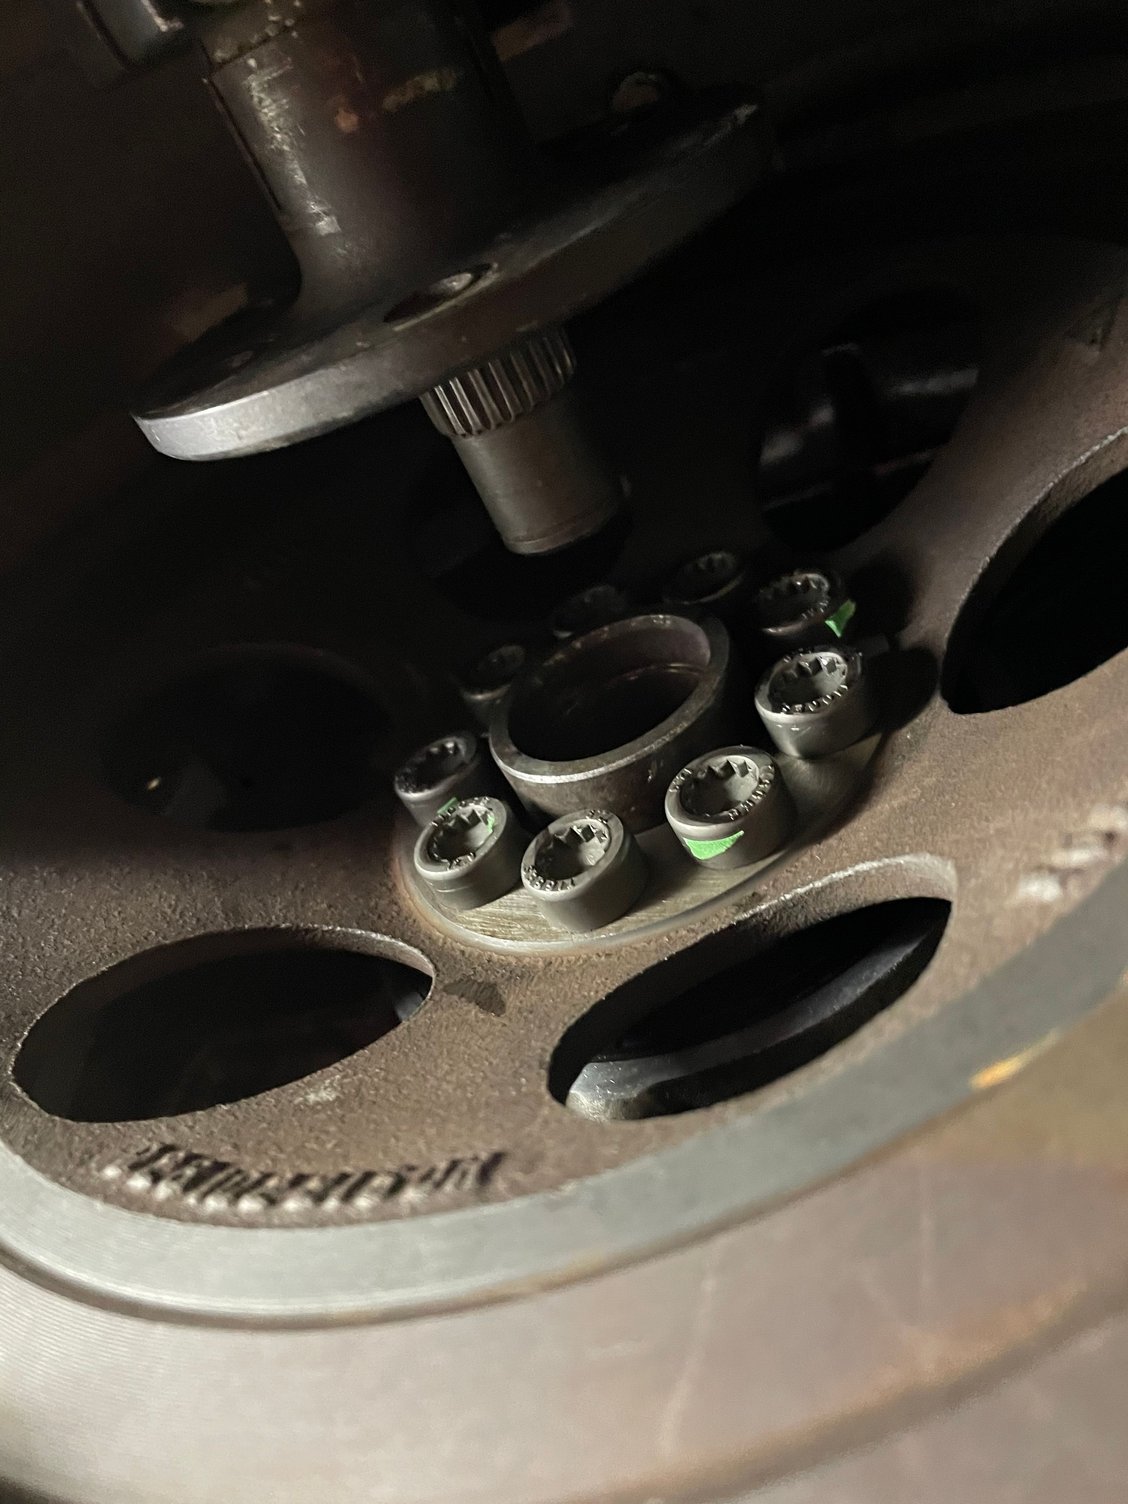
The issue was going to be the two stage torque of the flywheel bolts. Luckily, I had an extra set of brand new bolts. I then put a double layer of painters tape over the heads to have the cheese head tool tight. I then had to use the fly wheel lock About 30 times to get the bolts torqued in sequence.
All in all I am pretty pleased with how it all turned out.
disaster averted.
Nice work! I went through a similar process last year when I finally replaced a leaking rear main seal without taking out the engine or trans. I don't know what tool you used for the triple square bolts but I ended up using the tool below. It was short enough that I could put it on my ratchet and the bolts came off (and went back on) much easier. At first I was using a cut down tool with a wrench on it but I couldn't keep it square and get enough torque on it.
I just completed doing a RMS in situ last week.
I adapted a VW flywheel lock, Snap-on flex head torque wrench and OTC 5942-12 twelve point short socket bit made quick work of two stage flywheel bolt torque process.
That's a cool solution for the flywheel lock. I have a four post lift so I just jammed a big crowbar between a drip pan and the flywheel, but what you did is a much more elegant solution.

 03-31-2021, 08:29 PM