When you click on links to various merchants on this site and make a purchase, this can result in this site earning a commission. Affiliate programs and affiliations include, but are not limited to, the eBay Partner Network.
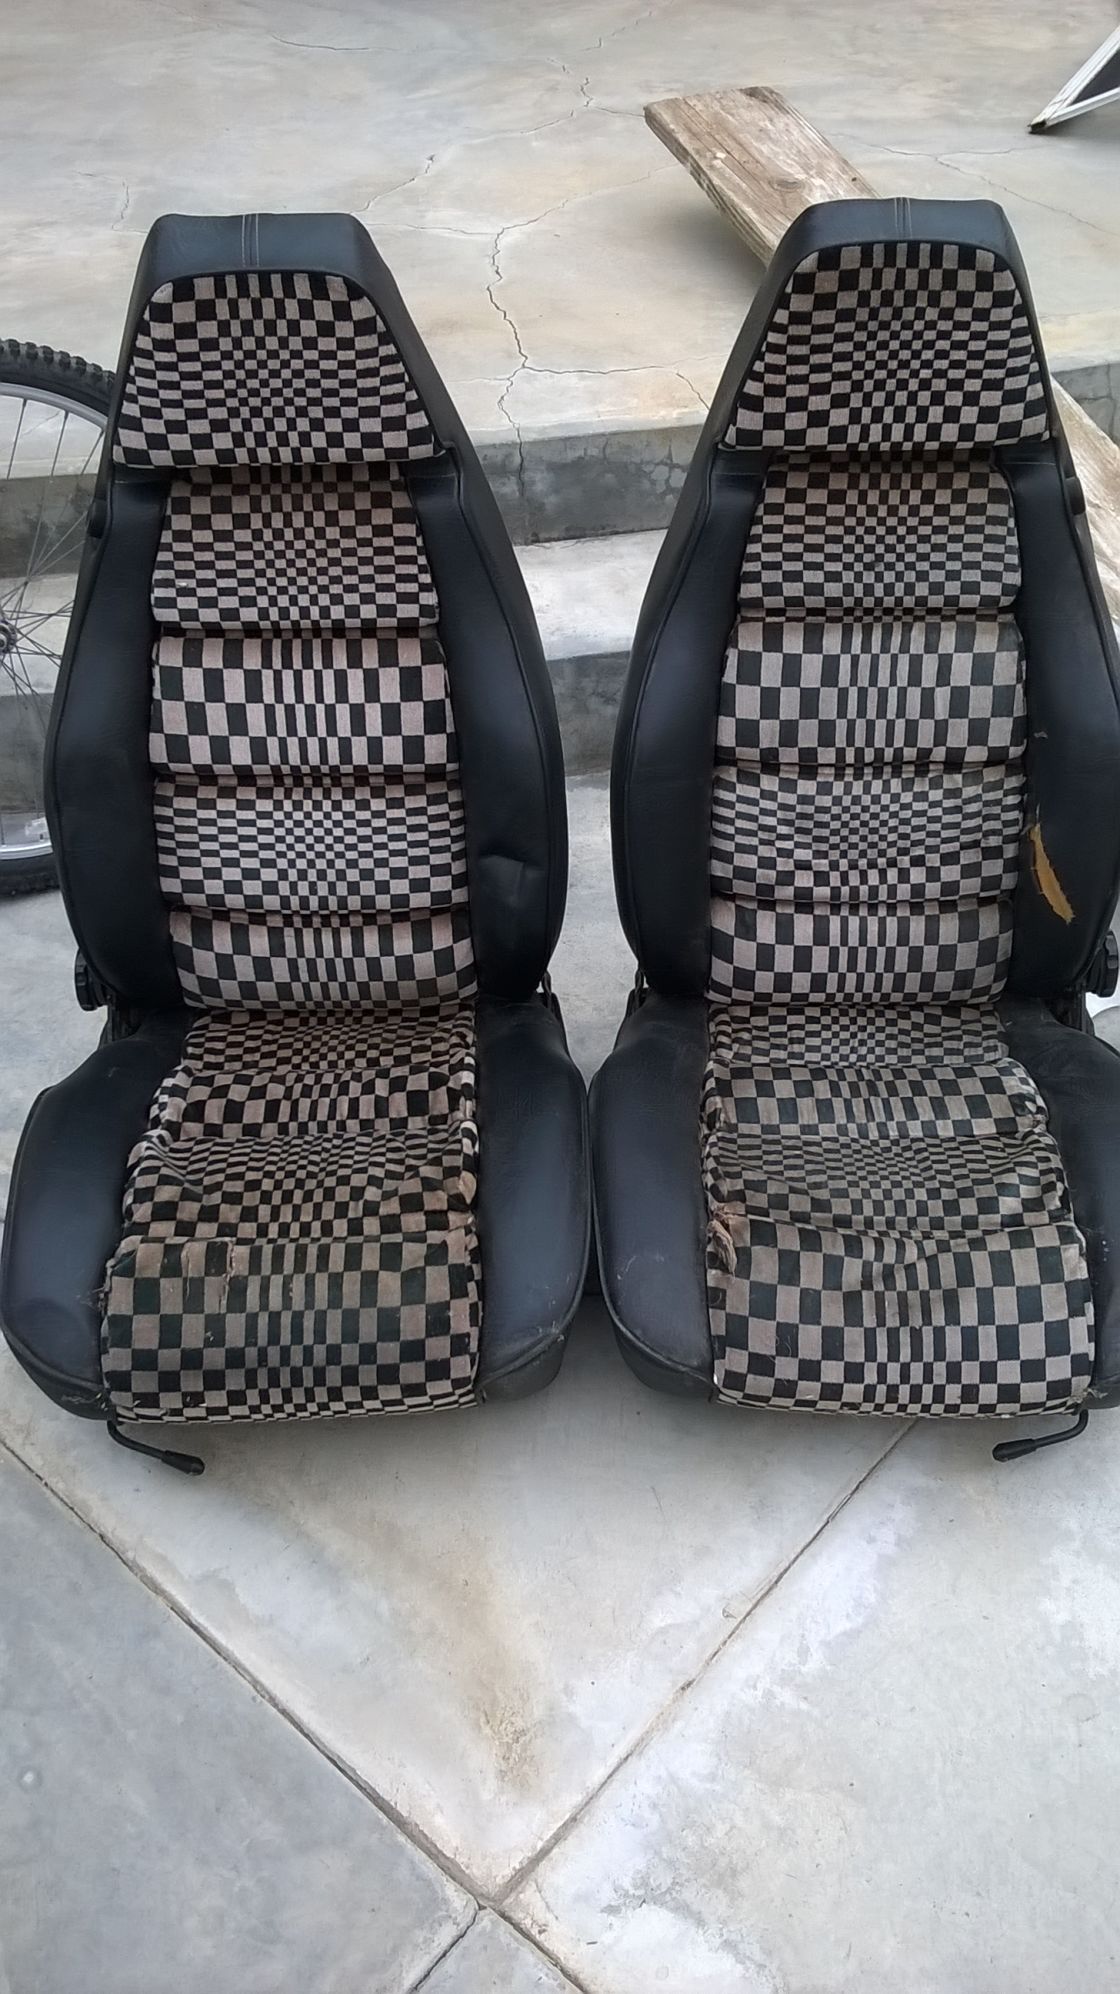
I am recovering my 1979 seats as the car is undergoing body and paint. I have many sets of seats to chose from and decided to recover the "best" set. A 1979 set of Pasha seats that I had picked up a few years back. My covers from Classic 9 were done in Black/ Beige Pascha with grainy vinyl.
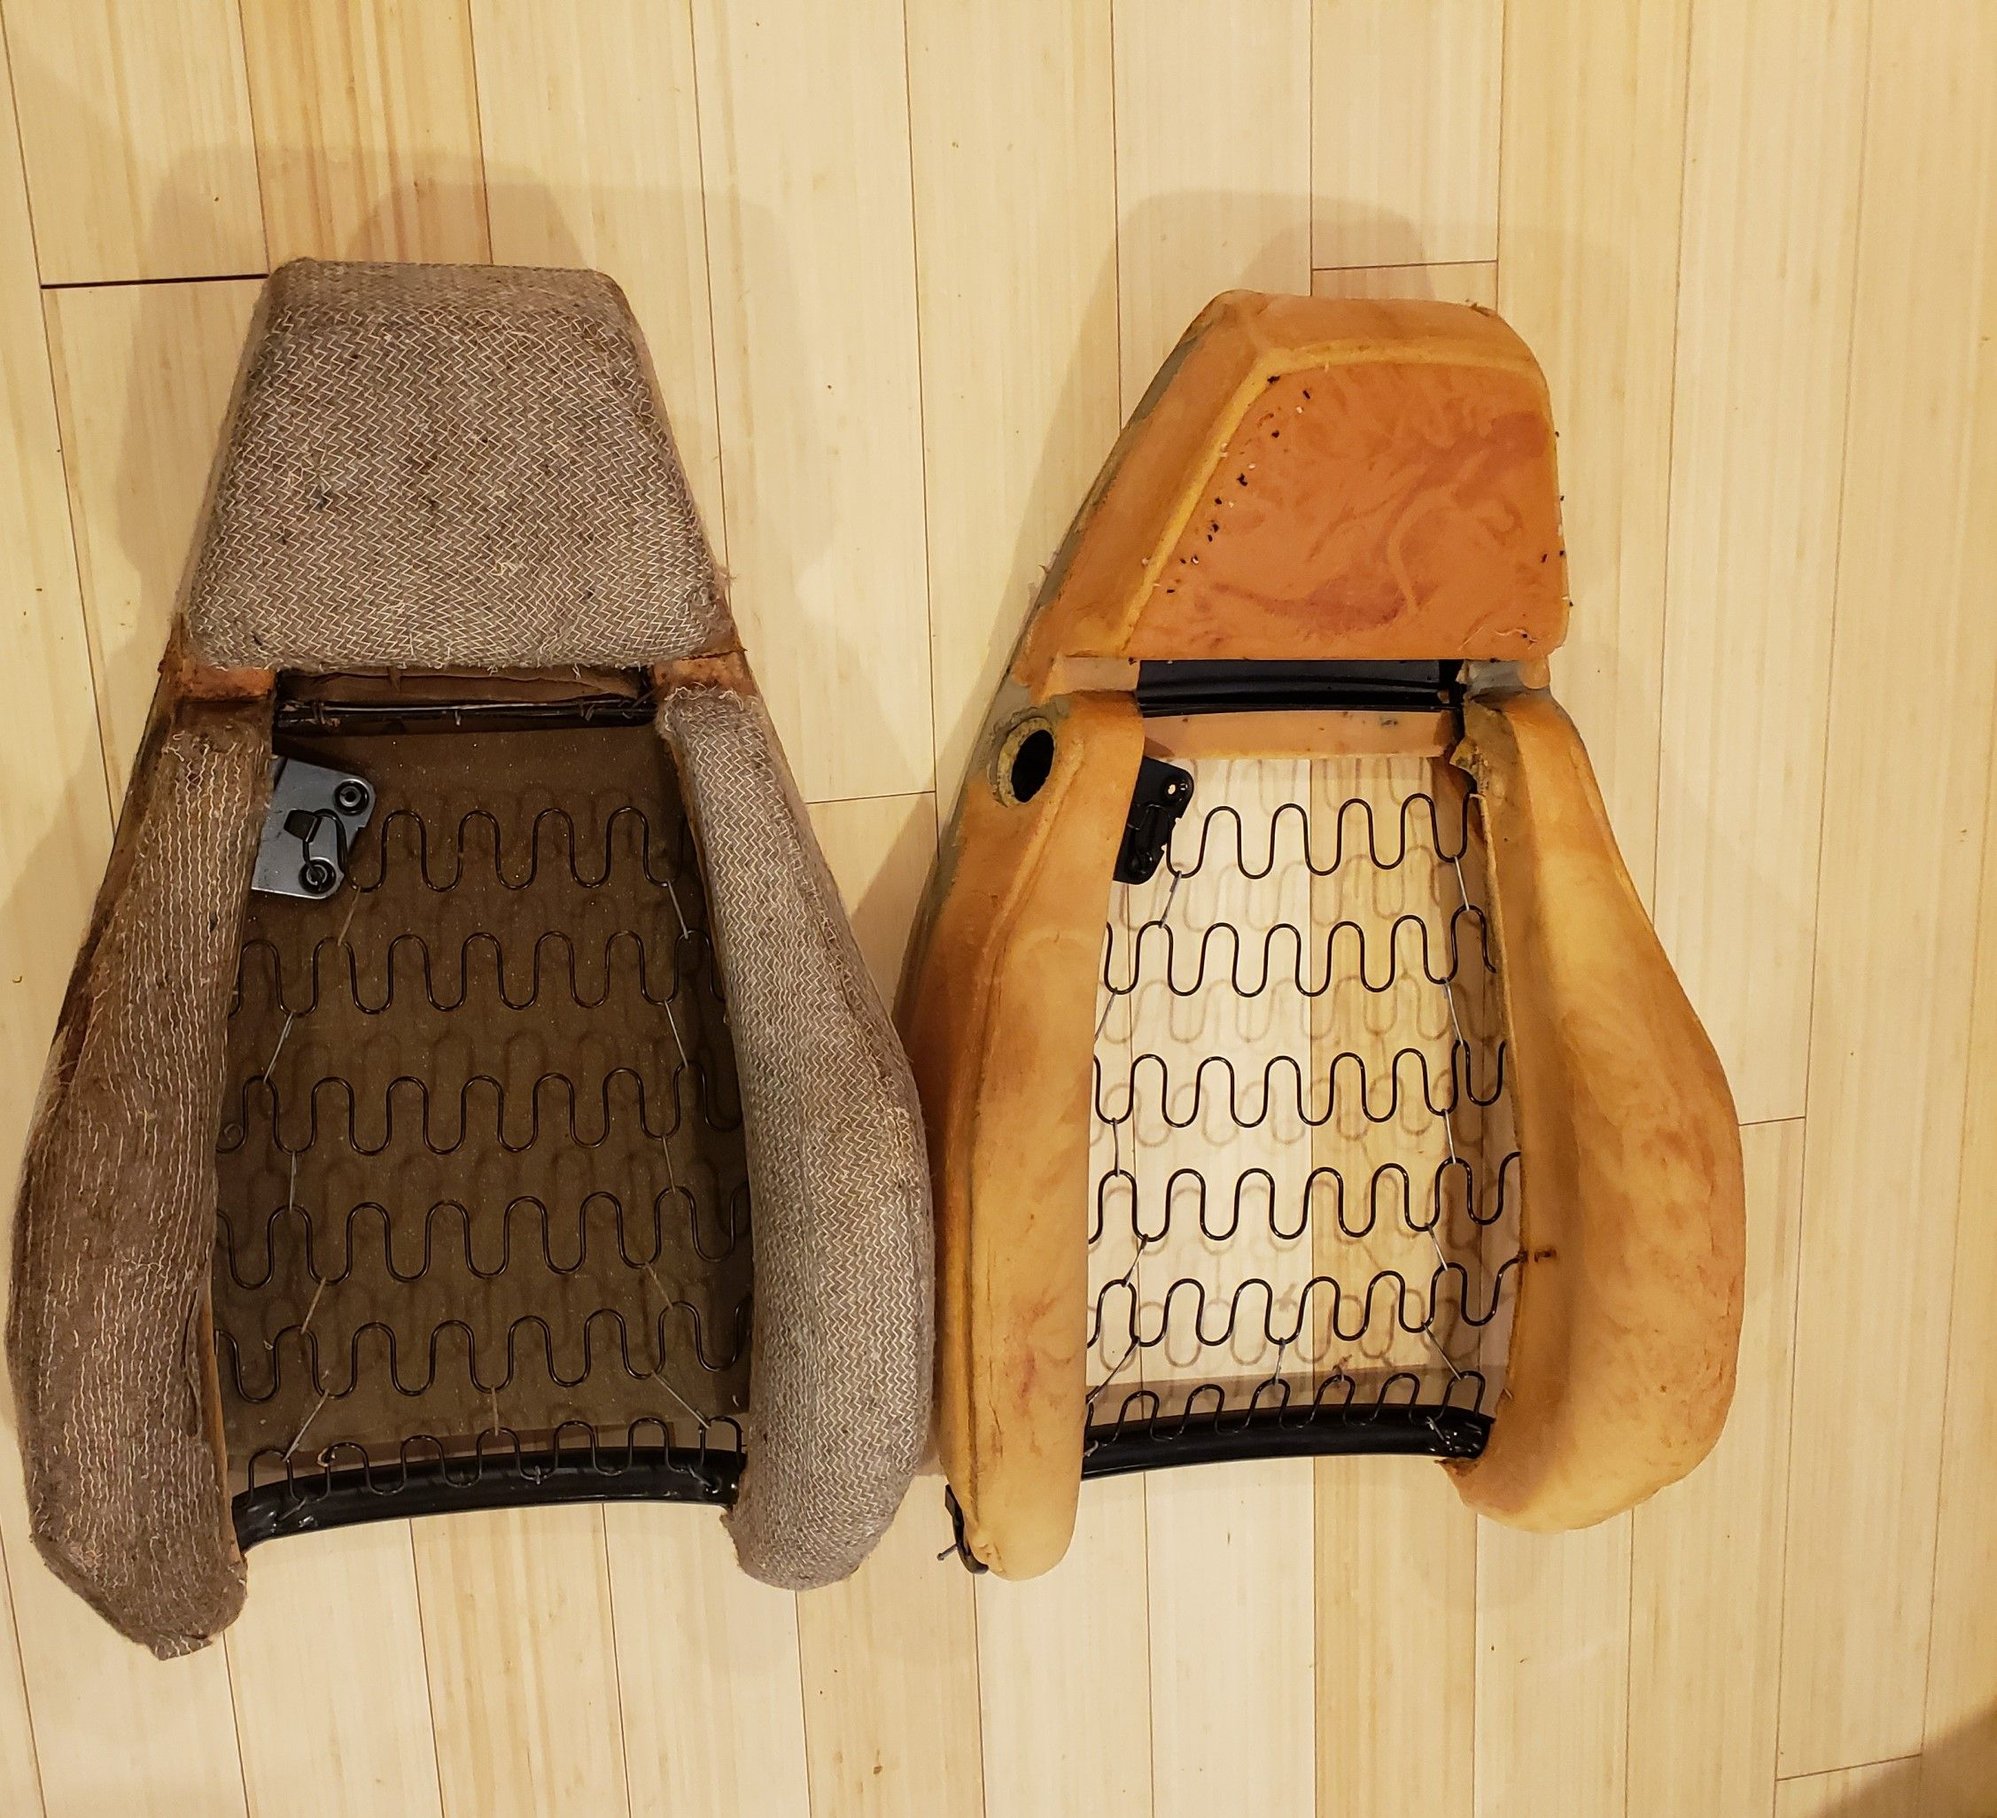
The donor set to be recovered
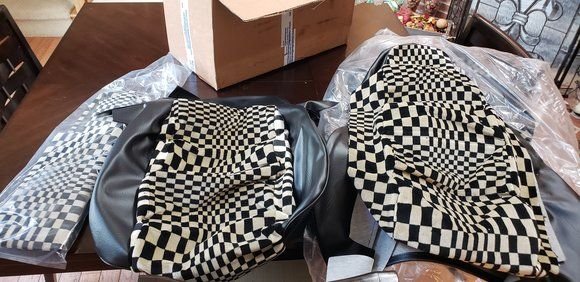
The new upholstery from Classic 9
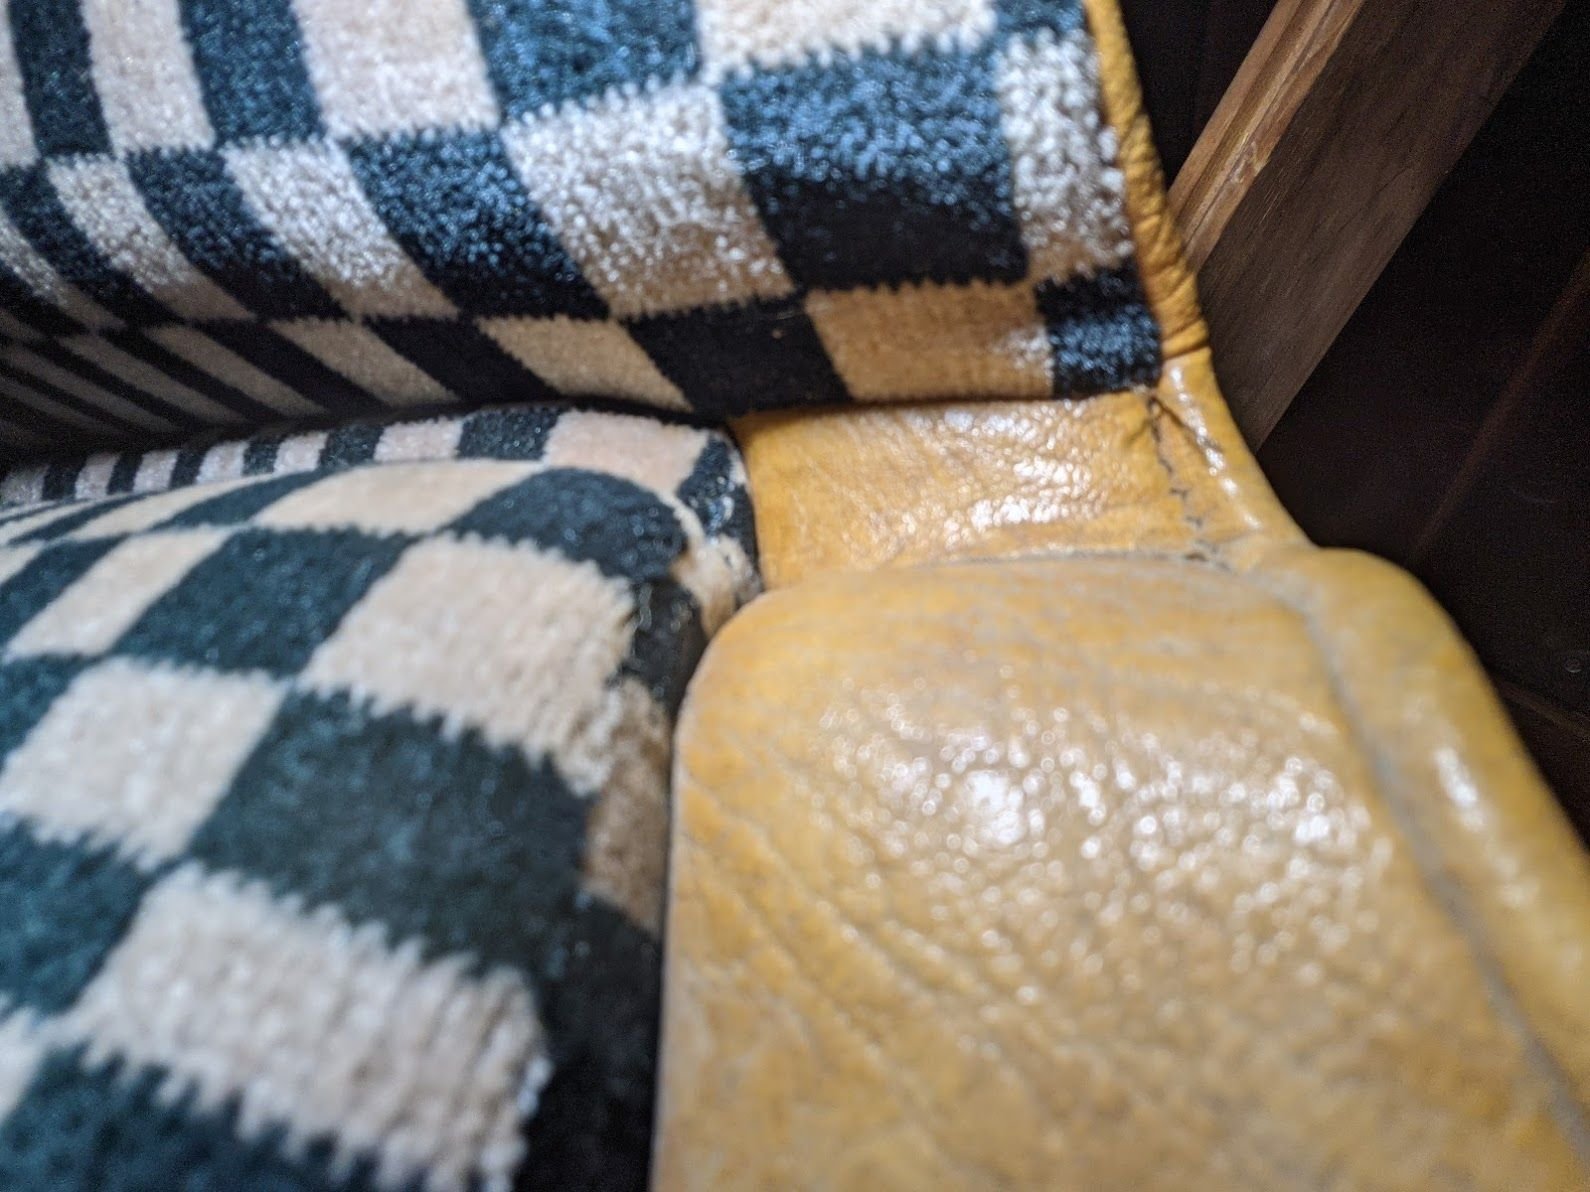
My initial impressions of the new covers was that the vinyl was much thinner than original but the quality and craftsmanship was excellent. I have trimmed seats many times in the past but have always worked with leather. This was my first cloth/ vinyl installation.
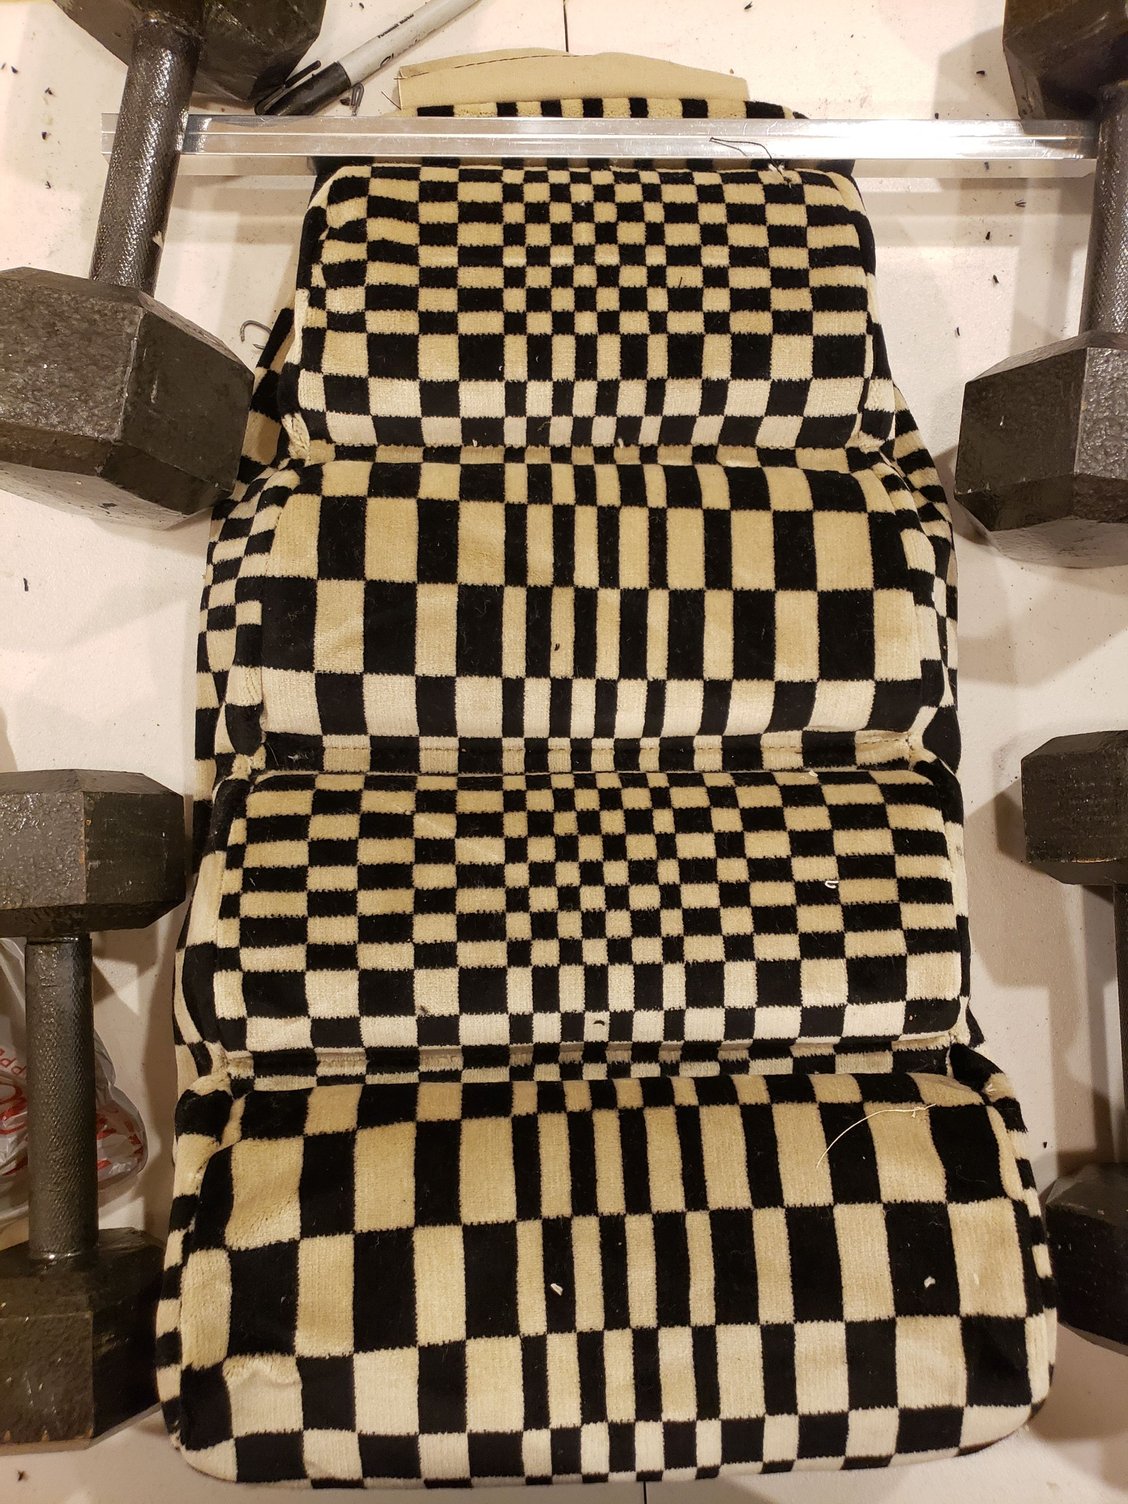
I jumped right in and started the install a couple weeks ago.
I wasn't happy with the fit on the vinyl areas of the backrest. Especially the back "flap" appeared to be too long. The thinner vinyl is challenging to work with so I talked with Rod at Classic 9 who gave me some fitment advice. So i tore it all down again to redo it and i discovered something interesting.
The 78 seatback is on the right and the 79 seatback is on the left. The 78 is slightly different in that it has no "batting" but the big difference is that its actually about an inch shorter. The driver side mate to this is the same, 1 inch shorter than the 79 . The difference appears to be the in the headrest frame although I plan to add some images showing the differences. The original covers also show a one inch difference when measured down the back. Classic 9's cover matches the 79 size perfectly.
I know many 78's were "handmade" to some degree and it would appear that this is just another oddity perhaps? Anyone else encounter this issue?
From my history with well-aged interesting cars, it's a close race between the foam and the burlap to decide which has more, um, 'fragrance' with age. The good news is that the foam can be casually steamed to eliminate most of that, while the burlap not so much. Conversely, the burlap is often better bet with thin vinyl covers for a couple reasons, mostly related to movement and stretching. The foam will lighten up in color with the cleaning too. If you have a steamer for de-wrinkling clothing, followed by the shop-vac, it's usually enough.
If you need an inch at the top of the earlier headrest to get the right fit with the later covers you have, don't hesitate to add an inch of foam to the top to make the fit correct. The loading on that foam top is minimal, really just the stretch of the foam. You don't load that section much more than the stretching of the cover during installation. Use an electric carving knife to detail the shape of the new pieces; just remember to wash that knife before Thursday's mini-feast.
Thanks Dr Bob. The vinyl here is really the kicker. I have worked with leather 928 covers before and they tend to hide so many more "sins" this vinyl shows everything.
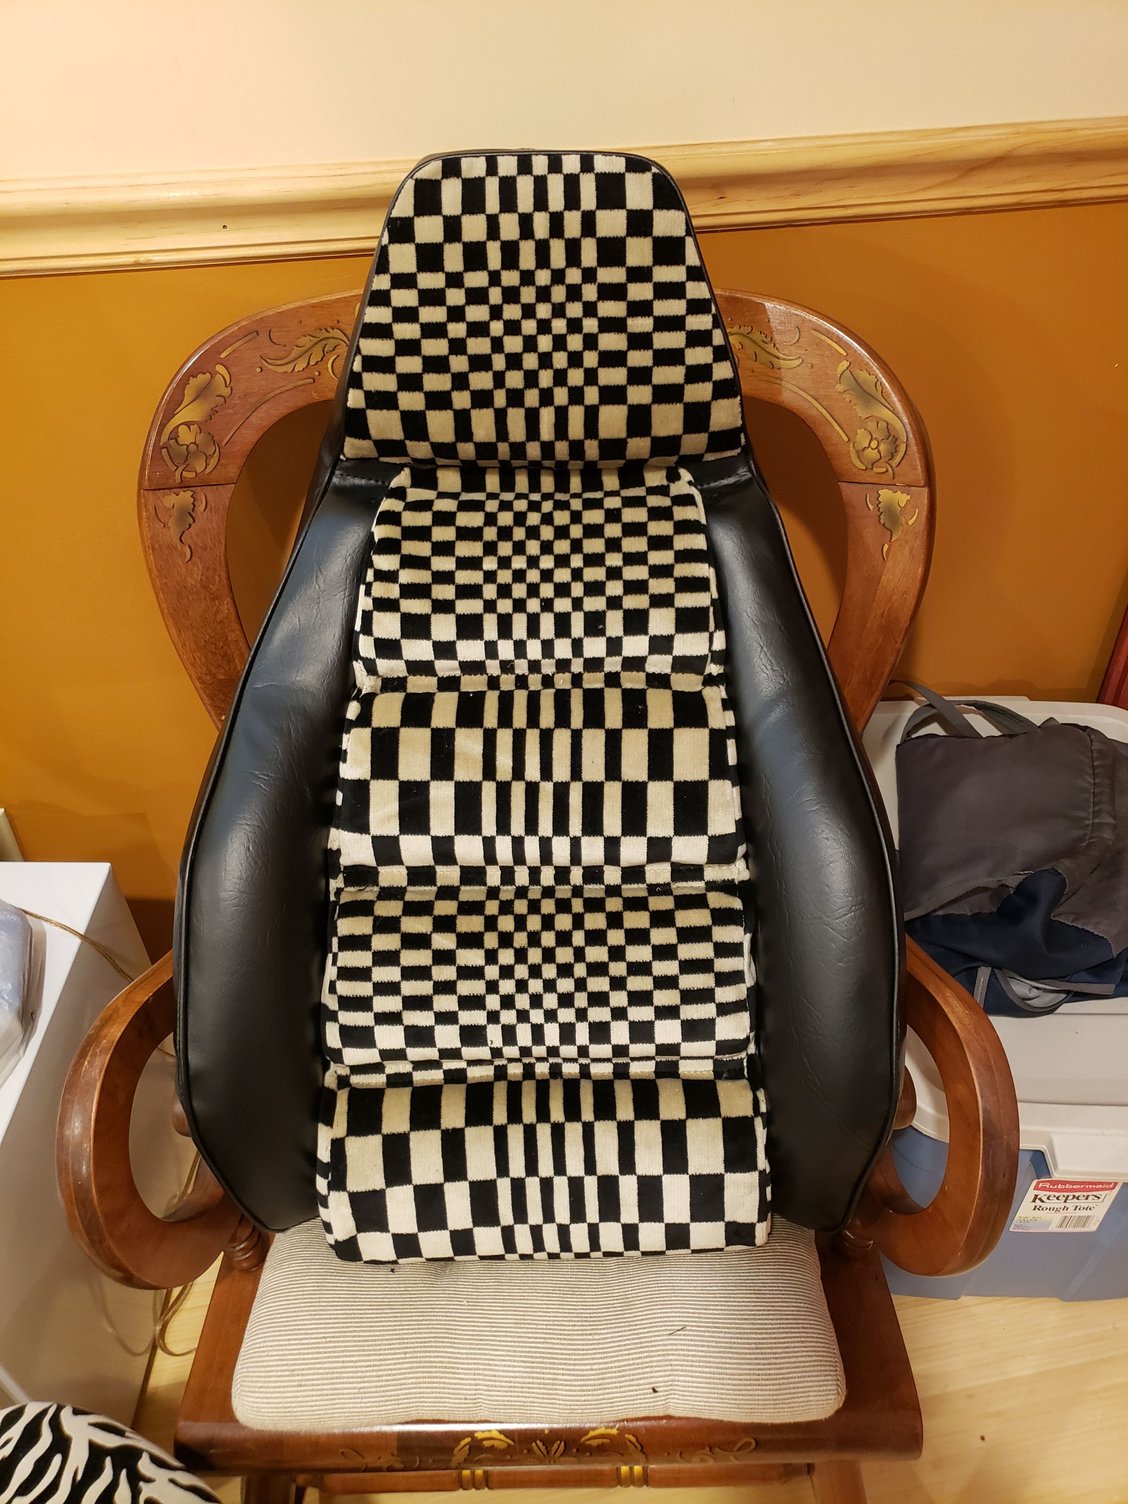
I redid the seat today for the 3rd time and added a lot of foam and cotton batting as well. I used the later seat frame and foam and added 1/2 to the top. I got a much better result but still left with a slight wrinkle. That is mostly caused by the seat release mechanism which interferes with the ability to cinch the vinyl tighter in this area. I am happy with this result over all and am going to live with this.
Thanks Dr Bob. The vinyl here is really the kicker. I have worked with leather 928 covers before and they tend to hide so many more "sins" this vinyl shows everything.
I redid the seat today for the 3rd time and added a lot of foam and cotton batting as well. I used the later seat frame and foam and added 1/2 to the top. I got a much better result but still left with a slight wrinkle. That is mostly caused by the seat release mechanism which interferes with the ability to cinch the vinyl tighter in this area. I am happy with this result over all and am going to live with this.
Is that a new cover on the right, and an original cover on the left?
Is that a new cover on the right, and an original cover on the left?
Yes sir, correct. The original vinyl is much thicker than the new stuff.
Andrew, kind of curious if you have ever noticed the differences in these early seats? Not sure if its because they were cloth vs the other ones I have are leather but lots of differences in the foam, etc.
I wound up using the 79 frames and foam. Seemed to be a denser foam, especially in the pillow areas.
I have never noticed the size difference. I have seen some seats without the batting, most with. I have a LOT of manual seat cores and a lot of seats in pieces, I started ripping apart all the parts car seats that came through here to salvage foam pieces out of them. (A long time ago one could buy new foam from Porsche) This is an important thread for a number of reasons, first that comes to mind is if 77-78 seats are a different size than 79 this presents a problem for (presumably) 77-78 owners with the available upholstery kits.
Finally had time to have a second look at all of this. pasha covers: 1 right way, a million wrong ways
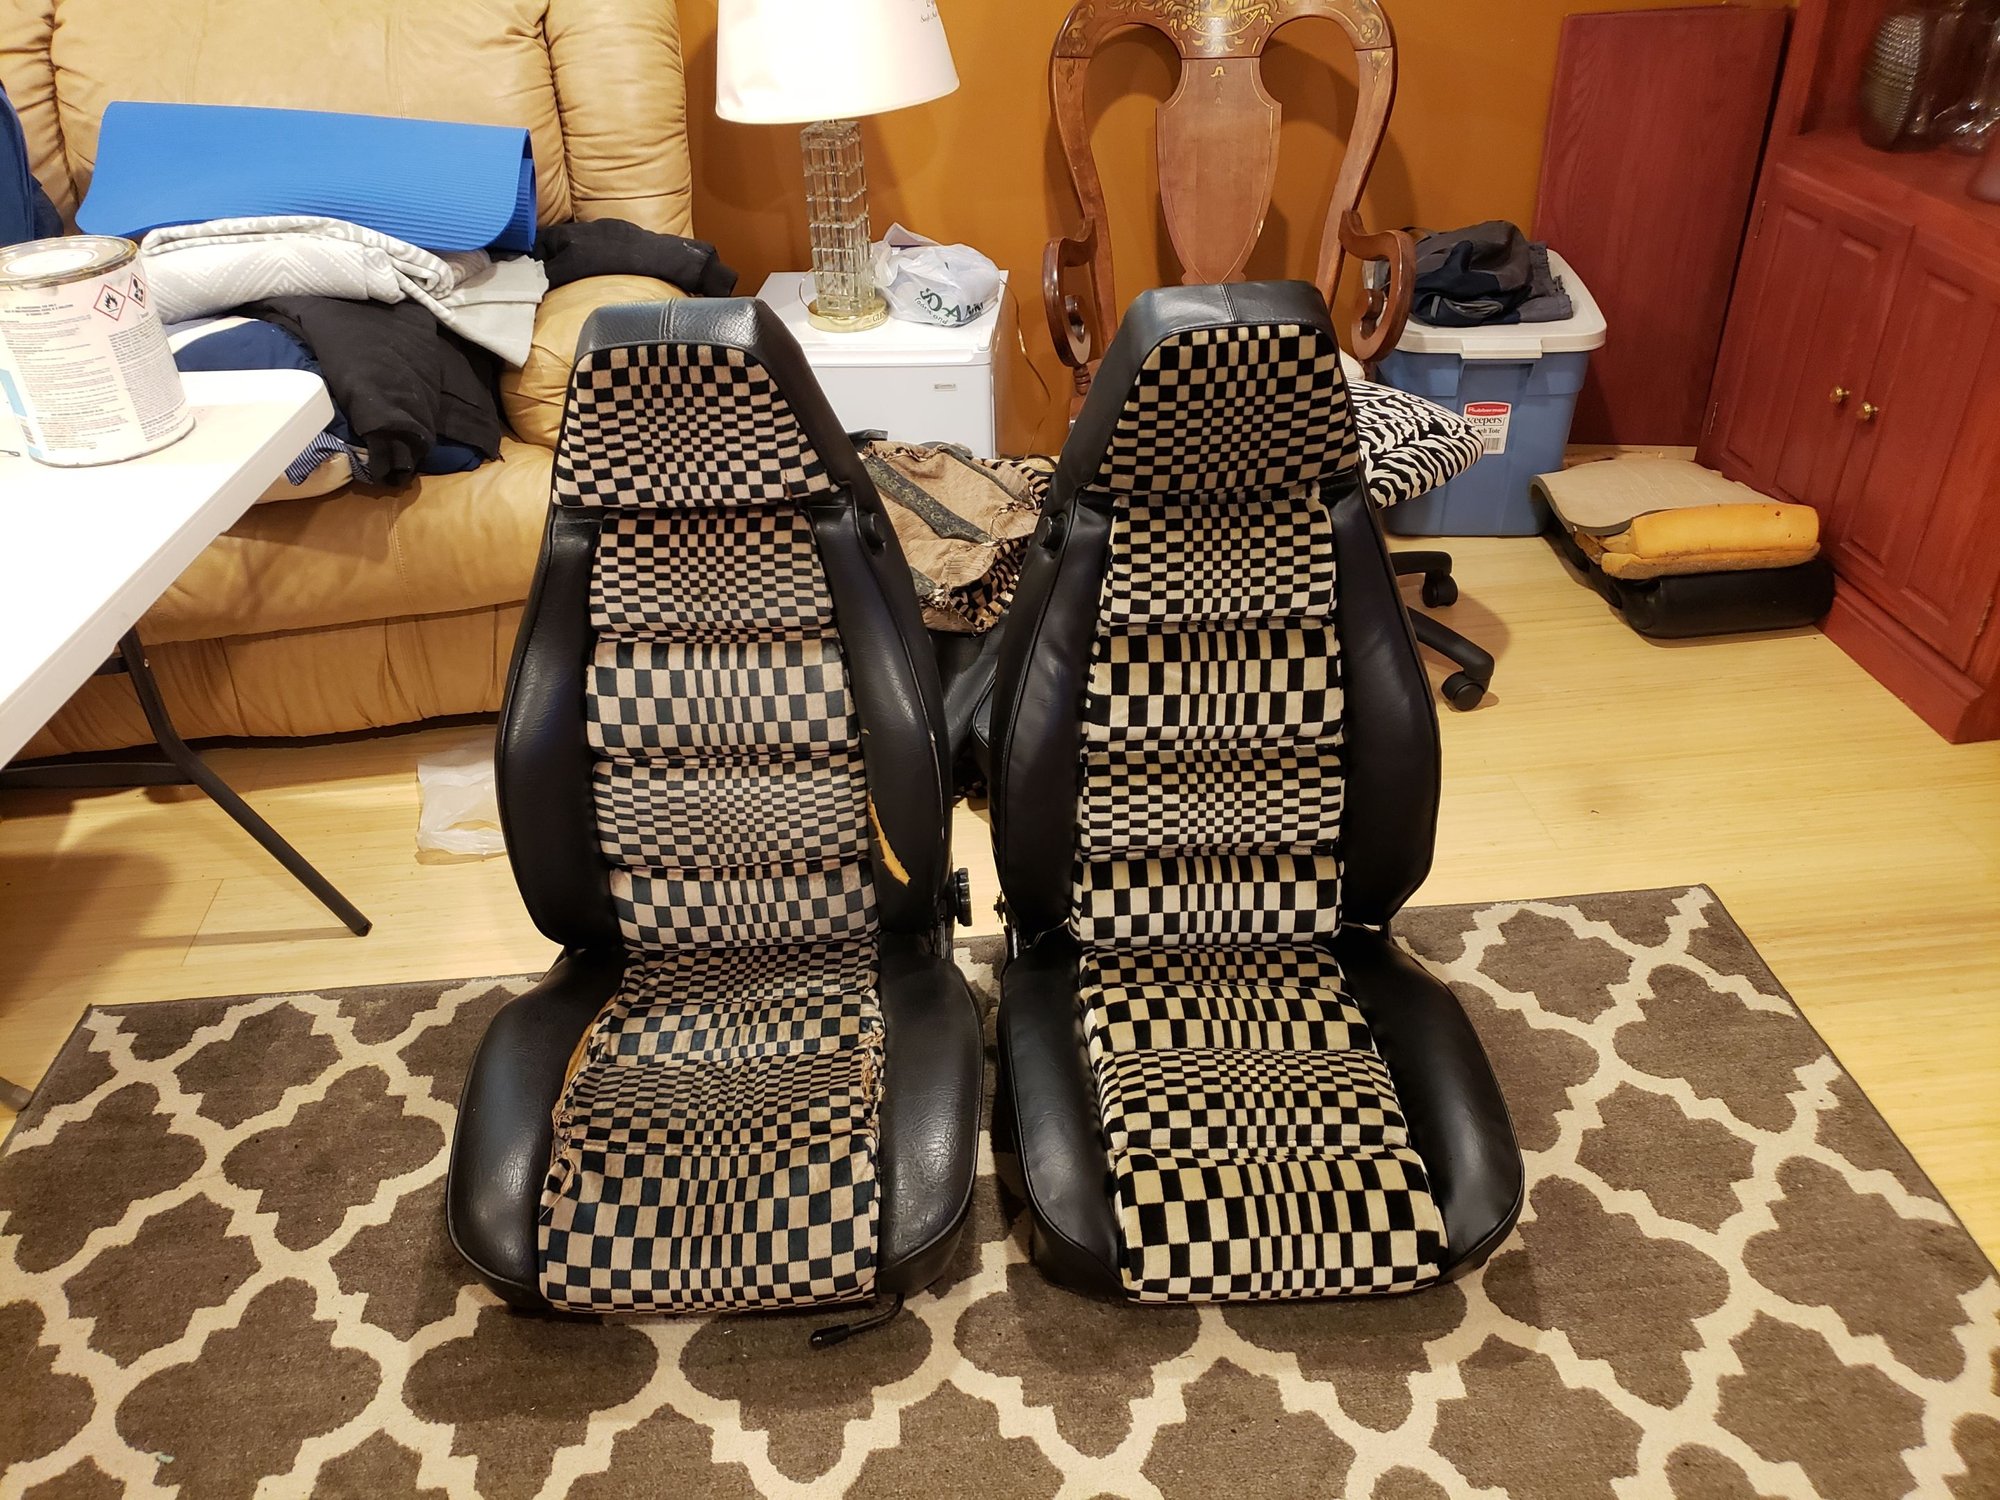
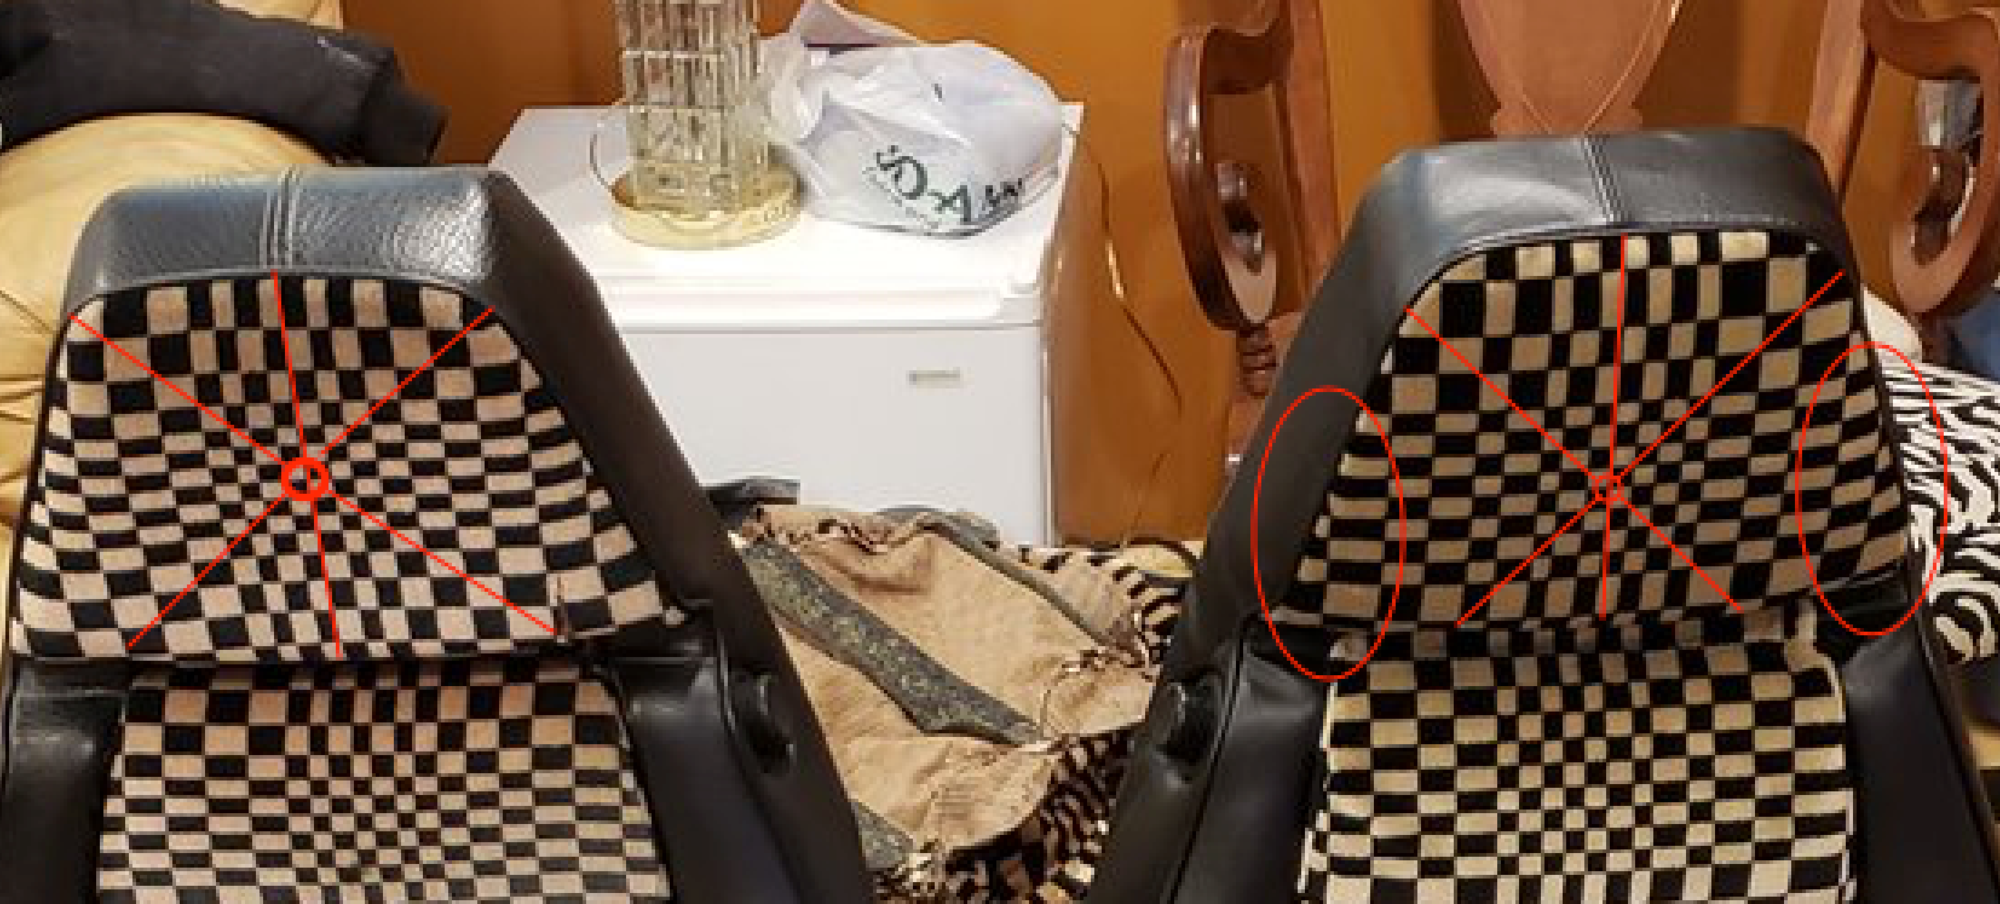
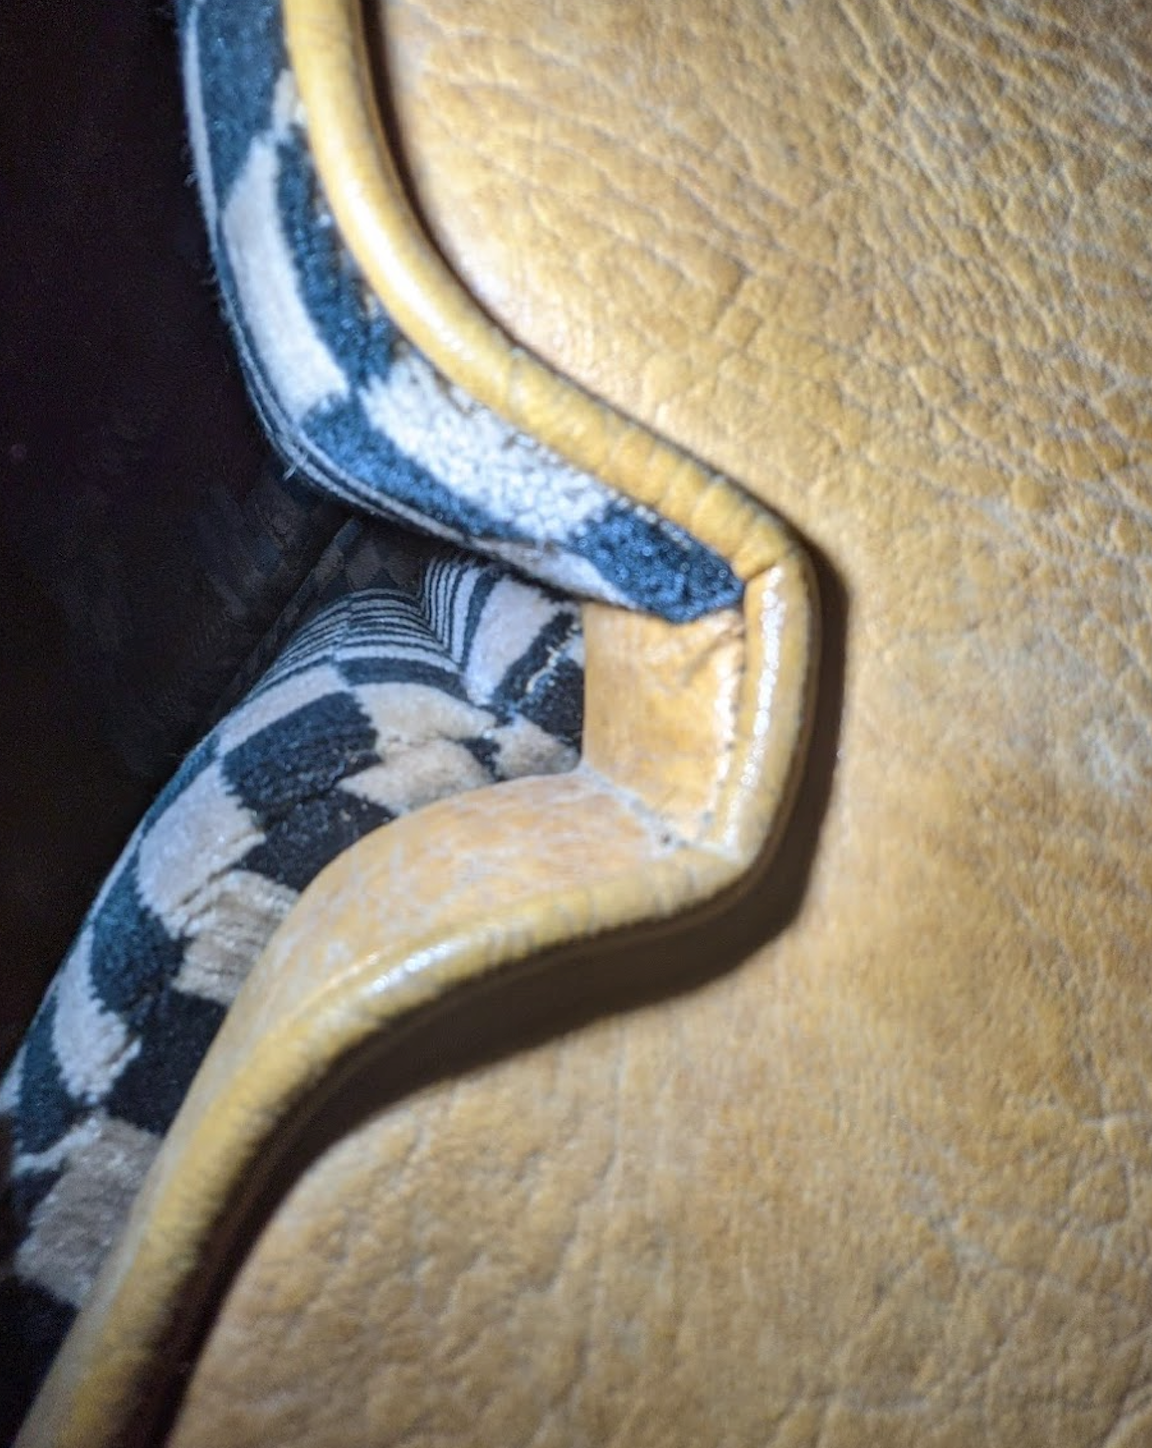
On these new covers in question, they're not made right, and there's no way to fix it without "re-making" them. Here is your seat pic, original seat on left, recovered seat on right. First issue is the pasha pattern on the headrest; incorrectly placed:
Notice the original headrest pattern on the right.. centered a certain way, symmetrical. THere is a "center" to the graphic pattern, it can be hard to find and give you a headache in the process, but it's there. its supposed to align horizontally with the seam in the top of the headrest, which is is supposed to be in the center of the headrest. Then the center of the pattern should end up centered vertically in the headrest. It's actually easier to see from a distance, the patterns just don't flow right on the seats. When they are right the perimeter of the headrest / pleat/ panel in question has the same shapes of often PARTIAL pasha boxes around the perimeter. See original seat versus perimeter pattern on the new ones. I also can't tell (but I suspect) the the vinyl seam at the top of the seat is off center.
I would be sending these back. There is no amount of reasoning or possible justification that these are made right.
This is disappointing from classic 9. Around 2014 (?) i visited Jim Doerr at his house in michigan, he showed me some "prototype" classic 9 pasha upholstery sets that he was working through the details with Robb Budd with. We spent some time discussing the nuances of the original construction methods of these seats and the challenges to recreate them correctly. There was a number of seat cover iterations passed between Jim and Robb, as to be expected. The job is complicated to begin with, and Jim was intent on having the details as correct as possible. I was under the impression that Jim finally "approved" the process....I think? I wasn't involved in the discussions but I know Jim would not have approved of THIS^^^^
In fairness to classic 9, the shape of the foam plays a big role in the final product. Some say it's like the paint prep in a paint job but a more appropriate metaphor might be like putting a thin skin-tight dress on saggy lumpy body. No one like the look of that. Advanced upholstery shops make new foam pieces for seat restorations. It's a real art using the correct type of foam and an electric carving knife. "sculpture" is a different skill set than "upholstery making" which is a different skill set than "assembling" Make no mistake it is a monumental and expensive task to restore pasha seats correctly.
For those connected I've been following this instagram account of mind blowing upholstery work from various shops around the world:
Your first problem is that the Pasha pattern itself, as used by the factory, is pretty screwed up. The center of the pattern, as you have marked it, starts at the four corners of opposite squares. Therefore as the pattern develops in wider rows outward, both side to side and up and down the blocks alternate opposite from the other side. You will also notice that as the rows move outward from the center where you would expect the next one to be a bit wider, they are not. In some cases, both side to side and up and down, there are some rows outward that are narrower than the one next inboard from it. In your case, in addition, the pasha pattern in your recovered seat is not even the same as the factory pattern. Too, as I recall studying these patterns some in the past, I think there is an extra row of blocks on one side somewhere. To the extent that your recovered seats have at least a similar pattern, it also looks like it is upside down from the pattern in your factory seat. Since it appears that the pattern in your recovered seat is at the best centered I would suggest that you live with it.
Last edited by Jerry Feather; 12-08-2020 at 10:47 AM.
Finally had time to have a second look at all of this. pasha covers: 1 right way, a million wrong ways
On these new covers in question, they're not made right, and there's no way to fix it without "re-making" them. Here is your seat pic, original seat on left, recovered seat on right. First issue is the pasha pattern on the headrest; incorrectly placed:
...This is disappointing from classic 9. Around 2014 (?) i visited Jim Doerr at his house in michigan, he showed me some "prototype" classic 9 pasha upholstery sets that he was working through the details with Robb Budd with. We spent some time discussing the nuances of the original construction methods of these seats and the challenges to recreate them correctly. There was a number of seat cover iterations passed between Jim and Robb, as to be expected. The job is complicated to begin with, and Jim was intent on having the details as correct as possible. I was under the impression that Jim finally "approved" the process....I think? I wasn't involved in the discussions but I know Jim would not have approved of THIS^^^^
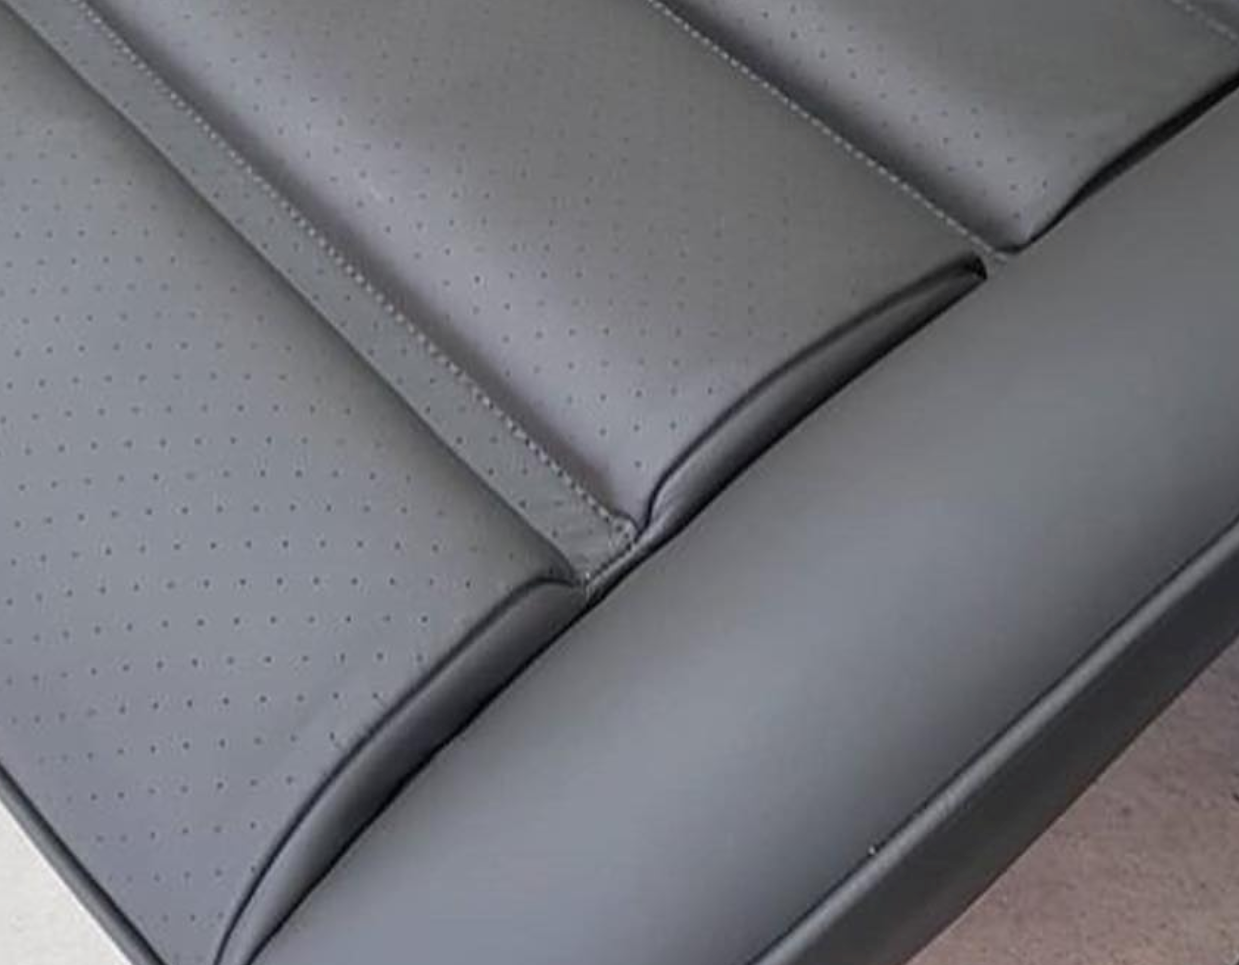
Agreed. Noticed the difference right away as well. And there is more going on there too, rearmost seat bottom as another example.
Bob (Classic9) and I never finished our discussions. And since, he has retired and I'm not as close with the new owner. Rod is a good and talented guy, we just don't have the same dialog.
And I just haven't had a pasha seat need in a while. When the next time occurs, I'm really not sure how I'll go about it. I suspect I would start at the beginning, evaluate the actual pasha '5 yard' sample, and digitally plot the 'cut lines' in plan view. The big question as I see it, is the modern repro pasha the same pattern as original (or similar enough)? I really don't know.
A real back to the beginning approach is needed, along with an upholsterer who is up to the challenge.
Guy, I know this isn't what you were looking for or asked about. And what you have put together is really quite nice! I've seen some serious pasha debacles... your's is certainly not one of them.
.....To the extent that your recovered seats have at least a similar pattern, it also looks like it is upside down from the pattern in your factory seat. Since it appears that the pattern in your recovered seat is at the best centered I would suggest that you live with it.
Kind of surprised to hear this from you Jerry, your work is always to exacting specifications!
These covers cost thousands of dollars, I don't think one should be asked to "live with it"
Once you know they're wrong that's all you'll ever see when you look at these seats, forever.
If this is OK with you then the local boat seat cover guy could have done it for less than half of what correct ones cost so to live with it means, at a minimum, you significantly overpaid.
If you are trying to do a nice job on your car, like I know Guy has been doing, it goes against your overall mission.
If you ever want to sell and someone catches it, it will cost you in negotiations. It's one of signs that says "if that's acceptable what else was shorted on this car?"
The problem with pasha in 928s is that there is a cult-like following to the stuff for some reason. Every car for sale with pasha says PASHA! in the ad, many cars that were never pasha are becoming pasha cars, lots of want ads say "with pasha" It seems to matter if the words "Chequered Velours" appears on a COA. People that can't tell the difference between a 944 and a 928 know what pasha is. It's viral, and anyone that likes it stares right into that abyss on those seats.
Maybe it's me but when they're wrong it's just aesthetically incongruous, and It jumps out at me immediately.
Stuff happens, mistakes are made. My understanding of Classic 9 is that they would make it right! They do a lot of fantastic work!
Agreed. Noticed the difference right away as well. And there is more going on there too, rearmost seat bottom as another example.
Bob (Classic9) and I never finished our discussions. And since, he has retired and I'm not as close with the new owner. Rod is a good and talented guy, we just don't have the same dialog.
And I just haven't had a pasha seat need in a while. When the next time occurs, I'm really not sure how I'll go about it. I suspect I would start at the beginning, evaluate the actual pasha '5 yard' sample, and digitally plot the 'cut lines' in plan view. The big question as I see it, is the modern repro pasha the same pattern as original (or similar enough)? I really don't know.
A real back to the beginning approach is needed, along with an upholsterer who is up to the challenge.
Guy, I know this isn't what you were looking for or asked about. And what you have put together is really quite nice! I've seen some serious pasha debacles... your's is certainly not one of them.
Jim check out that instagram account i linked... lots of shops, mind blowing quality.
My '78 seats are currently at a shop getting recovered. I had found some excellent used pasha in NLA brown/black combo and wanted used in the new covers. Classic 9 wouldn't do it; refusing to work with old material. I was disappointed, but not so much that I would agree to use new tan/black fabric as a substitute. I searched out & found a guy in my region who does a lot of HIGH quality hotrods & customs. Although he pointed out potential issues working with old material, he agreed & said it could be done. After reading this thread, I'm happy to know that at least my pasha pattern will line up, and the covers will be the correct length (I hope!)
Looks like from the new/old photos above, the thinner new vinyl doesn't have a grain that's as deep or defined as the original.

 11-20-2020, 09:41 PM