When you click on links to various merchants on this site and make a purchase, this can result in this site earning a commission. Affiliate programs and affiliations include, but are not limited to, the eBay Partner Network.
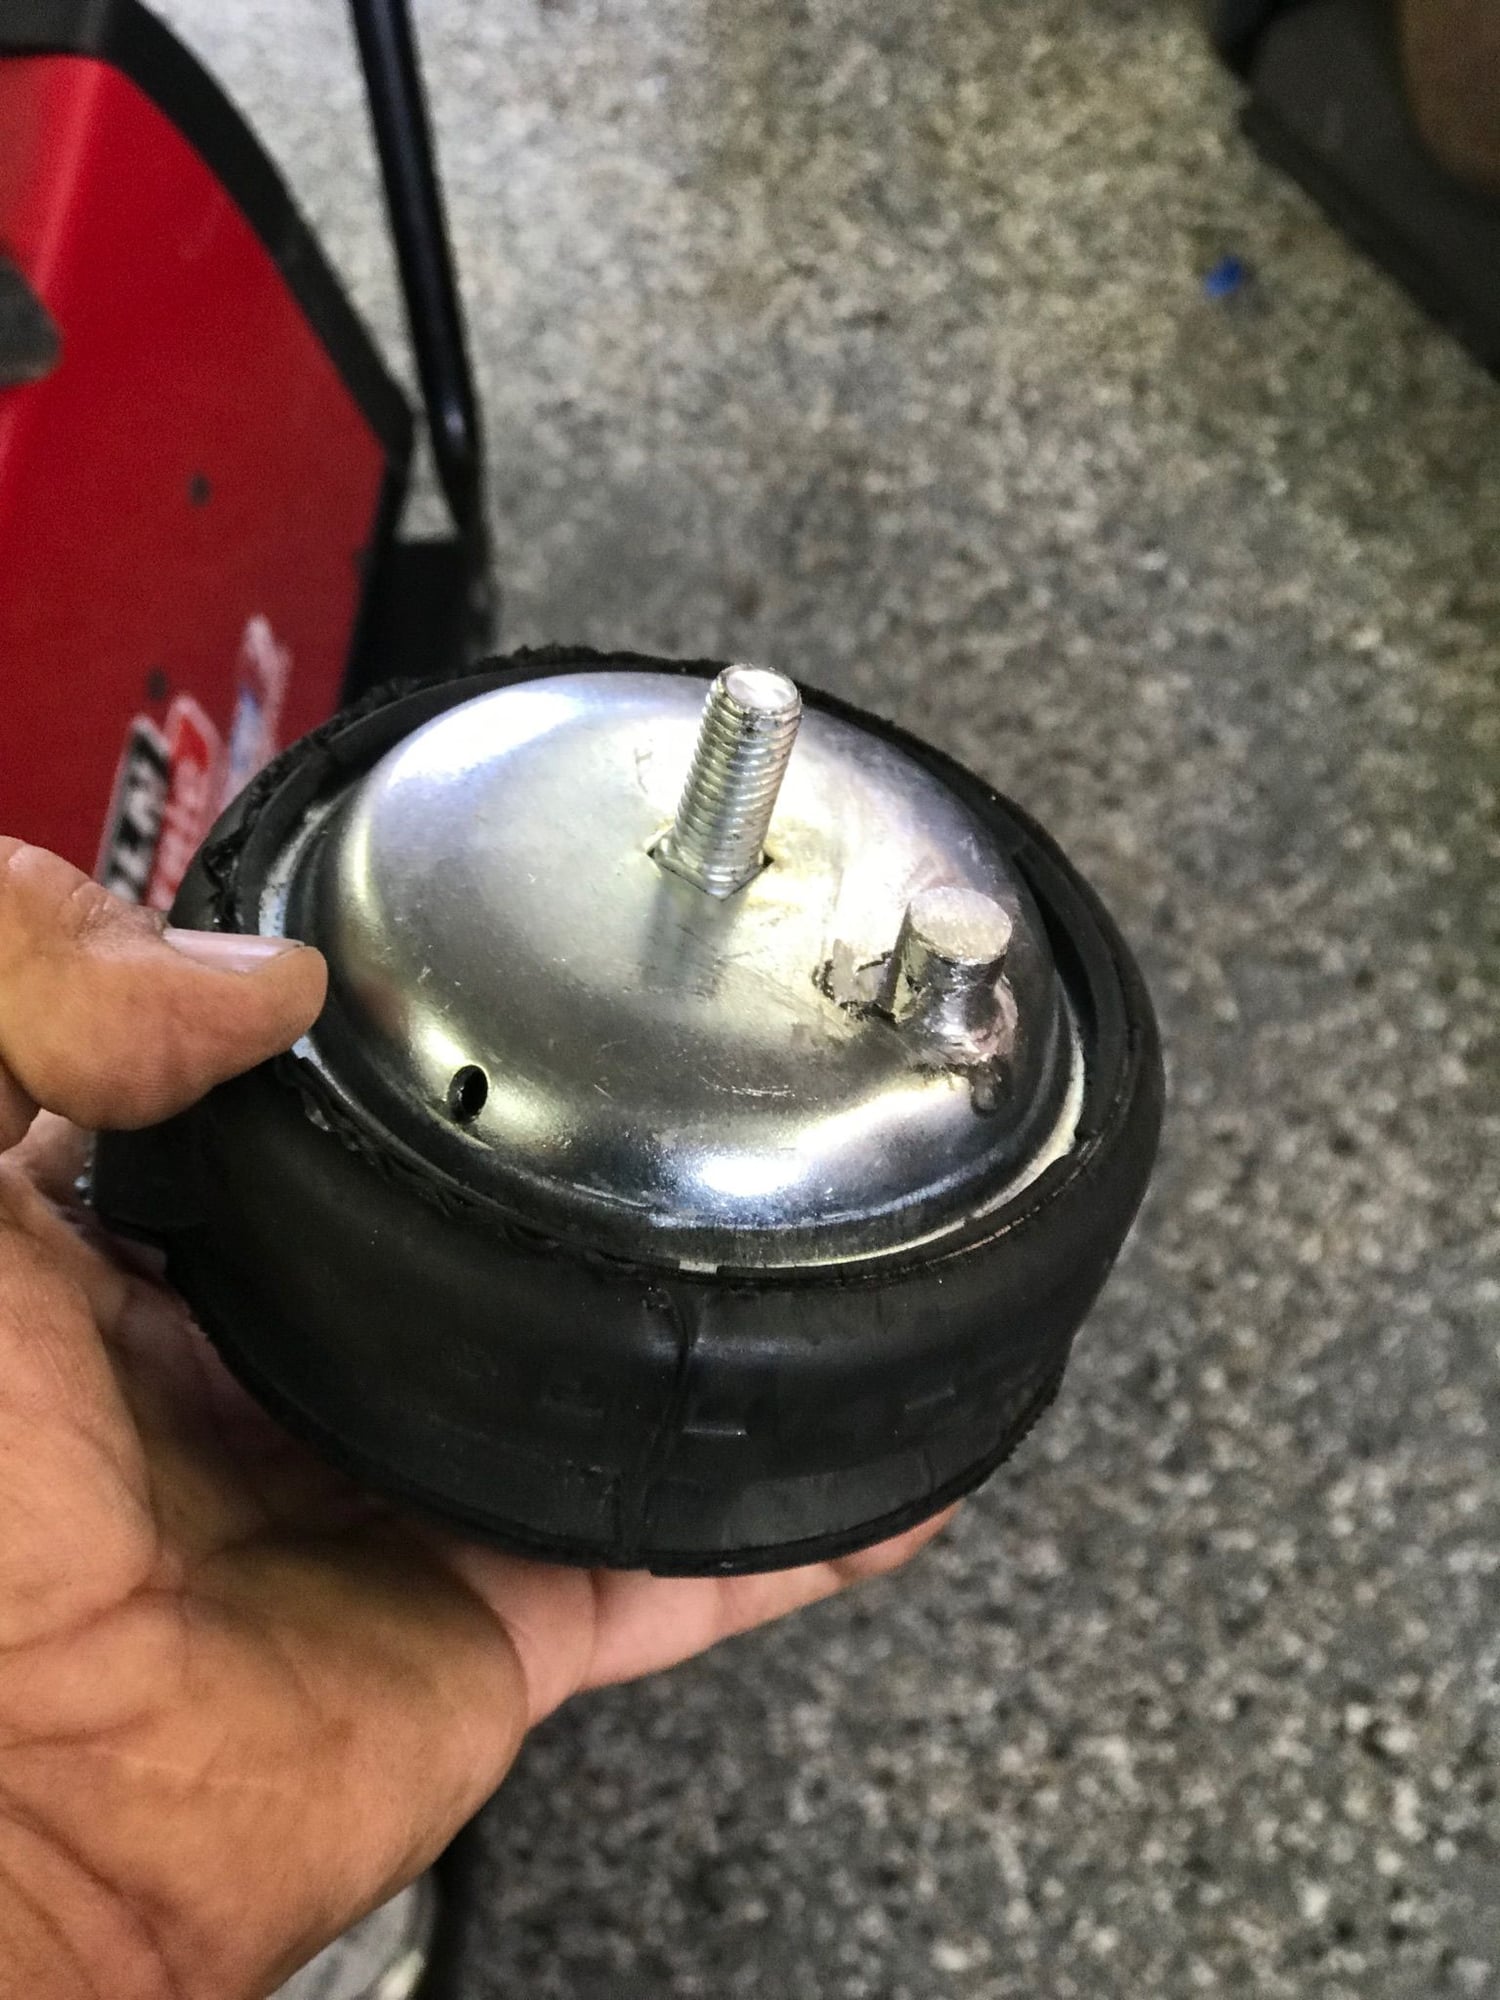
Changing out the factory MM with some Reinz (made in China, unfortunately...hope they last) MM. They weren’t fitting as I would like so I did some modifications for their installation.
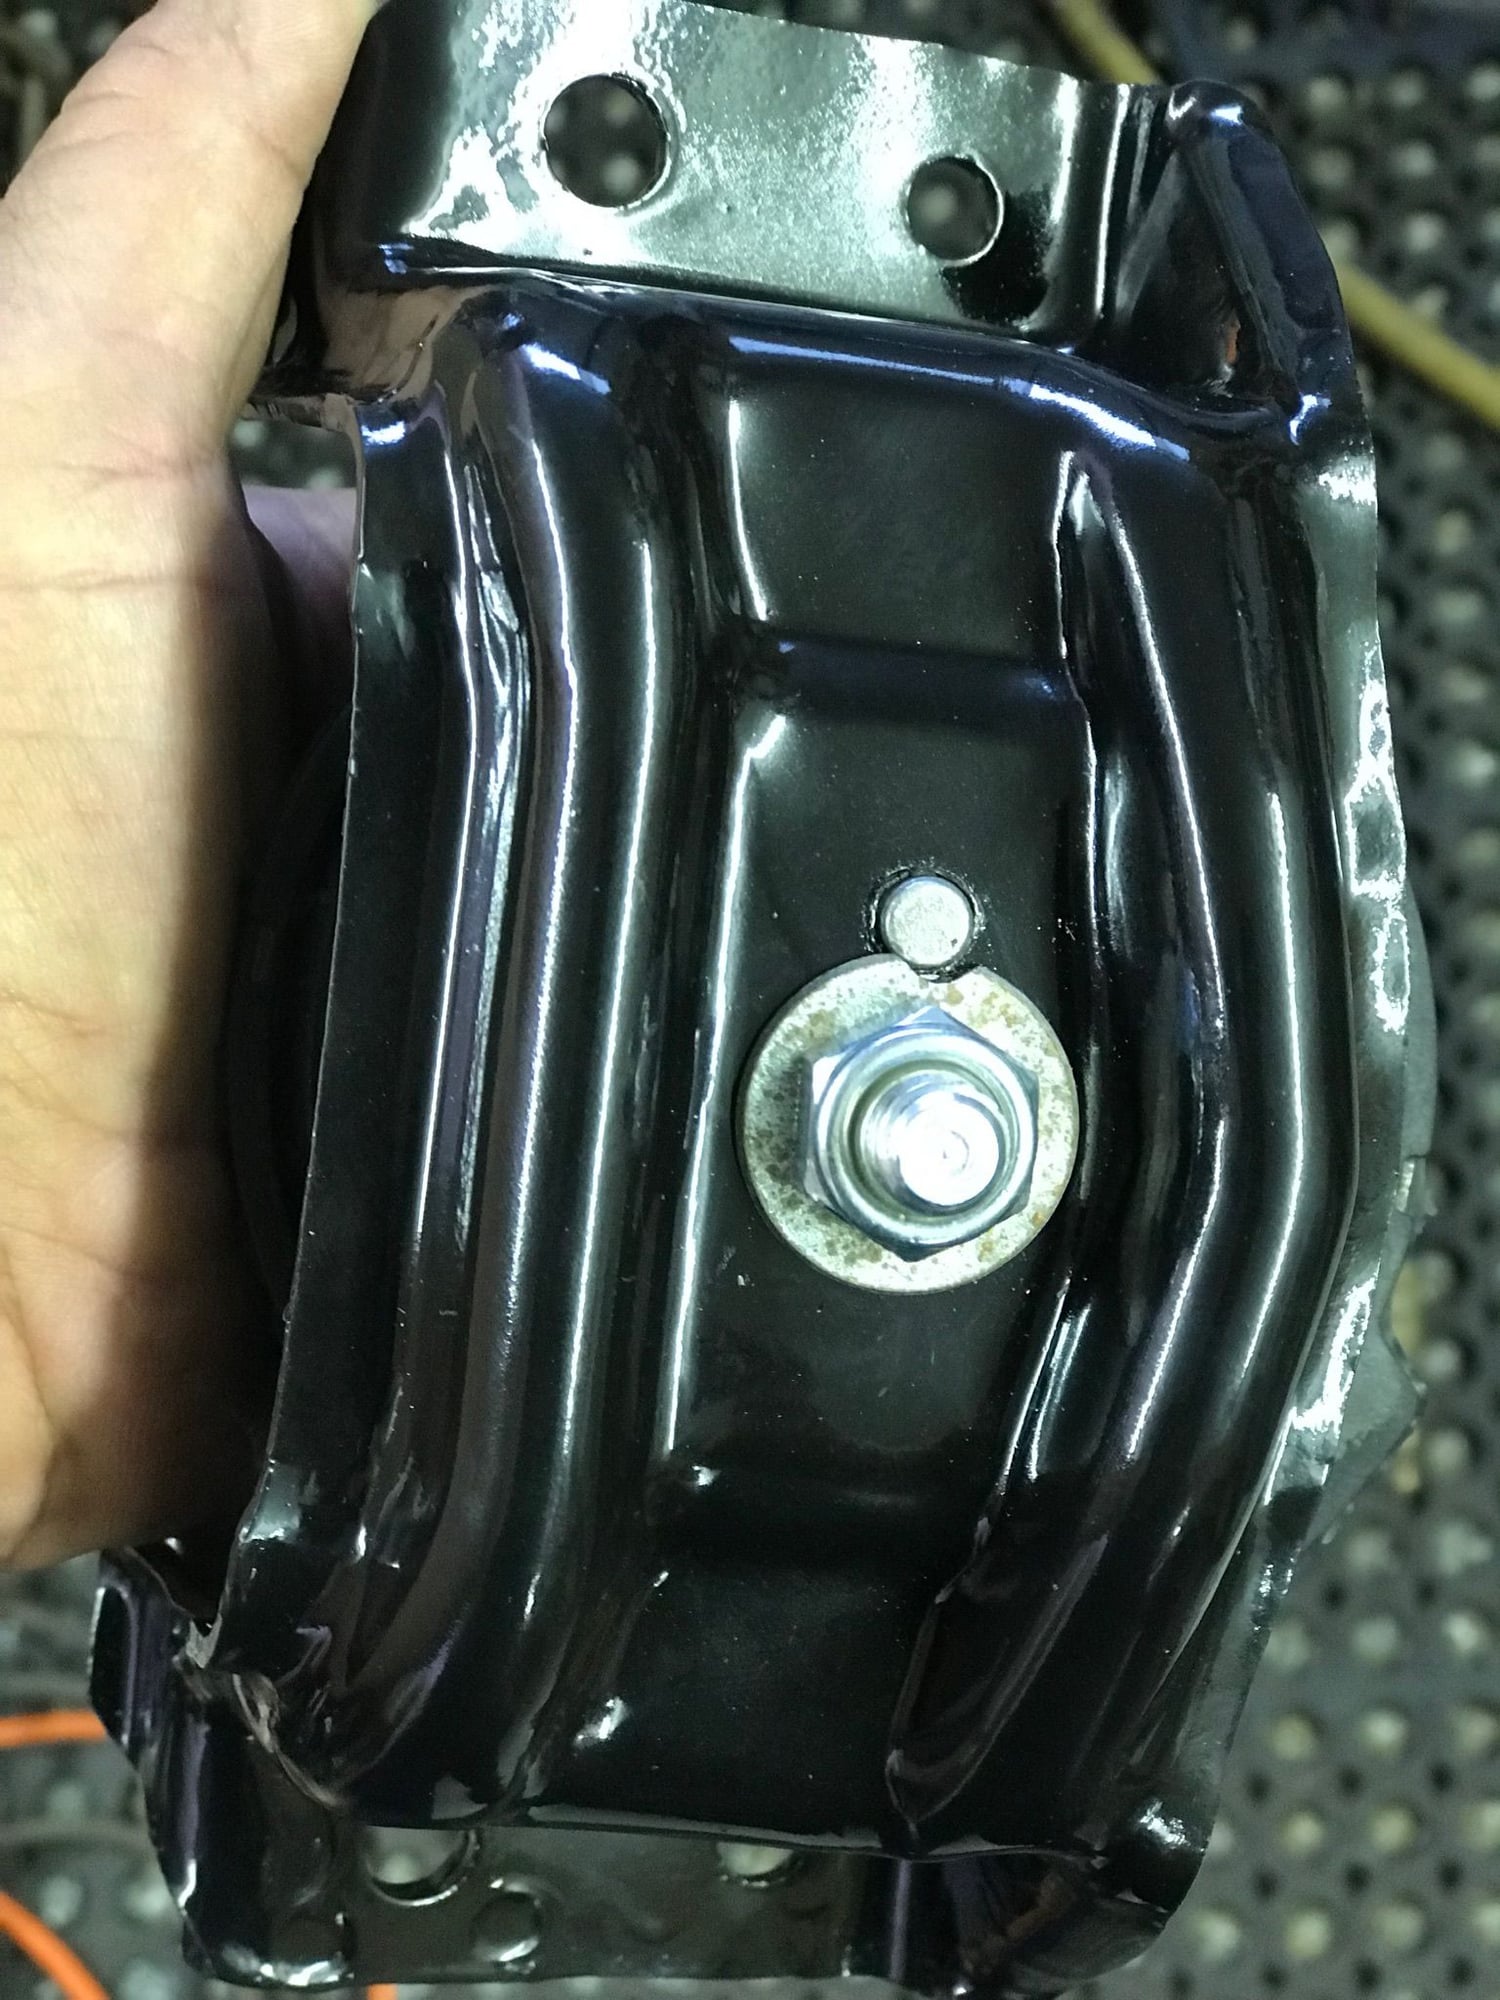
Unlike the factory MM, they didn’t have the rectangular protutions at the base of the studs to fit into the corresponding engine bracket rectangular holes and had a locating pin as well.
I modified a flat washer, that fit tight on the stud, by grinding it on two sides to fill the rectangular hole of the engine bracket. Next I drilled a 9/32” hole 5/8” away from the center of the rectangular bracket hole to fit the locating pin of the MM unto the engine bracket.
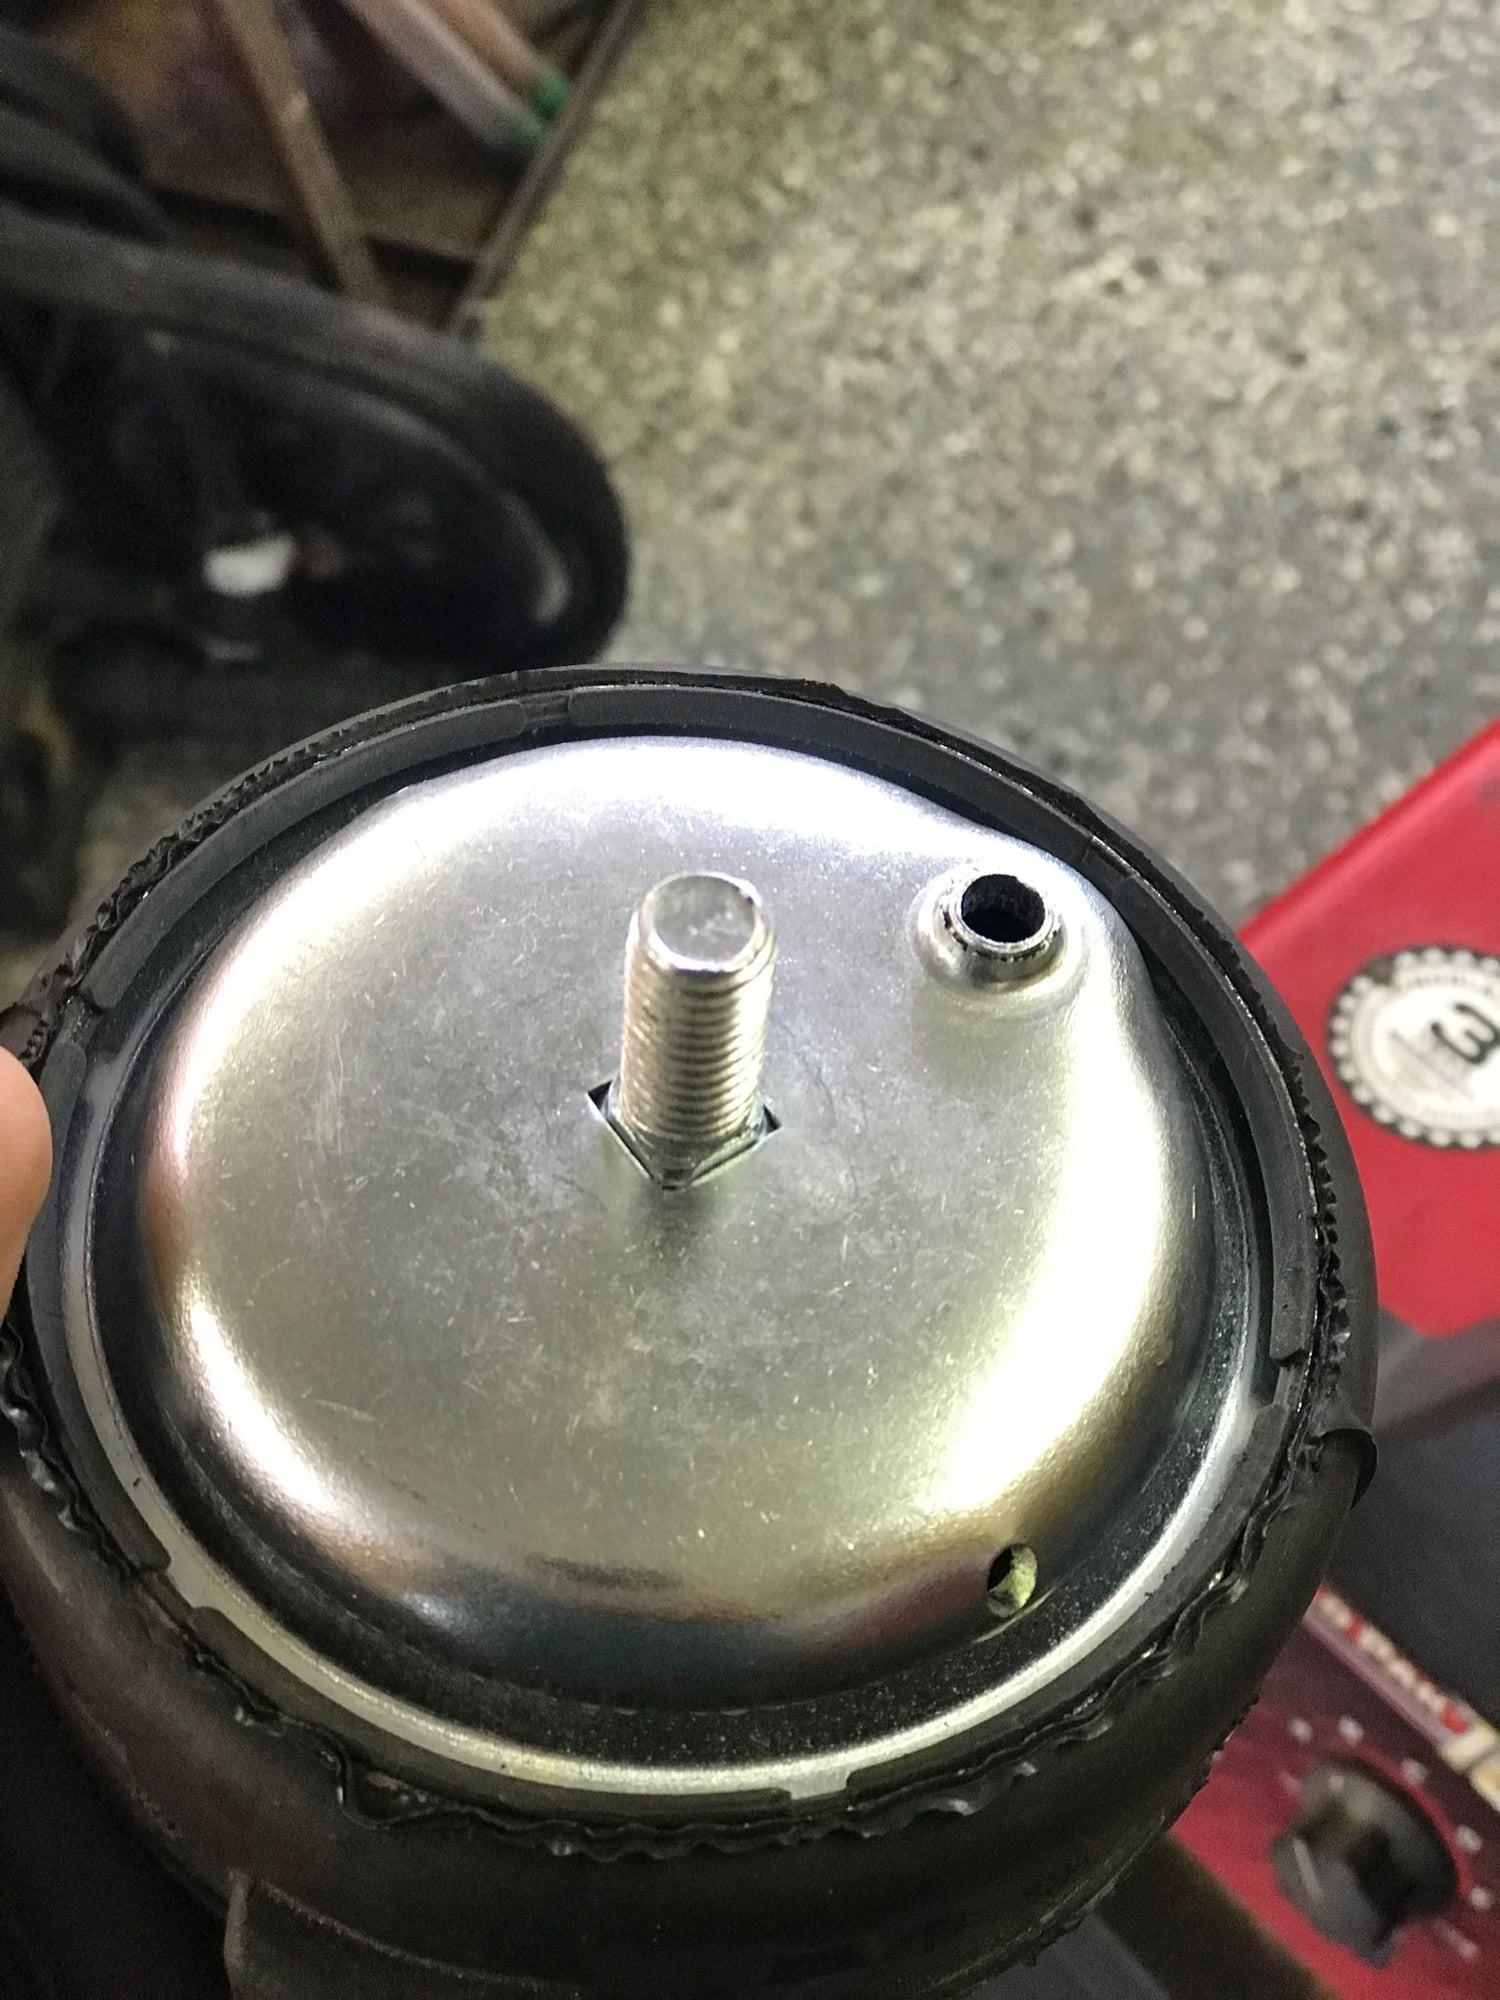
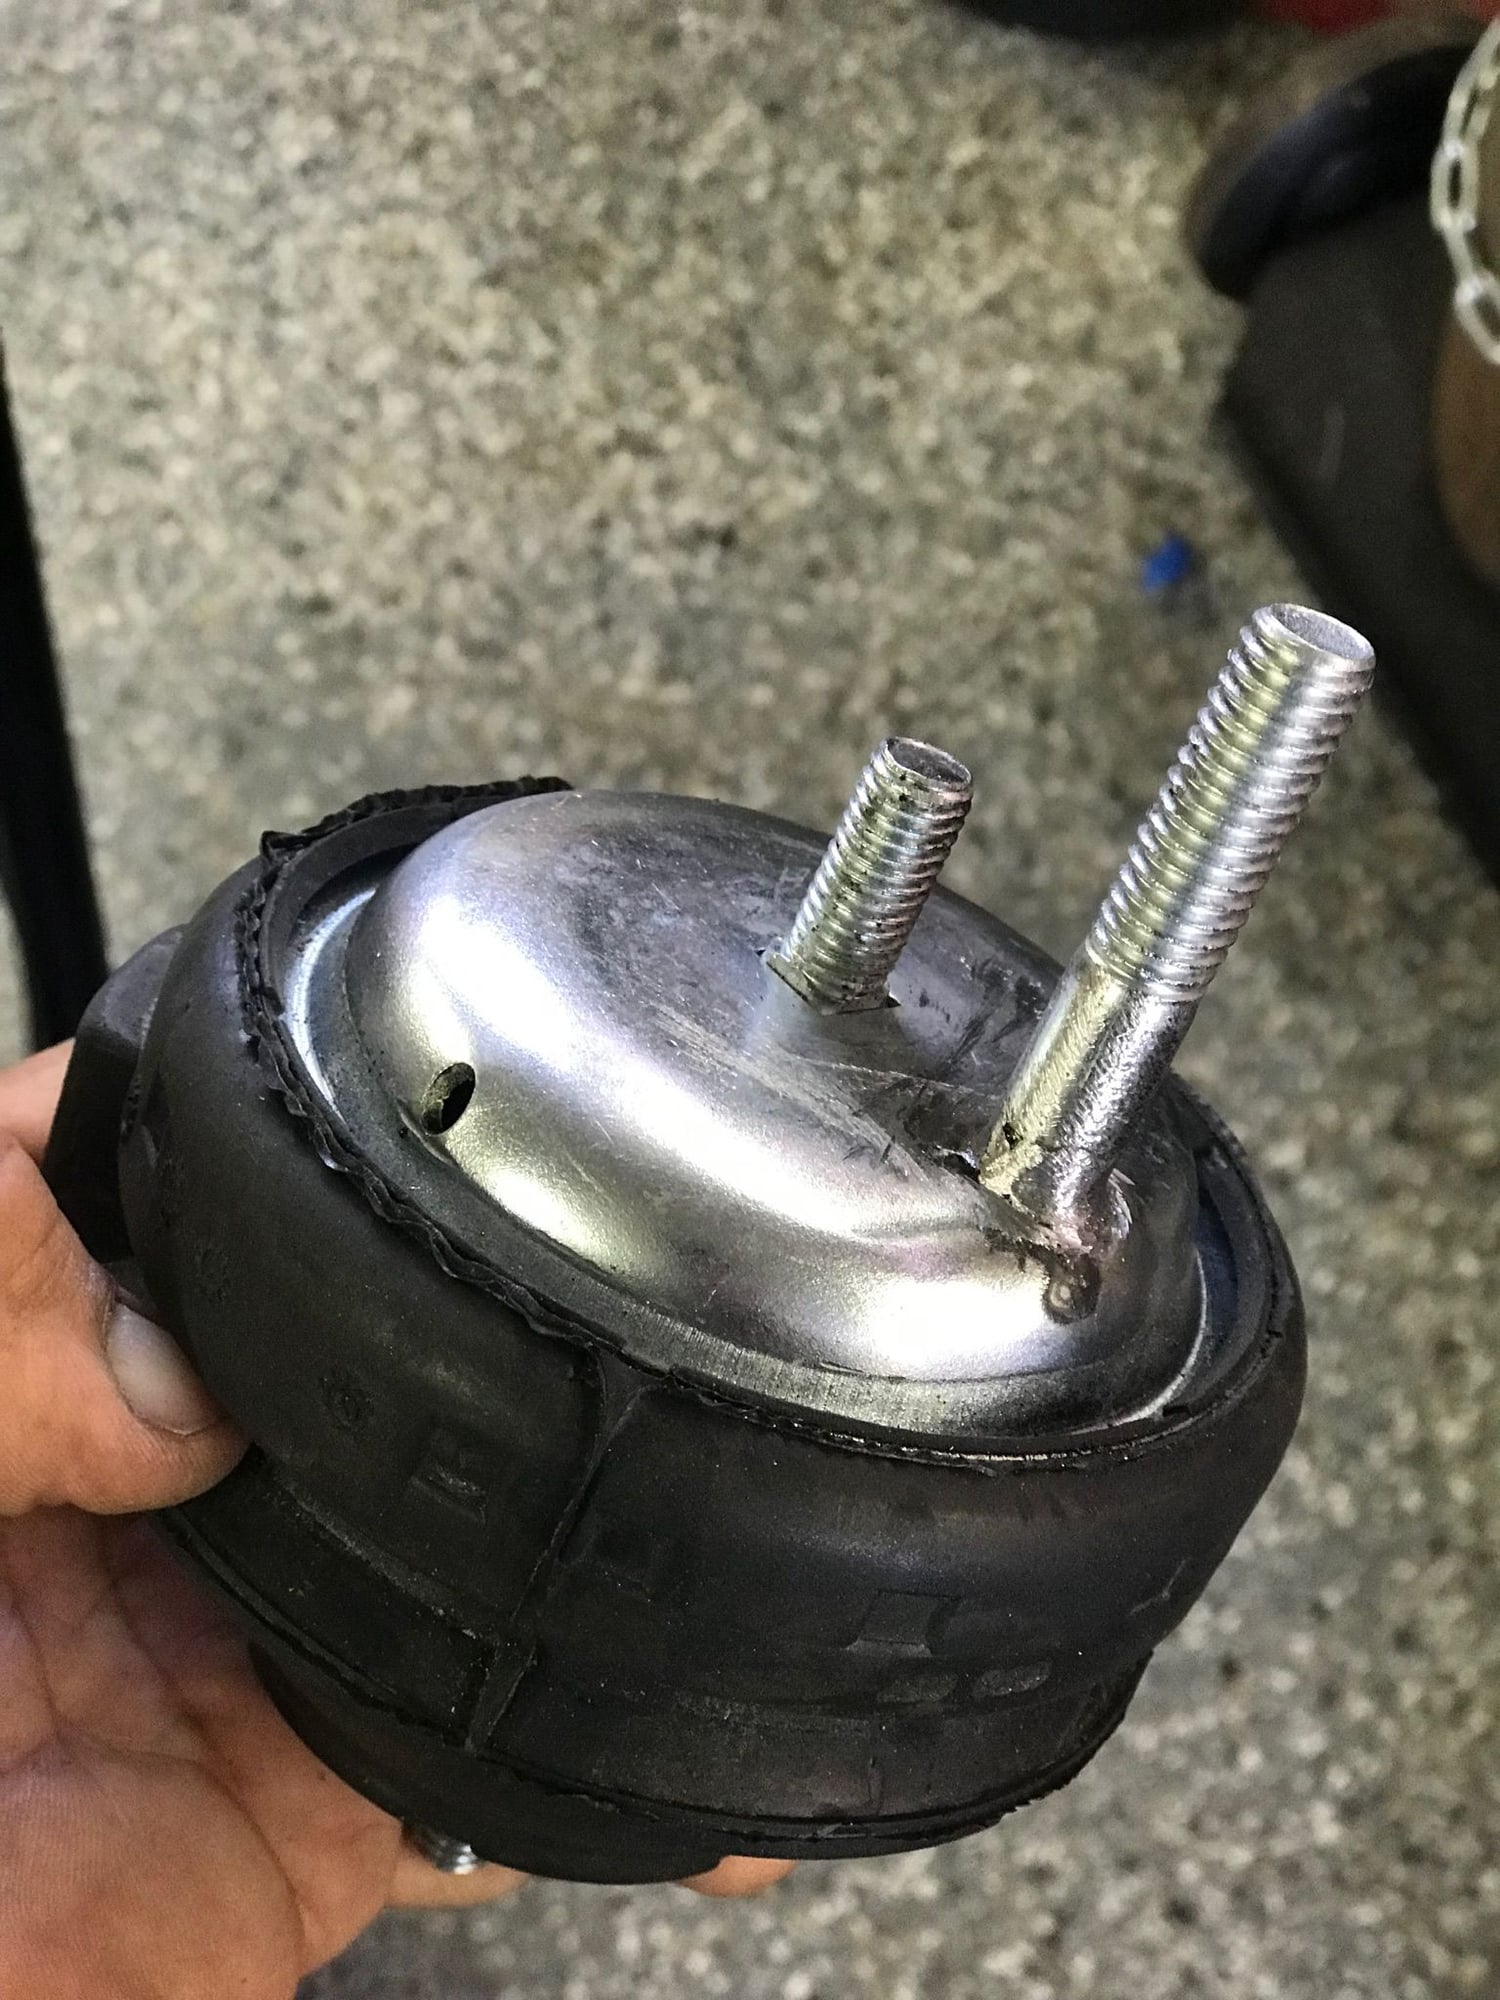
On the bottom end, the Reinz MMs didn’t have the locating pins, just a hole aproximately where the pins are on the factory mounts. I’ve seen some posts where people install the after market MM without the pins but thought it would be useful to have the pins to keep the locking bottom caps in place during installation. So I welded a bolt with the aproximate thickness of the factory pins over the Reinz MM and cut it down to size.
Those are the Volvo mounts being sold under the original Porsche mount part number.
They should need no modification apart from removal of one small stud.
I do not like Rein because they are yet to be proven good. New on the market with this mount.
We sell the Volvo mount for $56 already modified and complete with hardware.
__________________
Does it have the "Do It Yourself" manual transmission, or the superior "Fully Equipped by Porsche" Automatic Transmission? George Layton March 2014
928 Owners are ".....a secret sect of quietly assured Porsche pragmatists who in near anonymity appreciate the prodigious, easy going prowess of the 928."
I’m your customer from Florida that just bought the silicone gasket and oil lever wire boot!
Your right, I could’ve chopped the pin off but the studs were thinner than the factory studs (17 mm nuts instead of the 19 mm) and didn’t want them to wander in the holes, especially the rectangular one on top.
It was quite easy to make the filler for the rectangular hole.
Use a regular round washer that is the thickness of the motor bracket and fits the stud hole tight, and then just grab it with some vise grip plier and take it to the bench grinder to make it square on two sides. Centers the stud in the hole and fills in the thickness of the rectangle just fine.
Tom
I was just hoping someone could make them up in batches; plus I already installed my new mounts, so I am finished with this project. ( for a while, I hope)
Reinz used to be good in the 944 crowd. They made the Porsche 944 mounts for a while ( you could see where the Porsche P was scratched off). Too bad they have someone else make them now.
I would just go with Roger's price, no worries about fitment, and supporting the 928 community to boot!
Don't want to derail the OP's thread, so I waited until more folks had a chance to look and reply.
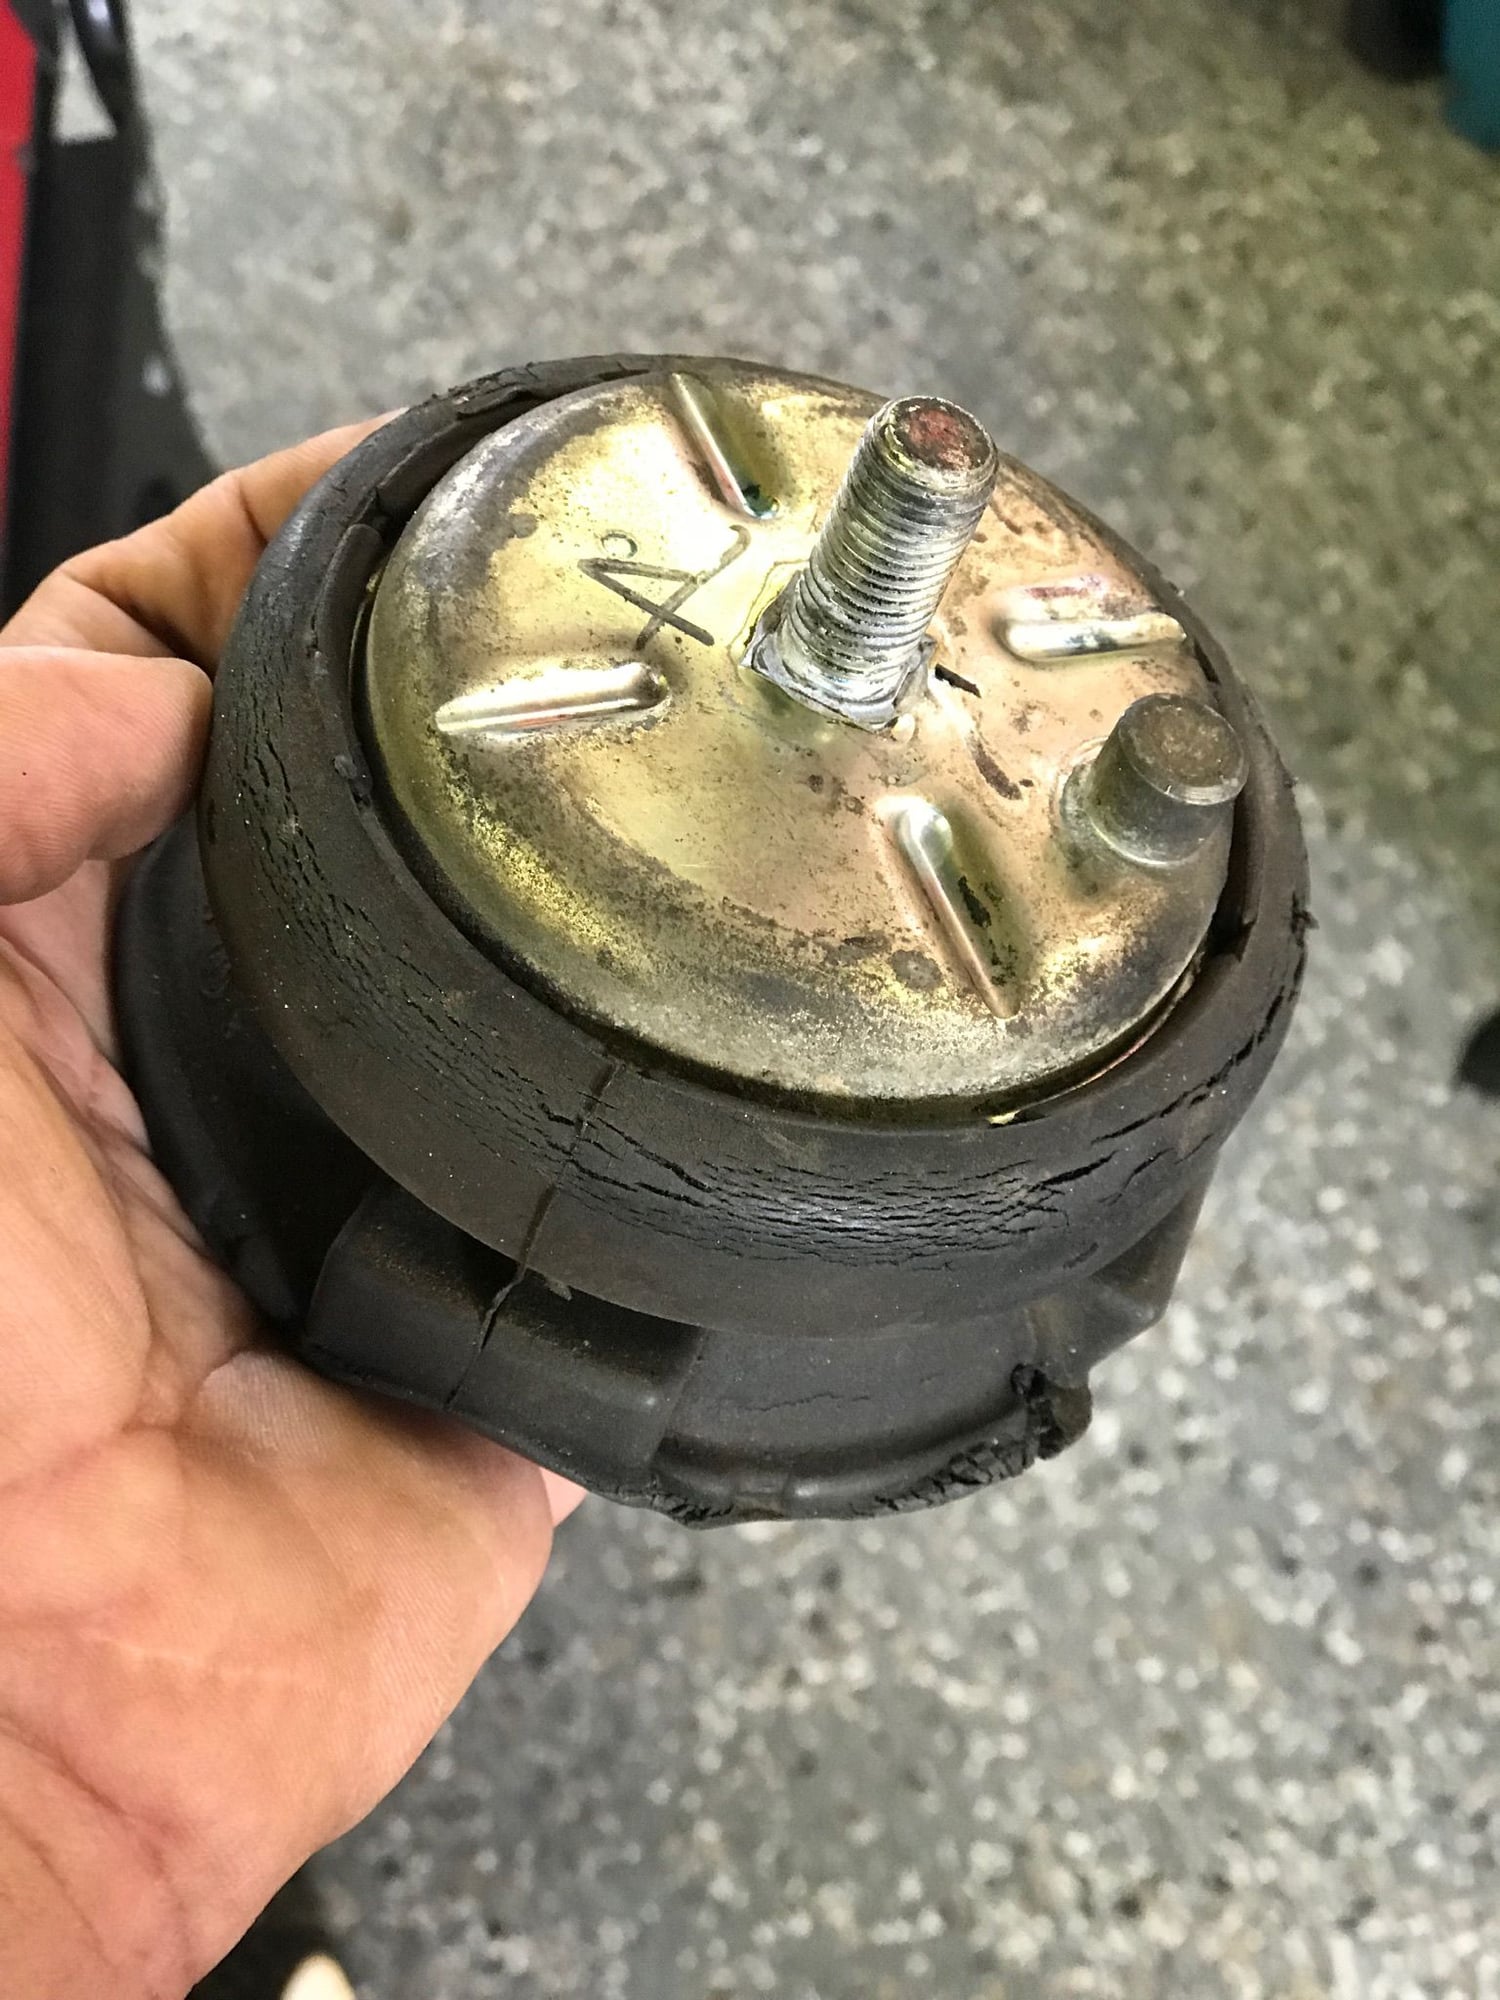
Way back in 2017, I swapped in new motor mounts from 928 International, part of an oil sump gasket renewal project. Genuine Porsche mounts came out. As the OP shares, the replacements have the pin on top to index it for location and rotation, where the Porsche mounts use a rectangular section of the mount itself to do the job. Similar to the OP's solution, I drilled each bracket to accept the pin. Rather than sectioning the washer as the OP shows, I chose to shorten the pin slightly with a flat file so it doesn't extend proud of the metal bracket. The attached picture shows the original mount on the left, and the bracket with the new hole added. Right shows the replacement mount with the pin, and below that the replacement mount in the drilled bracket. I used a standard washer in the picture so you can see the hole, but replaced that with a thicker grade-8 washer that happens to be yellow cad plated. It completely hides the top of the pin, and probably adds a few horsepower just because of the correct color. I have not verifies the horsepower. The washer does a good job of clamping, and sort of centers the top stud in the bracket with the help of the pin, so no hand-made washer inserts were required.
I think Roger removes the pin by default. I'm also pretty sure you could get him to leave them in place on request. The mounts from 928 International came with the pins intact, so I took advantage of them as the OP did.
That’s exactly what I did, except I went a step further and filled the rectangular hole with the modified flat washer.
And you can also see in the picture with the washer and nut on, I made a small cut out for the washer to fit around the pin...I didn’t grind down the pin - made a 9/32” hole and let it stick out.
Just wanted to share my mods since they only took another 10-15 minutes and locked in the MMs as best possible.
dr. bob and tom
earlier I posted about wanting a "centering" washer available to fit in the rectangle of the upper mount bracket, and while I appreciate what you guys have done, having just completed the job,
now I don't think that it is critical to have that stud "perfectly" centered in the bracket. certainly, you do not want it at either extreme in the slot, but I think you can eye ball it and be near spot on.
on a bench, I attached both original motor mounts to the crossmember, without removing the upper brackets. noting the orientation, I removed one upper bracket at a time.
next I bolted the new MM to the cross, making sure the lower pin (which is smaller on the volvo mount) was centered in the hole. this gave me the ability to move the mount quite a bit
once I got everything back in place. I eyeballed the upper bracket and tightened it up. I compared the newly assembled one with the other, and repeated the process.
well after watching some of the different ways to solve the centering issue some of these ideas are good .
What i do is take a yellow pen and draw cross hairs through the center of the hat mount opening so that the lines will go past the washer.
center the stud to the lines then tighten down the nut after verifying the proper orientation of the lower pin.
If you got the mounts with the upper pin still installed its pretty easy to cut it off flush.
I might try to make a few washer spacers for the next MM job I do .
I dont think I will be drilling more holes into the hat to fit a non factory part though


 03-20-2019, 07:19 AM


 George Layton March 2014

