When you click on links to various merchants on this site and make a purchase, this can result in this site earning a commission. Affiliate programs and affiliations include, but are not limited to, the eBay Partner Network.
83
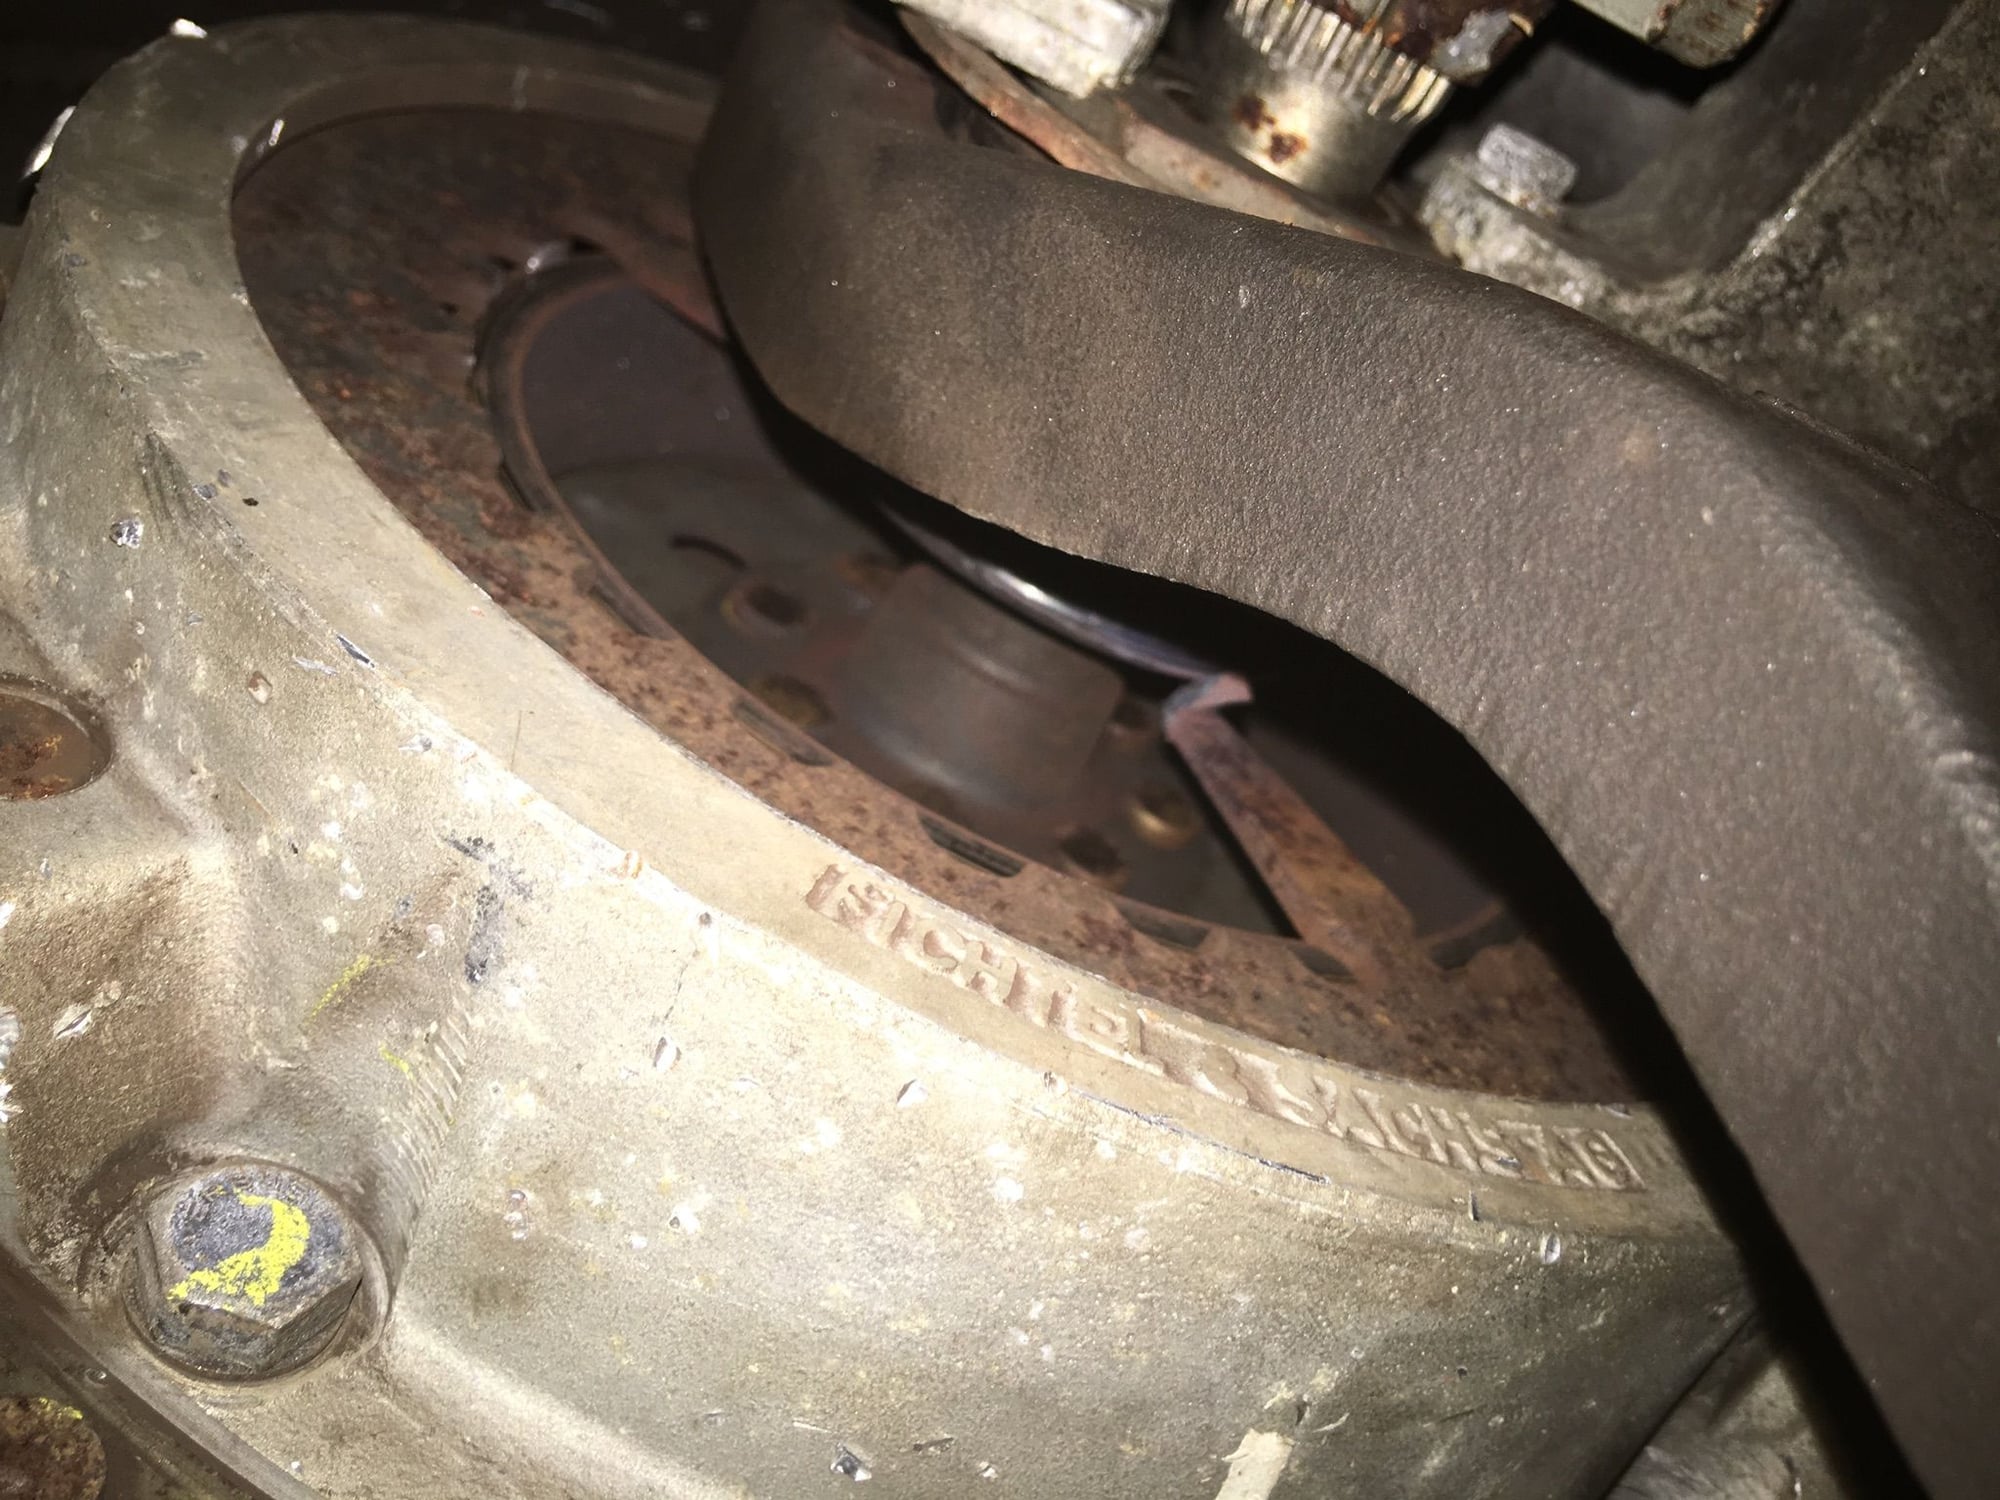
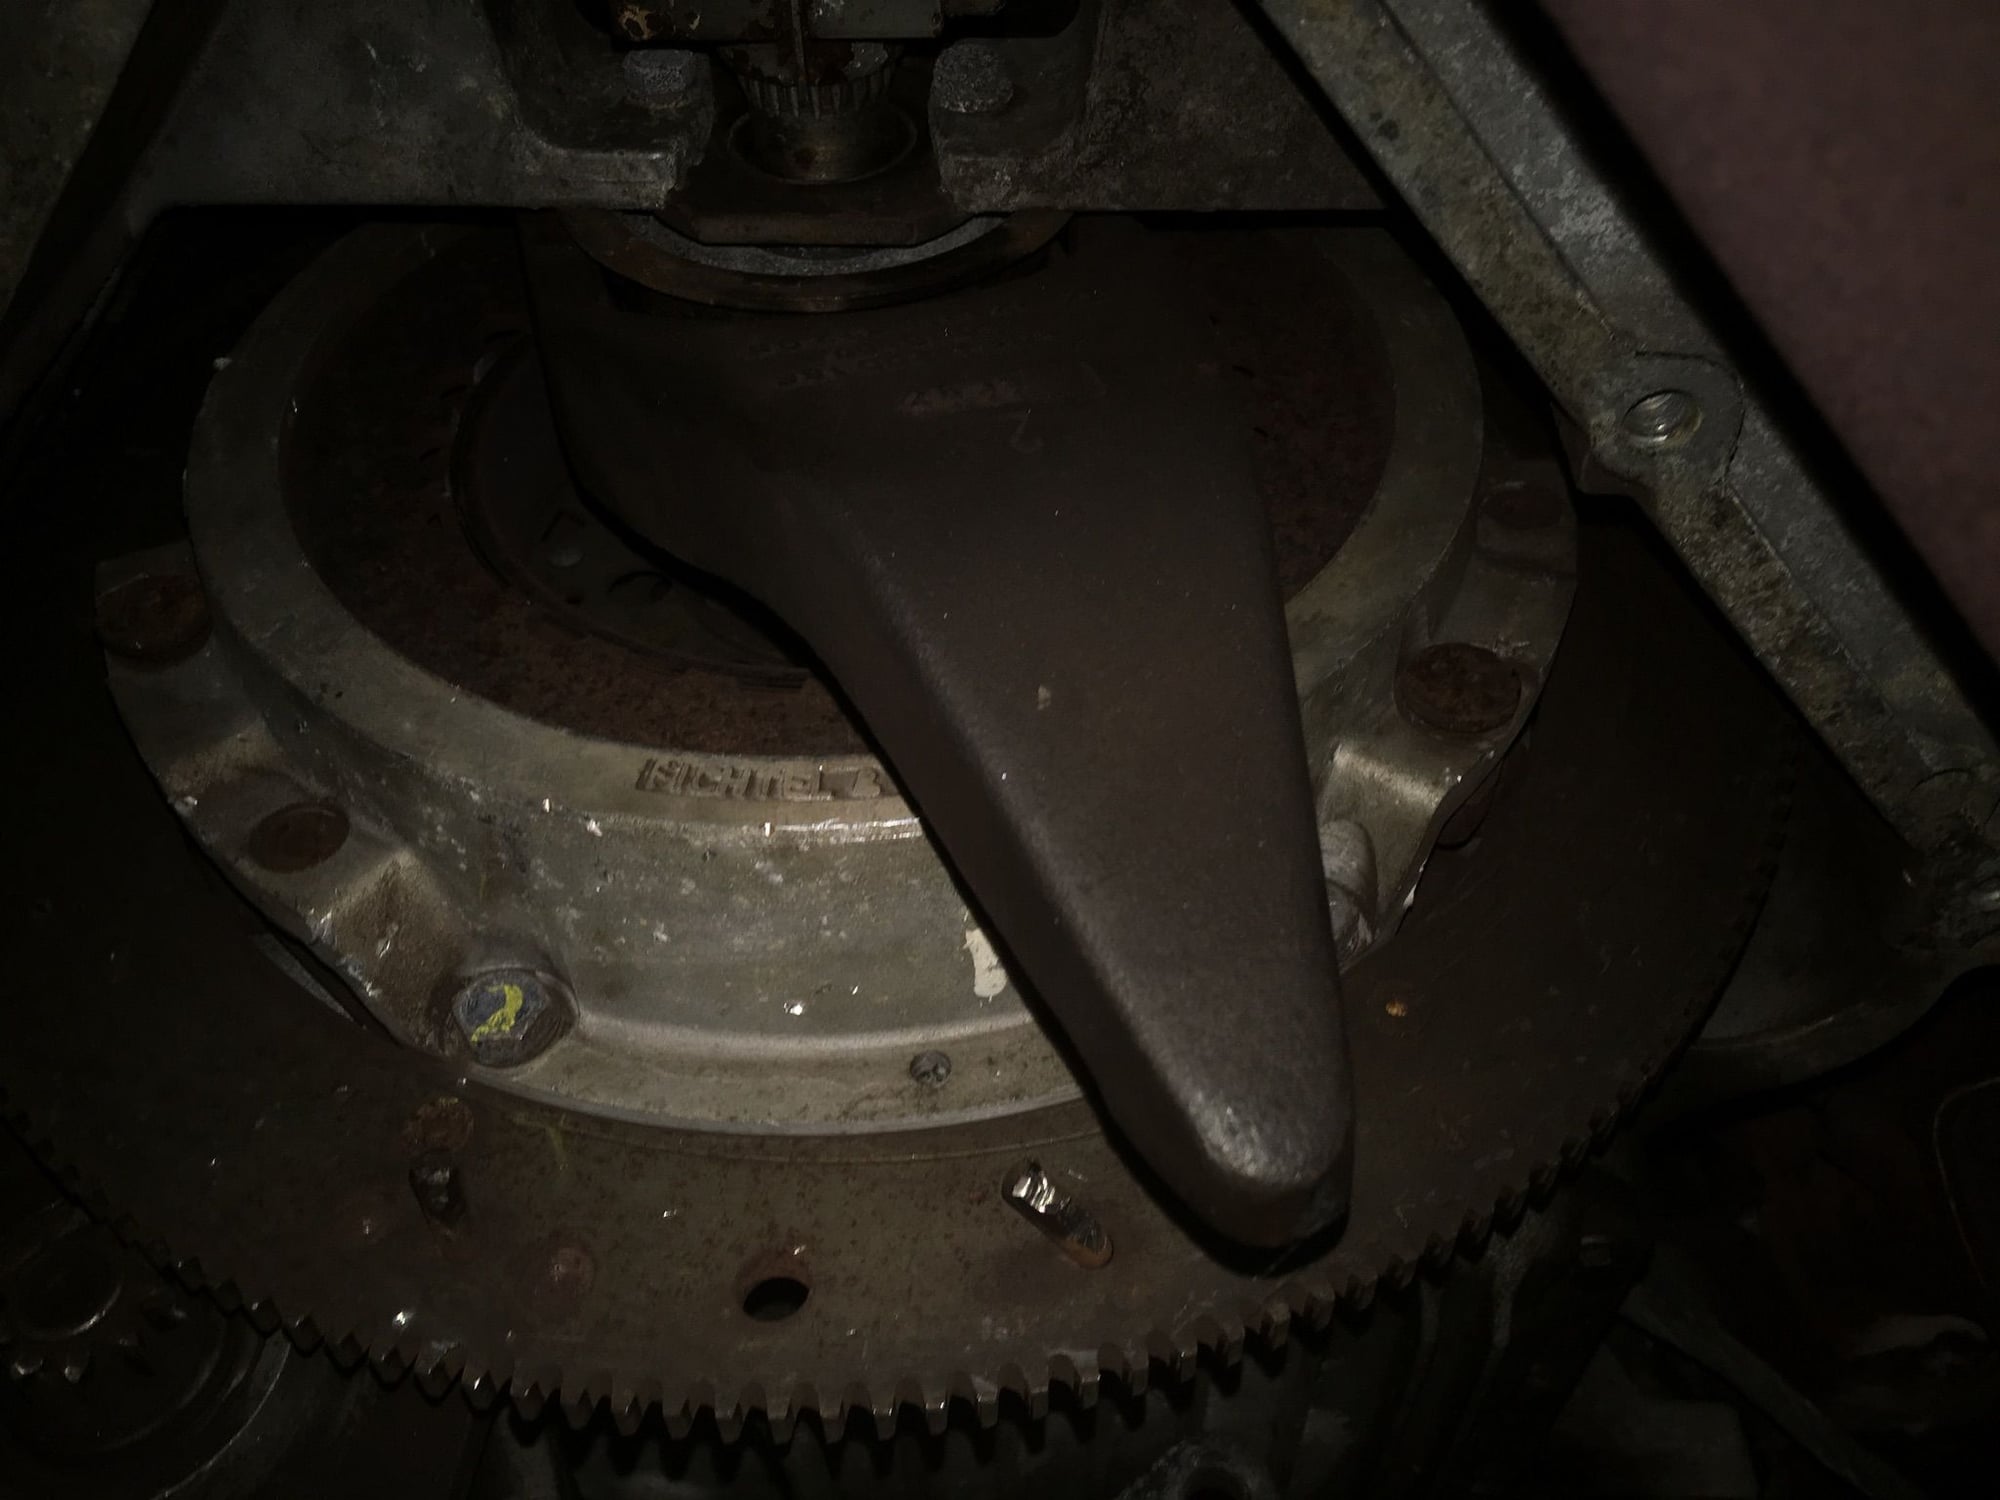
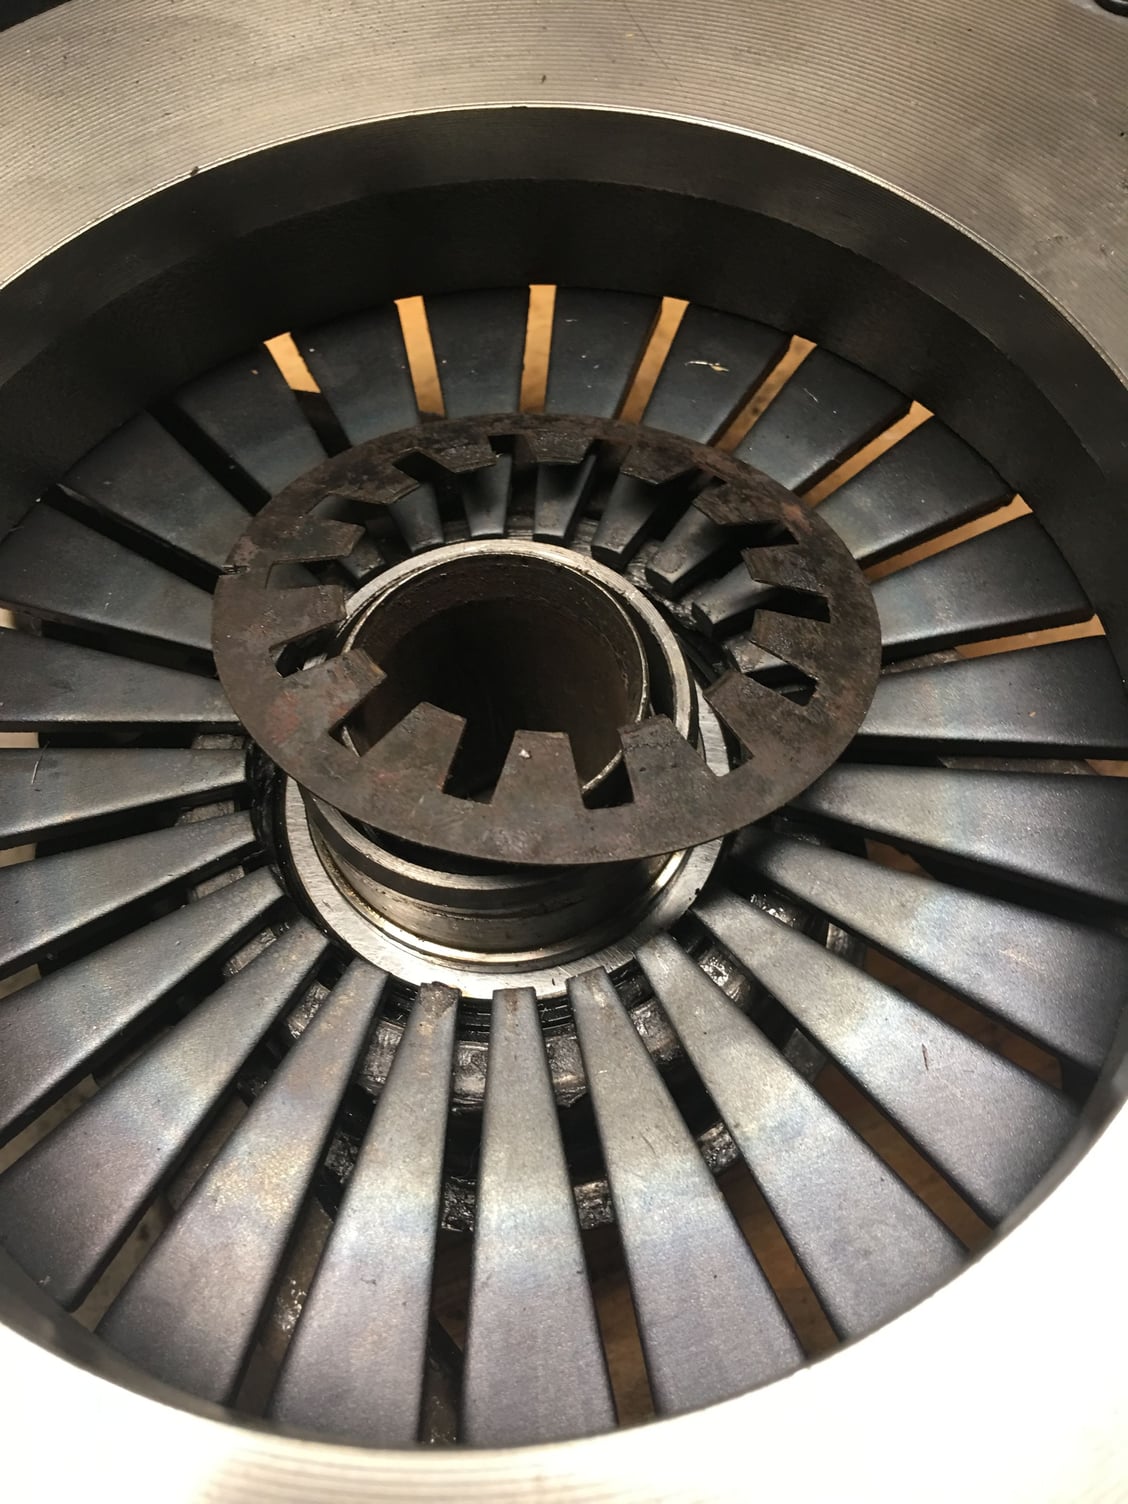
Found only one finger in place and 4 in the bottom of the bell housing the rest are probably on the road.
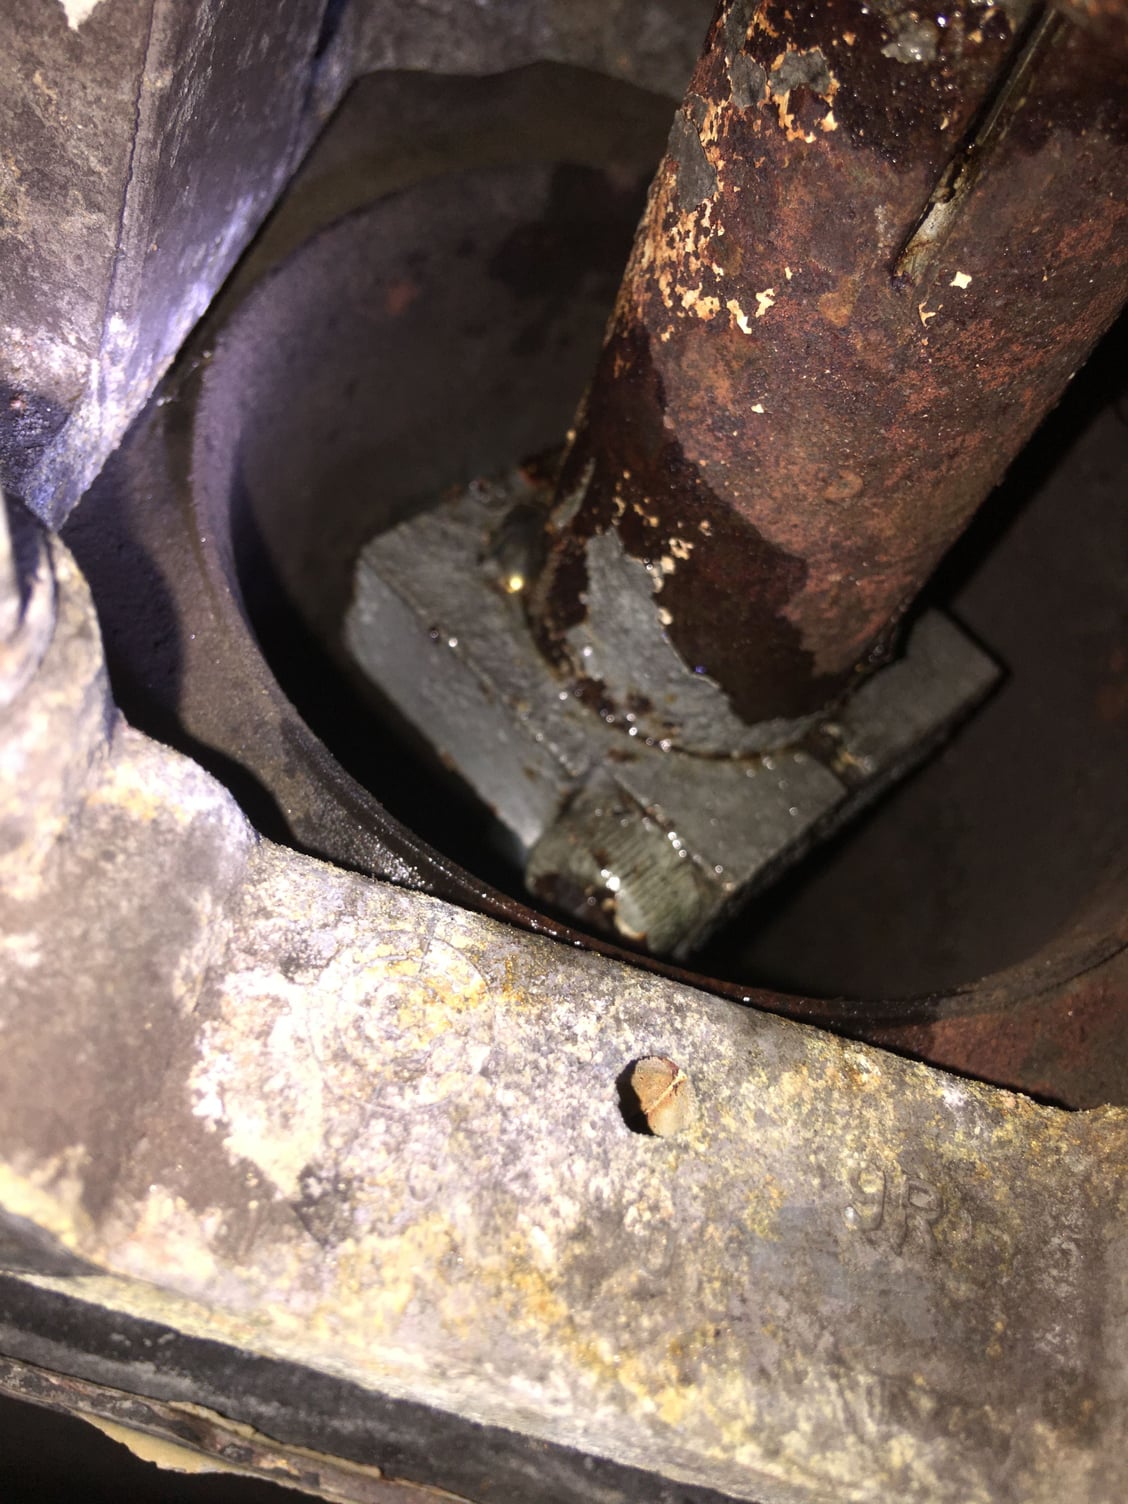
When taking it apart I found someone spot welded the rear small shaft clamp and now I can�t move it back enough to drop the clutch. I�m going to try removing the rear clamp unless someone else comes up with a workable solution.
You don't see that everyday! I don't think that weld will cause the problem you think it will. Don't let that slow you down!!
Dave
__________________
David Roberts
2010 Jaguar XKR Coupe - 510HP Stock - Liquid Silver Metallic
928 Owners Club Co-Founder
Rennlist 928 Forum Main Sponsor www.928gt.com
Your pictures show the clamp screws still in place-- they both need to loosened and removed before that coupling sleeve is going anywhere. The front one fits a groove in the short-shaft and must be removed for sure, the rear one will try to get itself into trouble so remove it also. And both need replacement, available from your favorite parts vendor.
As other have said, that is a factory spot weld. Given the condition of your clamp, your drive shaft and clamp might be rusted together which will make moving it back very difficult. Suggest using a generous amount of liquid wrench or other oil penetrant in the clamp and drive shaft union, letting it soak and then pry it back carefully with a pry bar. Be careful of the aluminum bell housing, use a piece of wood to pry against. Leave the rear clamped, since you could move the drive shaft backward through the bearings if you don't while trying to pry the front clamp rearward.
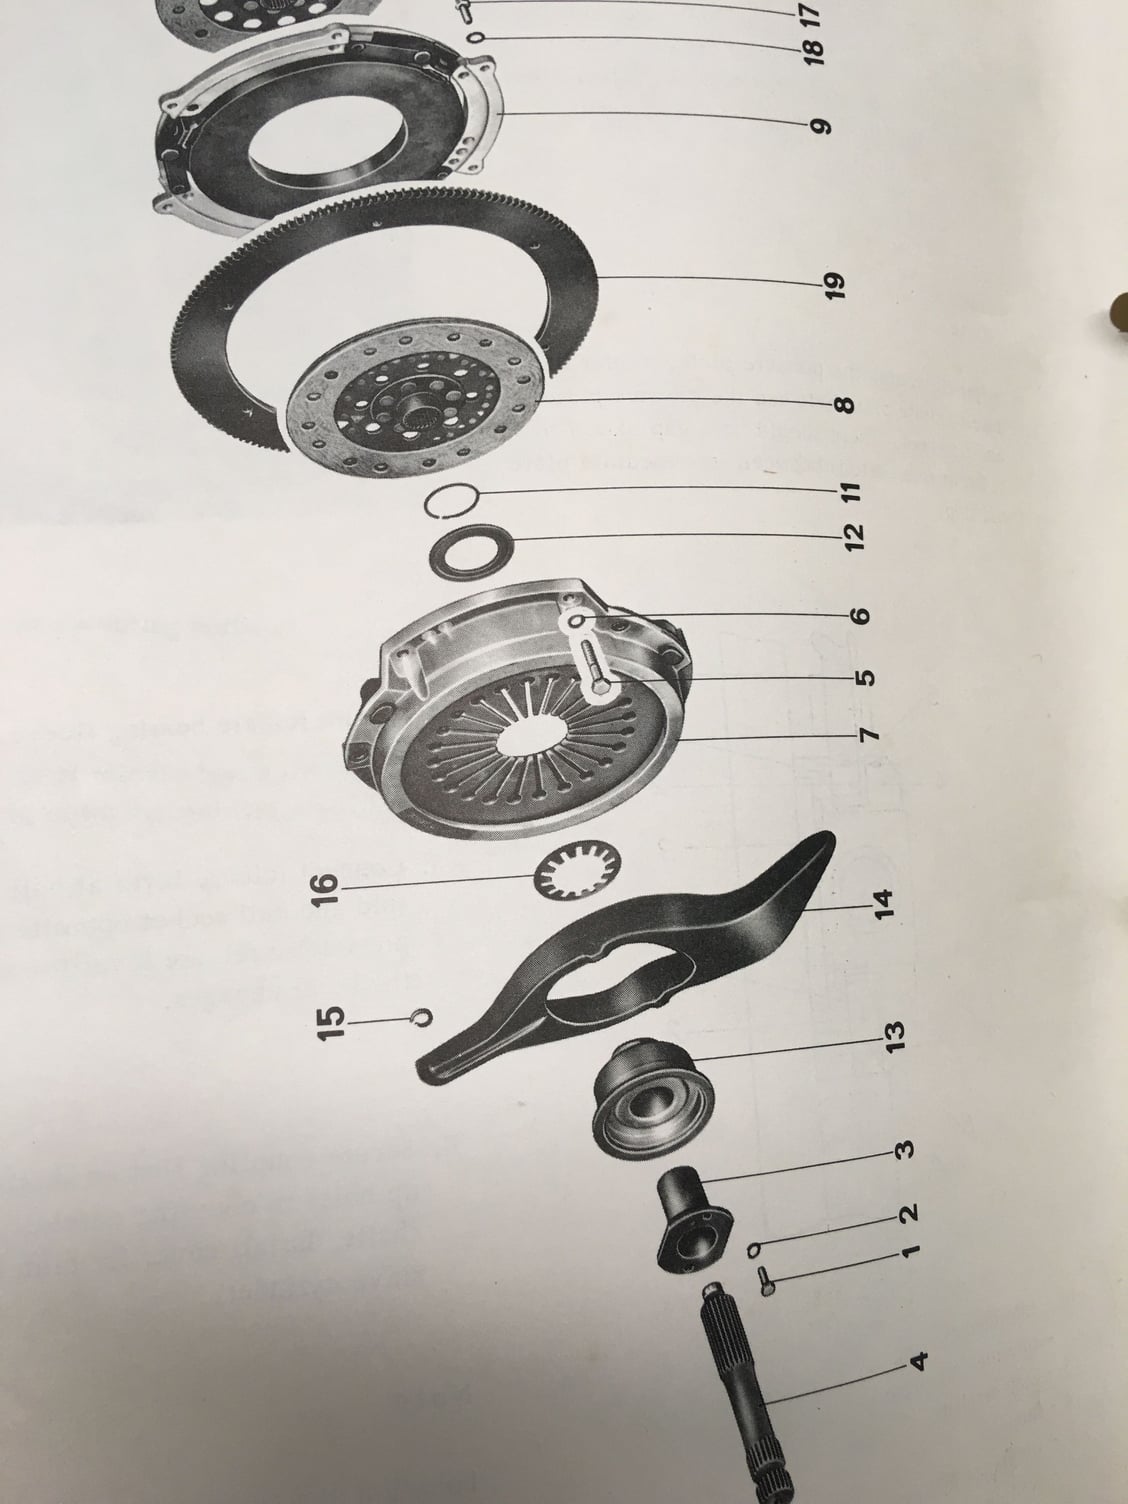
You've got it backwards. It's a pull-clutch, and the heavy washer #12 is what exerts the force against the PP diaphragm-spring fingers. So the spring-washer (15) goes on the bearing side-- below the PP diaphragm spring in your photos-- with the teeth oriented towards the bearing. On the top side (as shown in your photos) the heavy washer (12) goes on with the rounded side against the PP fingers. Then the snap ring (11) to hold it all together. As the clutch actuates (disengages) the release bearing pulls the center of the PP spring (downwards as pictured in your photos) via washer 12 and snap-ring 11.
Don't forget a light coating of hi-temp Optimoly grease on the splines, and also on the PP spring fingers where they contact washer (12) and the edge of the spring-washer (15).
Talos Takes Your 991 Porsche 911 GT3 to the Next Level for a Cool $1.13 Million
Slideshow: Talos Vehicles has transformed the Porsche 911 GT3 RS into a carbon-bodied, race-inspired machine that costs well over $1 million before the donor car is even included.
9 Vehicles Porsche Helped Engineer that Aren't Porsches
Slideshow: Long before engineering consulting became trendy, Porsche was quietly helping other automakers build everything from supercars to economy hatchbacks.
9 Features and Characteristics That Only Porsche People Understand
Slideshow: Some brands build cars. Porsche builds traditions, obsessions, and a few habits that stopped making sense decades ago but somehow became part of the charm.
This Builder Is Turning Heads With Its Slantnose 911 Creation
Slideshow: A small Polish tuner has reimagined the Porsche 911 Slantnose for the modern era, blending 1980s nostalgia with widebody tuning culture and serious performance upgrades.
Porsche 911 GT3 Artisan Edition Pays Homage to Japanese Culture
Slideshow: Porsche has created a Japan-only 911 GT3 Artisan Edition that blends track-ready hardware with design cues inspired by traditional Japanese craftsmanship.
Porsche Reveals Coupe Variant of the Electric Cayenne With a Fresh Look
Slideshow: Porsche's latest electric Cayenne Coupe blends dramatic styling with supercar acceleration, turning the brand's midsize SUV into a 1,139-horsepower flagship.