When you click on links to various merchants on this site and make a purchase, this can result in this site earning a commission. Affiliate programs and affiliations include, but are not limited to, the eBay Partner Network.
Hoping someone here has BTDT. I replaced the original rubber bits.
90 and up have the special wind noise dampening. Normally order of installation does not matter. But, the rubber insulation runs under the upper trim.
So, in order to properly install the trim what is the correct order of installation? Do you glue the rubber to the vertical molding (silicon)? Do you slide the rubber into place sans the vertical metal trim and then slide it into the groove in the rubber?
The side rubber pieces sit on the car, and the trim goes on over them..some soapy water may help them locate and go on easier.
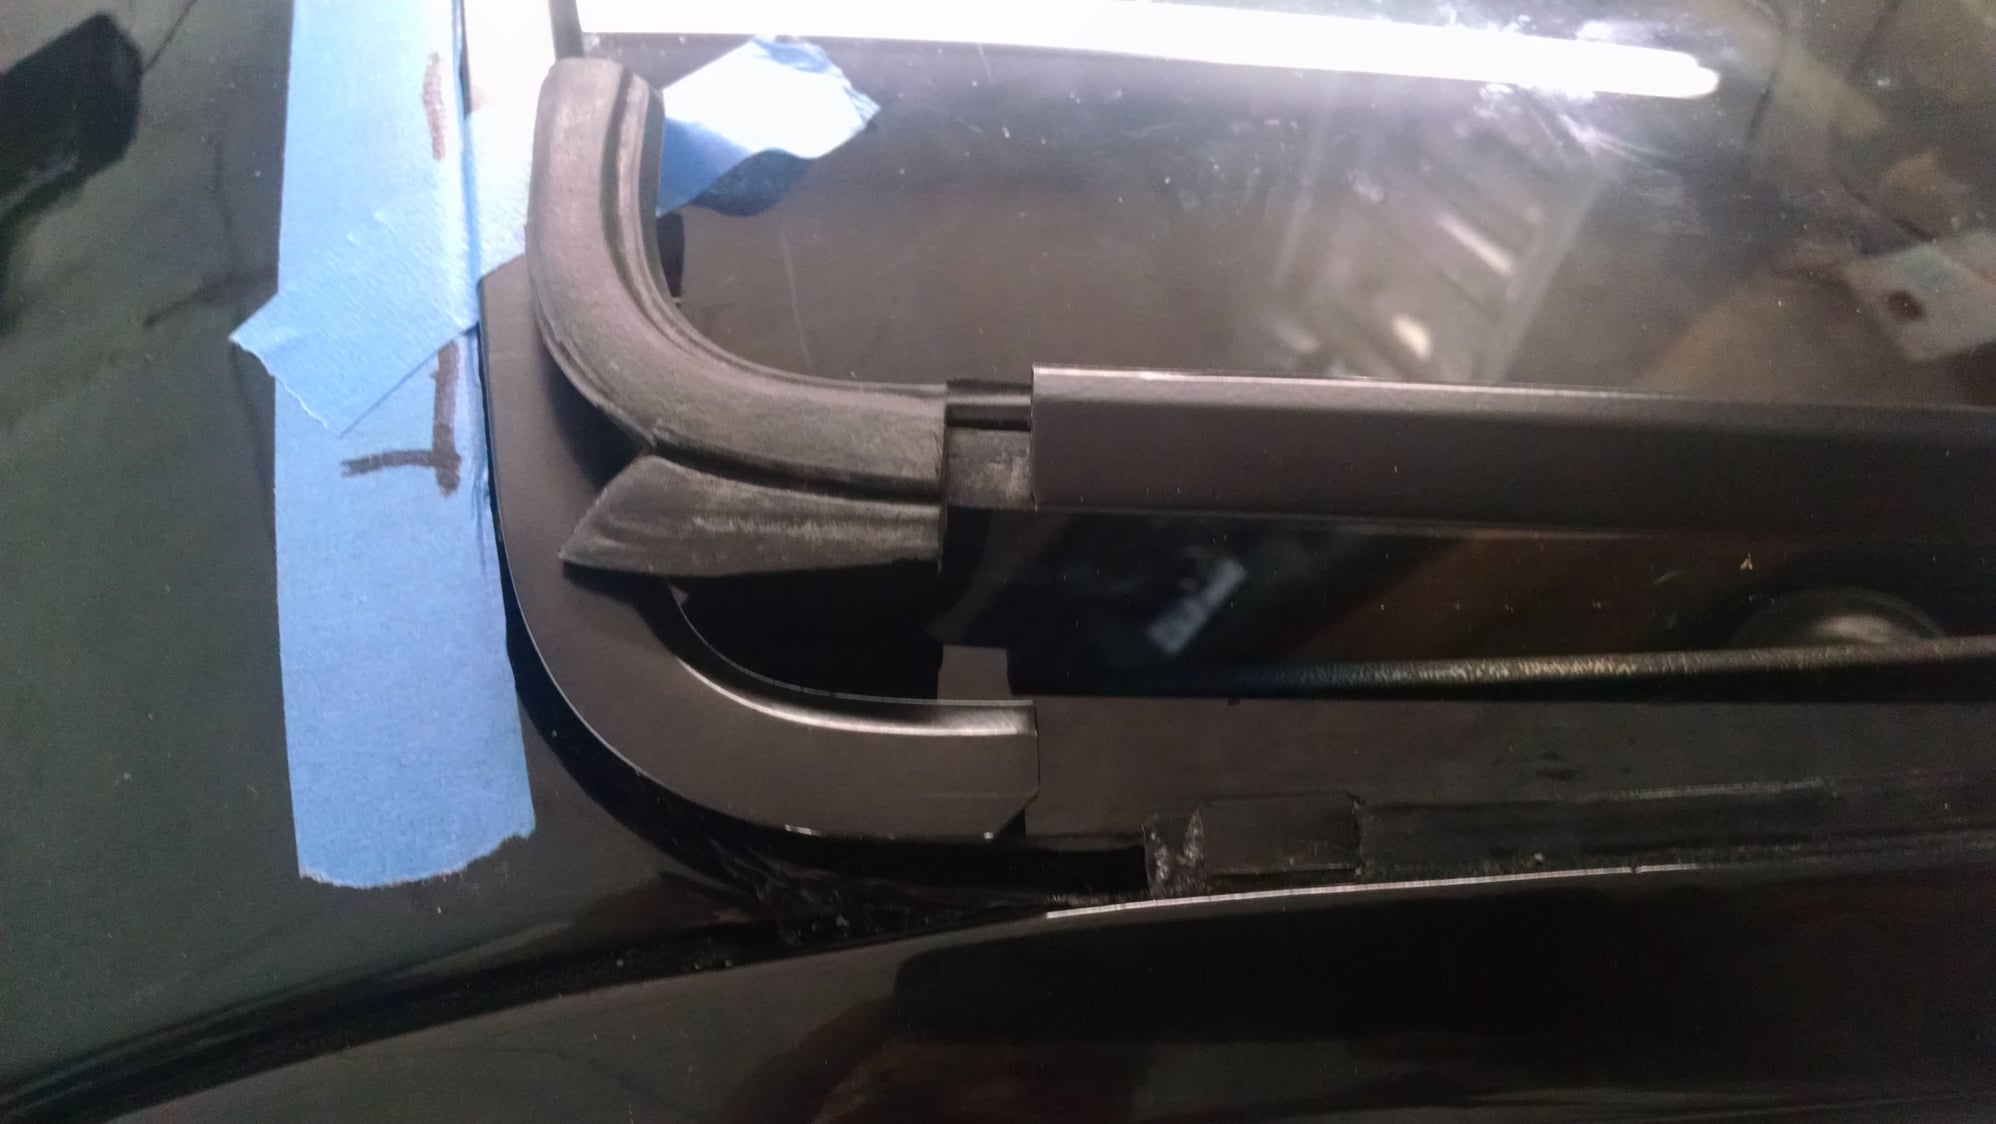
That top piece..with that tiny square rubber thing that sits up there? Seems a bit inadequate..
So, press the side rubber piece under the metal body part the vertical side pieces attach to. Attach the the upper trim over the right angled ends and then position the side pieces?
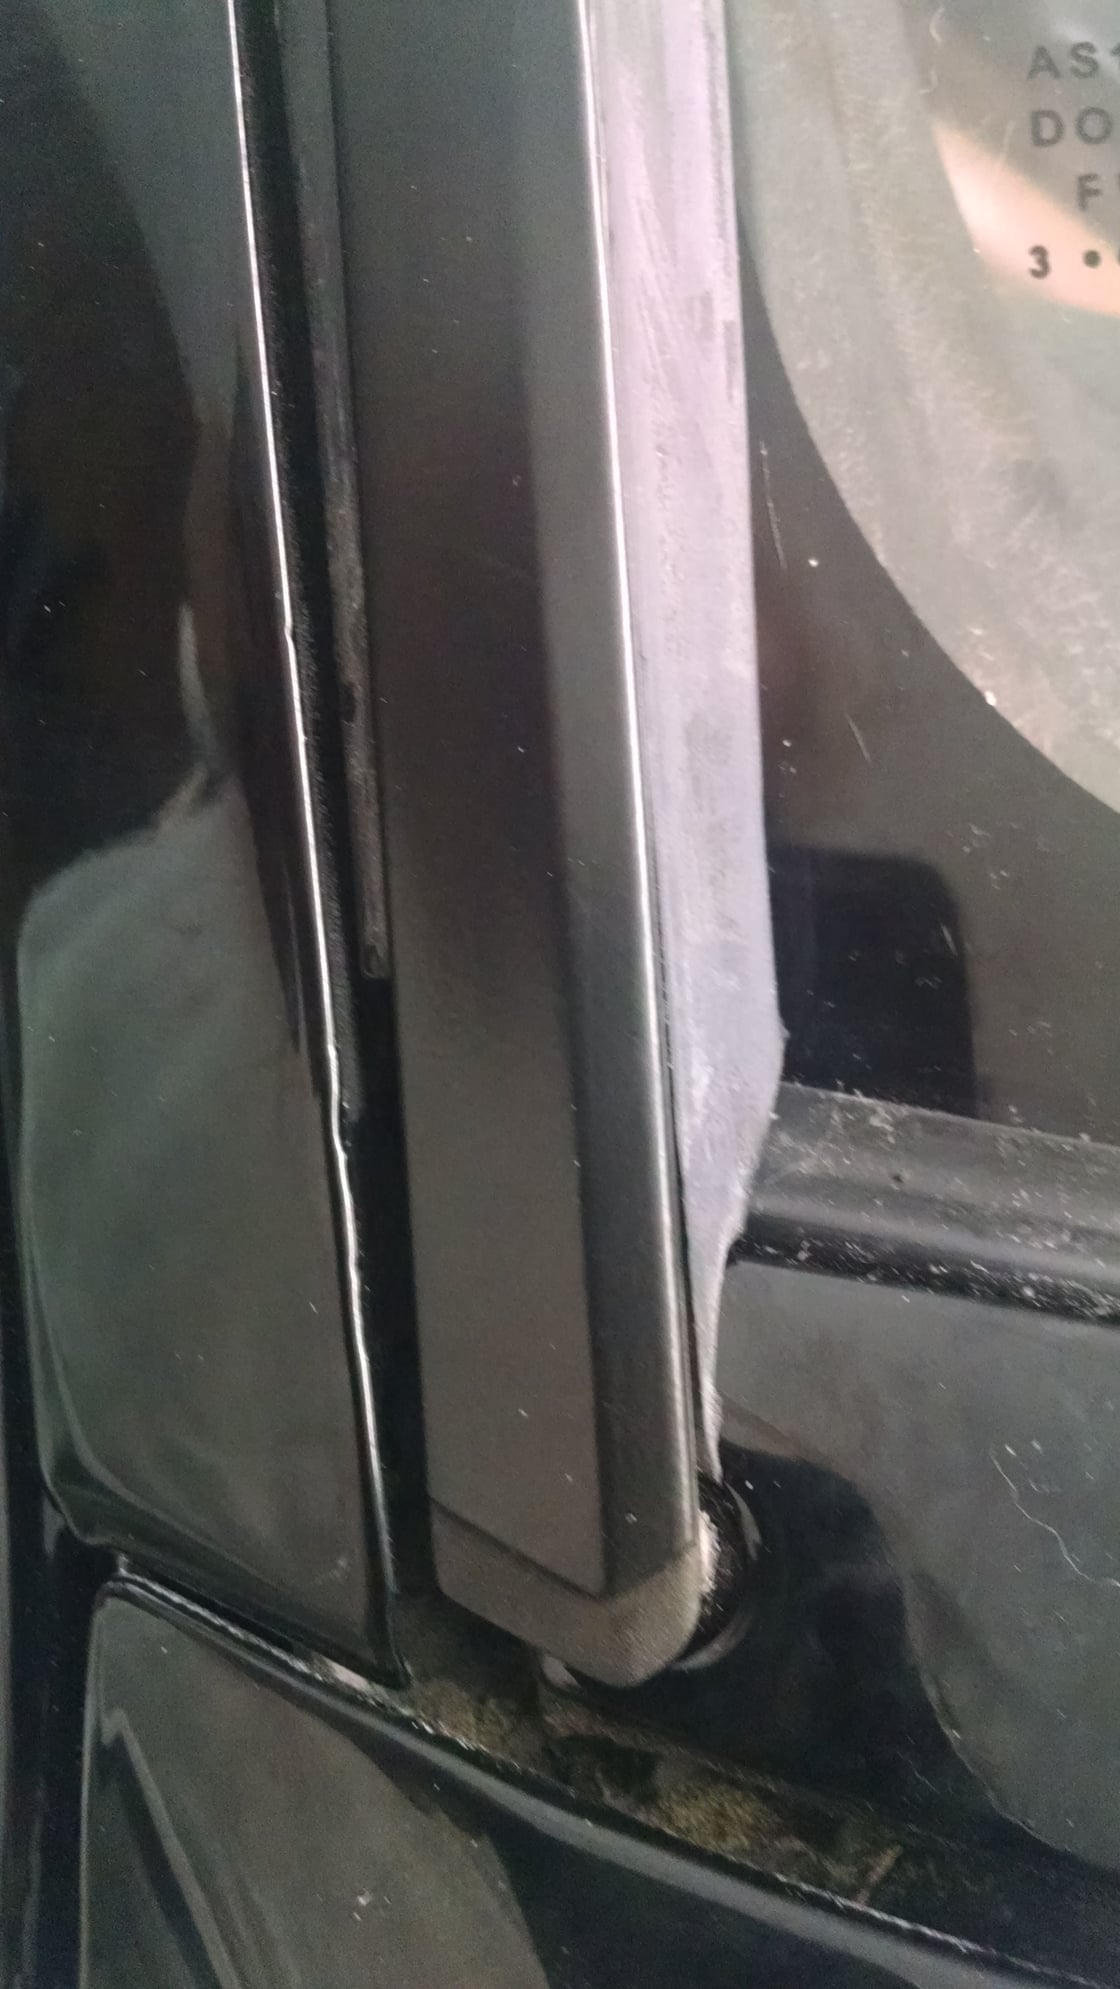
I believe the inserts are about 1/2" too long. Lining the side trim properly at the screw that secures the cowl reveals a 1/2" of rubber at the top of the side trim.
Bottom:
Top:
I am going to section the extra length out and see if that gets me closer to my goal.
I could be wrong about the fit - at least on the PS. With some wrangling it's almost installed with no cutting. Getting the two trim pieces to line up enough to slide the connecting piece is a be-ach,
Getting the two trim pieces to line up enough to slide the connecting piece is a be-ach,
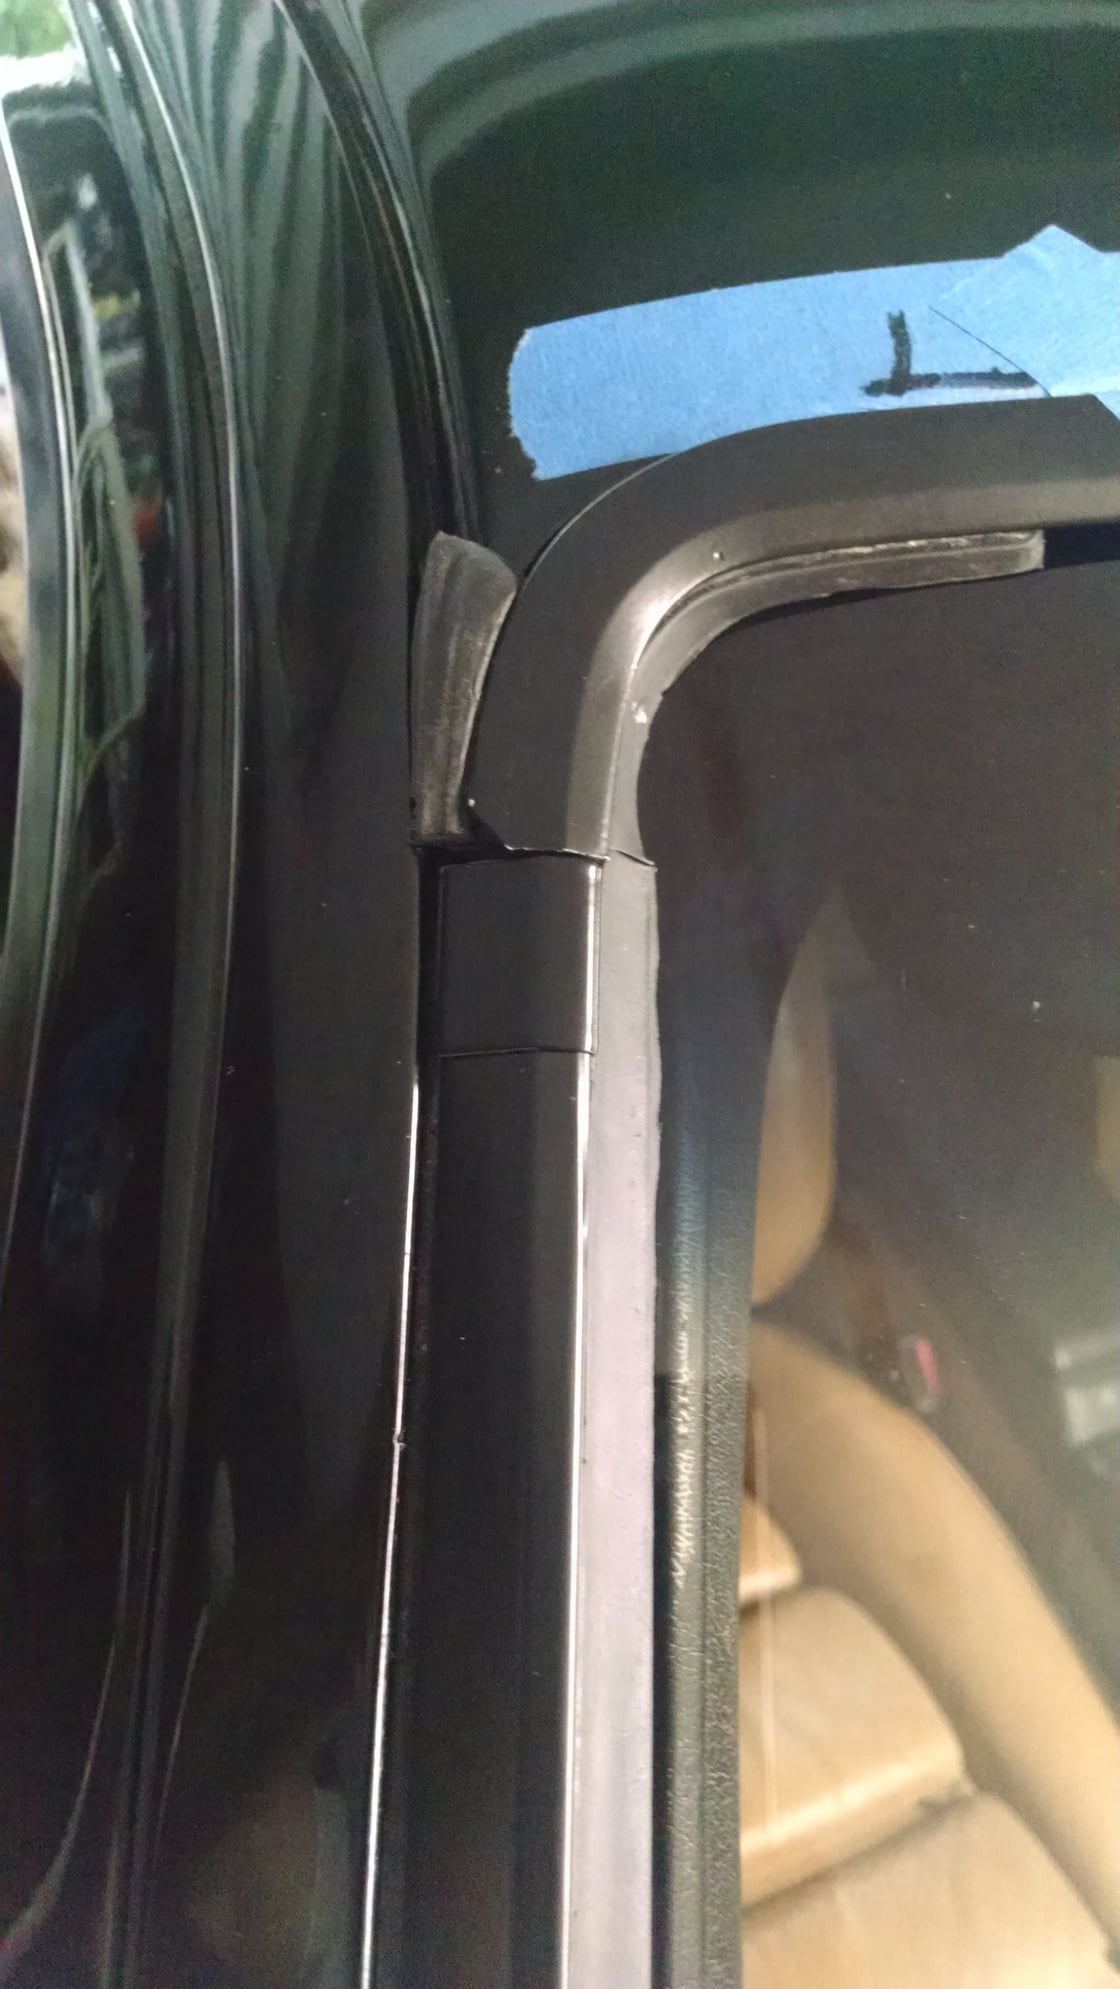
Yup. Very difficult to get the top trim off without tweaking it. Last time I did this I used a rubber-grip quick clamp to compress the coners of the upper trim and �un-tweak� them. Left them clamped for about a week. Worked.
I retro fitted these to my 89, I needed to remove a metal moulding (dremel) on the underside of the top trim in order to allow the top piece of the rubber to fin in. There was also a small foam piece which pulled off.

 05-18-2018, 03:25 PM