When you click on links to various merchants on this site and make a purchase, this can result in this site earning a commission. Affiliate programs and affiliations include, but are not limited to, the eBay Partner Network.
Intake and Cam Refresh Questions (just need a little advice)
We have some world class documented intake refresh threads. No need for another one. But I do have questions which seem to be gaps in what I see here or simply my confusion.
Here goes....
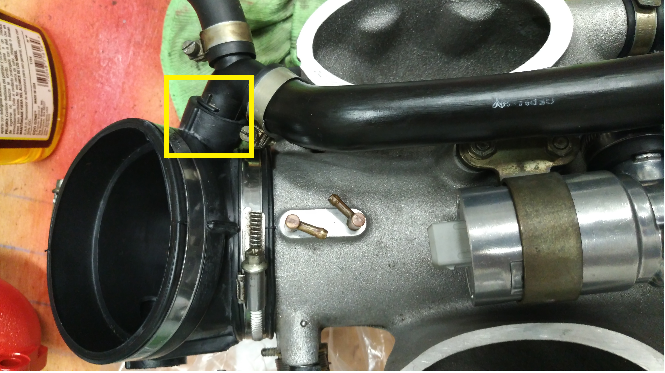
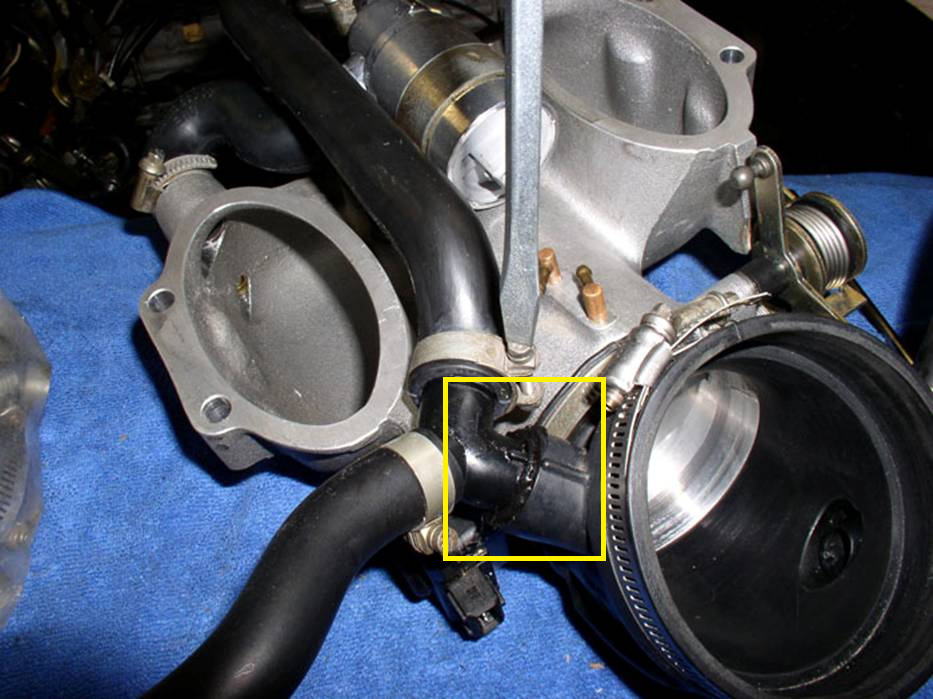
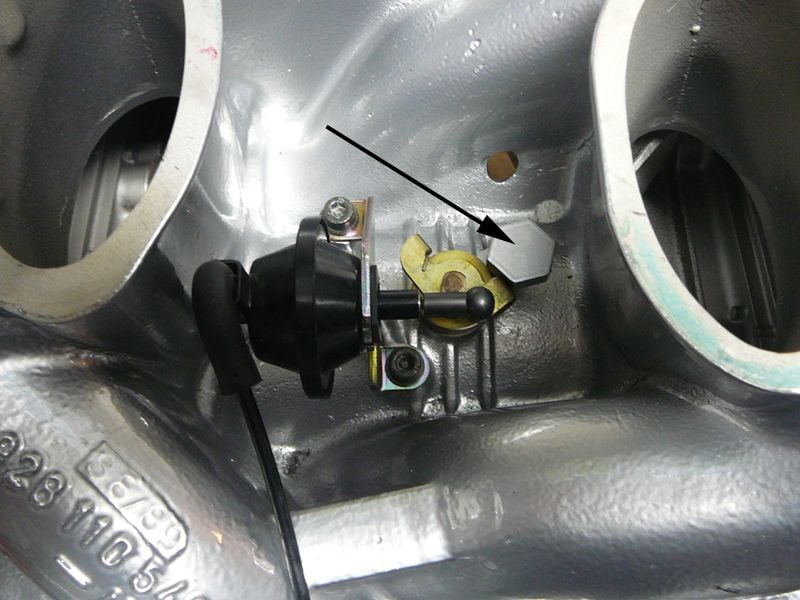
The ports on the side of the MAF boot. Do I need to use an adhesive of some sort or just plug the plastic bits into the new MAF boot dry.
Here is mine assembled without adhesive on the area in the yellow square but clamps on everything else....
For reference, here's one from Dwayne's awesome write up....
The only thing I've found written about this is in a response to Curt Austin's awesome intake refresh thread over here from MrMerlin...
Originally Posted by Mrmerlin
the things to look for are the plastic junctions that plug into the sides of the MAF boot these will crack and crumble, get new parts I like to press brass tubes into the new ones then super glue them into place (brass tubes come from the hobby shop) the hard lines that run between the vacuum ports get brittle.
So, WHAT should I do? Leave Dry, Apply some kind of Auto Adhesive or Brass Tubes and Super Glue?
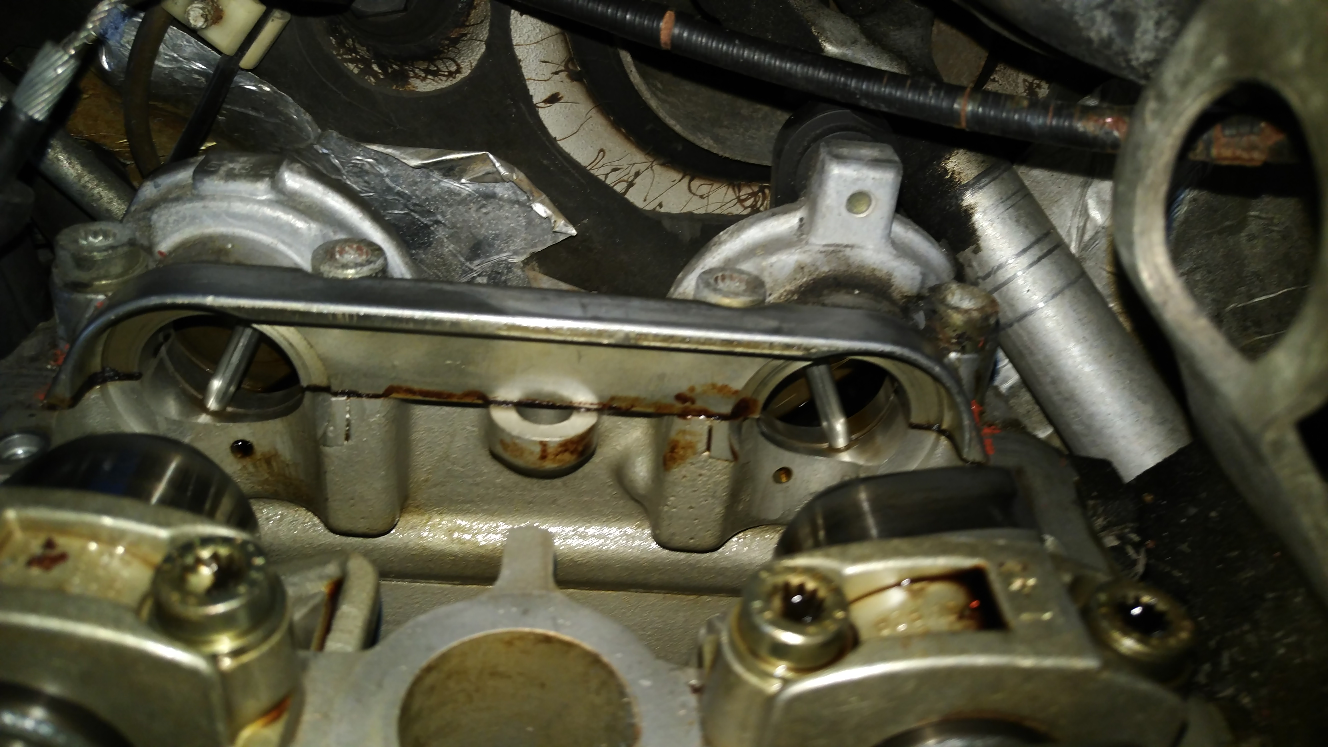
Also, I am curious about the Cam Oil Block pins, the Cam Block Caps and Arms. I have all 5 of the pins in place on my 1990 S4 (see pics below)....
Two Pins on Driver Side mean there must be Three on the other....
Looks like only two? But looking closer, there is a second one in one of the openings....
So my questions here are....
Are the Pins a wear item that should be replaced? (I'm thinking no)
Should I replace the Caps and Arms? (I'm thinking yes with some Loctite 574 on the cap edges)
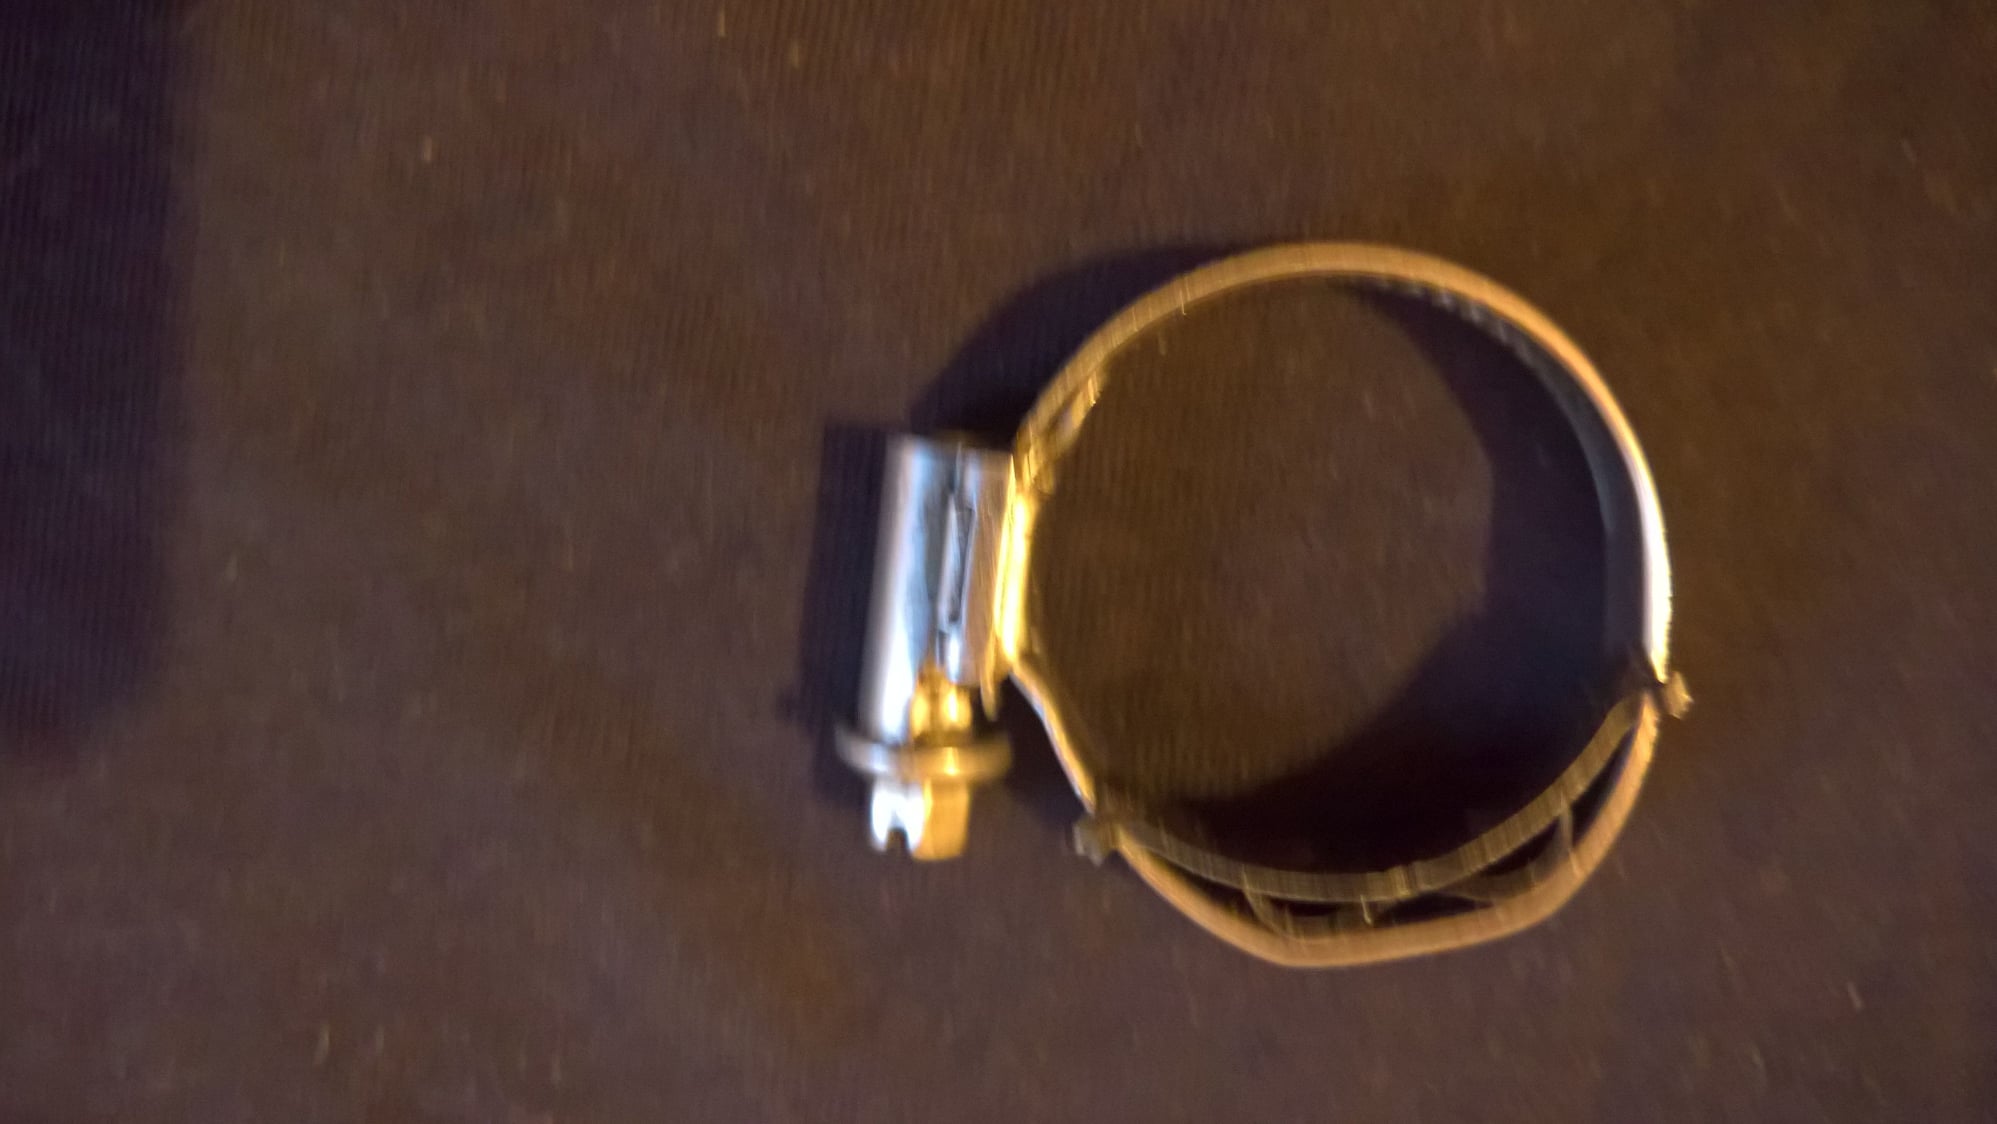
Just done an intake refresh i would put some RTV thear and a clip . I do not use Jubilee clips all though you do not need to go over board on the tightening they will go out off shape with the flat bit were the worm part is ,I use the one's in the picture Norma 20-32 mm BMW i think or you could use a tye wrapp cheers.
The Plastic fittings into the Rubber Throttle boot (in the yellow boxes) do not get or use clamps or RTV, they just snap into the groves, and if fitted correctly should not come out or leak if they are new.
The metal pins are a "one time" replacement for the original rubber ones that the factory fitted and can be reused.
Just done an intake refresh i would put some RTV thear and a clip . I do not use Jubilee clips all though you do not need to go over board on the tightening they will go out off shape with the flat bit were the worm part is ,I use the one's in the picture Norma 20-32 mm BMW i think or you could use a tye wrapp cheers.
There was sound engineering on why there was no clamp or rtv right -there- specifically...
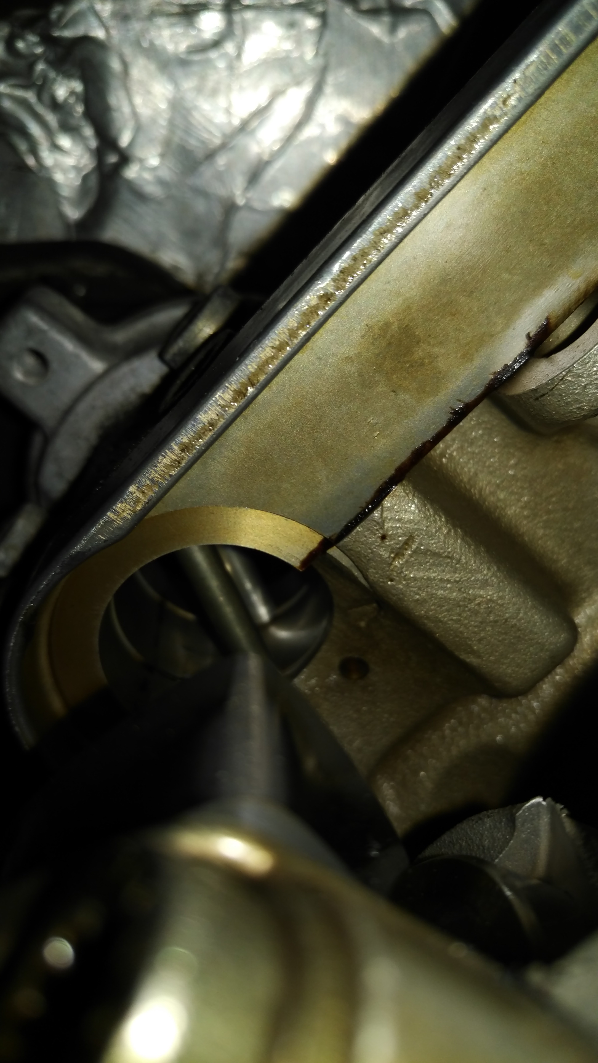
Tiny update. Replaced the front Camshaft Seal End Caps (DRY) and Arms but probably didn't need to replace them.
After careful inspection, I will NOT be replacing the back ones. I removed the arms and they are sealed in there very well...used a mirror and noticed no leaks. Just not worth the effort, IMO. Put the arms back on the back and have moved on to other tasks.
I slept on it and read about it I don't think I am going to do it based on the below quotes from other threads....
Originally Posted by Lizard928
If they aren't leaking don't bother!!!!!
Loctite 574 is not cheap, most places don't stock it.
Additionally the triple square heads strip out super easy. If you do undo them make sure you have around 40-50 lbs of force pushing the socket into the bolt and make sure that your forces are in the right direction.
If you get them out re-torque to 15ft-lbs. and consider replacing with a regular Allen head bolt.
and the OP of that thread said (I bolded the important to me parts)...
Originally Posted by 928Myles
Progress report:
have all bolts out - 2 stripped. One I tapped out by turning with a chisel, the other I had to drill the head off then the rest came out by hand. I have ordered a set of M8 by 40mm 1.25 pitch SHCS's to replace them.
The caps were loose once all bolts were removed and I could not detect any sign of sealer between the mating faces.
I have been supplied with Loctite 518 as the 'equivalent' anaerobic sealer for assembly.
Cam covers, intake and other bits returned from the coaters yesterday. Will wash them out today.
Next job is to replace the chain tensioner pads and the check valve o-rings and make sure the seats are tight.
Thanks again for all the advise.
Myles
I have the tools so I might go see if ONE of the bolts comes undone easily. If not, I'm 100% sure I am moving on.
I just replaced the MAF/ TB rubber boot as I suspected it of leaking. When I measured the difference in diameter of the holes in the boot there was a 2-3 mm difference between old and new. The part is fairly inexpensive so well worth replacing.
The original part was from an 89 so now 29 years old so understandable that it needed replaced.
Hi Marti - I am replacing the MAF/TB rubber boot. That was never a question.

 05-16-2018, 12:25 AM