When you click on links to various merchants on this site and make a purchase, this can result in this site earning a commission. Affiliate programs and affiliations include, but are not limited to, the eBay Partner Network.
These are very simple to replace. Up near the corner you will see a small piece that hides a gap in the trim. Slide this piece to reveal the gap. Then carefully using plastic stick or something similar nudge the side trim away from the edge of car.... Slide it towards the center of the window if that makes sense. These trims just get pushed onto a groove in the a pillar. Once it's off there should be some small clips which attach to the a pillar piece and these hold the trim in place.
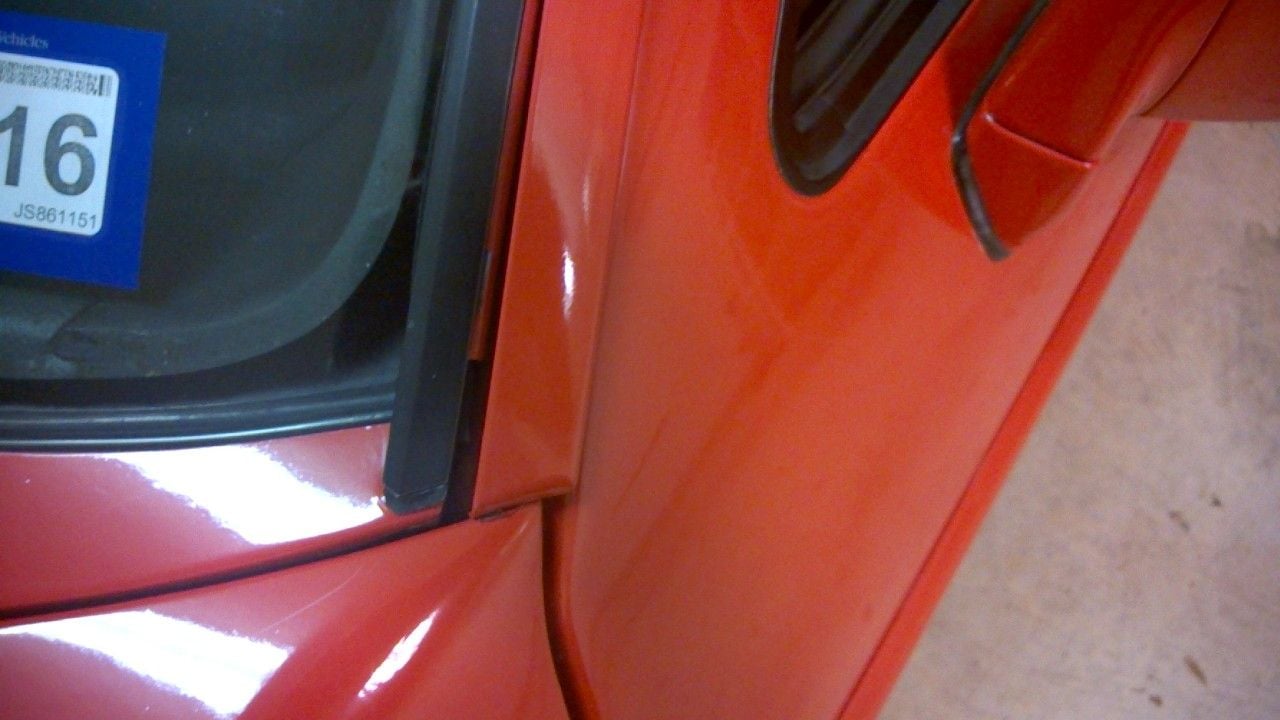
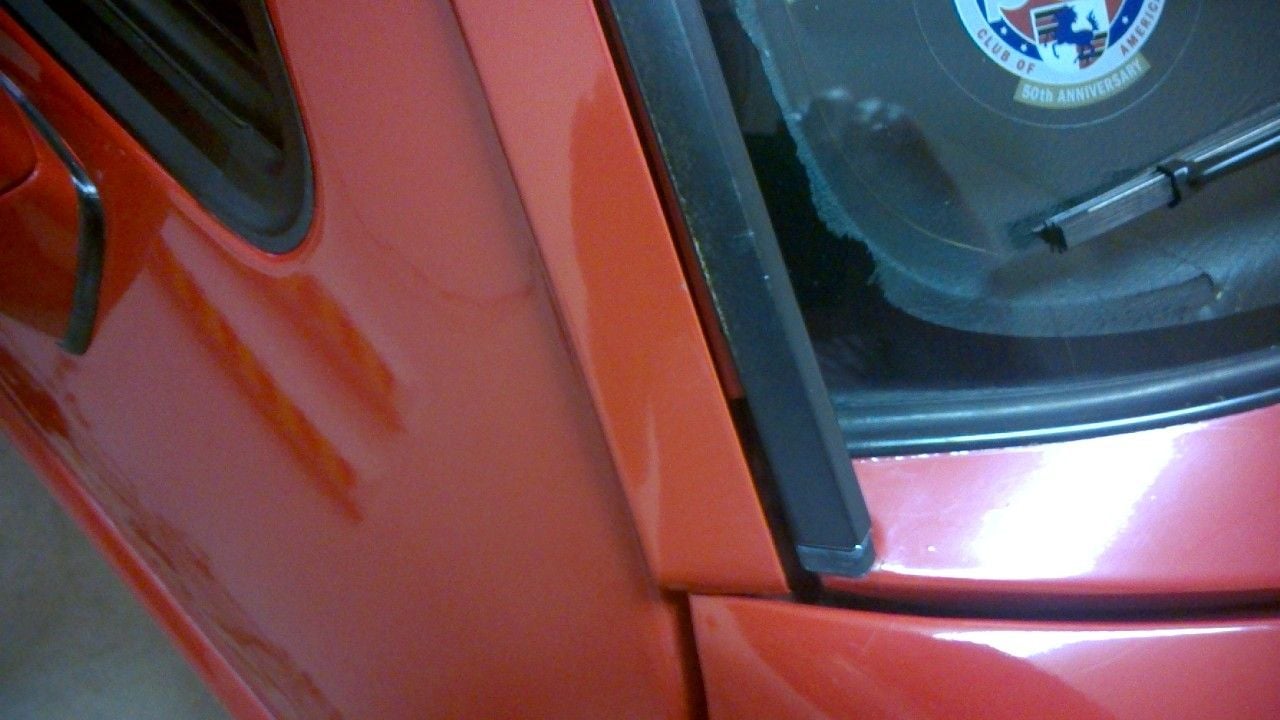
Thanks for the advice. However, the window trim also doesn't seem to be in place. If I push on the window trim near the bottom of the windshield, the entire piece lines up with the black windshield trim, so I don't know if it's both or just one that's out of place.
Thanks for the advice. However, the window trim also doesn't seem to be in place. If I push on the window trim near the bottom of the windshield, the entire piece lines up with the black windshield trim, so I don't know if it's both or just one that's out of place.
I think i know what youre asking, take a picture not so zoomed in..lets see the scope of the problem.
the black piece simply slides on sideways to the car,the red part...sits down onto a groove. i can often be put down unaligned and no be on right...it can be moved if excessive movement by some ham-hand in the past hasnt bent it.
Let's see if we can all get on the same page about what we are talking about. I had to scroll thru much of the PET to see what these item are actually called and find that the black trim item is called the "Water Drain Strip" and the red trim item is called the "Roof Edge Strip." I think most of us more commonly refer to the black item as the windshield side trim and the red item, I for one think of as the rain gutter cover, at least as it relates to the rain gutter over the door area.
Based on that, to me the red roof edge strips as shown in the pictures are not fully seated, but the water drain strips (black) look like they are where they belong; and that seems to be confirmed by the OP's description about pushing the red roof edge strips inward to where they meet the black strips.
The problem I think is that in order to get the roof edge strips to stay where they belong they may have to be completely removed from the car, and that is not an easy task and is one filled with risk of damage from bending because they are pretty soft aluminum.
It is common to find that the roof edge strips have been installed with some adhesive, but I don't know if that is from the factory or not. It may be that adhesive has been used in many cases to cure the same problem as this for the OP; but it may be that, since I think they have to be removed anyway, the slot where they fit over the flanges on the car might be squeezed tighter to fit snugly without adhesive.
When I finish my coffee and get dressed I'll go out and take some pictures of the roof edge strips that I recently removed from the car that is the subject of my Radical Custom 928 project.
In the meantime, for the OP, to answer the question, it is my thought that if you take it to a body shop to fix, they will most likely bend the **** out of them trying to get them off and then tell you that you need to pay for new factory items and have them painted to match. I have no idea about your level of skill, so I have no idea how to suggest that you take these off or to fix them. Well, actually I do, but I will save that for a bit later after I show you what they look like removed.
Read the WSM it details the fitting and removal of the rain gutter trims and the windshield trim, look in the body section.
With careful heating from a heat gun the gutter trim will come free,
NOTE start at the rear screw clip, open the hatch to find them.
A helper is good to keep the trim close to the body as you work to the front.
NOTE. the more you pull the trim as it comes free the more of a bend will be imparted to the trim, thus it will get a curve to it, this pretty hard to restore without damaging the paint,
I like to put blue tape on the gutter trim to prevent paint damage.
With a helper you can use a few pieces of 2x4 to reform the trim if it gets bent smaller force is better than bigger bending forces.
NOTE apply a smaller bending force over a larger area VS one small section getting the bulk of the bend.
Once you get the trim free clean the rib and get some body adhesive or the glue used in the WSM specification to glue the front edge of the trim back on
NOTE mark the trims position front and back position before you remove it from the car.
This makes it easier to start installation .
Installation starts at the front edge .
Picture of the location without either trim piece.
Picture with the Roof Edge Strip in about its correct location, except may need to fit farther down.
Picture with the Roof Edge Strip upside down and inboard of its location. Shows how easily it can be bent, but also how easily it might be squeezed back together to fit more snugly, with or without adhesive.
Picture shows another car that has the Roof Edge Strip probably correctly installed, and that it should line up with its outer edge in line with the edge of the fender at the corner.
Good points by Stan; except I suggest pushing it off rather than pulling it off. I would put protective tape on the top of the car and on the roof edge strips and use a sharp edged block of some sort to push the roof edge trim off with a mallet.
Now, upon looking at my own pictures, I think I would suggest that you put some protective tape on the Roof Edge Strips at the bottom where they are not correctly seated, then push the bottom end inward where it needs to be aligned and with some pliers, maybe even with the jaws padded, squeeze the trim snuggly onto its flange. The inside edge of the strip is actually the bottom of the squeeze-slot that holds it to the flange on the body.
Haven't been on the page for a few days, thanks Jerry and others for all your advice. I will try Jerry's suggestion first as it is within my wheelhouse.

 01-11-2018, 05:25 PM