My first motor mount/oil pan gasket/steering rack bushing job. Worklog. 92 GTS.
 01-18-2018, 02:48 PM
#61
Pro
Thread Starter
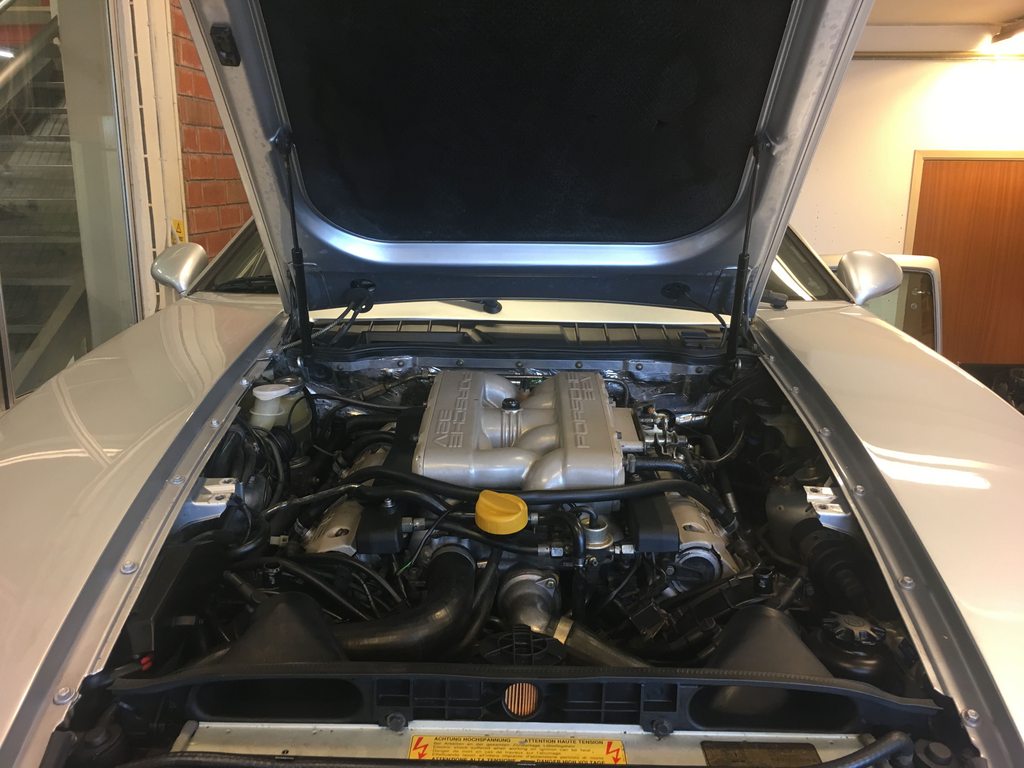
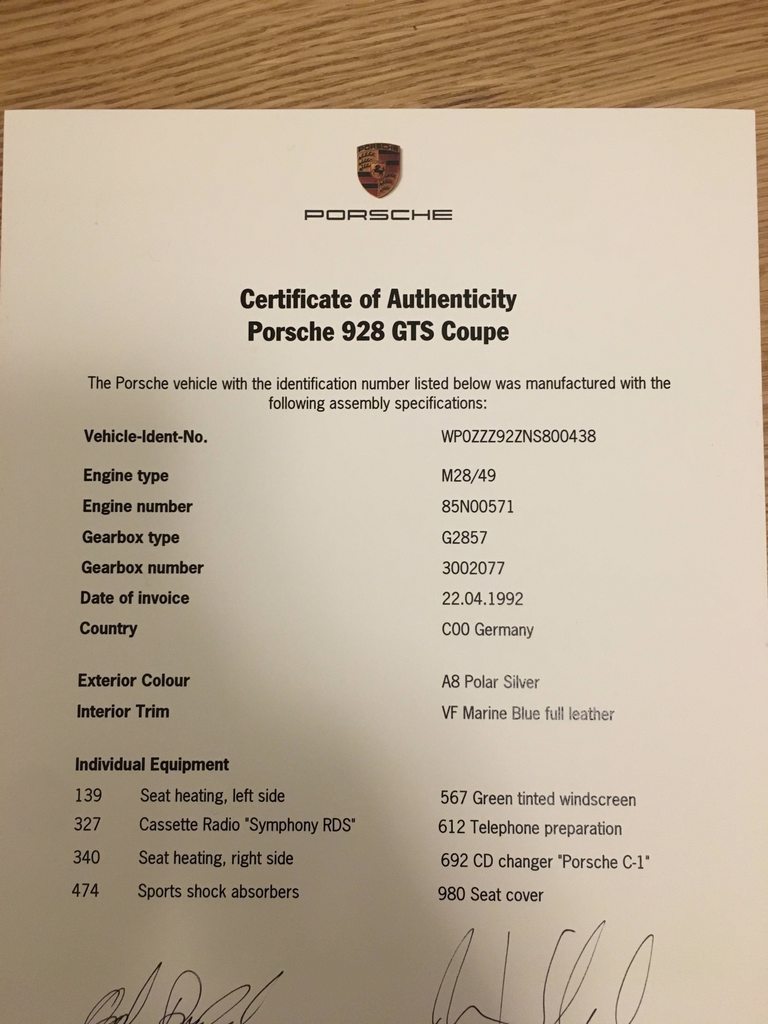
Here are my engine numbers
 01-18-2018, 03:20 PM
#62
Archive Gatekeeper
Rennlist Member
Rennlist Member
Sure, here's a 94 GTS motor showing the hex bolts used for the girdle:

And page 1-3 of the '92 service info tech book RE: the change:

And page 1-3 of the '92 service info tech book RE: the change:
01-18-2018, 04:19 PM
#63
Pro
Thread Starter
Thanks. Another thing learned 
The inside of that 94 engine looks more bronze coloured than mine. Is it just lightning? Or is it some kind of "pollution" or dirt? Or did they change anything in materials(sounds unlikely to me)?
The inside of that 94 engine looks more bronze coloured than mine. Is it just lightning? Or is it some kind of "pollution" or dirt? Or did they change anything in materials(sounds unlikely to me)?
01-18-2018, 04:53 PM
#64
Archive Gatekeeper
Rennlist Member
Rennlist Member
The '94 motor has 165K miles on it- the color is just residual varnish from oil. Yours is immaculate inside, good oil and regular oil changes, clearly! 
01-18-2018, 04:59 PM
#65
Pro
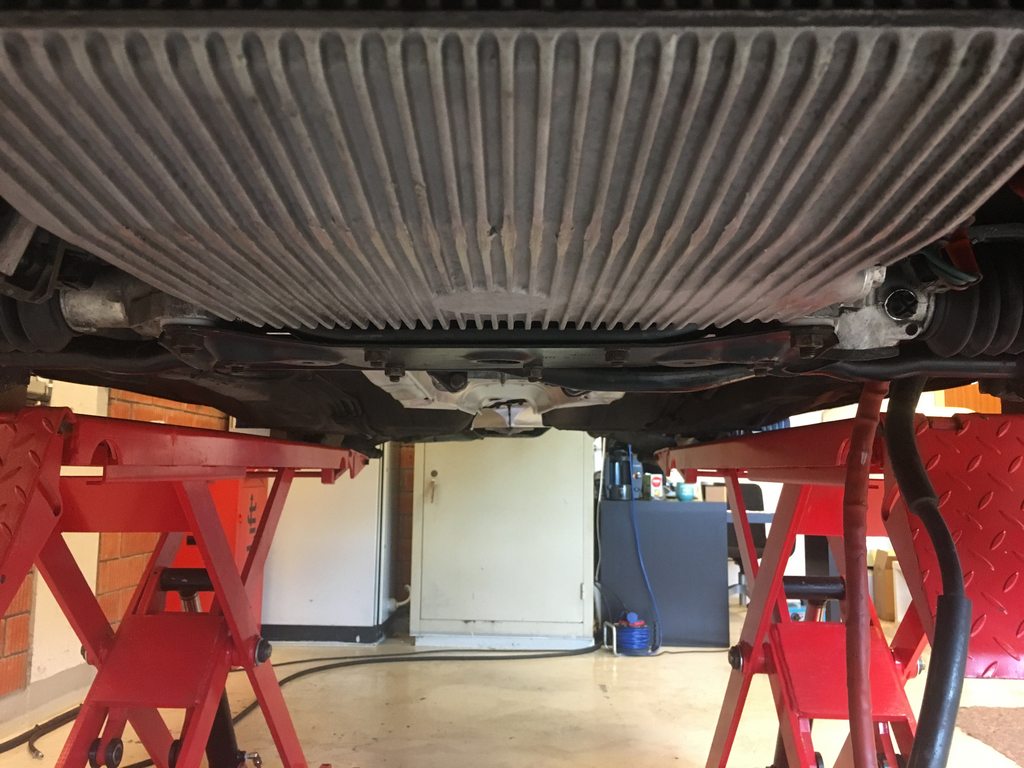
How did your exhaust manifold heat shields look that bolt to the cross member? Was the insulating material on them still intact? This helps keep heat away from your motor mounts so they last longer.
Also, did you get a new o-ring for the dip stick tube?
Also, did you get a new o-ring for the dip stick tube?
01-18-2018, 05:07 PM
#66
Pro
Thread Starter
No dipstick tube o-ring. Is that also something WYAIT inside?
01-19-2018, 11:05 AM
#67
Pro
Dipstick tube...yes, excellent time to replace the o-ring and eliminate another possible leak point. P/N 900 174 044 40
01-24-2018, 03:14 AM
#69
Archive Gatekeeper
Rennlist Member
Rennlist Member
Dry and dry.
01-24-2018, 08:03 AM
#70
Pro
Thread Starter
Thanks Rob.
New question;
I got the rack bellows and tie rods off to replace them. Thankfully the bellows were nice and dry inside. Should I relube the moving rack surface, while I have it open? In that case, what kind of lube should be used?
New question;
I got the rack bellows and tie rods off to replace them. Thankfully the bellows were nice and dry inside. Should I relube the moving rack surface, while I have it open? In that case, what kind of lube should be used?
Last edited by paalw; 01-24-2018 at 09:59 AM.
01-24-2018, 10:36 AM
#71
Chronic Tool Dropper
Lifetime Rennlist
Member
Lifetime Rennlist
Member

No lube needed or wanted on the sliding part of the rack. It gets oiled when it's inside the seals, wiped dry (hopefully) before it passes outside. The boots keep dirt from fouling the seals and bushings.
01-24-2018, 01:20 PM
#72
Pro
Thread Starter
Great, thanks Bob. Makes sense.
Not a lot of progress. Still waiting for more part. Got some of them, will get the rest tomorrow.
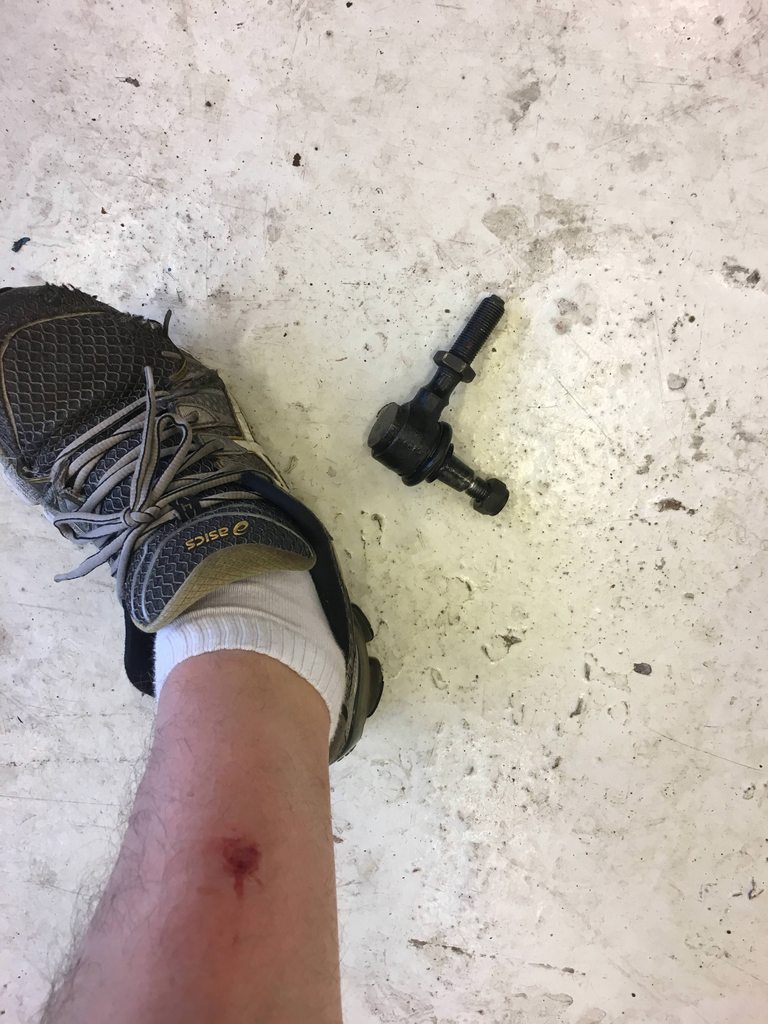
I got the tie rod ends off, ended up hurting myself in the process. The ends were stuck to the hub so I removed the ends from the rod not to damage the rack, then I used one of those "ball joint remove tools". It took a lot of force but when it finally came, it was with lightning speed, right into my leg. Well at least the steering rack is fine!
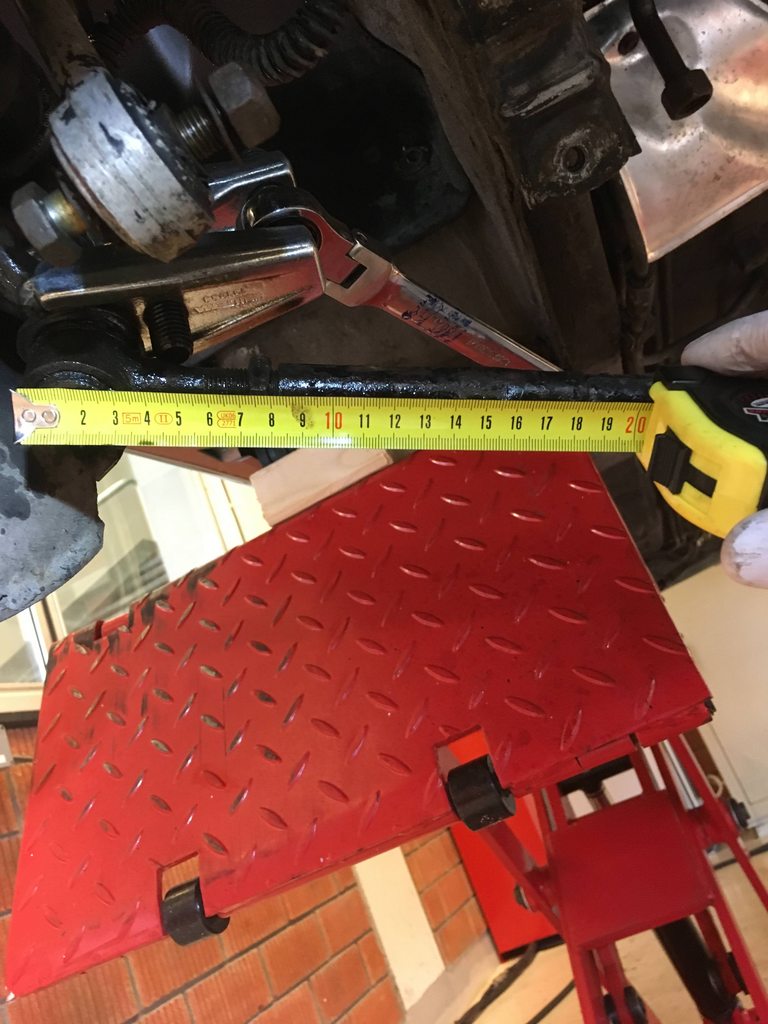
Now I am trying to find a thin 32mm wrench to get the rod off the rack. Not very easy to find..
Not a lot of progress. Still waiting for more part. Got some of them, will get the rest tomorrow.
I got the tie rod ends off, ended up hurting myself in the process. The ends were stuck to the hub so I removed the ends from the rod not to damage the rack, then I used one of those "ball joint remove tools". It took a lot of force but when it finally came, it was with lightning speed, right into my leg. Well at least the steering rack is fine!
Now I am trying to find a thin 32mm wrench to get the rod off the rack. Not very easy to find..
01-25-2018, 02:45 PM
#73
Pro
Thread Starter
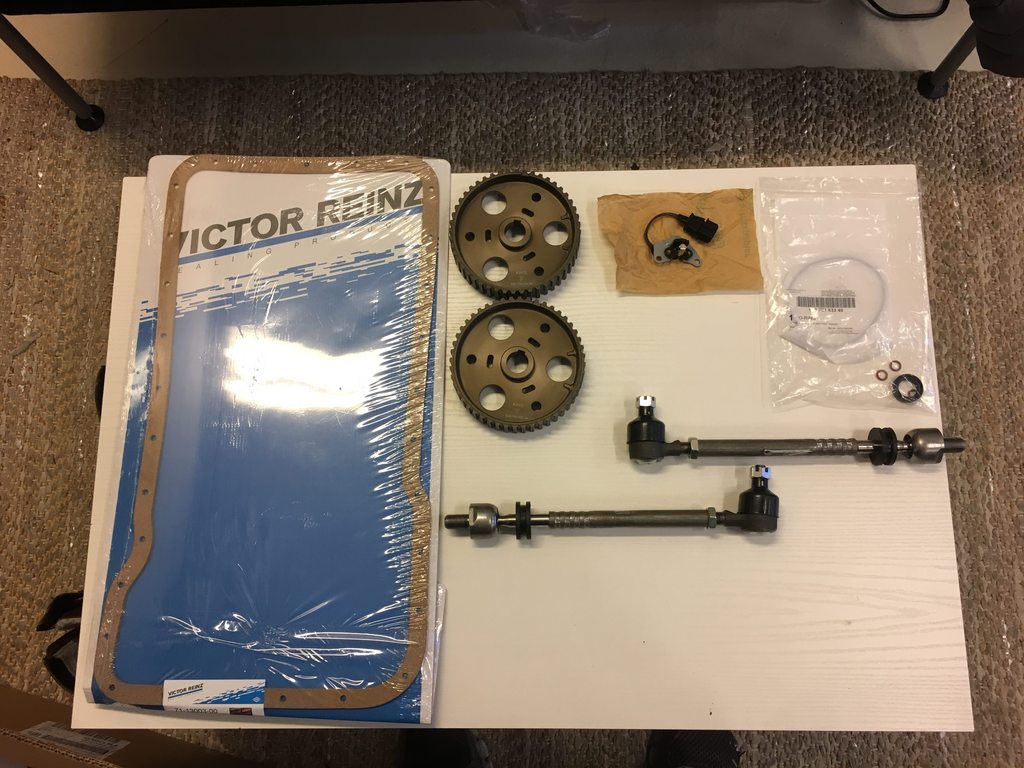
Finally I got the last parts, so I could start reassembling things. First I replaced the tie rod ends and the rack bellows. I had the whole tie rods with ends new and was planning to replace it, but I could not get the 32mm (with 22mm counterholding) to move. I didn't give it very much try or thought, the tie rods were fine so I just let them there and only replaced the ends, as they were the ones a bit bad. After that I installed the new rack delrin bushings. They had a nice fit, just needed a few hits with the hammer to seat perfectly.
Then the oil suction tube went back in with a new rubber ring, and I replaced the dipstick o-ring. Very easy and straight forward. The oil level sensor got a new gasket, and I went on to reinstall the oil pan. Some of the bolts were a pain in the .$$ to get to. I torqued the ones I could get to with the t-wrench down to 6+2nm, and took the rest on hand feeling with a flex-head ratchet spanner.
Reinstalled lower bellhouse cover, clutch slave and starter motor.
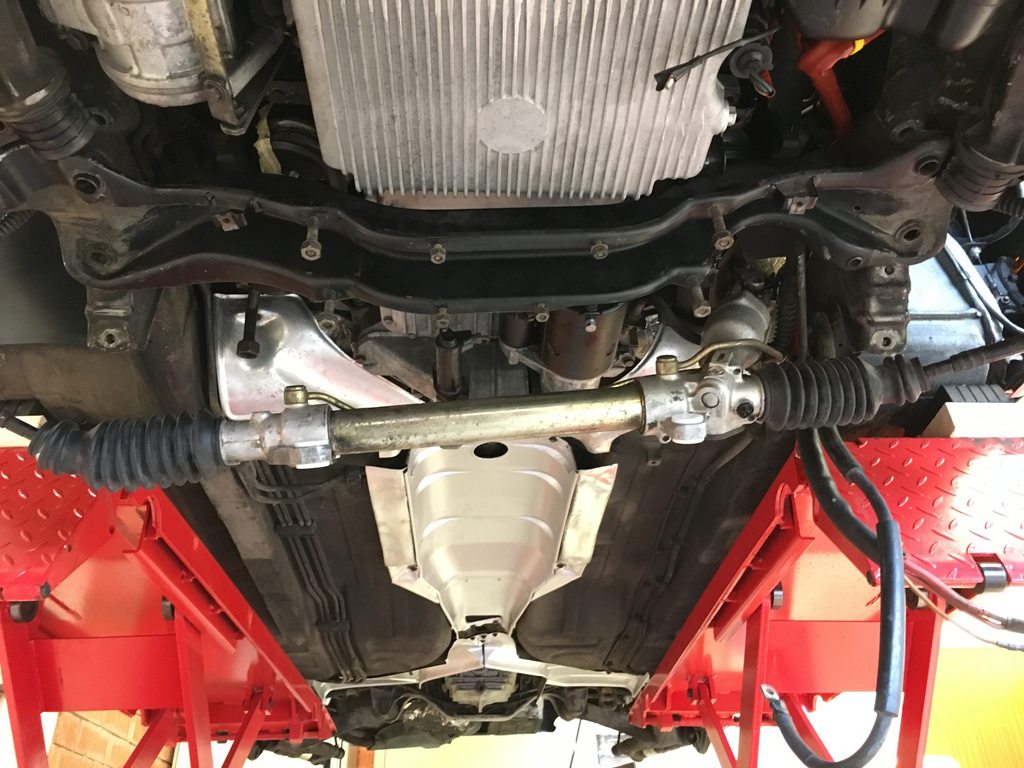
Then what I have been feared since I removed it - putting the crossmember back up. First I mounted both motor mounts with brackets on the crossmember. After some cursing and sore shoulders I gave up and had another read on some of the threads here on the subject(thanks MrMerlin). So I removed the passenger side mount/bracket from the crossmember and installed it loosely on the engine bracket. With some creativity keeping the lower control arms away, and some wiggling back and forth, I finally managed to squeeze the crossmember with the driver side motor mount more or less in place. And that is where I ended todays session. It looks like it will go fine to attach the PS mount to the crossmember and tighten everything up. I will find out tomorrow...more to follow then.
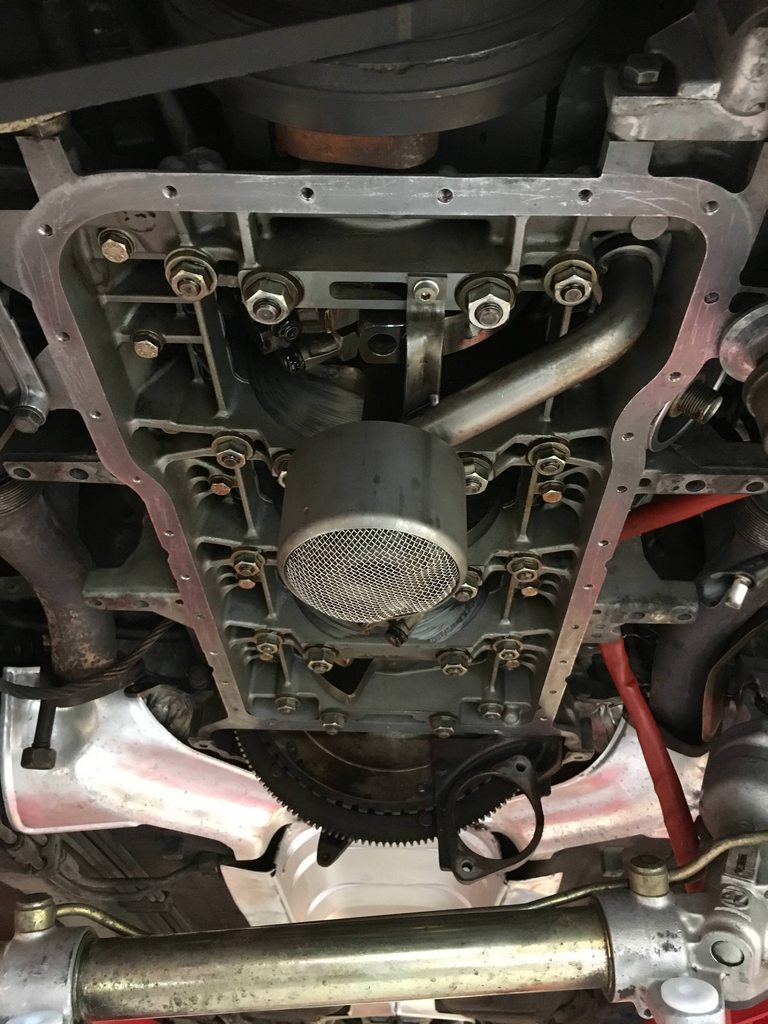
Then the oil suction tube went back in with a new rubber ring, and I replaced the dipstick o-ring. Very easy and straight forward. The oil level sensor got a new gasket, and I went on to reinstall the oil pan. Some of the bolts were a pain in the .$$ to get to. I torqued the ones I could get to with the t-wrench down to 6+2nm, and took the rest on hand feeling with a flex-head ratchet spanner.
Reinstalled lower bellhouse cover, clutch slave and starter motor.
Then what I have been feared since I removed it - putting the crossmember back up. First I mounted both motor mounts with brackets on the crossmember. After some cursing and sore shoulders I gave up and had another read on some of the threads here on the subject(thanks MrMerlin). So I removed the passenger side mount/bracket from the crossmember and installed it loosely on the engine bracket. With some creativity keeping the lower control arms away, and some wiggling back and forth, I finally managed to squeeze the crossmember with the driver side motor mount more or less in place. And that is where I ended todays session. It looks like it will go fine to attach the PS mount to the crossmember and tighten everything up. I will find out tomorrow...more to follow then.
 01-26-2018, 10:43 AM
#75
Pro
Thread Starter
Anyway, the engine is now once again resting on the crossmember!
Around one inch or maybe a bit more higher than before.