When you click on links to various merchants on this site and make a purchase, this can result in this site earning a commission. Affiliate programs and affiliations include, but are not limited to, the eBay Partner Network.
"Everything at the Back" - rebuilding rear suspension
'87 S4 Automatic
I am in the process of doing "Everything at the Back", using Dwayne's write-up on replacing the Torque Tube bearings as a guideline. The plan is:
1. Remove and overhaul fuel tank and lines;
2. Remove Torque Tube and transmission.
3. Install super bearings in Torque Tube
4. Remove and overhaul rear suspension
5. Replace all fuel lines from rear to front.
6. Install Torque Tube, transmission, rear suspension and fuel tank.
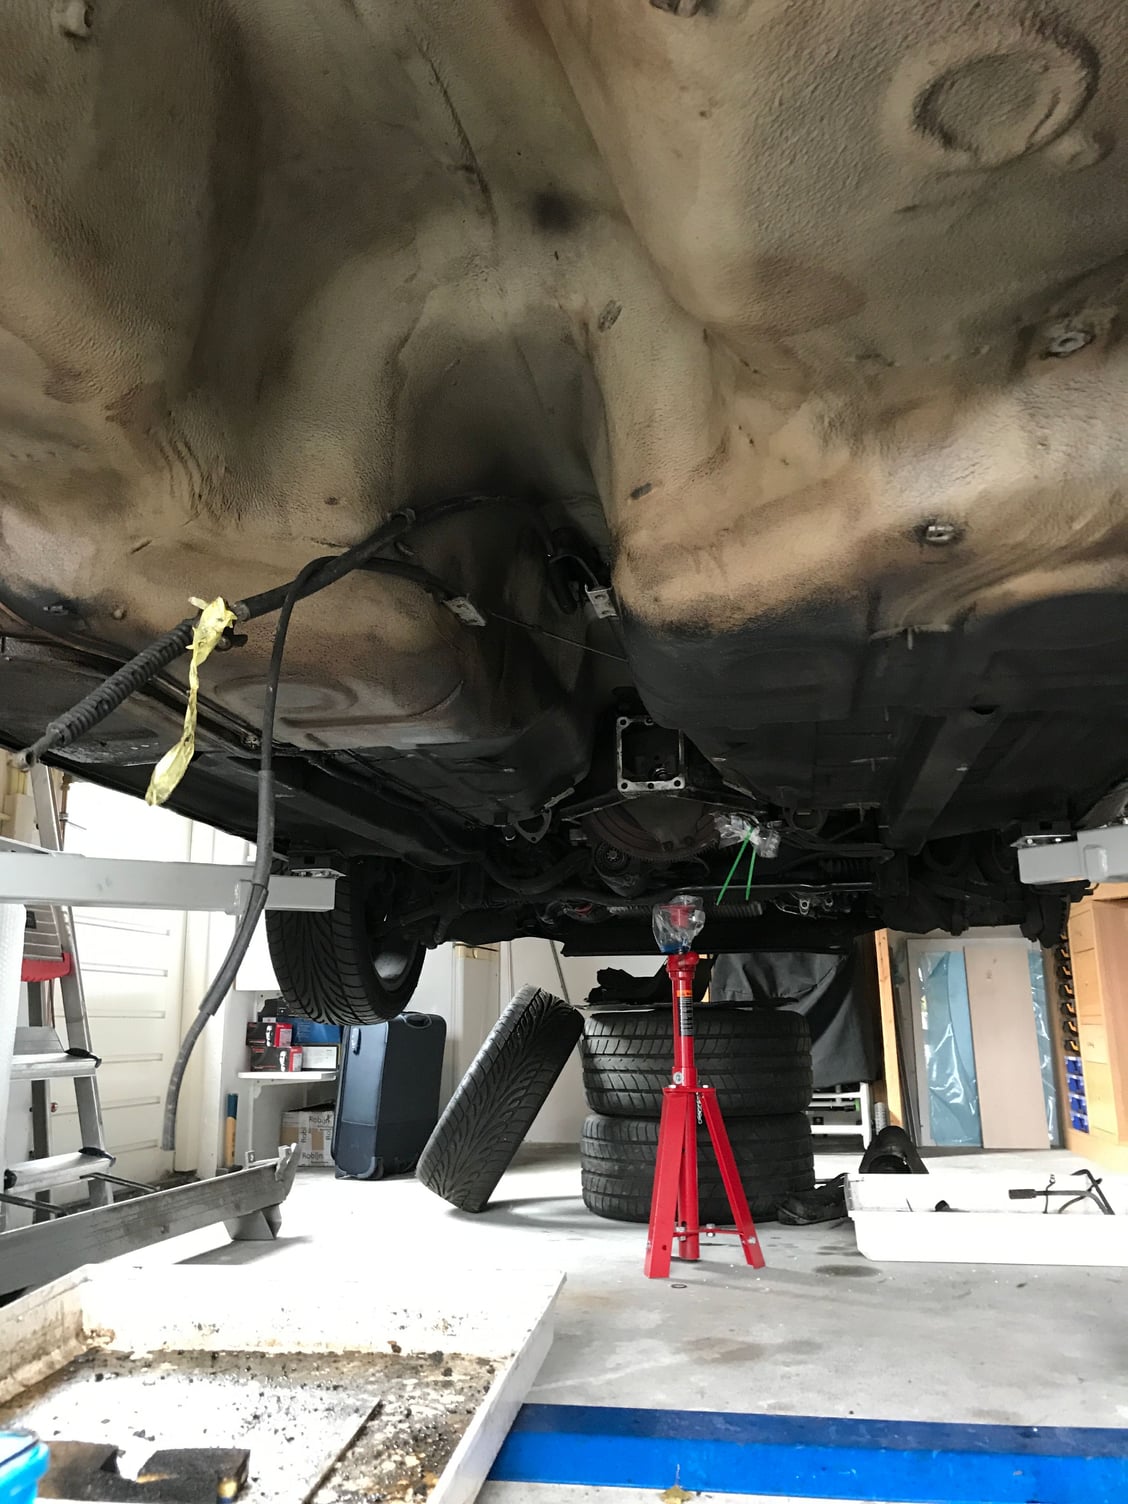
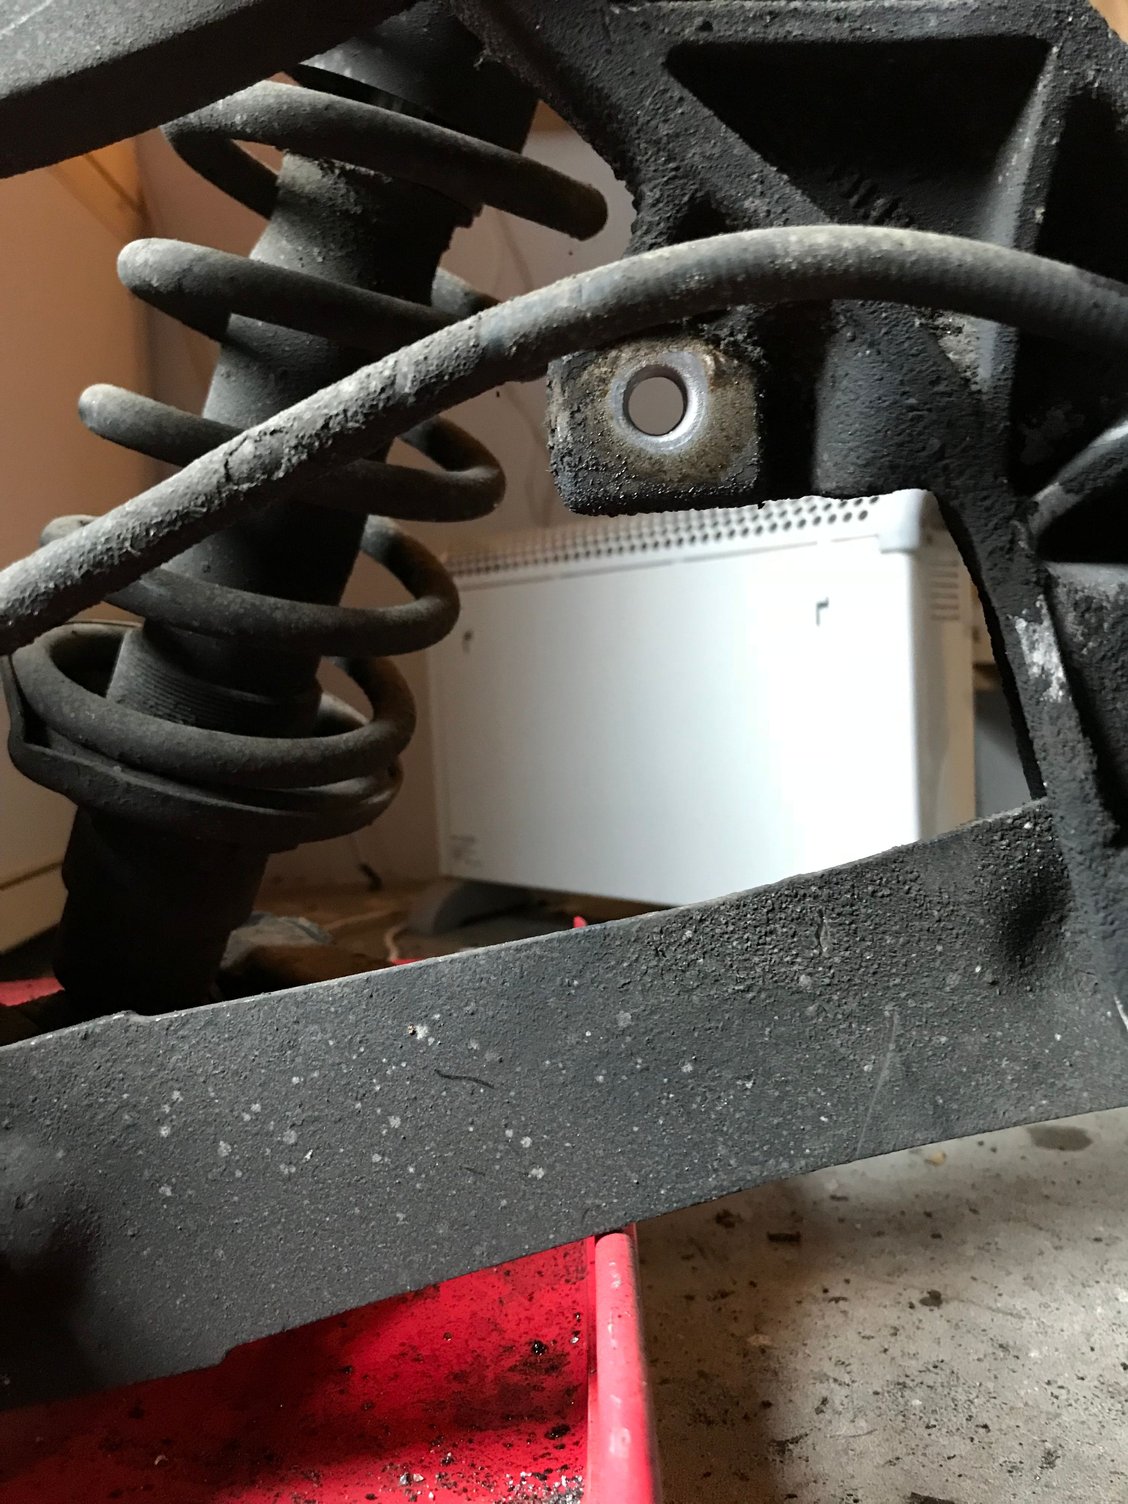
At the moment, the rear of the car is "empty":
Still need to do a bit more cleaning, but have already tried to use dry ice:
It was deafening, but the result was quite nice!
I will try to post my 'journey' in different posts, hoping that any questions I come up with stay with that specific part of the job. It may also help for future searches by anyone who wants to try these jobs as wel....
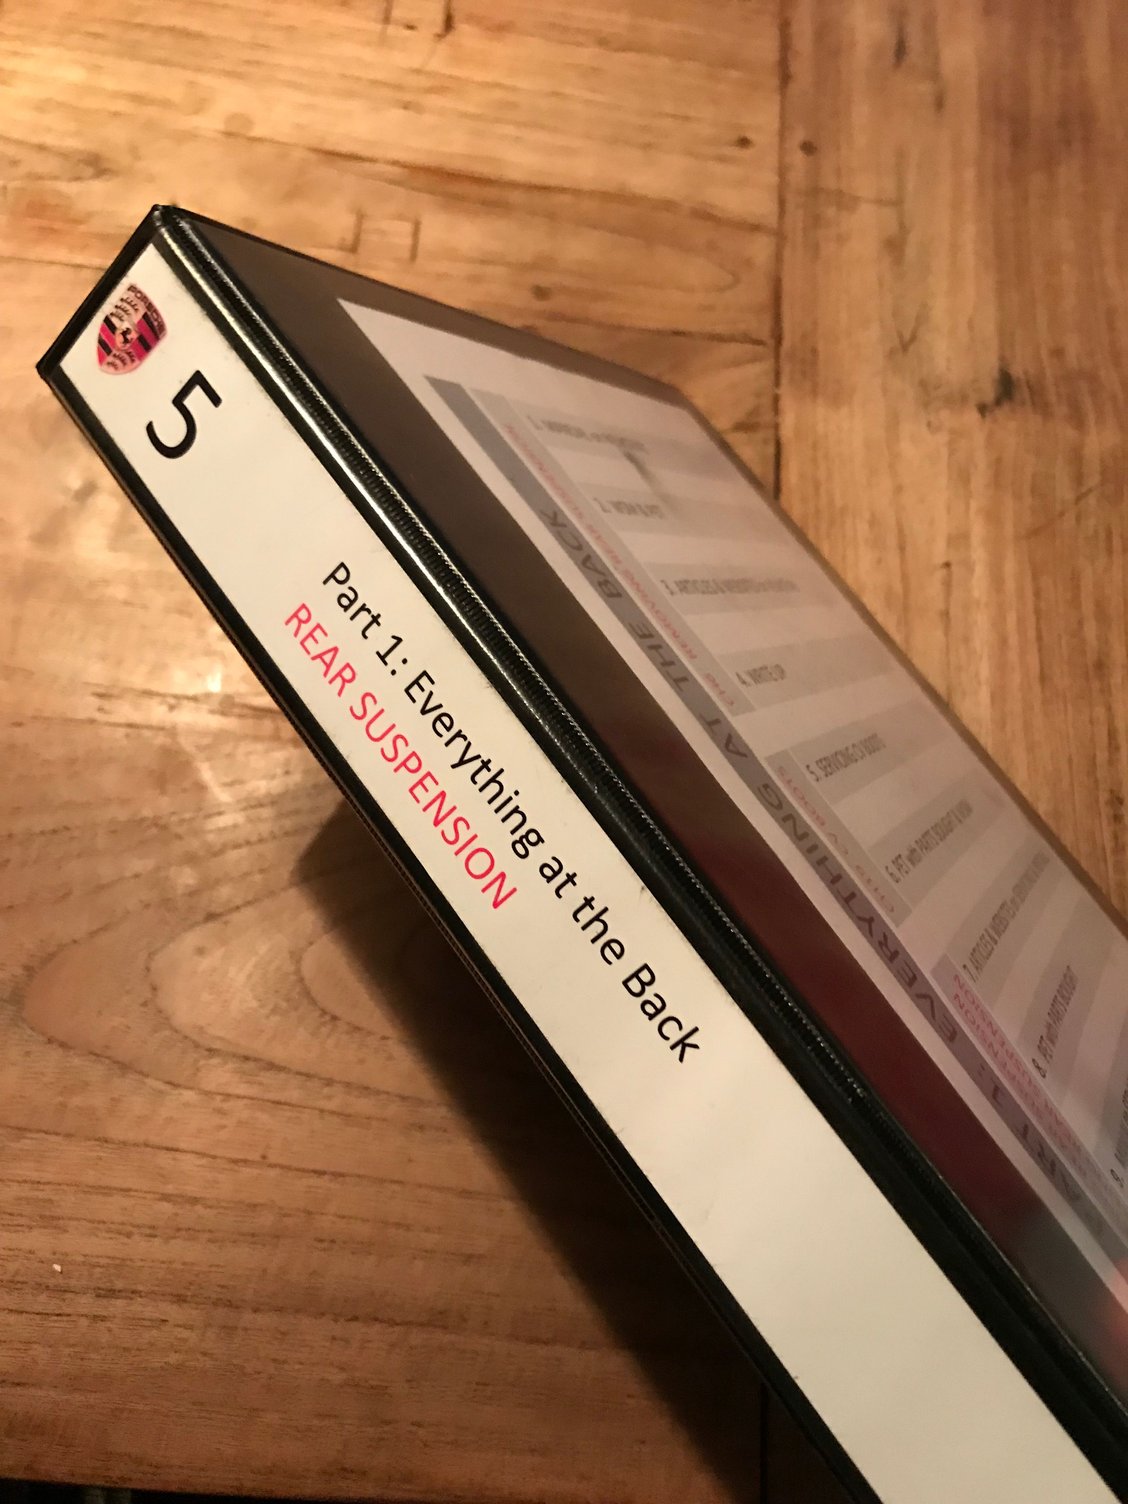
To make sure I keep track of what I do I made these 'books' with copies from PET, write-ups from Dwayne and other Rennlist heroes as well as copies of relevant pages in the WSM:
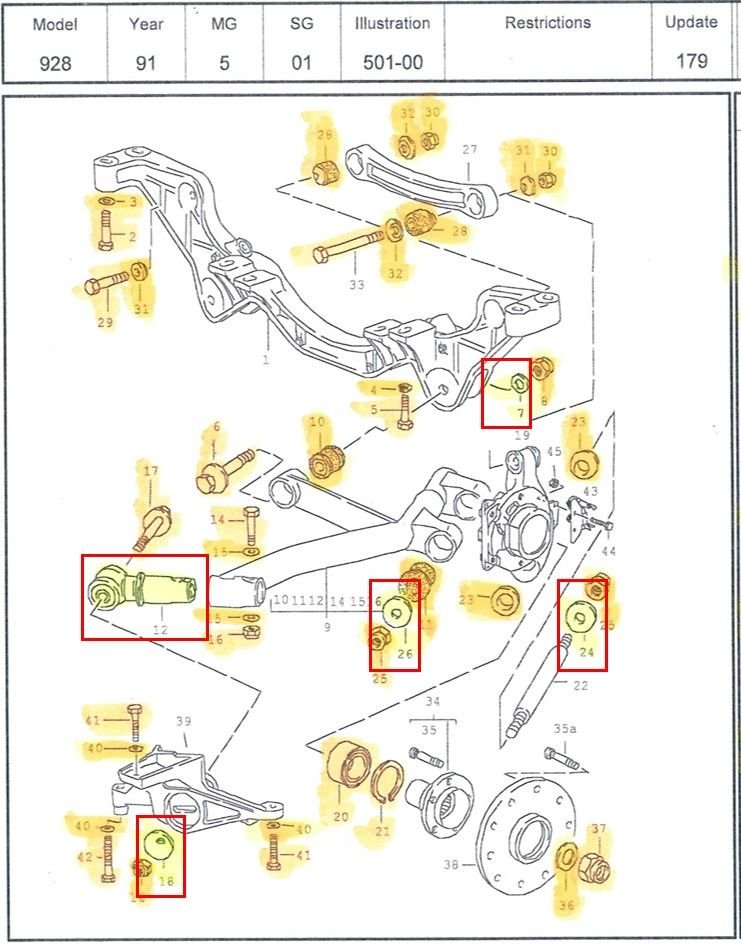
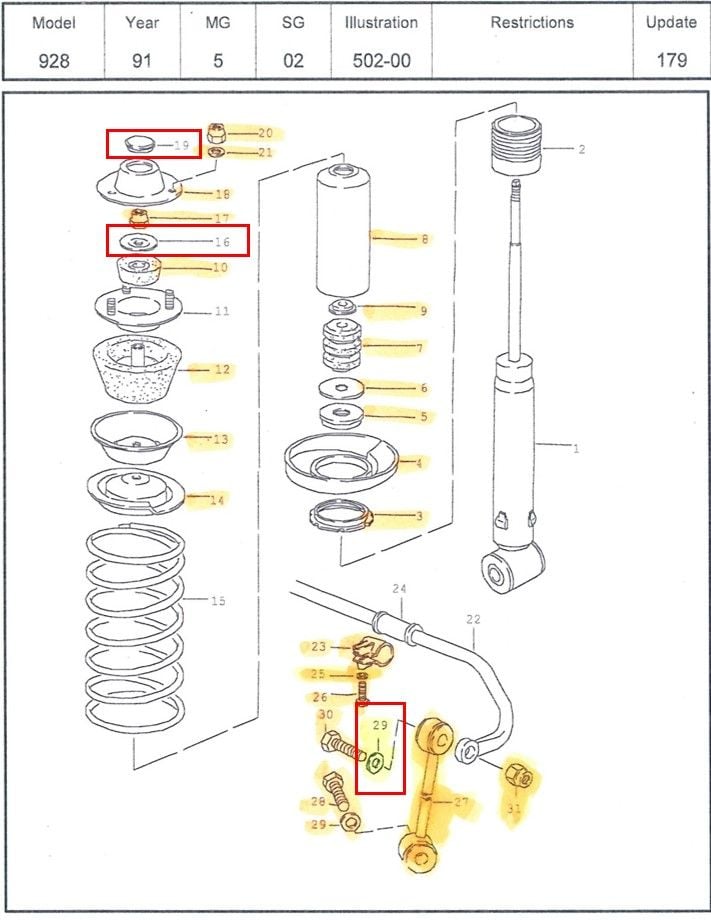
Below are the pages in PET that I used to keep track of what parts I ordered, and also which parts are NLA. Some have new part numbers: wherever applicable I wrote the new part number next to the old one.
Every "orange colored" part I ordered and is still available, every yellow part in the red boxes is NLA. Parts that are not colored I just did not (try to) order:
501-00 new part number:
Nr. 14 was: 900 082 140 01 now: N010 183 3
502-00 new part numbers:
Nr. 17 was: 900 910 046 02 now: 999 084 445 01
Nr. 26 was: N 010 472 4 now: 900 074 375 01
Nr. 28 was: N 010 445 2 now: 900 074 372 01
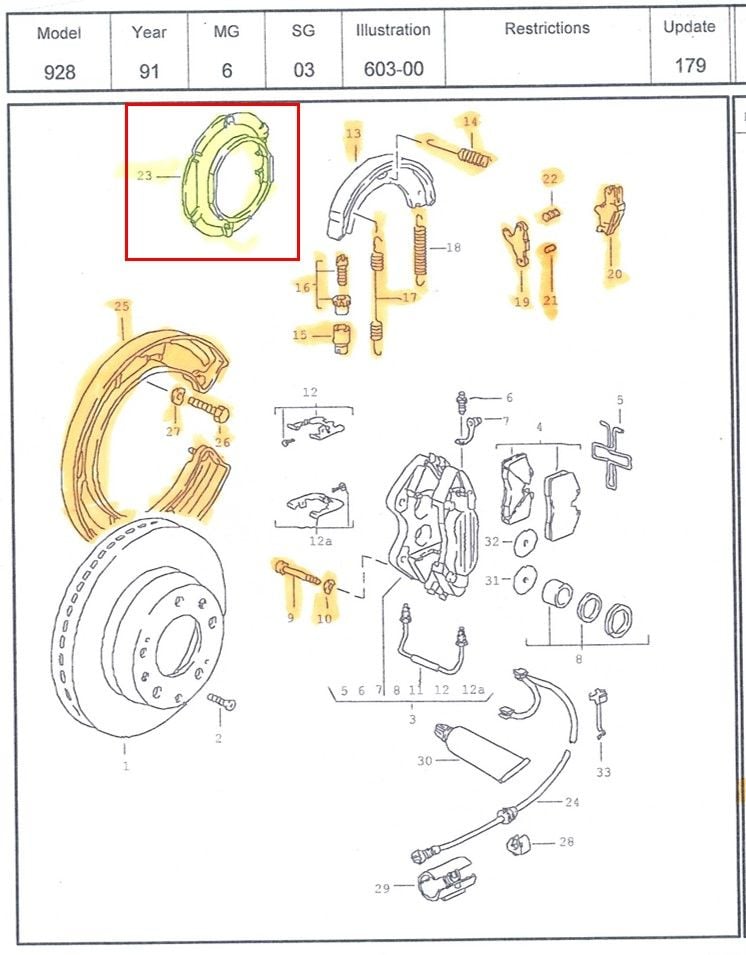
603-00 new part number:
Nr. 26 was: 999 075 005 09 now: 900 378 030 01
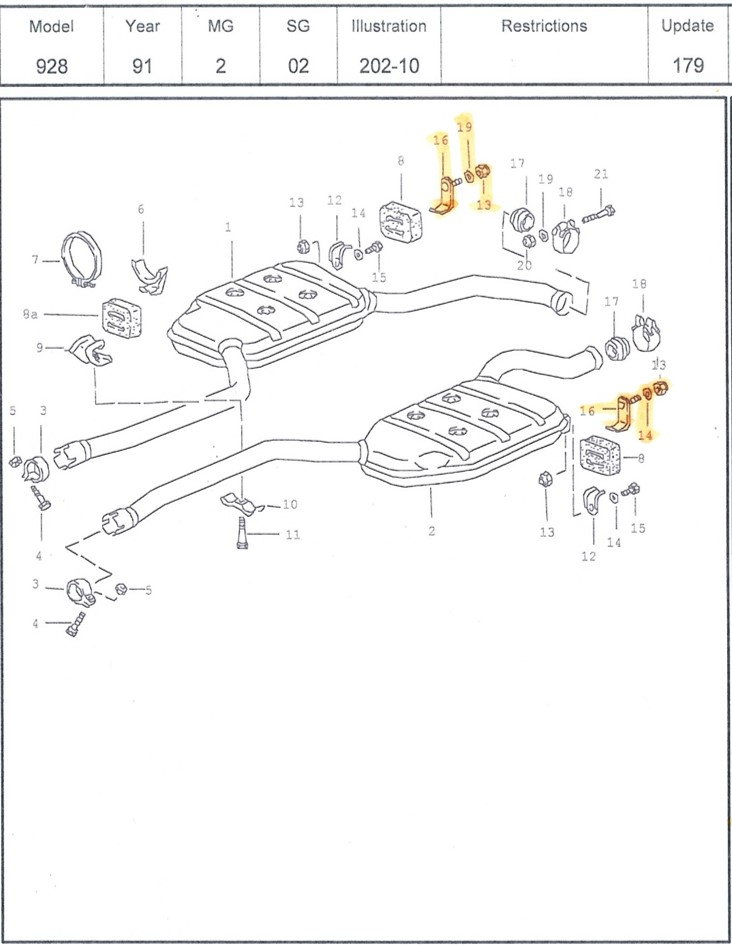
And one more, showing the brackets that are attached to the cross member for the exhaust system:
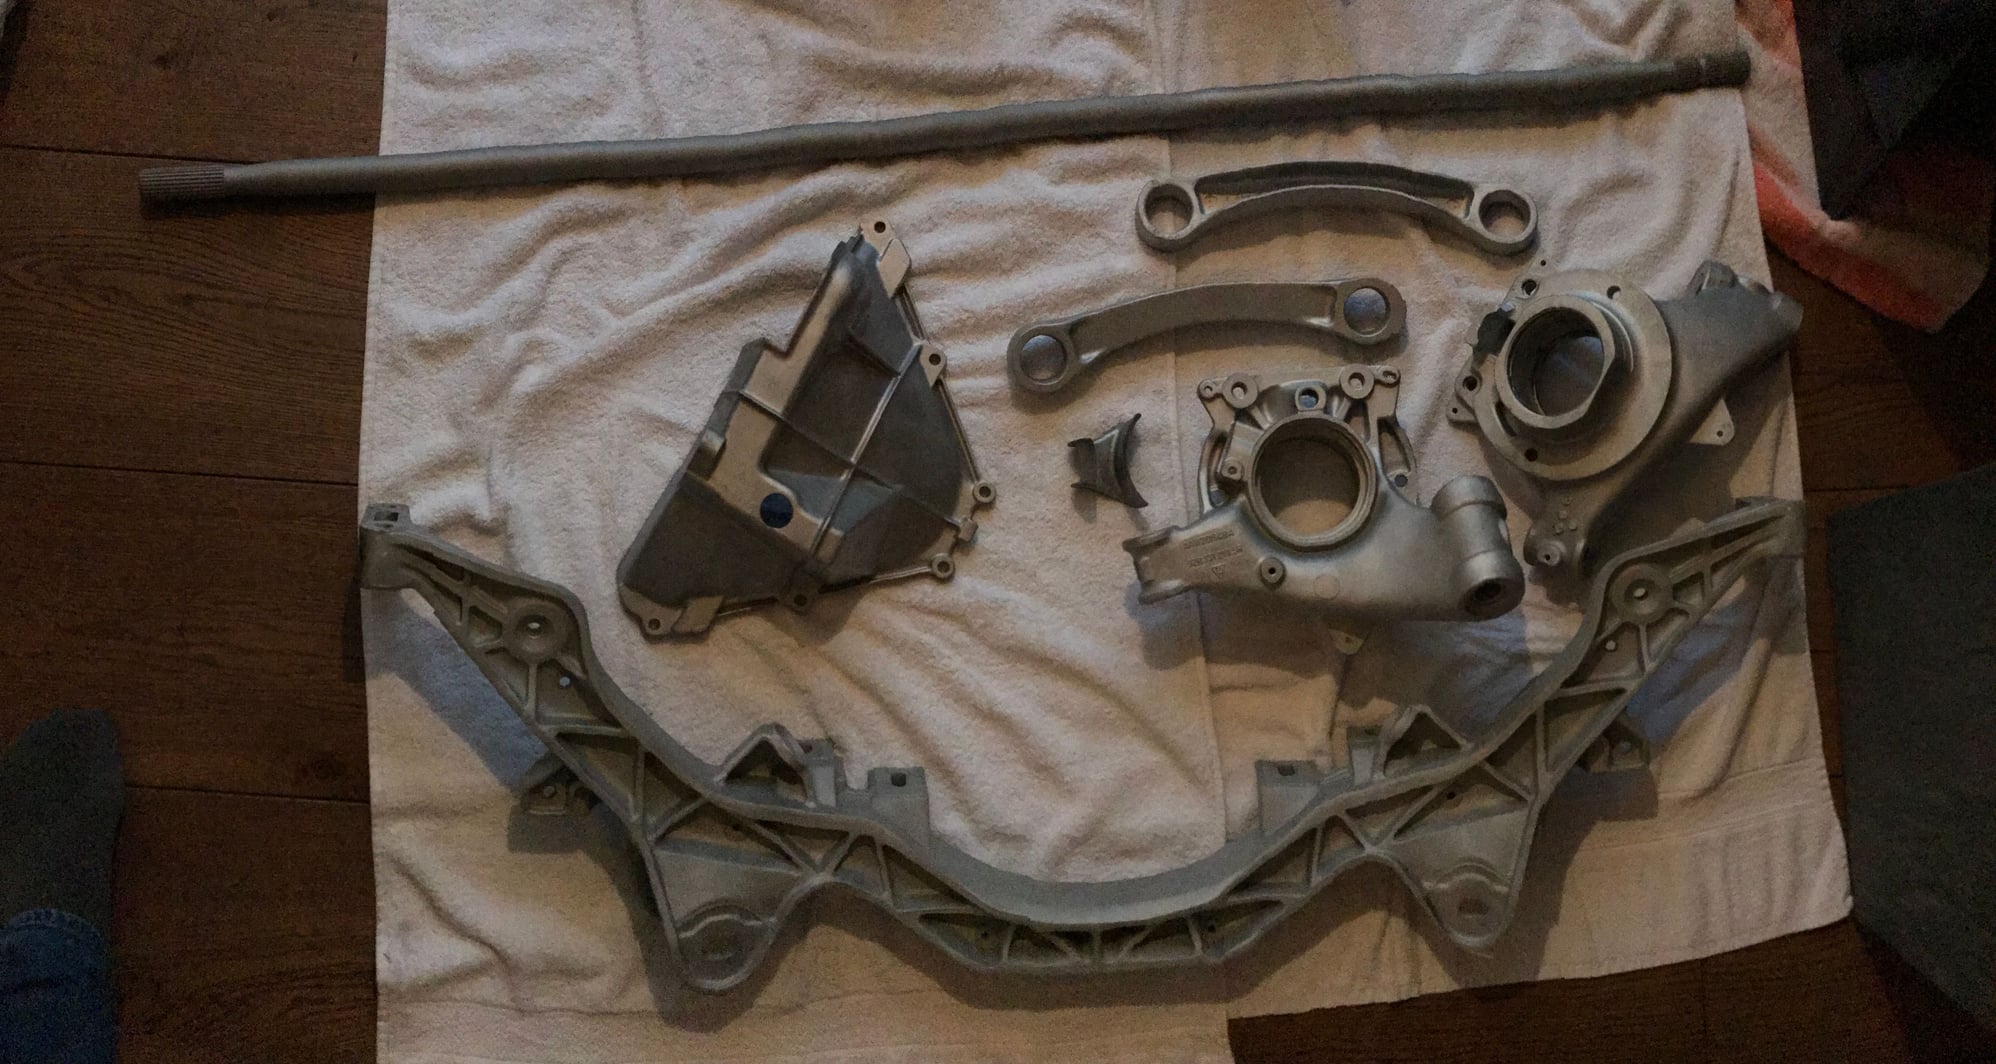
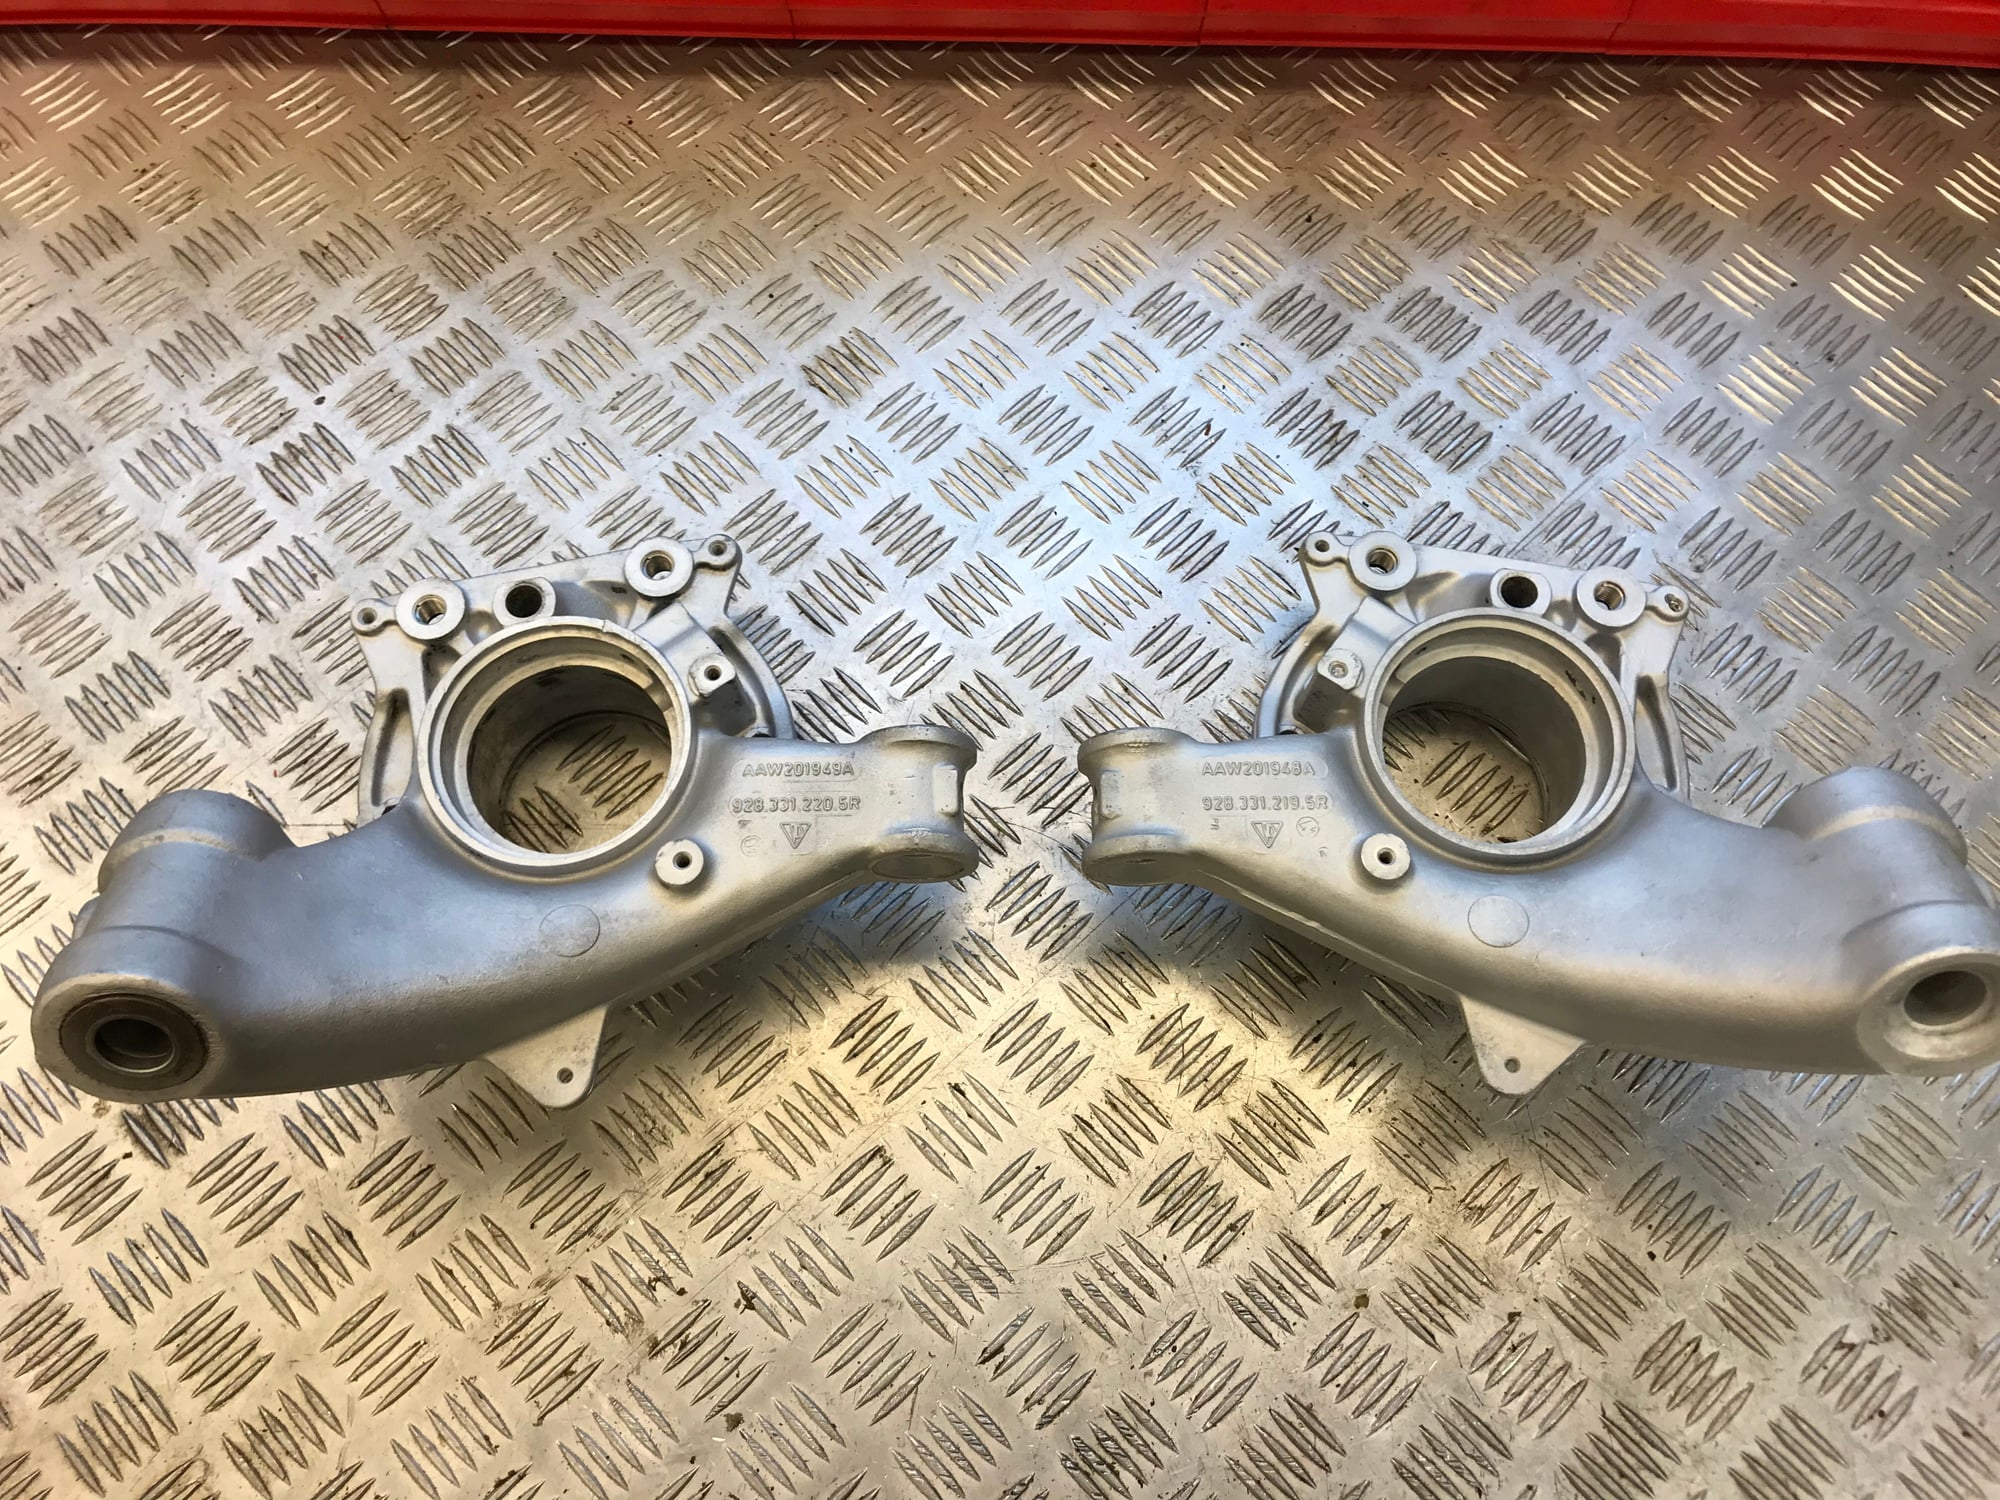
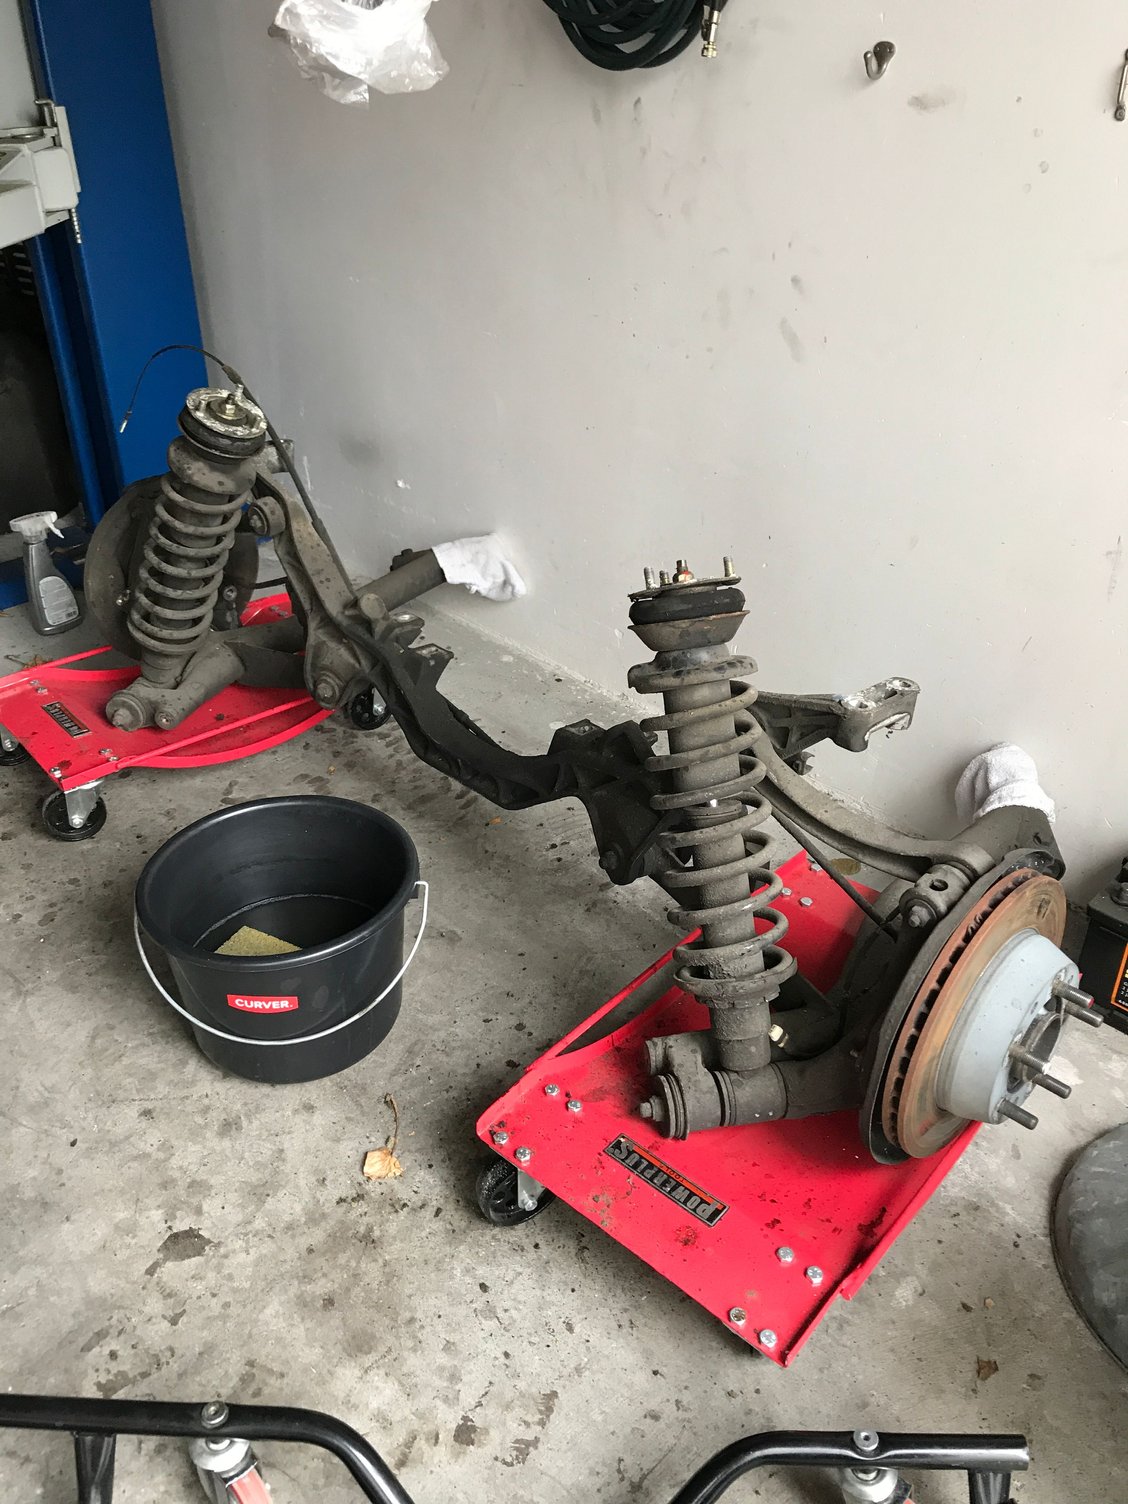
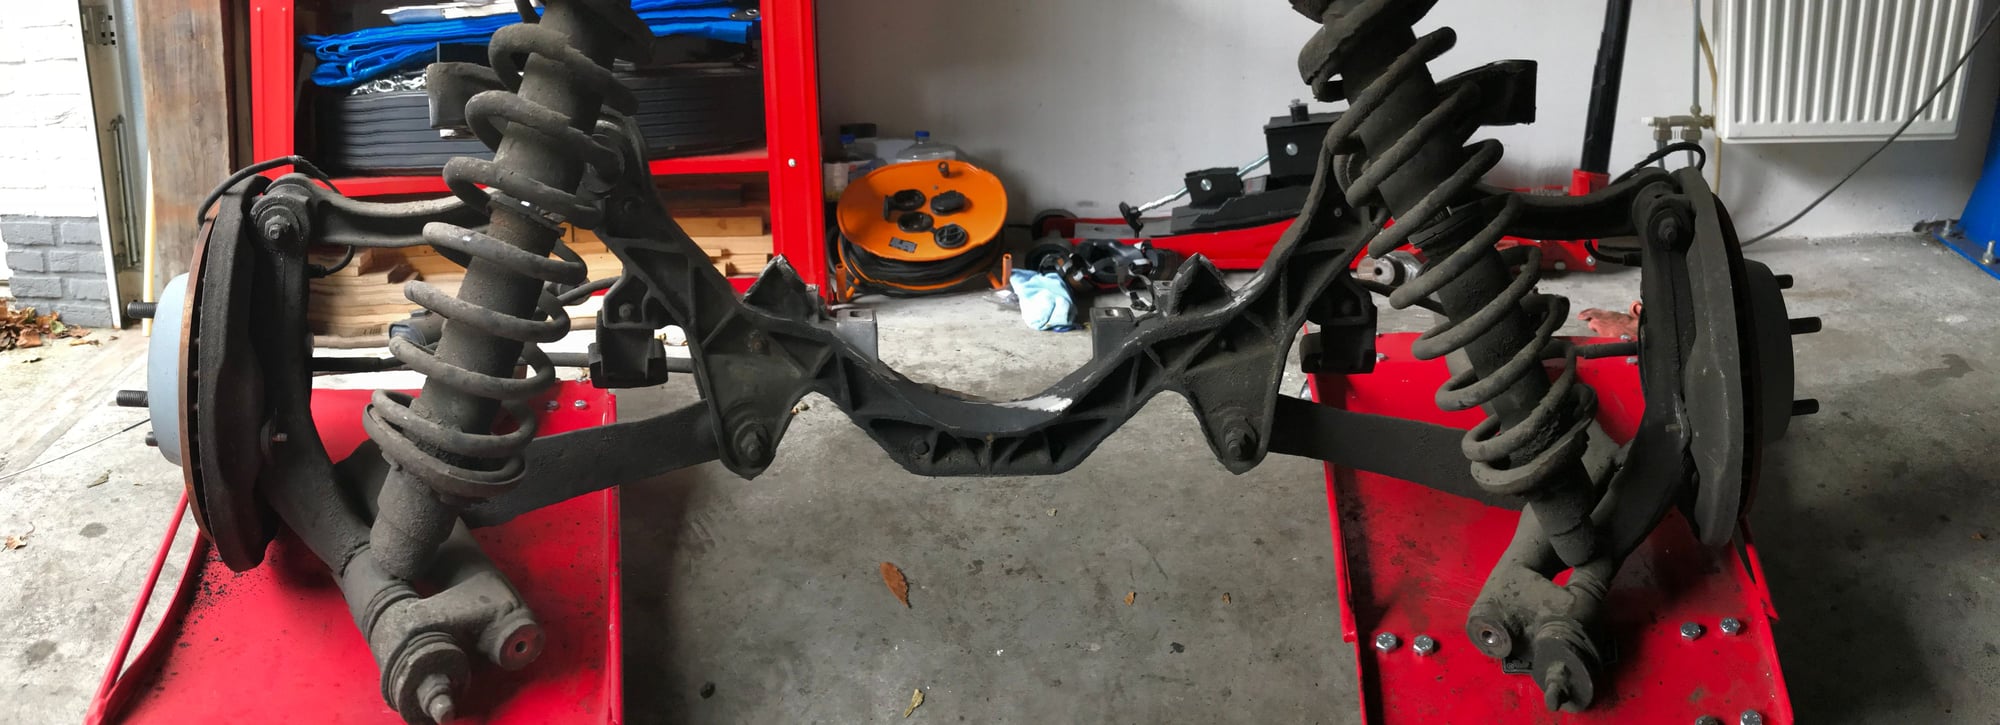
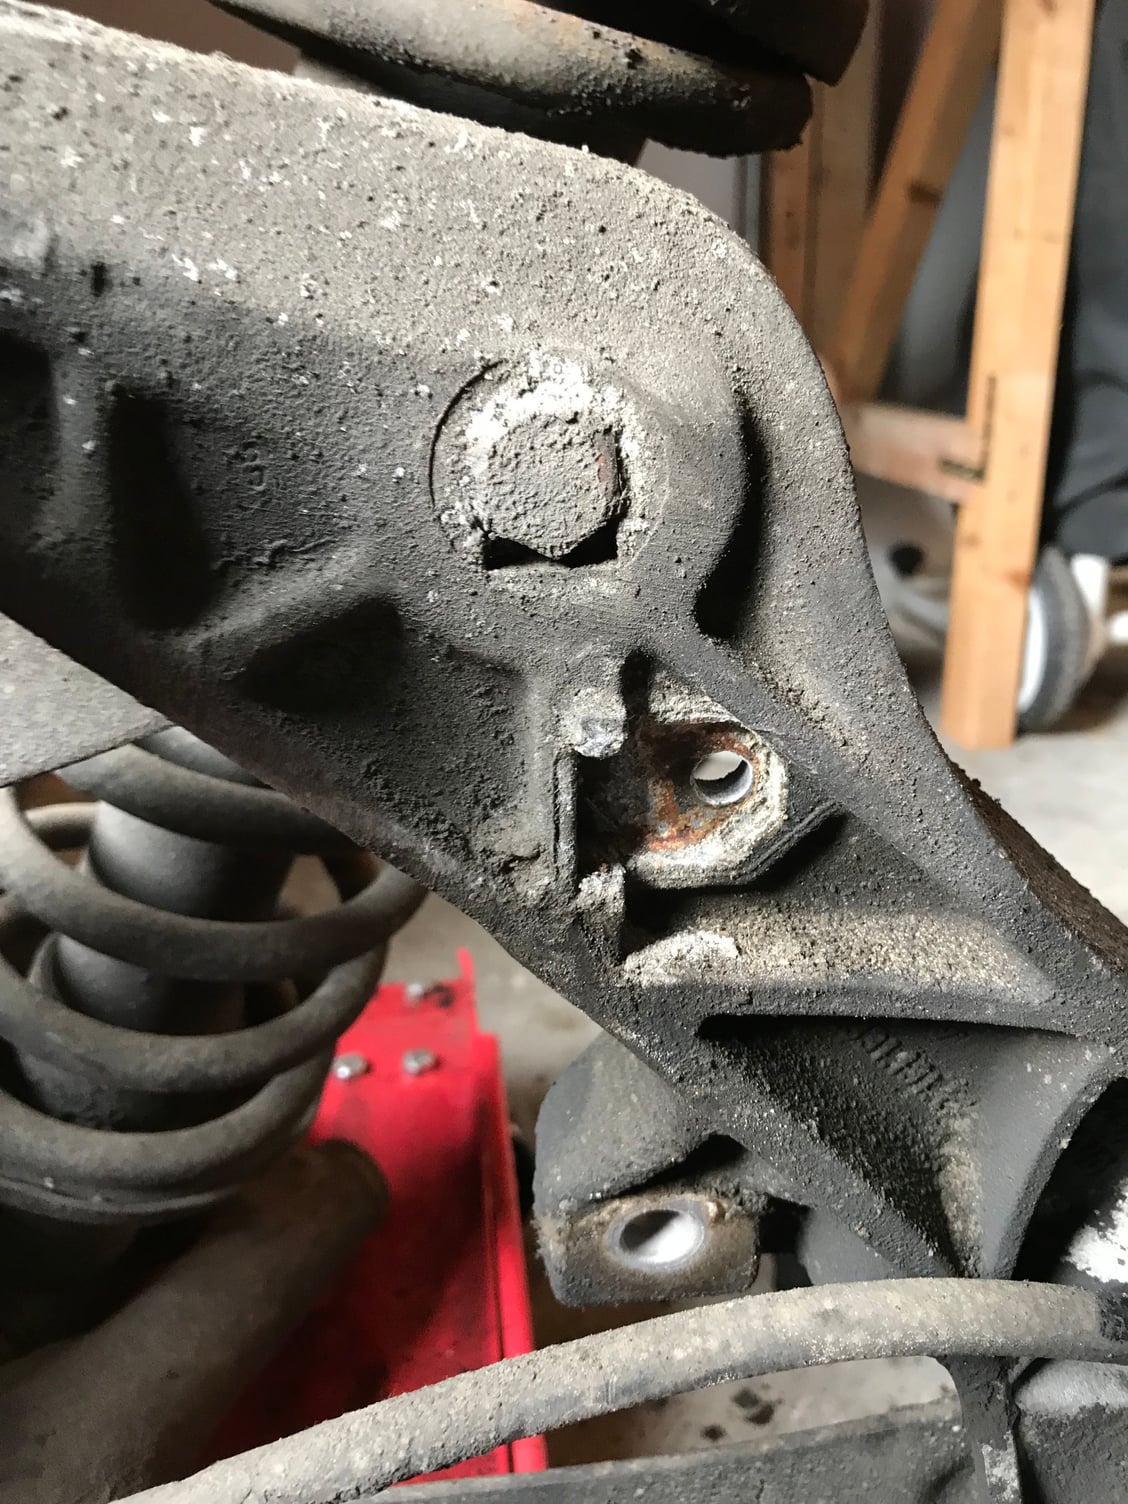
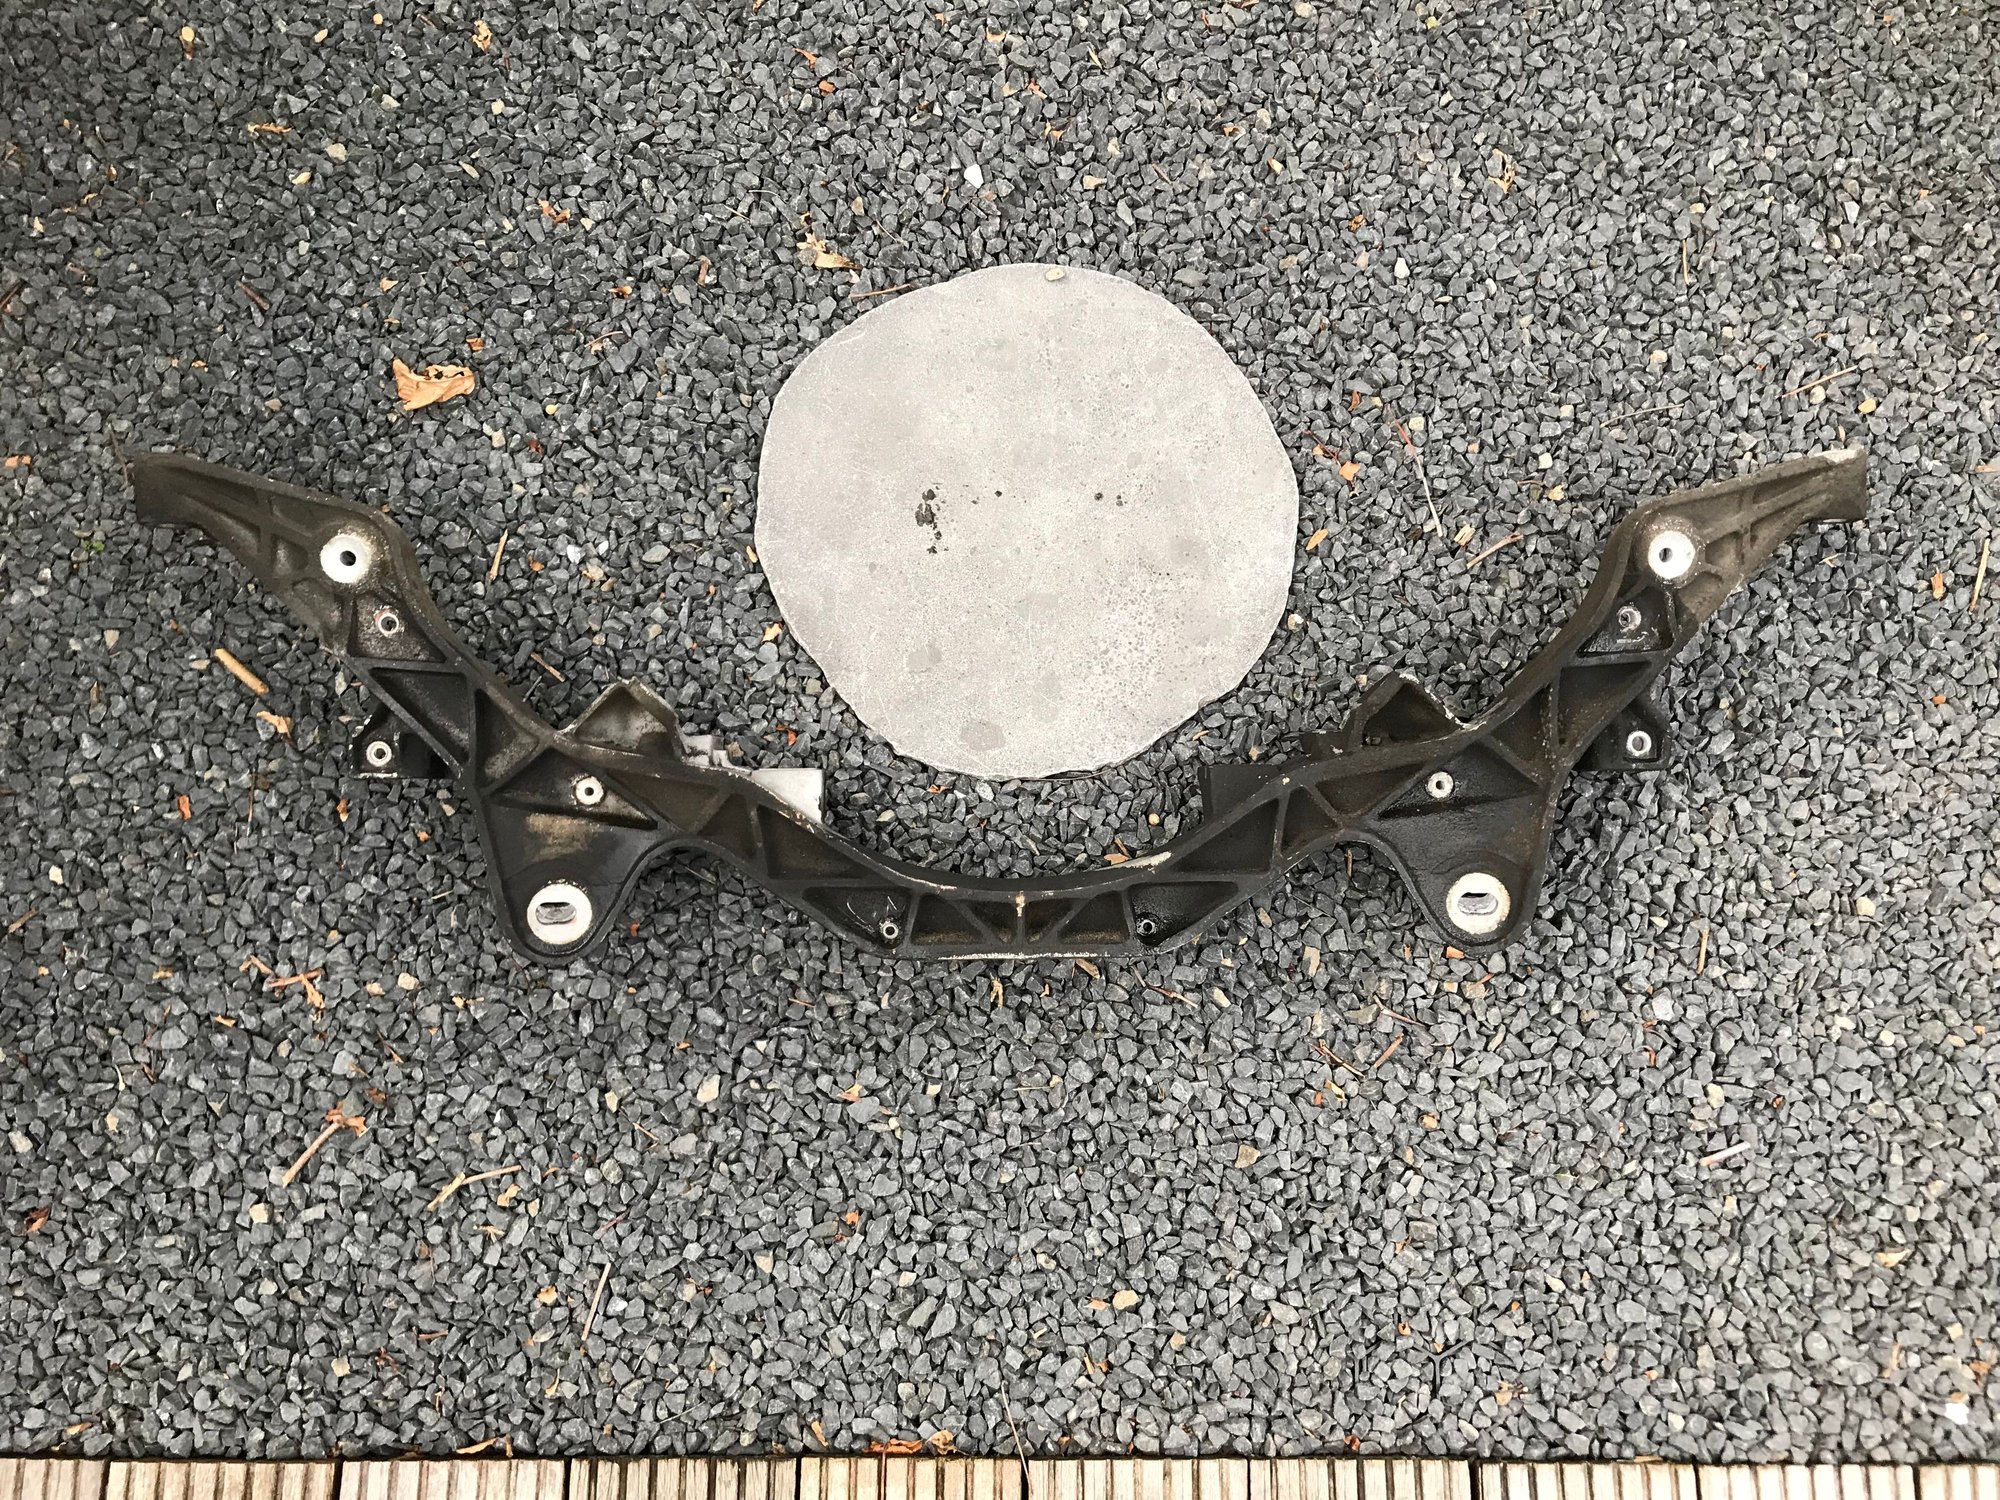
This is what my rear suspension looked like after we removed it from the car:
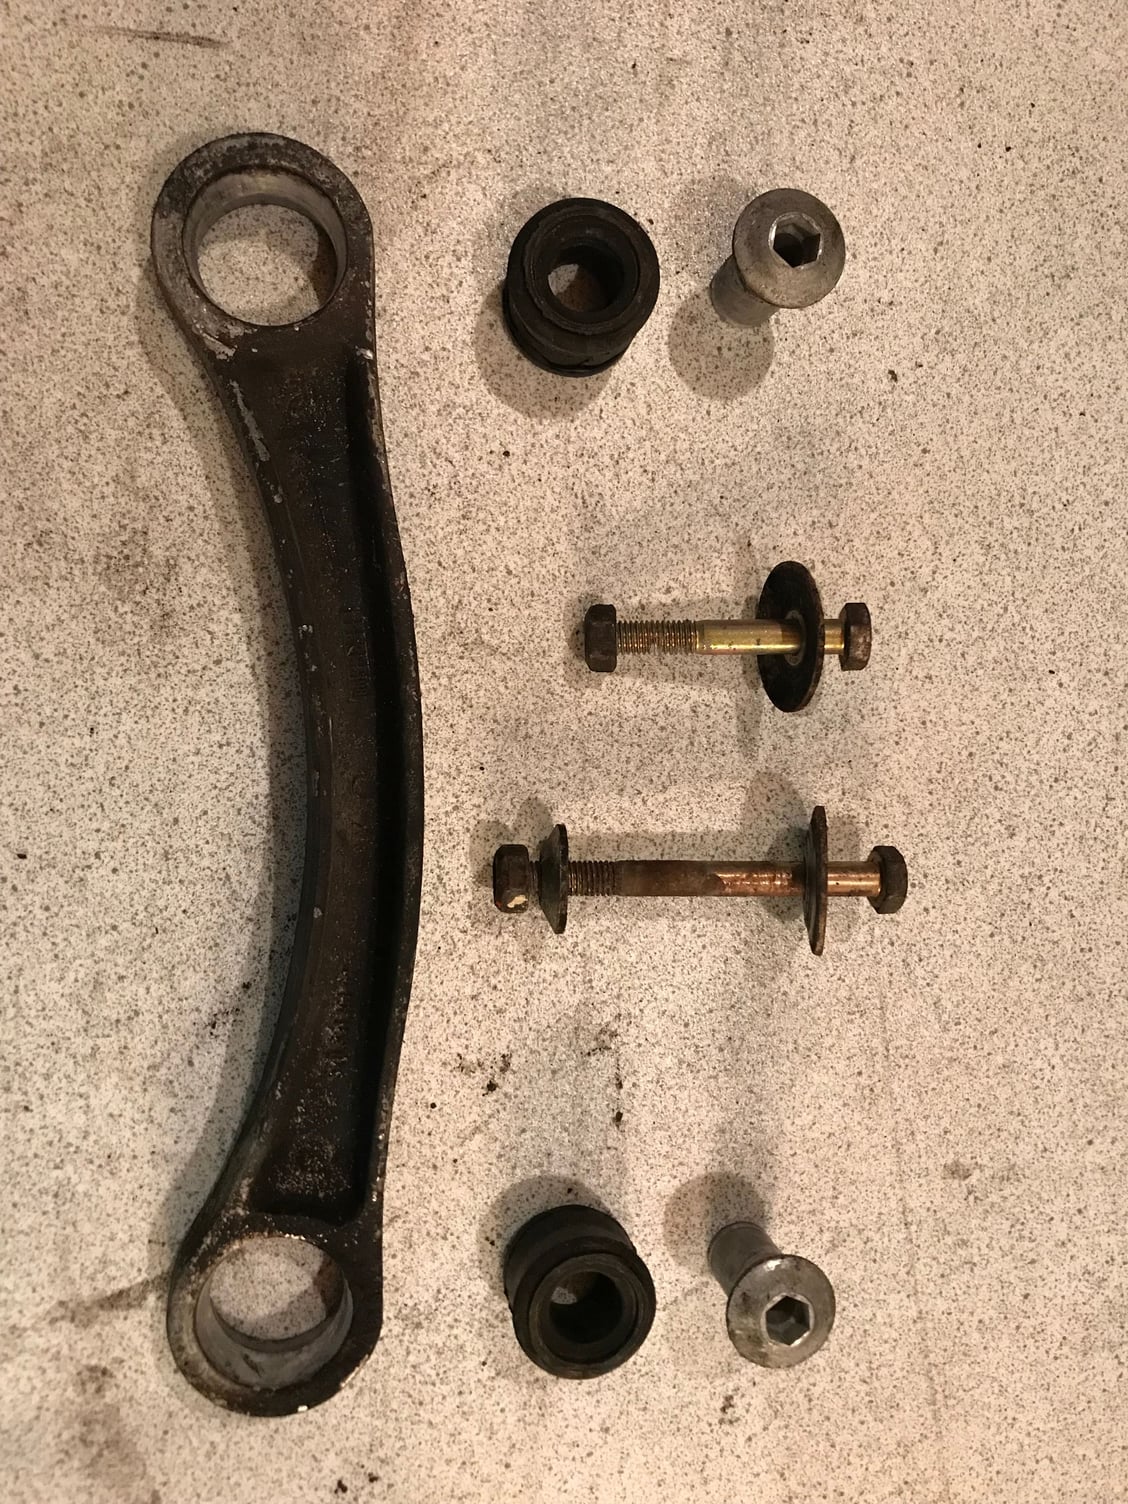
I started to take it apart:
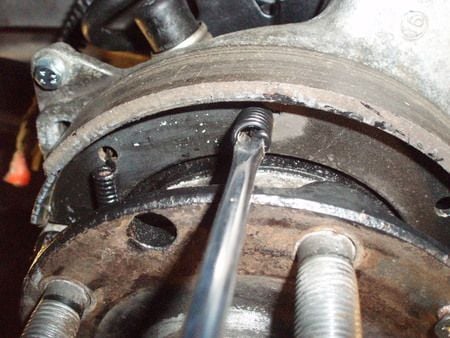
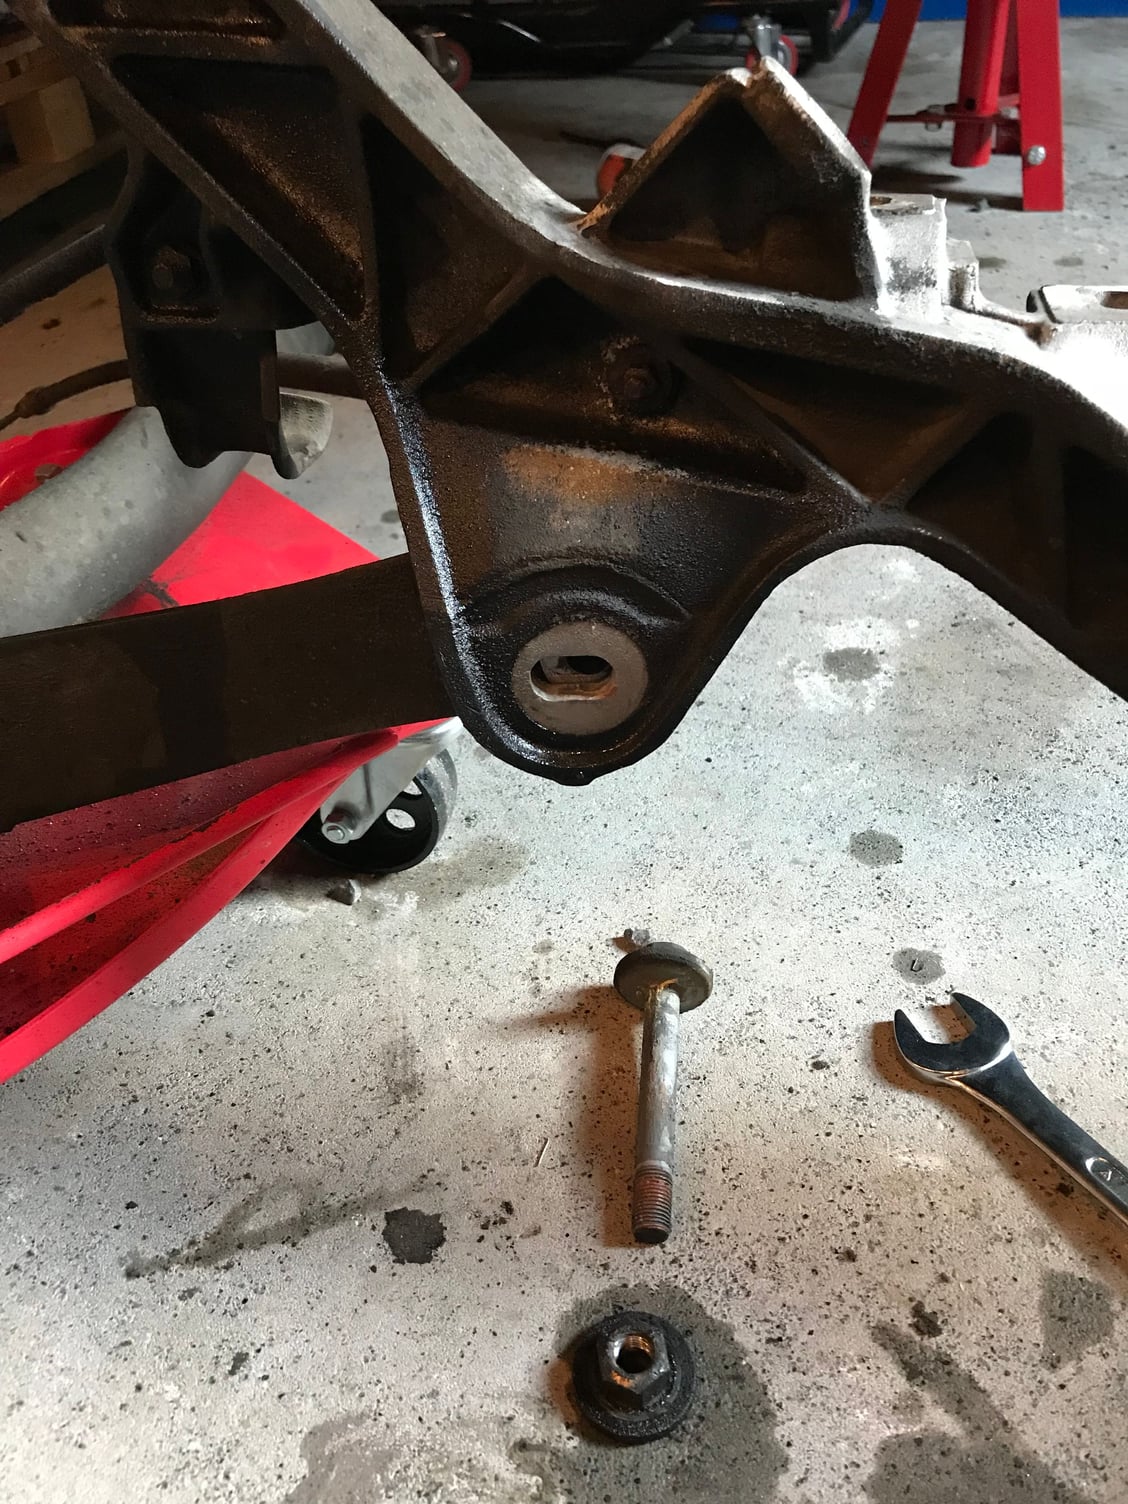
Removing the exhaust brackets (one of them refused to come off without some brutal force...
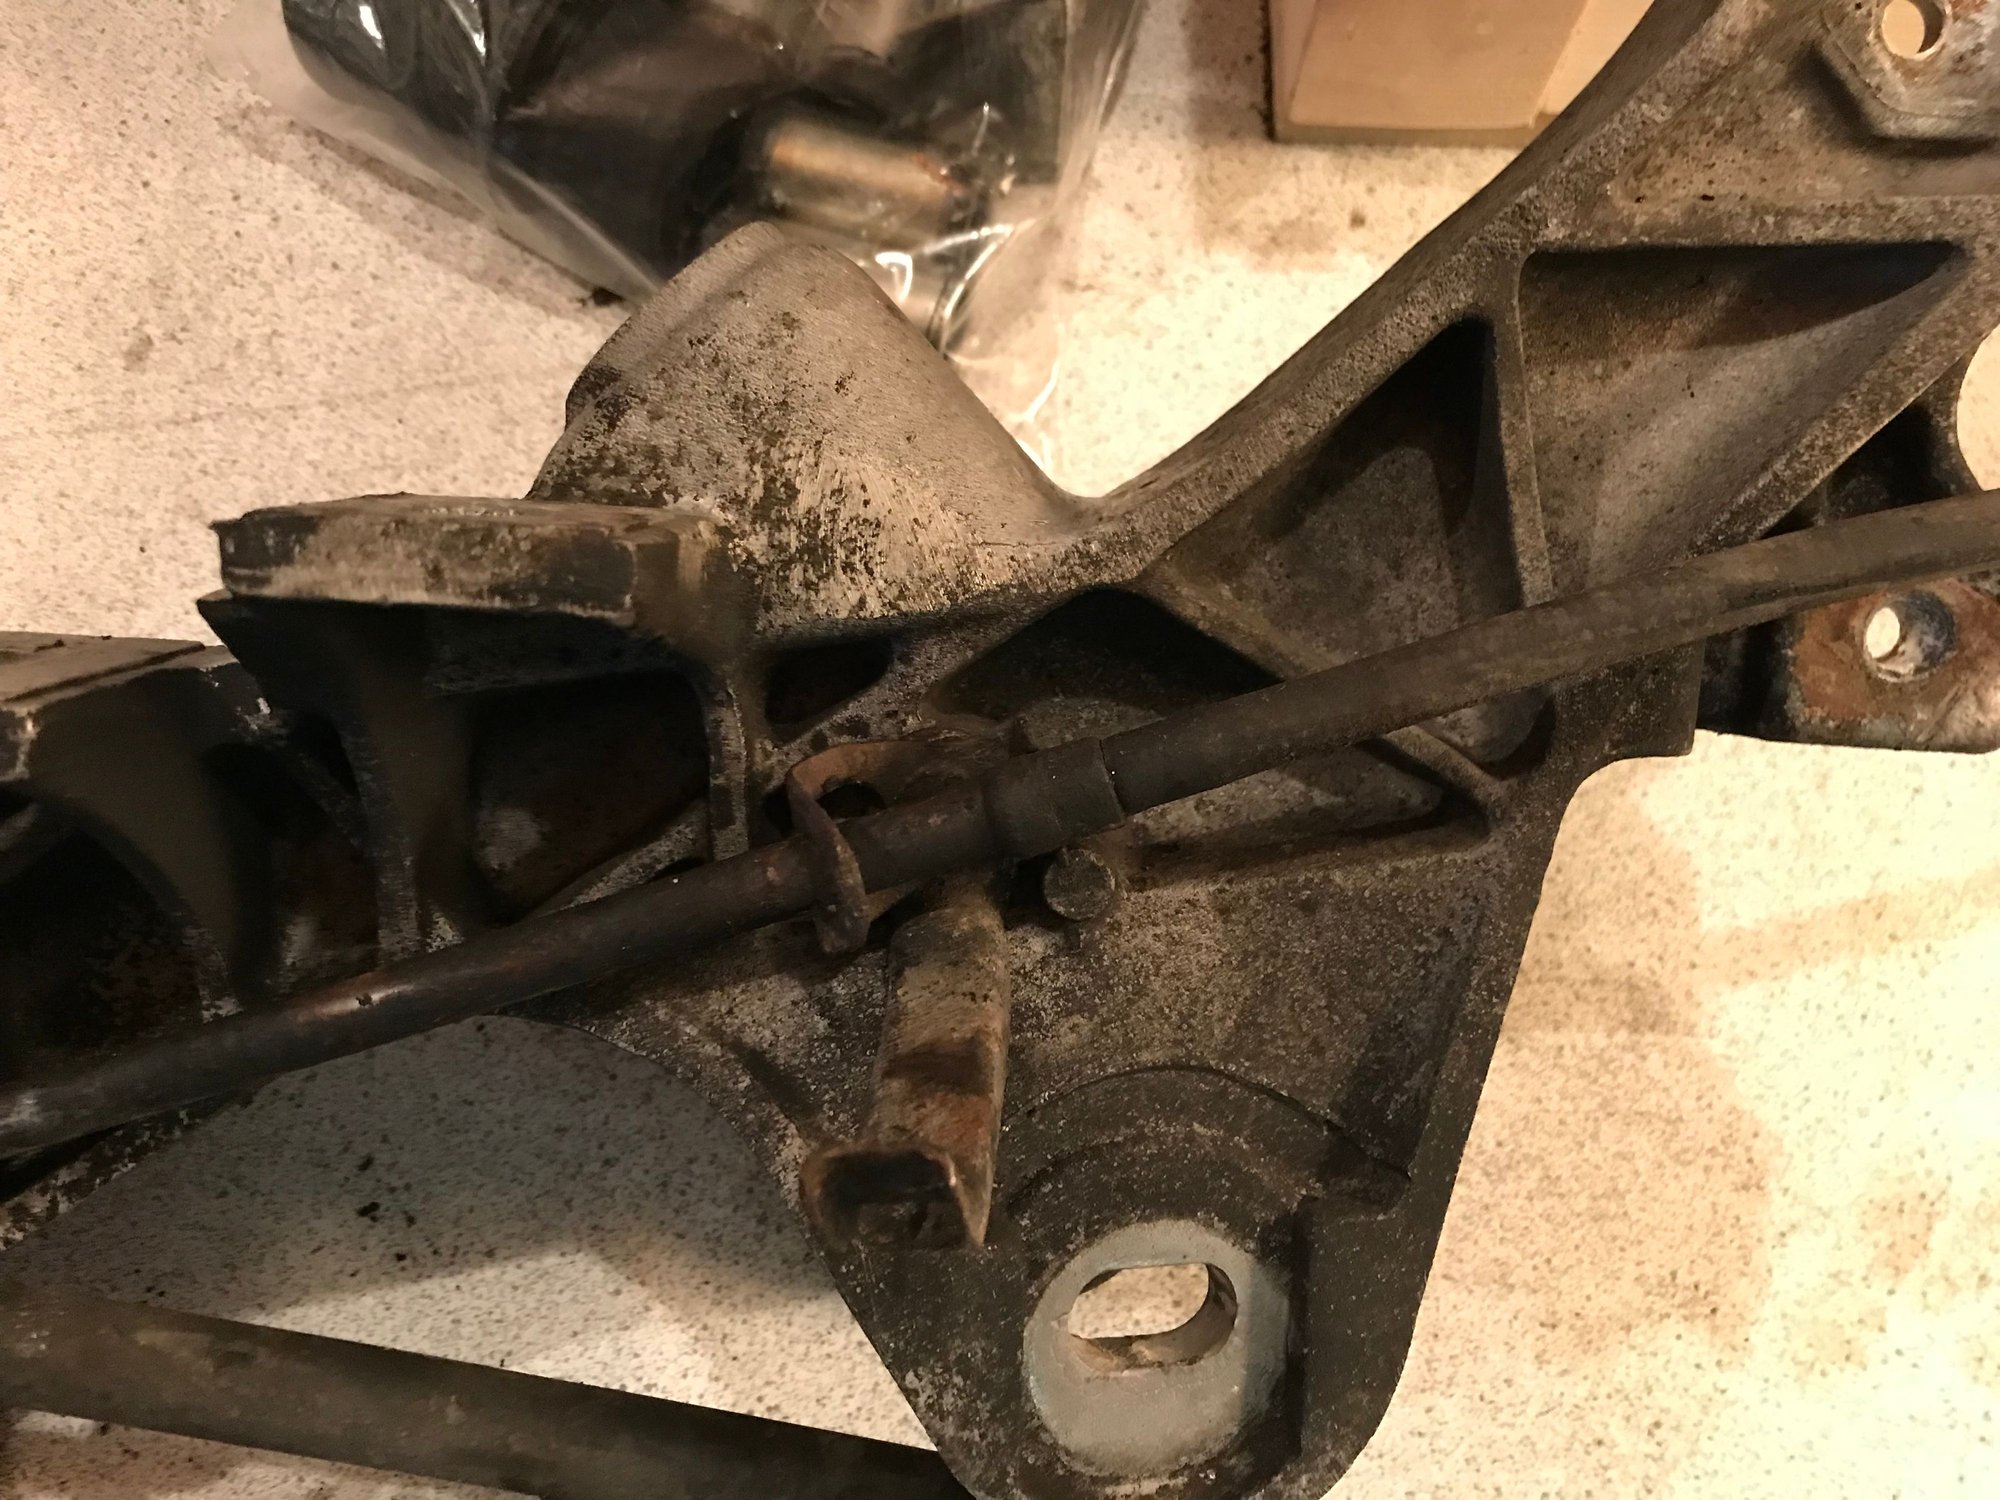
Next the 2 brackets for the ABS wiring harness:
And next the hand brake cables:
Make sure to save the bracket that is attached to the handbrake cable mount, as it is NLA:
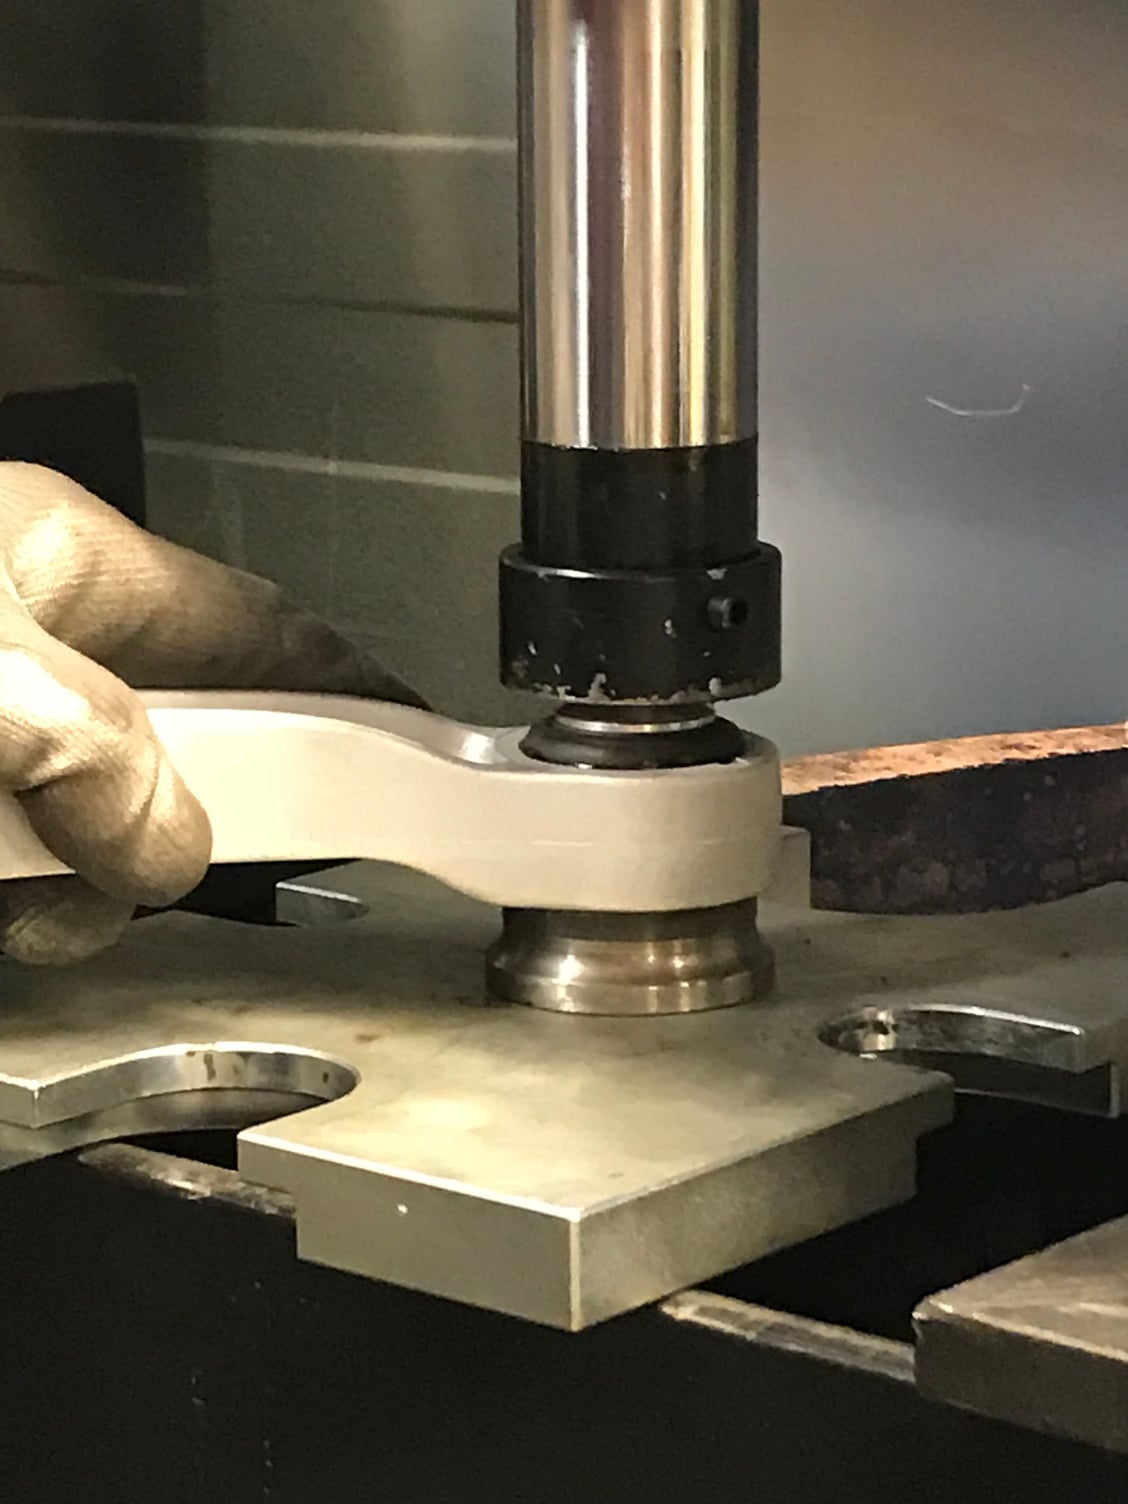
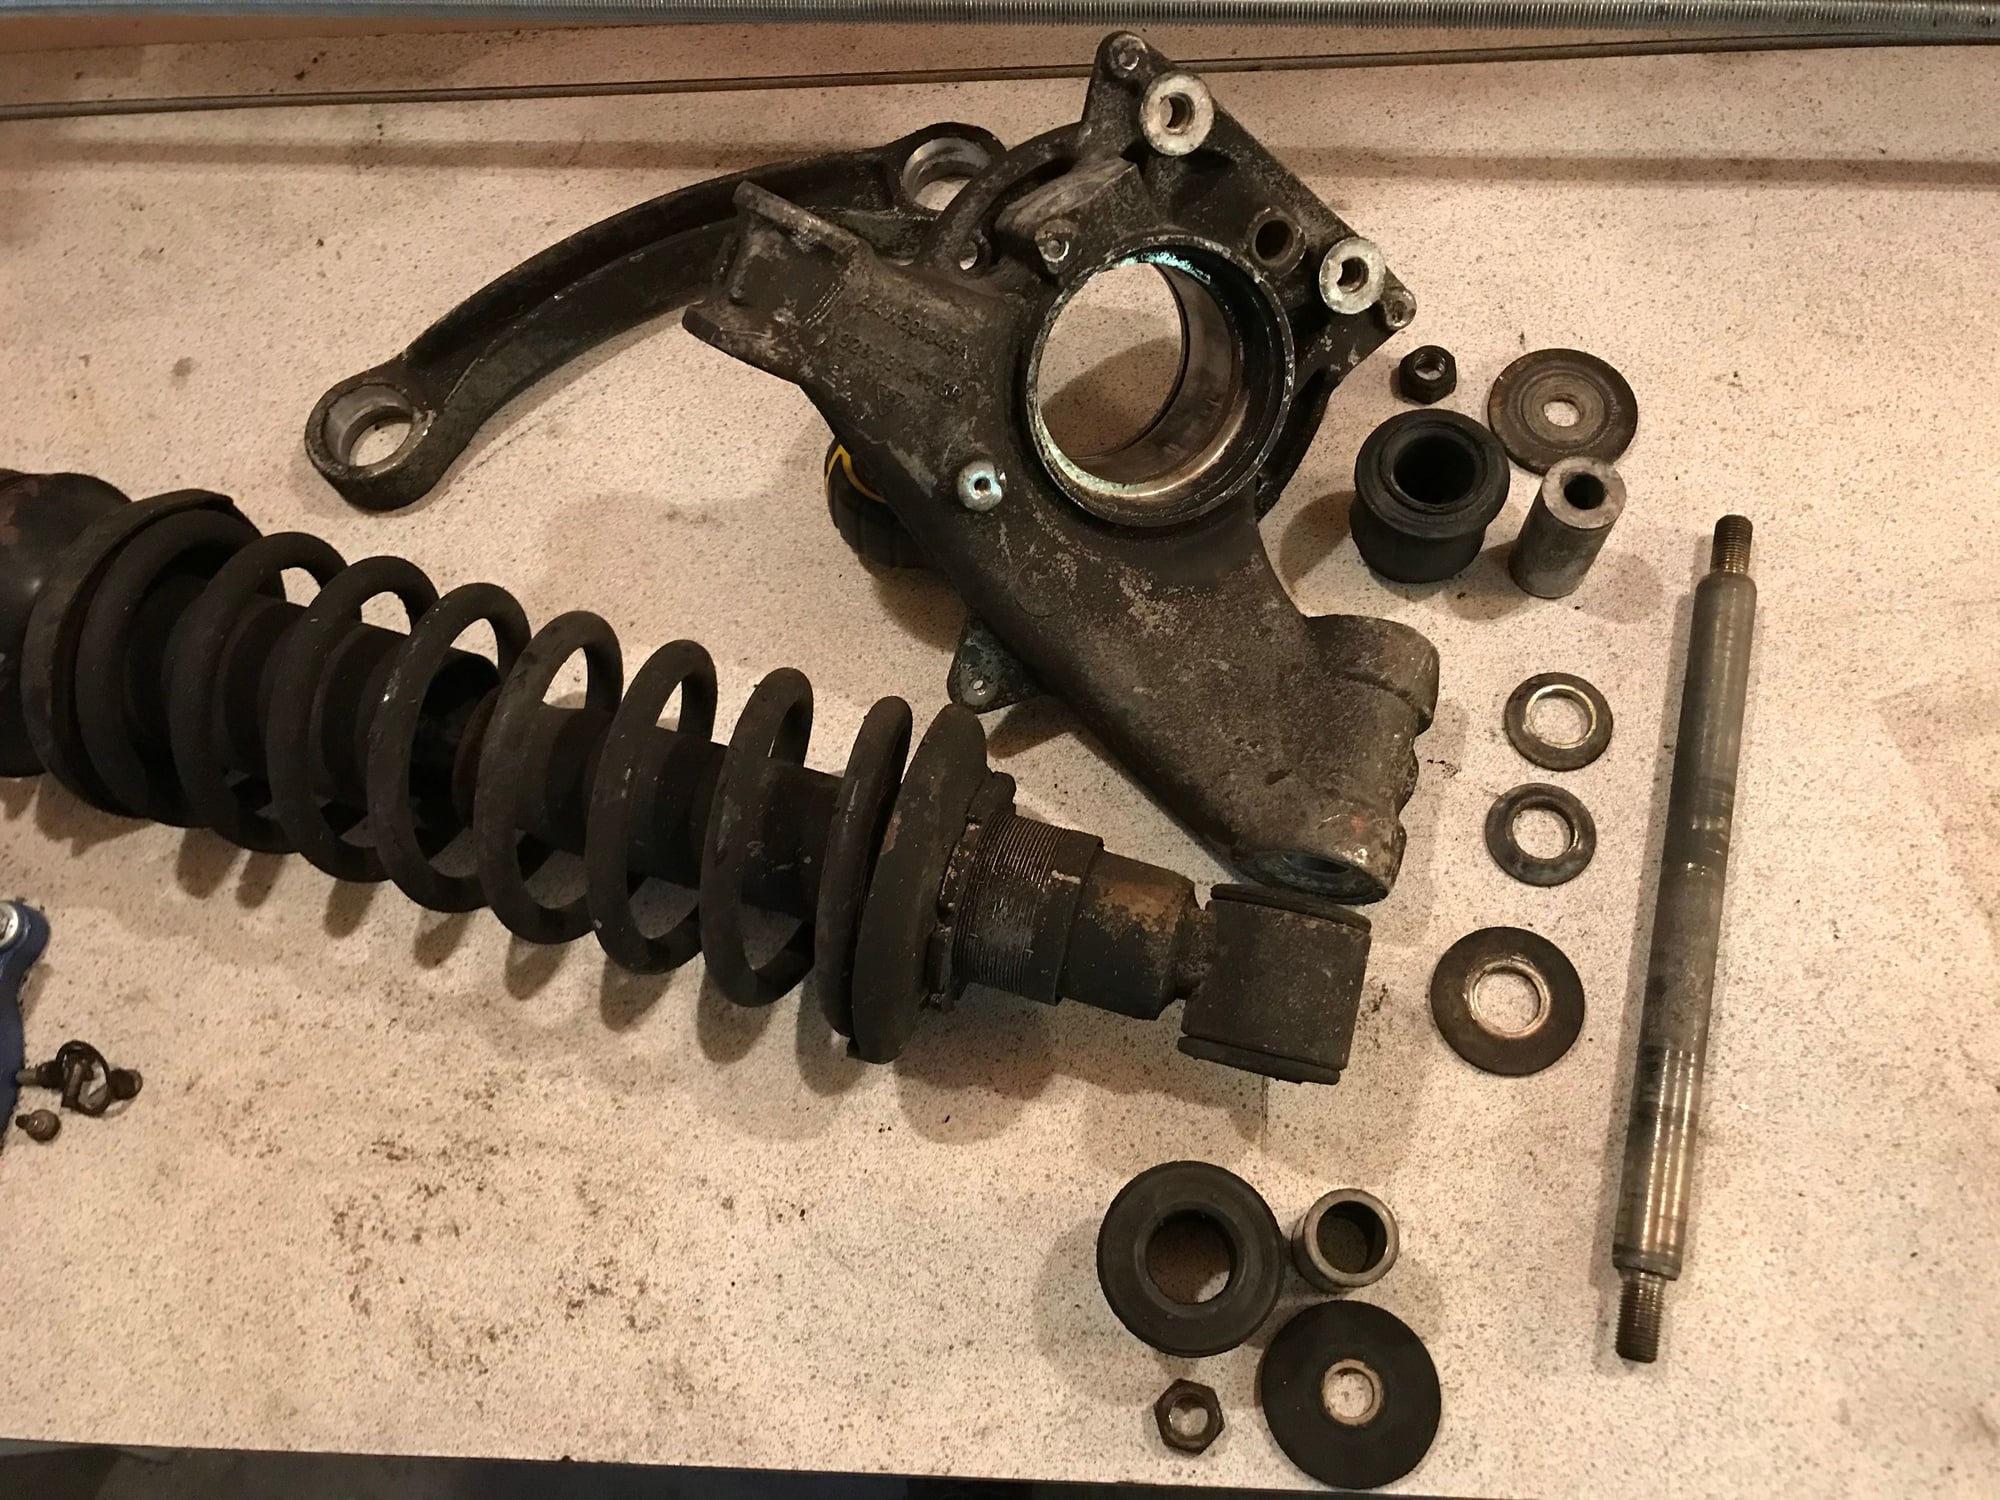
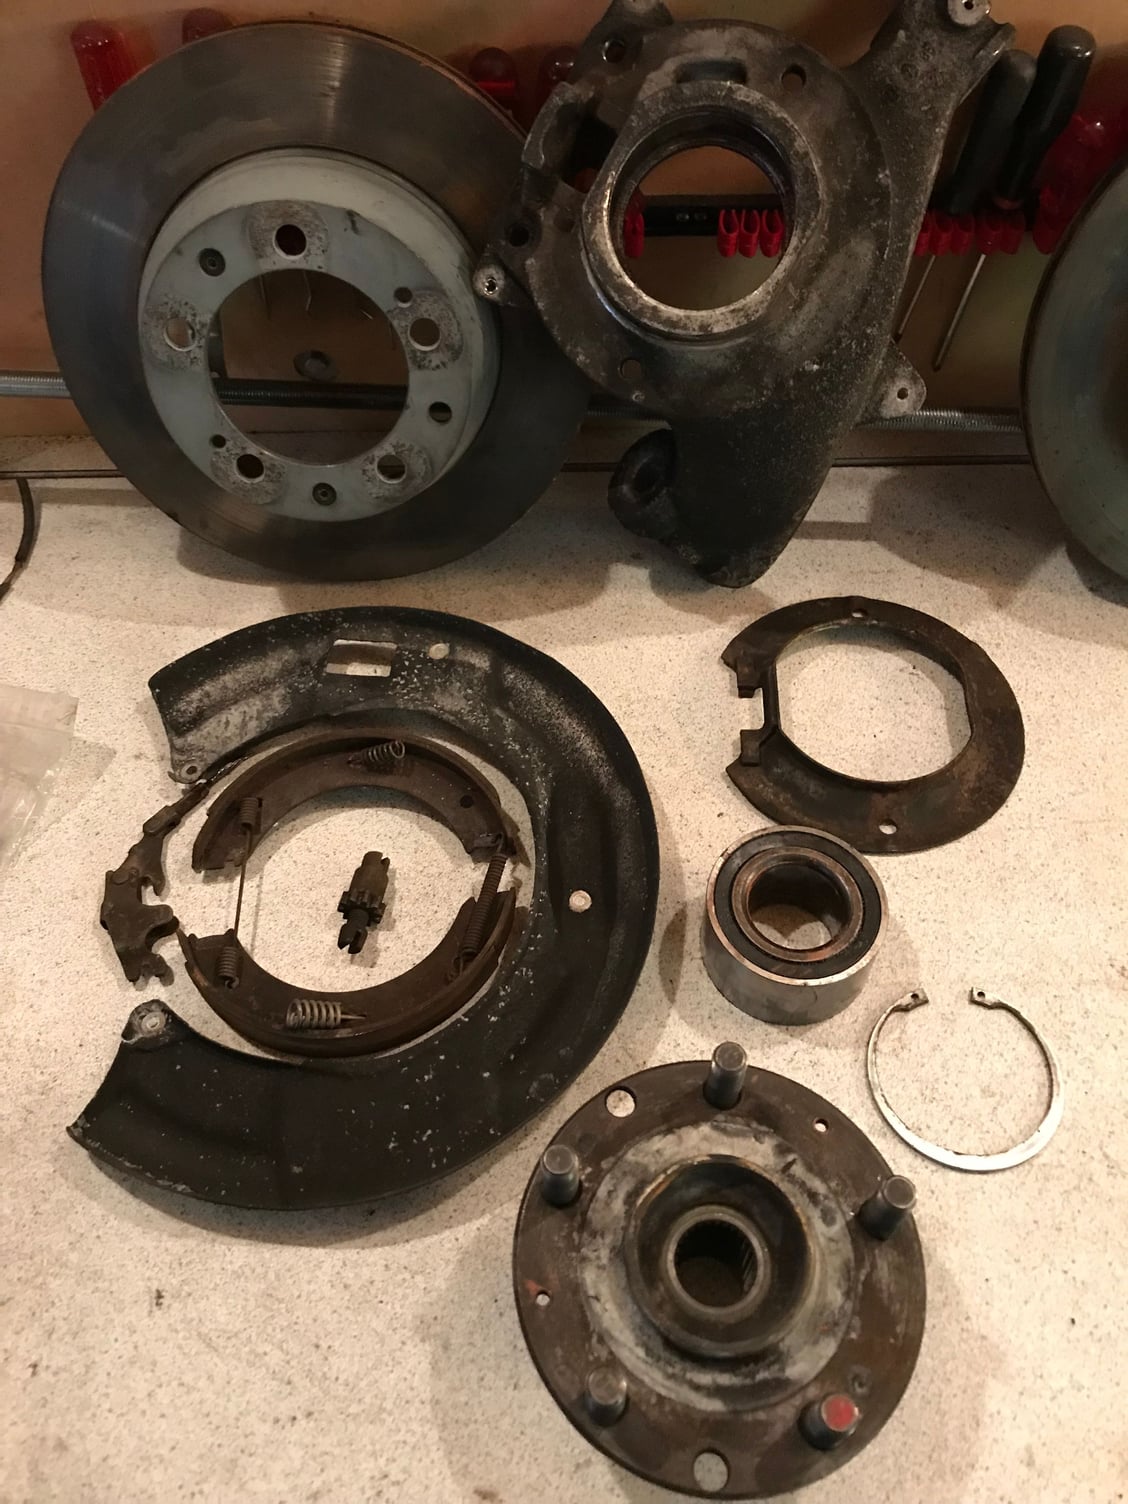
Here is the hub assembly detached from the cross member:
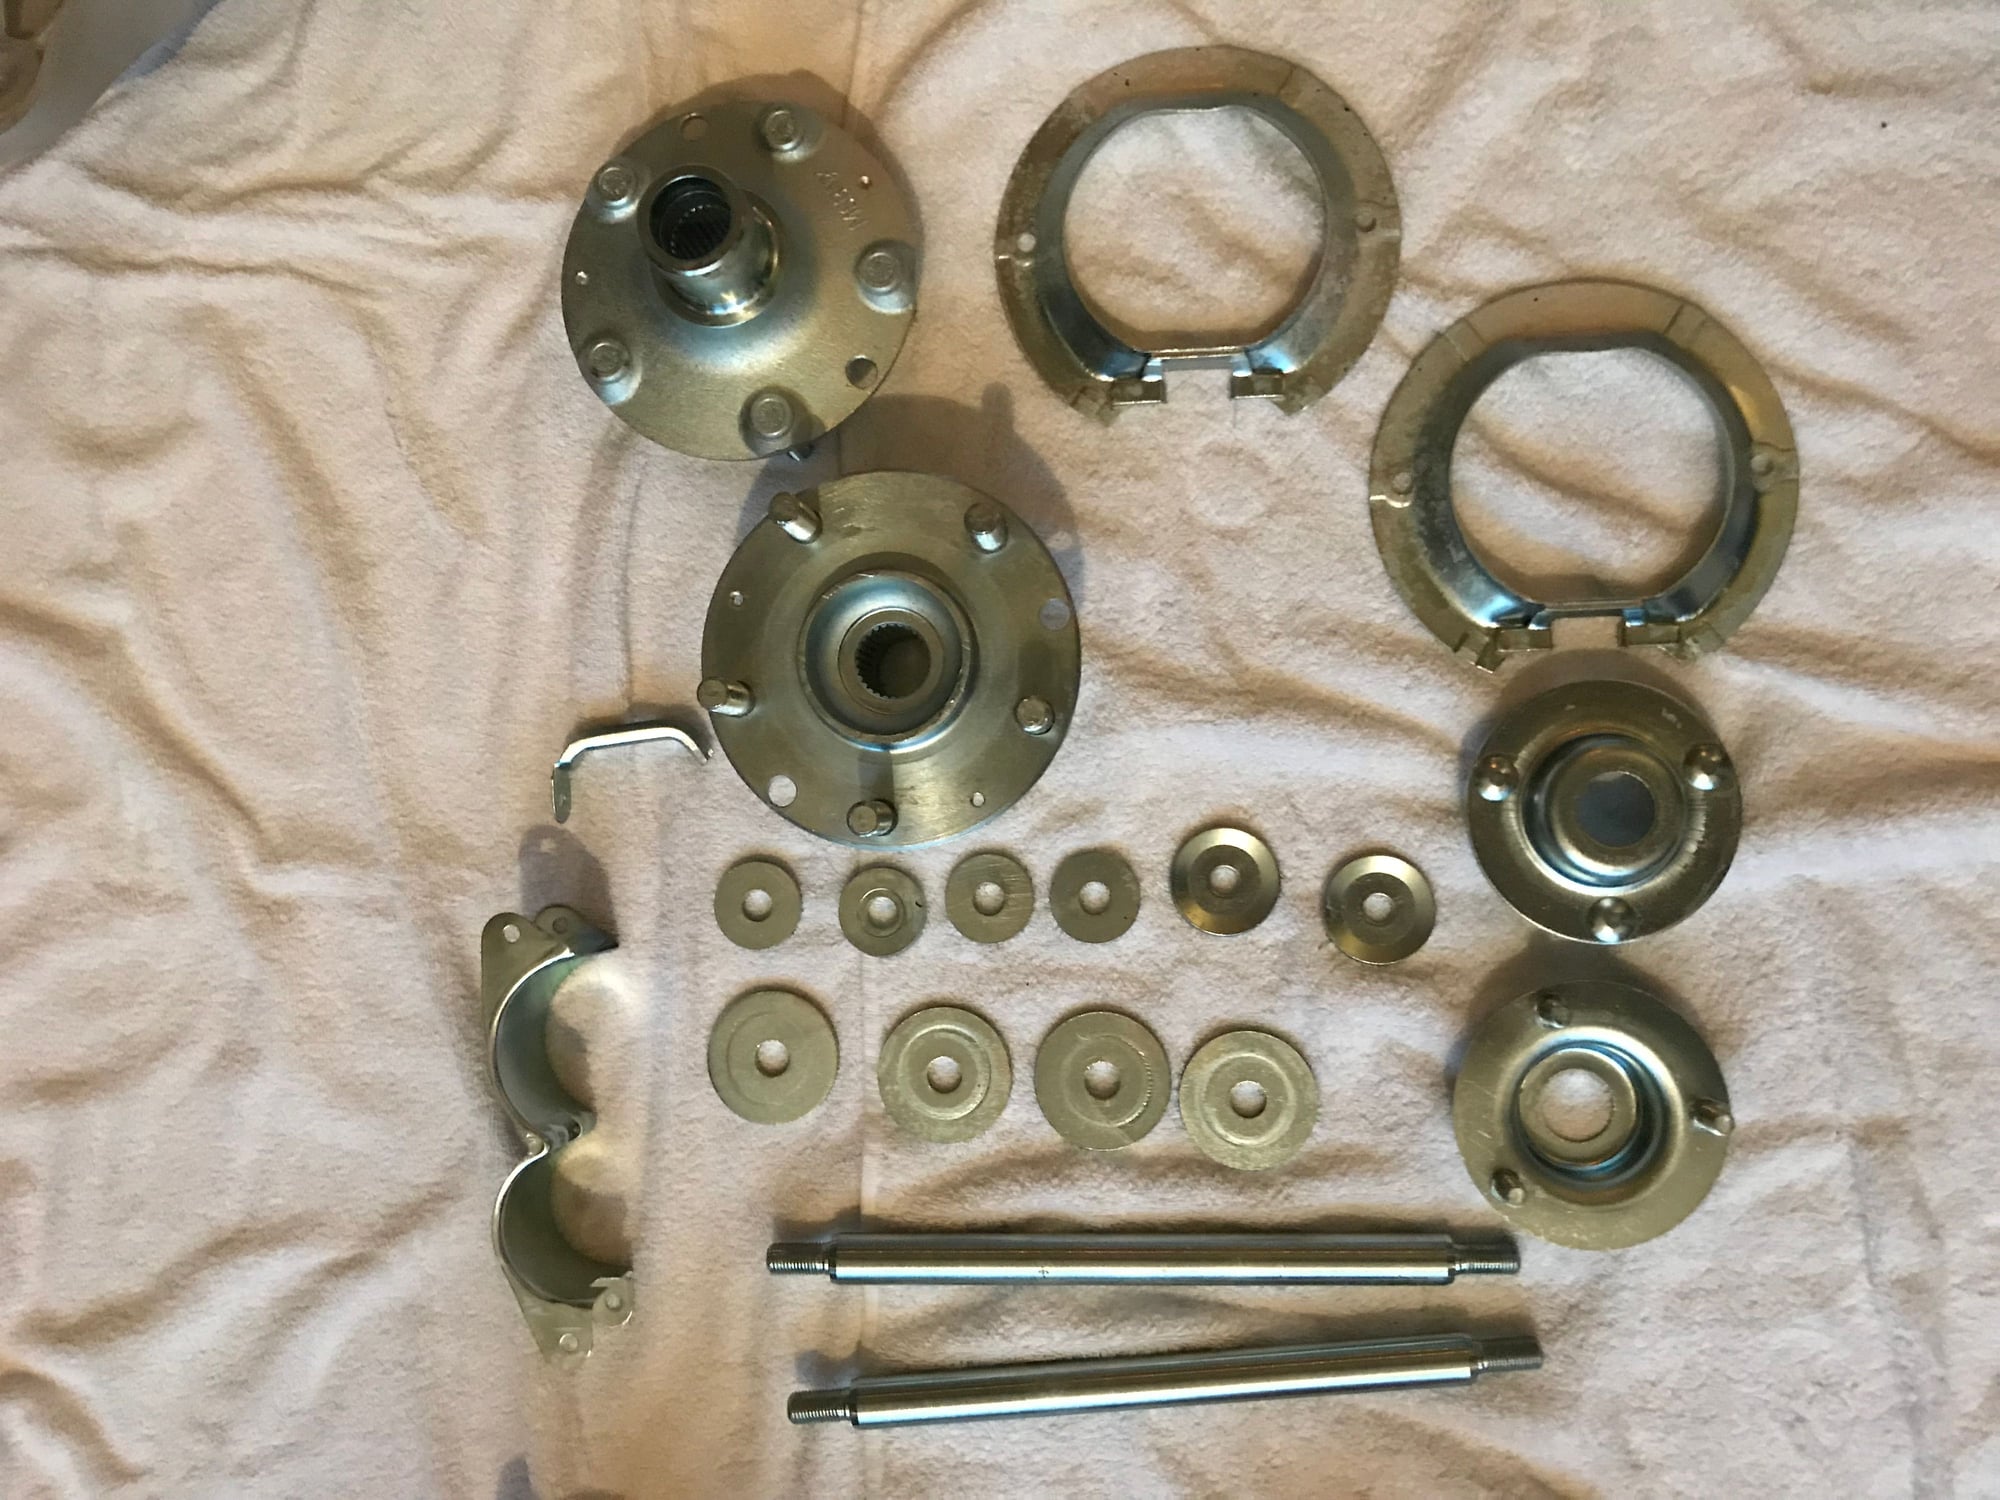
A 'line up' after the wheel hub, bearing and ABS sensor (which were completely stuck on both sides and a nightmare to get out...) were pressed out of the wheel carrier:
And finally everything is apart and ready for "treatment":
The results and first rebuild attempts will be in the next post...
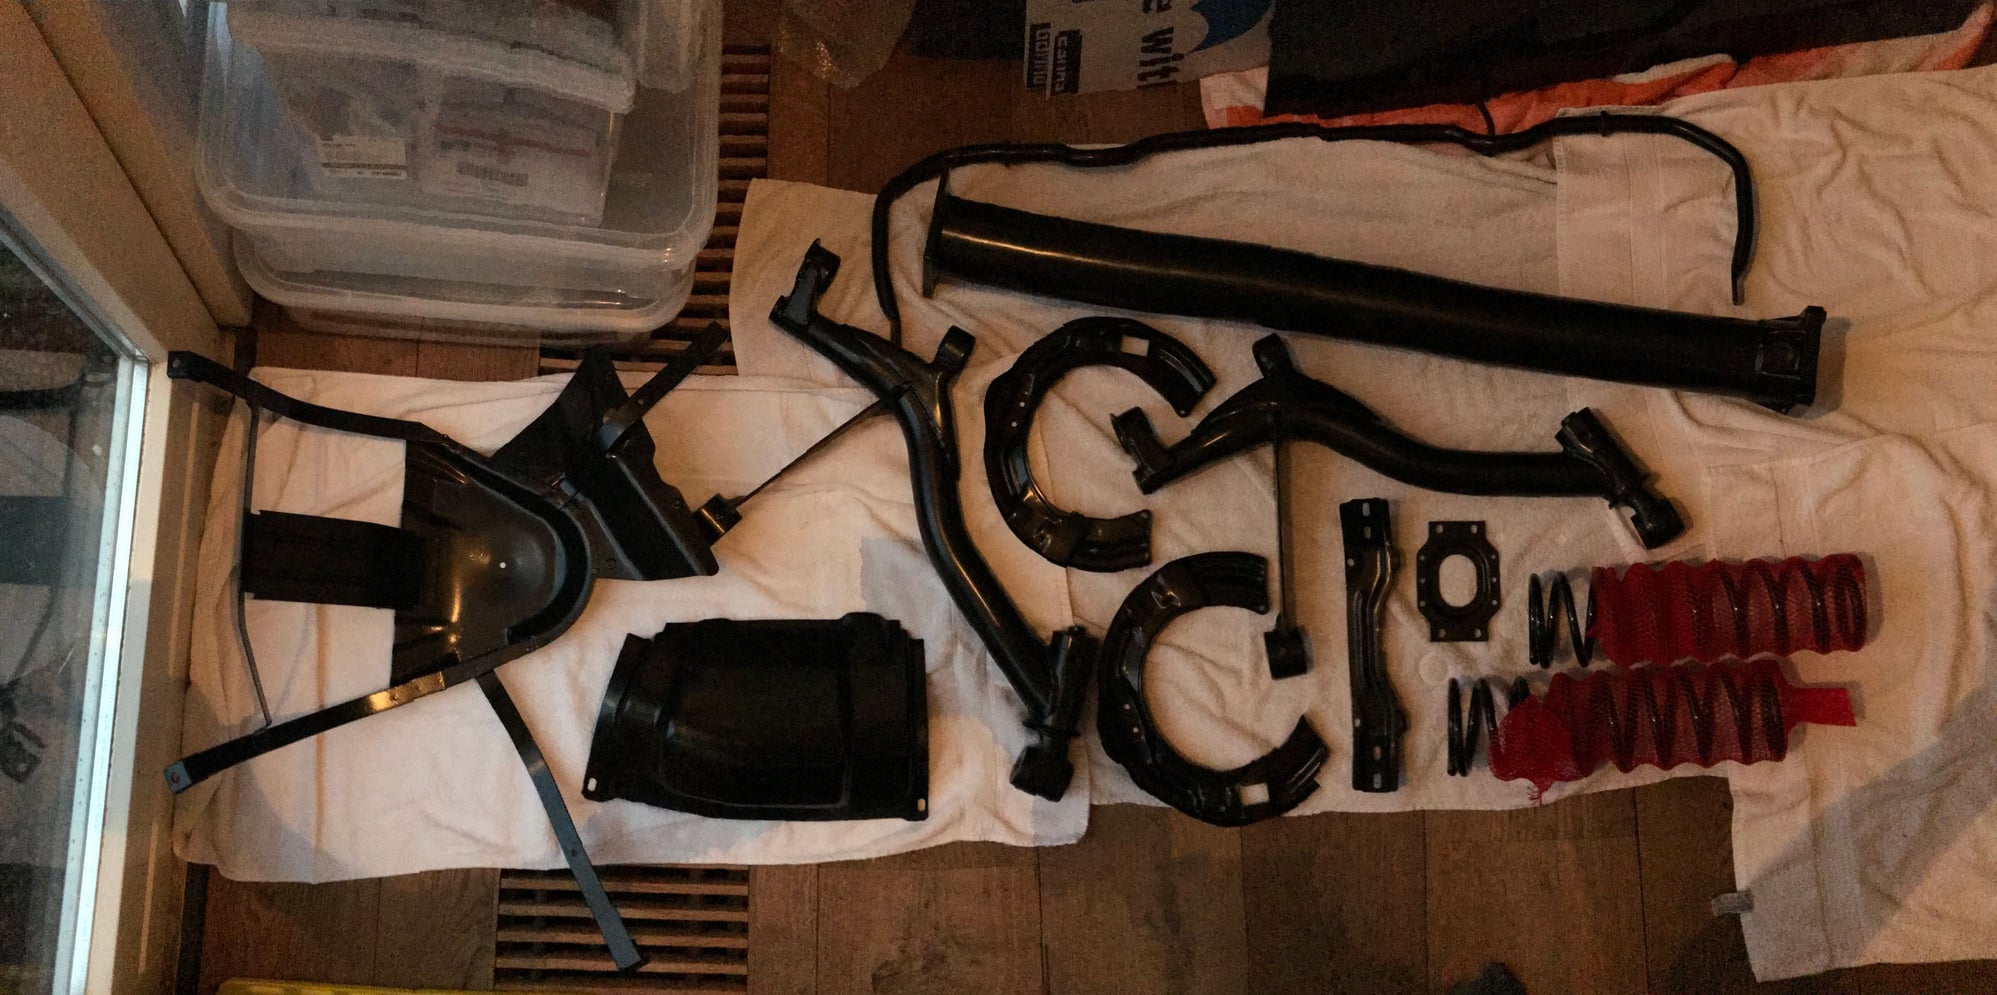
Next job was sending out all parts that needed to be treated.
Here is the result (including the gas tank strap, Torque Tube and new springs....) from the powdercoater:
....from nickel plating:
...and from soda blasting:
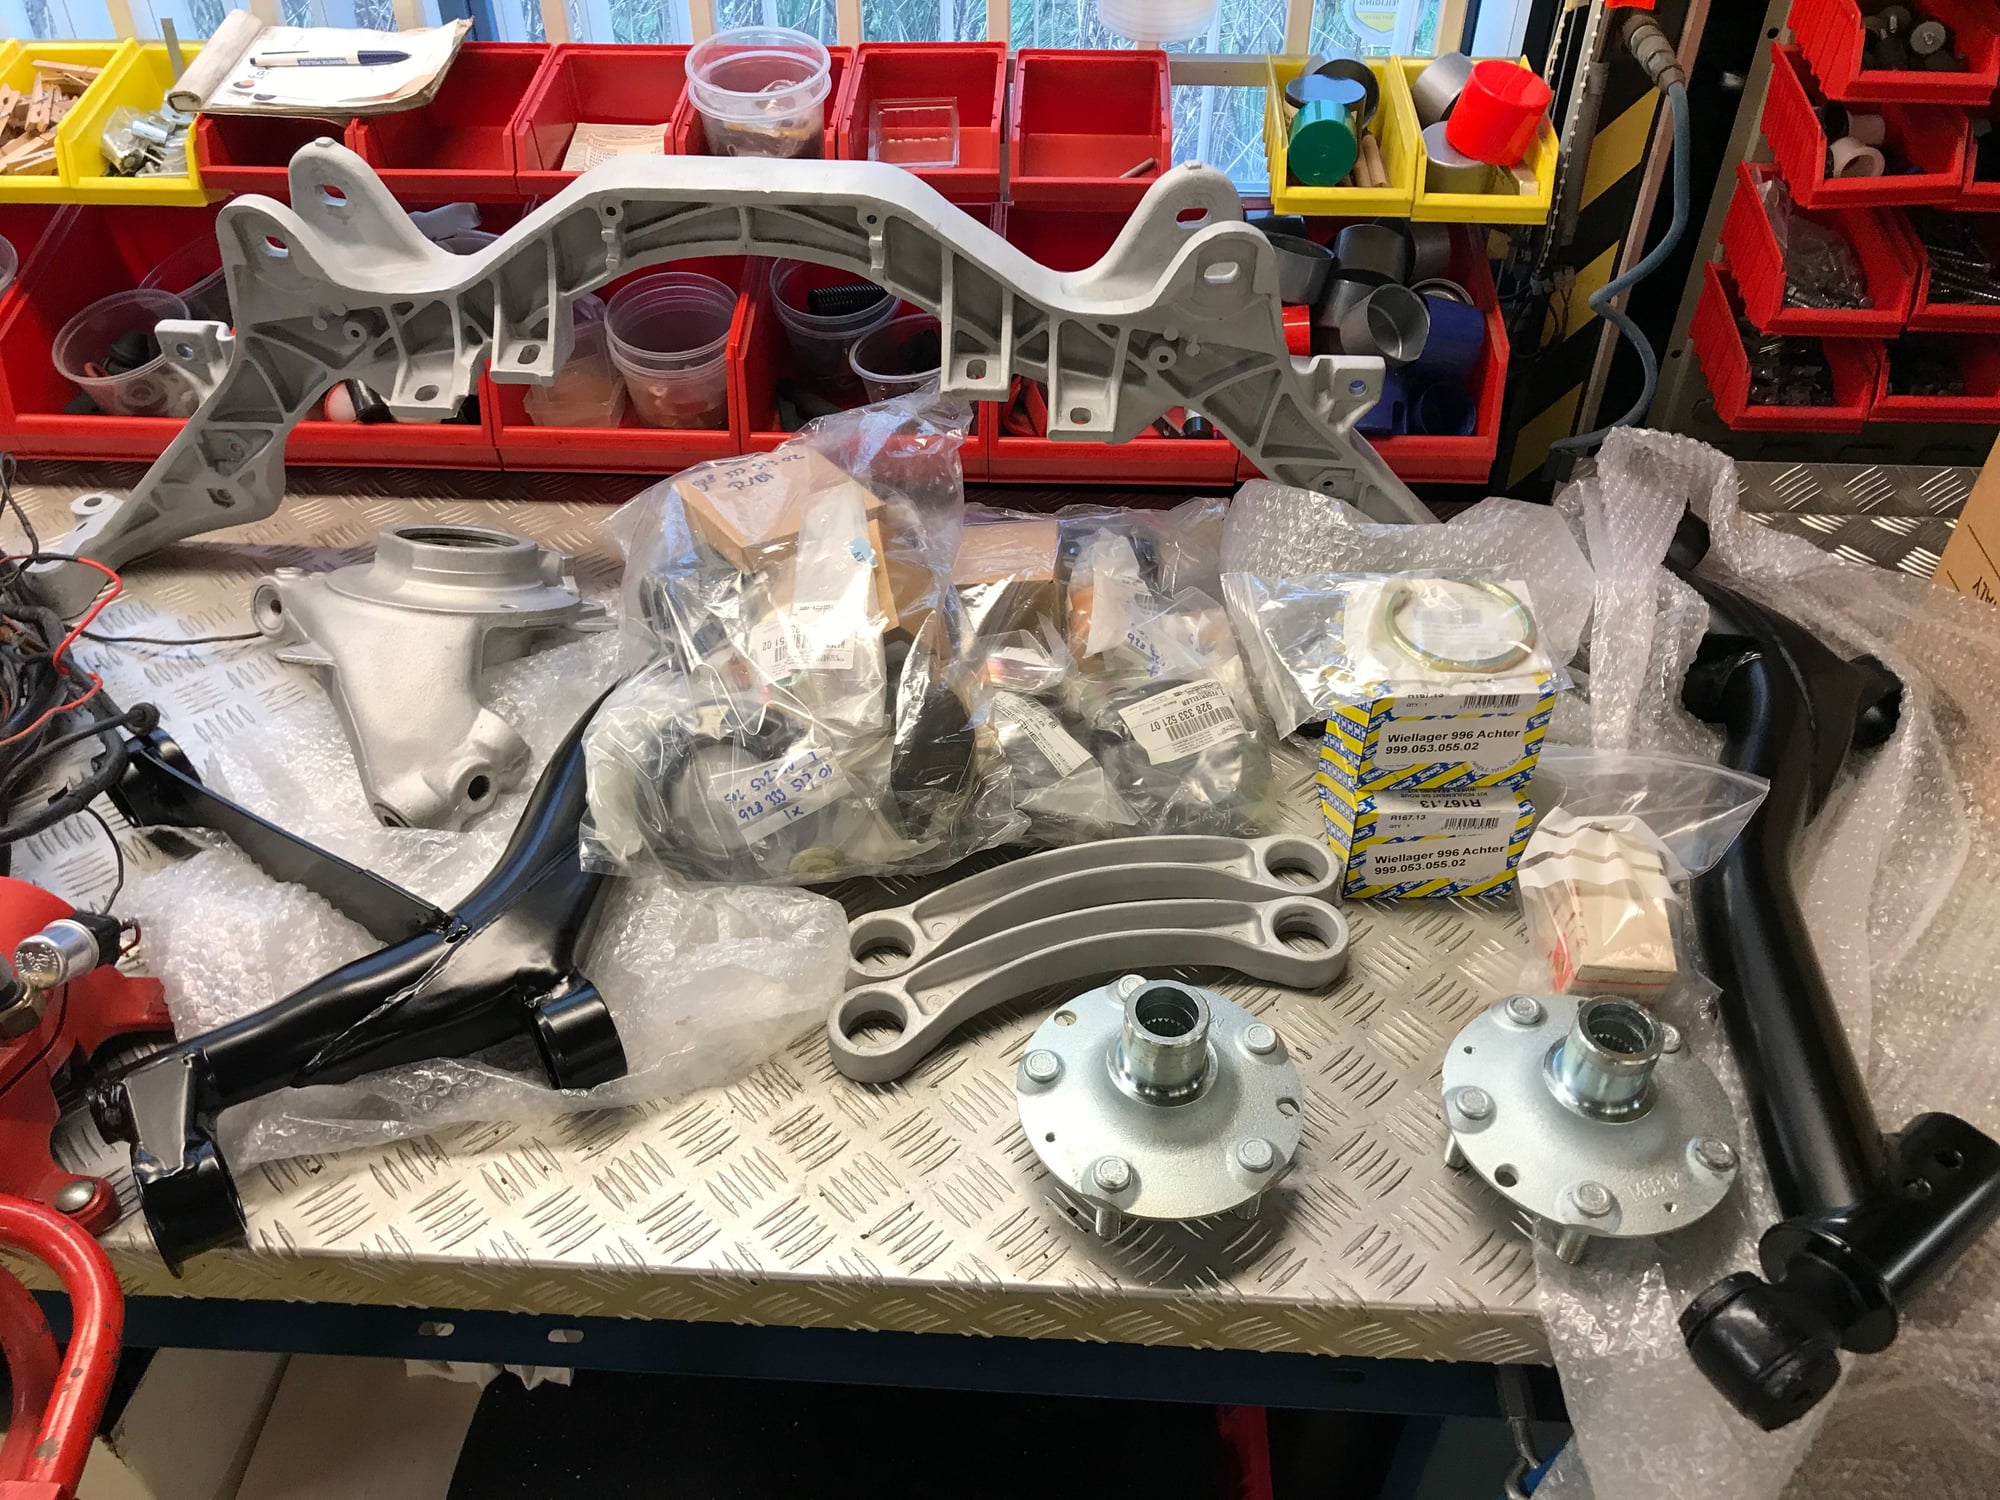
Finally we were able to do some assembly work...!!! These next pictures are taken at the workshop of Bob Botter in Mijdrecht, an excellent mechanic and absolute genius with Porsches:
Pressing in new rubbers:
Wrong car in the background, I know.....
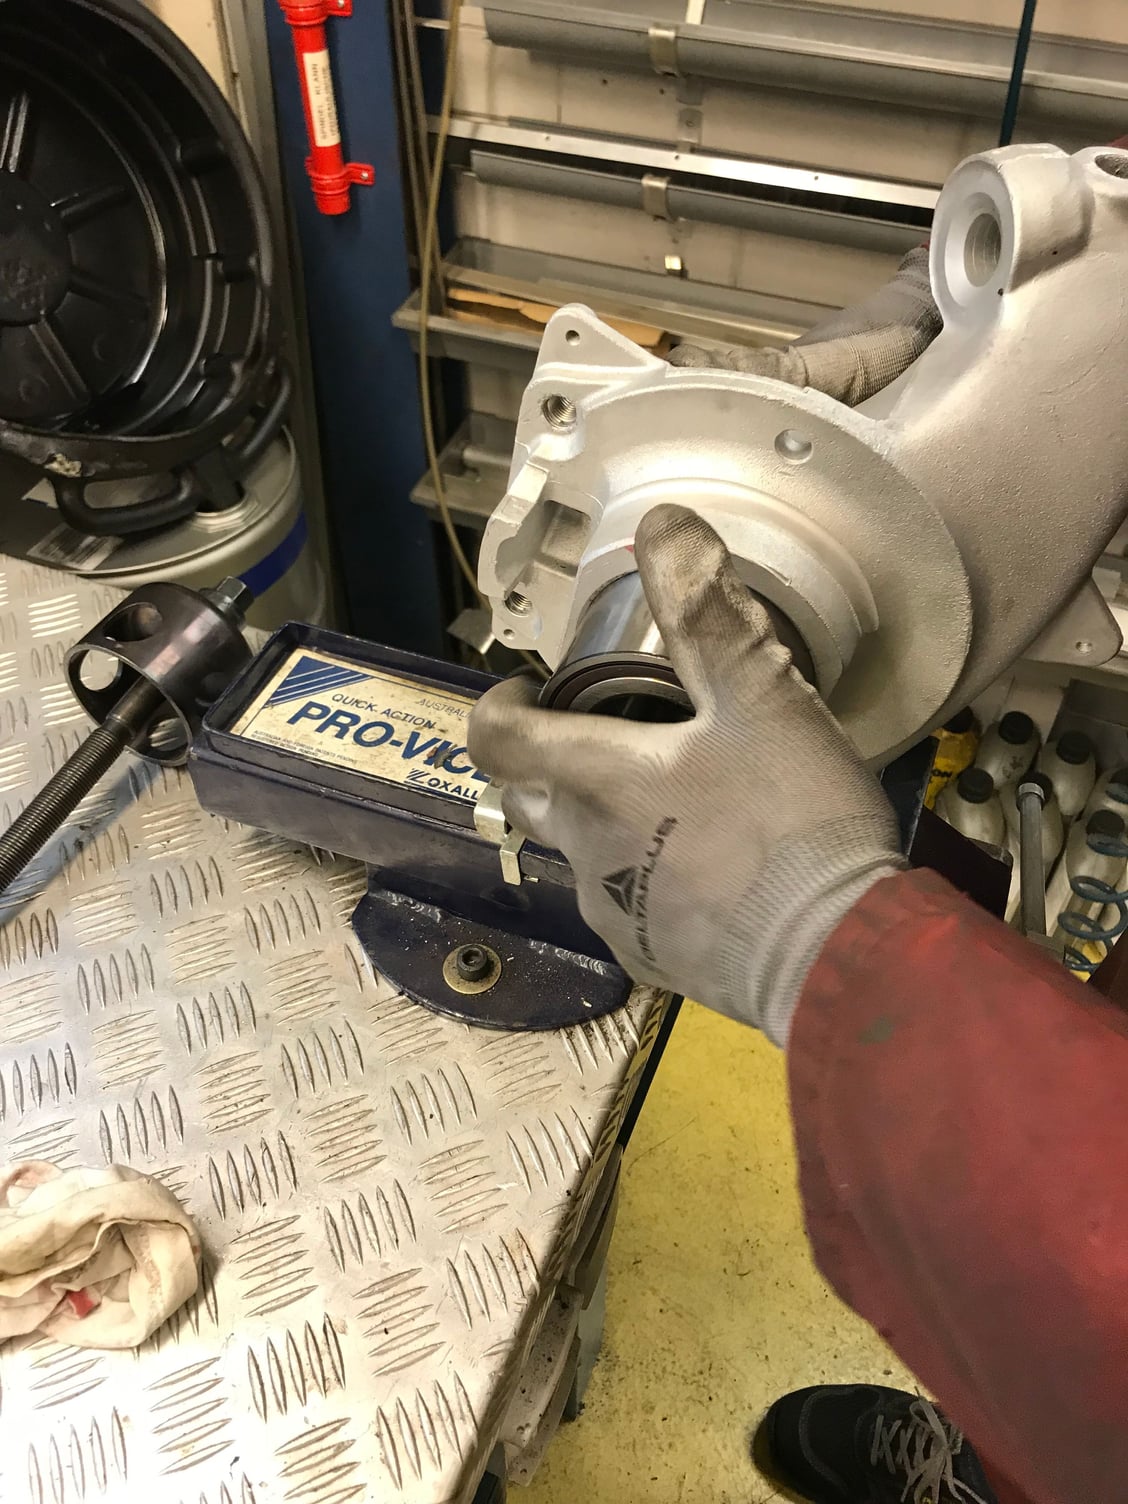
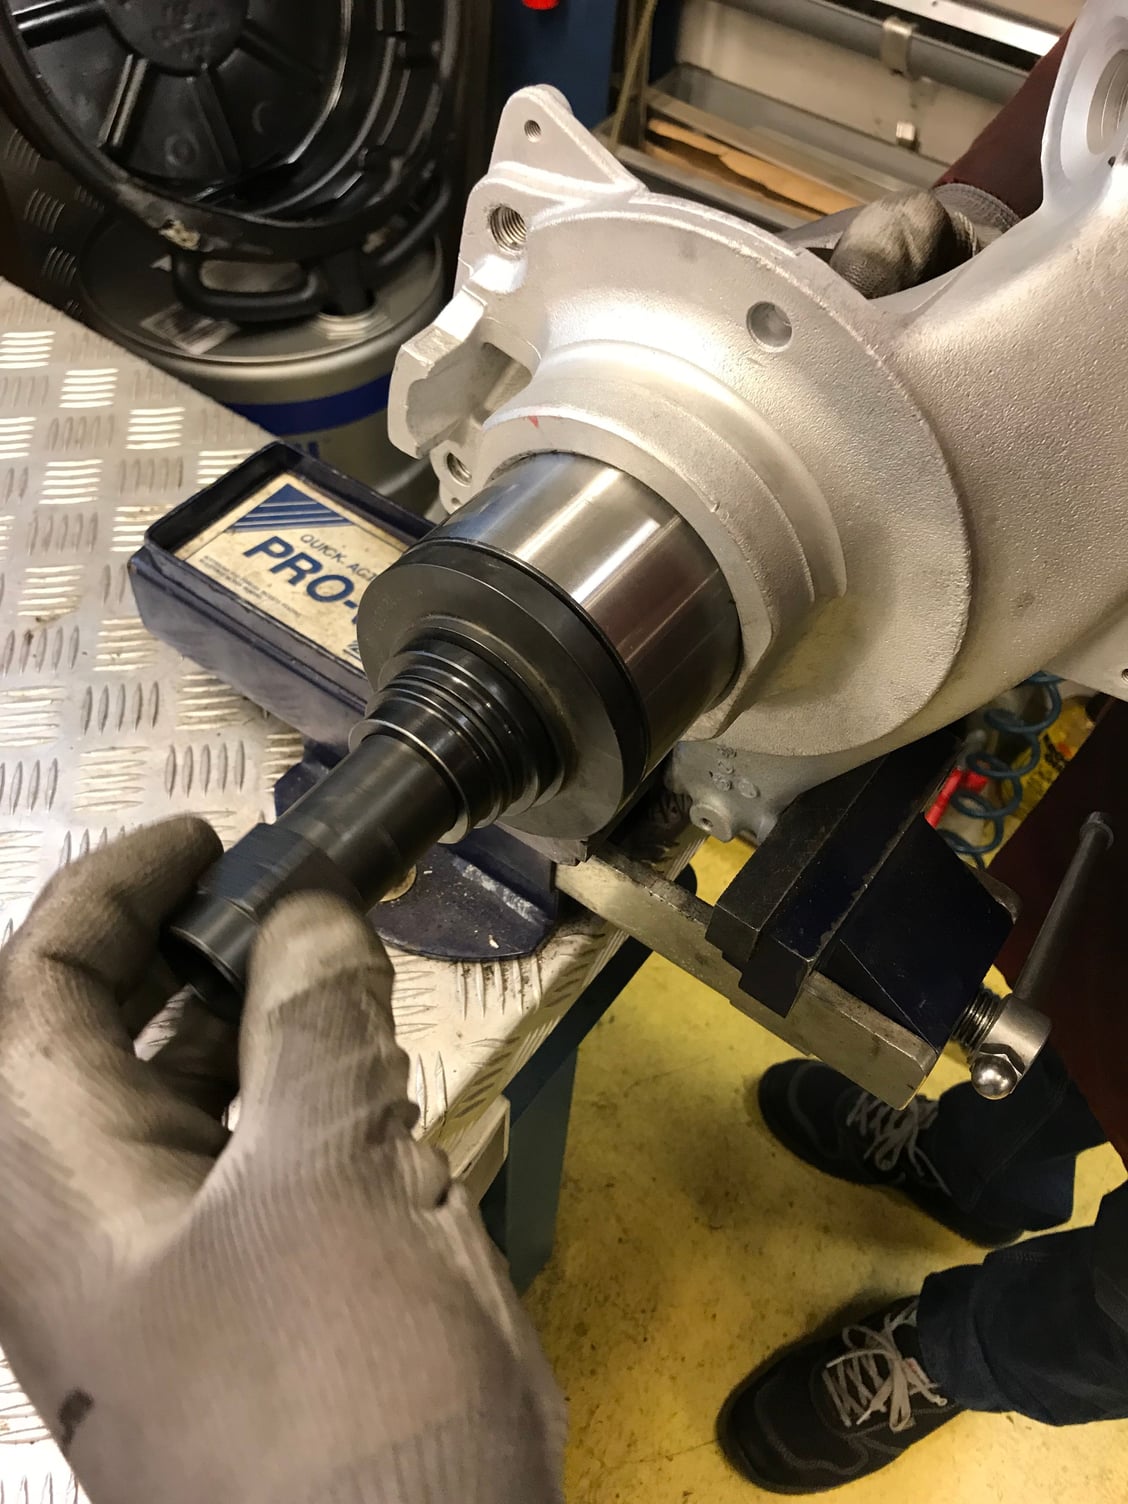
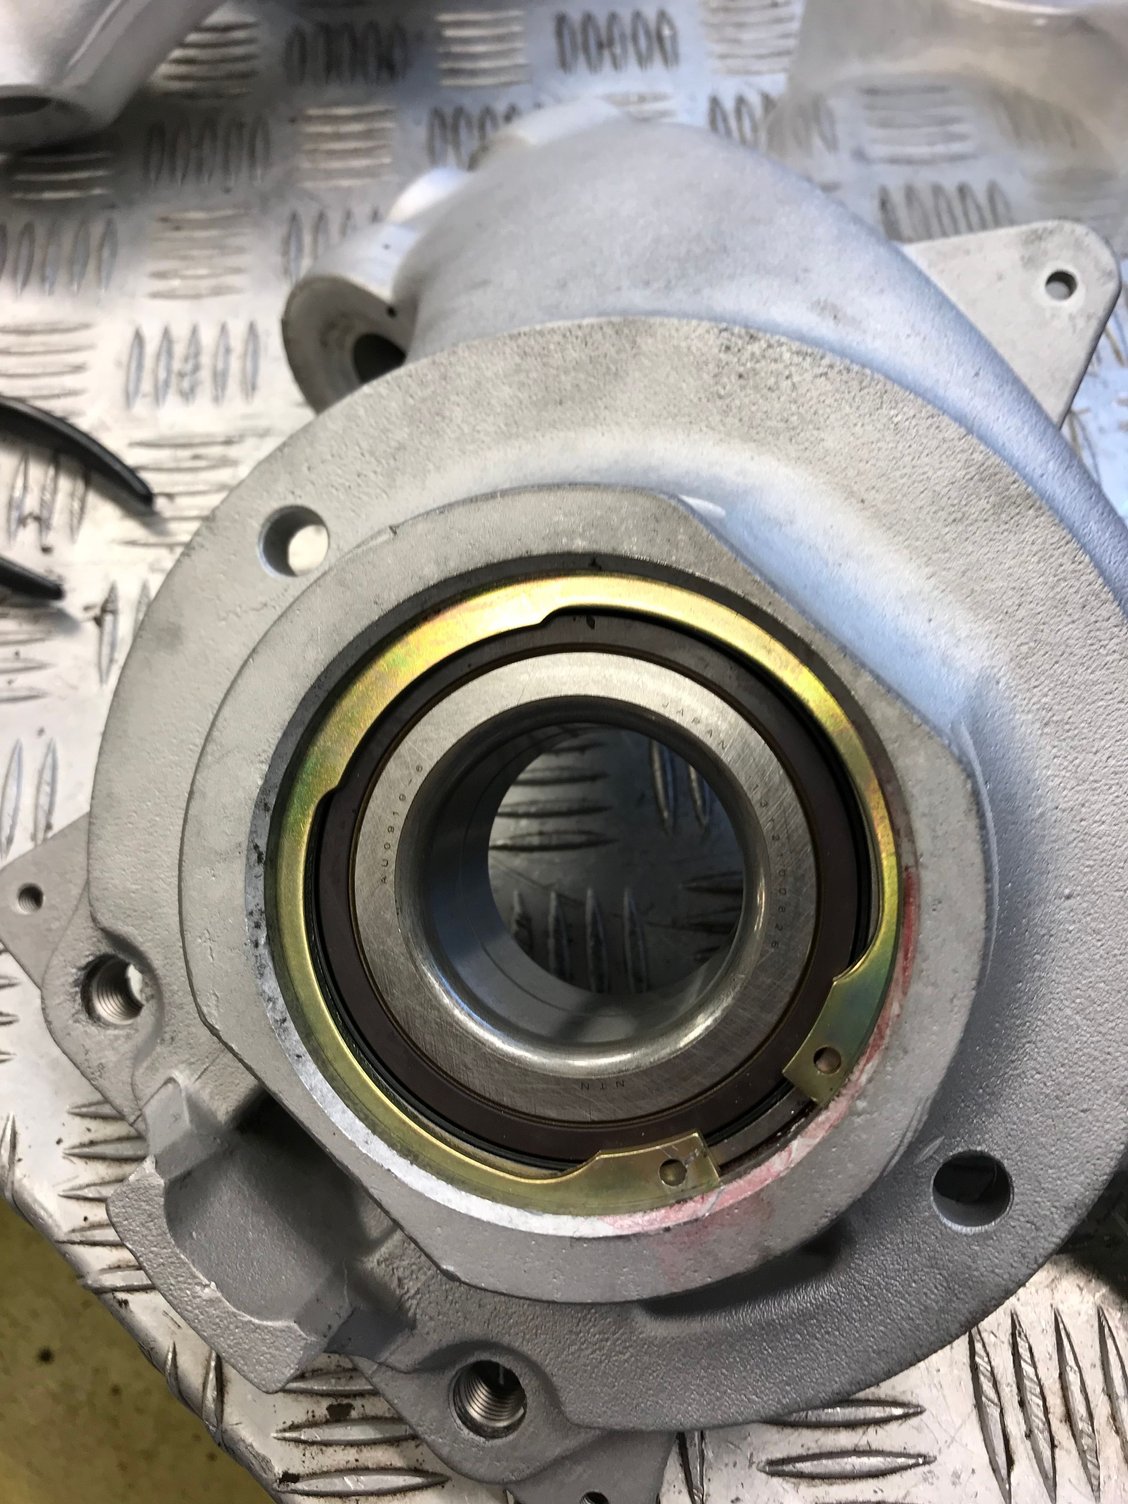
The next job was putting in the new wheel bearings into the wheel carriers:
A little bit of "Tool ****"......
Having fun with my dad....:
Done!
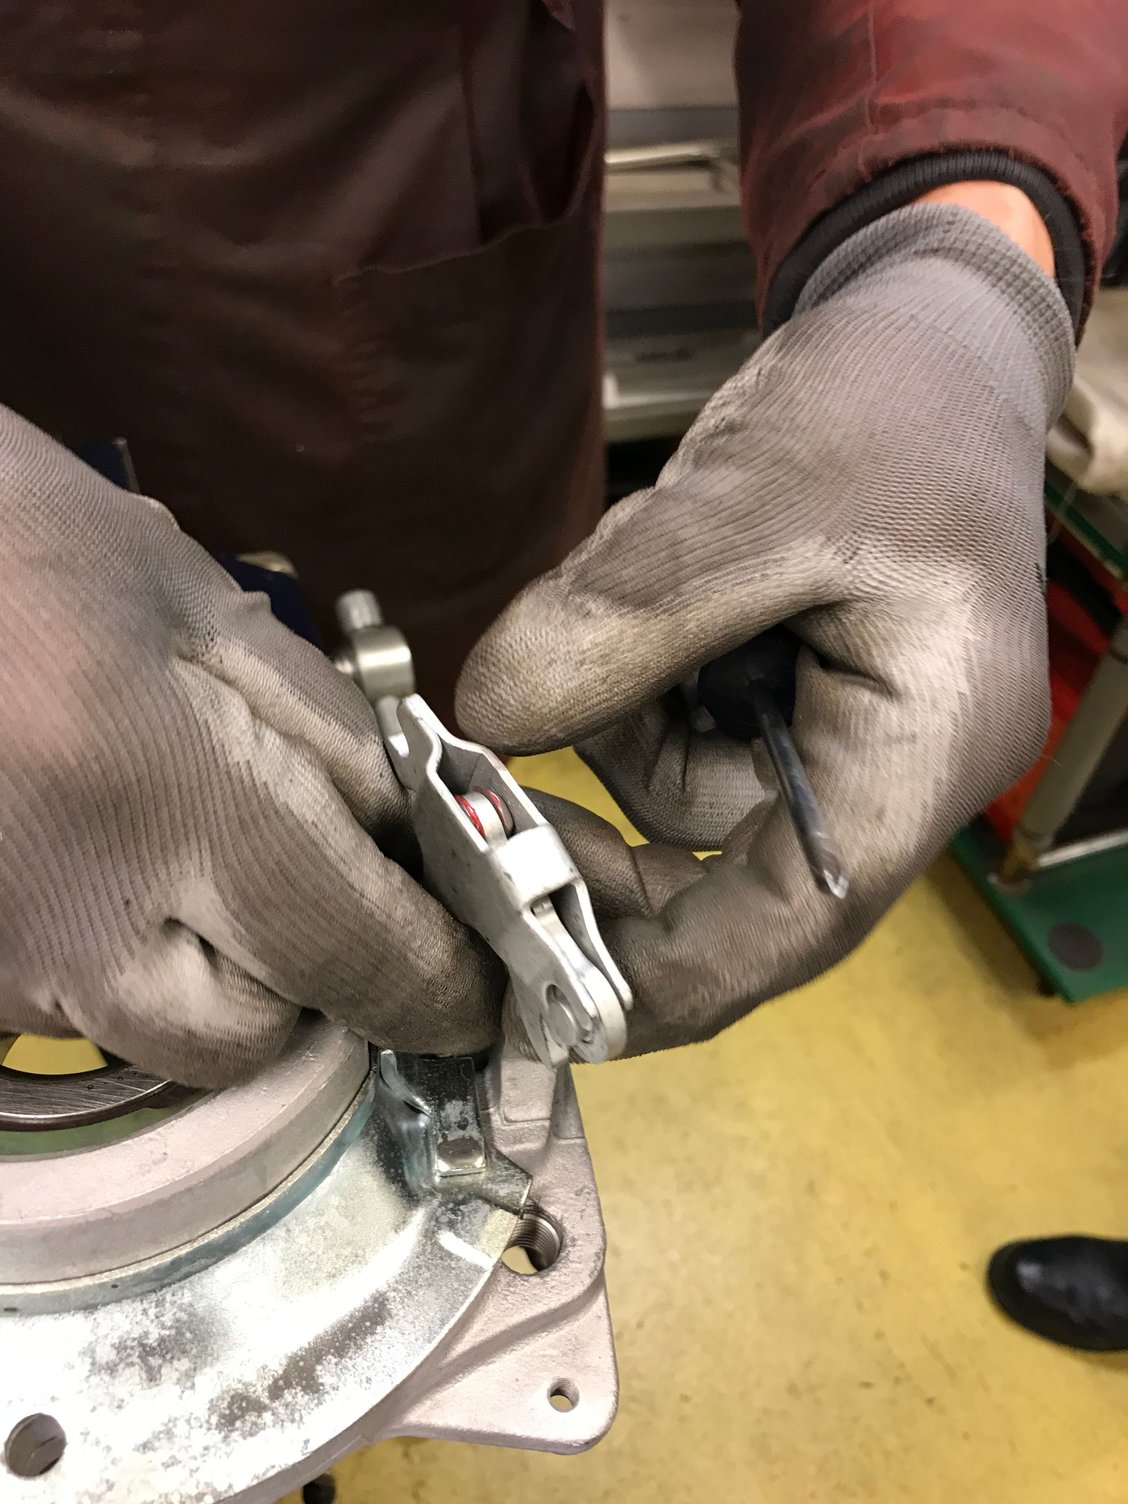
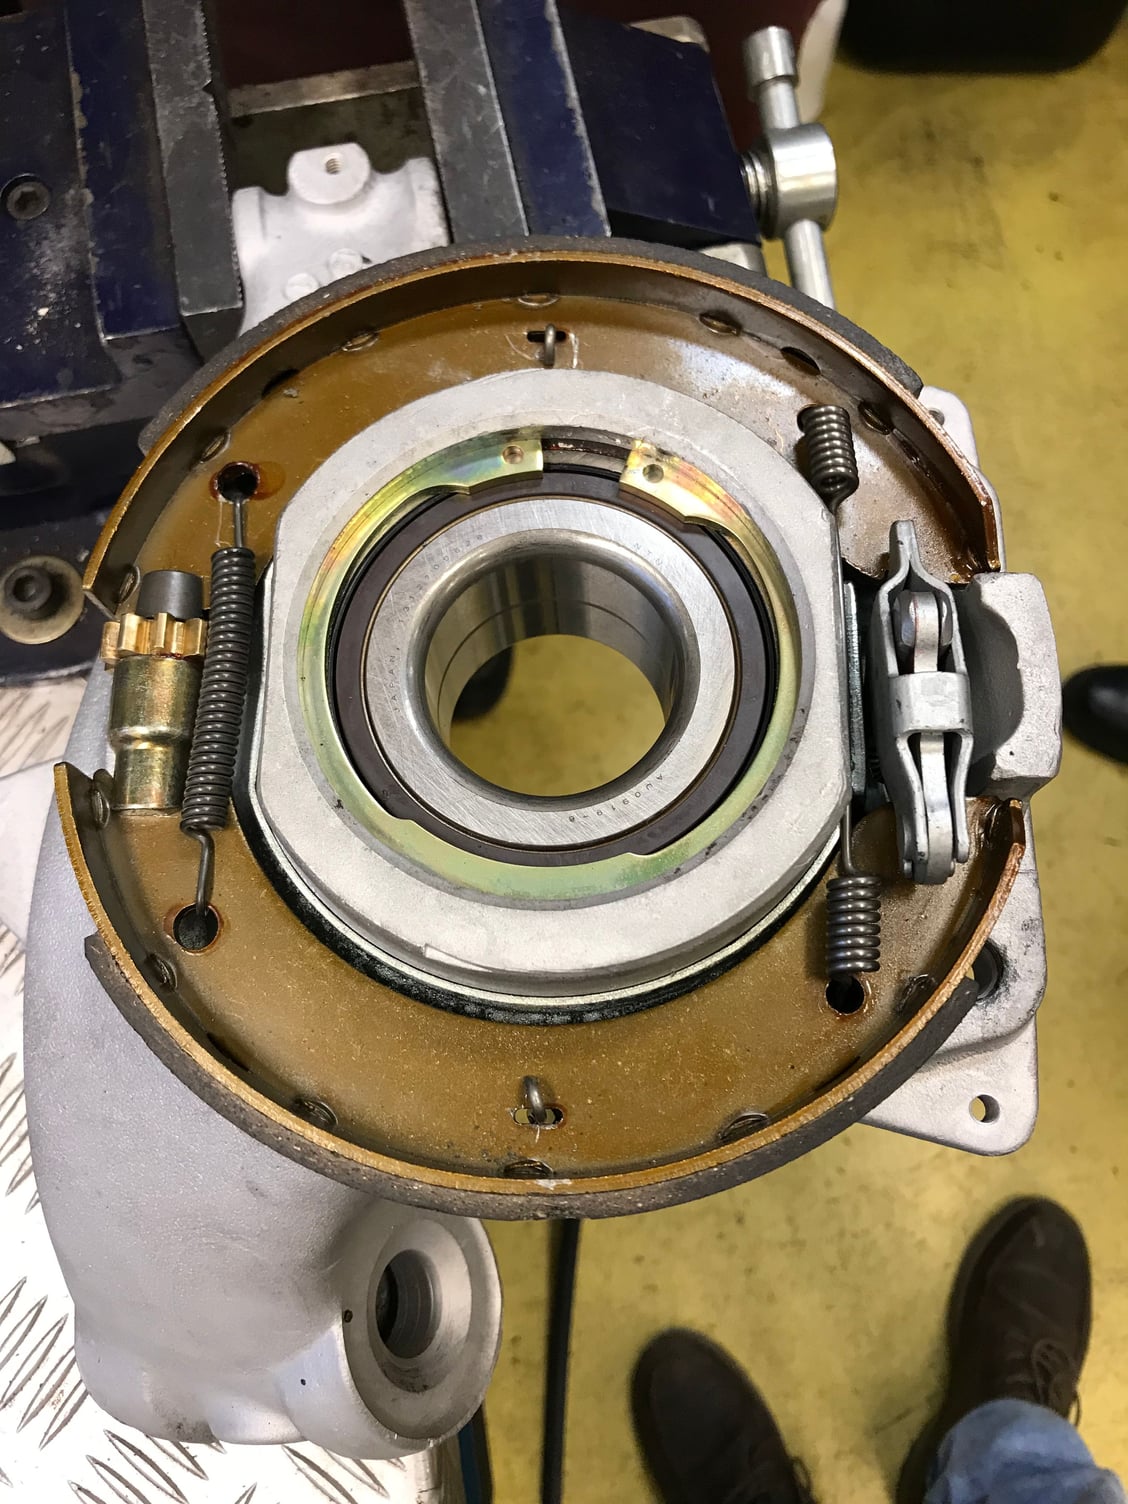
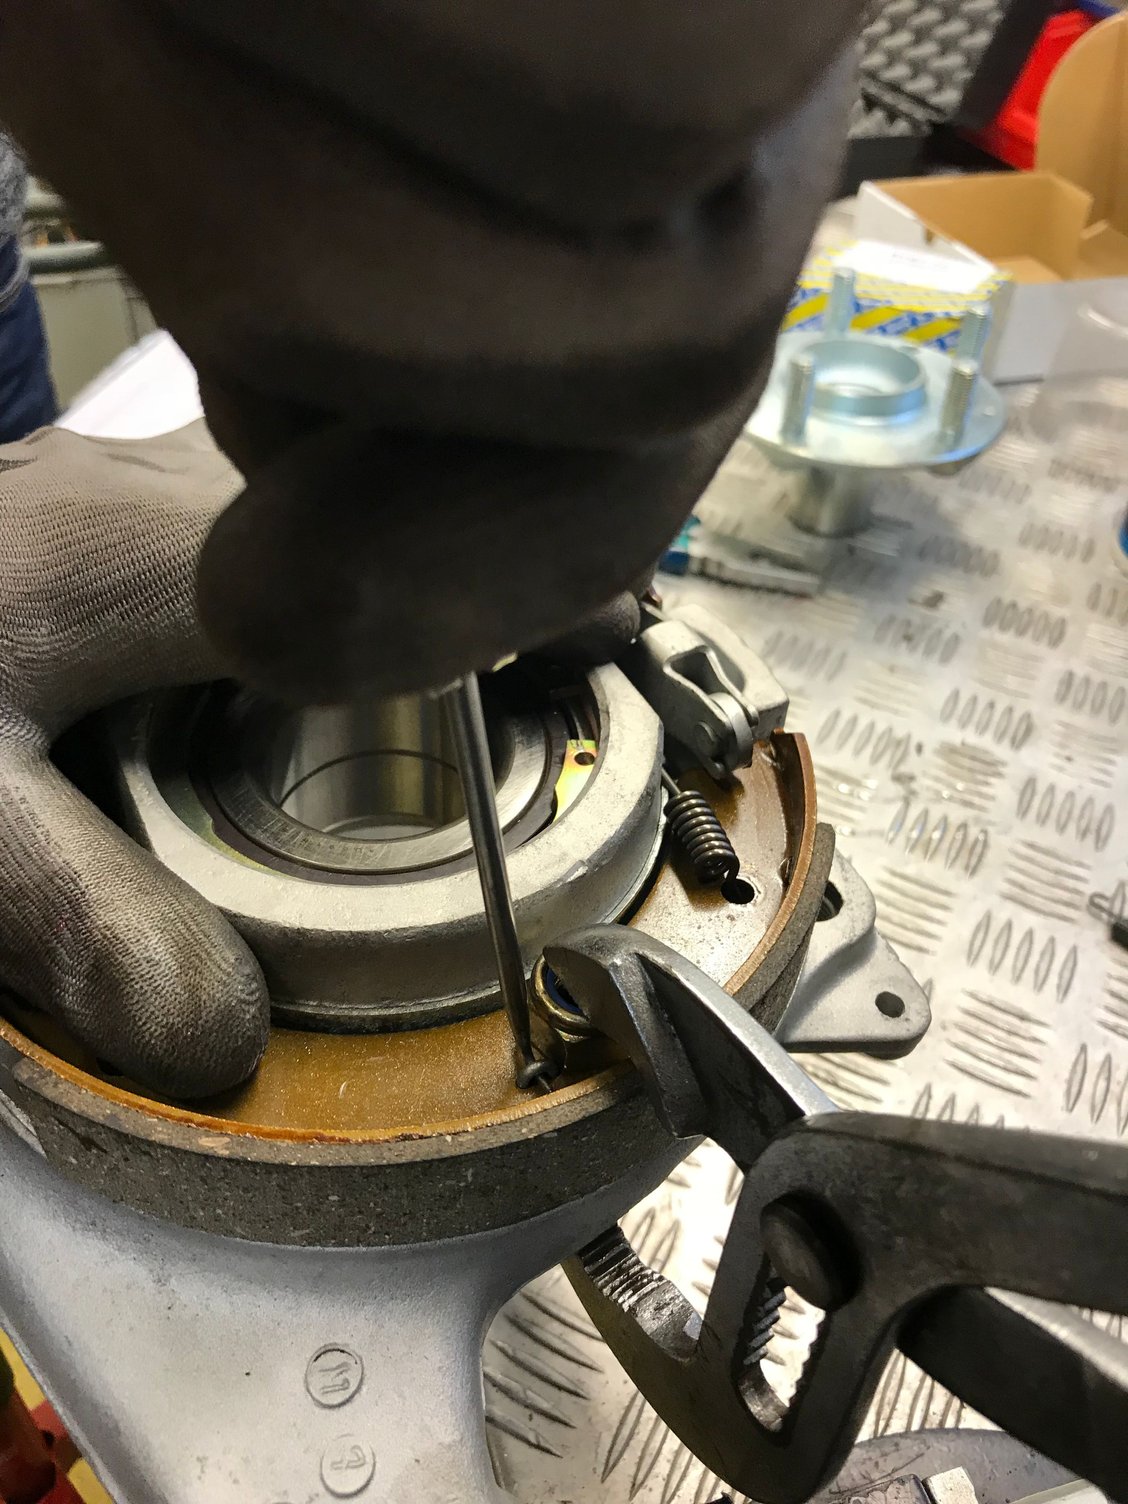
time to put together the hand brakes. First we put on the refurbished supporting plate (928 352 081 01, NLA)
Attach the push-lock button to the hand brake cable, but before you do that make sure to slide the support bracket (701-10, nr. 24 - 928 424 045 00) onto the cable!!!!!! We forgot it, so may have to take it all apart again...
Installing the rest of the hand brake parts went smooth, apart from the 2 compression springs that have to be put in from the back side of the carrier. It took quite a while and the help of a large nut and a pair of pliers to get them through (too?) narrow slots....
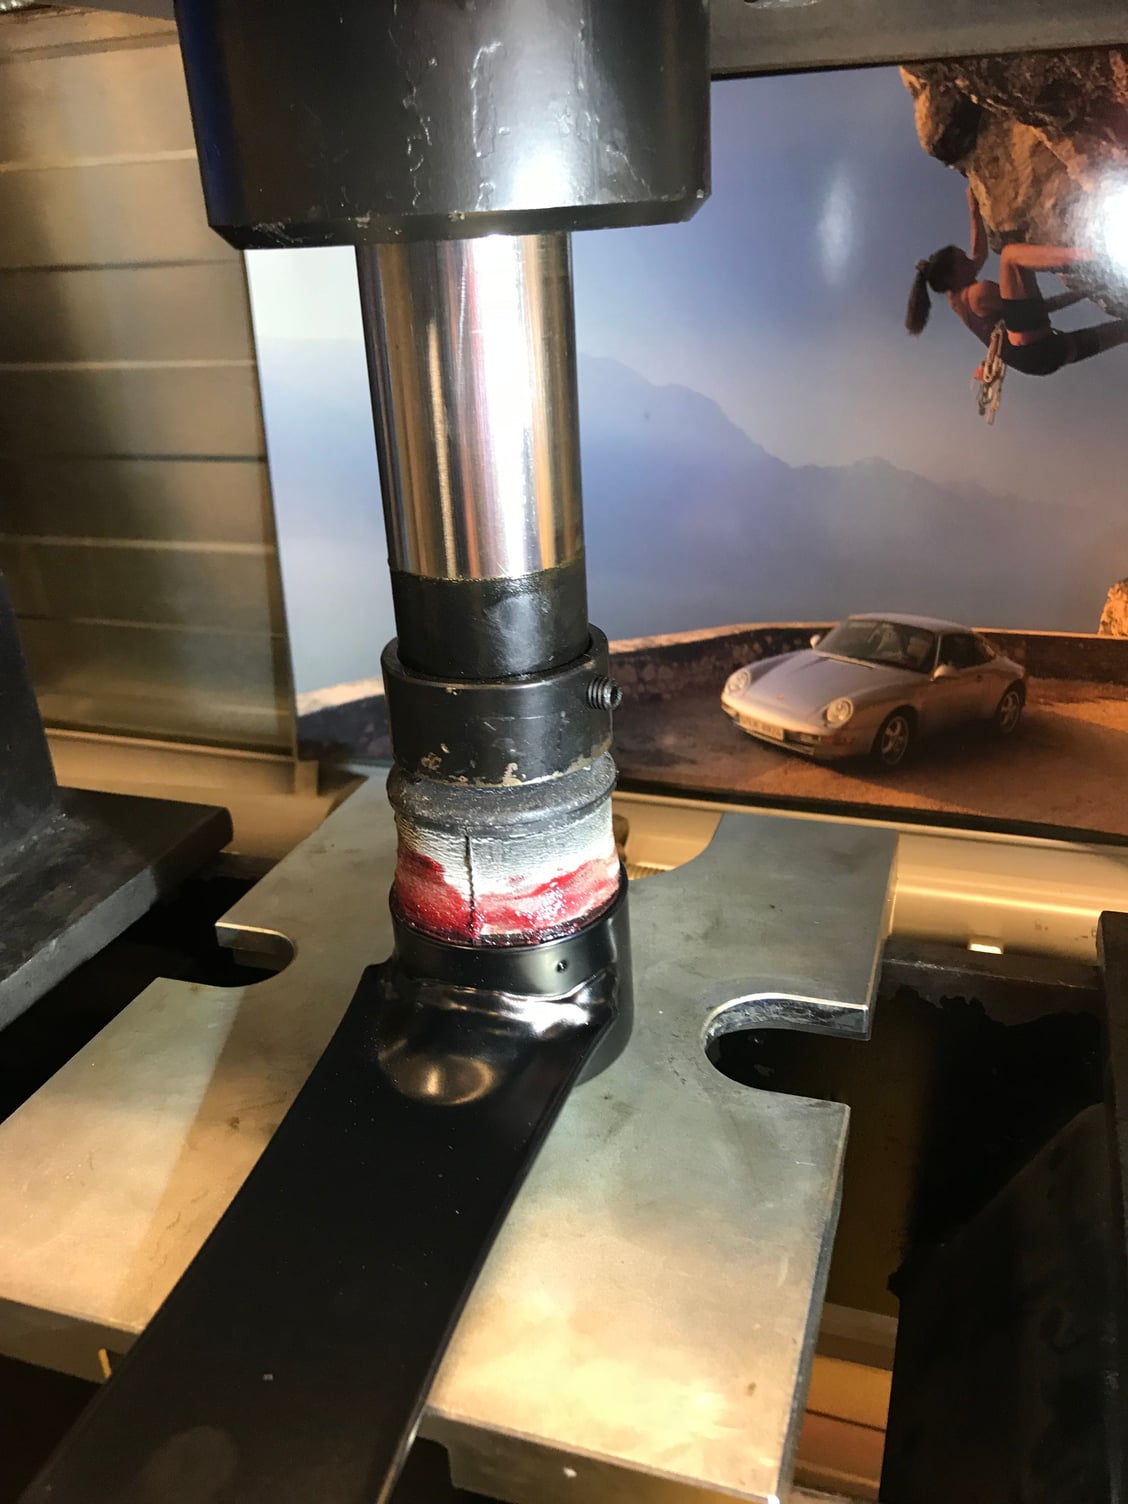
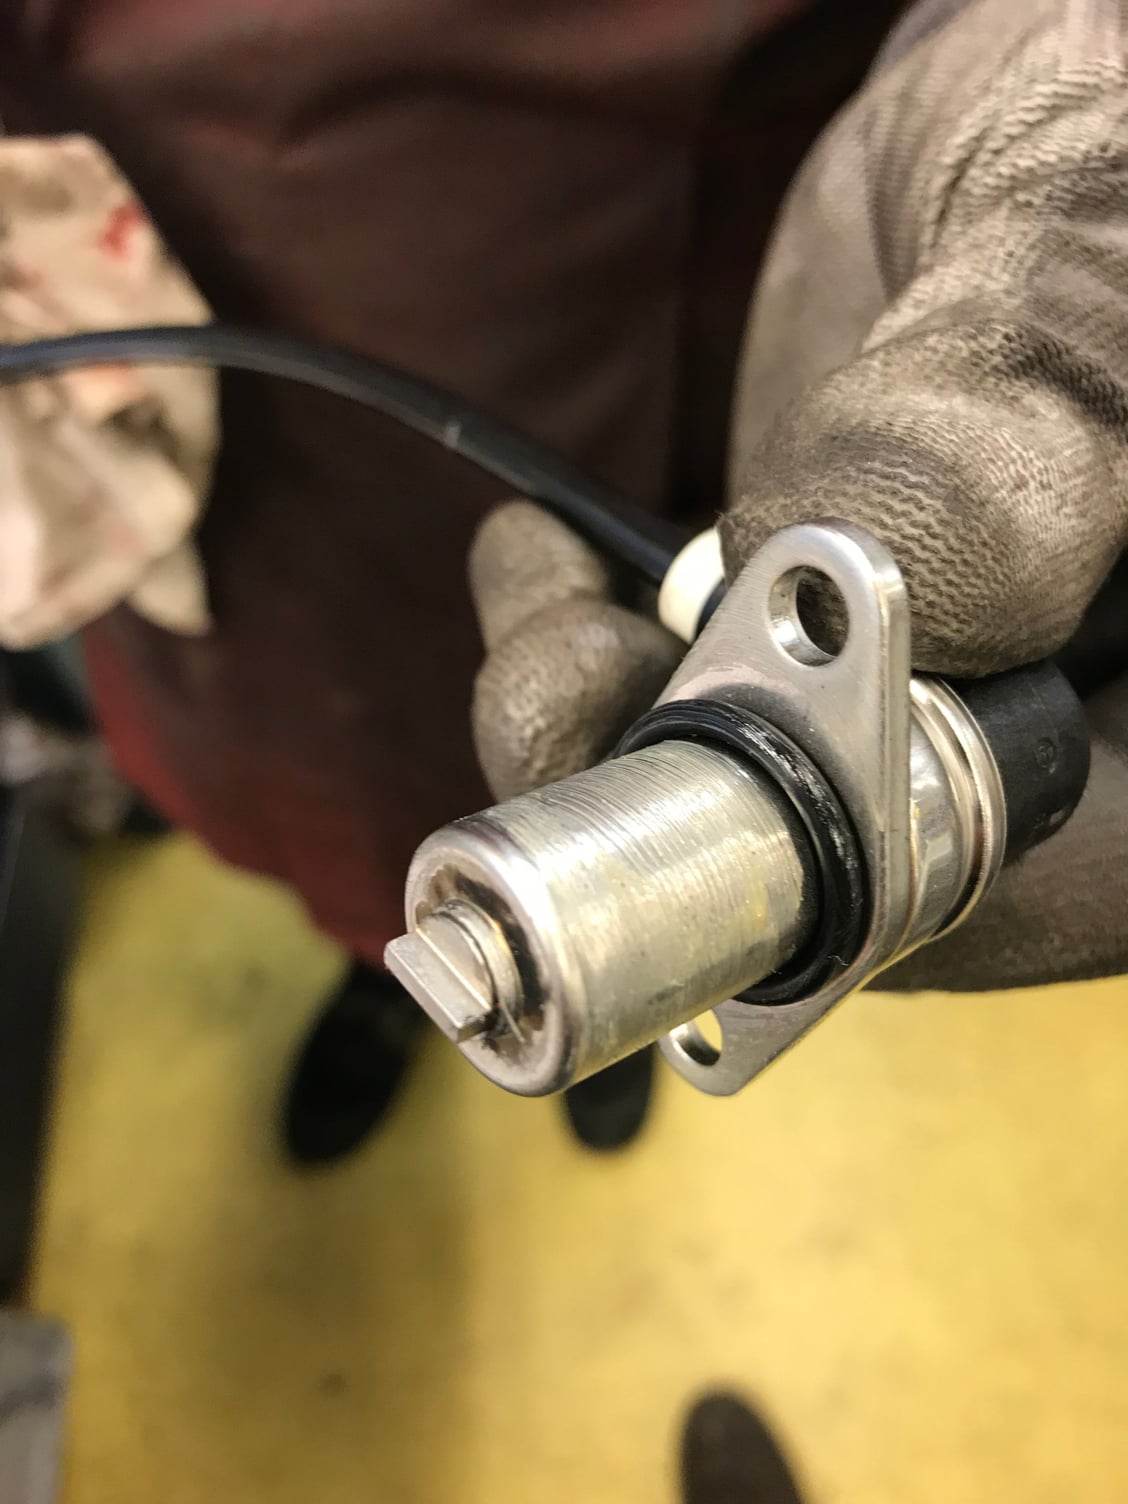
Putting in the wheel hub also became a bit of a challenge, as having it nickel plated increased the diameter of the hub slightly:
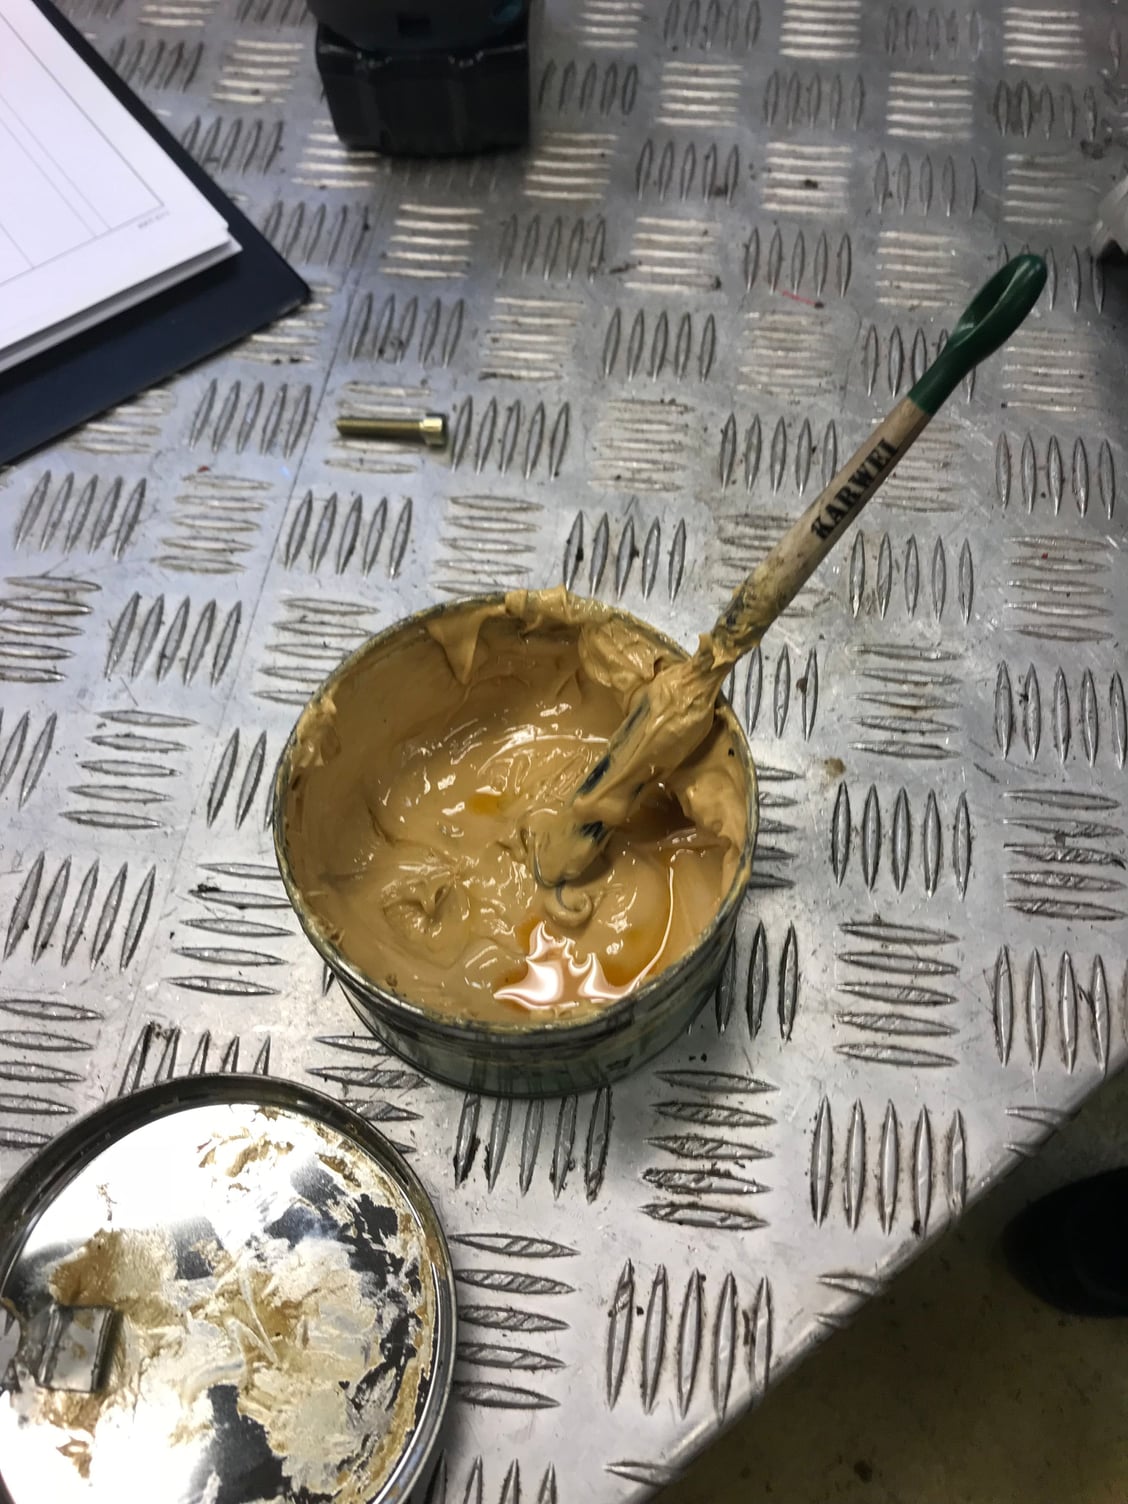
Final job for the day was inserting the new ABS sensors. We lightly coated them with a substance that consists of ground marble. I had never heard of it, but it makes sense: any other grease will melt under higher temperatures, whereas this stuff can handle temperatures up to 1200 degrees celcius....
DONE!
Next job will be shock absorbers and springs, hope to have that done next friday.....
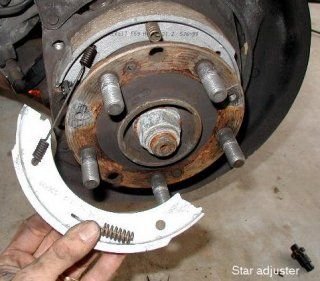
Respectfully, you might want to double check those compression springs on the hand brakes. I could be wrong but I think you installed them backwards. I believe they go in from front to rear, aka, the coil part of the spring should be facing the wheel. The carrier has some ridges where the hook grabs ahold. I use a needle nose pliers in the middle of the coil, insert through slot, push and turn till the hook is on the ridge of the carrier.
These parts look stunning after the plating and soda blasting - it's an inspiration! They look like jewellery.
I was also puzzled by reference to spring being inserted from rear. Here's a photo from John Pirtle's 928 S4 site showing it correctly positioned on the wheel side of the hub (but nowhere near as clean as your's!).
Does the brake shoe retaining spring go in from the back?
Originally Posted by Ladybug83
Respectfully, you might want to double check those compression springs on the hand brakes. I could be wrong but I think you installed them backwards. I believe they go in from front to rear, aka, the coil part of the spring should be facing the wheel. The carrier has some ridges where the hook grabs ahold. I use a needle nose pliers in the middle of the coil, insert through slot, push and turn till the hook is on the ridge of the carrier.
Oops, Glen beat me to it. Enzo
Thanks guys, that just might be the reason why we couldn't get them in properly.
When I took it all apart it all seemed so logical so I made pictures but did not write down the exact direction for installing them.
Looking at the relevant PET page again I understand why I was under the impression they had to go in the way we put them in.
Will have a look at it tomorrow and hopefully I can turn them around.
These parts look stunning after the plating and soda blasting - it's an inspiration! They look like jewellery.
I was also puzzled by reference to spring being inserted from rear. Here's a photo from John Pirtle's 928 S4 site showing it correctly positioned on the wheel side of the hub (but nowhere near as clean as your's!).
Thanks for that photo, StratfordShark: it helped us today when we re-did the springs...

 12-05-2017, 05:10 AM


 ) from the powdercoater: