When you click on links to various merchants on this site and make a purchase, this can result in this site earning a commission. Affiliate programs and affiliations include, but are not limited to, the eBay Partner Network.
Tips on window lower rubber scraper and upper trim
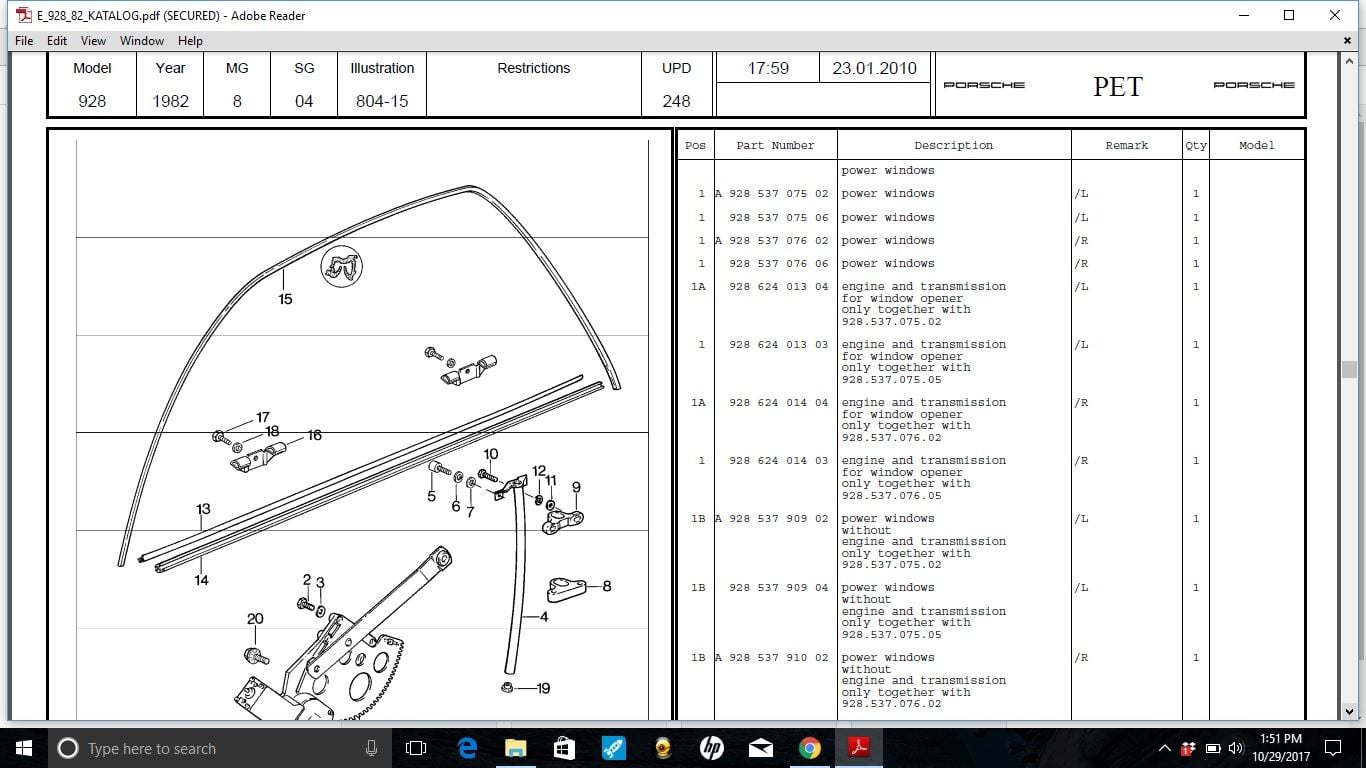
I am in the process of replacing the outer rubber window scraper and upper rubber channel - items 14 and 15 on the diagram. I know these can be a pain to work into place. Is there a preferred sequence of which one to install first? Thanks.
The sequence does not make any difference but I would replace the upper molding first so that you can trim the lower molding to the perfect length. There is a video from Roger for the lower molding:
The upper molding is the hard one to fit it into the tiny channel of the outside trim. I used a pick tool to press it in mm by mm. I could not figure out any tricks here, just take your time so as not to ruin this very expensive piece.
Get yourself some P-80 THIX to ease the installation. Cuts down on the toll the process takes on your thumbs, getting the bead of the outer lower trim into its channel.
I need to replace the 15 upper moulding (window not tight fit at top). But another owner I know who installed that seal recently told me it was easy 20 minute job, and only holdup was removing the outer thrust wedge Part with no other disassembly needed.
I need to replace the 15 upper moulding (window not tight fit at top). But another owner I know who installed that seal recently told me it was easy 20 minute job, and only holdup was removing the outer thrust wedge Part with no other disassembly needed.
Was he very modest or lucky?
I only used soapy water so that it would dry off and the molding would not come back out. The lubricant above looks to be made for the job and should make it easier.
I'm confused about the thrust wedge, is that the plastic triangle? That is the easy part and only held with a single screw.
Alex - Thanks for the tip. I deduced this as well during installation. I'm half way into the job at this time.
Rob - Thanks, I'll look into purchasing this stuff.
StartfordShark - So far the upper channel does not seem to be too difficult. It is a bit tricky to get the outer lip to seat all the way down tot he edge of the outer metal frame
I removed the inner interior trim piece. It made the upper window rubber easier to get into the correct position, BUT in the process, several of the metal clips which are molded onto that piece popped off. I'll be using some JB Weld to try to get those clips back on. When I do the other side I'm going to try it without removing that piece. I can't yet tell if that was necessary.
I only used soapy water so that it would dry off and the molding would not come back out. The lubricant above looks to be made for the job and should make it easier.
I'm confused about the thrust wedge, is that the plastic triangle? That is the easy part and only held with a single screw.
Yes it's the plastic triangle thing and it is just single screw. He mentioned it as the only noteworthy part of the install - so easy was the rest of the procedure.
Yes it's the plastic triangle thing and it is just single screw. He mentioned it as the only noteworthy part of the install - so easy was the rest of the procedure.
Ah I see, he is a better man than me. It took me about an hour

 10-29-2017, 02:59 PM