When you click on links to various merchants on this site and make a purchase, this can result in this site earning a commission. Affiliate programs and affiliations include, but are not limited to, the eBay Partner Network.
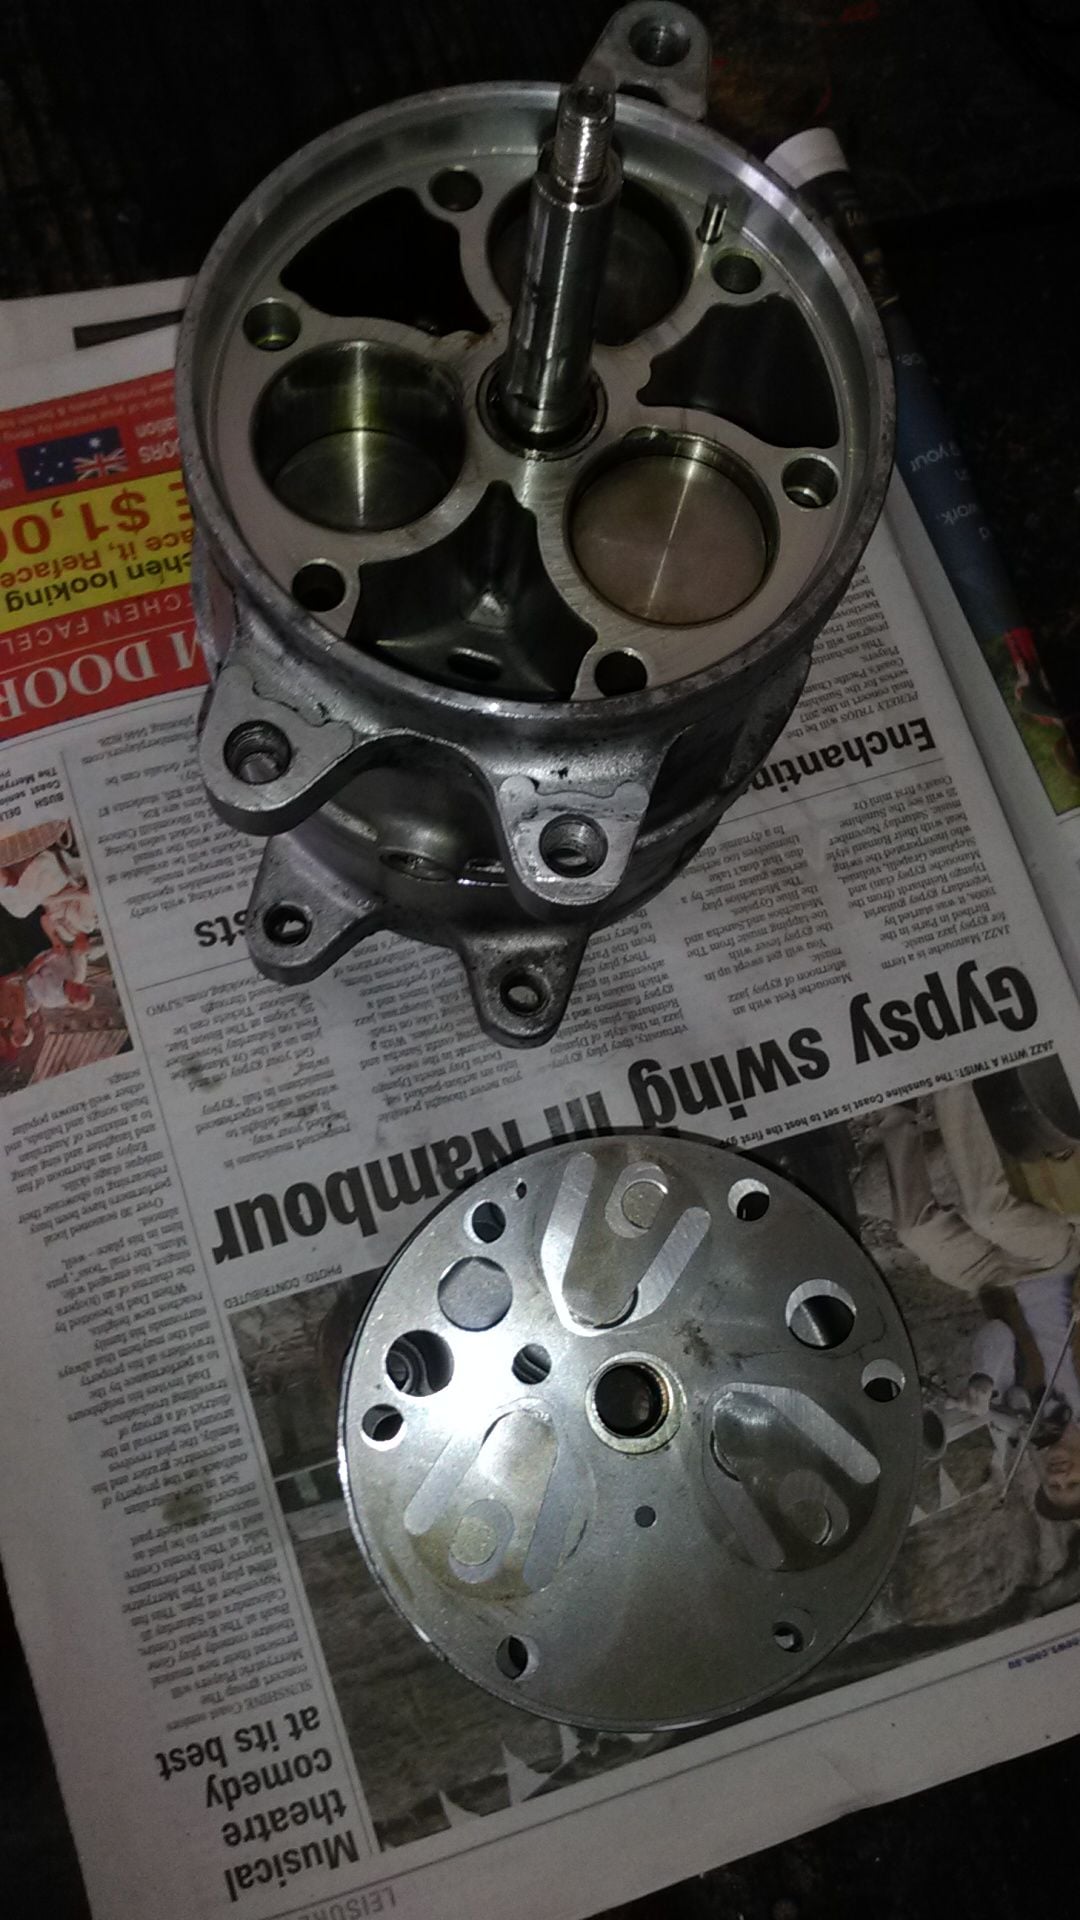
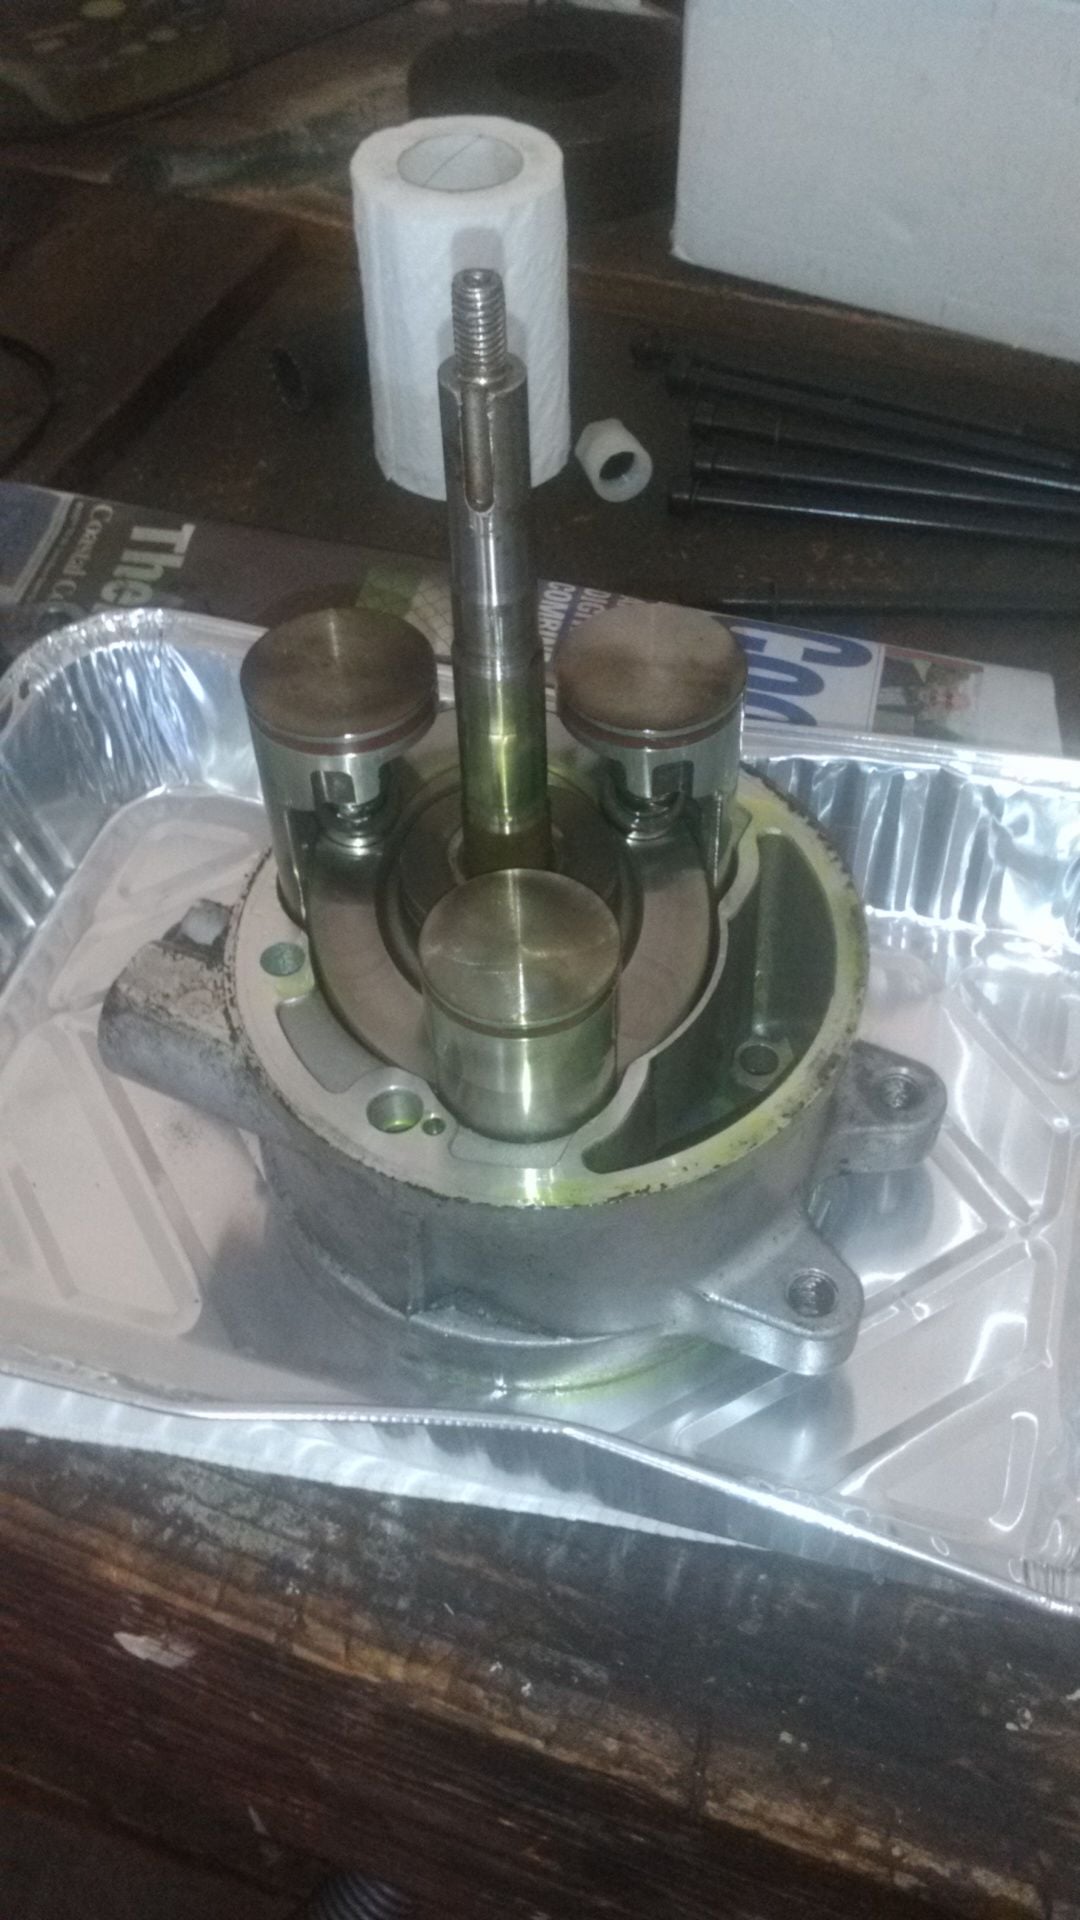
You can replace the center body seal without fear of the piston getting out of place quite easily. Just set the compressor on its aft end with the shaft pointing up. Then lift the front half of the compressor body up and remove it. The shaft and piston should all stay held in place by the rear body. Remove and replace the center body o-ring and set the front body half back down onto the compressor.
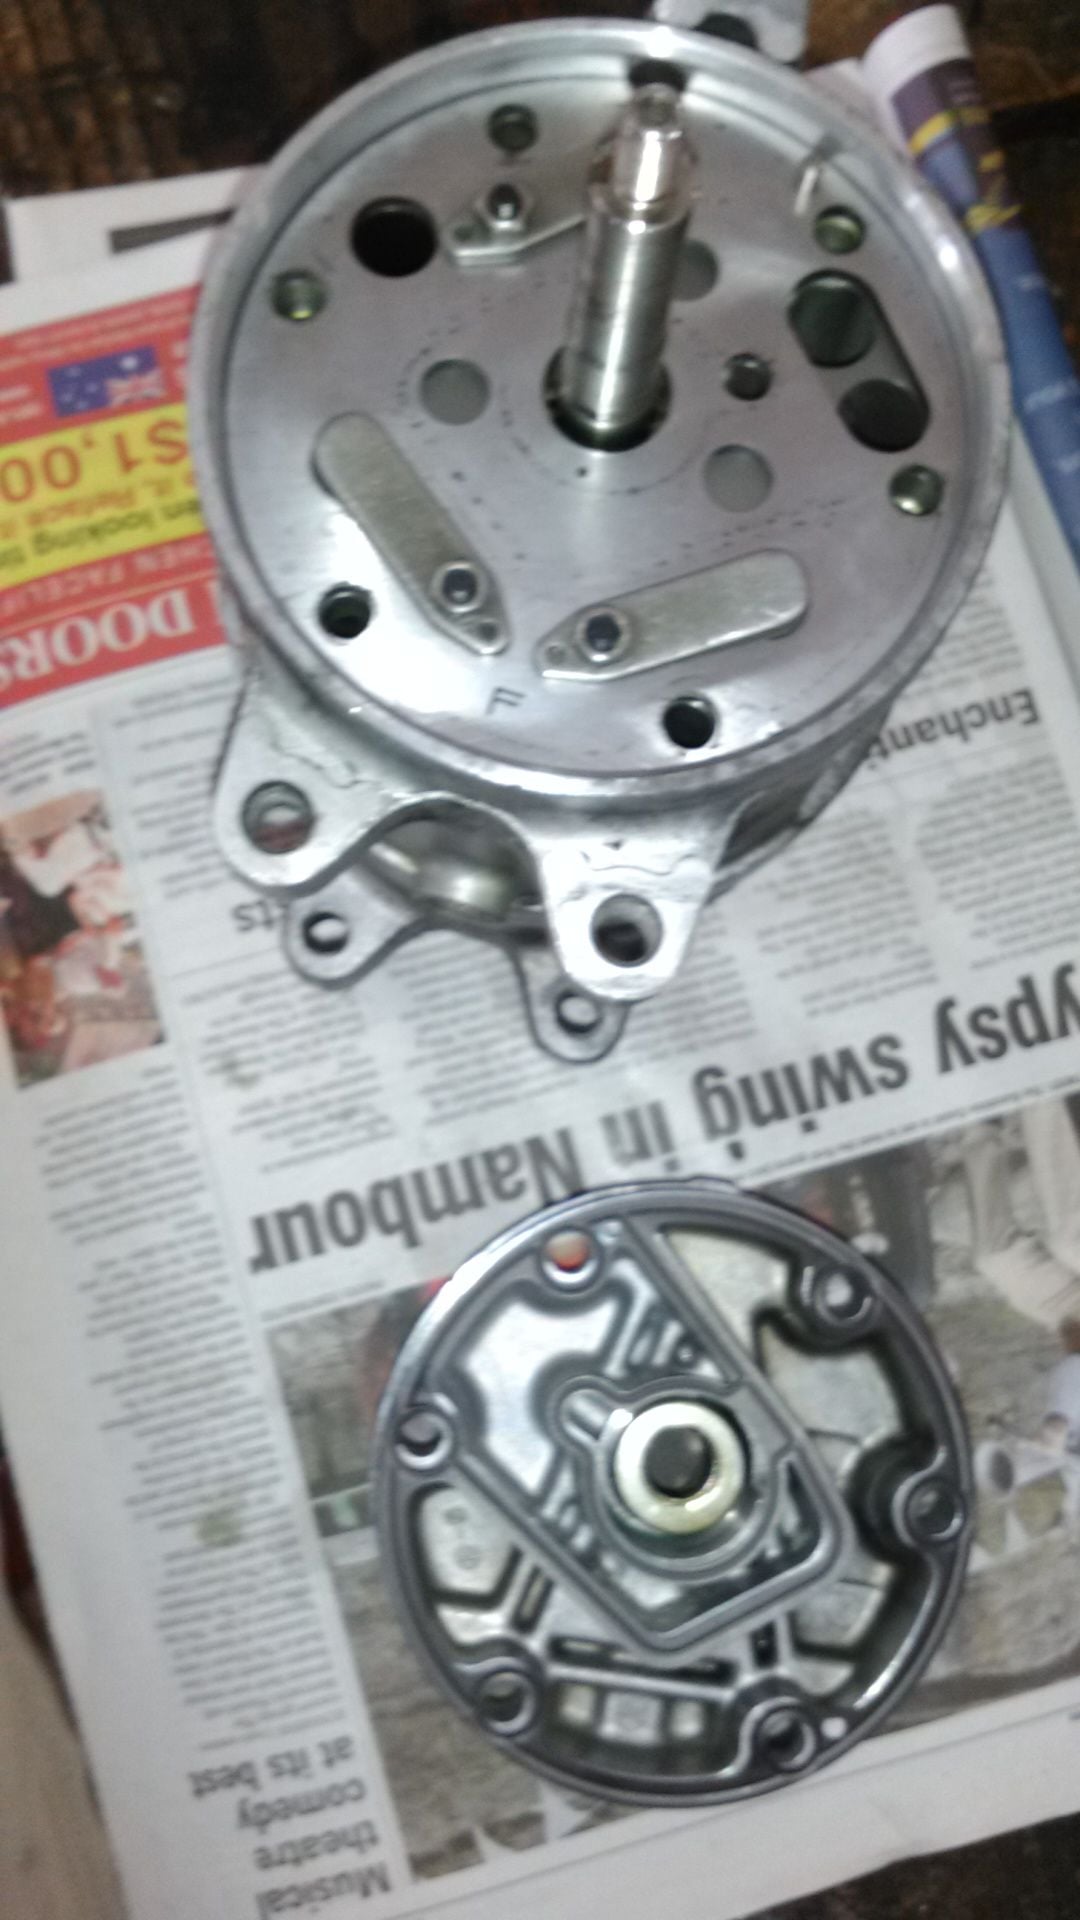
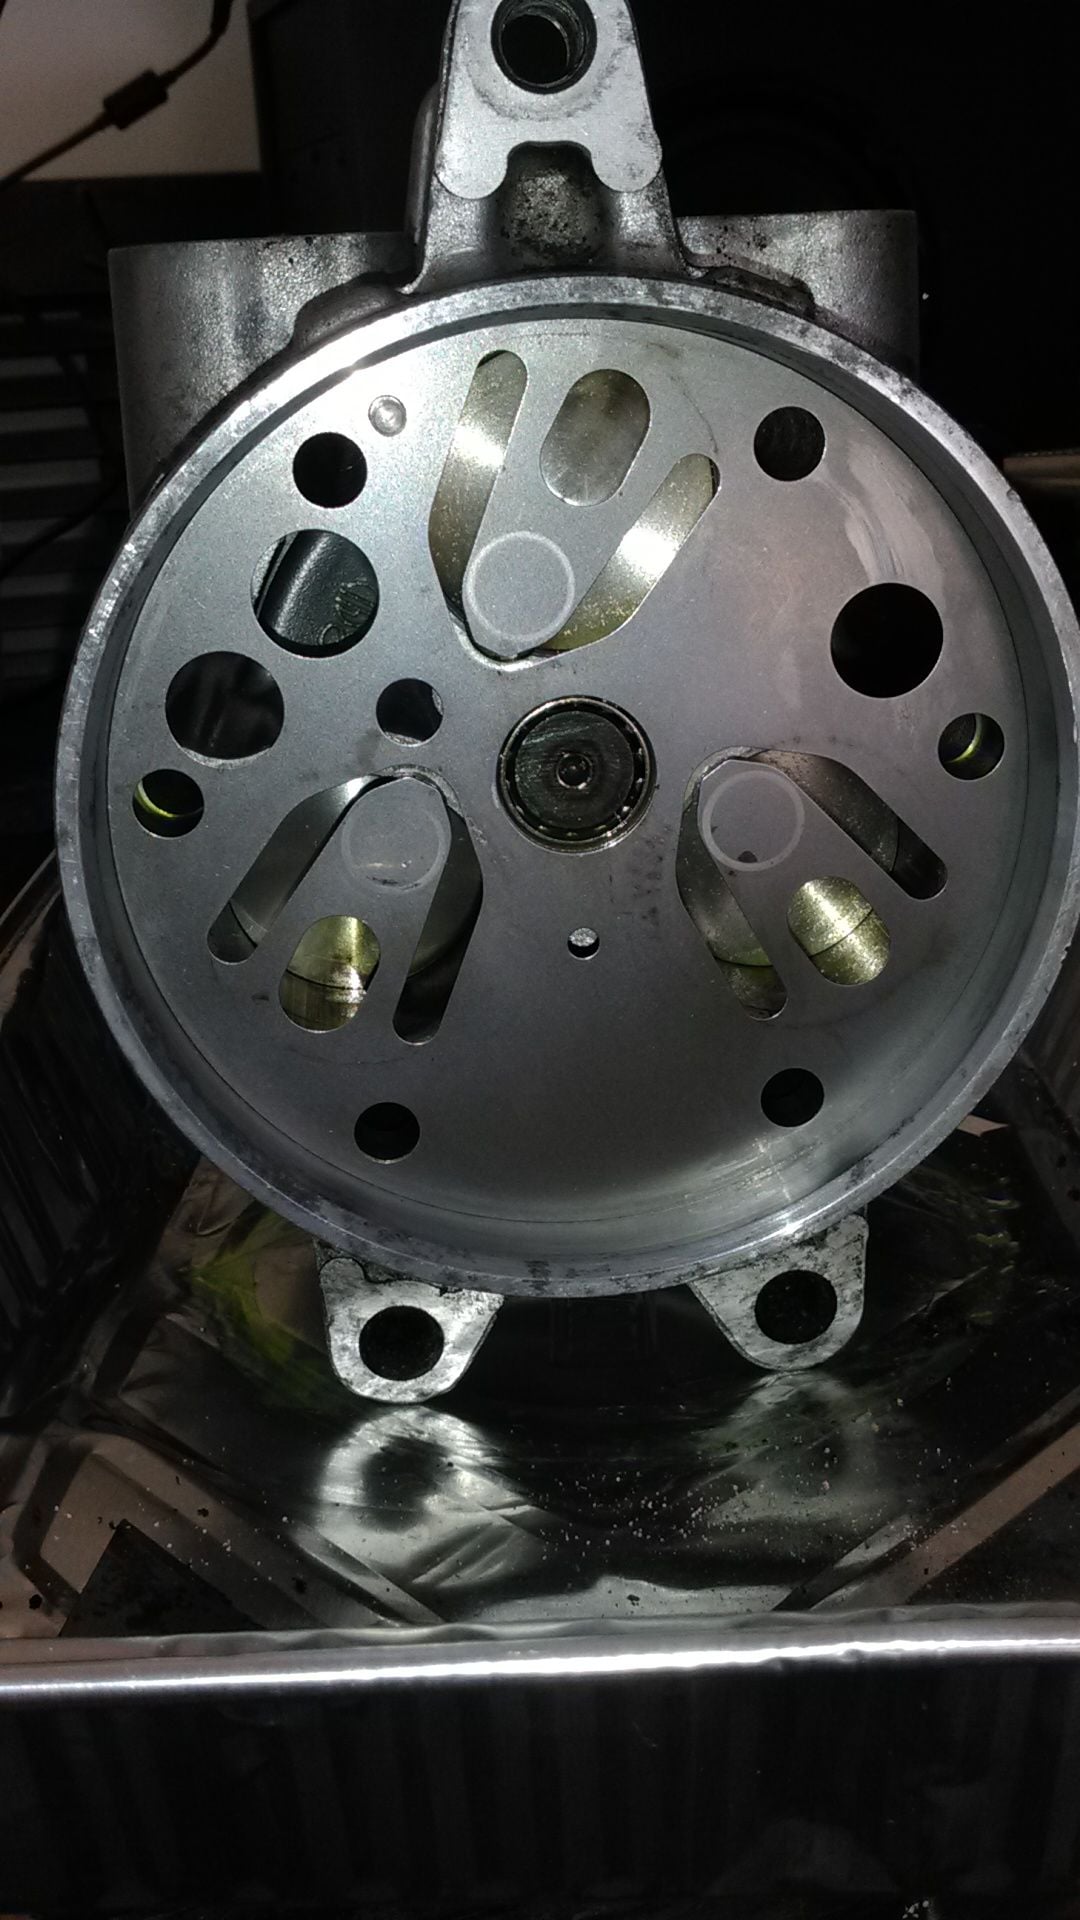
Best to do the case splitting and front and rear cover removal
over a large cookie sheet. Keep the pieces (reed plate assemblies)
separate, they look almost identical however sometimes there is
an "F" and "R" stamped on one side of them.
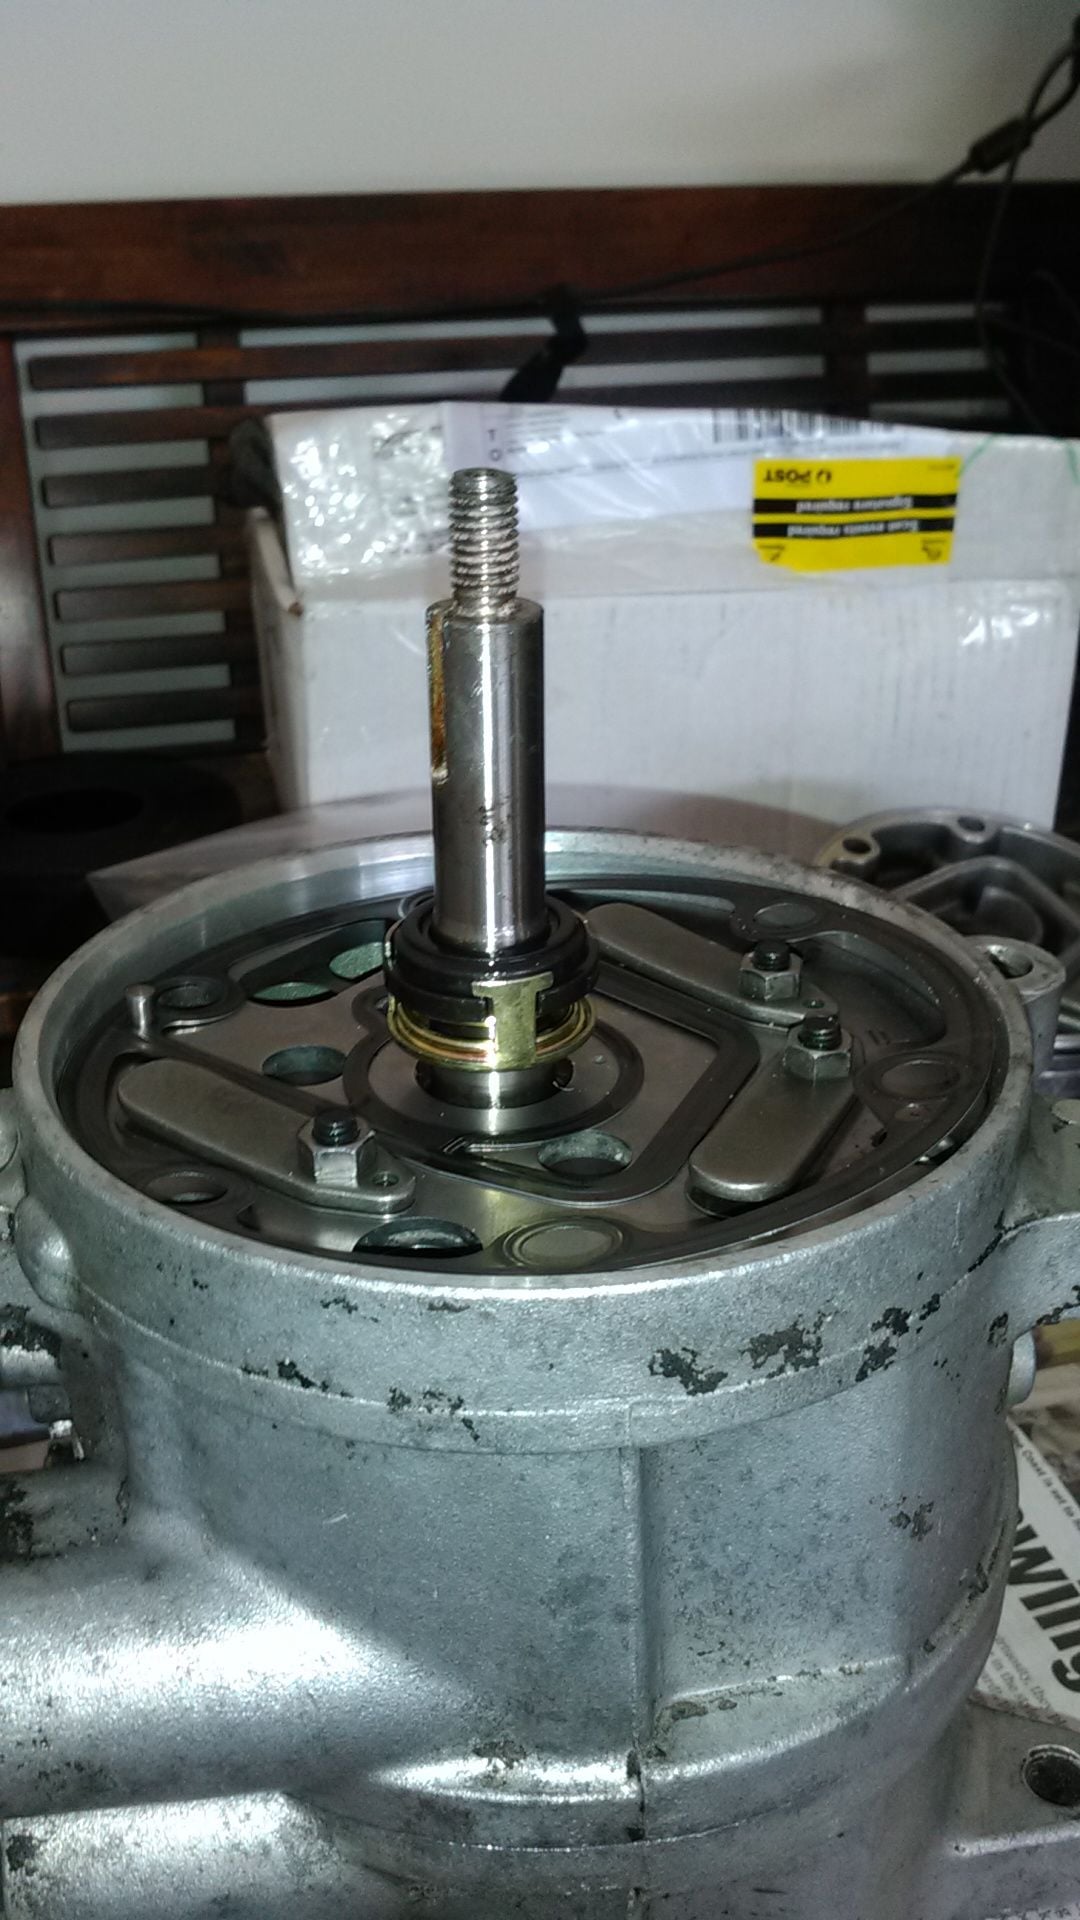
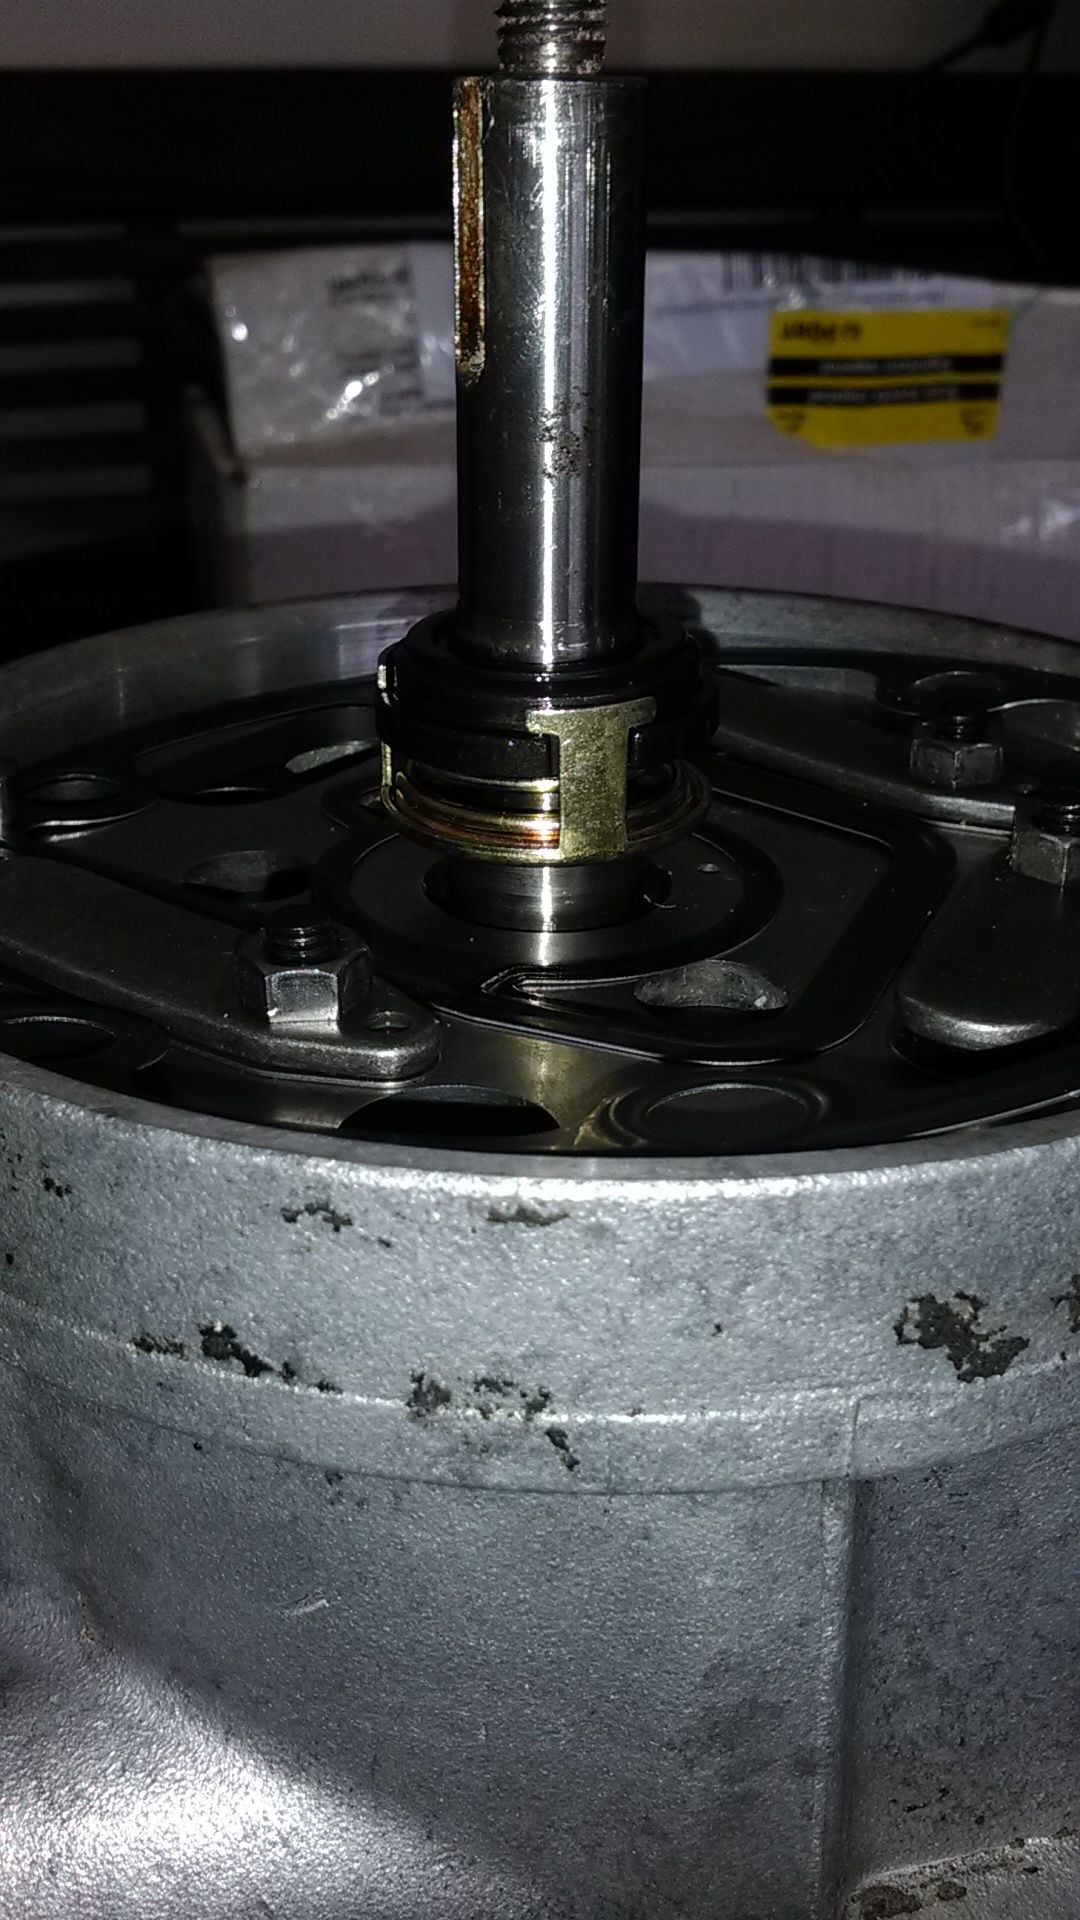
Wipe the oil off the shaft on the front side (clutch side).
Hold the shaft tightly with your fingers.
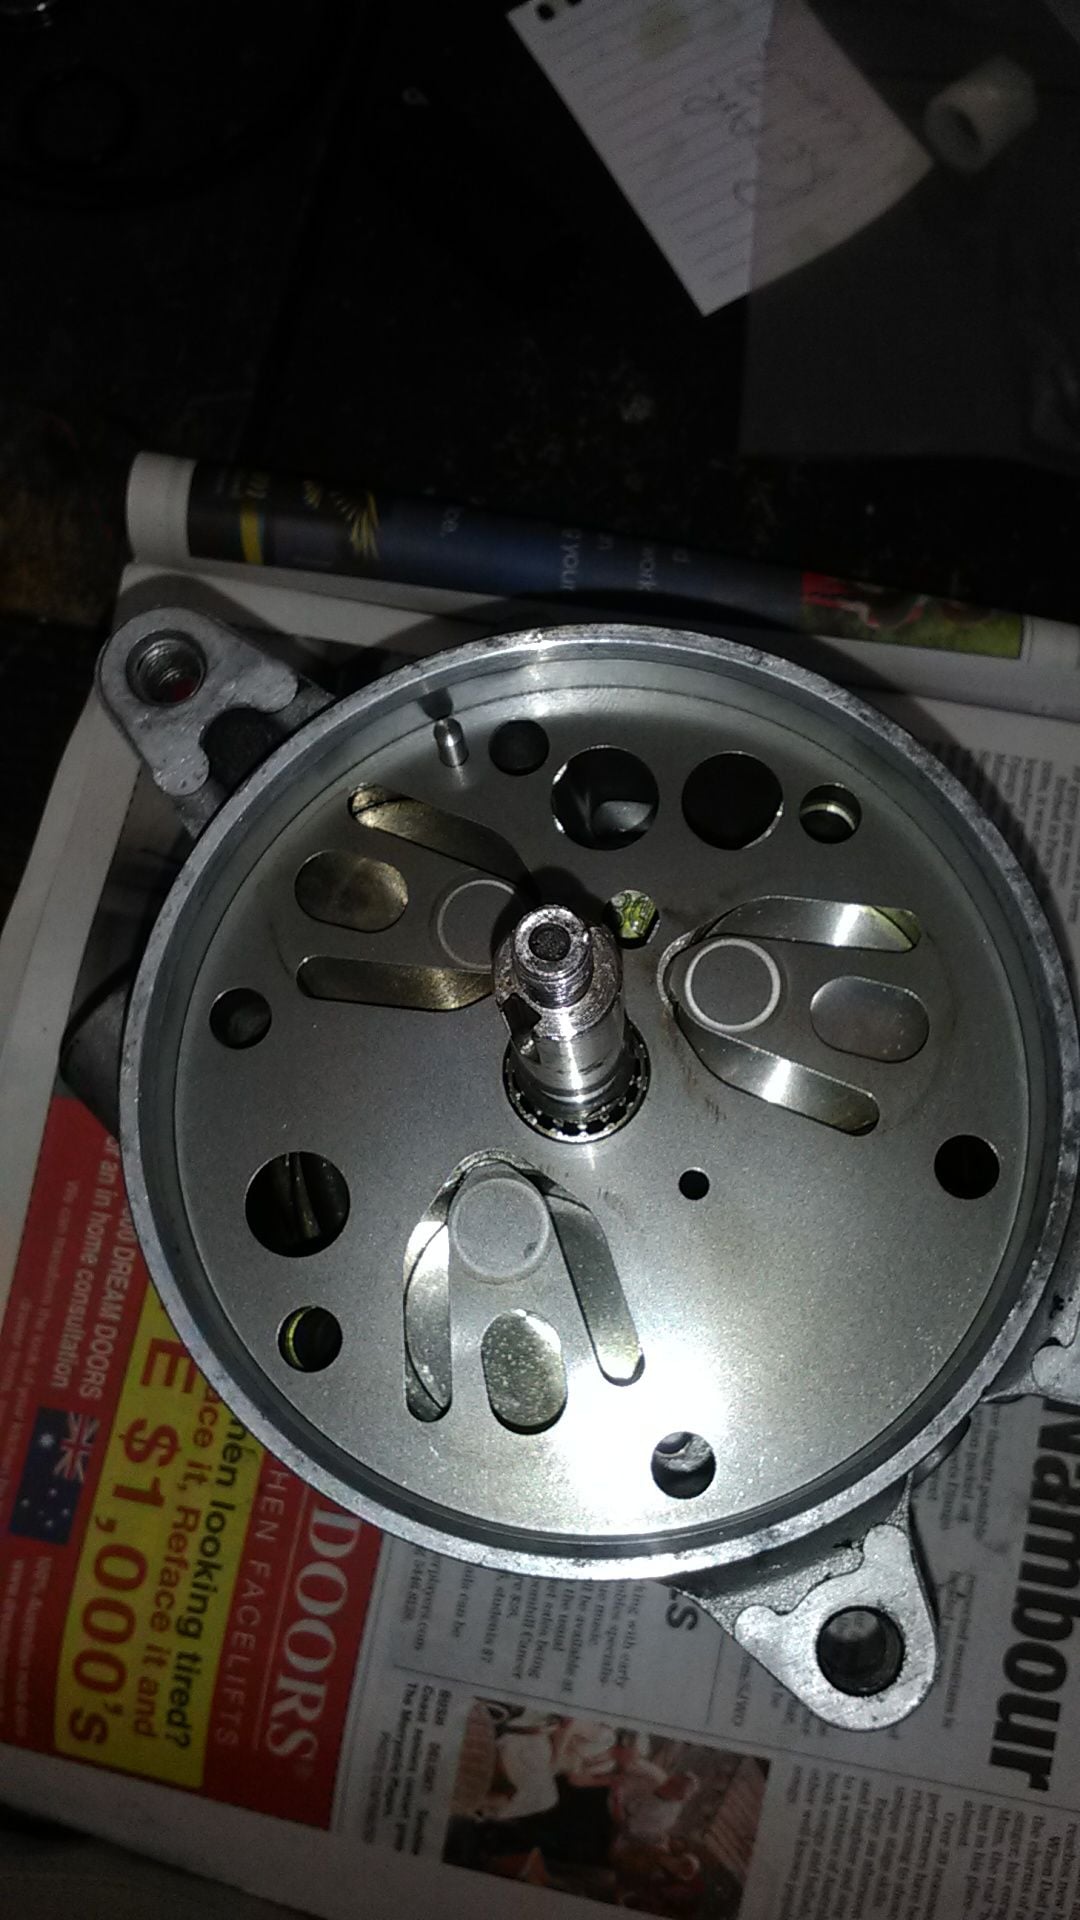
Take a plastic mallet and tap the rear section's ear to split the case,
holding tightly on the shaft so the shaft does not slip out of the front half;
this will keep the pistons and wobble plate in the front section's cylinders.
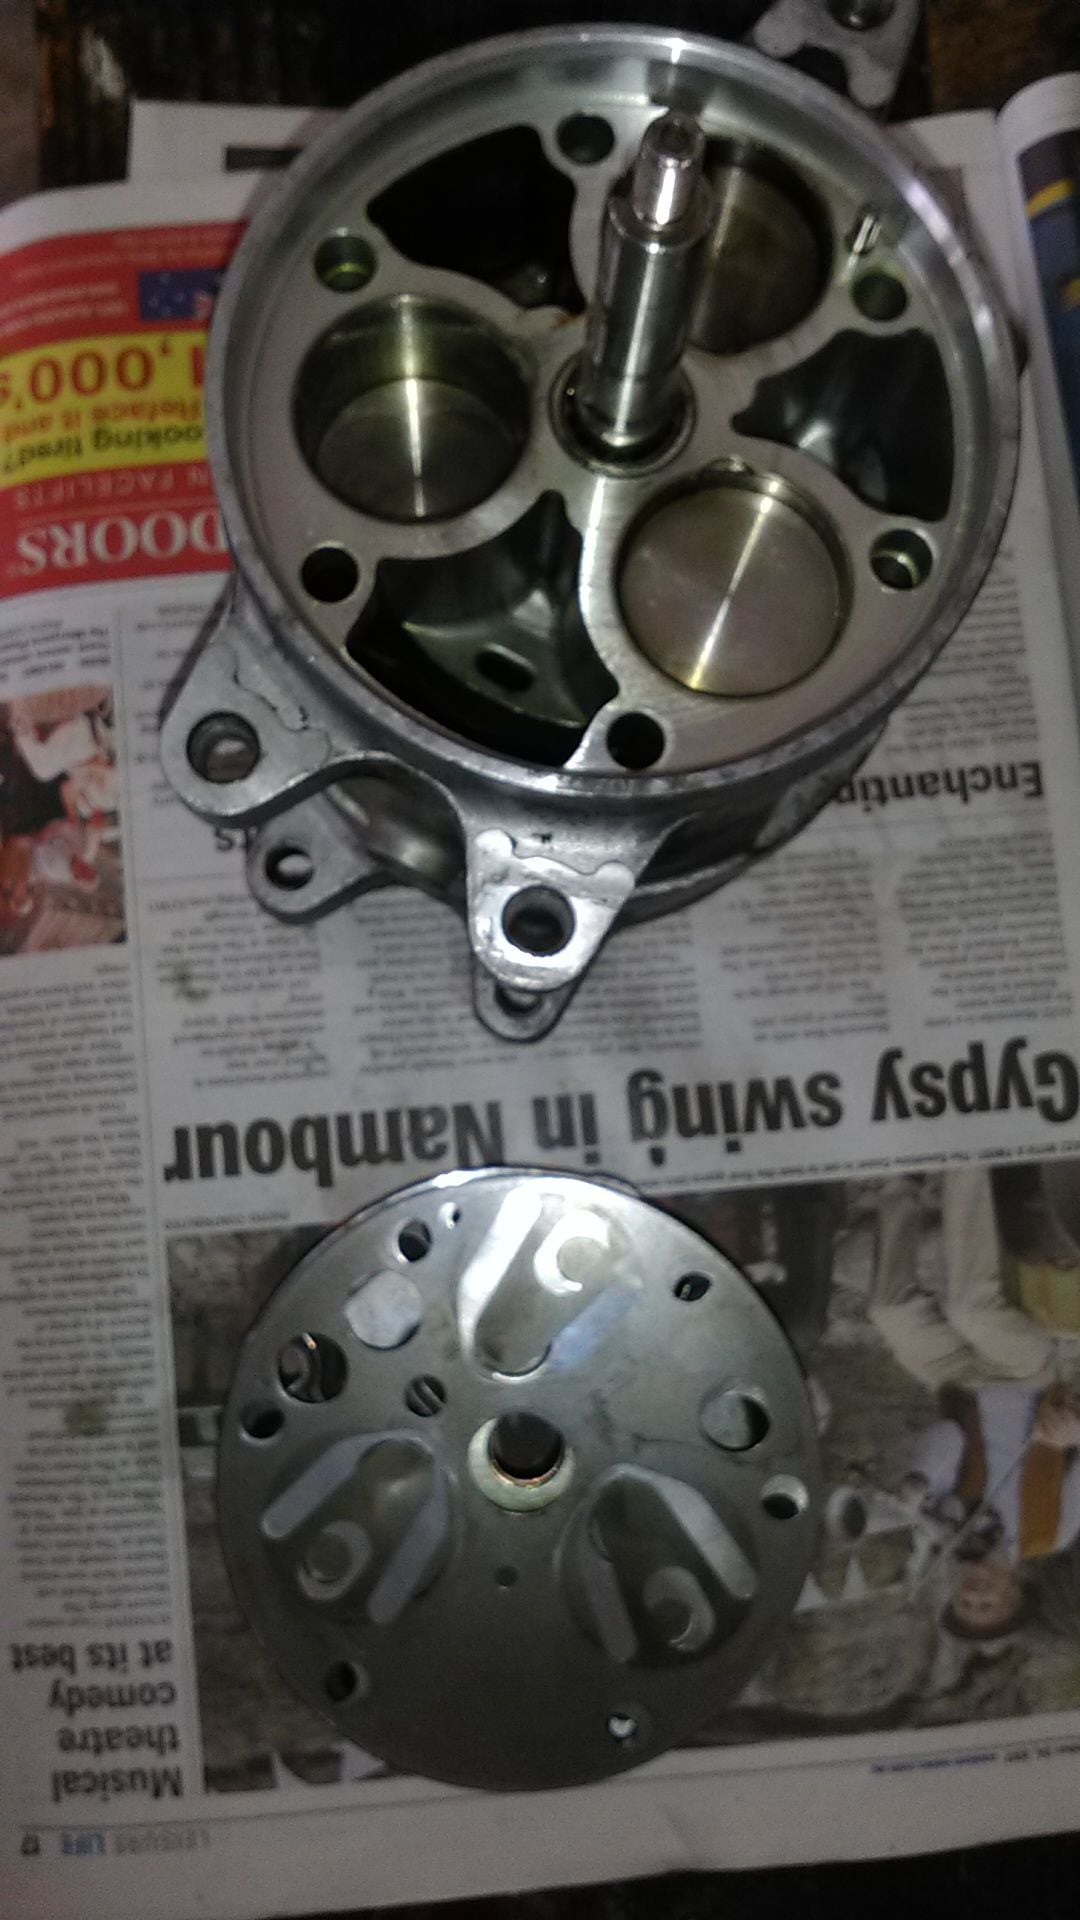
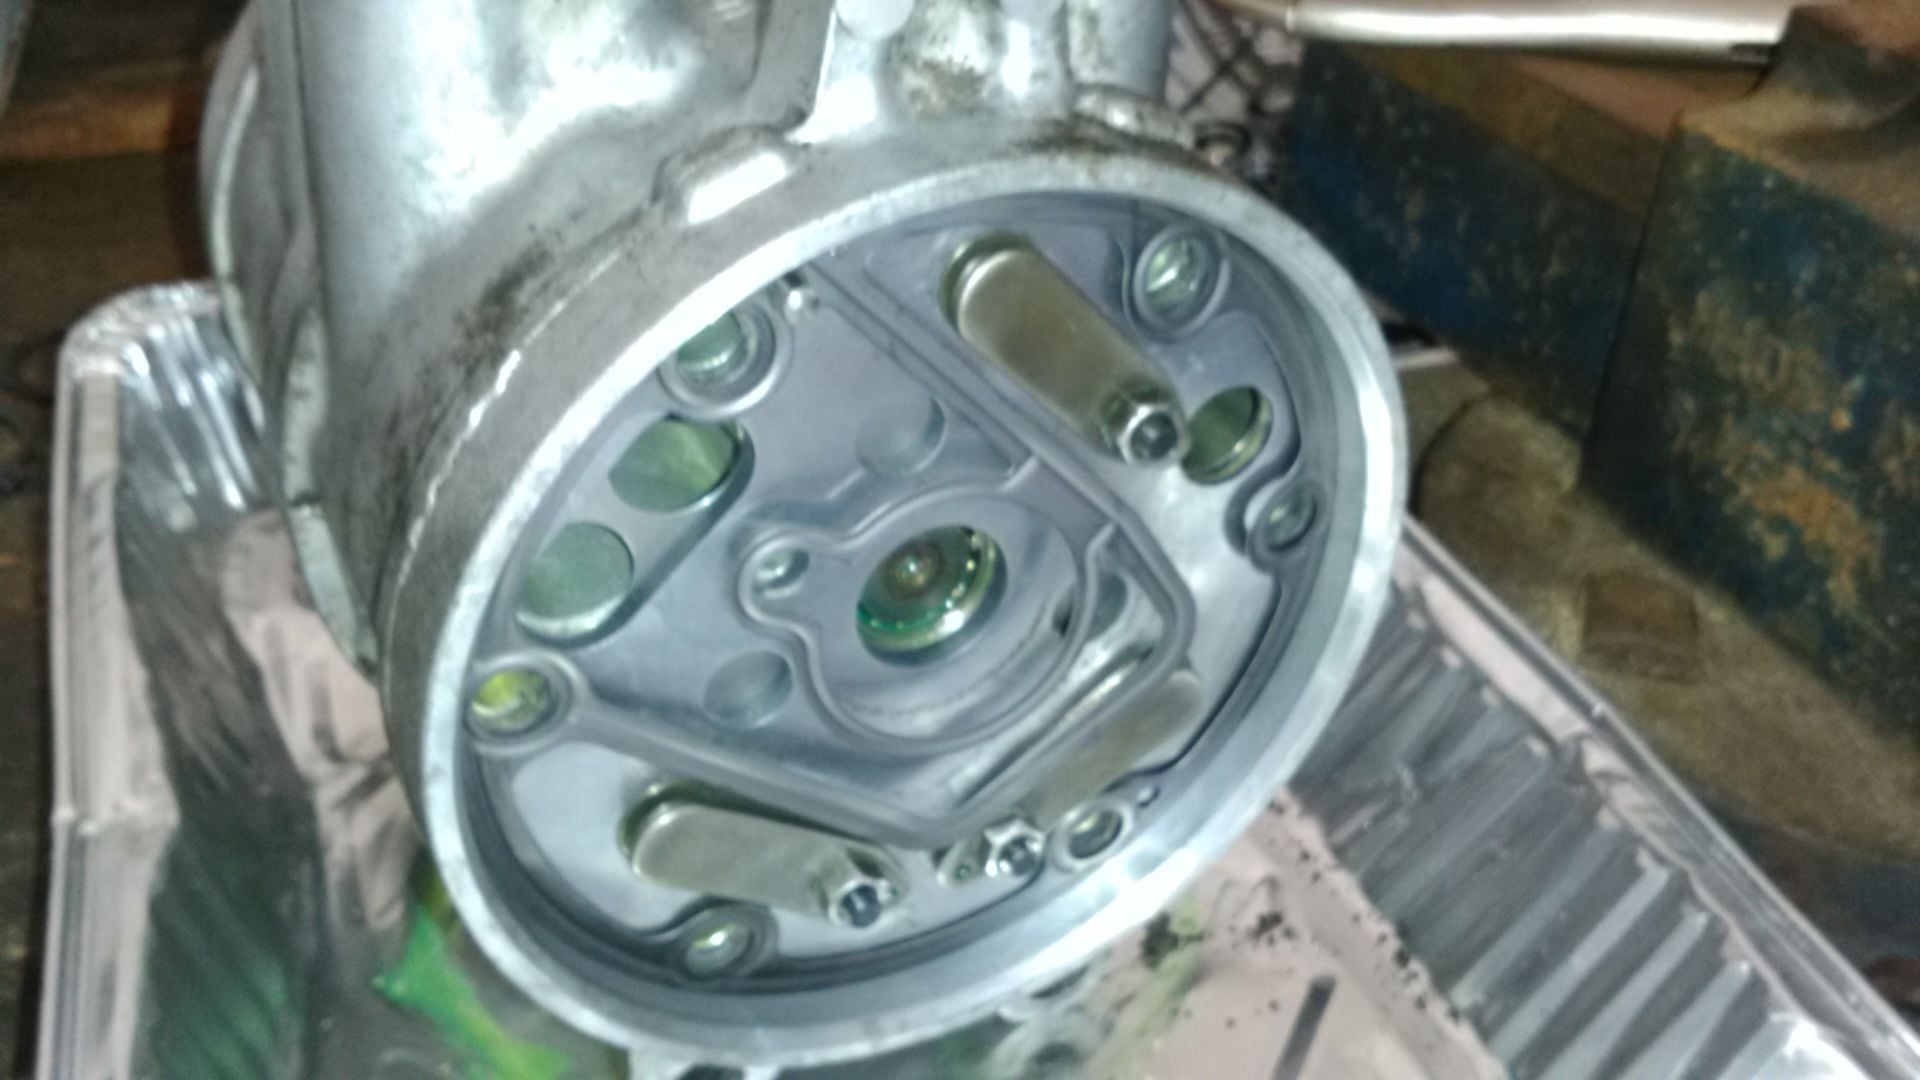
Wipe everything clean of residual oil. Inspect your cylinder bores on both ends;
and pistons and piston rings, wobble plate where the piston half bearings contact.
To inspect rear case section cylinder bores you can place the rear case on a clean table,
insert the front case with pistons back into it until the two cases are nearly together,
tap on the shaft carefully with a plastic mallet while applying upward pressure on the
front case; you are trying to prevent the pistons from falling off the wobble plate on the shaft.
To remove the residual paper gasket on the steel reed plate and the aluminum front and rear covers
wipe off residual compressor oil, spray the piece clean with your favorite degreaser,
get some liquid gasket remover and let the paper gaskets soak, scrape clean with
a plastic scraper of soft brass scraper, avoid scratching the surfaces on front and rear
aluminum covers. Worse case if you don't use a liquid gasket remover is using a 3M abrasive scotch
brite disc but you have to be careful to keep the surfaces flat; grit size and speed can remove
aluminum quite quickly.
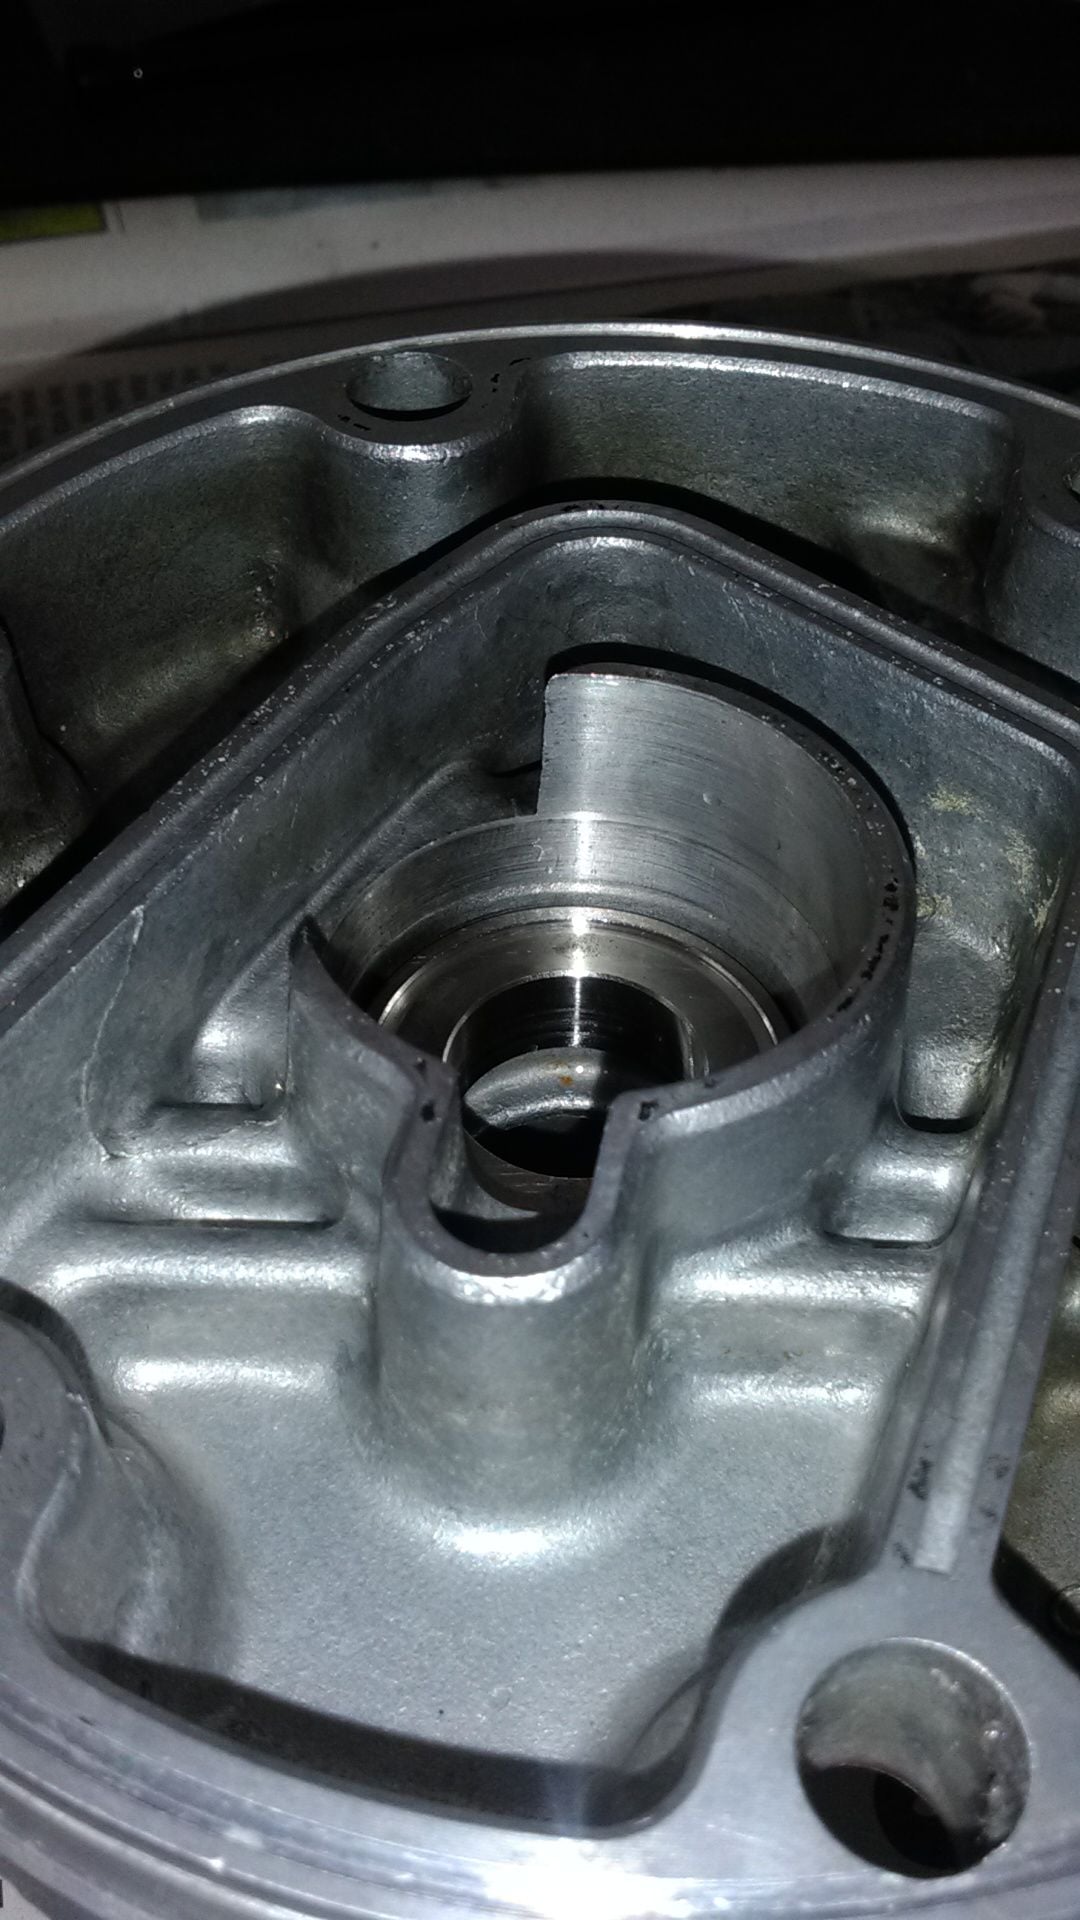
There are 3 large case o-rings, the center one is larger than the outers.
When you place the center o-ring in the groove in the center case insure you have removed
all residual oil in the groove. The o-ring typically won't lay perfectly flat and flush in the groove,
a dab of grease in a few places will hold it down if needed. Be careful not to pinch the o-ring, insure
it is in the groove all the way around. Inspect the o-ring grooves for all
3 locations to insure the aluminum walls are not cracked; the walls are very thin and can
easily break if you drop one of the sections.
Most of the time you do not need to disassemble the reed valves (screws, reed plate and nut)
unless you see signs of corrosion (typical from old R12 days when acids could have formed).
PS, its GRIFFITHS (Welsh spelling).
Griffith is typically Irish or English,
The "Griffits" ran off with the Romans.
Thanks for the comments and suggestions.
I'll split the case the weekend and follow the steps.
Apologies for for the misspelling in the title Griffiths - I'll see if Asterix and Obelix is up to recovering the Griffits.
Spend the weekend cleaning the old gaskets off, splitting the case to change the seal, and putting the compressor back together.
All up, I think I got it right - please comment if I didn't.
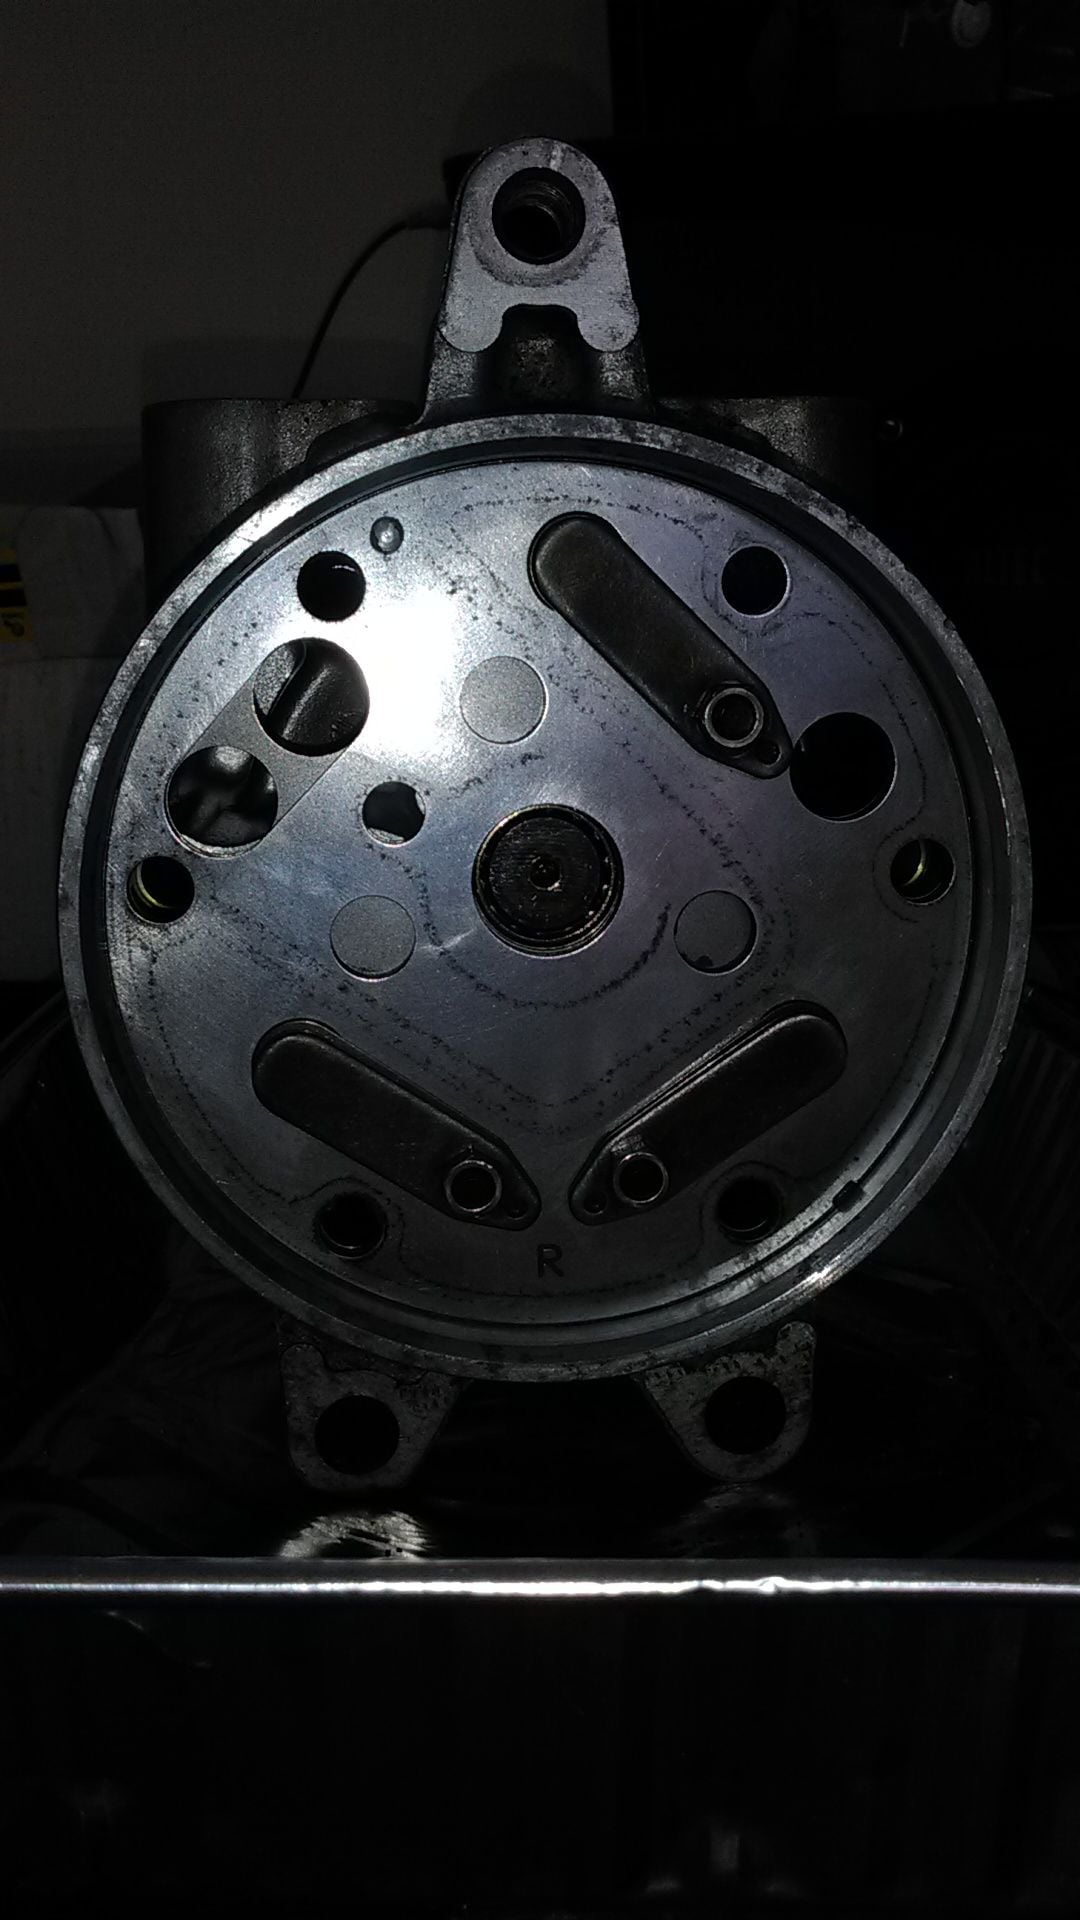
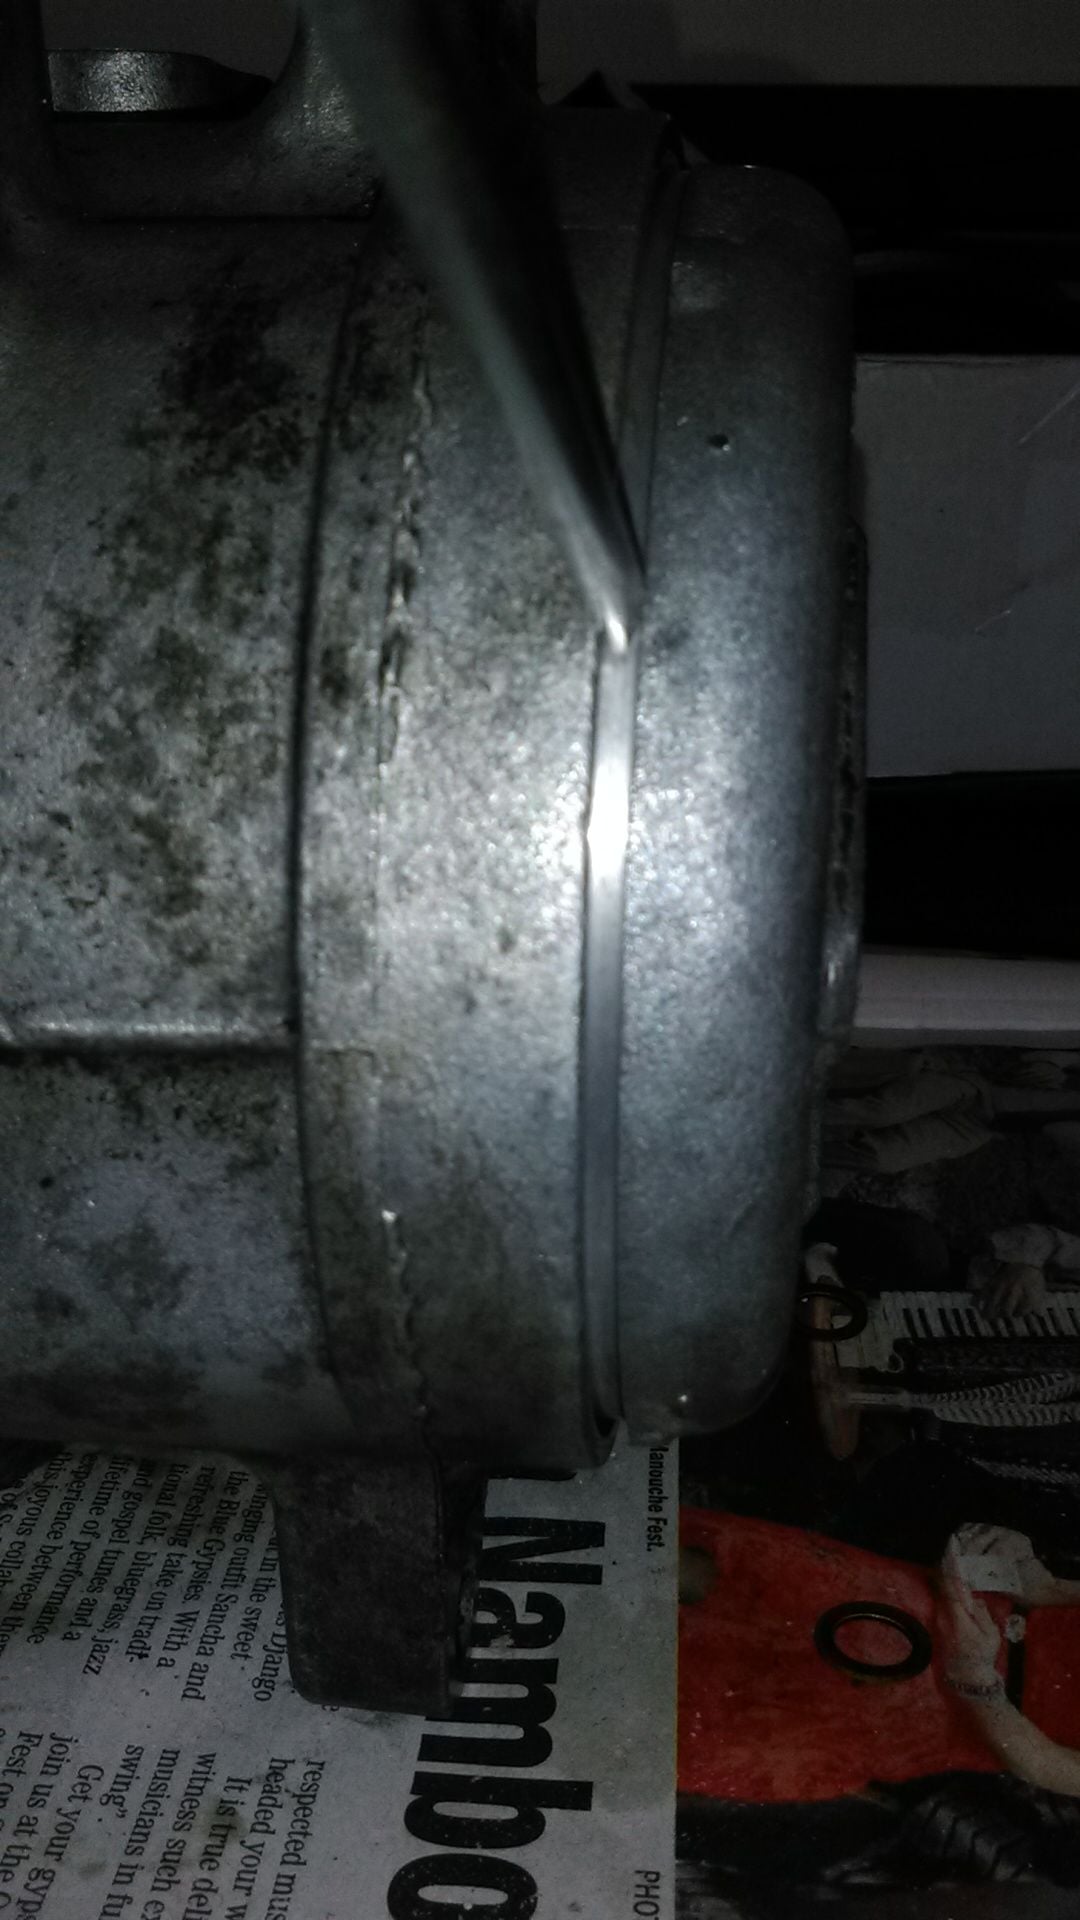
The image show the outline of the old gasket - I spend a lot of time trying to clean this as good as possible. It's smooth to the touch so home it seals.
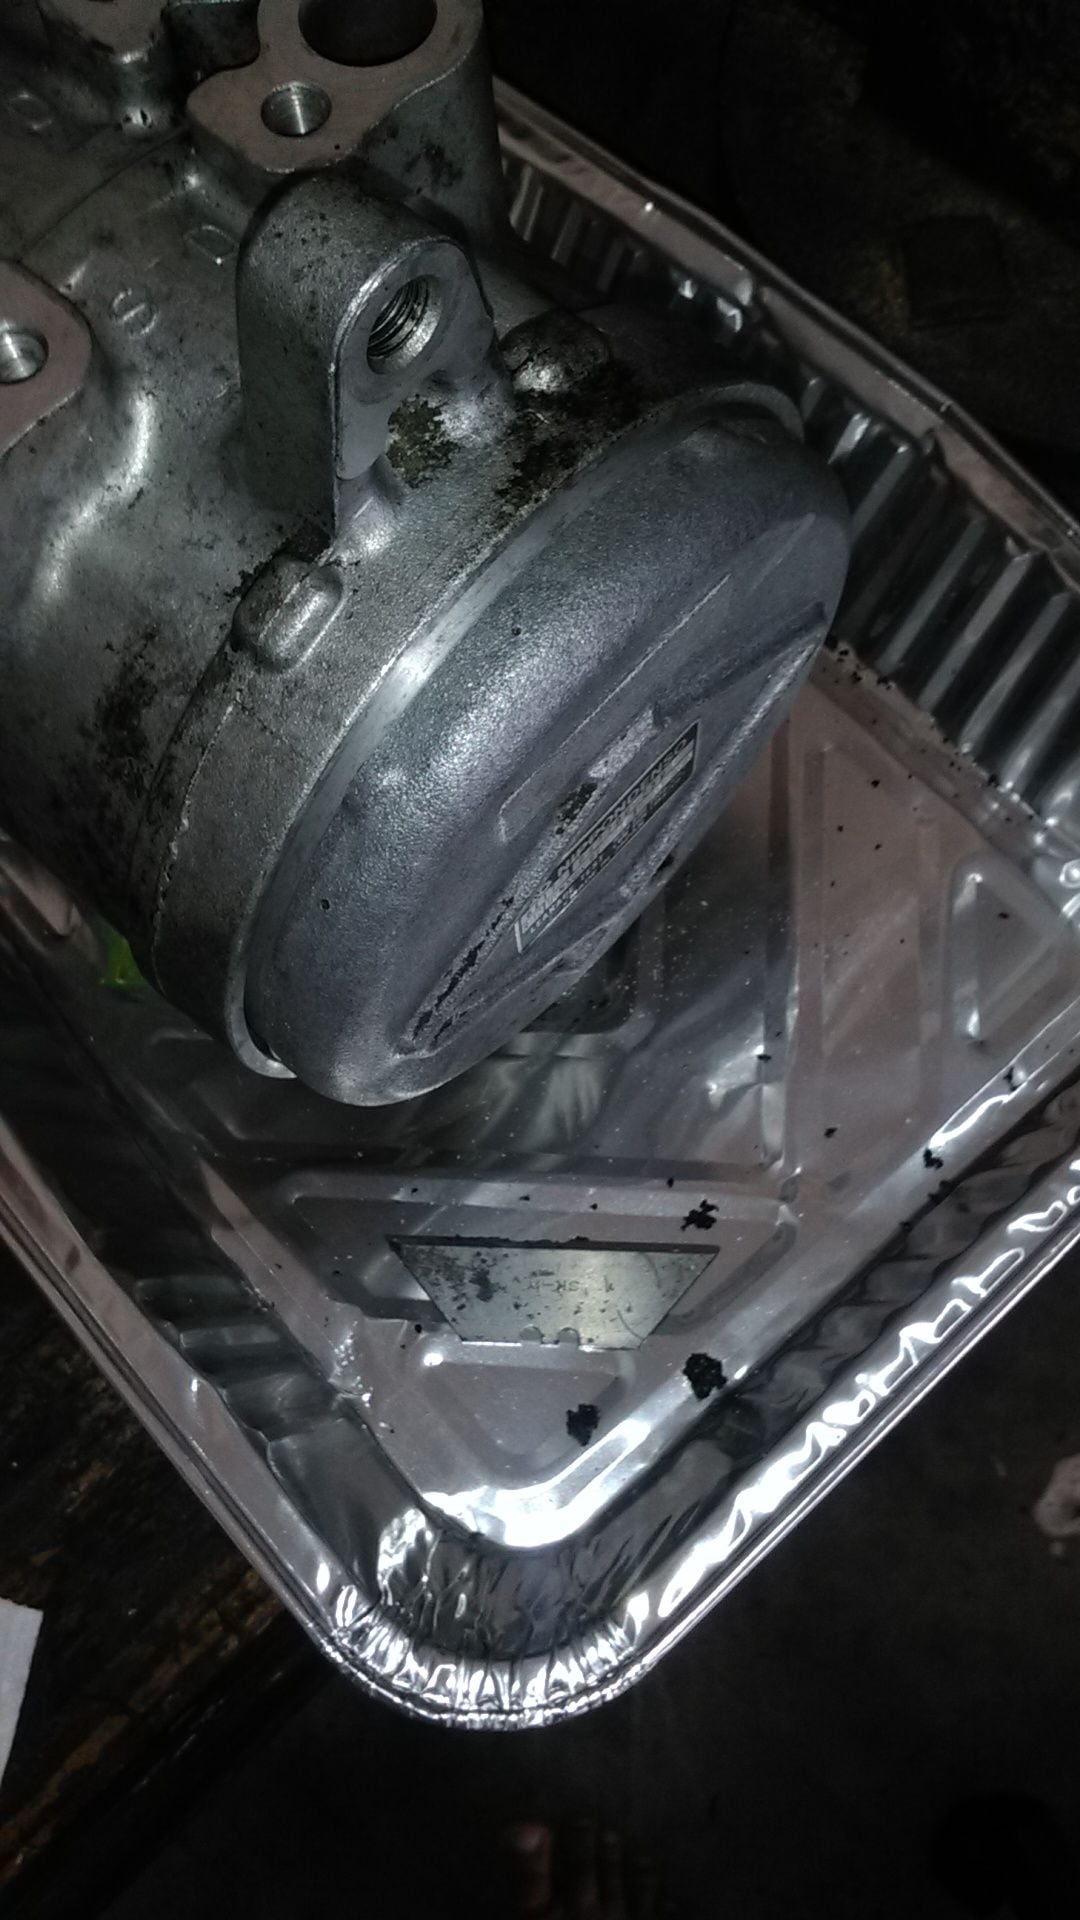
I now have the end caps fitted and tightened the through bolts to pull everything together. I haven't torqued it yet but it's pretty tight. - I found a value of 18 pound/inch in a web search. Is this the correct value?
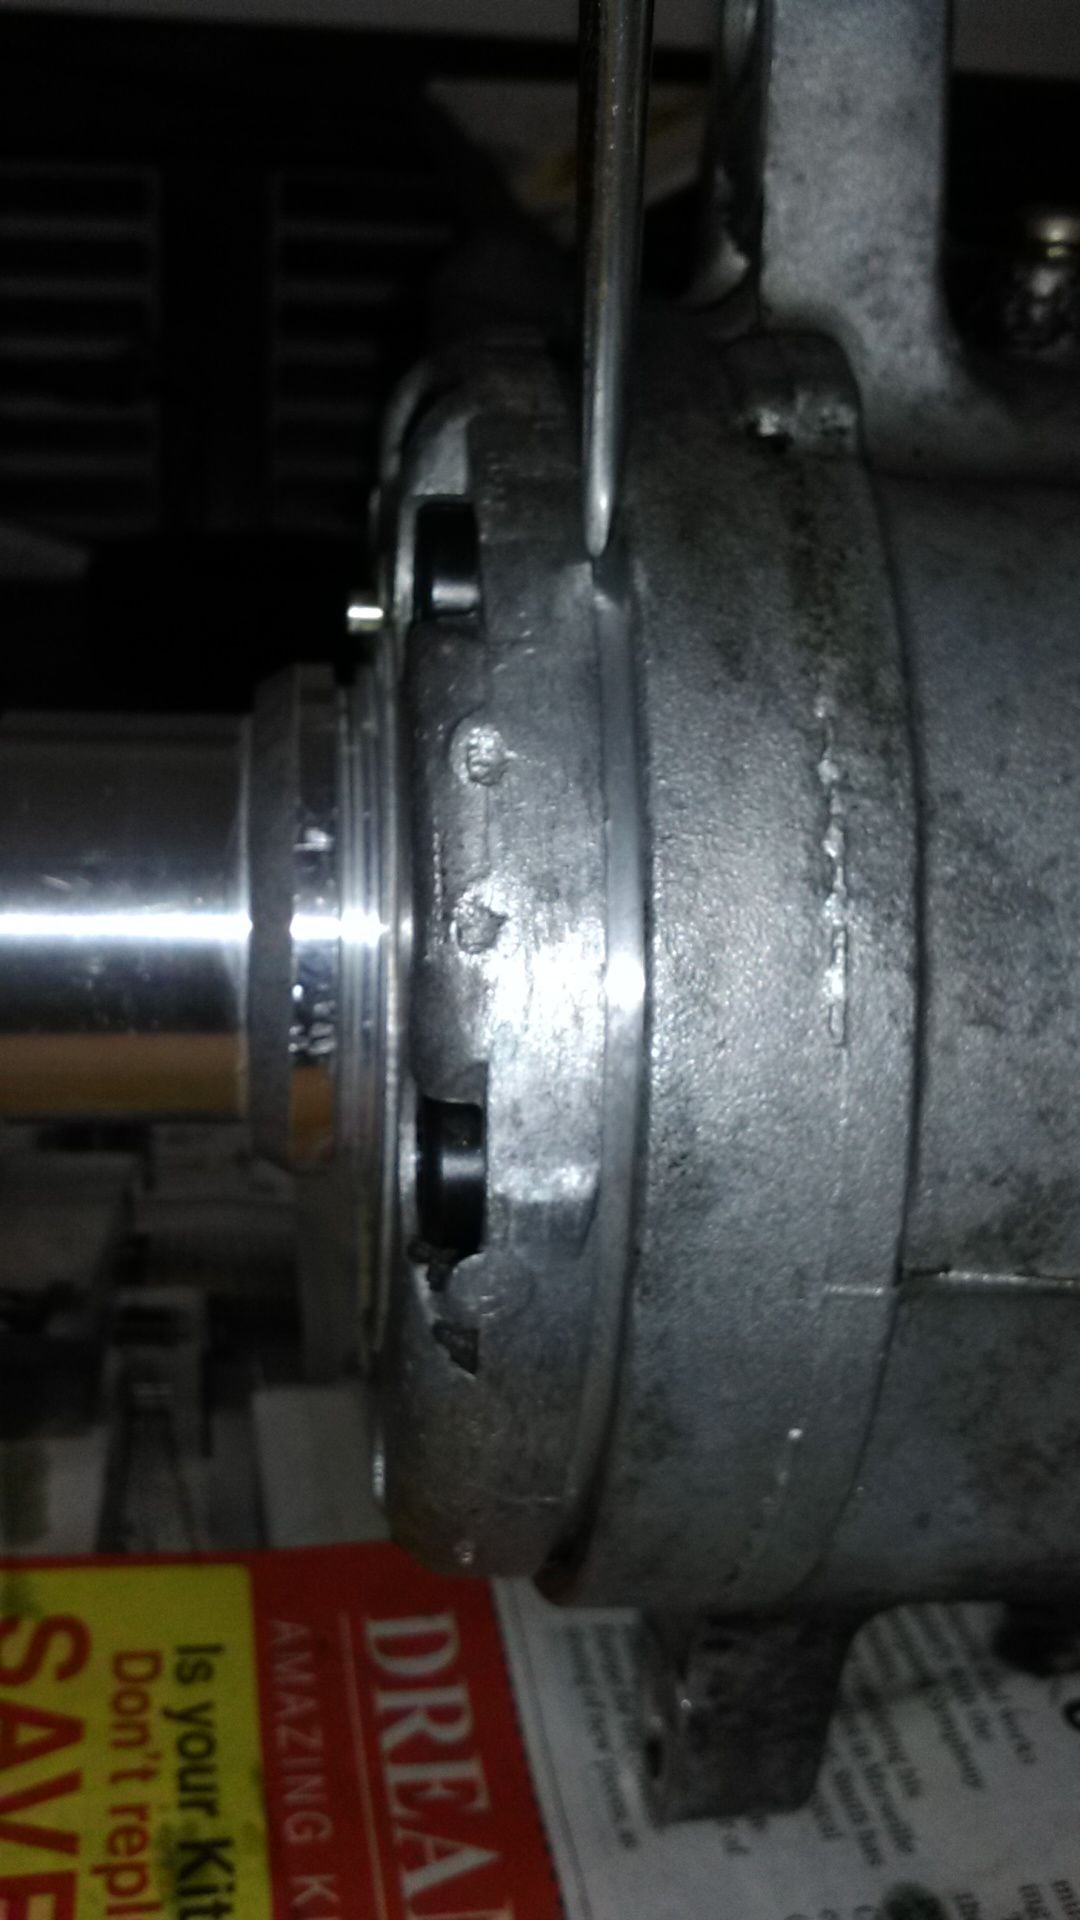
One concern I have is that it seem that the end caps aren't seated fully - please see the images. The gaps are just under 1 mm.
Thoughts?
Another question: As there isn't a filler plug - do I add oil through on of the pipe connectors on top of the compressor?
Thanks for all the tips so far.
Steve, the gap is normal from memory - I've done this rebuild a few times on my S4's.
Yes, fill oil through the ports on the top - however before filling, I like to run the compressor with a power drill on a slow setting (use a bit of hose and a couple of clamps to attach to the snout) and bed in the carbon seal with a couple of mins running, with no fittings on the intake/exhaust ports. Then add as much POE oil as your car calls for, torque up the pipe fittings and attach to the car.
Thanks Hilton.
I put in oil and so far so good. No oil leaks.
Nothing for it but to fit the pulley and clutch and connect everything.
(I wish I had fittings to fit my vacuum pump directly to the compressor to check)
Update - the compressor is back in the car. Everything connected and new drier also fitted.
A/C guy just finished gassing the system. The air is not super cool at 14 Celsius in the vent but will hopefully improve a bit as everything settles.
Now to see how it hold over time.
Please hold thumbs and toes
In general rebuilding the compressor was fun and easy. Removing the compressor and refitting it was hard without a lift.
Removing the residue paper seals was also not easy and quite time consuming.
Now that the system make cool it's time to service all the vacuum lines, valves and flaps.
Thanks again for the tips and hints along the way.


 11-29-2017, 10:47 AM