When you click on links to various merchants on this site and make a purchase, this can result in this site earning a commission. Affiliate programs and affiliations include, but are not limited to, the eBay Partner Network.
Finally got some time to dig into replacing the rear axle seals. Started on the passenger side so I'd have more room to see without the exhaust in the way. When I got to the old seal, it was in one piece but when I started to pull it out it began to disintegrate. Ended up with lots of little rubber pieces and took a while to pick them all out.
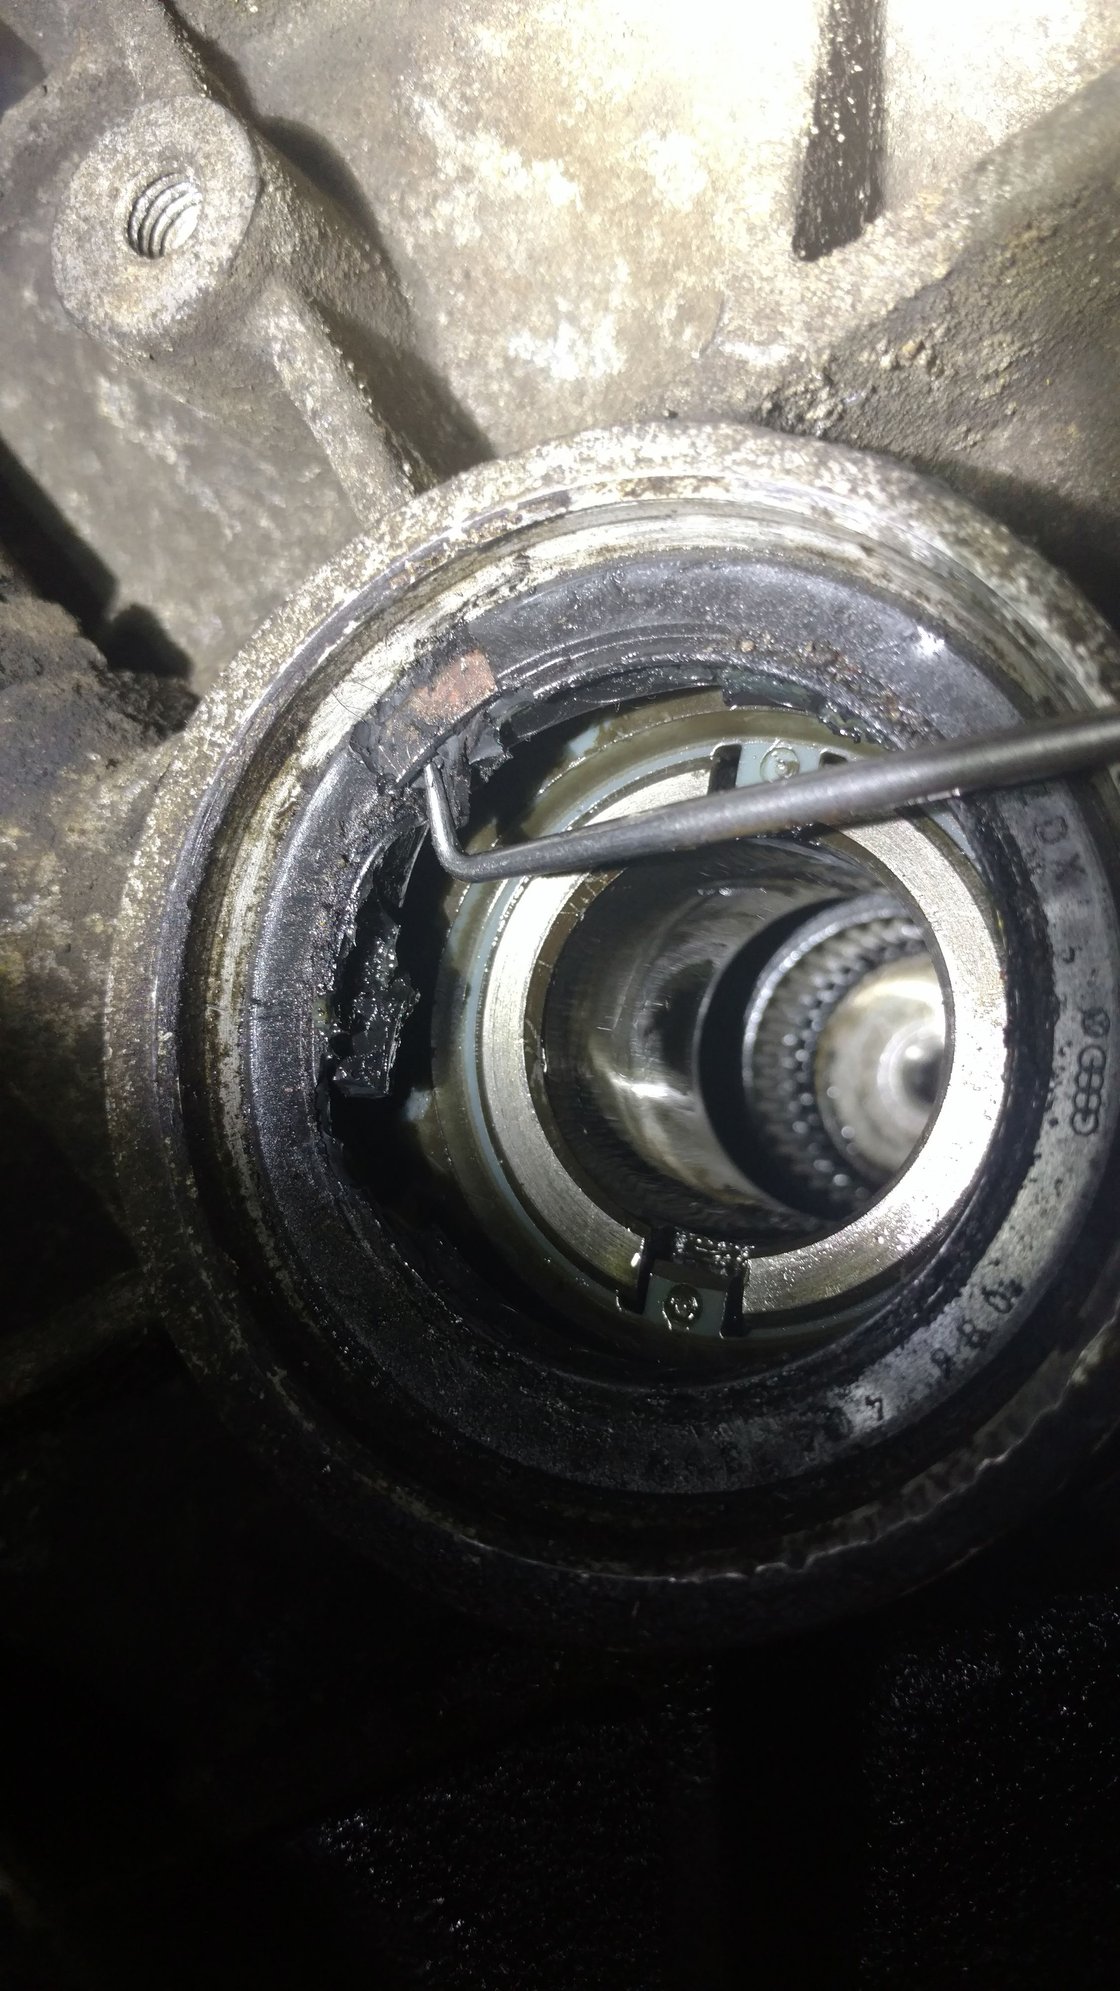
So I found the metal "stopper" on the right side that the seal fits up against. My problem is I can't figure out how. When looking at the old seal, it looks like it goes around the front lip and then the back. I cant understand how the shape of the new seal can fit like that. I tried tapping it in with a 40mm socket but I don't understand how the edges of the seal are supposed to fit in over that metal piece.
I took a break from the passenger side and started on the driver side, hoping it would make a bit more sense over there. I had read there was no stopper on that side for the seal and that you just pressed it to about a 5mm in. Well, my '86 has the exact same setup with the metal stopper on the left. I'm confused to say the least. Any hints on how to do this?
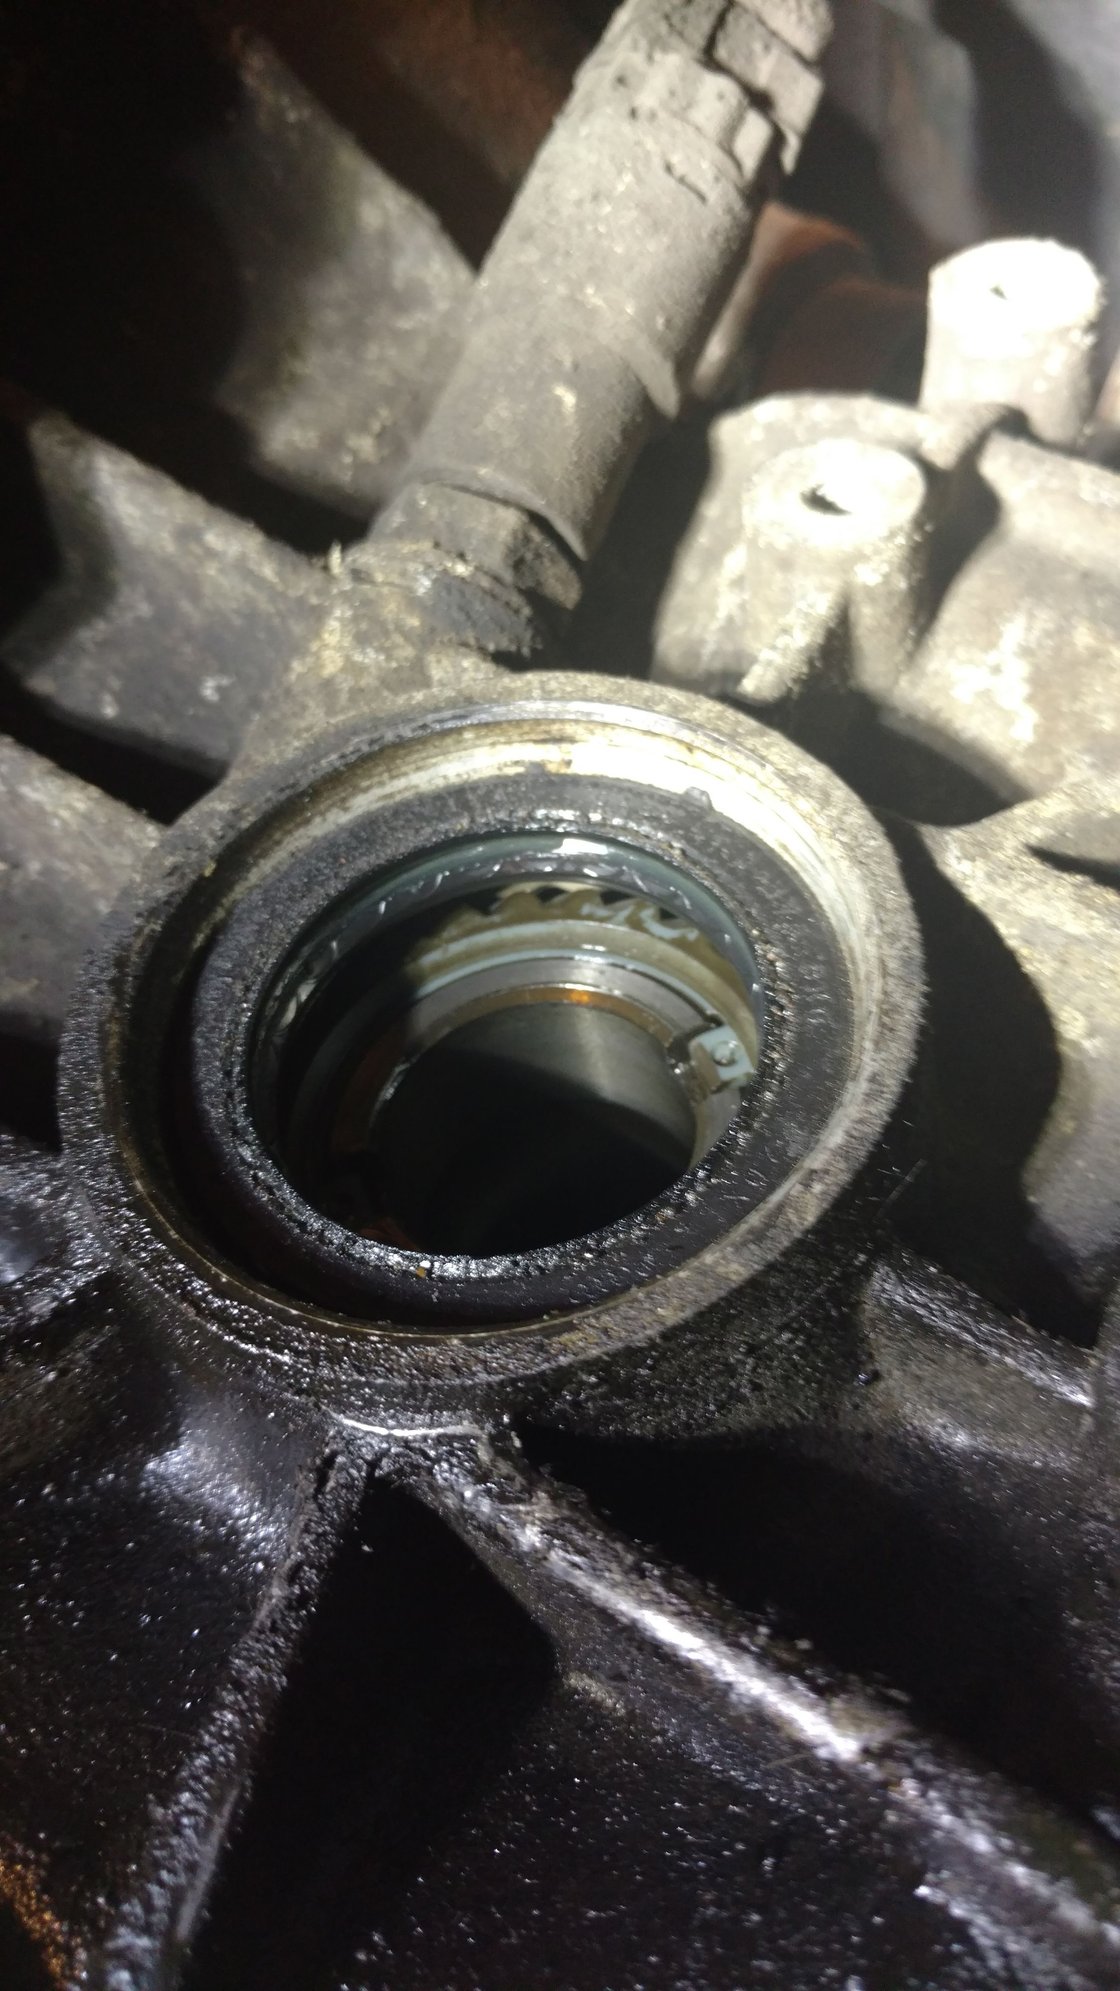
Here's a pic of the left side before I began to remove the old seal:
And here's a pic showing the metal stopper on the left side:
From this angle you can see what I mean about that lip, if you tap the new seal in (once the old is removed), you are just pressing against the lip.
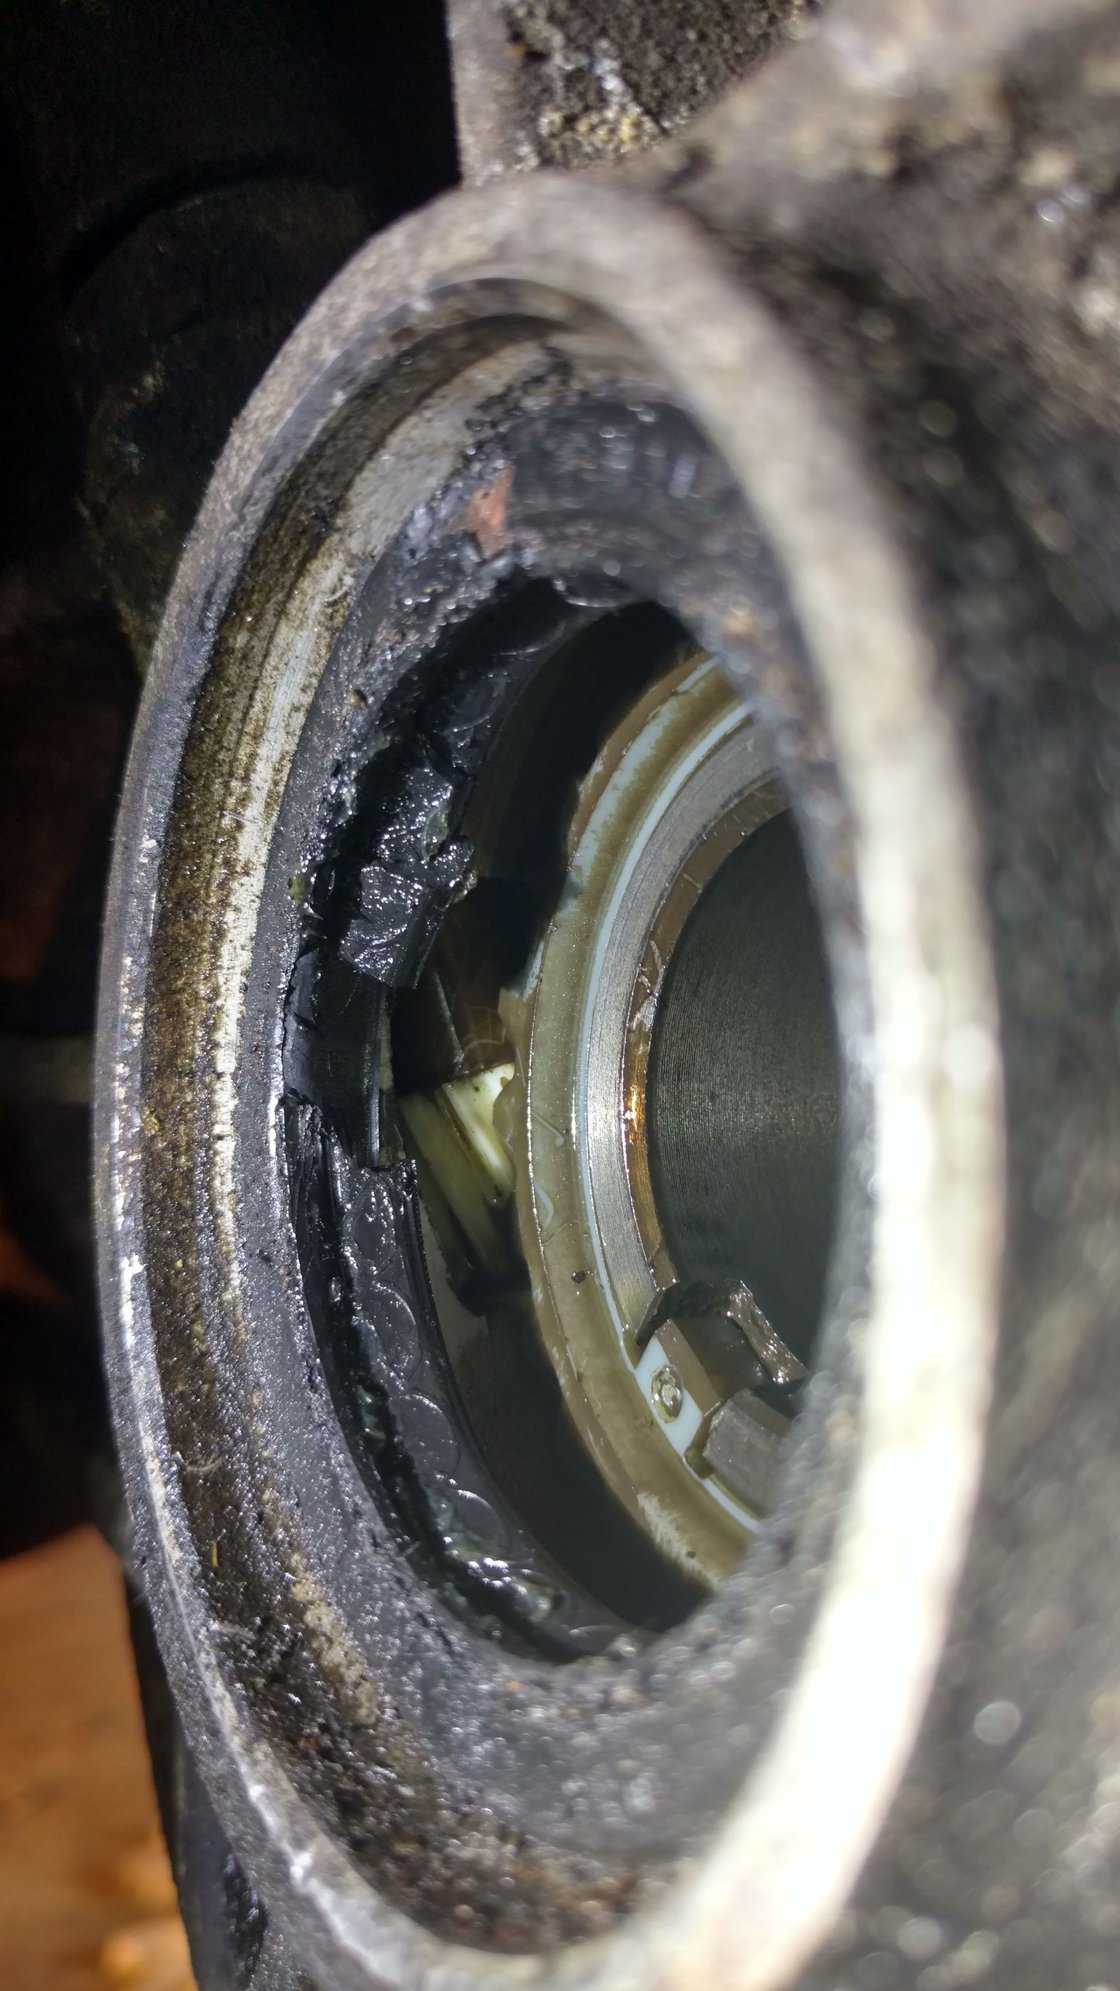
Looks like you might have left the metal housing of the old seal in place...It comes out too, and probably presses up against a stepped portion inside the axle housing..A seal pulling tool might help here, or you might crush in one side of the metal ring with a screwdriver and a hammer, (screwdriver goes in between metal of axle housing and metal ring)and then pop it out with the screwdriver. You might have to do this maneuver on both sides before it will come out. Hope this helps some..
This^^
Wow, removing the rubber, piece by piece, from the metal part of the seal must have been frustrating to say the least. Get a puller and take that sucker out in less than a minute and in one piece.
AutoZone sells one for about 12 bucks that looks like a medivial double bitted axe..works pretty good except on the front transaxle seal..Then you have to modify it to get it to work.
The Autozone tool should be fine, the need is for a generic seal puller. You could also use a pry bar. When you use the seal puller, be careful to keep its pointy end inside the radial oil seal, else you will gouge the aluminum sealing surface.
Last I checked, the factory seal installation tool was still available and quite inexpensive. It is handy in that it ensures the seal is set to the correct depth, no more no less. Also makes it easy to get the critter into the case. Zelenda is my go-to source for VW/Audi special tools, give them a call.
When installing the new seals, be sure to first pack them with grease. This will keep the "gaiter" (the spring wire) in position under the seal lip. If you have an LSD in your car, make sure the grease you use is free of MoS2. Audi sells a grease for doing this, which is unnecessary but quite handy because it's easy to work with: squeezes out of a nozzle into the seal. I get two or three transmissions out of a tube. If interested, shoot me a note, I'll dig out the p/n. Good luck!
Alright guys, update time. I got my seal puller in, it's a Lisle 58430. Kinda awkward to use but eventually did the job. The passenger side came out fairly easy. The driver side took a bit more force and bent the metal ring on removal. This side also has the old seal completely fused to the ring and after spending so much time getting the other side off, I think I'll just order two new metal rings. Does anyone have a part number for these?
Also got some Valvoline synthetic grease. No LSD here so I think it should work ok. Do you guys remove all the old grease on CV joint when reinstalling or just pack the new stuff on the old grease?
The metal ring is part of the old seal..discard it..when you get the new seal, it will have a new metal ring. Unless that you are talking about a retaining snap ring, which, may be hidden underneath the grease and unseen in the photos. Those usually sit in a groove, and require a pair of snap ring pliers to remove them...totally unlike the metal ring portion of the old seal. hope this helps some.
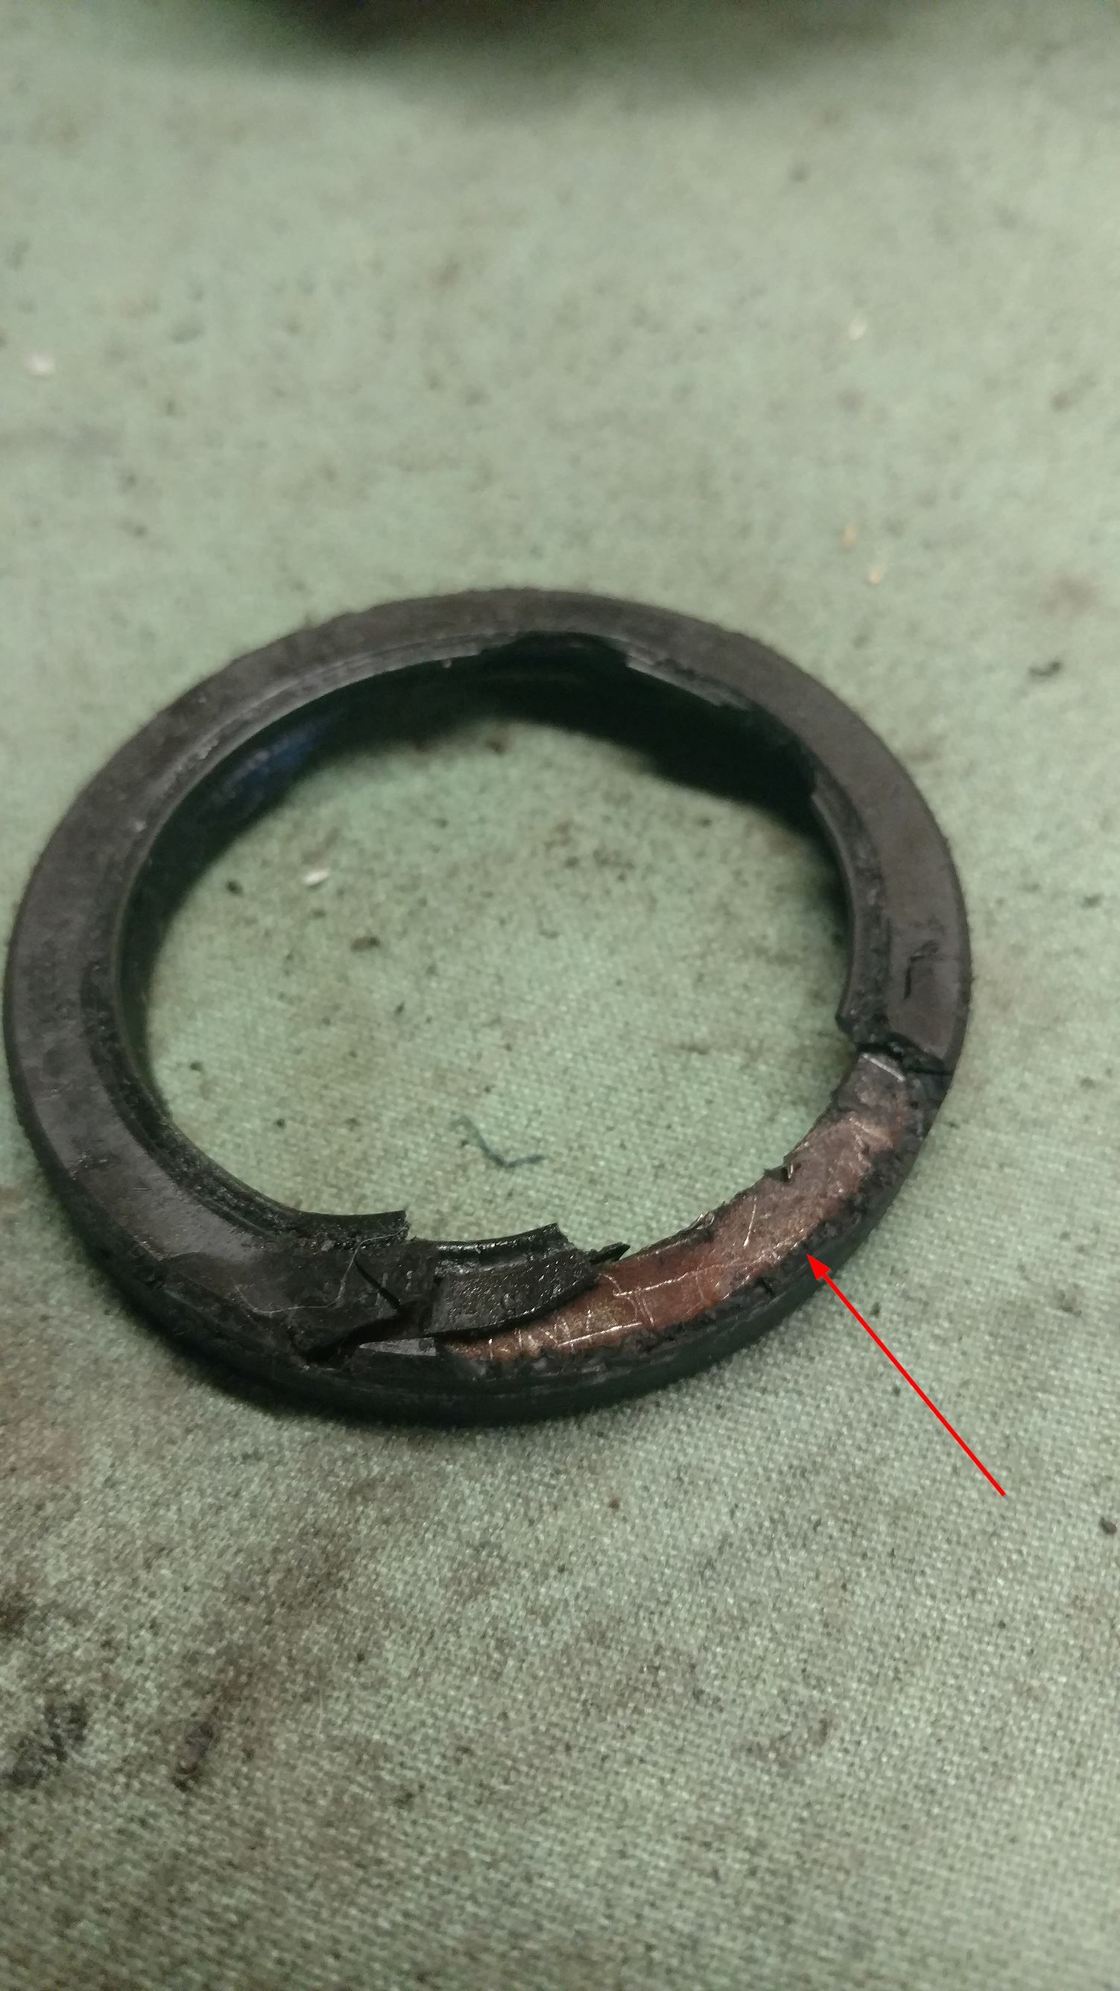
Below is the ring I was referring to. There's a little elastic metal band that the new seals were each included with too. But I couldn't tell if I was supposed to reuse this old metal ring or if it's built into the new seals.
When you tap in the new seal..be careful how far you tap it into the transmission, if that is where you are tapping it into. On my transmission, there wasn't a back up ring behind where the seal was to go against. It could potentially fall right into the ring and pinion section if tapped in too far. Try to reference the seal depth before you totally remove it...sometimes a seal installer tool (rental from AZ or FLAPS) will help also, insuring that the seal is square with the bore centerline. While you are in there, are you going to pull a side plate too? If so, be sure to pull, clean and re-install the magnets that are inside the R&P section. (2). Then you will need a new 0-ring to re-seal the side plate too. Hope this helps some.
I have to do this to the front end of my S8 in the next few days. I have taken to using the stub axle to set the final seal depth, I cut some doughnuts out of cereal box cardboard, however many needed to get the seal to the right depth.
I sometimes shoot for a slightly different depth than stock if there is a groove in the counterface, like 0.5mm less deep, not a lot by any means.
Regarding CV grease, LSD or non-LSD is relevant to the transaxle oil, not the CV joint grease. I use a moly grease on the outers, some people use something different on the inner tripod joint, a lithium high-tack is probably best. A lot of the EP moly greases I think are fine for the inner as well, maybe the moly is not needed on the tripod joint and manufacturers skip it due to cost. I usually use Mobil 1 synthetic grease (red) for applications like the inner joint, for the outer I have used valvoline synthetic moly grease but also use the packets that come with the boot kits I buy.
When you tap in the new seal..be careful how far you tap it into the transmission, if that is where you are tapping it into. On my transmission, there wasn't a back up ring behind where the seal was to go against. It could potentially fall right into the ring and pinion section if tapped in too far. Try to reference the seal depth before you totally remove it...sometimes a seal installer tool (rental from AZ or FLAPS) will help also, insuring that the seal is square with the bore centerline. While you are in there, are you going to pull a side plate too? If so, be sure to pull, clean and re-install the magnets that are inside the R&P section. (2). Then you will need a new 0-ring to re-seal the side plate too. Hope this helps some.
You got me thinking, I hadn't planned to pull the side plate but remember reading something on this. I think I will since I'm already right there. Any idea on the replacement o-ring size? I did a quick search and failed to find it. If you know of a procedure out there w/ pics that'd be great too.
Originally Posted by Jfrahm
I have to do this to the front end of my S8 in the next few days. I have taken to using the stub axle to set the final seal depth, I cut some doughnuts out of cereal box cardboard, however many needed to get the seal to the right depth.
I sometimes shoot for a slightly different depth than stock if there is a groove in the counterface, like 0.5mm less deep, not a lot by any means.
Regarding CV grease, LSD or non-LSD is relevant to the transaxle oil, not the CV joint grease. I use a moly grease on the outers, some people use something different on the inner tripod joint, a lithium high-tack is probably best. A lot of the EP moly greases I think are fine for the inner as well, maybe the moly is not needed on the tripod joint and manufacturers skip it due to cost. I usually use Mobil 1 synthetic grease (red) for applications like the inner joint, for the outer I have used valvoline synthetic moly grease but also use the packets that come with the boot kits I buy.
Transaxle oil is another conversation.
-Joel.
Great idea about the cereal box cardboard. I think I am going to use one of the new seals stacked on the installed one to ensure proper depth. Before I took out the old one I got a few pictures to reference how deep it was with the new seal on top.
Good to know about the grease too. I knew transaxel oil was specific and picked up some Red Line (50304) MT-90 75W-90 GL-4 for my non-LSD.
 05-28-2017, 01:48 PM