When you click on links to various merchants on this site and make a purchase, this can result in this site earning a commission. Affiliate programs and affiliations include, but are not limited to, the eBay Partner Network.
+1, I spend most of my time in OT babbling nonsense so I don't get to the tech forums often. Just re-read this thread from the beginning, fantastic work on bringing this car back from where the PO had it.
How did you clean up the paint? Mine is starting to look like your “pre” side & always interested what others are using / doing.
Also.. it looks like you put rear jack stands on the torsion bar tube ends, yes? I’ve always used the side jack point in front of the rear wheels, scared to use the torsion ends but wishing I do
Good work!
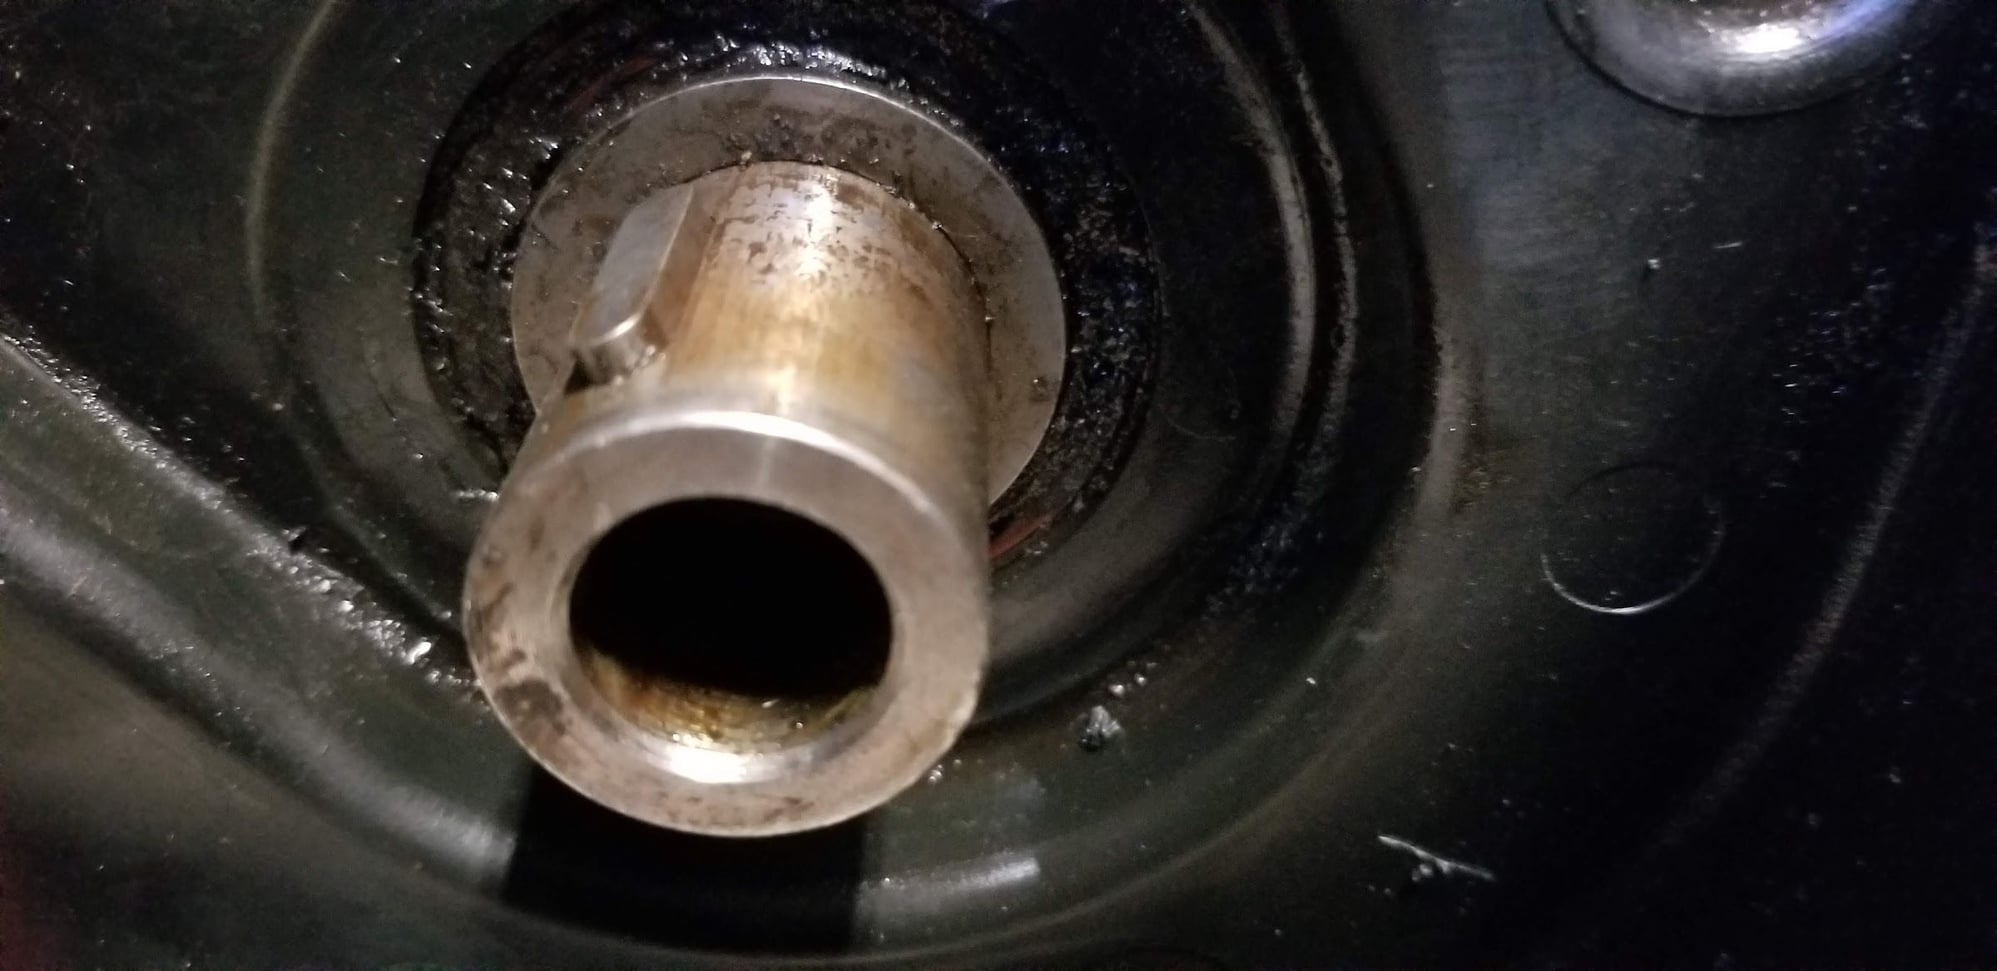
Were none of the front oil seals leaking? Rare if not.
Well, I didn't think they were, but upon closer inspection, yes, the front crank seal was leaking. Which, of course, meant that the woodruff key needed to come out of the crank:
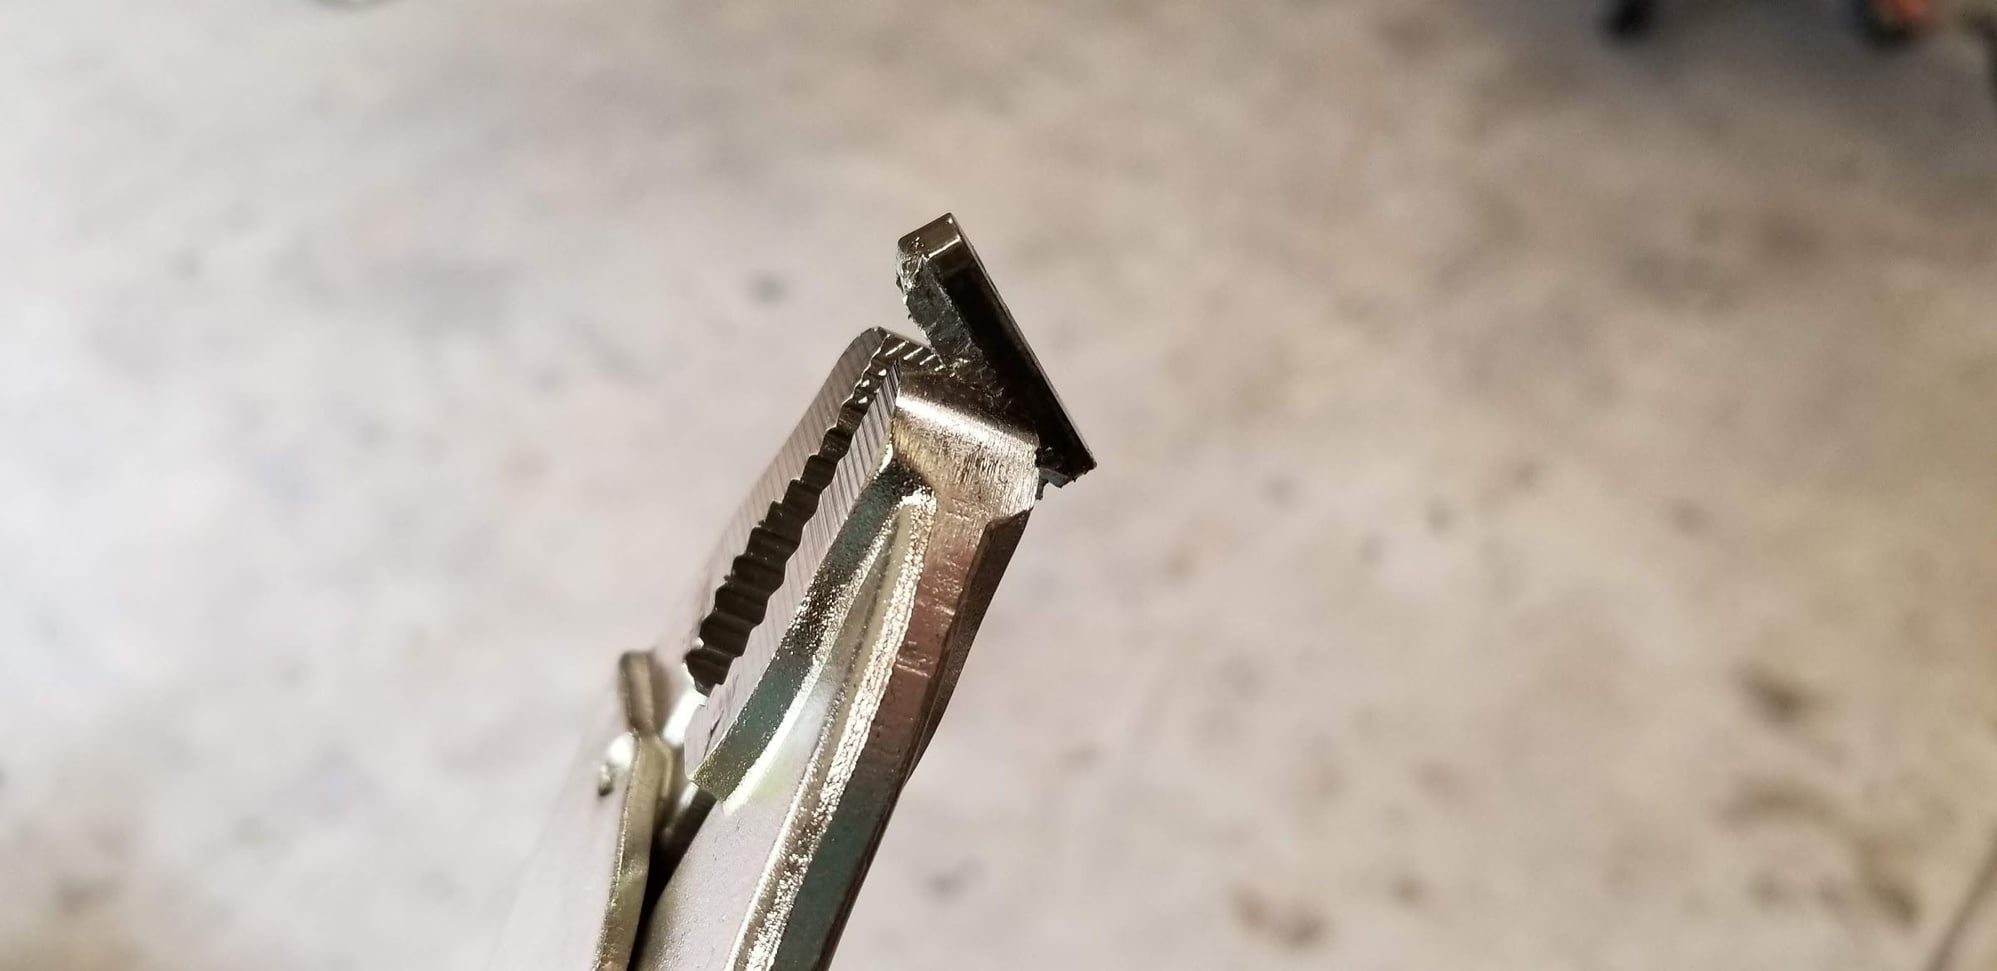
Easy, right? Well, after several days of PB Blaster, ATF/acetone mix, vice grips, end-cutting pliers, heat, screwdrivers, mini pry bars, basically you name it, I finally got the little bastard:
As you can see, it's pretty chewed-up. By this point I had already ordered a new one, so I ended up using my Dremel to very carefully cut a little slot in the end which I was able to jam a screwdriver into and lever it up.
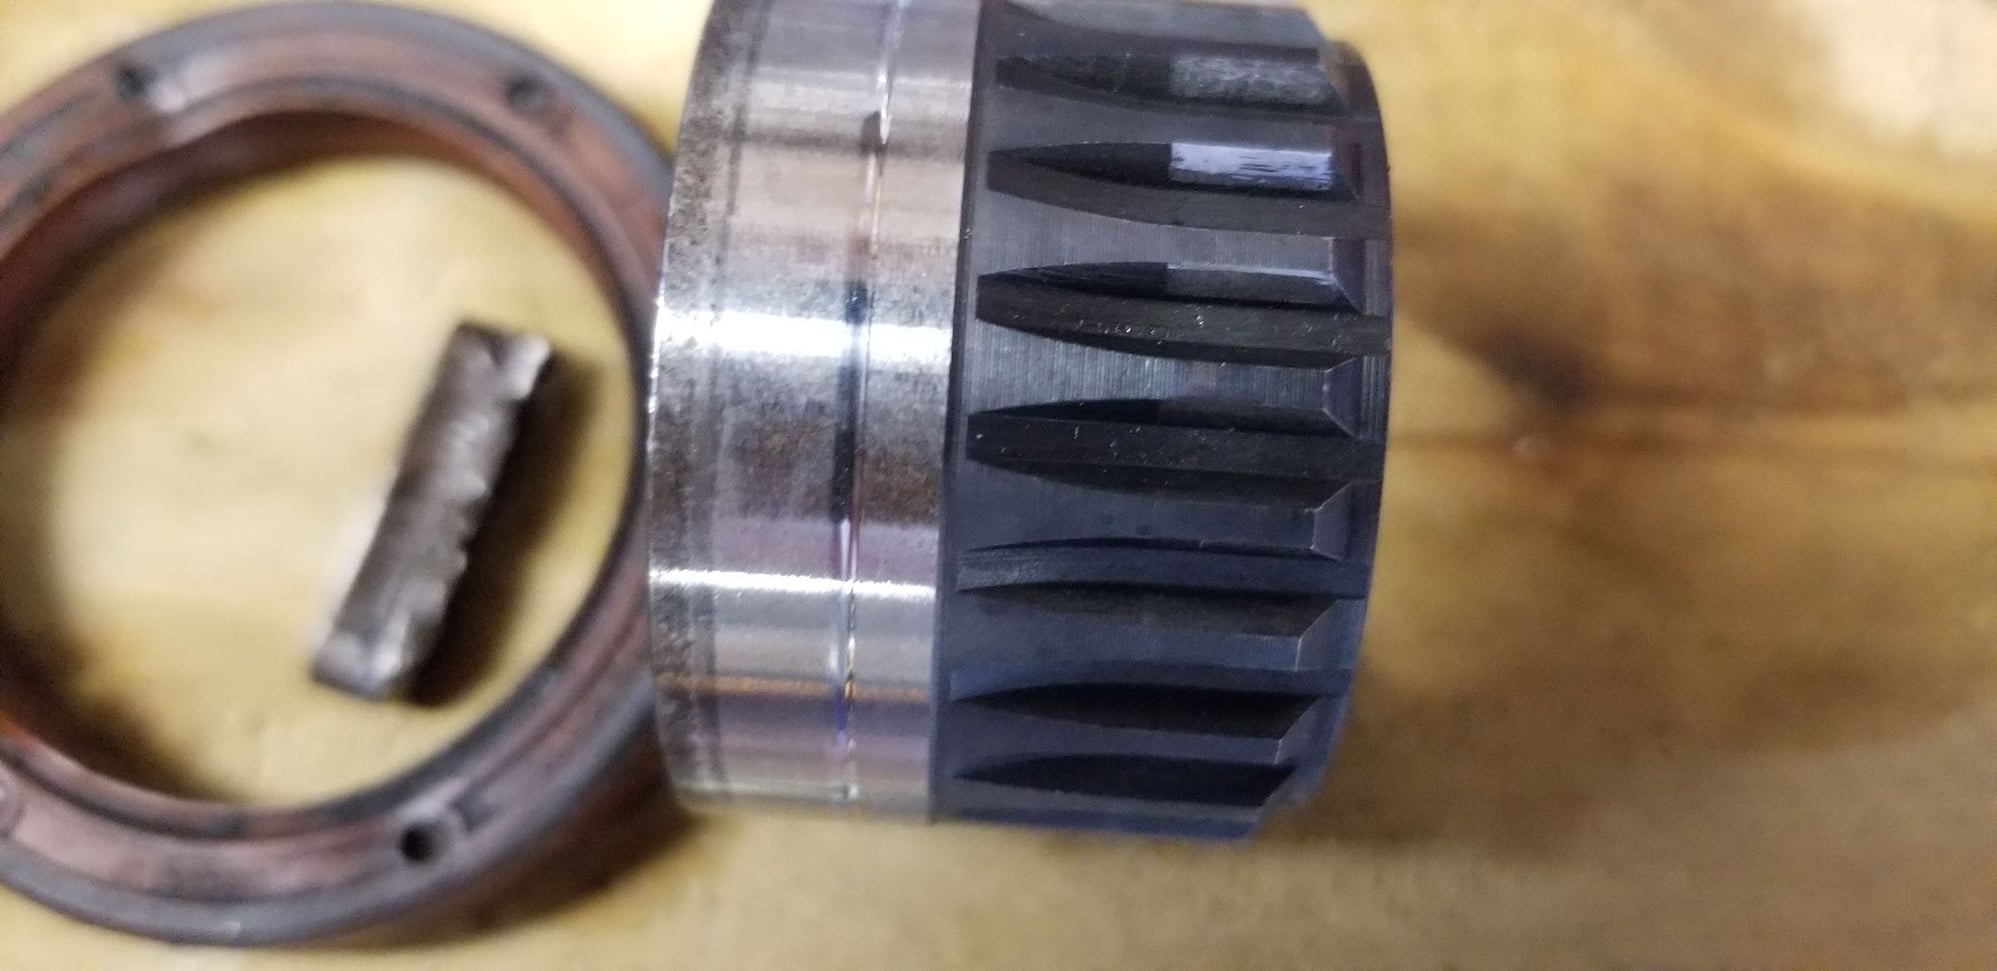
Removing the oil pump drive gear revealed the usual groove:
So, a new one of those is on the way now, too. Part of the reason everything takes forever on this car is that every time I find a new part to buy, it takes the better part of a week to get it from Paragon/Pelican/etc.
How did you clean up the paint? Mine is starting to look like your �pre� side & always interested what others are using / doing.
I used my Porter Cable 7424XP polisher with Meguiars Ultimate Compound and a Chemical Guys foam pad, I forget which one.
Also.. it looks like you put rear jack stands on the torsion bar tube ends, yes? I�ve always used the side jack point in front of the rear wheels, scared to use the torsion ends but wishing I do
Yes, I think? I can't even remember where I positioned them, it's been up on jackstands for so long. And honestly, the back end doesn't even need to be on stands, I only did that to get extra height in case I ended up having to drop the motor.
Slow progress continues on the timing and balance shaft belts. I made an interesting discovery when I was under there putting the flywheel lock on:
Seems the previous owner (or a previous owner, who knows how long ago this happened), not only left an O2 sensor socket on the sensor, it was only finger tight, which explains the exhaust leak I had. After removing it, the sensor and socket are so jammed together there's no way of getting them apart without destroying the sensor, so in the trash they went, and a new sensor is on it's way.
Anyhow, after a few fits and starts, the timing belt is on:
I don't have the Porsche tool or the Arnworx equivalent, but I've read just about all there is to read about tensioning the timing belt, watched a bunch of Youtube videos, and I did use the "kriket" tool:
So, the kricket is in range, the "twist test" shows that I can turn it 90 degrees without too much effort, and I can turn the water pump pulley with some effort. I think I'm good. Some folks swear you need to have this thing checked to the millionth of a percent of perfect, but just as many say that this is no big deal. I'm satisfied with where it is, though I guess I won't know for sure until I start it and listen. I've at least turned it over and I know there are no piston/valve collisions.
I’ve changed a few timing belts over the years on a variety of cars and never paid too much attention to the tension other than by feel or auto tensioner. Cleary this is designed with some tolerance.
The balance belts on this thing are a different story though! A little off of optimun and you get all kinds of whine. FYI I believe that credit-card gap thing is wrong; my reading of that diagram is the belt is touching and in fact one-tooth width tensioned. That’s how I set mine and only a bit of noise at cold start—but only after sitting more than a few days. Goes away in about 10s.
 05-24-2018, 06:41 PM