When you click on links to various merchants on this site and make a purchase, this can result in this site earning a commission. Affiliate programs and affiliations include, but are not limited to, the eBay Partner Network.
Has anyone here successfully mounted Sparco sport seats in their cars using the Sparco bottom mount seat bracket? I've seen some posts using home made brackets, but have found nothing completed using the Sparco brackets. I've got the seats mounted to Sparco sliders, mounted to the bracket. When in the car, attempting to mount the assembly to the floor, I can get the front 2 bolts in, and the rear outboard one. The rear inboard bolt presents an access problem due to the tight fit of the seat assembly against the tunnel. Would love to hear anyone's success story!
I have a 994 S2, not sure if is the same interior, I have sparco evo seats and sparco steel brackets. I got rid of the sparco sliders because the seat was too high and I was hitting the roof of the car with my helmet, and I'm only 5' 9".
I've mounted the brackets in "L L" arrangement and even got space to install the original seatbelt clamp to the inboard bracket. I did have to modify one of the mounting holes on the outboard bracket because it didn't line up with the hole in the car floor and also made some shims out of aluminum bars to level the seat as the outboard side looked lower than the inboard.
I know that planted sales frames that should be a no-worries install but I'm concerned how high the seat is going to be with the frame, the sliders and the brackets.
Interiors should be identical. Once I got the driver's seat secured with 3 of the 4 bolts, I climbed in to try out the fit and height. Mine, with the sliders, sit pretty low. Lower than the factory seats, I believe.
You mention you have the Evo seats. Can you confirm you are using the bottom mount bracket, versus the side mounts? I have the Sparco adjustable sport seats, and am attempting to mount with the one-piece bottom mount plate.
Can't quite wrap my brain around your "L L" arrangement. Can you explain?
I have successfully mounted 2 older (bottom hole) sparco to a manual pass side & an electric drivers side (now converted to manual by shear will power). Been solid for 2 years. Lowers the height (more helmet room & lowers centre of gravity).
You'll need a 4.5"-5" angle grinder & a good welder.
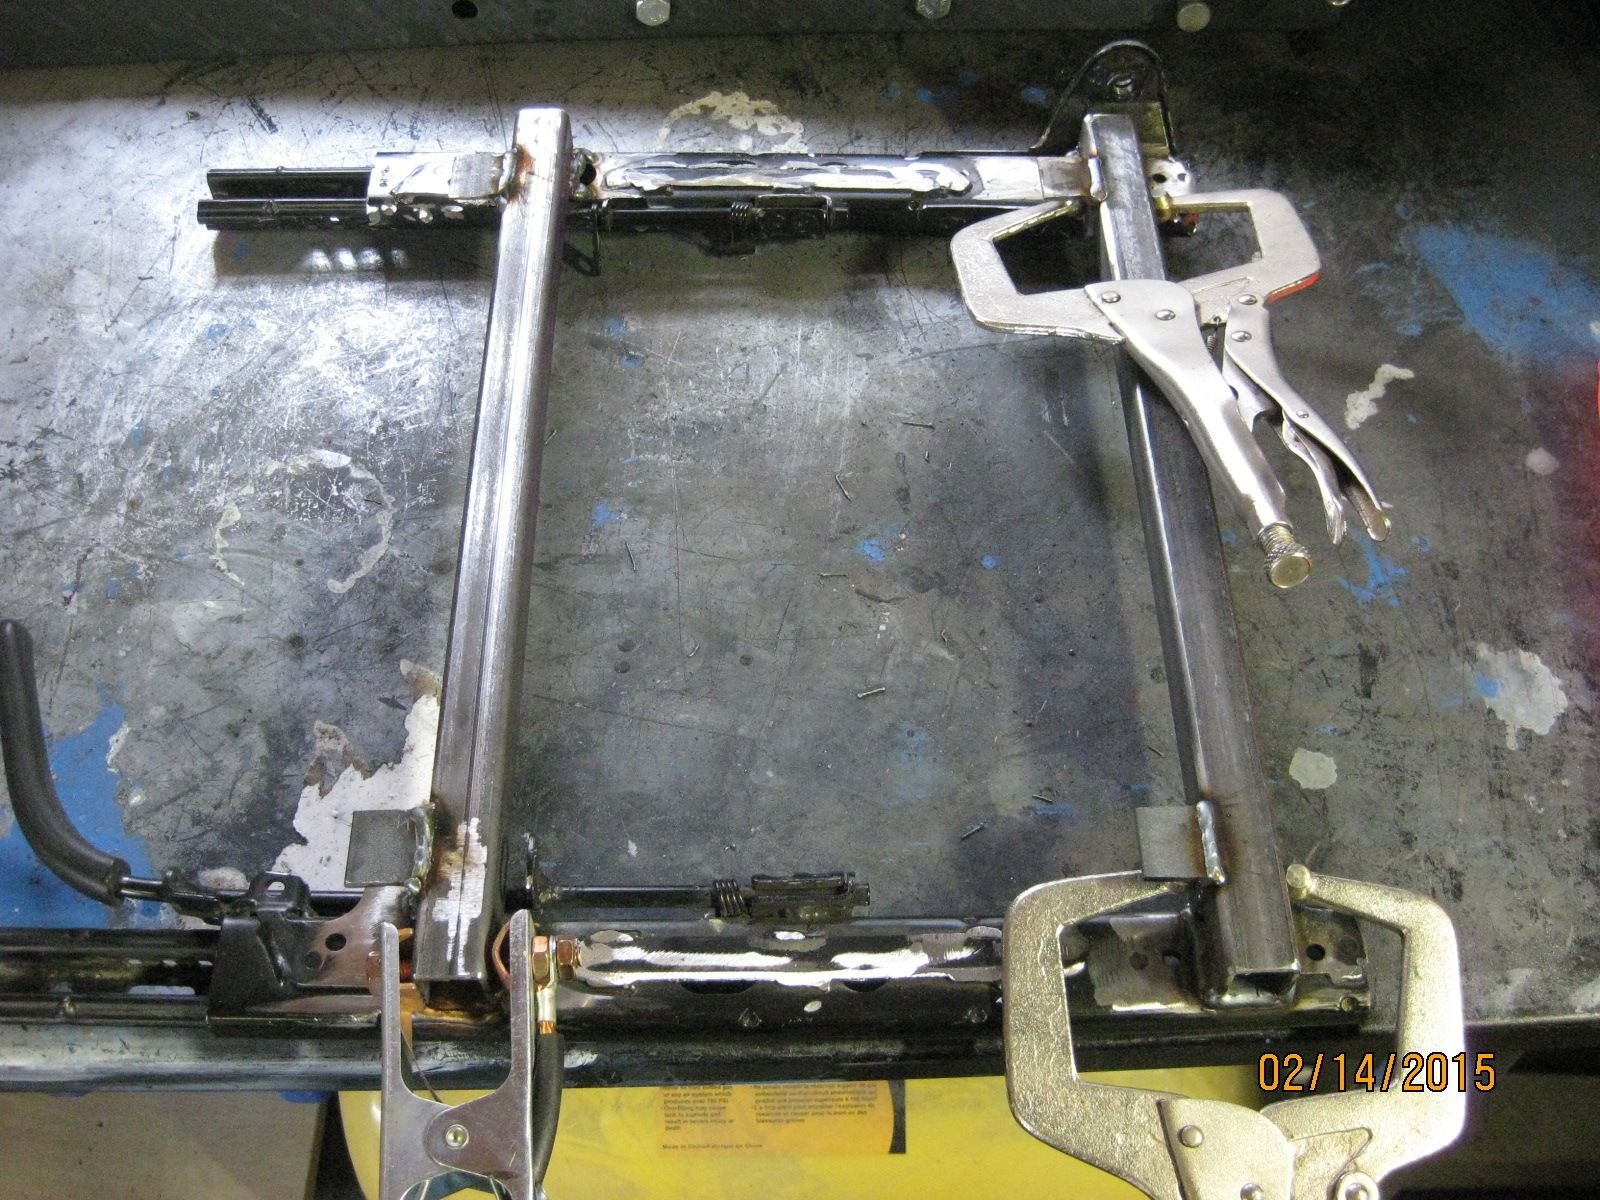
After a lot of searching all I could come up with is 1 darn photo. This was the tough side because it was electric not a manual seat. The pass side is much "prettier" and easier to fabricate because you don't have as many brackets & strange holes to contend with.. The entire process took me a WEEK. Take your time & get it right.
I chose to use 1" square tubing (mild steel) and eventually had to add these 4 little pieces of "angle iron" to the square tubing because the release mechanism for the sliders neads to move UP a considerable ways into the seat.
Best of luck and please show us what YOU come up with.
Small note: due to constraints of the release mechanism I *think* I had to go forward not rearward with the seat (hence the angle iron in front of the square tubing)... this limits the amount of available room for getting in & out of the car. It's a pain but doable with a stock steering wheel (I'm 6' and 190 lbs).
Has anyone here successfully mounted Sparco sport seats in their cars using the Sparco bottom mount seat bracket? I've seen some posts using home made brackets, but have found nothing completed using the Sparco brackets. I've got the seats mounted to Sparco sliders, mounted to the bracket. When in the car, attempting to mount the assembly to the floor, I can get the front 2 bolts in, and the rear outboard one. The rear inboard bolt presents an access problem due to the tight fit of the seat assembly against the tunnel. Would love to hear anyone's success story!
i hybridized the oem sliders to accommodate the Sparco seats back in 2008.
The result has been very good.
 06-15-2016, 11:48 PM