
Projects on our new to us 1988 944 Turbo

 12-15-2015 | 11:23 PM
#32

Thread Starter
Racer
Joined: Apr 2006
Posts: 485
Likes: 11
From: Rockwell, NC
While on the '85 Germany trip, the three of us were touring the concentration camp at Dachau. Very sobering place. However, as we were walking about on the grounds, I could hear a 911 being driven in anger. Once we left the site, we drove to the sound and discovered an autocross. My wife says I have to be the only person who can find an autocross from a concentration camp.


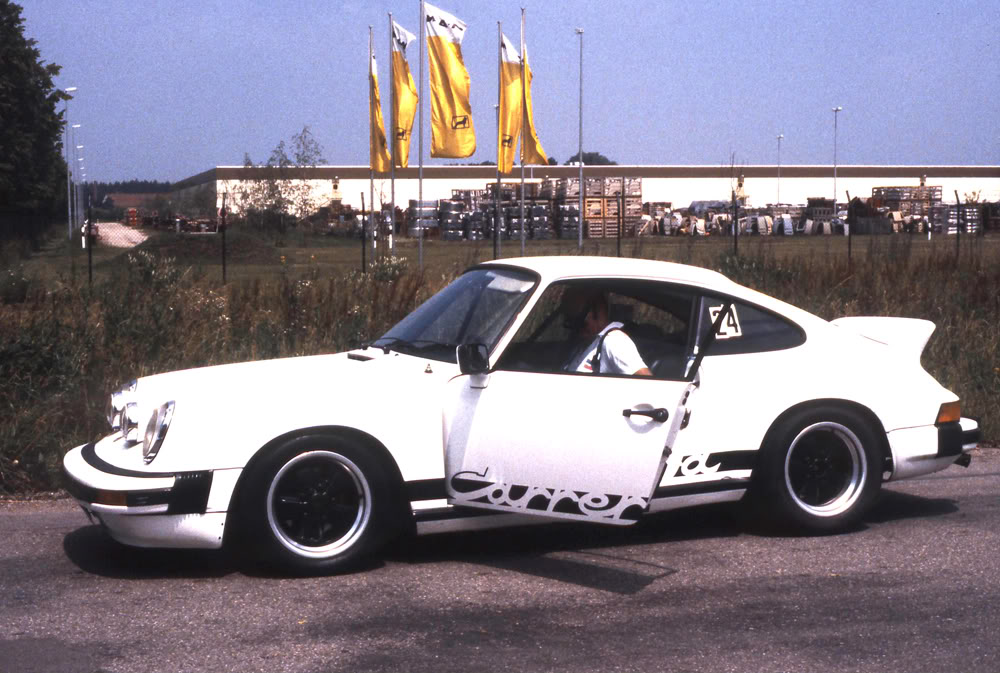
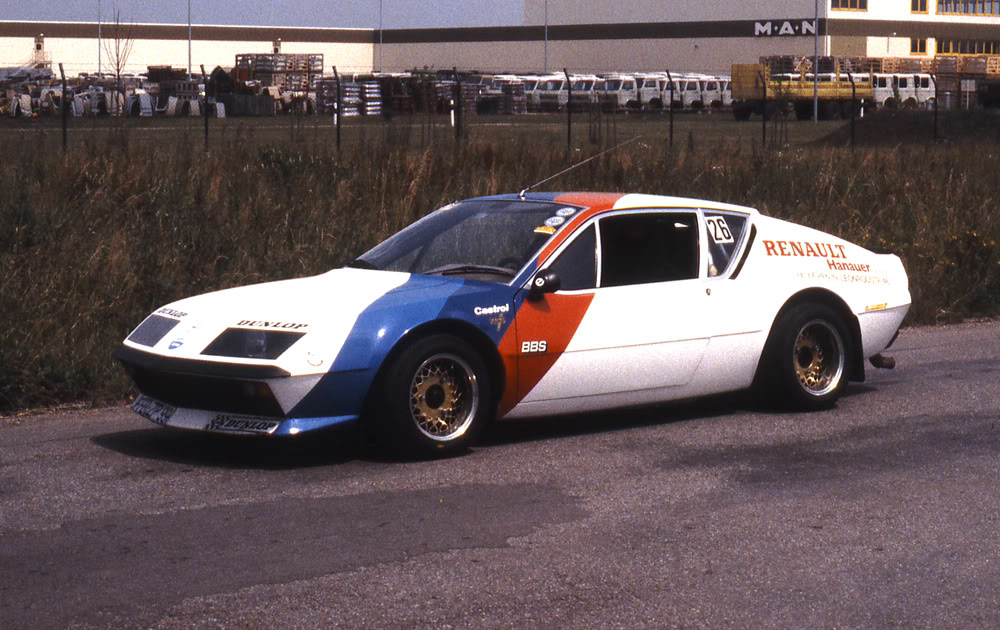


This car wasn't at the autocross but my son was taking photos of cars that were of interest to him.


This car wasn't at the autocross but my son was taking photos of cars that were of interest to him.
 12-20-2015 | 06:22 PM
#33
Thread Starter
Racer
Joined: Apr 2006
Posts: 485
Likes: 11
From: Rockwell, NC
New front rotors and pads had recently been installed and the brakes were squealing. On the advice of an experienced parts guy, I pulled the pads and put some anti-seize on the back of the pads. Much better.
While doing this I noticed that the brake wear sensor harnesses were literally falling apart.

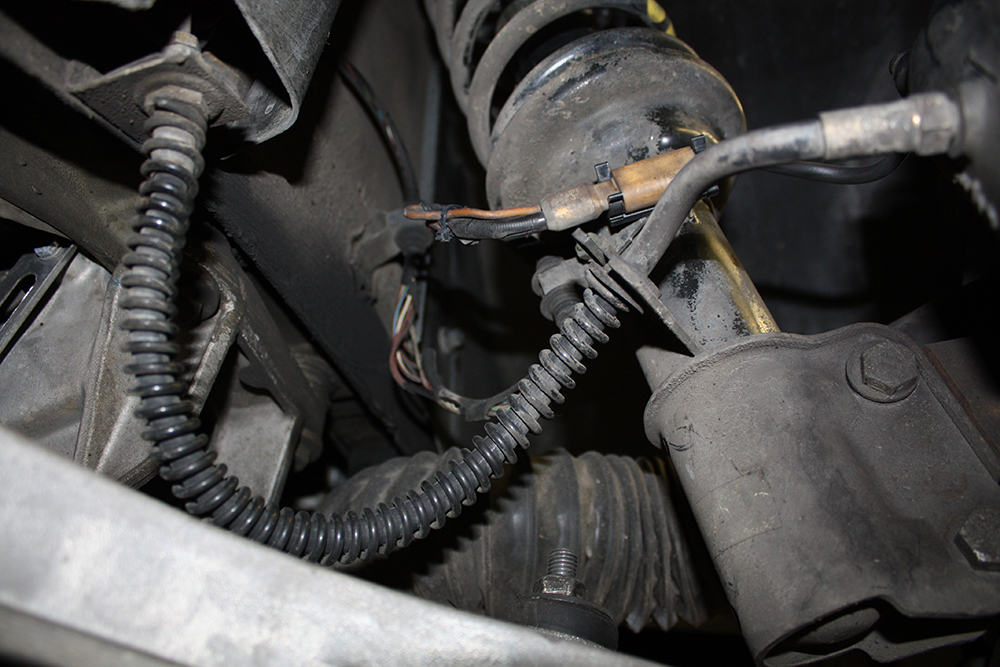

I looked online but was having a hard time finding a set of these. One place that did show them available wanted about $150 a corner!! I may still replace them but in the meantime I cleaned them up and used convoluted tubing to protect the wiring. The cable holders were all falling apart and I only had enough to do the rears. I have more on order and will also do the fronts before the car goes back on the ground.


I also am getting ready to replace the fuel lines that go to the top of the motor. Wanting to keep everything original, I called the local Porsche dealer whose prices were better than one of the online stores. And they even shipped them to me. However, even though they look exactly like the ones on the online store's website, they will not fit the car. They extend down in the wheelwell and then under the car for a foot or so. The problem is that I cannot find a junction there where they end. Mine are one piece back to the fuel tank. They asked for my VIN number to order them so you would think they should be correct. I am headed there tomorrow to return them as they are not cheap!! Tell me if I am doing something wrong here. I may end up cutting the lines and installing an aftermarket kit like most others are doing.


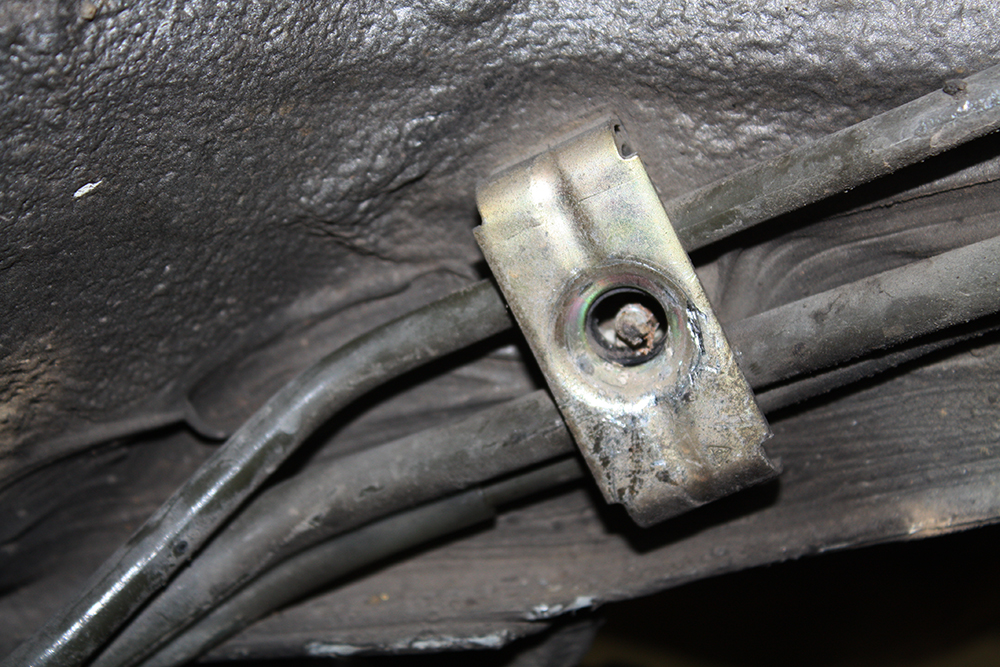
I had already taken the wheelwell liner out and removed the fuel line clips.


While doing this I noticed that the brake wear sensor harnesses were literally falling apart.


I looked online but was having a hard time finding a set of these. One place that did show them available wanted about $150 a corner!! I may still replace them but in the meantime I cleaned them up and used convoluted tubing to protect the wiring. The cable holders were all falling apart and I only had enough to do the rears. I have more on order and will also do the fronts before the car goes back on the ground.


I also am getting ready to replace the fuel lines that go to the top of the motor. Wanting to keep everything original, I called the local Porsche dealer whose prices were better than one of the online stores. And they even shipped them to me. However, even though they look exactly like the ones on the online store's website, they will not fit the car. They extend down in the wheelwell and then under the car for a foot or so. The problem is that I cannot find a junction there where they end. Mine are one piece back to the fuel tank. They asked for my VIN number to order them so you would think they should be correct. I am headed there tomorrow to return them as they are not cheap!! Tell me if I am doing something wrong here. I may end up cutting the lines and installing an aftermarket kit like most others are doing.


I had already taken the wheelwell liner out and removed the fuel line clips.


 12-20-2015 | 11:18 PM
#34
Thread Starter
Racer
Joined: Apr 2006
Posts: 485
Likes: 11
From: Rockwell, NC
The timing belt was replaced about 9,000 miles and six years ago. Time for them to be changed. Since the water pump was changed then and is not leaking, I don't plan on replacing it unless I discover some issue with the bearing.
First thing was protecting the fenders and nose.

Next I removed the air box and the inter cooler tubes.


Removing these pieces exposed a potential cooling issue as the water pipe under the air box is heavily corroded. I have ordered a replacement.

Many years ago I bent a screwdriver so that I could undo the bottom fastener for the distributor. Luckily it was still in my tool box and came in very handy. Once the distributor was out of the way, I removed the set screw on the rotor.


With the distributor out of the way, I could work on removing the upper bolts for the time belt cover.

Next it was time to raise the car and remove the power steering and AC/Alternator belts followed by removing the lower timing belt cover bolts.
Removing the upper plastic cover let me remove the cam gear housing.

Before I removed the crankshaft pulley, I needed to set the engine to Top Dead Center and make sure the balance belt pulley's line up with their timing marks. Using a 24mm socket, I turned the engine over clockwise until I could see that the cam gear and balance shaft pulley marks lined up.


To confirm that I had the engine set at TDC, there is an opening on the top of the motor at the rear next to the firewall. This opening gives one a view of the flywheel which, when the motor is set to TDC, will display the letter OT followed by the timing line which lines up with a metal edge on the housing. If I were 6'8" like my son-in-law, I could probably bend over far enough to see this opening. Even then it is difficult to see. Then I remembered that my buddy had an inspection camera. It worked great.

There is also a raised area on the flywheel that can be viewed from the bottom of the car through a hole in the bell housing.

Next I removed the starter which requires first undoing the wiring and then removing the heat shield on the right side. To remove the heat shield, one must loosen, but not remove, the two 17mm bolts that are towards the front of the shield. There are two small nuts on the rear of the starter and then one bolt on top that is also one of the four bolts that mounts the torque tube.


There are two bolts on front end of the starter that mount it to the bellhousing.

With the starter removed, I could use the flywheel lock to make sure the engine could not turn over.

First thing was protecting the fenders and nose.

Next I removed the air box and the inter cooler tubes.


Removing these pieces exposed a potential cooling issue as the water pipe under the air box is heavily corroded. I have ordered a replacement.

Many years ago I bent a screwdriver so that I could undo the bottom fastener for the distributor. Luckily it was still in my tool box and came in very handy. Once the distributor was out of the way, I removed the set screw on the rotor.


With the distributor out of the way, I could work on removing the upper bolts for the time belt cover.

Next it was time to raise the car and remove the power steering and AC/Alternator belts followed by removing the lower timing belt cover bolts.

Removing the upper plastic cover let me remove the cam gear housing.

Before I removed the crankshaft pulley, I needed to set the engine to Top Dead Center and make sure the balance belt pulley's line up with their timing marks. Using a 24mm socket, I turned the engine over clockwise until I could see that the cam gear and balance shaft pulley marks lined up.


To confirm that I had the engine set at TDC, there is an opening on the top of the motor at the rear next to the firewall. This opening gives one a view of the flywheel which, when the motor is set to TDC, will display the letter OT followed by the timing line which lines up with a metal edge on the housing. If I were 6'8" like my son-in-law, I could probably bend over far enough to see this opening. Even then it is difficult to see. Then I remembered that my buddy had an inspection camera. It worked great.

There is also a raised area on the flywheel that can be viewed from the bottom of the car through a hole in the bell housing.

Next I removed the starter which requires first undoing the wiring and then removing the heat shield on the right side. To remove the heat shield, one must loosen, but not remove, the two 17mm bolts that are towards the front of the shield. There are two small nuts on the rear of the starter and then one bolt on top that is also one of the four bolts that mounts the torque tube.


There are two bolts on front end of the starter that mount it to the bellhousing.

With the starter removed, I could use the flywheel lock to make sure the engine could not turn over.
 12-24-2015 | 11:14 PM
#35
Thread Starter
Racer
Joined: Apr 2006
Posts: 485
Likes: 11
From: Rockwell, NC
I have the timing and balance belts back on and checked the tension with the P9201 tension tool. My son and I did the timing belts on a Ferrari 348 a couple years ago so I bought the tool then and now we share it.

I also bought Porsche's tool for removing the pulley's which also worked on the automatic tensioner when I needed to move it to take the tension off of the timing belt.


Here is what the automatic tensioner looks like and a shot with the three mounting holes that are nearly impossible to see.


Both of the old belts appeared to be in great shape even though they were six years old.

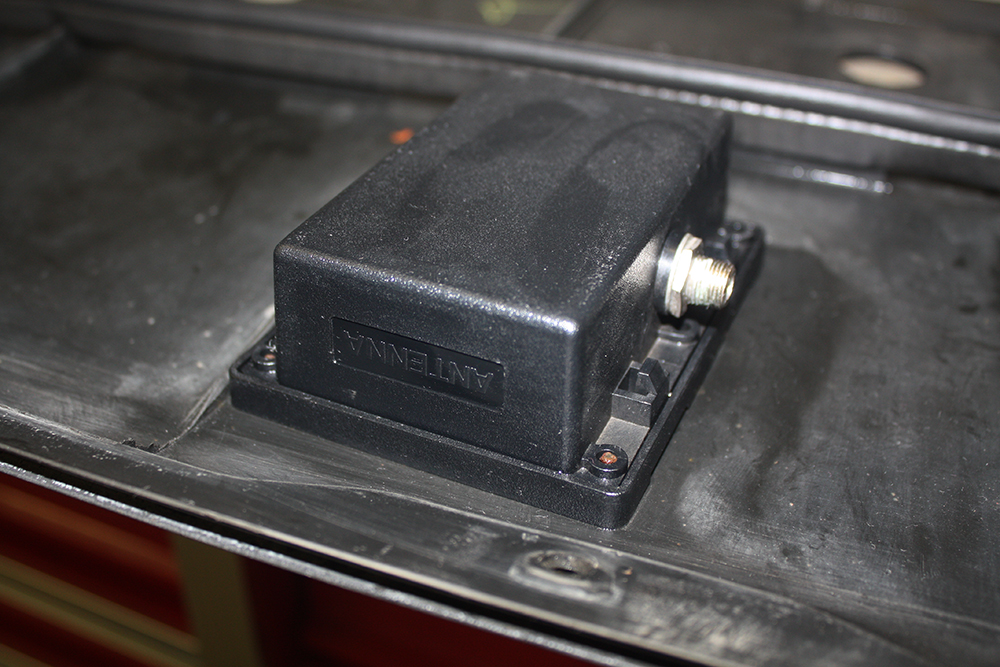
I finally got tired of scratching my arm on the metal tab on the cover mounted to the front bumper so I removed the cover. I was surprised to find that it had a black box mounted on it with the words "antenna" on the side. There is a coax cable that runs from the front of the car along the left side of the engine bay and then through a grommet to the inside of the car. I haven't had a chance to see where it goes inside the car. Anyone have any idea about its function?

I spent most of today cleaning all of the pieces and hardware that I had removed from the car. The starter heat shield did not clean up well so I bead blasted it and will be taking it to a local powder coater that I have used a lot. In addition to waiting for the cooling pipe I have also ordered the cooling hose for the alternator as the existing one was, as they say on Wheeler Dealer, perished.


I also bought Porsche's tool for removing the pulley's which also worked on the automatic tensioner when I needed to move it to take the tension off of the timing belt.


Here is what the automatic tensioner looks like and a shot with the three mounting holes that are nearly impossible to see.


Both of the old belts appeared to be in great shape even though they were six years old.

I finally got tired of scratching my arm on the metal tab on the cover mounted to the front bumper so I removed the cover. I was surprised to find that it had a black box mounted on it with the words "antenna" on the side. There is a coax cable that runs from the front of the car along the left side of the engine bay and then through a grommet to the inside of the car. I haven't had a chance to see where it goes inside the car. Anyone have any idea about its function?


I spent most of today cleaning all of the pieces and hardware that I had removed from the car. The starter heat shield did not clean up well so I bead blasted it and will be taking it to a local powder coater that I have used a lot. In addition to waiting for the cooling pipe I have also ordered the cooling hose for the alternator as the existing one was, as they say on Wheeler Dealer, perished.
 12-30-2015 | 04:48 PM
#36
Thread Starter
Racer
Joined: Apr 2006
Posts: 485
Likes: 11
From: Rockwell, NC
My next project was installing convoluted tubing on the front brake wear sensor harnesses. I loosened the harness in the engine bay, removed the right one to repair it and did the left one in the wheel well. I already had the wheel well liner out on the right side for the fuel line replacement (just picked up the parts I needed a few minutes ago) and had to remove the left liner as well to repair the harnesses. As I do not like to put dirty things back on a car, the liners received some scrubbing.


 12-30-2015 | 05:01 PM
#37
Thread Starter
Racer
Joined: Apr 2006
Posts: 485
Likes: 11
From: Rockwell, NC
My left front fog light lens was broken when I received the car. Both lenses were pretty much bead blasted so I decided to replace both of them. To replace them, I ordered the Euro version with the driving light in place of the blank panel next to the fog light. Since my primary reason for getting the driving lights is to be able to use them when I don't want to raise the headlight buckets, wiring them to come on with the fog lights works for me. I tapped into the existing fog light harness by soldering in leads for the driving lights.

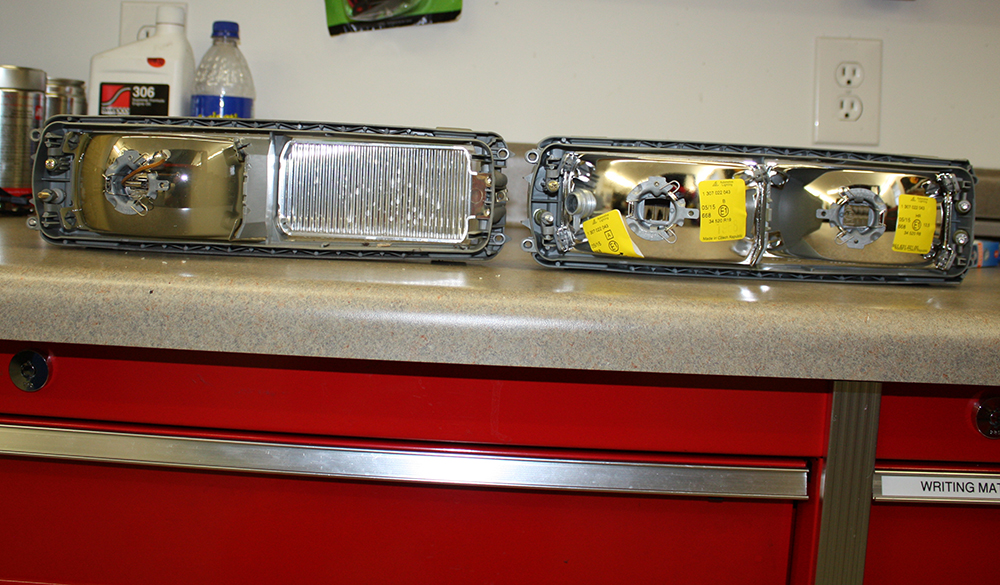


The trim pieces on each side of the fog light were also bead blasted. My first thought was to replace them until I discovered how much they cost. I broke out my favorite polish and went to work on them. After polishing for quite awhile, it seemed like I wasn't making any more progress. On closer inspection, it appeared that the inside of the lens was dirty. I was surprised to find these parts came apart. The combination of cleaning the inside of the lens and polishing the exterior made a huge difference.


The trim pieces on each side of the fog light were also bead blasted. My first thought was to replace them until I discovered how much they cost. I broke out my favorite polish and went to work on them. After polishing for quite awhile, it seemed like I wasn't making any more progress. On closer inspection, it appeared that the inside of the lens was dirty. I was surprised to find these parts came apart. The combination of cleaning the inside of the lens and polishing the exterior made a huge difference.


 01-23-2016 | 10:08 AM
#41
Thread Starter
Racer
Joined: Apr 2006
Posts: 485
Likes: 11
From: Rockwell, NC
On January 4th we headed for Dauphin Island (near Mobile, AL) and then to Florida for a two week motor home trip. We really enjoy our small motorhome. It is a Mercedes Sprinter based coach converted by Airstream. It has a 3 liter turbo V6 rated at 185HP and 325 lbs of torque. When I decided to tow a small car, (2013 Fiat Abarth) I sent the ECU to Renntech in Florida for some massaging. I now have 265HP and 421 lbs of torque. When not towing I can easily get 18mpg or better at around 70mph, although it will easily cruise at 80. Towing the car results in around a 1.5mpg penalty.
It drives like a very tall car and is only 6'7" wide which makes for mostly easy maneuvering. The Abarth has been a great tow car. It is peppy, has plenty of room inside for stowing the hitch and other things. Abarth's do not come with a muffler. There are straight pipes from the cat to the rear so it sounds great!!

While we enjoyed the trip, it was good to be home and back at work on the car. While we were gone the rest of the parts arrived. First up was replacing the rusty coolant pipe that sits under the air box. After draining the radiator, it was a very straightforward job which included replacing the water hoses at each end of the pipe.


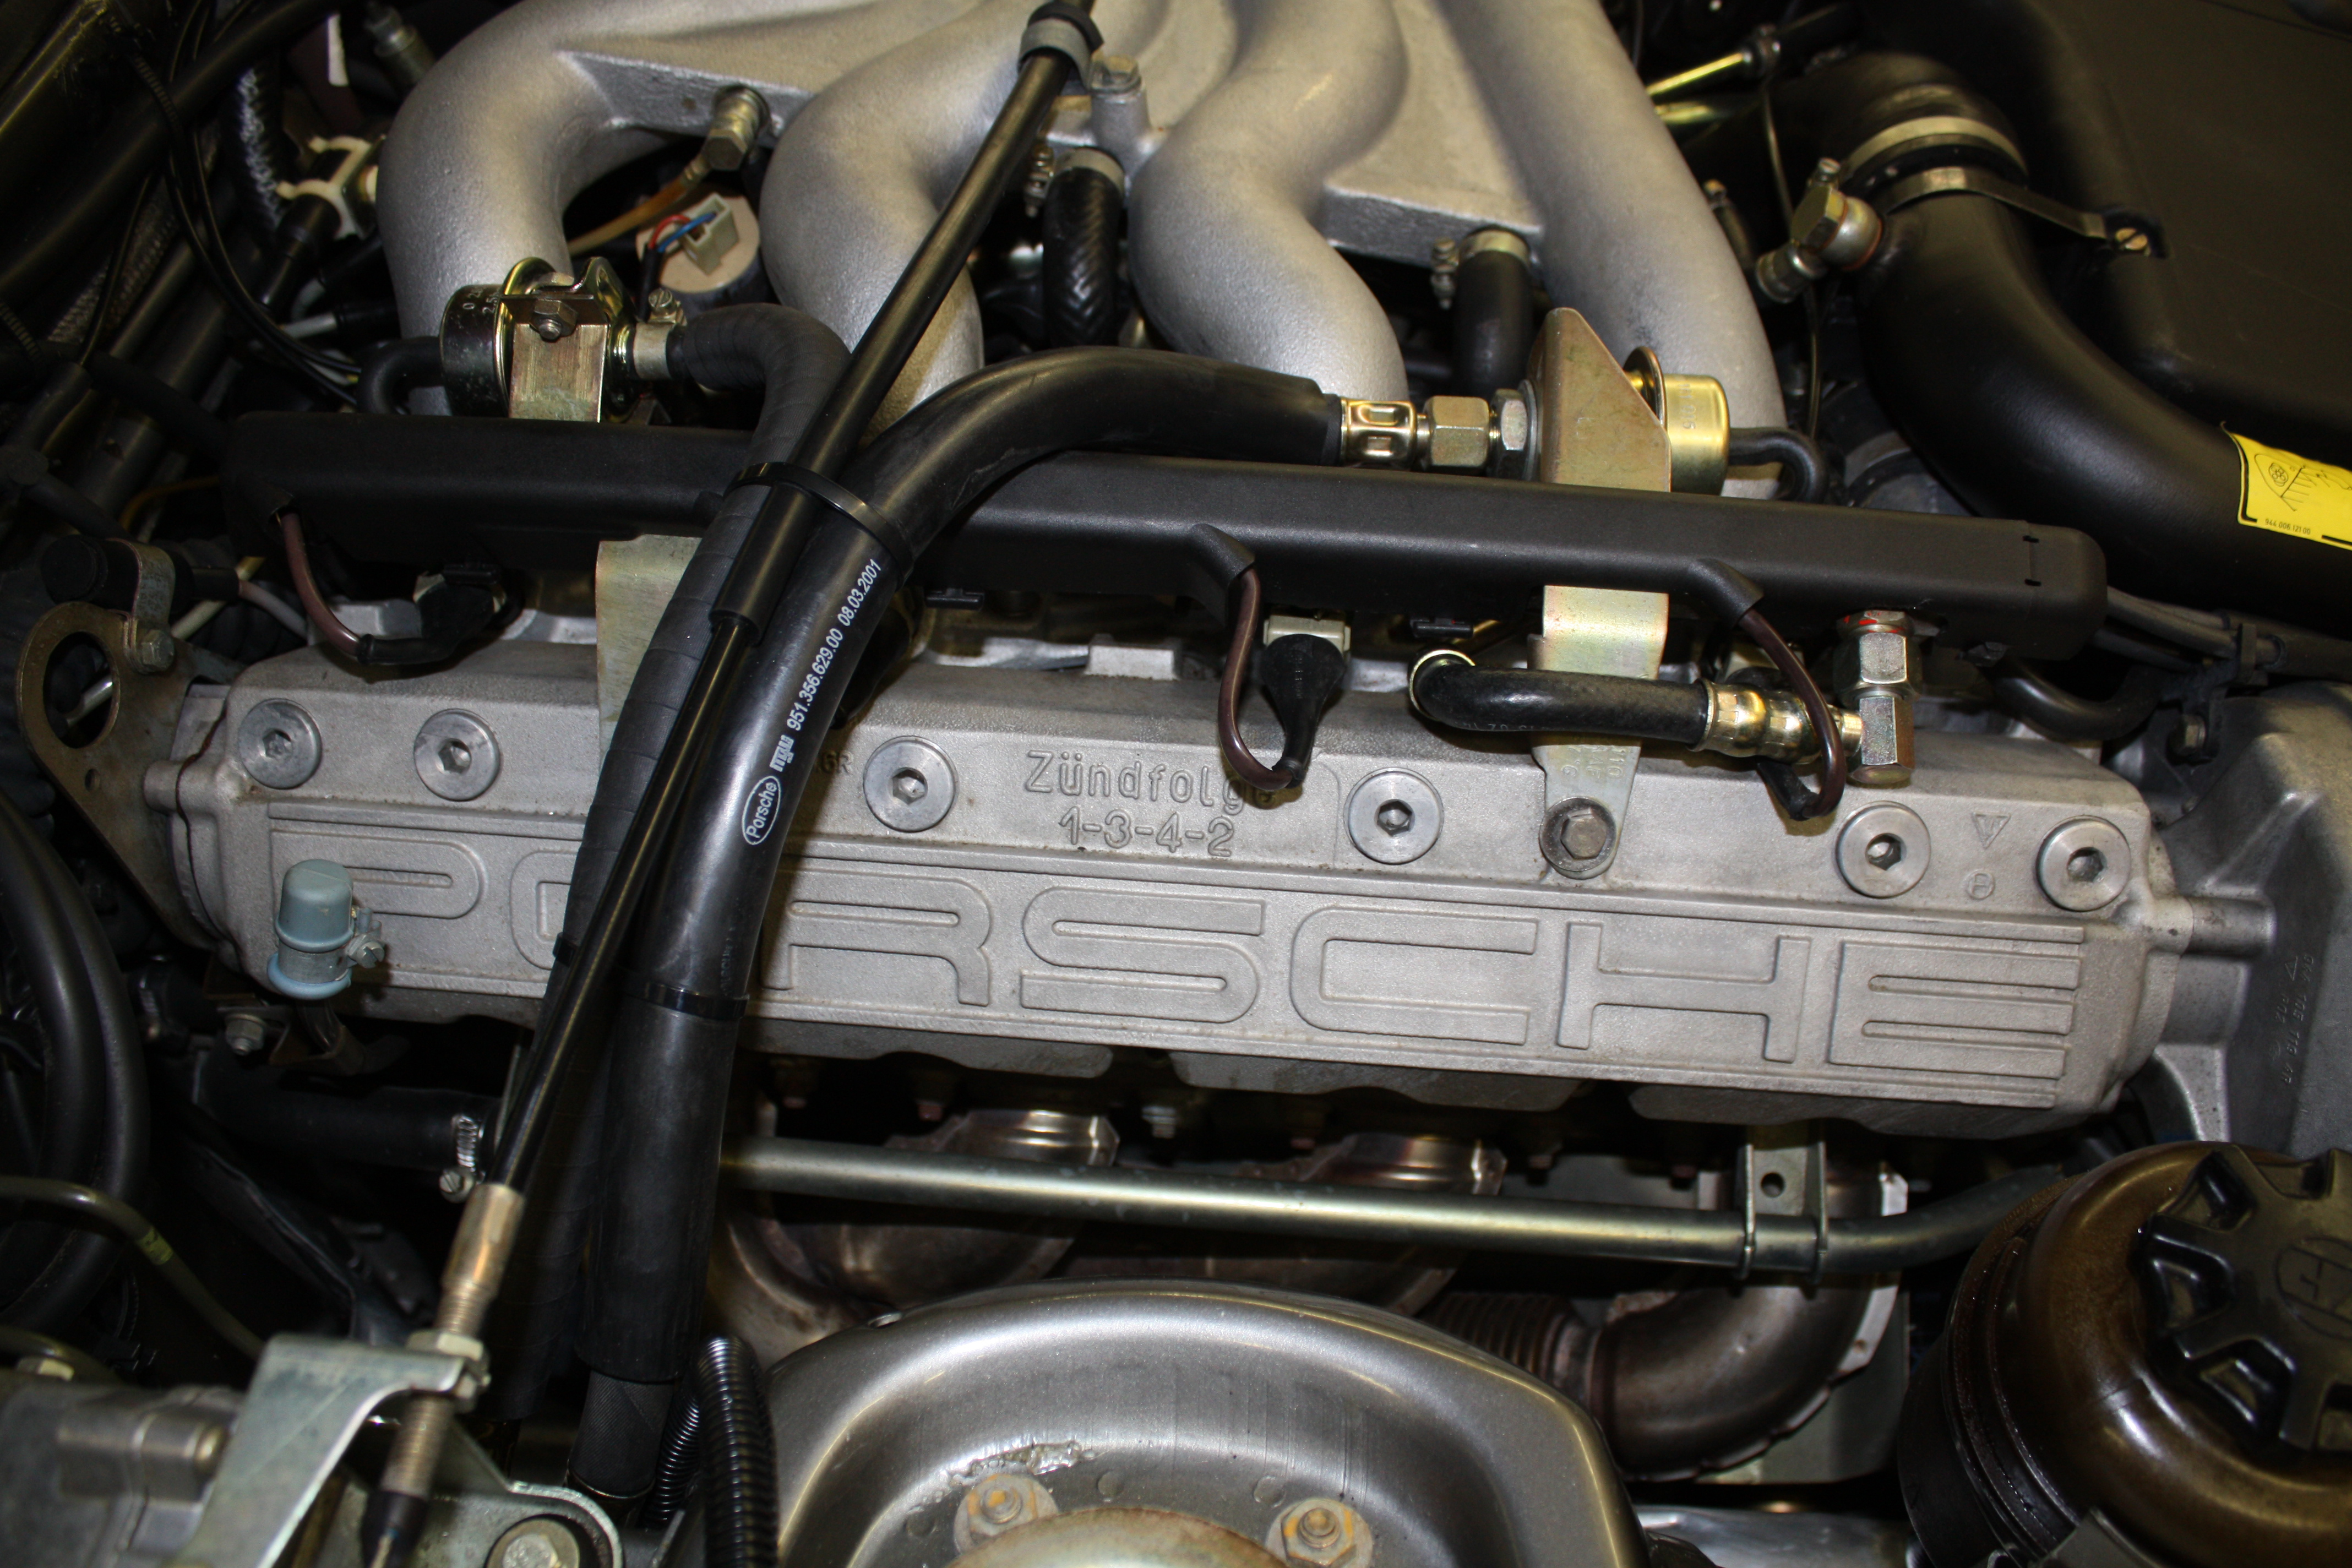
I then turned my attention to replacing the spark plugs, the spark plug wires, the distributor cap and rotor and the coil. All of these items appeared to be original. The rubber insulator pieces on the spark plug wires were cracked and brittle. I used the OEM Beru wires, Bosch cap and rotor, Bosch coil and Bosch Platinum plugs. To remove the rearmost spark plug wires I had to remove the fuel damper on the fuel rail as there was not enough room to slip the plug wires past it. To make it easier for the next plug change, I coated the threads with anti-seize. Which means I also anti seize coated everything within about three feet of the car!! It has to be THE messiest of all chemicals one will use on a car!!!


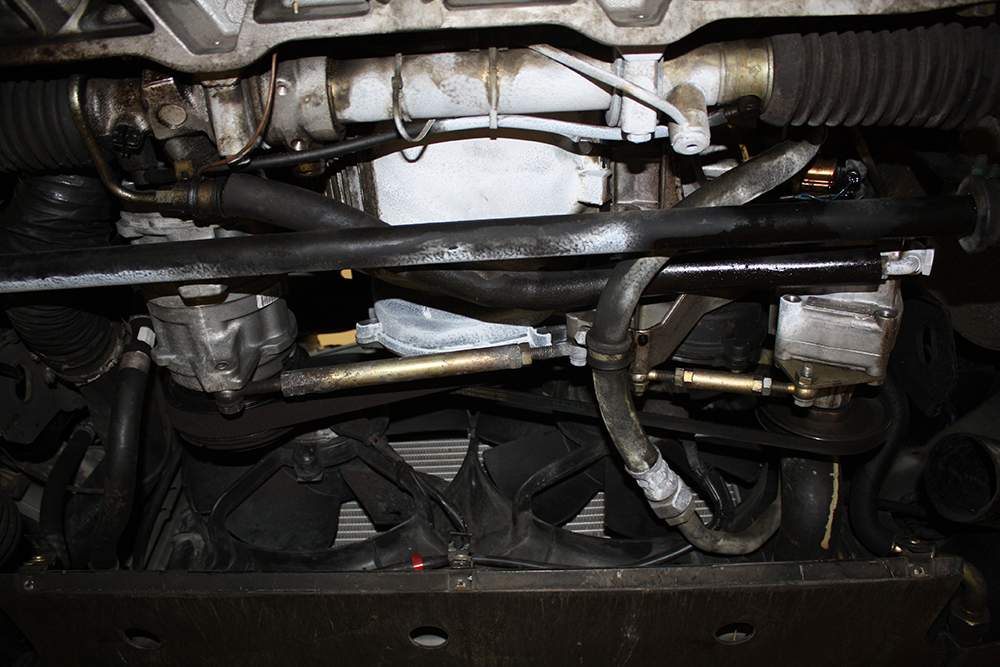
With the coolant pipe replaced I could install the new PS and AC belts and close up the bottom of the engine. I also replaced the cooling hose to the alternator as the old one was in very bad shape. As you can see below, I also did some cleaning prior to installing the bottom panels.


Replacing the upper fuel lines was the next job. I had ordered the factory replacement pieces which required cutting the lines under the car. After consulting with my son, we decided it would be better to cut the lines in the wheel well where they would be more protected.

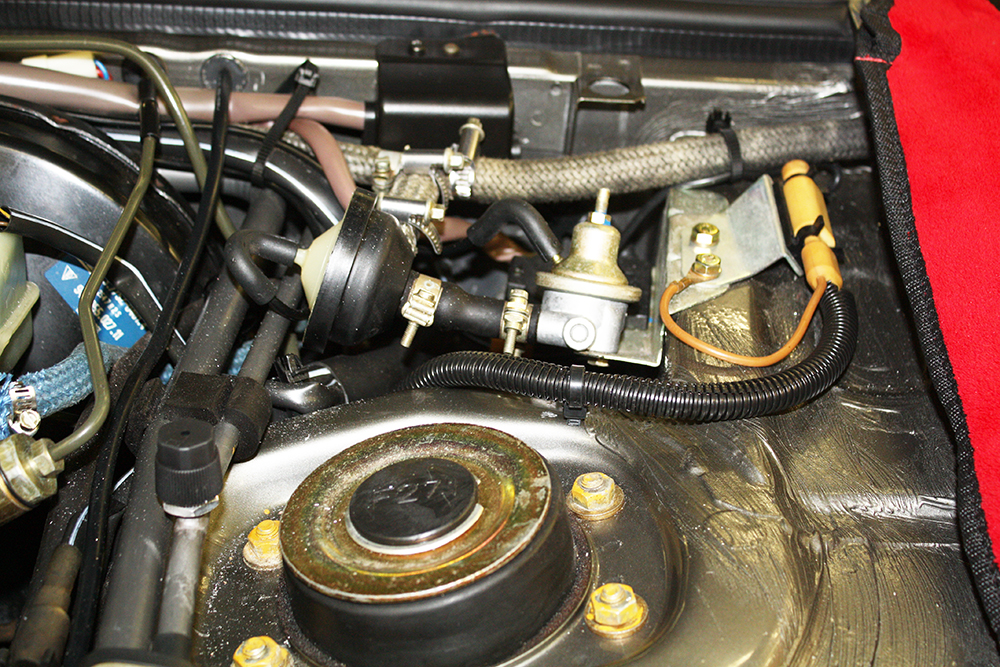
Occasionally I had experienced hard starting when the engine was warm. I did a search and the likely culprits were the fuel pressure regulator and the DME relay. I replaced both and, for good measure since I had to remove it for the spark plug wires, the fuel pressure damper. I also replaced the small hose that goes from the fuel pressure damper to the fuel rail.

It drives like a very tall car and is only 6'7" wide which makes for mostly easy maneuvering. The Abarth has been a great tow car. It is peppy, has plenty of room inside for stowing the hitch and other things. Abarth's do not come with a muffler. There are straight pipes from the cat to the rear so it sounds great!!

While we enjoyed the trip, it was good to be home and back at work on the car. While we were gone the rest of the parts arrived. First up was replacing the rusty coolant pipe that sits under the air box. After draining the radiator, it was a very straightforward job which included replacing the water hoses at each end of the pipe.


I then turned my attention to replacing the spark plugs, the spark plug wires, the distributor cap and rotor and the coil. All of these items appeared to be original. The rubber insulator pieces on the spark plug wires were cracked and brittle. I used the OEM Beru wires, Bosch cap and rotor, Bosch coil and Bosch Platinum plugs. To remove the rearmost spark plug wires I had to remove the fuel damper on the fuel rail as there was not enough room to slip the plug wires past it. To make it easier for the next plug change, I coated the threads with anti-seize. Which means I also anti seize coated everything within about three feet of the car!! It has to be THE messiest of all chemicals one will use on a car!!!


With the coolant pipe replaced I could install the new PS and AC belts and close up the bottom of the engine. I also replaced the cooling hose to the alternator as the old one was in very bad shape. As you can see below, I also did some cleaning prior to installing the bottom panels.


Replacing the upper fuel lines was the next job. I had ordered the factory replacement pieces which required cutting the lines under the car. After consulting with my son, we decided it would be better to cut the lines in the wheel well where they would be more protected.

Occasionally I had experienced hard starting when the engine was warm. I did a search and the likely culprits were the fuel pressure regulator and the DME relay. I replaced both and, for good measure since I had to remove it for the spark plug wires, the fuel pressure damper. I also replaced the small hose that goes from the fuel pressure damper to the fuel rail.

 01-23-2016 | 10:47 PM
#43
Thread Starter
Racer
Joined: Apr 2006
Posts: 485
Likes: 11
From: Rockwell, NC
Based on things I have found, the car had an aftermarket alarm system at one time. I wonder if this antenna was for the alarm remote control.
01-23-2016 | 11:37 PM
#44
Three Wheelin'
Joined: Dec 2012
Posts: 1,398
Likes: 13
From: Marco Island , FL --- Red River Valley, midwest
Just a quick hint on the center distributor 'coil wire'.
Porsche originally had a 'circular twist locator' which snapped over that wire as well as onto another to keep it centered and located in a 'down' position, thereby keeping that wire from getting snagged by the headlamp arm when it rotates the lights up and down. After years of heat or oil changes, these twists get broken or lost and the coil wire gets inadvertently turned into the way of the arm. Which may well cause abrasion or a quick pulling out of the wire shutting down the car. Or arcing and loss of volts to the distributor.
It is very rare to see the twist tie still on or the coil wire in the correct position.
01-24-2016 | 03:54 AM
#45
Thread Starter
Racer
Joined: Apr 2006
Posts: 485
Likes: 11
From: Rockwell, NC
Just a quick hint on the center distributor 'coil wire'.
Porsche originally had a 'circular twist locator' which snapped over that wire as well as onto another to keep it centered and located in a 'down' position, thereby keeping that wire from getting snagged by the headlamp arm when it rotates the lights up and down. After years of heat or oil changes, these twists get broken or lost and the coil wire gets inadvertently turned into the way of the arm. Which may well cause abrasion or a quick pulling out of the wire shutting down the car. Or arcing and loss of volts to the distributor.
It is very rare to see the twist tie still on or the coil wire in the correct position.
Porsche originally had a 'circular twist locator' which snapped over that wire as well as onto another to keep it centered and located in a 'down' position, thereby keeping that wire from getting snagged by the headlamp arm when it rotates the lights up and down. After years of heat or oil changes, these twists get broken or lost and the coil wire gets inadvertently turned into the way of the arm. Which may well cause abrasion or a quick pulling out of the wire shutting down the car. Or arcing and loss of volts to the distributor.
It is very rare to see the twist tie still on or the coil wire in the correct position.