When you click on links to various merchants on this site and make a purchase, this can result in this site earning a commission. Affiliate programs and affiliations include, but are not limited to, the eBay Partner Network.
Only think I may have done differently is, on your new patch piece, you could have had tacked strips that would have set the new piece precisely at level with the old metal and also allowed you to just tack through 5/16 holes drilled around the perimeter of your existing metal but it's really just a preference.
Either method....you don't really have to worry about welding your gap completely closed with a mig bead but still, it's just a preference that you'll decide for you own fix.
Personally, after using the spot weld method I described above....., I'd just grind everything clean (no weld through primer), prime with 2K epoxy. This way....when you grind your welds.....the strength is still present because you can grind flush with your old metal since the weld is below the surface to the strips you would have attached previously. Within the 24 hour window of wet on wet workability, I'd lay regular epoxy and cloth (not fiberglass cloth and polyester resin) as the epoxy primer and epoxy resin will be of the same molecular structure and will bond better that epoxy on polyester (google molecular chain of both products). You can then sand and swipe a thin coat of body filler for perfect finish. Body filler is polyester but it depends on a mechanical bond of a scratched surface not molecular bond. Brush seam sealer (Transtar makes a good one that is inexpensive and available through O�Reilly). Seal with a 2K Urethane sealer or just use the epoxy again mixed as a sealer so you don't have to buy so many products.
Paint to finish.
One of your problems here is going to be where to stop painting.
On a fender or door.....the panel is the ending boundary.
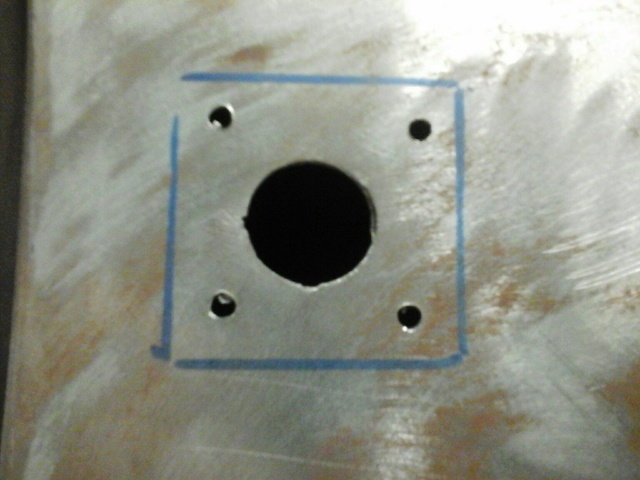
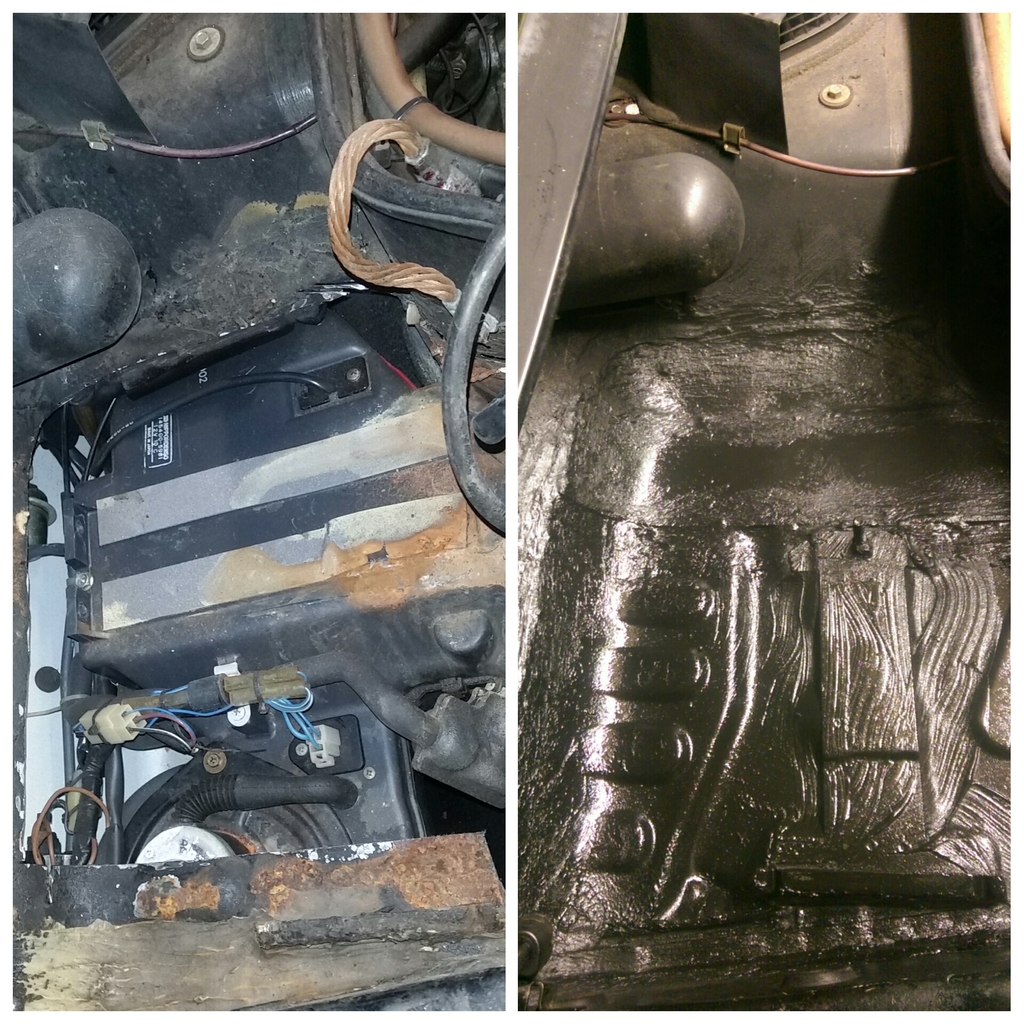
Here you are either painting red the entire battery/blower/fuse box panel or you will have to stop painting somewhere with an attempt to make it look seamless.
Hopefully it's still single stage there and the person who "fixed this" before didn't do base/clear.
I'll pop back in here to check on you.
T
Hmmm.... sounds like you have a bit of experience, so appreciate your comments As with so much on this car, it's mostly on the job training for me, with help from Edd China and youtube (although I'd note that many of the rust repair youtube videos are cringe-worthy...).
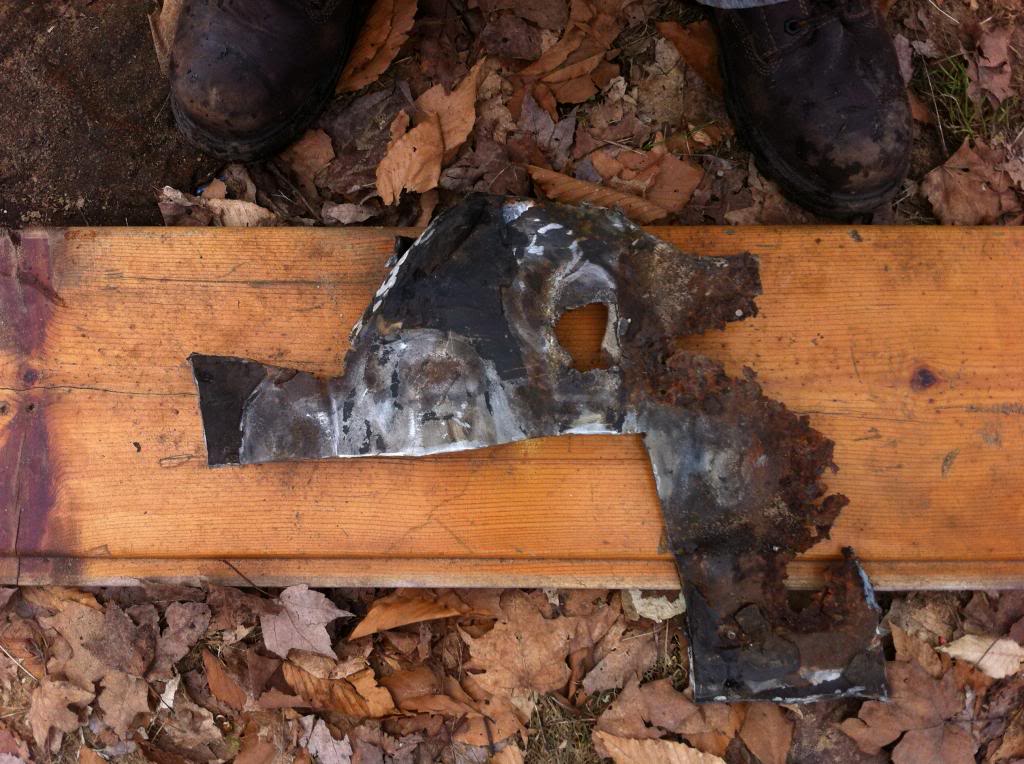
When you say to tack strips around the perimeter, do you mean flanging the edge of the patch all around so it can fit in from below and be plug welded thru holes on the top? I started out that way, but the contours made it too hard for me to flange the patch, but maybe I'm missing your point...
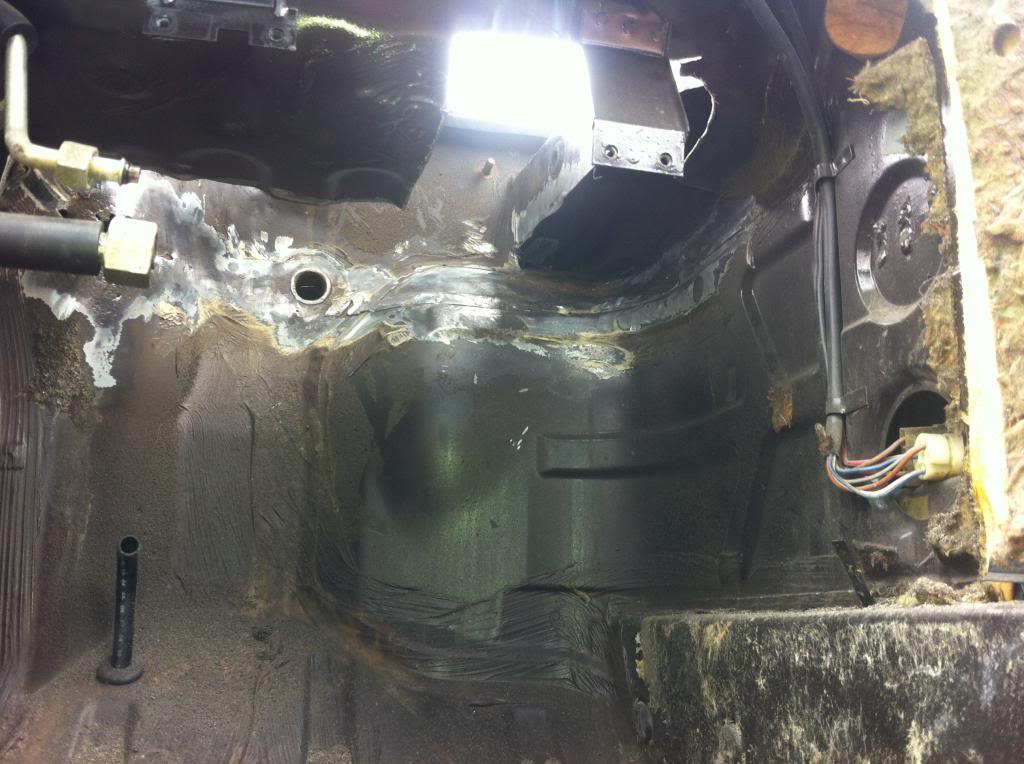
I used the weld-thru primer where two pieces of sheet metal were being plug welded together, like the glove box bracket and the battery tray to the floor. Without it, I would have bare metal against bare metal, which seems like bad idea? In hindsight, I agree I probably didn't need to make water tight weld seams, but no harm done.
I do have 2k epoxy primer and 2k single stage paint (the kind with the catalyst you release into the spray can to activate). My plan is to use the epoxy primer first, then seal everything fairly excessively with Wurth Brushable Seam Sealer, then apply the color coat. Was trying to avoid epoxy and cloth, etc. And you are spot on correct about there being no natural break point for the paint. The body isn't really painted well on the walls either -- almost like a pinkish overspray from the factory. The first guys to "fix" the battery box seemed to use hardware store spray paint over hardware store clear silicon, so doubt I can make it worse.
Here's an example from a RL'er car I'm working on that wanted the alarm hole deleted -
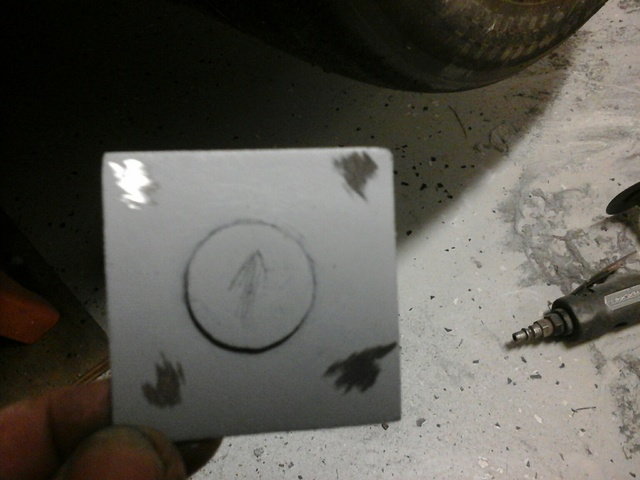
Here's the piece I made....circular plug that will fall flush with a backing plate where the welds will go - I just pre-prime my part and grind only where the weld will go.....
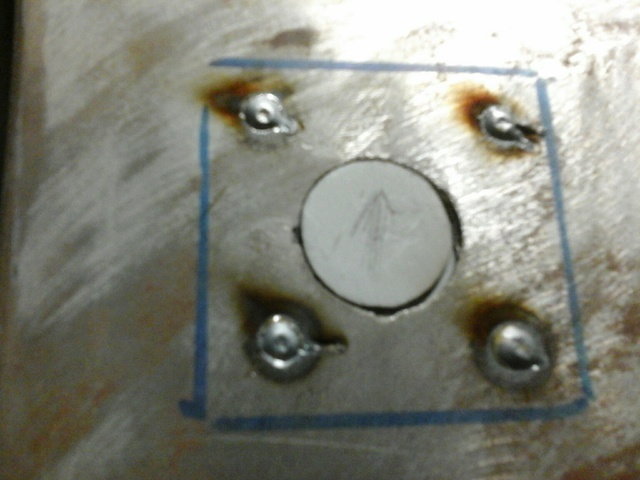
Piece welded in - In this case I was able to reach in through the black plastic vent hole near the door striker and place a magnet to hold it in place,
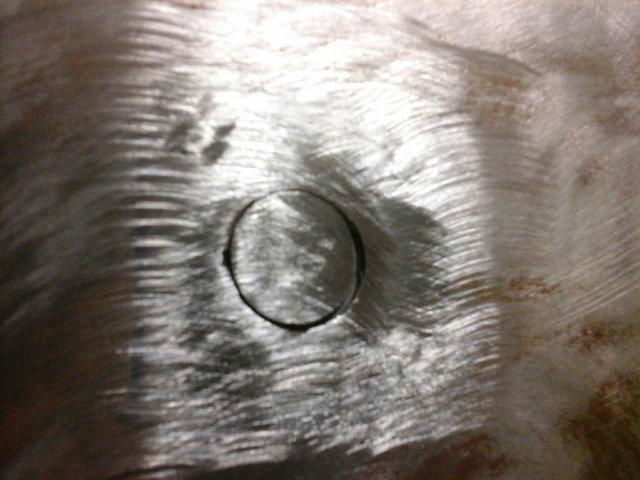
And ground (roloc 80grit) flush and ready for a skim of body filler or epoxy and then filler depending on what I am doing -
BTW - there�s no rule that you have to have the entire piece supported all the way around....where your battery tray has a discrepancy just have a space in the backup piece.
Same car, lower quarter panel was rotten under chip guard, I had to get my arm inside the 1/4 through the same plastic vent in the door jamb to grind rust and treat the metal....then epoxy primed the interior of the 1/4 to protect it....you can see my weld through holes ready at the top of the cutout but in this case I had to butt weld the lower part as the metal around the 90 degree corner towards the floor was good and I wanted to keep that intact.
Great post and tips, thanks. I probably would have benefited from a partial backing piece, though the position of the glove box bracket below complicated things a bit.
You did a very nice job on yours, on mine the damage was so extensive we cut pretty much the whole bottom out, and welded in one from another car, only the one side didn't quite match up and some custom fabrication had to be done.
To close the loop, here is the finished product. I used SprayMax paint in standard guards red from a local automotive paint shop (and the color matched remarkably well...). It's a single stage paint (no clear coat) that comes in a spray can, but it has a catalyst you release into the can just before painting like you would with real automotive paint. The big benefit is that it's way more chemical resistant and durable than hardware store spray paint. The stuff that was in there before from the first "repair" would dissolve with brake cleaner. Probably didn't help that it was sprayed over clear silicon caulking, which was someone's bright idea for sealing it last time. It's all metal now, with the floor fully coated in Wurth Brushable Seam Sealer. Should be good forever this way (knock on wood)....
It certainly pays to be persistent and diligent when tackling a job of this order, and your professional attitude went a very long way in accomplishing the task;
Thanks for saving another one. GREAT job !


 04-02-2016, 02:53 PM
 As with so much on this car, it's mostly on the job training for me, with help from Edd China and youtube (although I'd note that many of the rust repair youtube videos are cringe-worthy...).
  The body isn't really painted well on the walls either -- almost like a pinkish overspray from the factory. The first guys to "fix" the battery box seemed to use hardware store spray paint over hardware store clear silicon, so doubt I can make it worse.