The "How to Make GT Headlights" Guide
 04-28-2010, 02:52 PM
#31
Cruisin'

Join Date: Oct 2009
Posts: 9
Likes: 0
Received 0 Likes
on
0 Posts
Is that hood not fully closed or do these tend to make the gap look horrendous due to being see through and all? My only real concern....otherwise the headlights themselves look amazing. If I were to do this though, I would make a rear surround for the light itself so that when looking at them, you would not see everything in the engine bay behind them.
 04-28-2010, 07:51 PM
#32
Rennlist Member
Join Date: Dec 2007
Location: Cameron Park/ San Diego, CA
Posts: 447
Likes: 0
Received 1 Like
on
1 Post
Ya, the hood isn't all the way closed, they have the same gap as the stock covers when it is closed, also I am painting about 3/4 of the covers as well so you can't see in. They are pretty easy to make I bought a 4'x4' sheet of acrylic for $30 so it's no big deal if you make a few mistakes.
 04-29-2010, 02:43 AM
#35
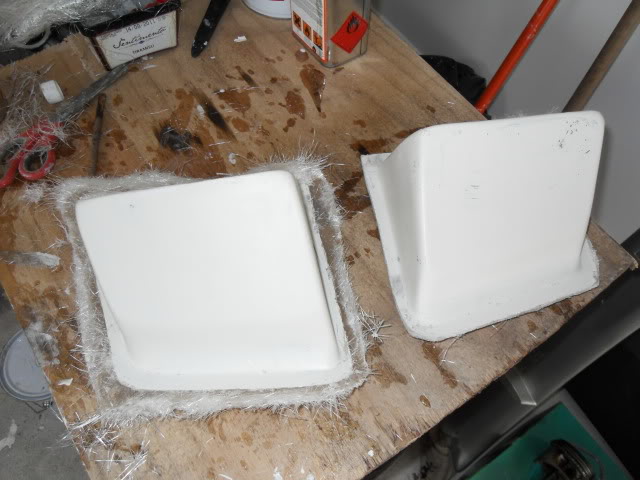
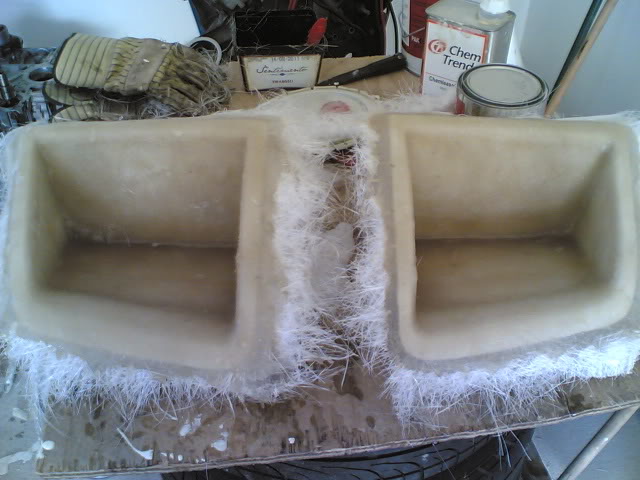
Nice write. I am in the similar project fabricating new nose panel with GTS style light units to my son's 951. Bucket molds are ready.
The final product should look more or less like this
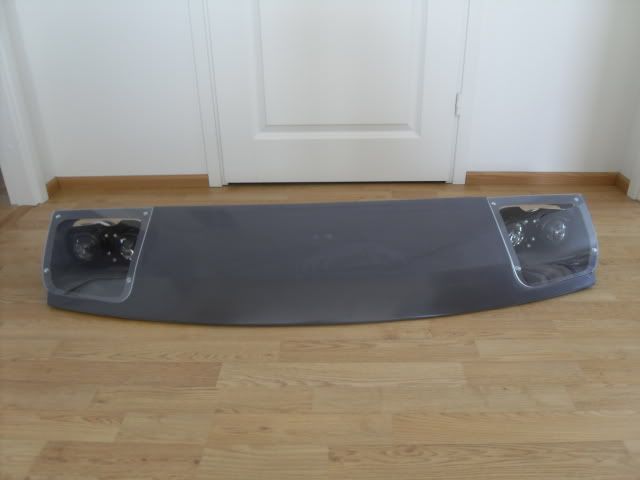
The final product should look more or less like this
04-29-2010, 06:38 PM
#37
Three Wheelin'
Join Date: Mar 2007
Location: Land of 10,000 potholes
Posts: 1,352
Likes: 0
Received 0 Likes
on
0 Posts
Olli, are those 90mm Hellas that you are using? I'd love to see how those look mounted.
I remember seeing this on 924board awhile back. Great writeup!
I remember seeing this on 924board awhile back. Great writeup!
 04-30-2010, 03:22 PM
#39
Rennlist Member
Join Date: Dec 2007
Location: Cameron Park/ San Diego, CA
Posts: 447
Likes: 0
Received 1 Like
on
1 Post
944 ono, I made the 90 degree angle brackets, and to cover the screws, I went to auto zone and got the rubber strips of the door sealer stuff and it slides right over the screws going through the plastic and hides them.
04-30-2010, 10:36 PM
#41
Burning Brakes
Excellent idea and application.
For other ways to skin the cat, go on YouTube with keywords "vacuum forming" and/or "PETG" This method of thermoforming of the lens is pretty simple, so vacuum forming may be overkill, especially if you goose the heat somewhat as suggested in a prior post.
PETG is that clear plastic they make soda pop and water bottles from. MUCH tougher than Plexiglass.
Anybody for a similarly made sunroof for a fraction of the cost of a Saratoga top?
This method oughta work, just need a bigger oven. Got friend with pizza oven?
Or, make your own oven with sheetrock, 2X2s for simple frame, and gas burners borrowed from your barbeque stove. Any heat source is fine, just use aluminum foil or screen to dissipate hot spots, which would unevenly heat the plastic sheet.
05-02-2010, 07:09 PM
#42
Burning Brakes
http://www.youtube.com/watch?v=yClQsQjg45g
This guy also uses vacuum forming, heating the plastic in his oven, then using vacuum table and shop vac to suck the heated plastic sheet down over the shape to be duplicated. See YouTube links for vacuum forming.
Here, he's pulling the heated plastic down over a sharp plug to make the fuselage cockpit section for a hand-launched model glider. Note how ductile the plastic is. If it can be pulled way down over this pointed plug, pulling it over a headlight cover should be super easy, given its very shallow depth.
Note that this stuff is much thinner than plexiglass as used in the original post on this thread. Being thinner, this stuff would pull easily down over the edges of the headlight cover, making a side lip around the perimeter in the process. Such side lip would be perfect for mounting to the headlight box, perhaps by use of silicone bathtub caulk from a tube, which is flexible, weatherproof, and has a 50 year life. Saves making those little angle brackets and screw holes, and weatherproofs the joint.
05-03-2010, 03:51 AM
#44
Olli, are those 90mm Hellas that you are using? I'd love to see how those look mounted.
my bucket molds from opposite side