
Removing stuff in engine bay for paint.
 04-18-2008, 02:20 PM
#1
Rennlist Member
Thread Starter
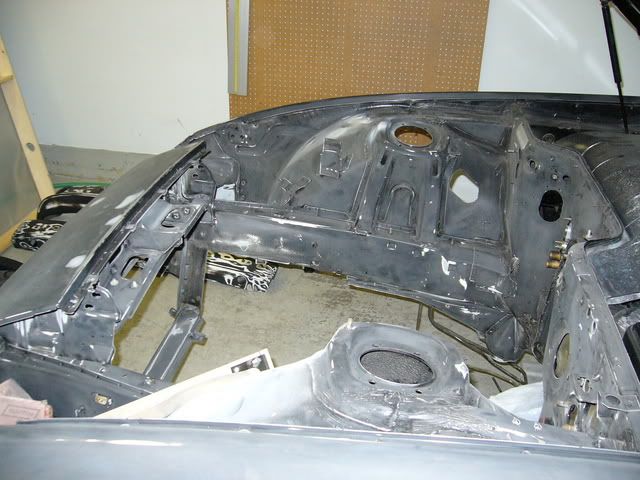
My engine bay needs to be cleared out for painting. The engine has been out for a while so thats gone. I took the wiring harness for the DME out, the battery cables are out, the washer fluid stuff, ignition coil, and brake booster.
The only things left are what is behind the firewall, the lighting harness that runs under the brake booster, the brake lines, and the headlight setup.
How could I go about taking that harness out from the drivers side compartment? It seems like it would be a huge PITA to disconnect all those wires. Is it even possible with the dash in?
Also can the headlight stuff all come out as one unit? Any easy way to do this?
Two of the brake lines have hard plastic sleeves on them. Can I take them out from there or do I have to pull the whole line through the firewall?
And thanks for any additional tips on cleaning up the engine bay.
 04-18-2008, 04:14 PM
#2
I just did this. it is a PITA to get the rubber grommet to fit back in when you put the harness back through. But pulling the harness though is not hard. I taped up the brake master as it sat. Taped just about everything that wouldnt need paint. Its hard to explain what I did so heres a pic. I did not paint behid the firewall because thats alot of work and no one ever sees it. The headlight set-up, once removed, will need all these little adjustments to get back to where it was. Luckily, from years of being in a certain spot, the plating has worn off around where the adjustments were so lining it back up should be easy.

04-18-2008, 04:16 PM
#3
Oh yeah..... Funny, I forgot to tape the hood latch at the last second. Its amazing what you see when paints shooting out the tip. Not like you can stop and start taping again though so I sprayed right over it. hahahaha. I figured Id just buy a new zinc plated one from that guy here who had a bunch of parts replated. Havent seen him around and forgot his screen name.
Good Luck.
Good Luck.
04-18-2008, 05:22 PM
#5
RL Community Team
Rennlist Member
Rennlist Member
Hey Mr. LT1, I love that color! Any pics of the finished product?
I wend down the same route. I cleared everything out. The brake booster is the hardest. You need to unplug the connectors from the bottom of the main fuse panel (driver's side, right behind the firewall). The only trick there is to there are retainer tabs for each row that must be slid out first. Keep track and carefully label the connectors. There is also a ground wire I recall�
The new grommet was a bit of a challenge to get in, but with some dish soap and a lot of thumb force, it went OK.
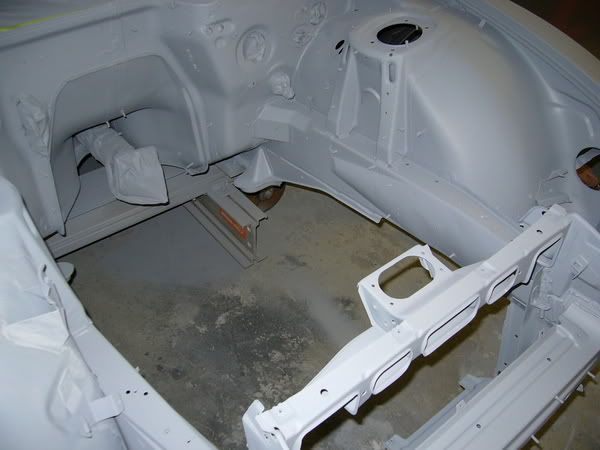
Clean the engine bay first with degreaser and then with Ajax or Comet � very alkaline!
Next, sand thoroughly every knick and cranny. Consult your specific product�s data sheets for the grit recommendation. I used P320 for the Glasurit HS primer I used. I spent hours and hours getting the bay sanded:
Here it is after primer (I eventually did the area behind the firewall too, but I used a gloss-reducing additive in the clear to give it a semi-gloss look):
I don�t have any clear pics of how it looked after painting, but here it is in the early stages of re-assembly:

I wend down the same route. I cleared everything out. The brake booster is the hardest. You need to unplug the connectors from the bottom of the main fuse panel (driver's side, right behind the firewall). The only trick there is to there are retainer tabs for each row that must be slid out first. Keep track and carefully label the connectors. There is also a ground wire I recall�
The new grommet was a bit of a challenge to get in, but with some dish soap and a lot of thumb force, it went OK.
Clean the engine bay first with degreaser and then with Ajax or Comet � very alkaline!
Next, sand thoroughly every knick and cranny. Consult your specific product�s data sheets for the grit recommendation. I used P320 for the Glasurit HS primer I used. I spent hours and hours getting the bay sanded:
Here it is after primer (I eventually did the area behind the firewall too, but I used a gloss-reducing additive in the clear to give it a semi-gloss look):
I don�t have any clear pics of how it looked after painting, but here it is in the early stages of re-assembly:
04-18-2008, 05:35 PM
#6
Rennlist Member

Your cars looks so amazing, and in two of my favorite colors for a 944, red and black.
I need a shiny black car
 04-18-2008, 06:12 PM
#7
Almost Addicted
Rennlist Member
Rennlist Member
That part of the car will not be painted until I do the engine swap, which, unfortunately, will be a little later than I thought. The engine I thought I was getting can still be had, but after hearing it's history and the fact it is no LS or even LT, it is not worth the effort.
EDIT: Forgot to say- Good job guys!
EDIT: Forgot to say- Good job guys!
Trending Topics
04-18-2008, 11:34 PM
#8
Wow. Nice job. Blacks a hard color to lay. The only after pictures I have are with the engine in place so nothing is really visible. I have pictures of the primer step, basecoat step and then the first clear coat step. DOnt really have any with the final clear coat without the engine in the way.


04-19-2008, 08:38 PM
#11
RL Community Team
Rennlist Member
Rennlist Member
Thanks for posting the extra pics LT1, I love looking at this stuff!