Could this be it? The ultimate 944 oil pan gasket? (Pics!)
 06-08-2005, 01:17 AM
#1
Addict
Rennlist Member
Rennlist Member
Thread Starter
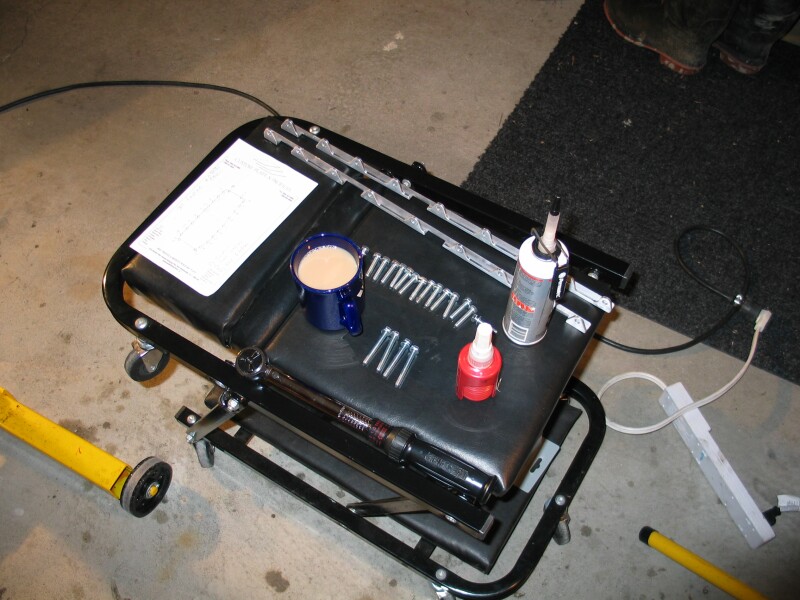
Ingredients:
1) Dannos Famous "Bombproof/Elephant Snot Method" with a slight change*
2) MySwiss' EXCELLENT gasket retainers
3) Someone who doesnt want to have to take the oil pan off again (Yes, thats me, but it could be you! Read on for details!)
* = In gathering supplies for Dannos method, I was unable to locate Yamabond4 and using body trim adhesive for an oilpan somehow struck me as... Odd? After telling the guy at NAPA what I was doing, we settled on "The Right Stuff: For Imports" by Permatex to be what I needed. After reading the back, I cant disagree with him.
Mostly all setup. Gotta start things off right with a nice hot cup of tea, milk, no sugar.
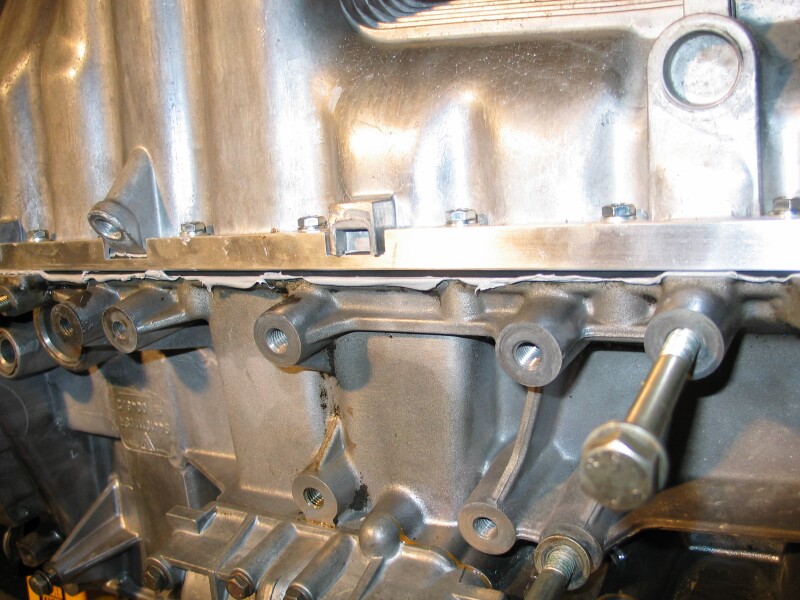
I was hurrying, so I missed taking a pic of the Right Stuff on the block side, but its on there. I used a similarly fat bead on that side too.

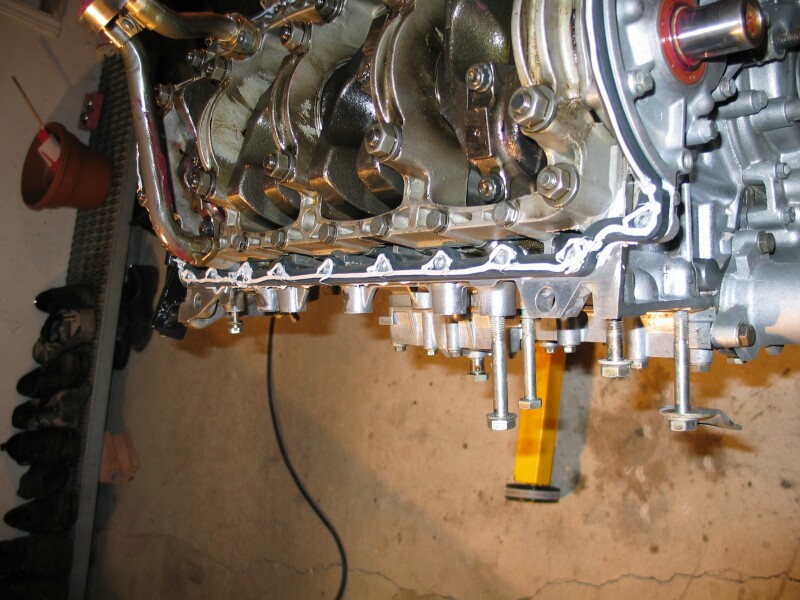
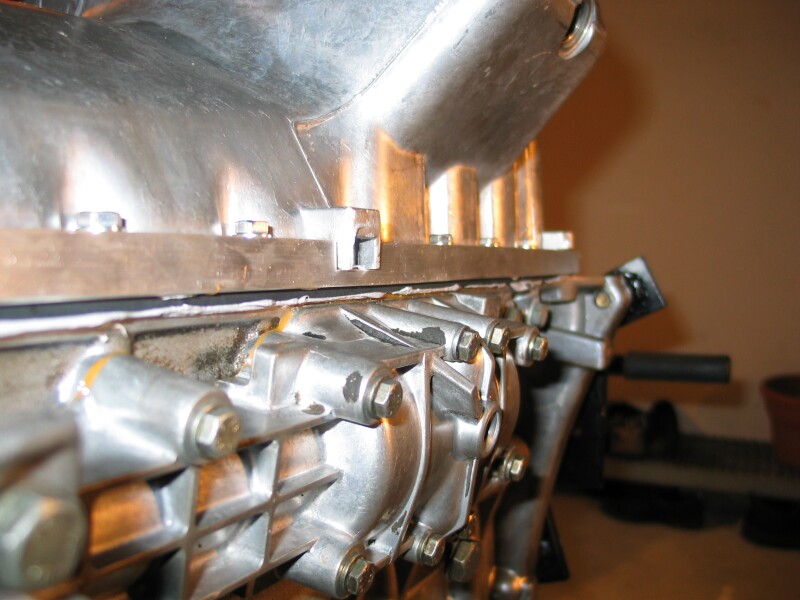
The pan went on without issue this time around. It took a long time to get all the bolts torqued down. A few others have said it before me, and ill say it again. When putting the bolts in, put them all in finger tight then follow the sequence twice more again going finger tight. The middle ones loosen up as the outside ones get put it. I did the whole sequence three times to finger tight, twice to 4ft/lbs, and three times to 8ft/lbs. The two under the part of the oil pan that has the drain plug are an absolute bitch. Make sure you have a little 10MM crowsfoot for those, that was all that worked.
Ahhh thats the stuff. Brian no function beer well without. That and I needed it after all the mad bolt tightening
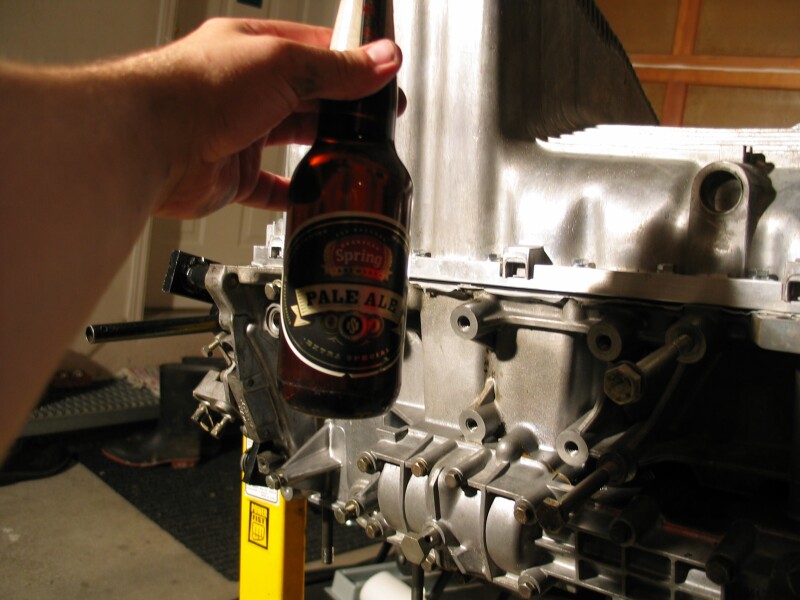
A big thumbs up goes out to MySwiss for his awsome gasket retainers, and to Danno for his post about the Bombproof Method. Im not out to take credit, they deserve it all. I just took pics and drank a beer after completion
1) Dannos Famous "Bombproof/Elephant Snot Method" with a slight change*
2) MySwiss' EXCELLENT gasket retainers
3) Someone who doesnt want to have to take the oil pan off again (Yes, thats me, but it could be you! Read on for details!)
* = In gathering supplies for Dannos method, I was unable to locate Yamabond4 and using body trim adhesive for an oilpan somehow struck me as... Odd? After telling the guy at NAPA what I was doing, we settled on "The Right Stuff: For Imports" by Permatex to be what I needed. After reading the back, I cant disagree with him.
Mostly all setup. Gotta start things off right with a nice hot cup of tea, milk, no sugar.
I was hurrying, so I missed taking a pic of the Right Stuff on the block side, but its on there. I used a similarly fat bead on that side too.
The pan went on without issue this time around. It took a long time to get all the bolts torqued down. A few others have said it before me, and ill say it again. When putting the bolts in, put them all in finger tight then follow the sequence twice more again going finger tight. The middle ones loosen up as the outside ones get put it. I did the whole sequence three times to finger tight, twice to 4ft/lbs, and three times to 8ft/lbs. The two under the part of the oil pan that has the drain plug are an absolute bitch. Make sure you have a little 10MM crowsfoot for those, that was all that worked.
Ahhh thats the stuff. Brian no function beer well without. That and I needed it after all the mad bolt tightening
A big thumbs up goes out to MySwiss for his awsome gasket retainers, and to Danno for his post about the Bombproof Method. Im not out to take credit, they deserve it all. I just took pics and drank a beer after completion
Last edited by theedge; 11-15-2006 at 04:28 PM.
 06-08-2005, 01:28 AM
#3
Addict
Rennlist Member
Rennlist Member
Thread Starter
Originally Posted by Danno
Good job! 


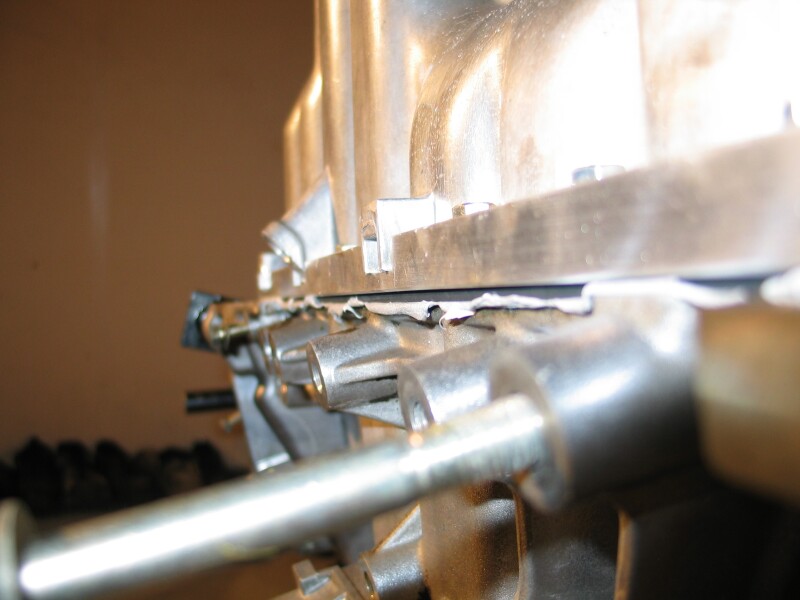
That extra gasket stuff oozing out... is it soft and gooey after drying? I'm just a little worried about it on the inside..
That extra gasket stuff oozing out... is it soft and gooey after drying? I'm just a little worried about it on the inside..
Thanks!Its a tad gooy, but its got a thick skin already. It skins over within a few min actually. Im kinda worried about it too, but the engine wont be running for a few more weeks so I assume itll have time to cure fully.
Last edited by theedge; 06-08-2005 at 01:55 AM.
06-08-2005, 01:41 AM
#4
Race Car
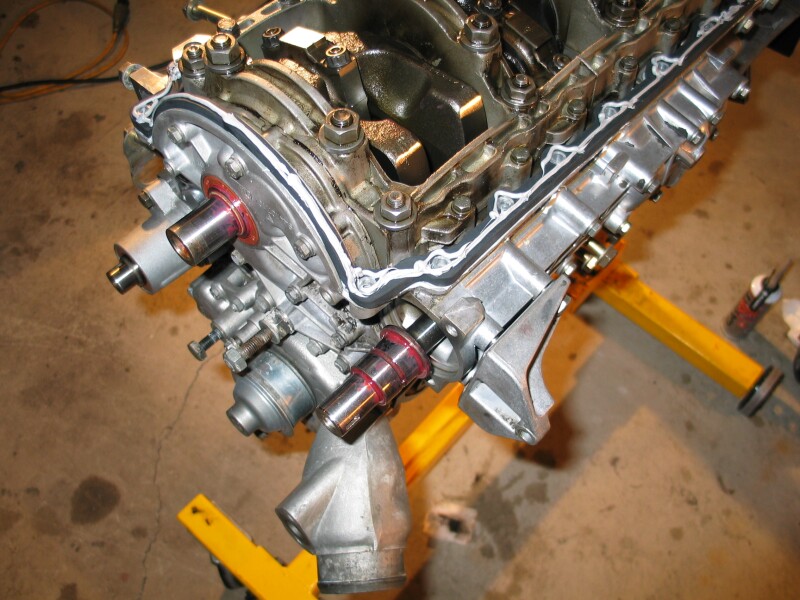
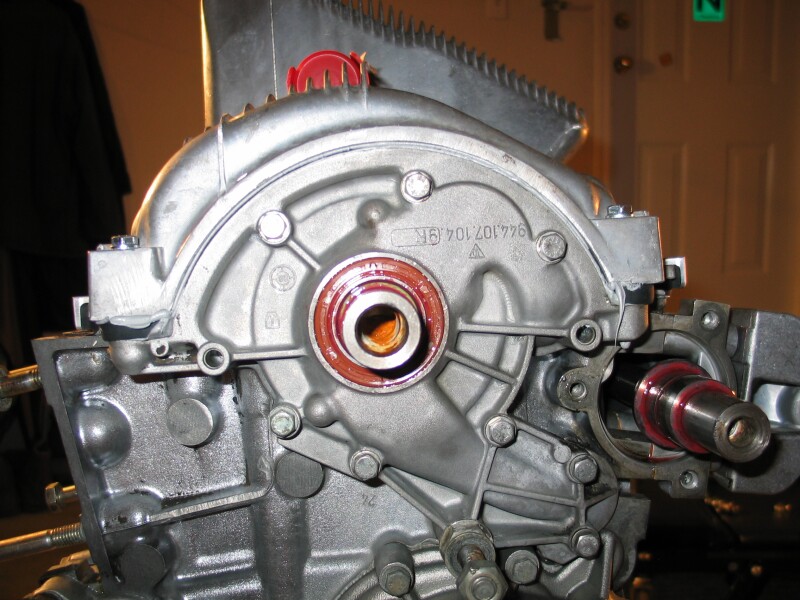
nice job. such a fun thing to do.....what's that red stuff on your oil pickup? your engine sure looks nice n clean!! hope you don't have lots of leaks like i did, but at least you got the rear main seal seated correctly from the looks of it, unlike my first try 
06-08-2005, 01:54 AM
#5
Addict
Rennlist Member
Rennlist Member
Thread Starter
Originally Posted by joseph mitro
nice job. such a fun thing to do.....what's that red stuff on your oil pickup? your engine sure looks nice n clean!! hope you don't have lots of leaks like i did, but at least you got the rear main seal seated correctly from the looks of it, unlike my first try
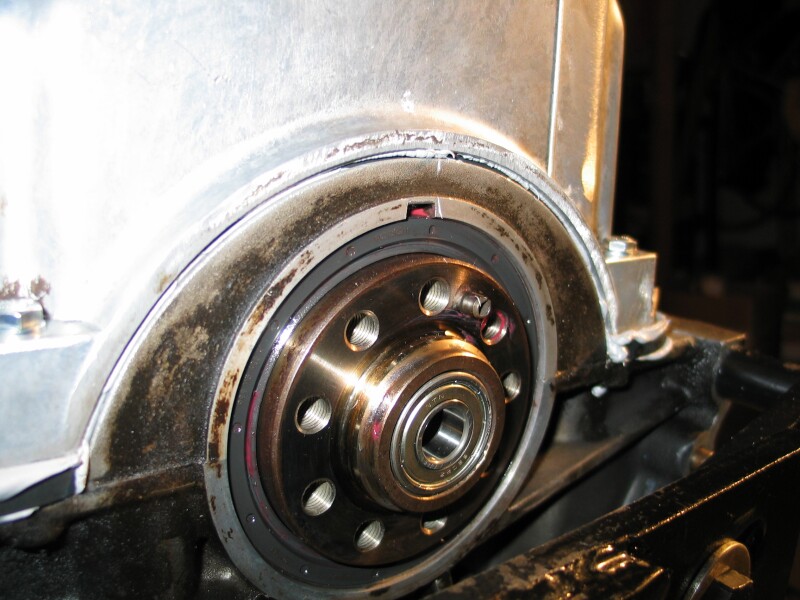
Im still worried about that RMS actually
I tried to be gentle with it, but its hard to hit it evenly when the engine is on a stand. Im going to recheck it to make sure its up against its stop tomorrow night.
06-08-2005, 03:10 AM
#6
Race Car
The RMS is pretty foolproof. Get a 3/8" extension, it's the same width as the RMS, makes an excellent driver to press it against the stop. For front seals, once they're flush, I use a 1/4" extension
I had to torque mine down in 16 steps, perhaps because it settled more than others, perhaps because I was absolutely ****. Put it on dry, and it doesn't leak a drop. There is more than one way to skin a cat, and both my method and this one are proven to be very effective. Looking very good!!
That looks like really thick assembly lube, more like a bearing grease. I used Royal Purple MaxTuff, which is about 5x thicker than oil, but still flows.
06-08-2005, 12:19 PM
#7
Addict
Rennlist Member
Rennlist Member
Thread Starter
Originally Posted by Zero10
The RMS is pretty foolproof. Get a 3/8" extension, it's the same width as the RMS, makes an excellent driver to press it against the stop. For front seals, once they're flush, I use a 1/4" extension
I had to torque mine down in 16 steps, perhaps because it settled more than others, perhaps because I was absolutely ****. Put it on dry, and it doesn't leak a drop. There is more than one way to skin a cat, and both my method and this one are proven to be very effective. Looking very good!!
That looks like really thick assembly lube, more like a bearing grease. I used Royal Purple MaxTuff, which is about 5x thicker than oil, but still flows.
I had to torque mine down in 16 steps, perhaps because it settled more than others, perhaps because I was absolutely ****. Put it on dry, and it doesn't leak a drop. There is more than one way to skin a cat, and both my method and this one are proven to be very effective. Looking very good!!
That looks like really thick assembly lube, more like a bearing grease. I used Royal Purple MaxTuff, which is about 5x thicker than oil, but still flows.
Thanks for the tip about the RMS, ill try that out tonight.
I used the Redline Assembly lube, nice little tub.
Trending Topics
06-08-2005, 01:20 PM
#8
Three Wheelin'
Join Date: Aug 2003
Location: Louisville, Ky/Altanta, GA (Georgia Tech)
Posts: 1,815
Likes: 0
Received 2 Likes
on
2 Posts
zero 10. I did much what you did, with only a little silicon in the corners, and just spent like 2 hours torqueing all the bolts, and it worked like a charm. I did have trouble with the rear main seal as well though, mine was leaking some, but after driving the car for about a week it seated by itself, and i was good to go, NO MORE LEAKS! (knock on wood)
06-08-2005, 03:18 PM
#9
Race Car
Ahhh, Redline assembly lube. That was first on my list of what assembly lube I wanted to get, but none of the stores I went to had it. So I got Royal Purple instead. I thought the Redline one was a liquid, funky!
As for the RMS, just give it a light coating of engine oil, inside and out, and it should go in relatively easily. I just set mine in relatively straight, put my thumb on one side, and gave the other side a light tap, and kind of went in a circle 2 or 3 times until it was flush with the back of the block, then got out my 3/8" extension
It took me well over an hour to tighten down my oil pan gasket, but IMO it's time well spent. As I'm sure all of you guys agree, an hour now is worth 20 hours later, if that SOB leaks
06-09-2005, 12:24 AM
#10
Race Car
brian - here's my learning curve on the rear main seal, for your benefit. don't make the same mistake i did.
https://rennlist.com/forums/showthre...&highlight=PVC
https://rennlist.com/forums/showthre...&highlight=PVC
06-09-2005, 01:21 AM
#12
Addict
Rennlist Member
Rennlist Member
Thread Starter
Originally Posted by Zero10
Ahhh, Redline assembly lube. That was first on my list of what assembly lube I wanted to get, but none of the stores I went to had it. So I got Royal Purple instead. I thought the Redline one was a liquid, funky!
As for the RMS, just give it a light coating of engine oil, inside and out, and it should go in relatively easily. I just set mine in relatively straight, put my thumb on one side, and gave the other side a light tap, and kind of went in a circle 2 or 3 times until it was flush with the back of the block, then got out my 3/8" extension
It took me well over an hour to tighten down my oil pan gasket, but IMO it's time well spent. As I'm sure all of you guys agree, an hour now is worth 20 hours later, if that SOB leaks
As for the RMS, just give it a light coating of engine oil, inside and out, and it should go in relatively easily. I just set mine in relatively straight, put my thumb on one side, and gave the other side a light tap, and kind of went in a circle 2 or 3 times until it was flush with the back of the block, then got out my 3/8" extension
It took me well over an hour to tighten down my oil pan gasket, but IMO it's time well spent. As I'm sure all of you guys agree, an hour now is worth 20 hours later, if that SOB leaks
06-09-2005, 01:26 AM
#13
Addict
Rennlist Member
Rennlist Member
Thread Starter
Originally Posted by joseph mitro
brian - here's my learning curve on the rear main seal, for your benefit. don't make the same mistake i did.
https://rennlist.com/forums/showthre...&highlight=PVC
https://rennlist.com/forums/showthre...&highlight=PVC
Not a fun experience at all Thanks redlyne!
06-11-2005, 03:14 AM
#14
Race Car
Yeah, to press the seal straight in, evenly takes quite a lot of force. That's why I just inch it in, going all the way around several times. The 4" end cap is a good idea though, I'll file that one away for next time!
09-28-2005, 02:47 PM
#15
Rennlist Member
I was just looking at this thread
How come the pics are gone this was only in June of 05 ?
regards
Ed
How come the pics are gone this was only in June of 05 ?
regards
Ed