When you click on links to various merchants on this site and make a purchase, this can result in this site earning a commission. Affiliate programs and affiliations include, but are not limited to, the eBay Partner Network.
It's time to share the progress made on our project car.
Last year we purchased a 944 Turbo that had an LS1 swap already (mostly) completed. Car was really rough cosmetically, but the heavy lifting had already been done. Figure buying an existing swap was FAR less expensive than starting from scratch. As bought, the car was intended as a track toy only. Here is a link to the auction on BaT where there is a ton of detail about the car, pictures, and videos, so I won't bother posting them here:
The plan for the car is to transform it from an exclusively capable track weapon into a nicer, more versatile, comfortable car that can be used every day - but we're keeping the power and the suspension mods.
Agenda/Budget
Finish engine build - as purchased it was about 85% complete
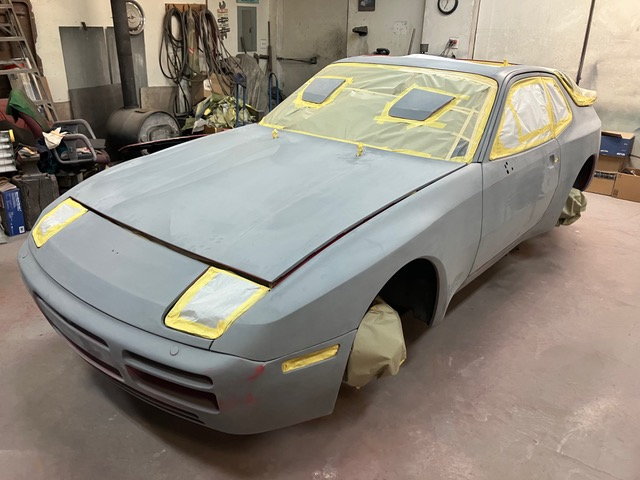
Body & Paint - there were roughly 1,500 dents (OK, maybe not that many) and the paint was buffed down to the primer at nearly every seam
Reupholster seats
Refinish or replace dash
Explore installing air conditioning
Stereo options
Should be a great car when finished. Updates will be posted here when there's time.
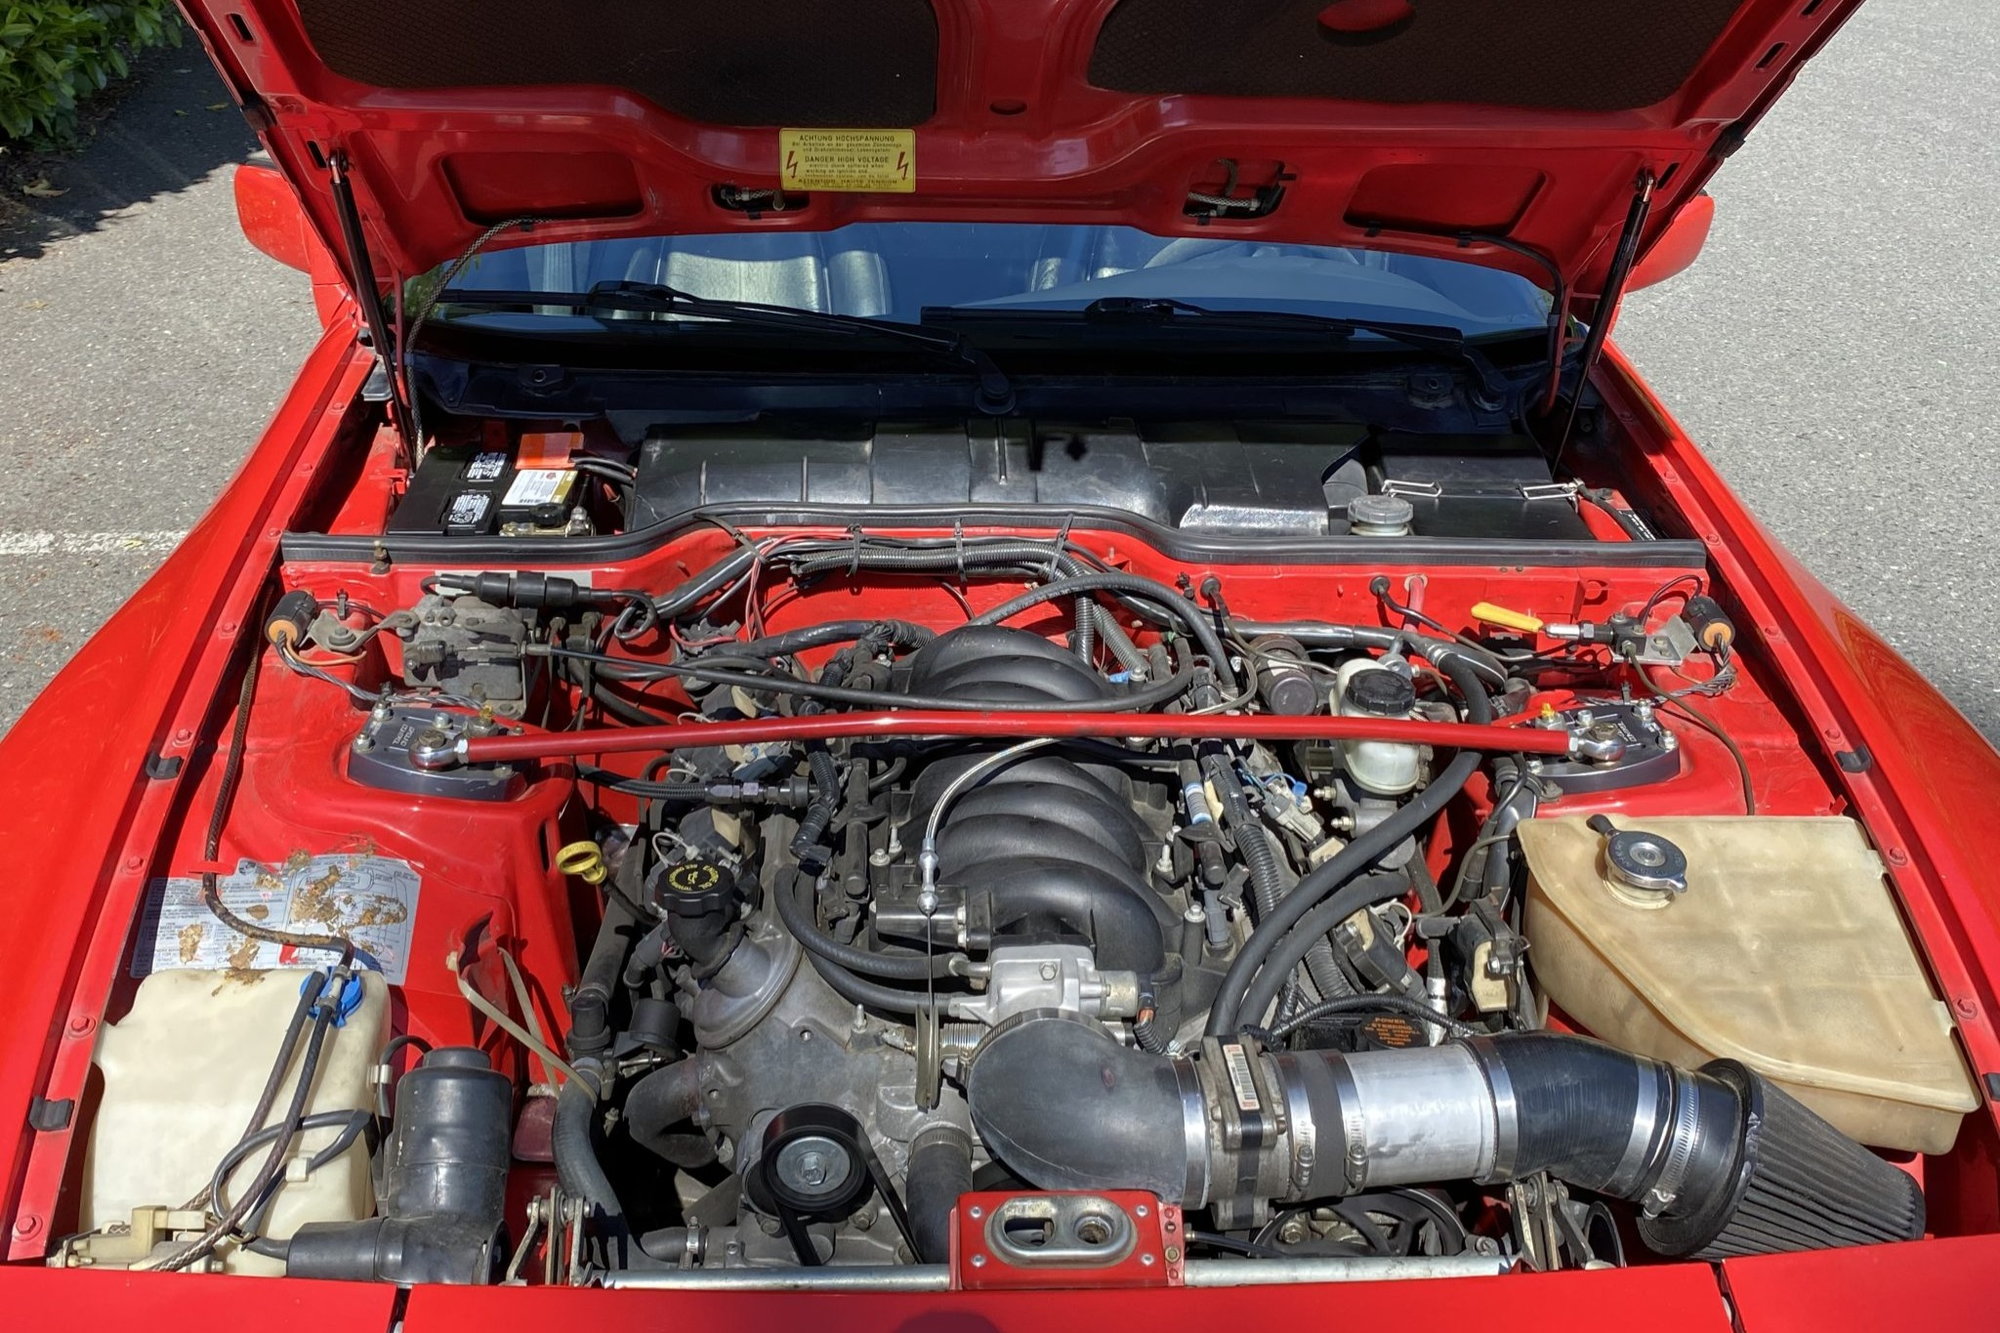
The first task was to finish the LS1 build once we spent a little time with the car. Since this was originally imagined to be a track toy only there were a few rough edges that needed to be smoothed out.
The first agenda item was the steering. There was a full inch of play at the top/center of the steering wheel. If you haven�t driven a car on the highway that requires an expert level understanding of just how far to jerk the wheel in order to avoid a distracted driver about to sideswipe you � without overdoing it � then you haven�t lived. This is a terrifying experience. Sarcasm aside, the car wasn�t safe. Cannot imagine attempting to track the car with the vagueness in steering this vehicle was inflicted with.
The original build attempted to use the original steering column/coupling and�..uhhh�..to put it nicely � modify it slightly to compensate for the new tighter pathway as a result of the larger engine.
Hint � it was ineffective.
A new steering shaft/coupling was fabricated � issue fixed. Steering feels as tight as a new car now.
Next there were several things we wanted to address, tighten up, and improve:
Replace O2 sensor
Replace coolant reservoir
Replace coolant sensor
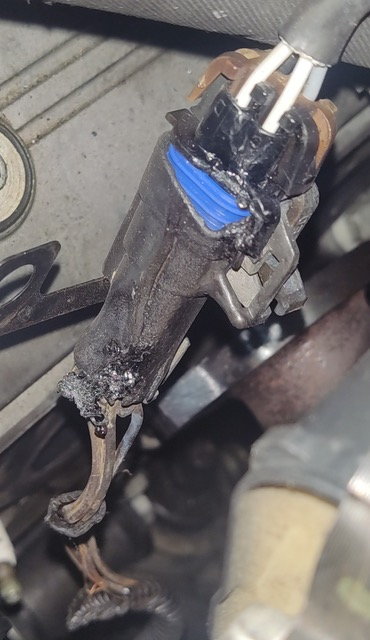
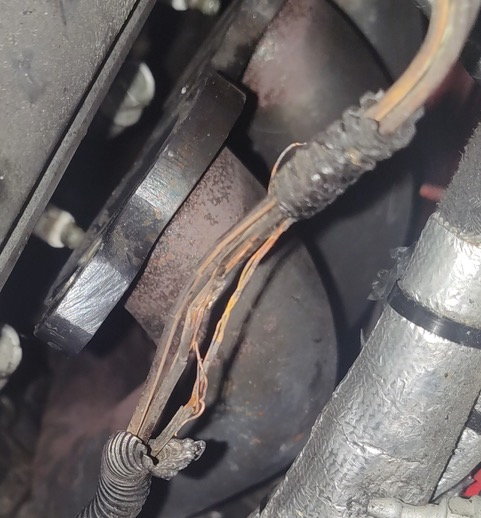
Replace/reroute two pieces of the electrical that were laying directly on the headers
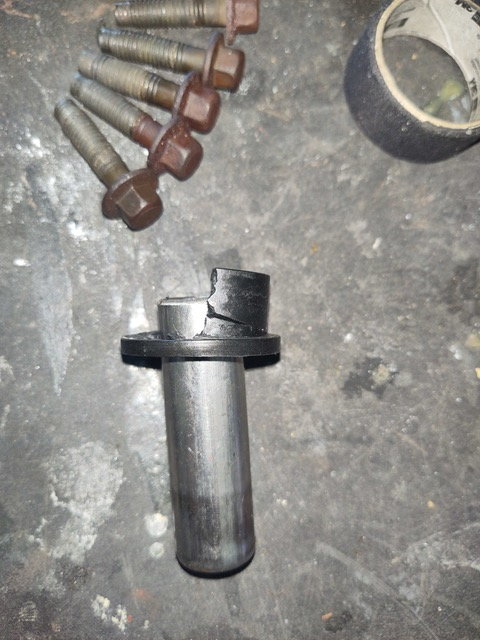
Replace motor mounts/bolts, original bolts were too short, and one mount cracked
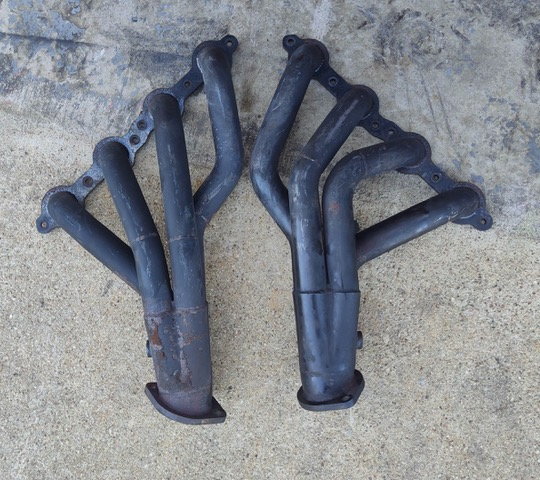
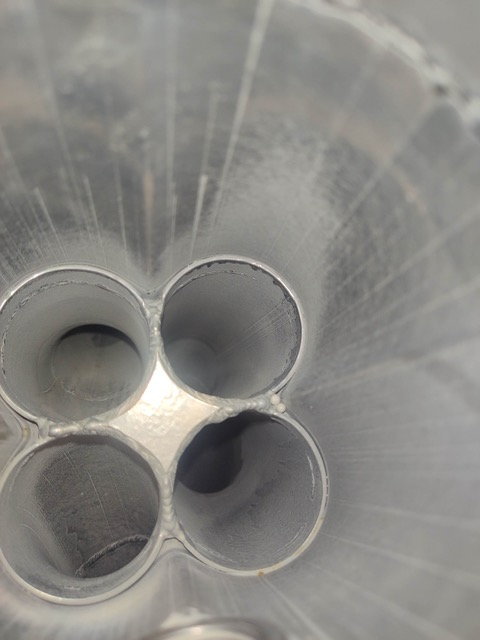
Reduce heat � refinish the headers (ceramic) inside and out to keep engine compartment temp down � also new gaskets upon reinstallation fixed the exhaust leak
There were other minor things addressed including:
Upgrade sunroof components from OEM plastic to brass so it would actually function
Plug in the power seat connector, you know - so they actually work
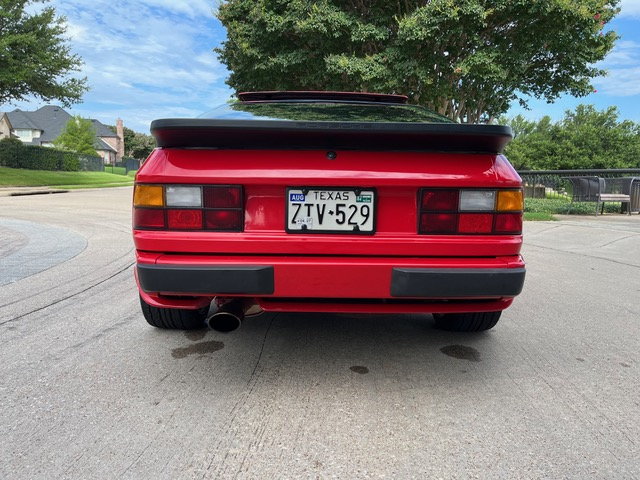
The picture in the original post on the car you can see the hood riding high over the fender on the driver side. Figured out a way to lower it and fit better.
Another issue that is troublesome is that about once every ten times you take the car out of gear and slow to a stop the engine shuts off around 15 mph � you are rewarded with no power for the steering and brakes. Now � not as terrifying as the steering maleficence described above, but it is definitely in that direction. We thought replacing the Max Airflow Sensor would do the trick. It didn�t. This is still an issue and we�re trying to figure it out. In the meantime, we�re using throttle to retain power when the transmission is in neutral.
That�s our update for tonight � next is body/paint.
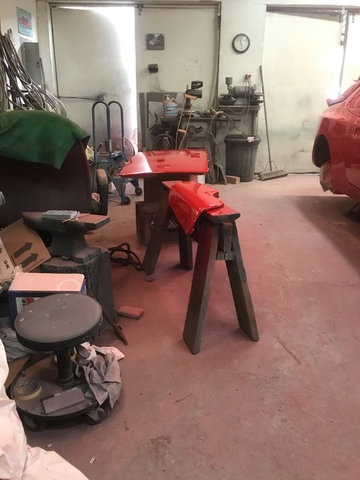
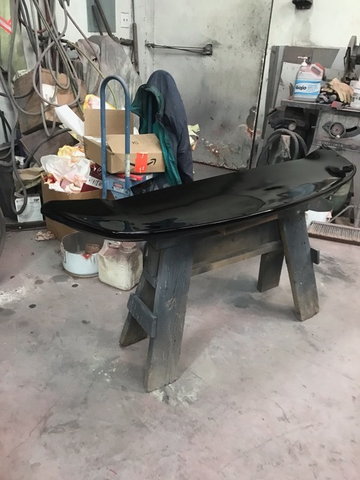
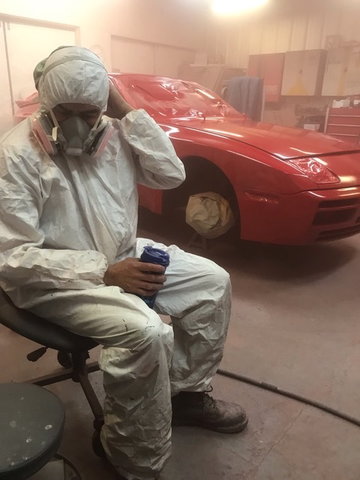
Mentioned that the body and paint were a little in need. Healthy amount of small dents everywhere, and it’s within reason to speculate an actual wrestling match was held on the roof of the car at some point. If you zoom in on the pictures in the auction from the first post, you can see the results of years of buffing that exposed primer on most sharp seams.
The car’s exterior was a hot mess.
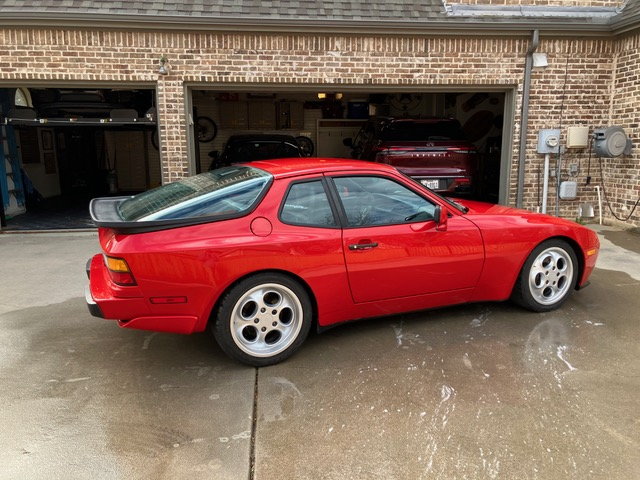
The color decision wasn’t controversial or difficult. Child of the 80’s here – has anybody seen ‘Sixteen Candles?’ That’s right. Bright red for this 944 was to stay, and yes, her name is Samantha.
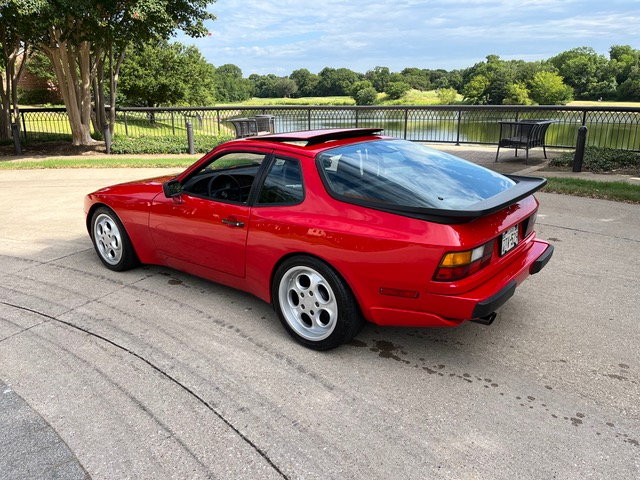
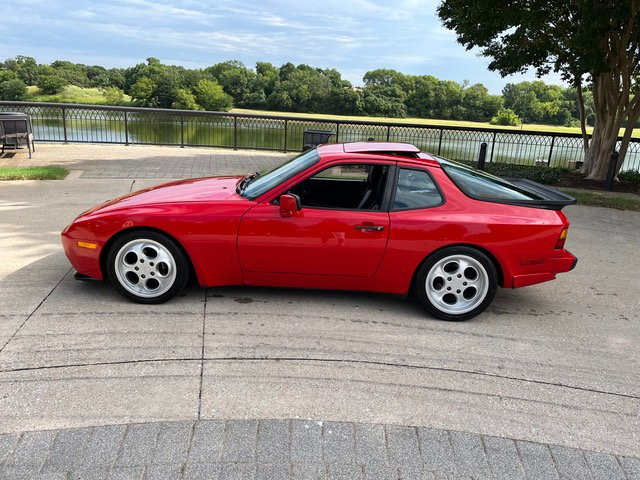
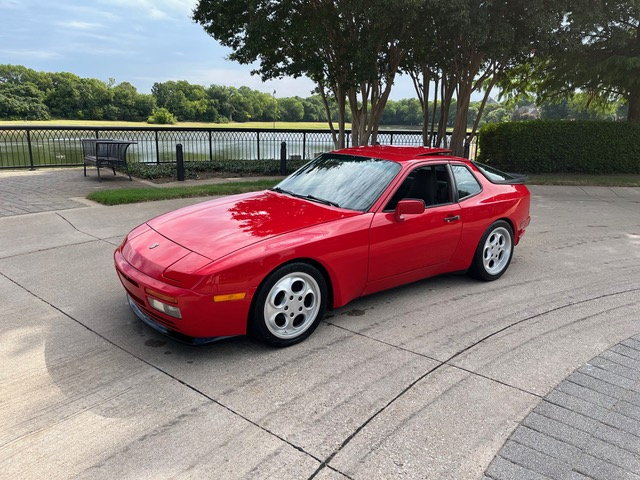
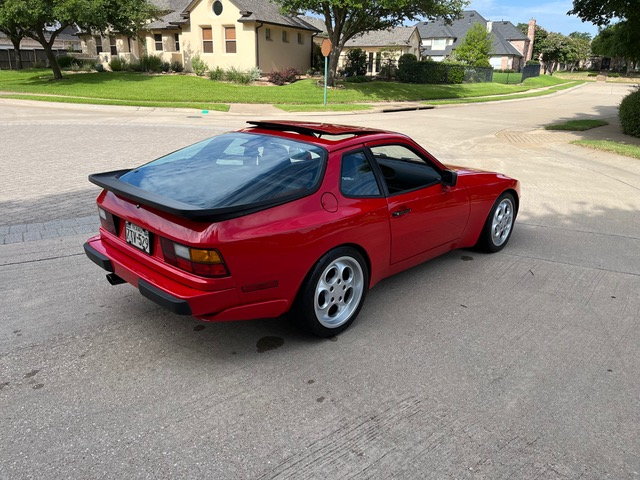
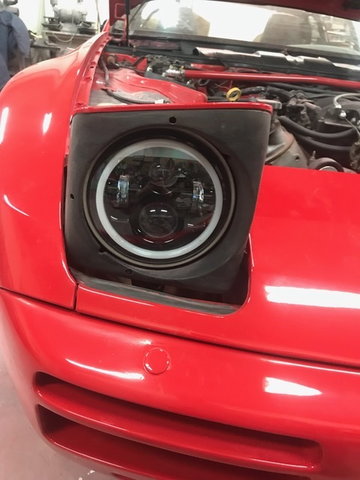
At any rate, the following are pictures taken during the work. Last picture of the car all put back together with the 17” aftermarket phone dial wheels and new rubber. After a month or so it was decided that the wheels need spacers to fill out the wheel wells better. The spacers are here, need to install them after the upholstery work is complete. Also - the headlamps were upgraded to LED, huge difference at night. Almost forgot, the doors aren't sporting the guards anymore, looks pretty clean.
Last - the Turbo badge for the rear was not put back on. Have had no luck finding someone that could make a custom badge in the original script style. If anyone knows someone that could make a "Outlaw 5.7" (or something similar) badge please drop me a DM or reply to this post. Thanks!
We spent some time looking into this and learned a couple of things. First, we haven�t found a 944 LS swap out there WITH A/C. If they exist, they�ve been elusive to us. Second, companies like Vintage Air specialize in this sort of thing, but had a hard time building a complete material list. Some of the parts were on backorder, for example. They also guided that this was an unusual effort � a lot of trial and error including fabrication should be expected. Last, sounds like this would be quite expensive.
The effort�s largest result was delivery of several headaches.
So � this project has become a �fair-weather day� car. The
If anyone has found an easy way, or you know of an LS swap car like this that does include air � please comment or send a DM.
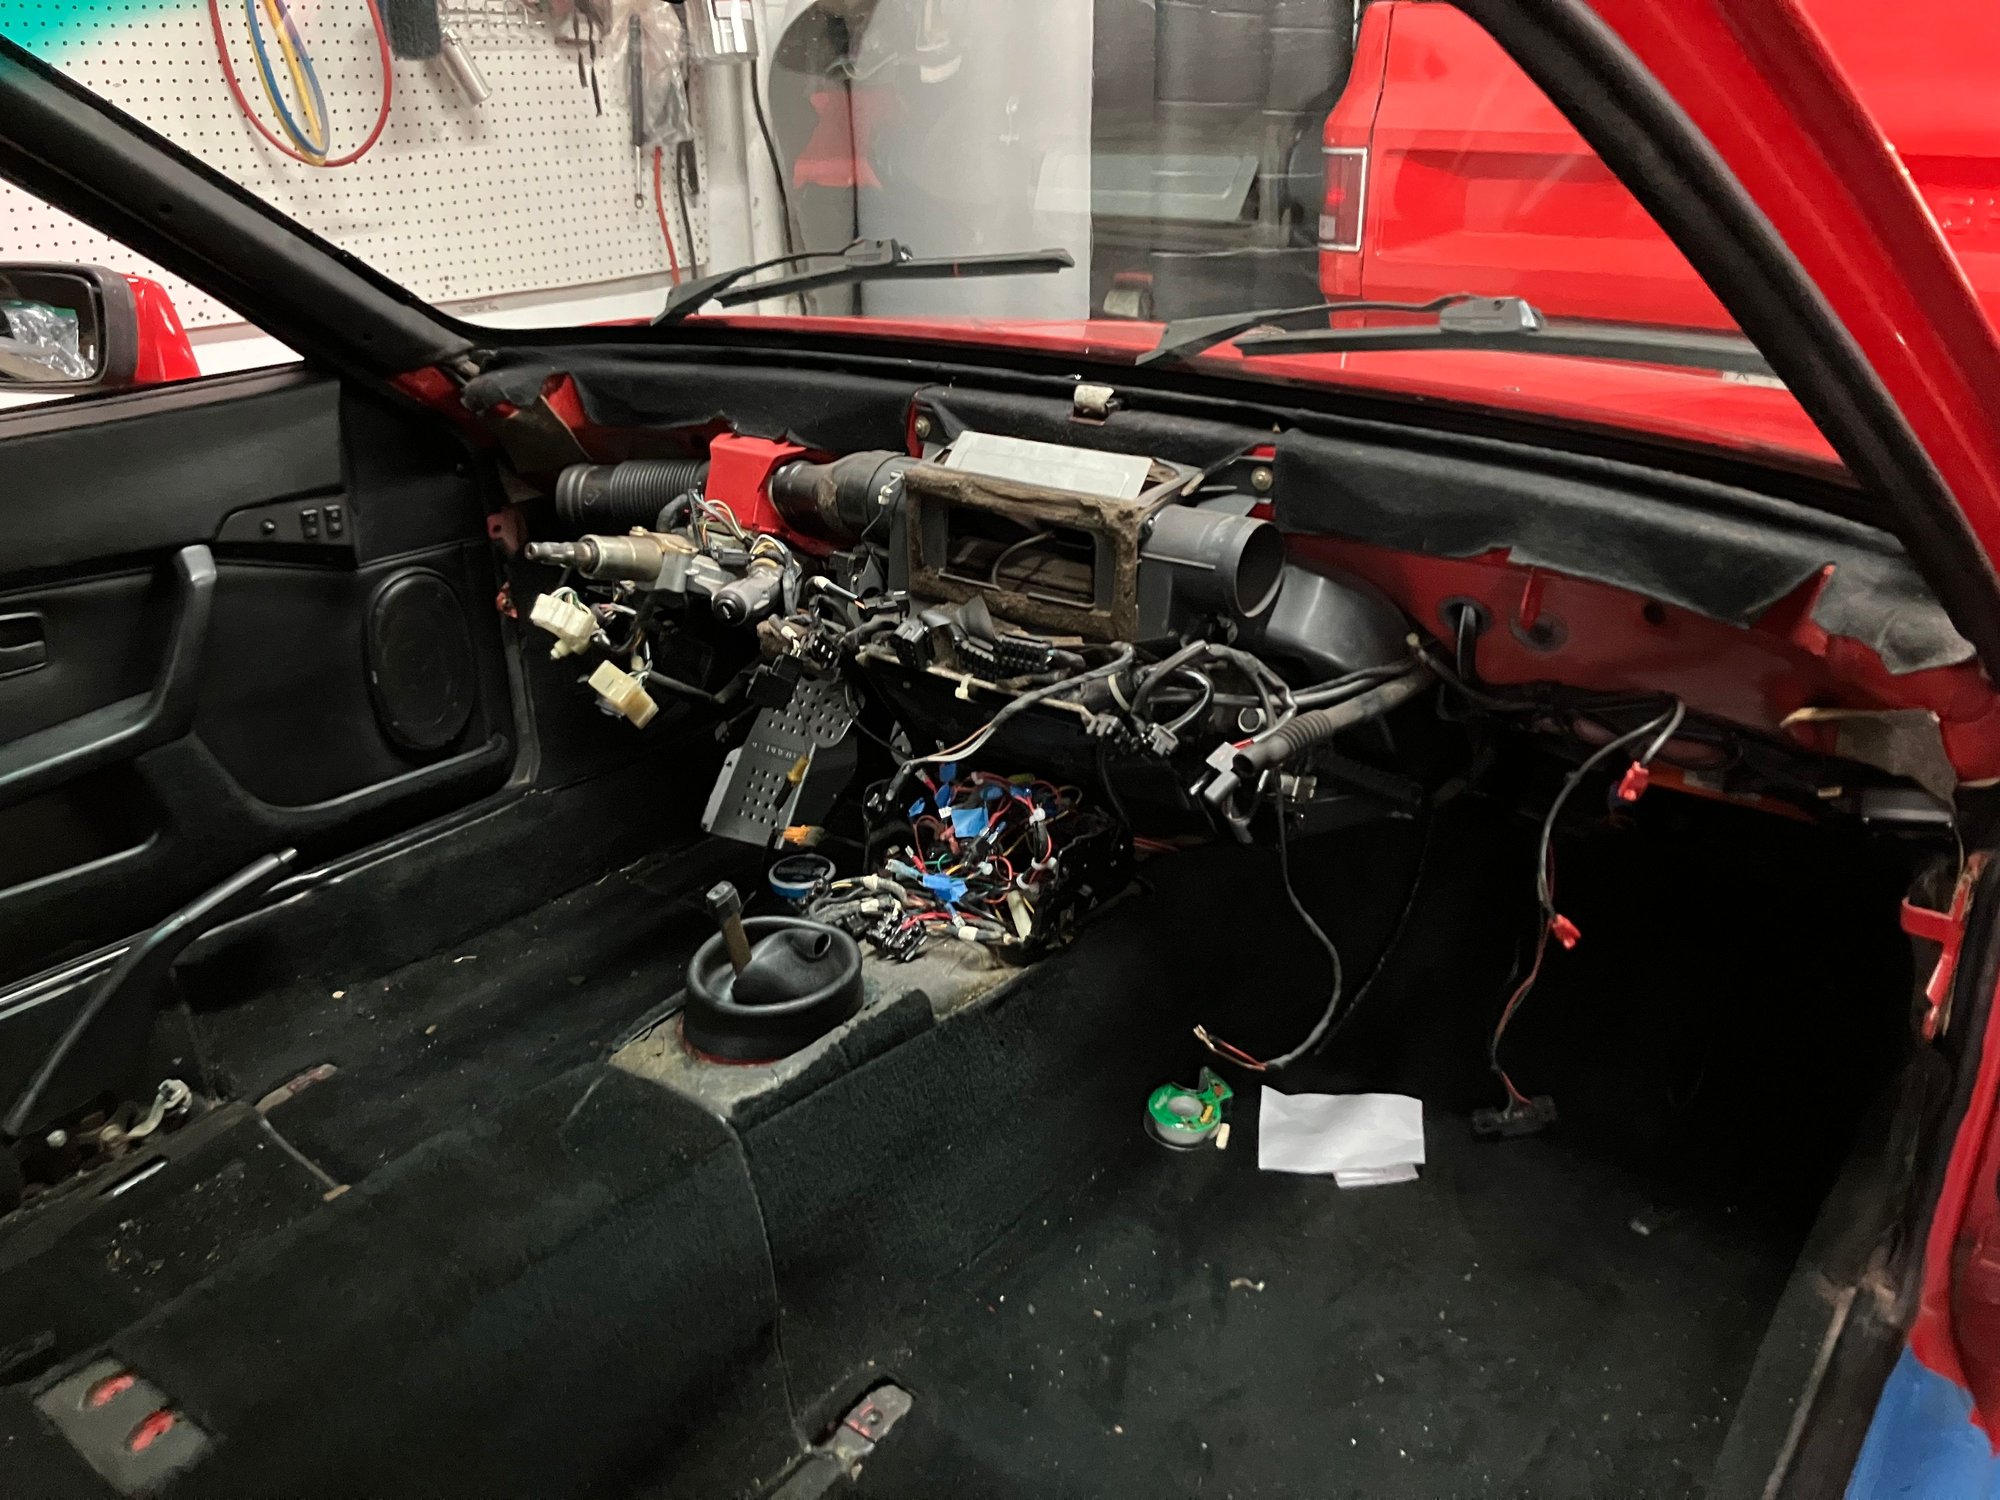
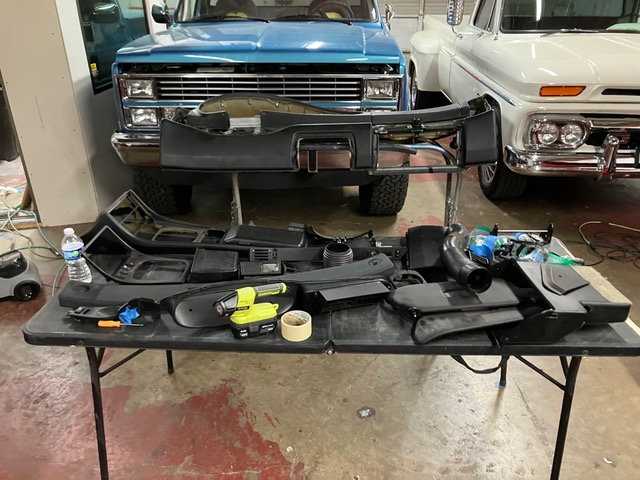
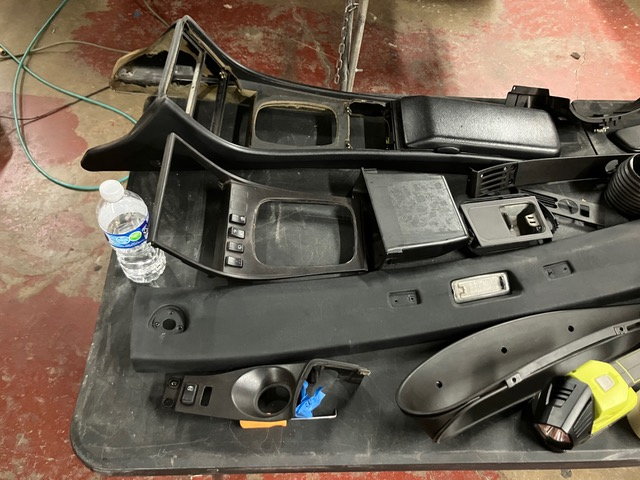
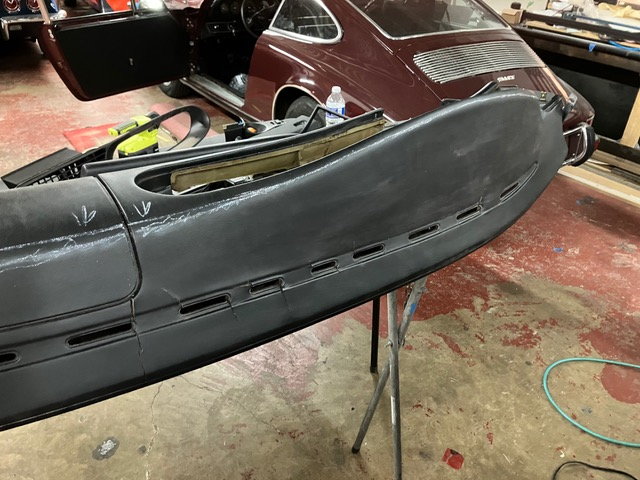
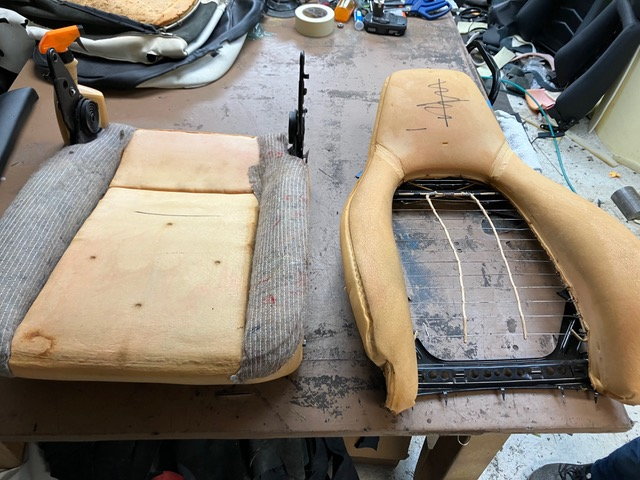
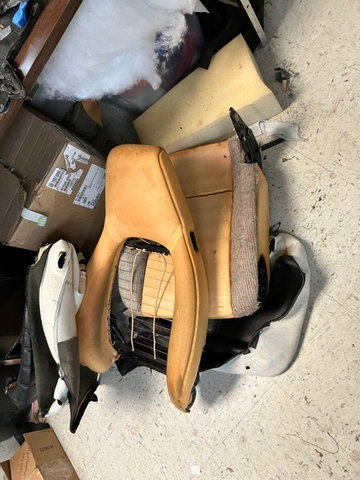
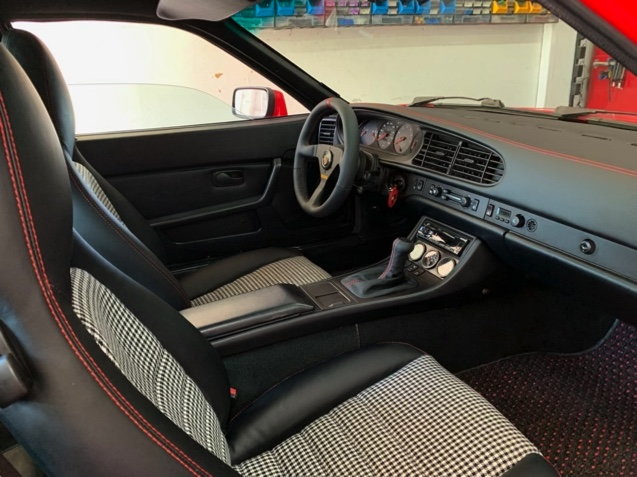
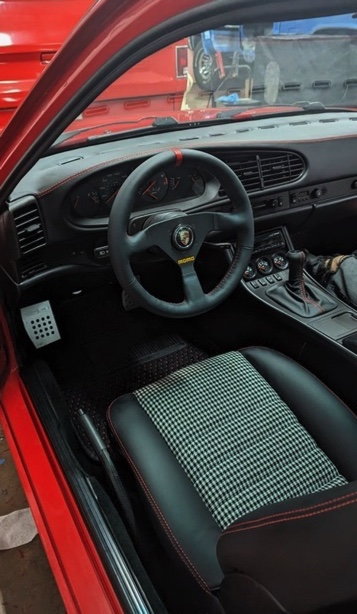
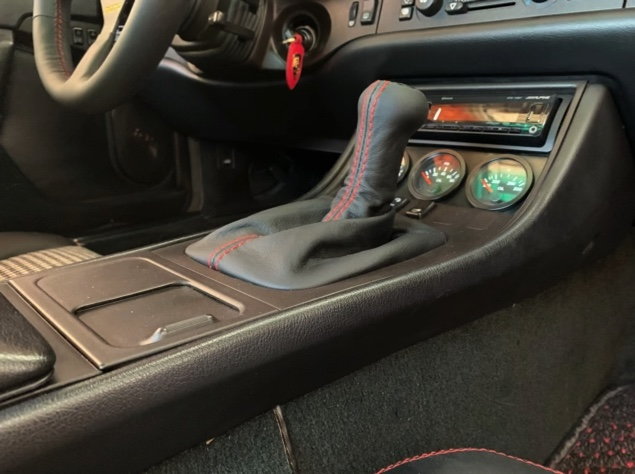
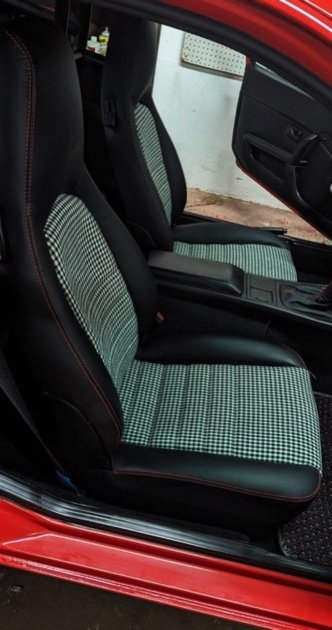
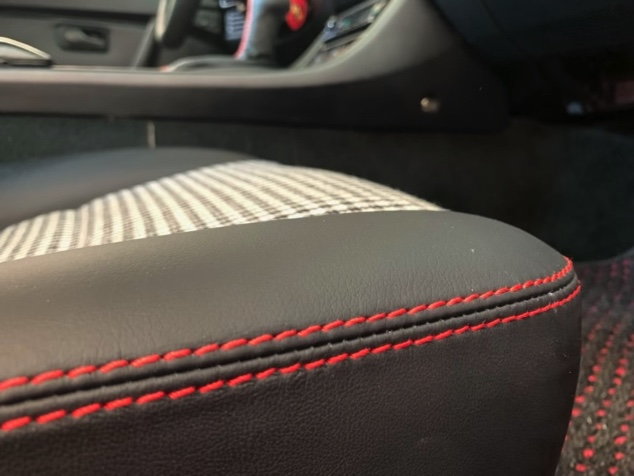
Upholstery work took begun in earnest this spring. We’re redoing the front seats, dashboard, steering wheel, and shifter. This post is mostly images of how much was disassembled. Additionally, we were pleasantly surprised at the condition of the foam and frames of the bucket seats once the original leather was removed. We didn’t have to address any of it, which is a bit unusual....and yes, it made everyone happy.
Got the car back from the upholsterer, and really couldn't be happier. The pictures are fairly representative of the end result, we'll let them speak for themselves.
I do want to point out the clever idea (that wasn't mine) on the dash. The provider didn't like the way the defog vents looked after the dash was recovered, so they fabricated individual pieces to fit down in the slots. The result is really nice. 3D printers are quite cool.
Last step is for a couple of minor items to be addressed like fitting the wheel spacers, fit of the sunroof, etc. We'll get the engine detailed and then we will close the (check)book on this project.
Looking for opinions on the coco mats. Do they work with the new seats, or is there another option that might fit better?
Enjoying watching the project progress, It is looking very nice so far. Could you post more pictures of the dash defog vents, please? Would it be possible to purchase the printed parts or fabricate ourselfs?
If anyone has found an easy way, or you know of an LS swap car like this that does include air � please comment or send a DM.
Someone on here on Rennlist (or Pelican, not sure,) is doing an electric compressor on their 944. In your case, you could consider mounting it in the back somewhere since you have no space up front, running long lines and thick wiring in the tunnel. Hey, the 911 has the compressor in the back and they managed to make it work. Search around and find the thread. Maybe some inspiration to be found.
Enjoying watching the project progress, It is looking very nice so far. Could you post more pictures of the dash defog vents, please? Would it be possible to purchase the printed parts or fabricate ourselfs?
Thank you
Here's another picture, perhaps this helps. Also, Xtitch did the work here in DFW, maybe they'd crank out a few for you or provide the specs for DIY - not sure. Ask for Enrique, he just finished the work on the car, should be fresh in his memory.
Great work! The project turned out really well as an outlaw that still respects the original aesthetics. Did you match the rear seats?
Good question - Since the bottom half of the rear seats are removed for the roll bar, we decided to leave the remaining backs alone. We felt that it wouldn't look right, draw your eye to the back seat where there really isn't one.
The project's basically complete.......for now. We're still waiting on a couple of super minor parts (like a new sunroof button) but for all practical purposes the checkbook is closed! One of the big differences in these photos compared to previous posts is the wheel spacers. 21mm hub centric units sourced from Pelican push the wheels out just the right amount, and there's no rubbing or any other nonsense. Think the car looks much better.
Maybe in the future we'll try some additional cosmetic wizardry like prettying up the engine compartment, but for now it's time to drive and enjoy.

 04-30-2023, 09:16 PM


 Search around and find the thread. Maybe some inspiration to be found.