When you click on links to various merchants on this site and make a purchase, this can result in this site earning a commission. Affiliate programs and affiliations include, but are not limited to, the eBay Partner Network.
This is going to be a how-to guide on how I retrofitted the wiper motor on my 87' 924S.
To start with you will need basic hand tools, a voltmeter of some kind, spade connectors (male & female), appropriate electrical wire, electrical tape, some kind of cable sleeve to contain the pigtail, and some kind of saw to make minor modifications to the new motor. In my case an oscillating saw worked just fine. A hacksaw or angle grinder I'm sure would work just as well.
Also, you will need a solid handful of fuses as you will instapop your fuses if you make a mistake, and, if you are like me, it will take a bit to figure out what you did so you're going to eat fuses like the cookie monster.
Right, on to the fun part.
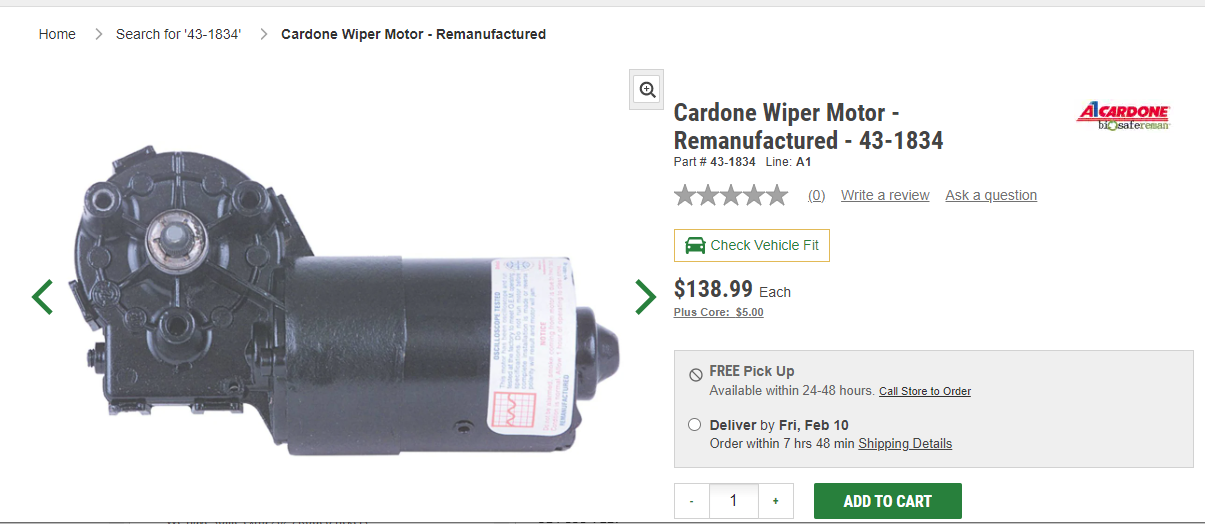
Why did I do this? Well, mine died, and I couldn't find a reman one and getting another used one off ebay was both silly expensive and I had no way of knowing if that motor would even be any good. So I took a chance on looking for a VW wiper motor that might work. Most of the plastic components in my 924S have VW and Audi stamps in them and I had used a VW Rabbit door handle to replace one of mine when the mechanism broke so I was hopeful that this would also work out.
Now, that picture is not exactly what the one I received looked like, but the part that bolts to the wiper bracket looked right enough, so that's all I cared about. The website shows only 2 wires and 3 pins. Thats not what actually is on there. This reman motor did have 5 pins although they were much smaller than the blades on the Porsche one.
If I had to do it over again, I would do this step next, which is the opposite of what I did, but would have saved me a ton of time.
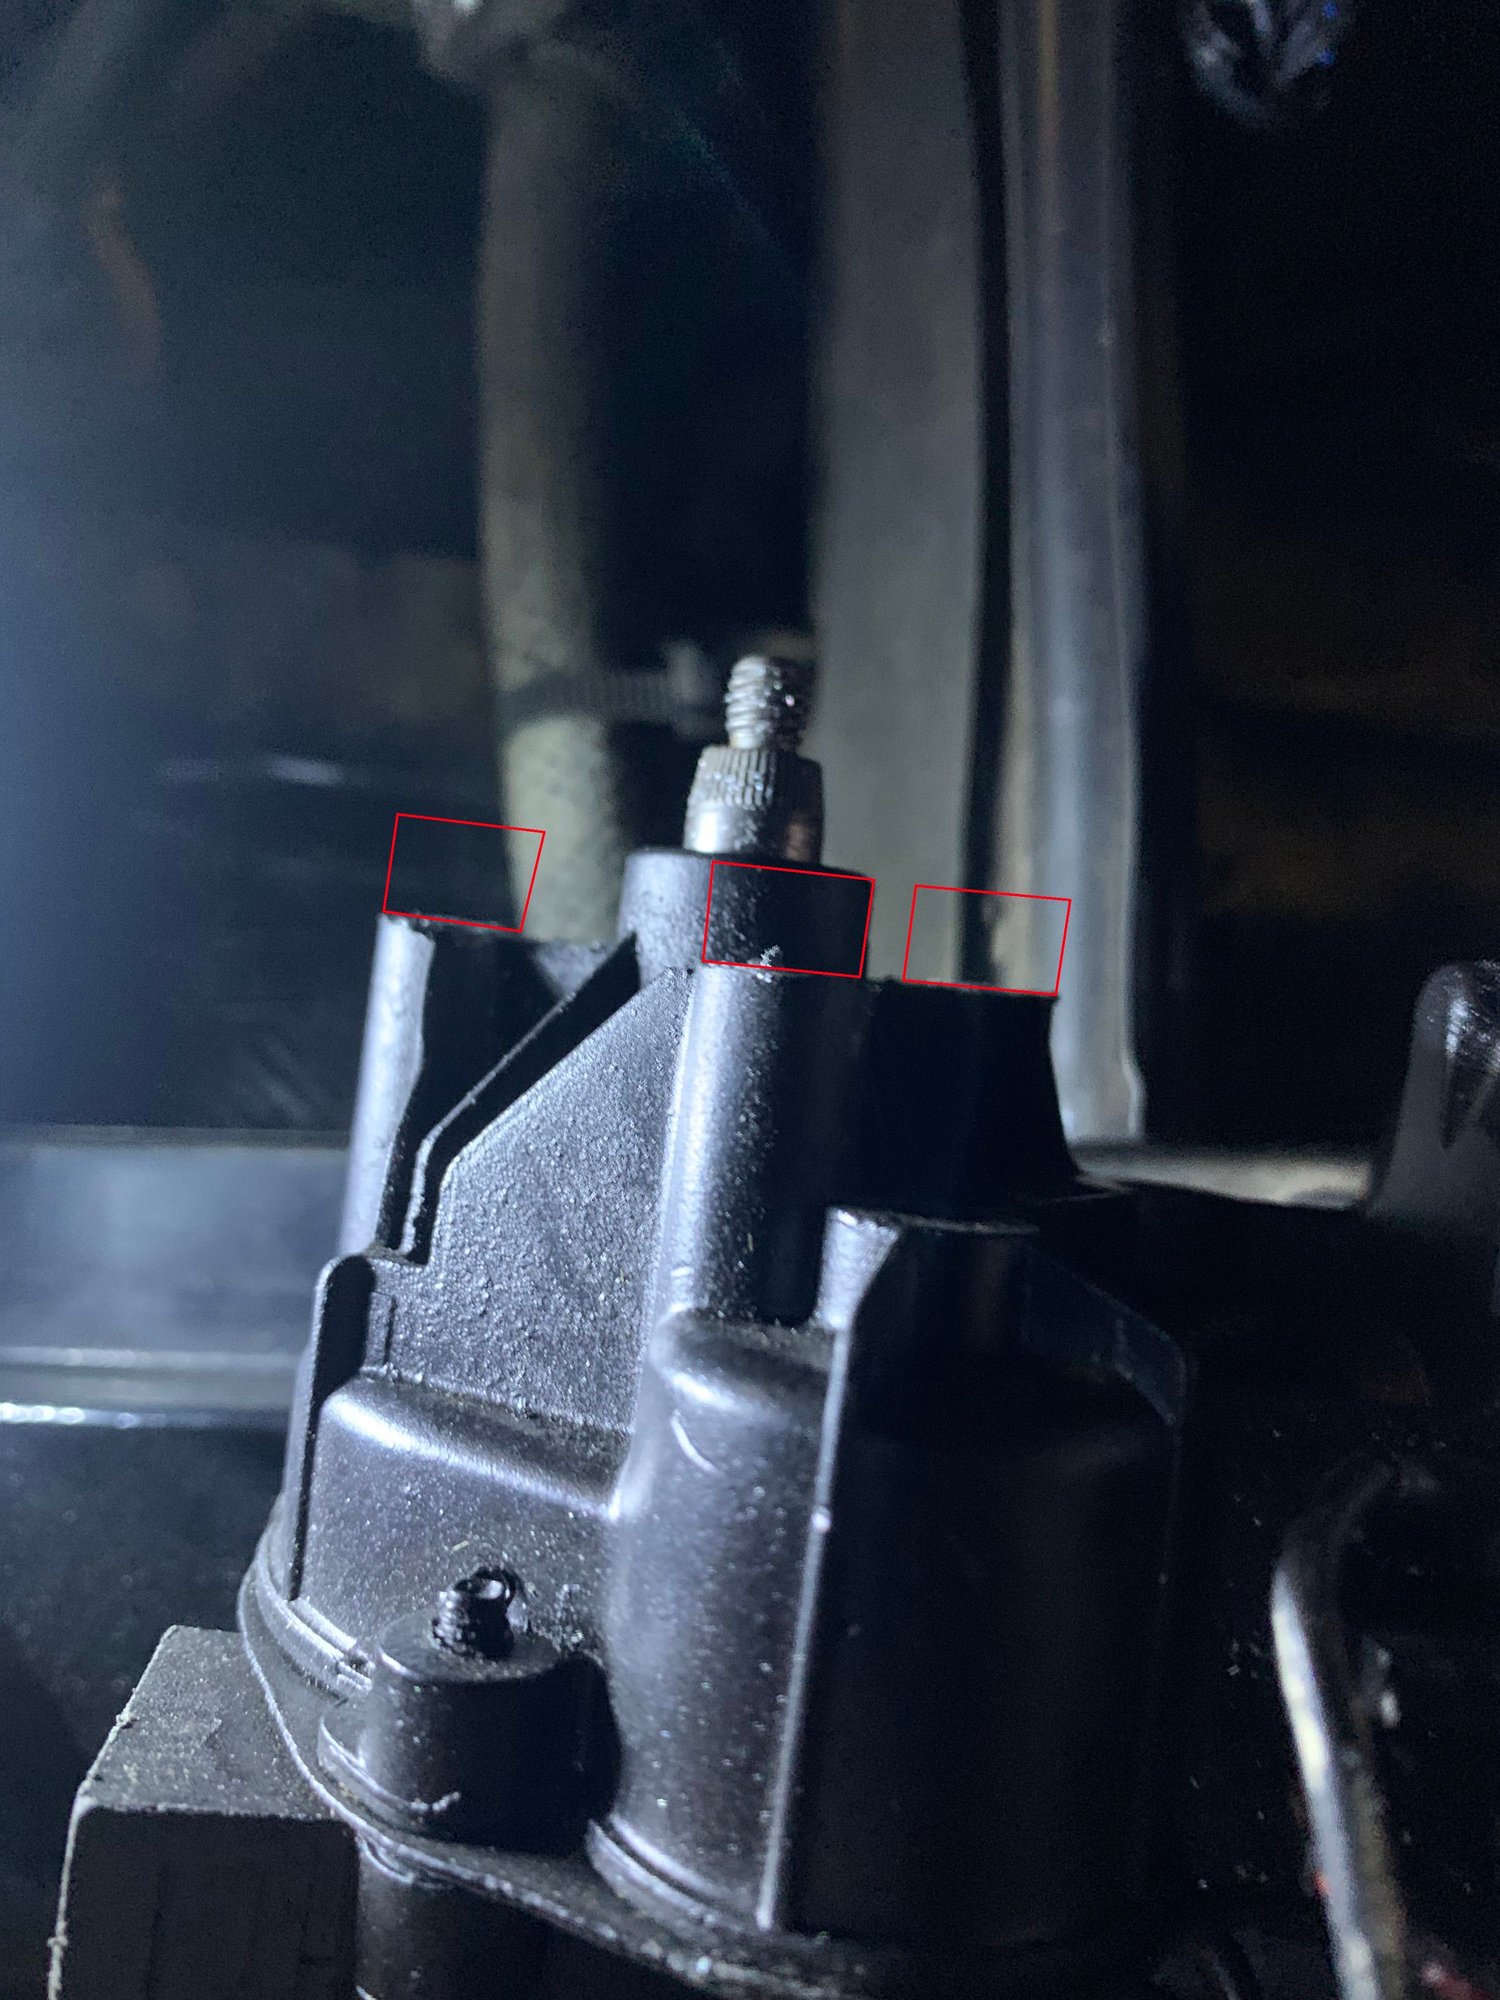
So, the three mounting studs on the aftermarket motor are too high and need to be cut off to allow the wiper arm to move once its all connected. You can measure the exact distance you need or just chop if right where the support fin merges with the stud. The little red boxes are the parts I cut off and it worked fine. You have two hemispherical joints between the motor and the pivot point on the wiper mechanism so you can afford to be not super exact here. Note: If you are reusing the OEM mounting bolts you will not bottom out after cutting it.
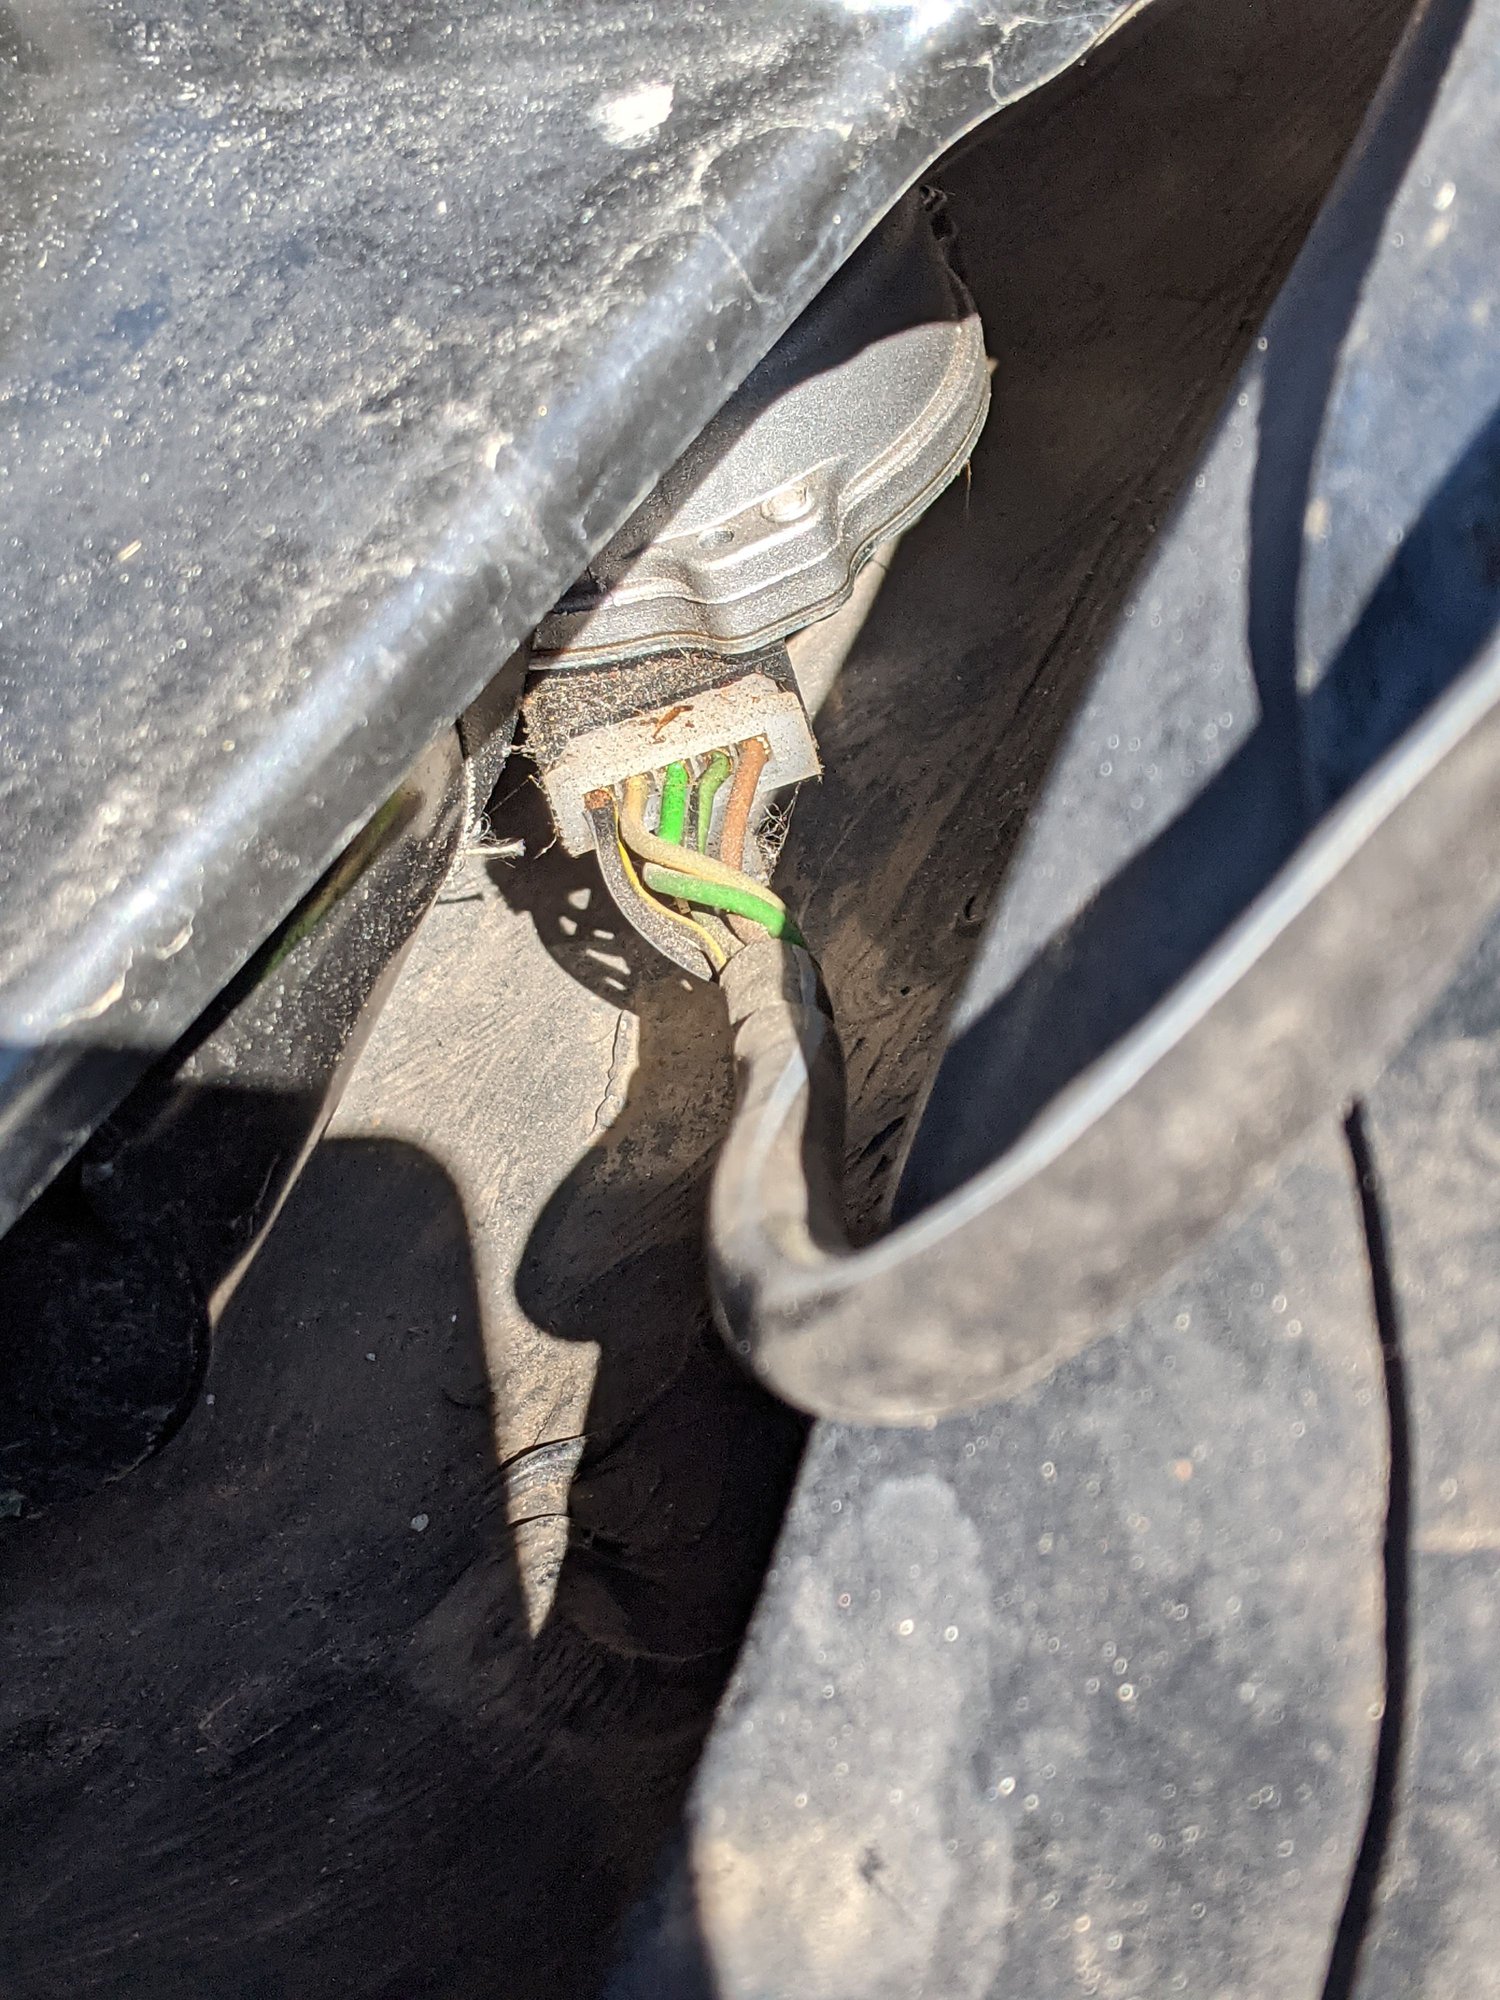
With that done you will need to make about a 12-14inch long pigtail to allow you to mount the motor with the wires already attached to the motor because getting them on there while it's in place is an exercise in frustration. The reason it's so long is that the connection on the aftermarket motor is on the "outside" vs the "inside" on the OEM motor.
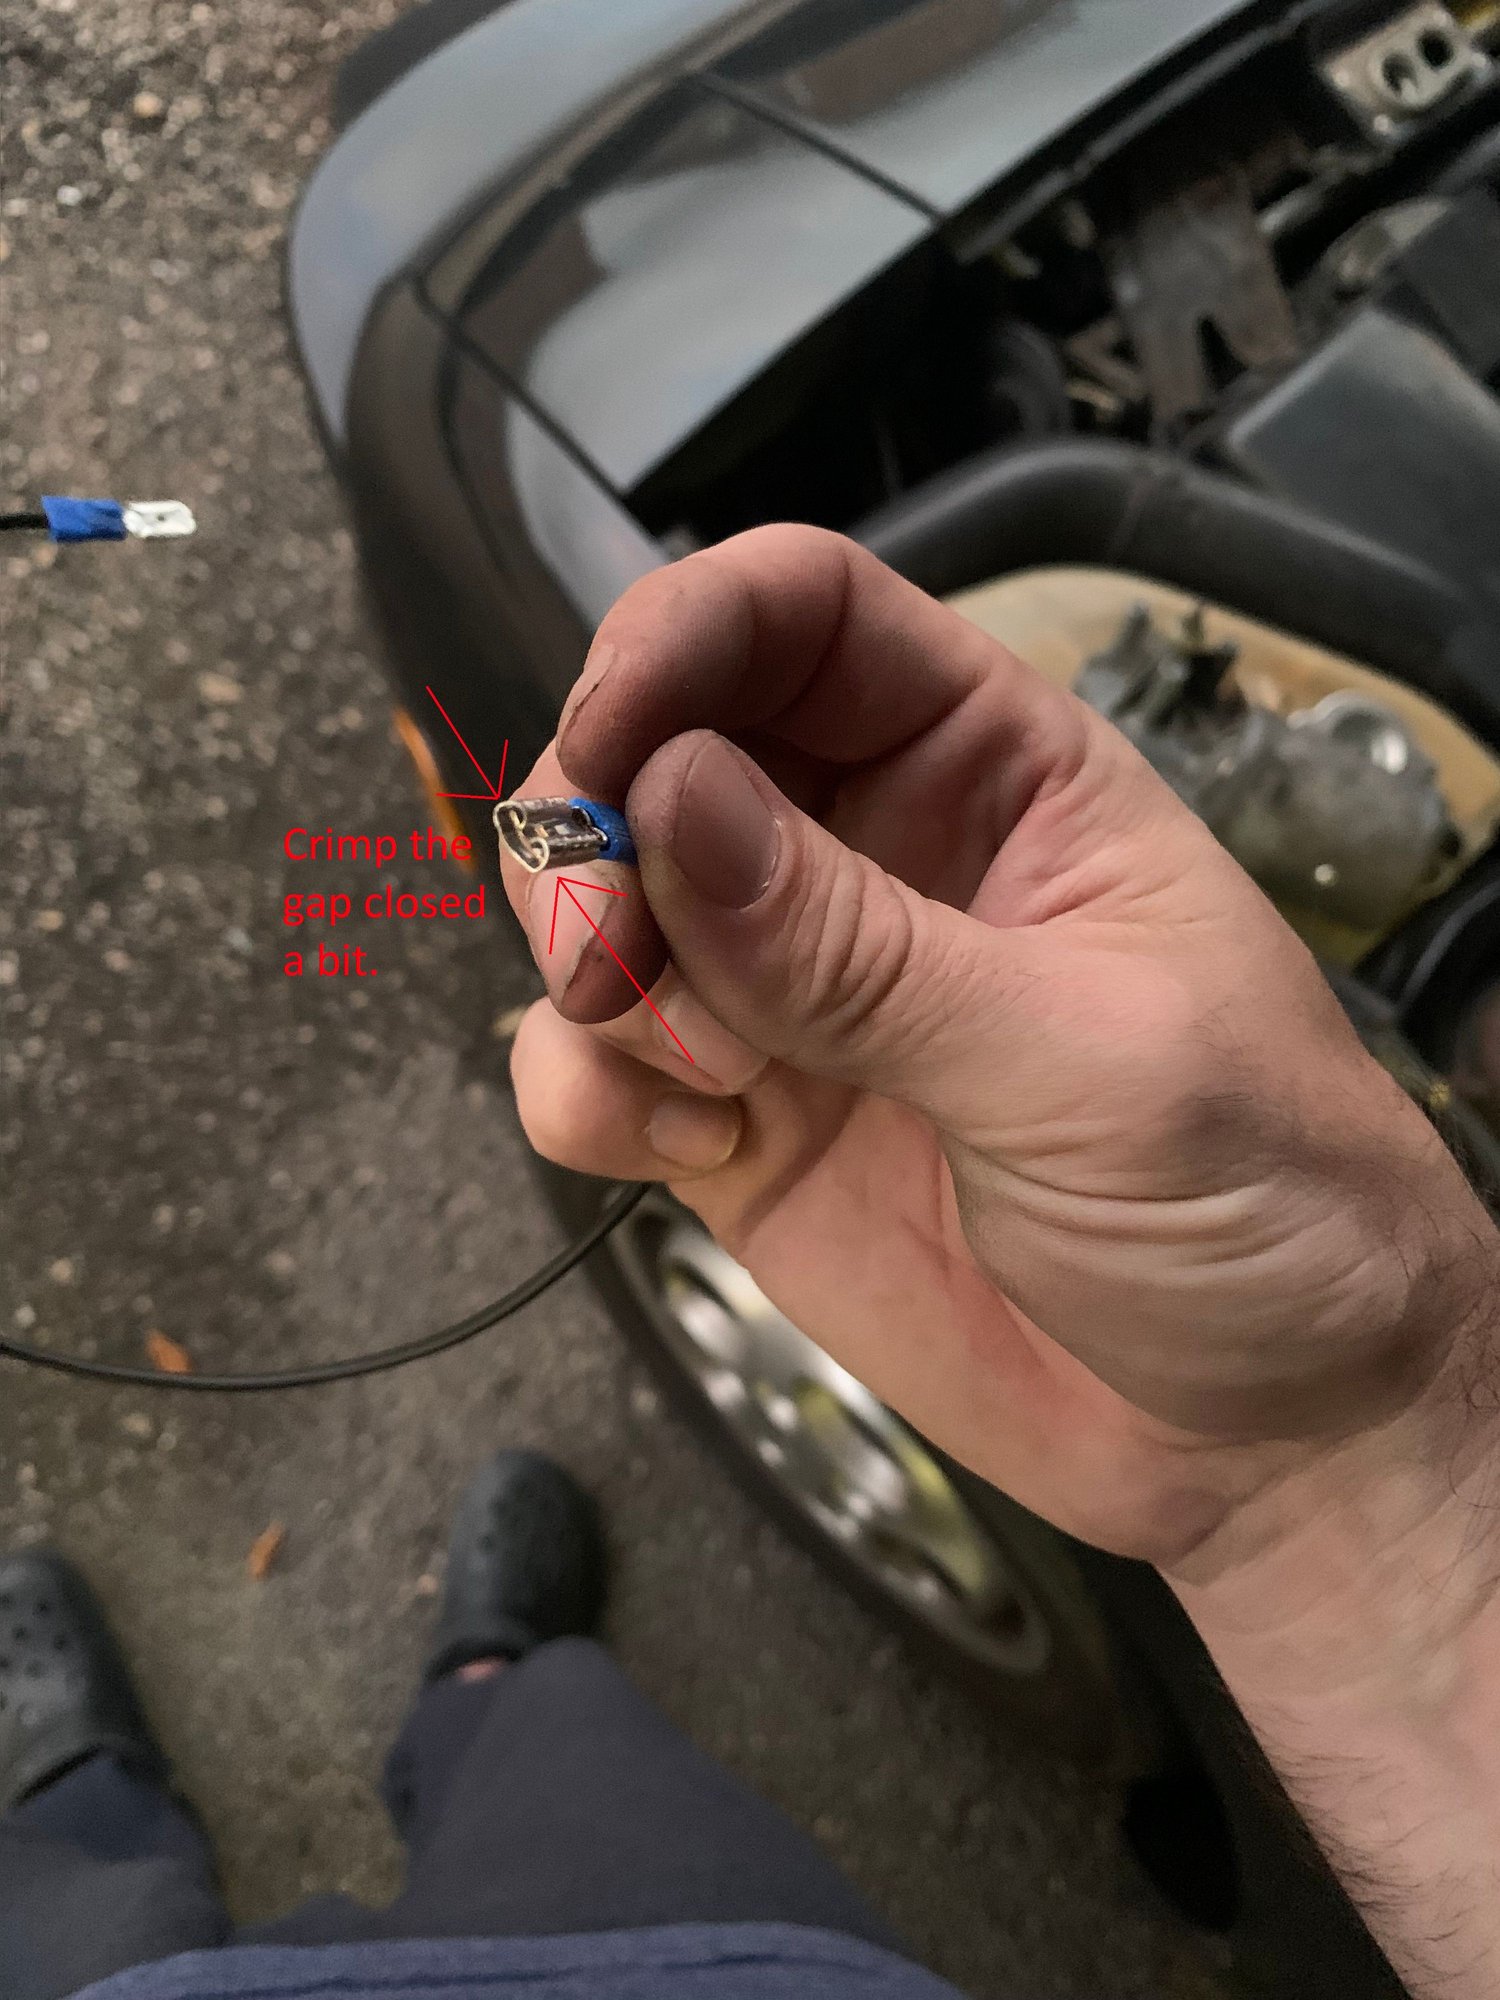
I took a stab at using regular male and female spade connectors for mine, which worked fine actually, but you do need to crimp the female connectors closed slightly or else two things happen. The first is they don't really fit in the plug space and keep wanting to go in at an angle, which then prevents you from putting all of them in due to lack of space, and the second is they tend to slip on the narrow motor pins and short out, murdering your fuse in the process. Crimping the gap closed a bit on the female ends makes just enough space to get them in straight and holds the pin snugly so it won't come off or move. I put a picture below to show what I mean.
Once that's done, get to matching which wires go where on the motor. If you have an OEM motor it's easy to put it next to the aftermarket one and go from there. Note: The aftermarket motor I used had 5 pins and 4 wires coming out the back of the little plastic plug housing thing. The one without a wire coming off the back of it is the ground for the aftermarket motor. This corresponds to the center blade of the OEM harness plug. Start with that one and work your way around the OEM plug. Since you can't test anything to see if you did it right without the ground and getting my fat fingers in the middle of the plug just wasn't gonna happen with the other 4 wires already in place. Turn the ignition on and set the wiper motor indicator on "low" and test with the volt meter to find out which blades on the OEM motor go to which setting so you can make adjustments later if you get it wrong. It wasn't super intuitive which of the wires on the aftermarket motor went to the "high" speed setting vs the "low" speed setting. I started by trying to match what I saw on the OEM motor and got lucky that it worked first try, if you get it wrong, my recommendation would be to flip the connection at the OEM plug side not the aftermarket motor side since it's such a pain in the *** to get the connectors back in there.
Very Very Very important part here. Your connectors will 100% be touching each other inside that plastic receptacle on the aftermarket motor. You will need to wrap 1 layer of electrical tape(2 max) around the end of the spade connector before you stick it in there or you will short it. IF you remove a connector for any reason, save yourself the headache and take off the tape and put new tape on it before sticking it back in there. Sounds stupid but, just do it, these things will end up in there nice and tight and getting them in and out tears the tape up just enough to warrant putting new tape on it (many many fuses were sacrificed until I did this and like magic that fixed it, even though most of the tape I removed looked fine).
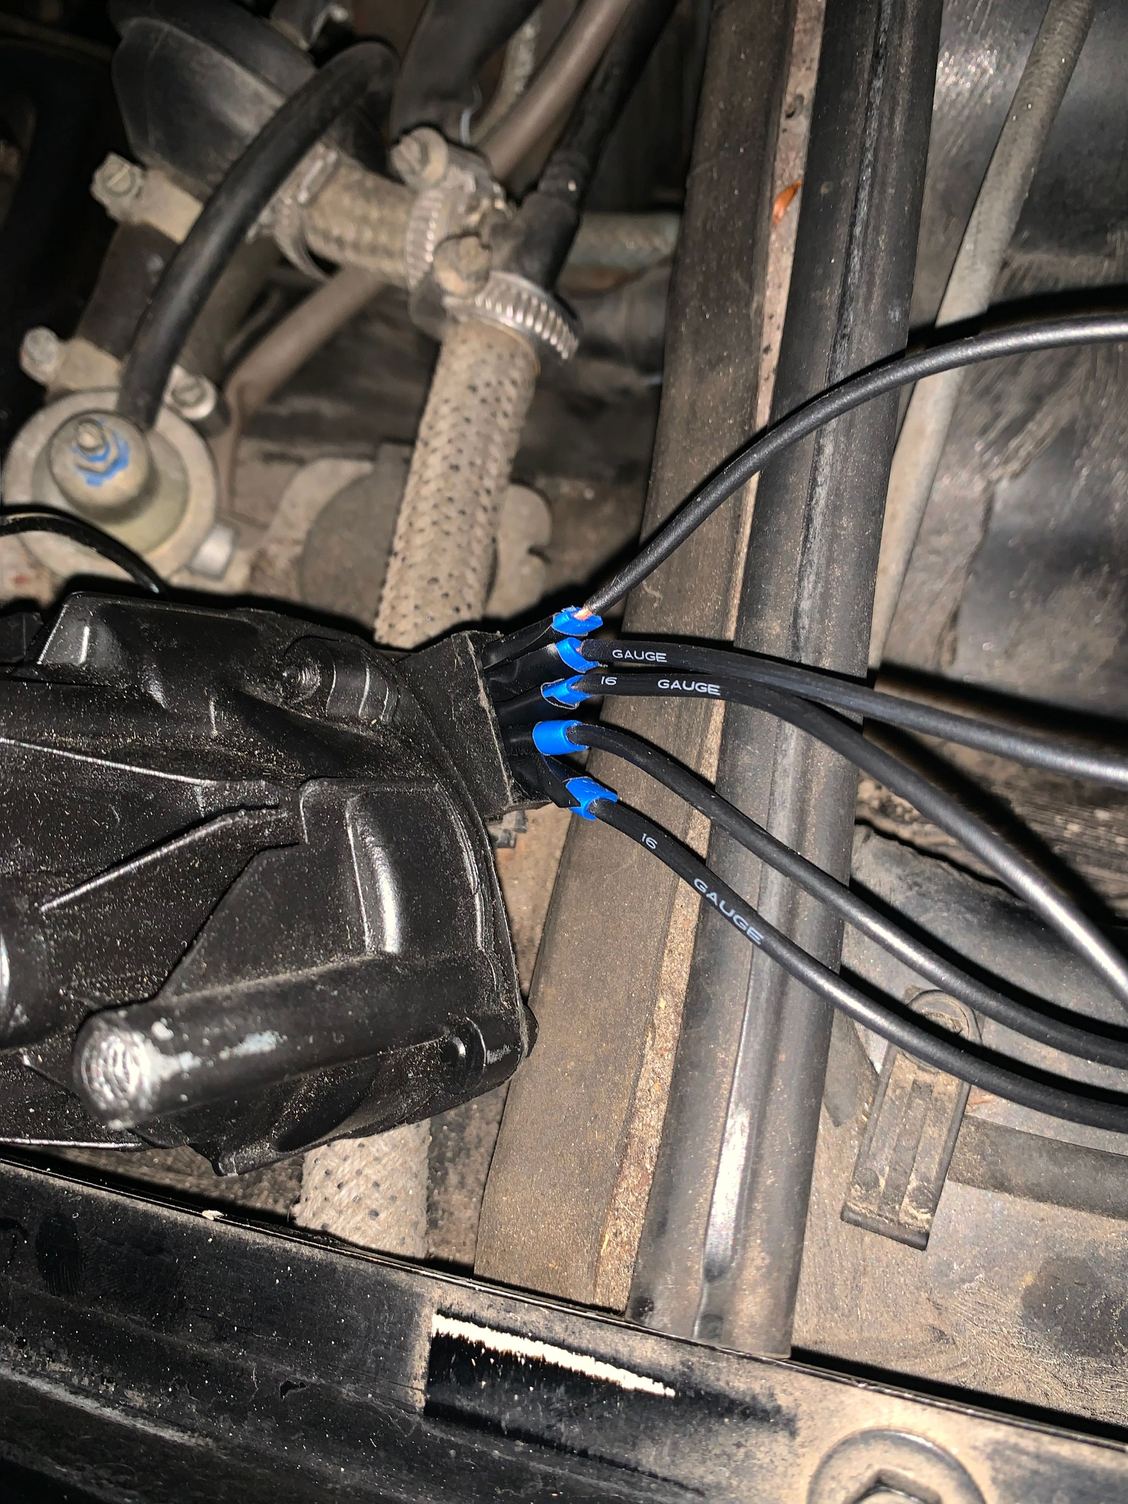
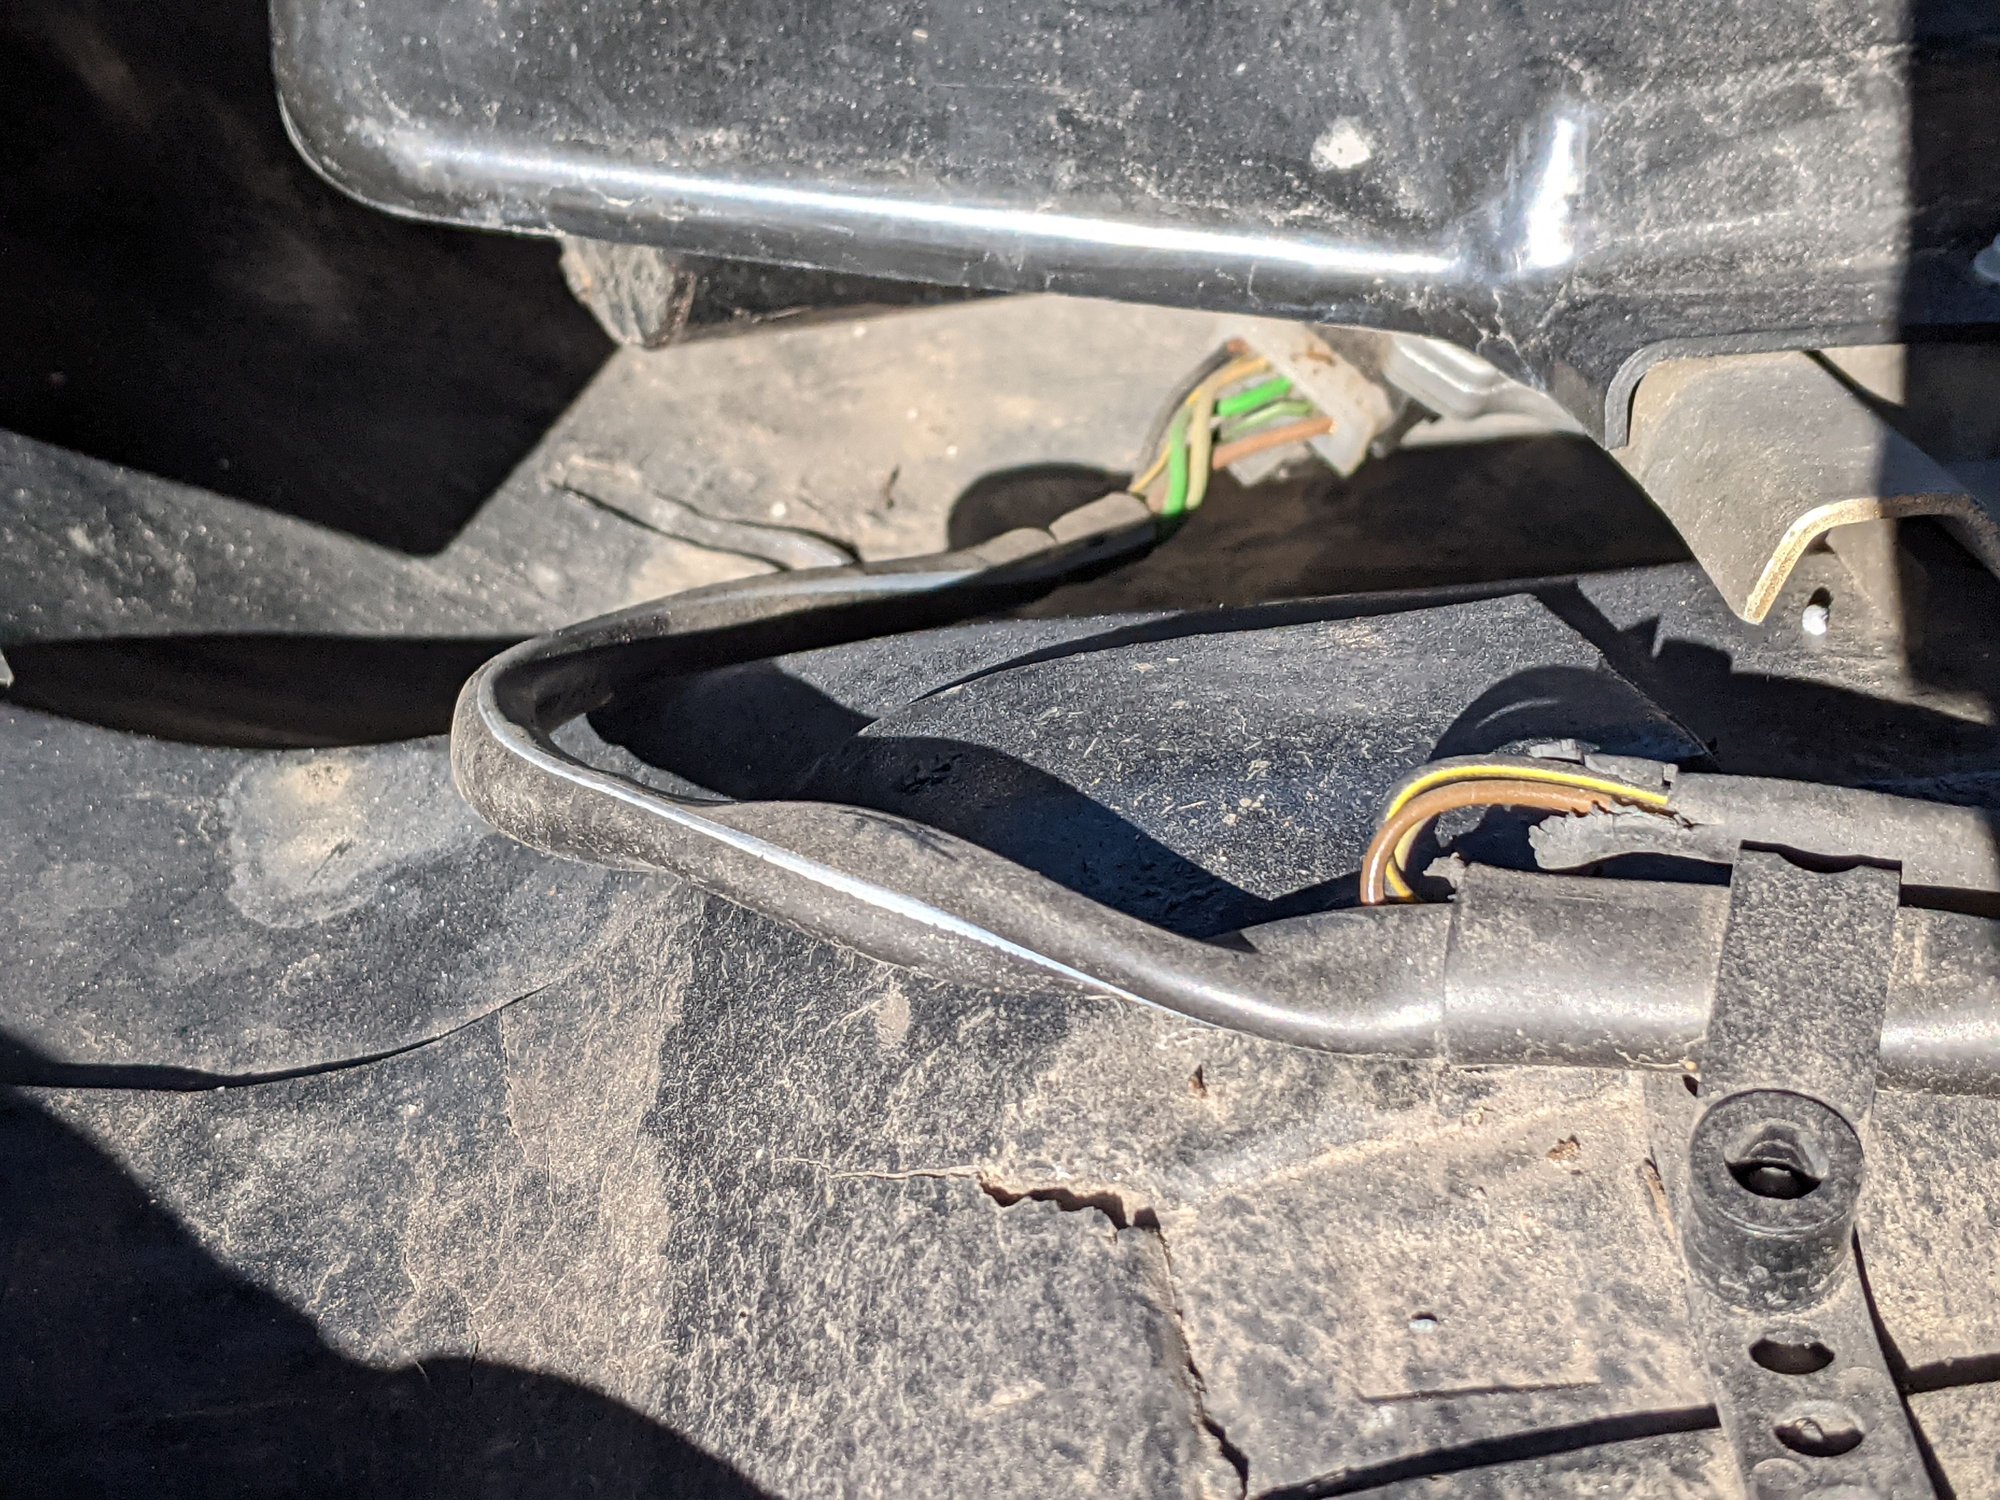
When you are done you should wind up with something that looks kinda like the picture below.
From there, put your cable sleeve on and secure it to clean the pigtail all up and make mounting and securing it easier. I chose to put some tape over the connection to the motor and OEM plug just for good measure. If you had been testing as you go up to this point you should have no issues once it's in place(I would test it before connecting the mechanism anyway just in case). I chose to run my pigtail up towards the firewall, over the back of the aftermarket motor and back to the OEM plug because that was just the easiest way to get it in there without bending the motor connection ends a ton. It also just looked tidier to me once it was done so I left it.
That is correct, but I have not been able to get one of those. Signed up for the waitlist a few months ago and still nothing so I decided to do something so I could have working wipers.
I used a '93-'01 VW Jetta motor and it worked grear. I had to change the connector to match the motor, but didn't have to extend any wires. It's been in use for a couple years now and works much better than my factory original, which were said to be very slow even when new.
In my experience, you will have to modify the wiper assembly to get the VW motor to bolt down flat. Also, the VW motor uses a 13 mm nut to attach the crank for the assembly.
In my experience, you will have to modify the wiper assembly to get the VW motor to bolt down flat. Also, the VW motor uses a 13 mm nut to attach the crank for the assembly.
The VW unit I used has an 8mm thread on the output shaft. The OE Porsche arm fit perfectly.

 02-07-2023, 11:37 AM