When you click on links to various merchants on this site and make a purchase, this can result in this site earning a commission. Affiliate programs and affiliations include, but are not limited to, the eBay Partner Network.
Project Decent Tunes
This project started a while back as an idea.
The plan was to fit decent speakers into my 952.
I used Dynaudio speakers in my National sound quality winning system and so decided that was the go for this project, because I still had the mid domes and crossover and I like their warm neutral accurate sound. I sourced the required tweeters and mid-bass drivers and decided due to lack of space the 5 3/4" mid-bass would be as big as I could go.
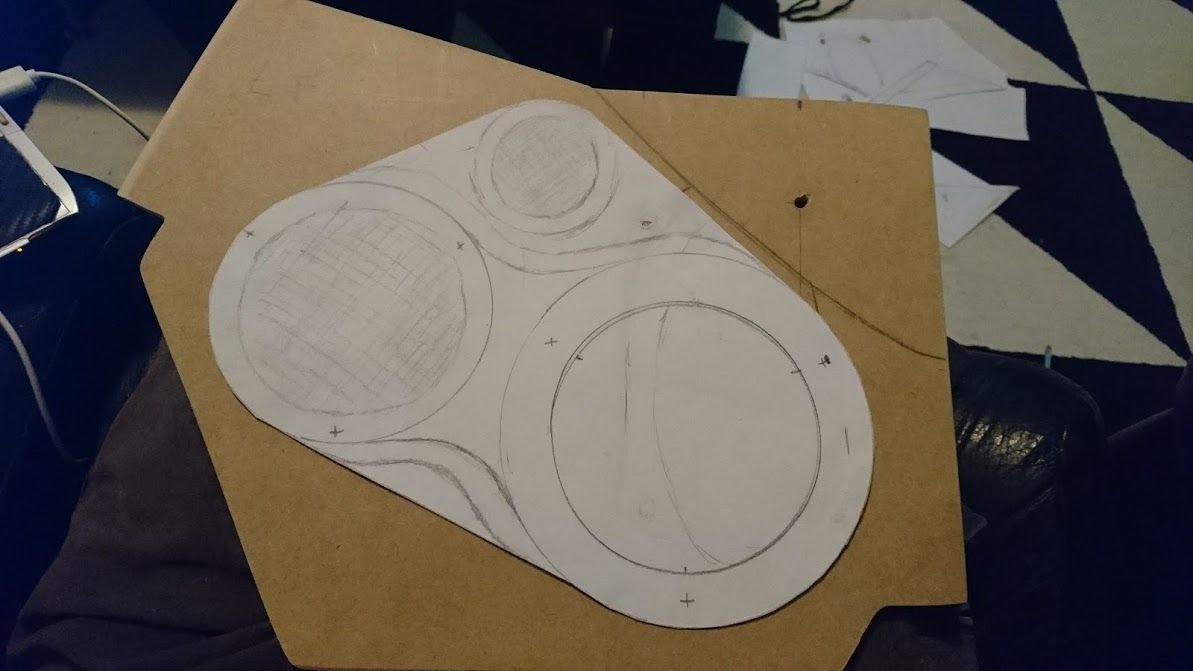
Next was to work out placement and this involved doing a sketch. I already had the design in my head, so time to put it on paper, which I could then use as a template
sketch template
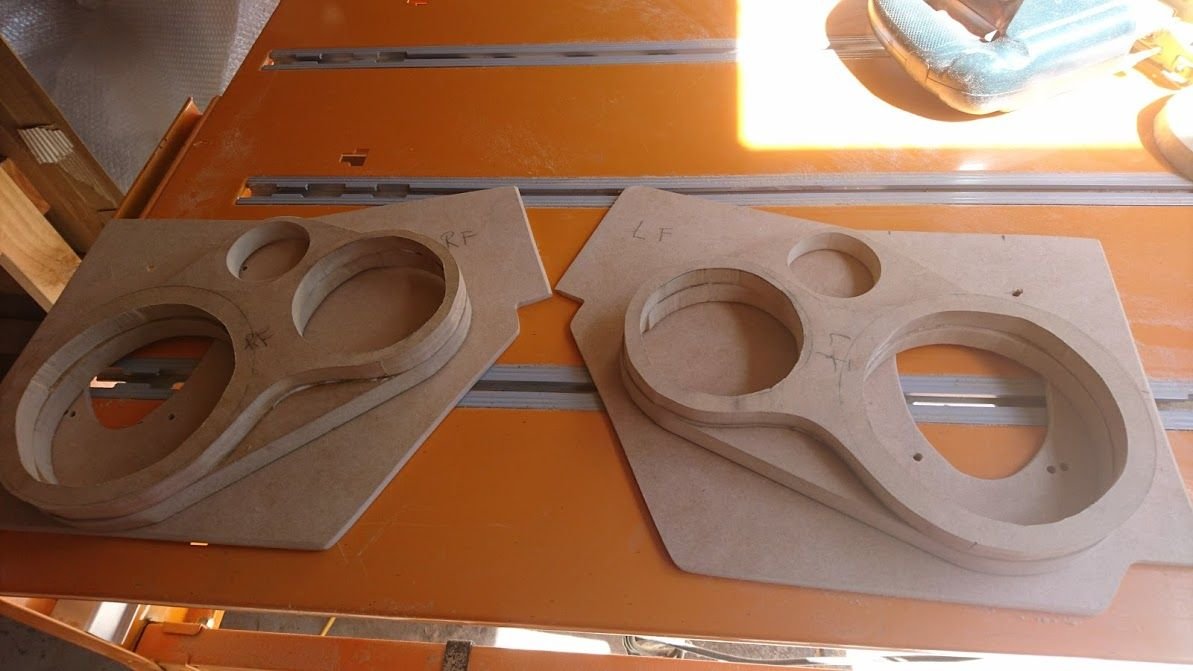
Then it was time to transfer this to some MDF
I used 6mm for the base plate. This will be mounted to the door using the original speaker mounting points, so no holes are cut into door
base boards
I then cut holes for speakers to vent into doors and aligned the mounting holes(not and exact science )
Yeah I missed on one hole
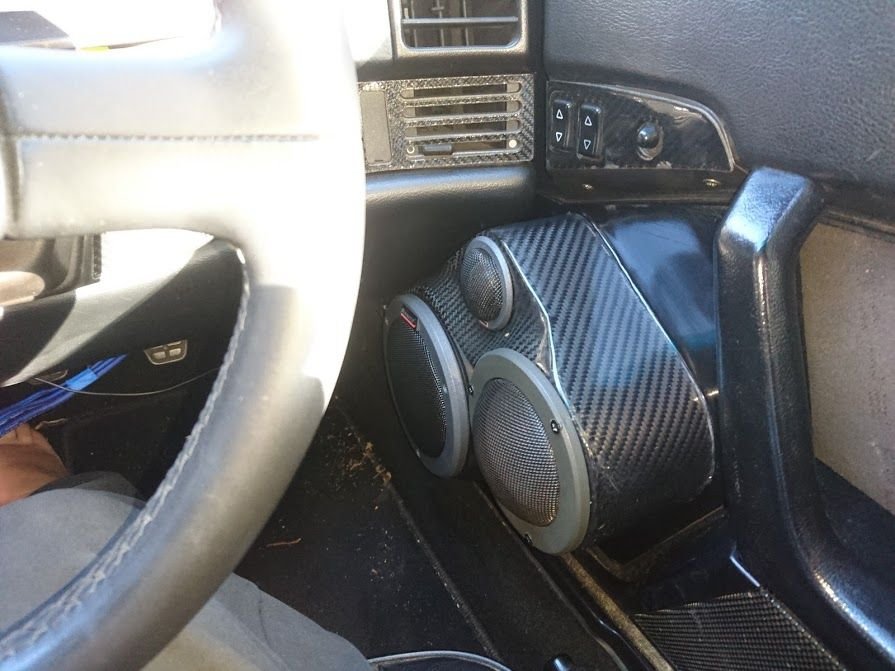
Then deciding location of pod and checking it will clear the dash
millimetres to spare
Last edited by Cyberpunky; 02-10-2018 at 10:19 AM.
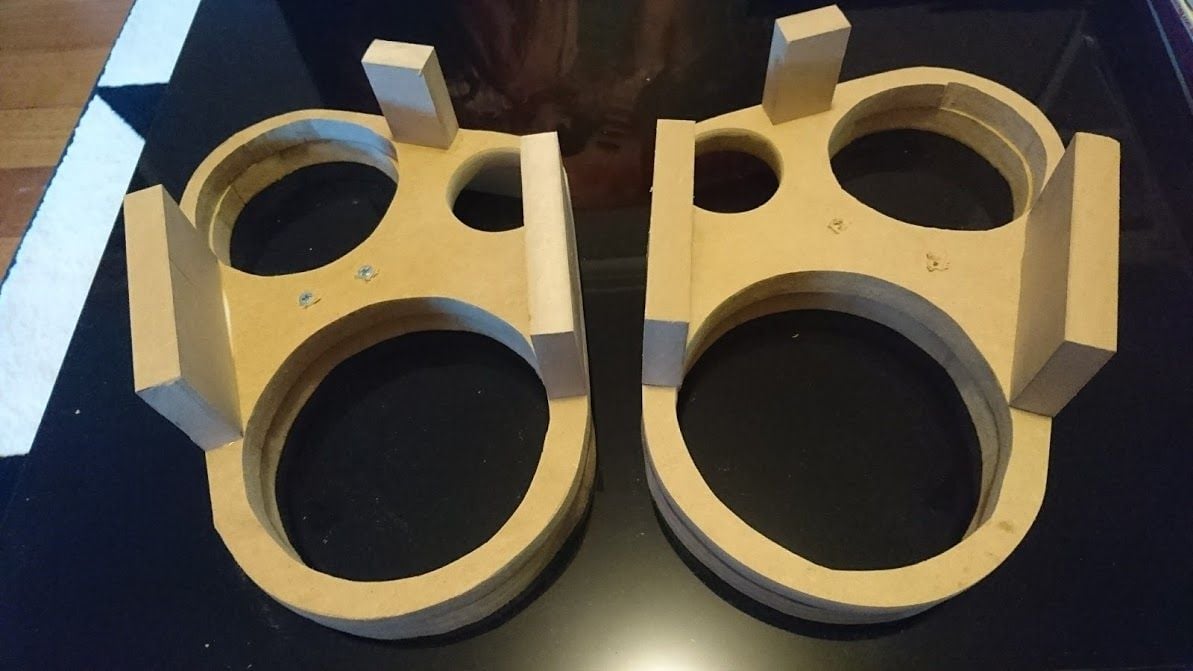
Then I made the baffles that the speakers are mounted to.
I used a larger piece that tweeter will be mounted to, to offset the tweeter and help physically time align the speakers a little and then mounted a top piece for the mid dome and woofer
speaker holes cut and boards will be glued together using PVC glue
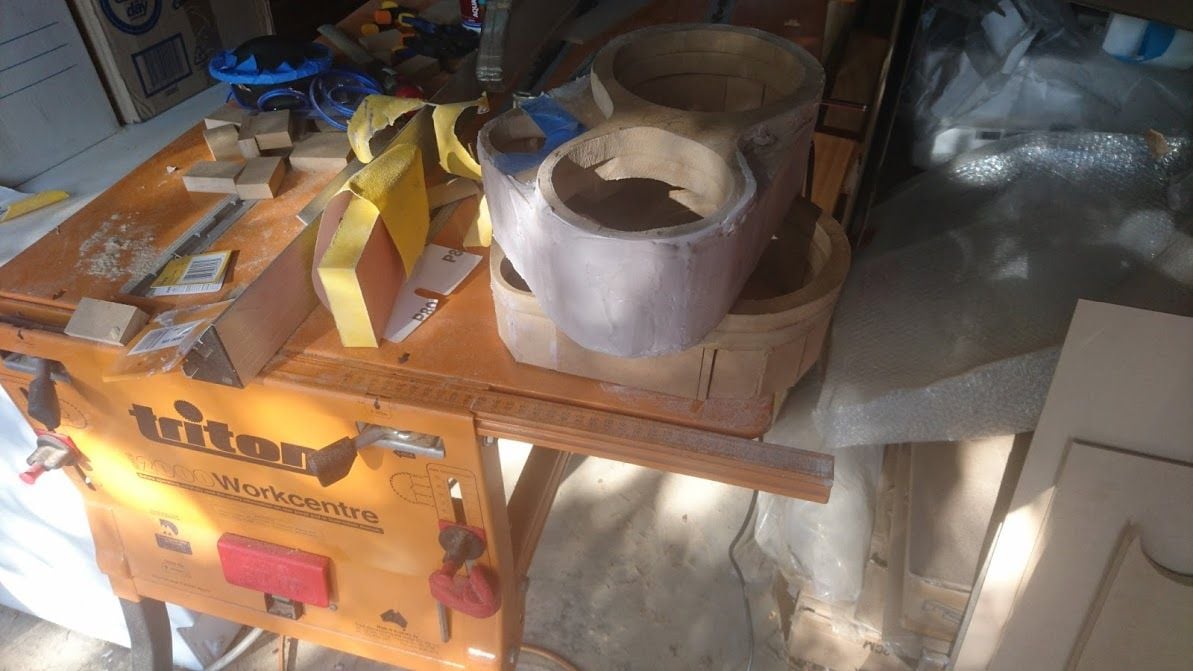
Then turning straight edges into curves.
We call it bog but it is just auto body filler. I used a lot of it and sanded a bit....well weeks and weeks actually
First layer
Starting to take shape.
I swapped from cheap filler to Rage gold. Huge difference. So much nicer to work with and to sand.
Fill, sand, repeat. Then sand sand, sand, repeat....
Rage Gold ftw
Now they are starting to match what I designed in my head
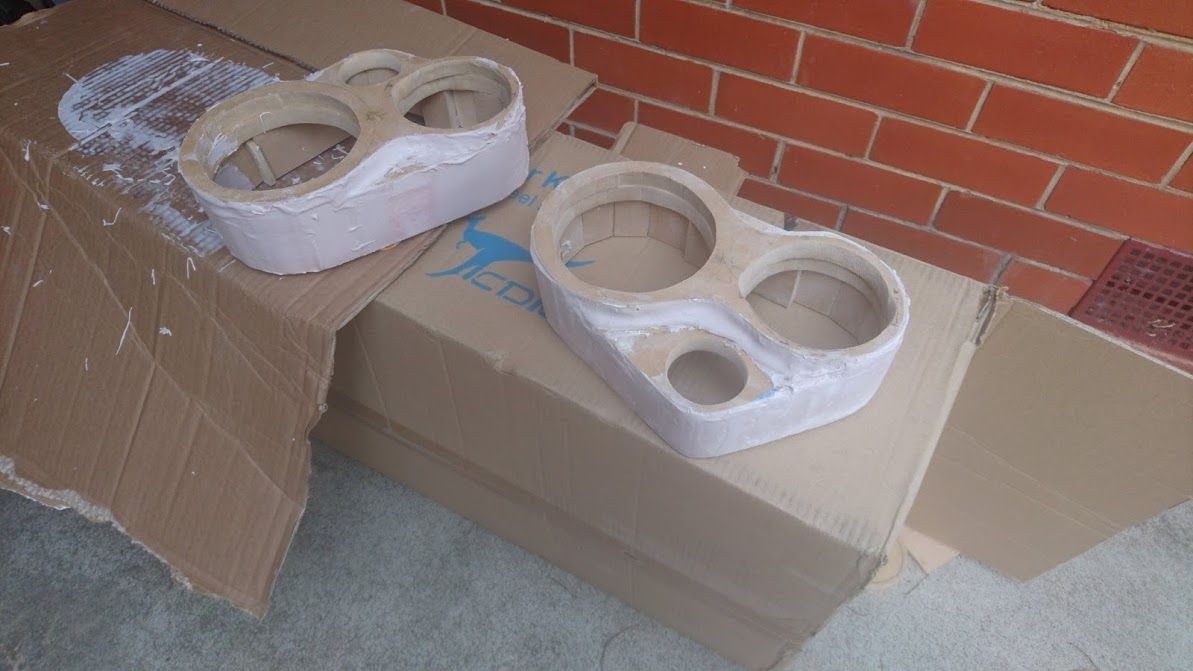
Next was to seal and strengthen the inside with fibreglass resin and strand matt. This adds strength but doesn't add a lot of weight, as well as making the MDF water proof.
A lot of resin was used to ensure the MDF was sealed so it won't take up any water and swell up, as they are exposed to a wet area
Then I coated the outside of pods with resin. This was in preparation for a carbon fibre overlay.
I used black pigment in the resin so any gaps in the carbon fibre weave don't stand out.
This can be skipped if you use 2 layers of CF, but as it's expensive I was trying to avoid that and use a single layer.
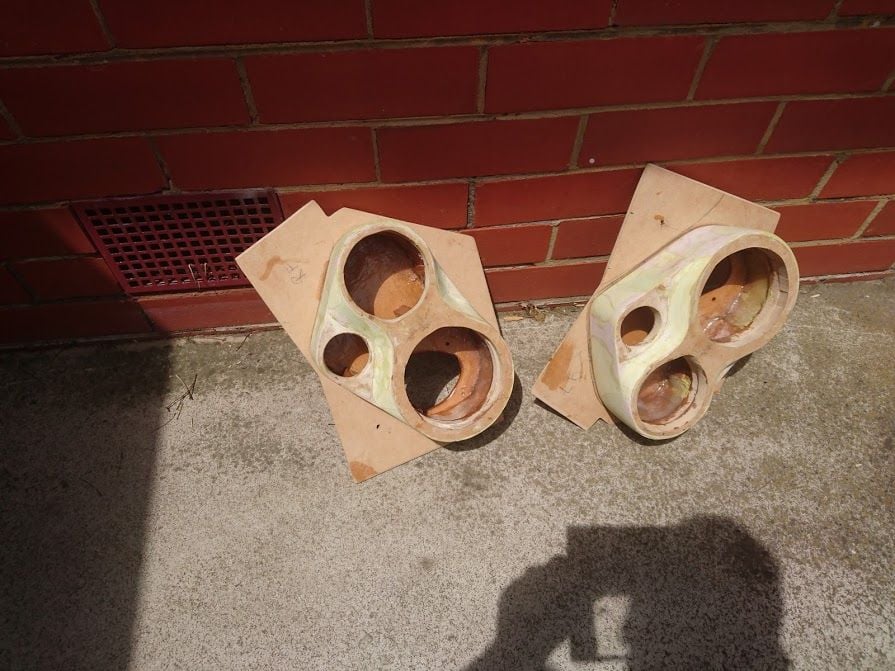
This pic is after I had sanded the resin back to be smooth
I then taped up the top of pod so I could control where the resin went. The carbon fibre is applied while the resin is in its tacky stage, so you only want it where you want the carbon fibre to stick
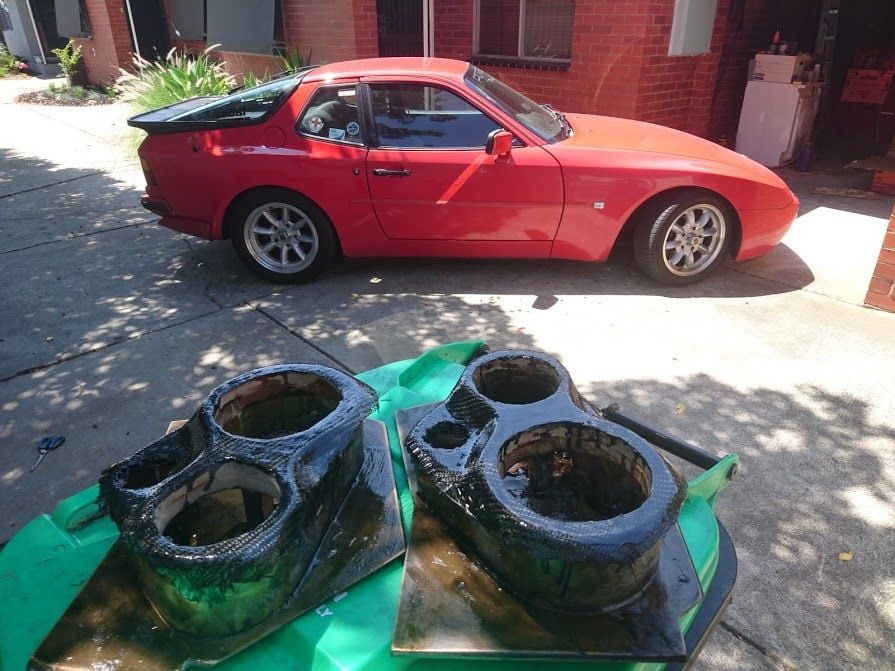
Then I applied resin over the CF. I need to build up enough resin so I can sand it back and polish it to a mirror shine and it needs to be deep enough that I don't sand back into the carbon fibre.
So it gets lots of coats of resin
This was first coat before CF was trimmed up properly
Once the top layer was right I added carbon fibre to the sides of pod.
I decided to put weave in opposite direction as seam/join would stand out more if weave flowed same way.
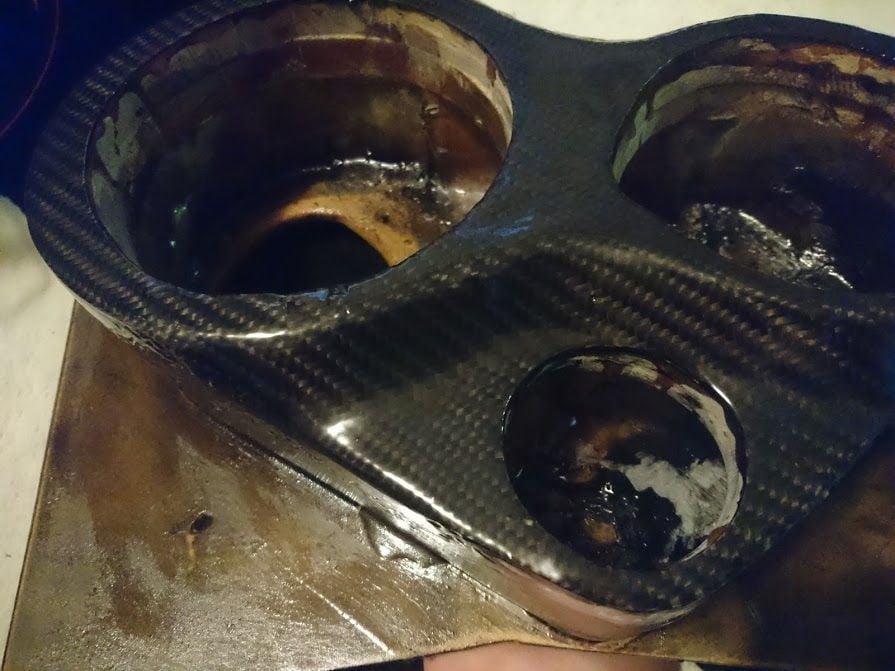
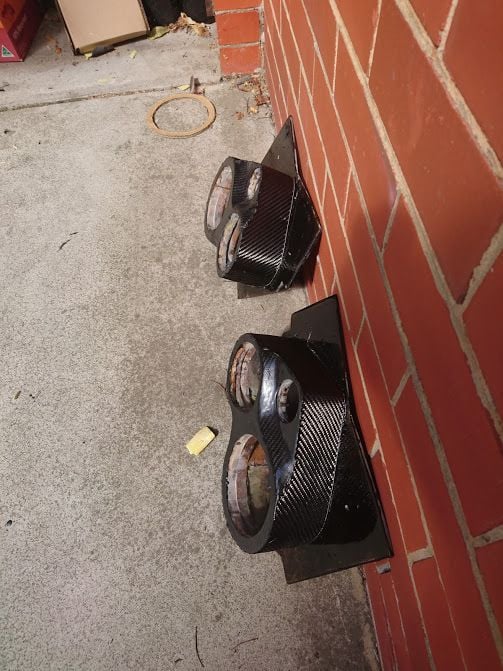
Lots of sanding and polishing and the CF is done.
Each pod was polished several times as I would notice imperfections which would require another heavy sand using 40 or 80 grit and then working back up to 1200 grit, then finishing with a fine cut compound polish
The back board was sprayed in high gloss black.
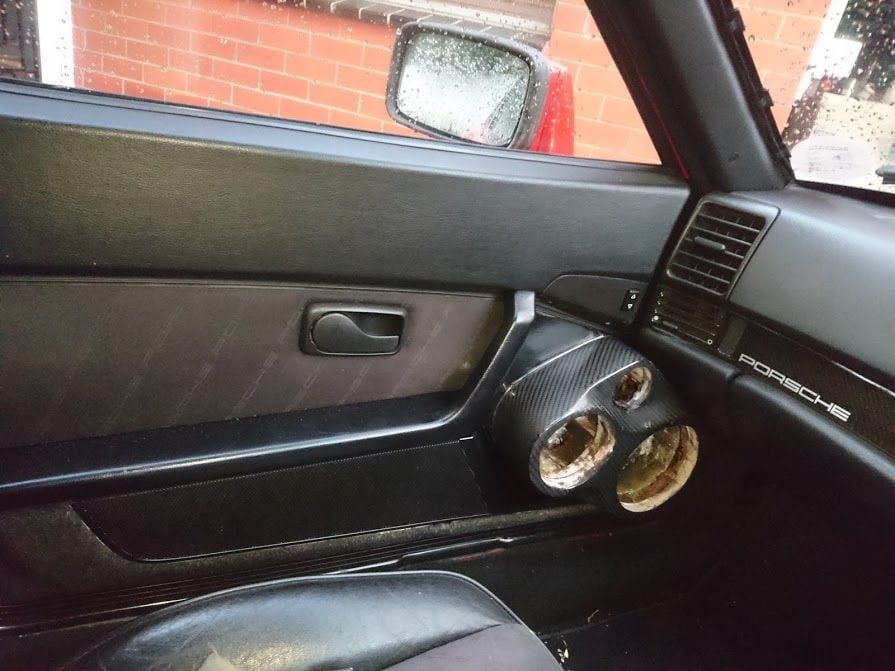
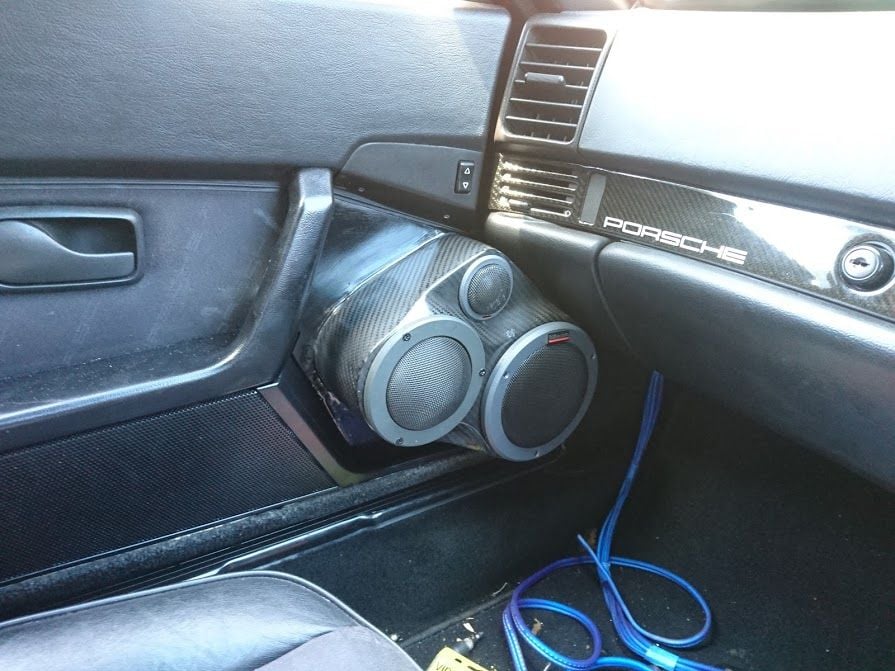
This is the finished pods mounted on the door
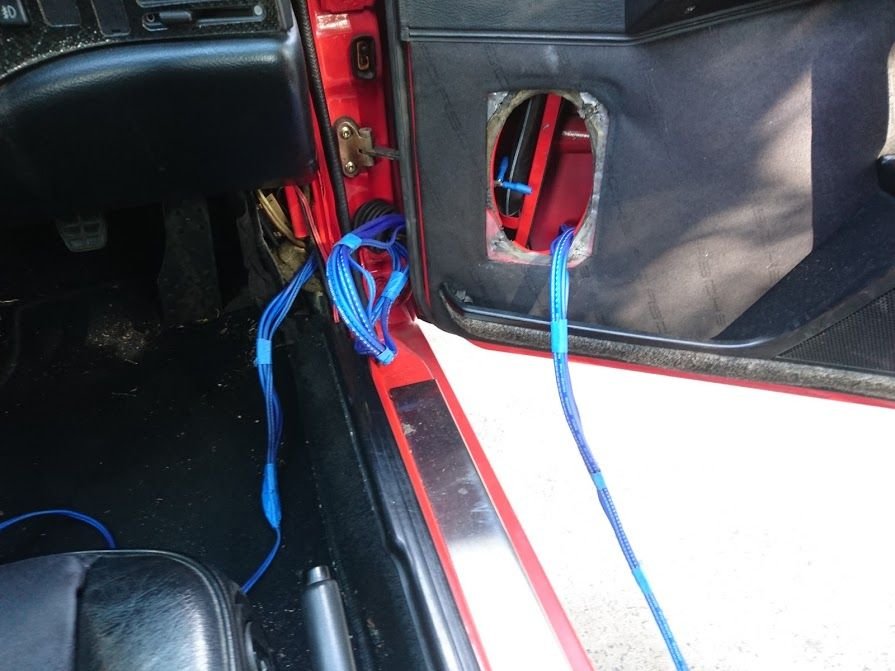
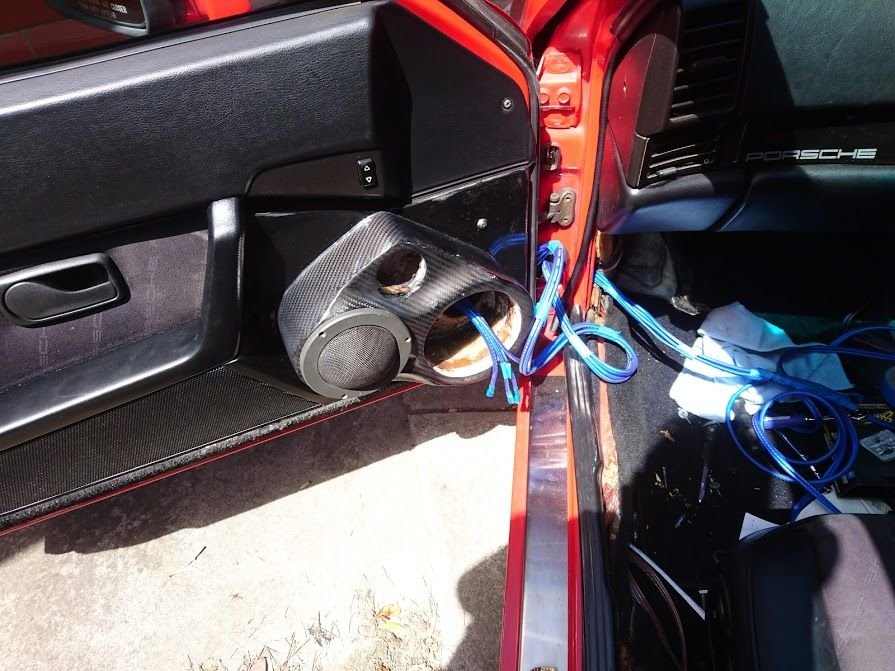
Today I got both speakers mounted, and ran the cables through the door grommet.
I am running the Dyn's with their passive crossover(well it's the one I still had from my system 360's ).
The dyns crossover is shallow slope(6dB) and is phase correct. This means that the phase doesn't shift when transitioning from mid-dome(midrange) to the tweeter. This is especially important as it can be an issue with female vocals that are in this region. Many believe that active gives more control(and that's true) and I have run fully active systems before but IMO with a good designed crossover passive can actually give superior results.
The hardest part mounting the pods was a screw inside the pod that was tight against a wall and behind the front baffle. It was very tricky to tighten but was needed as all four screws that normally hold the 4 x 6 speaker were used to secure the pod. It's nice and solid and has a good seal to the door.
Feeding the three cables per pod was also fun. I used an existing cable to pull another cable back through from cabin side. I then taped the 3 cables together and then used the cable I pulled through into the door, to pull the cables back out of door into cabin
feeding cable through the door grommet
Once cable was sorted, It was time to get speakers mounted.
System is complete. Sony supertweeters are in and working. These play from 20,000Hz up to 50,000Hz. I am using a Sony RSX-GS9 Hi-Res head unit. The amp for the supertsupertw is also a SonyHi-Res amp
To say I am happy with the results is an understatement
 02-10-2018, 08:04 AM


 )
)