

Projects on my new, to me, 1974 914-6
 12-03-2018, 10:38 PM
#121
Racer
Thread Starter

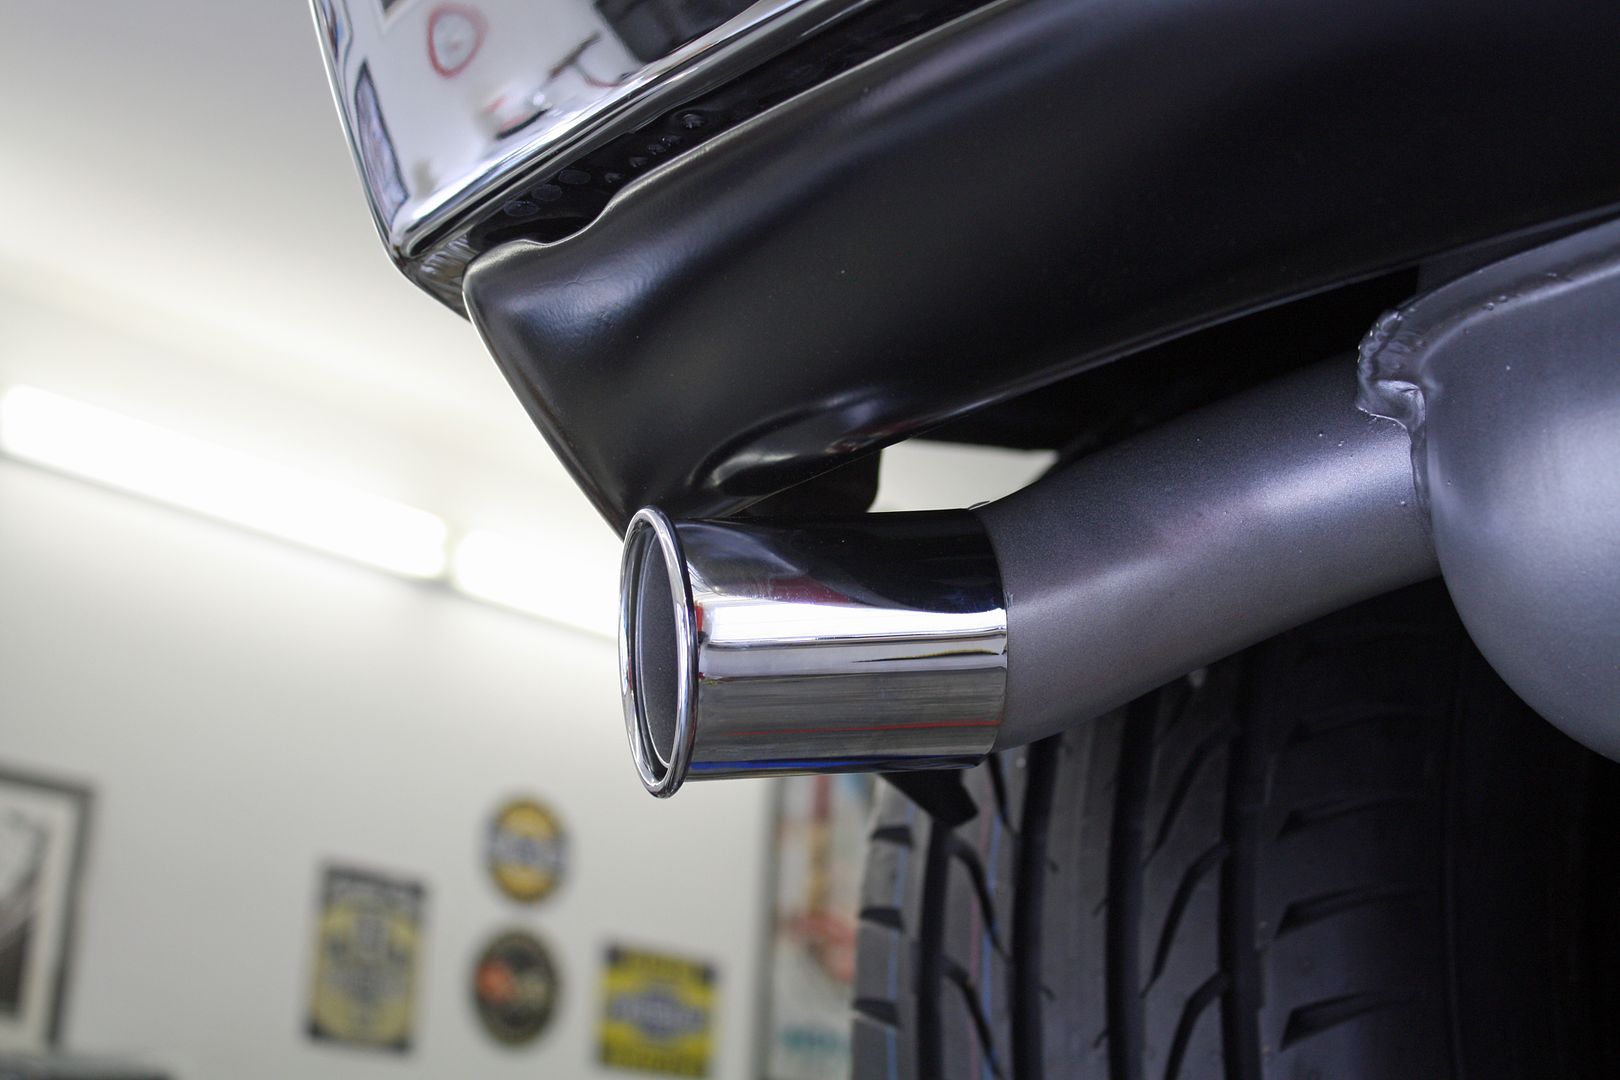
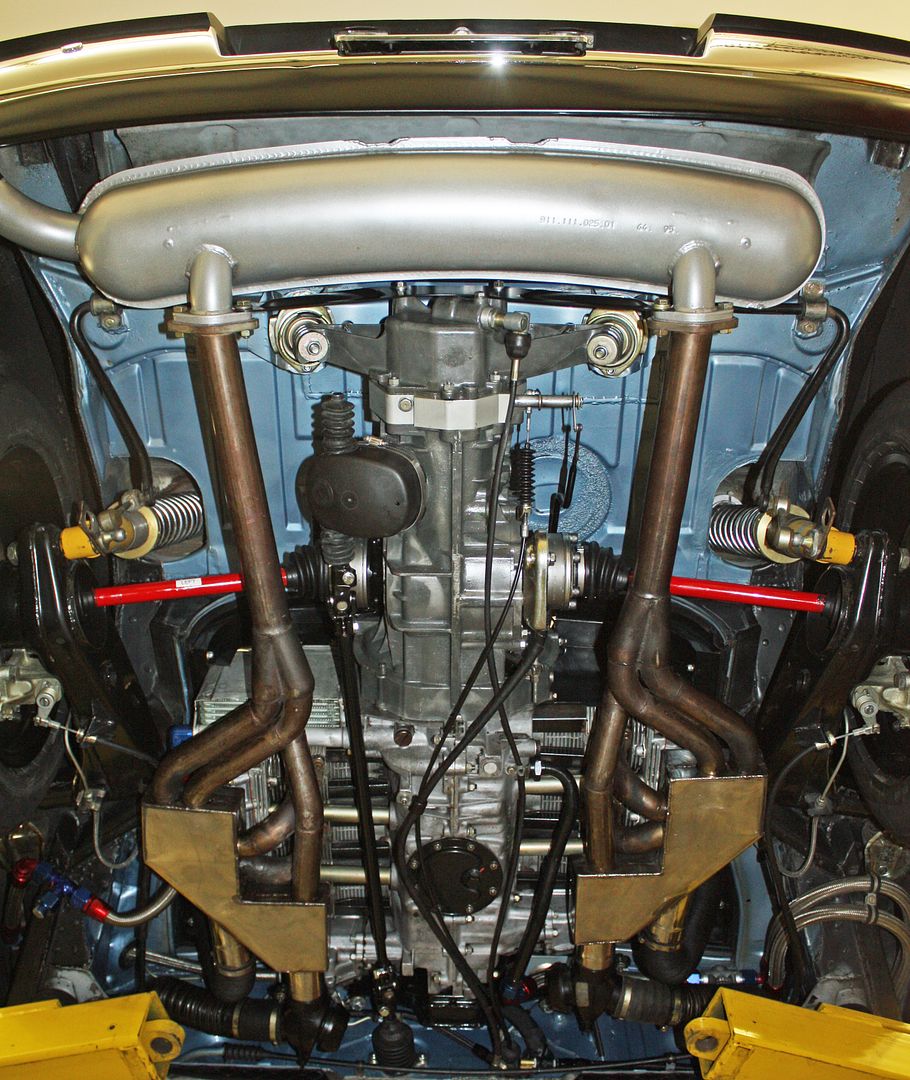
While I was waiting for my son to arrive, I installed the muffler. I had sanded it down and had it powder coated a metallic sliver. On my previous project, the '73 Mercedes 280SEL 4.5, I had the exhaust manifold heat shields powder coated using this same material. After many heat cycles, those shields looked the same as the day I put them on. This covering is supposed to be good for 450 degrees.

I also had time to install the crankcase vent hose.


I also had time to install the crankcase vent hose.


 12-04-2018, 06:52 PM
#122
Racer
Thread Starter
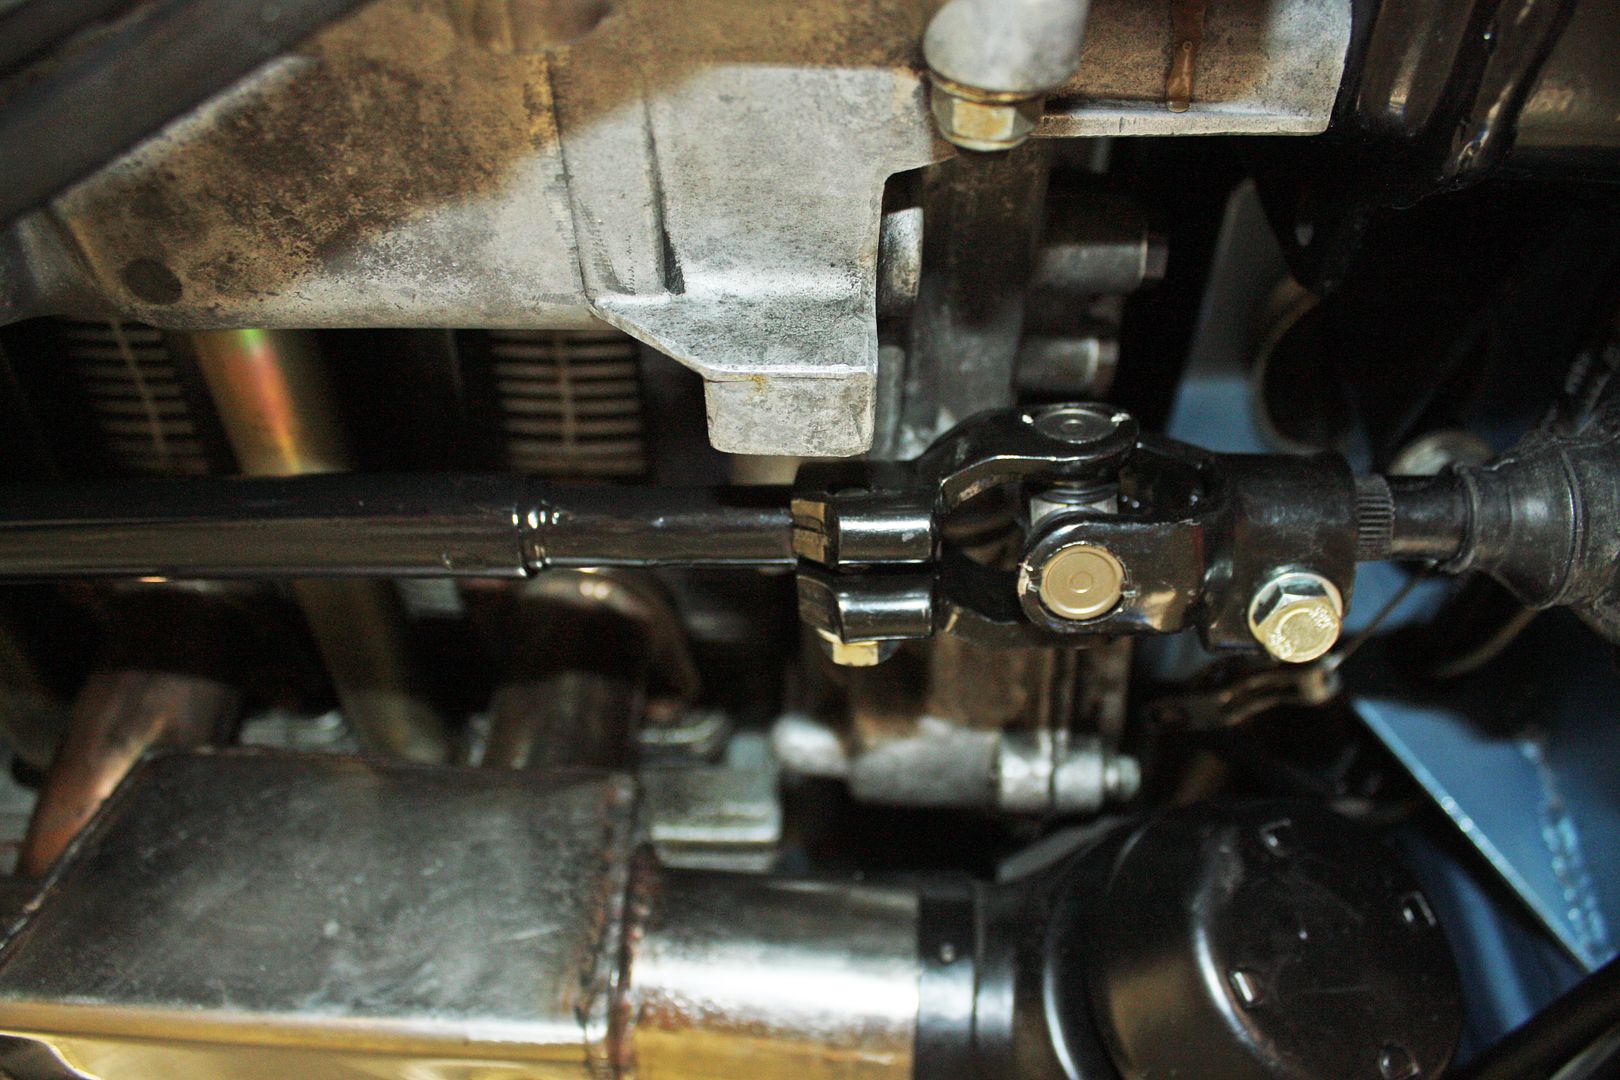
My son texted me this morning saying the shift rod was at the front desk at TRD where he works. I picked it up and then called my powder coater. I asked when he was going to do satin black and he said next week. But he was doing gloss black today. I blasted the rod and took it to him for a coating. About an hour later, he texted me that it was done. Another $10 well spent but lots of running around today.
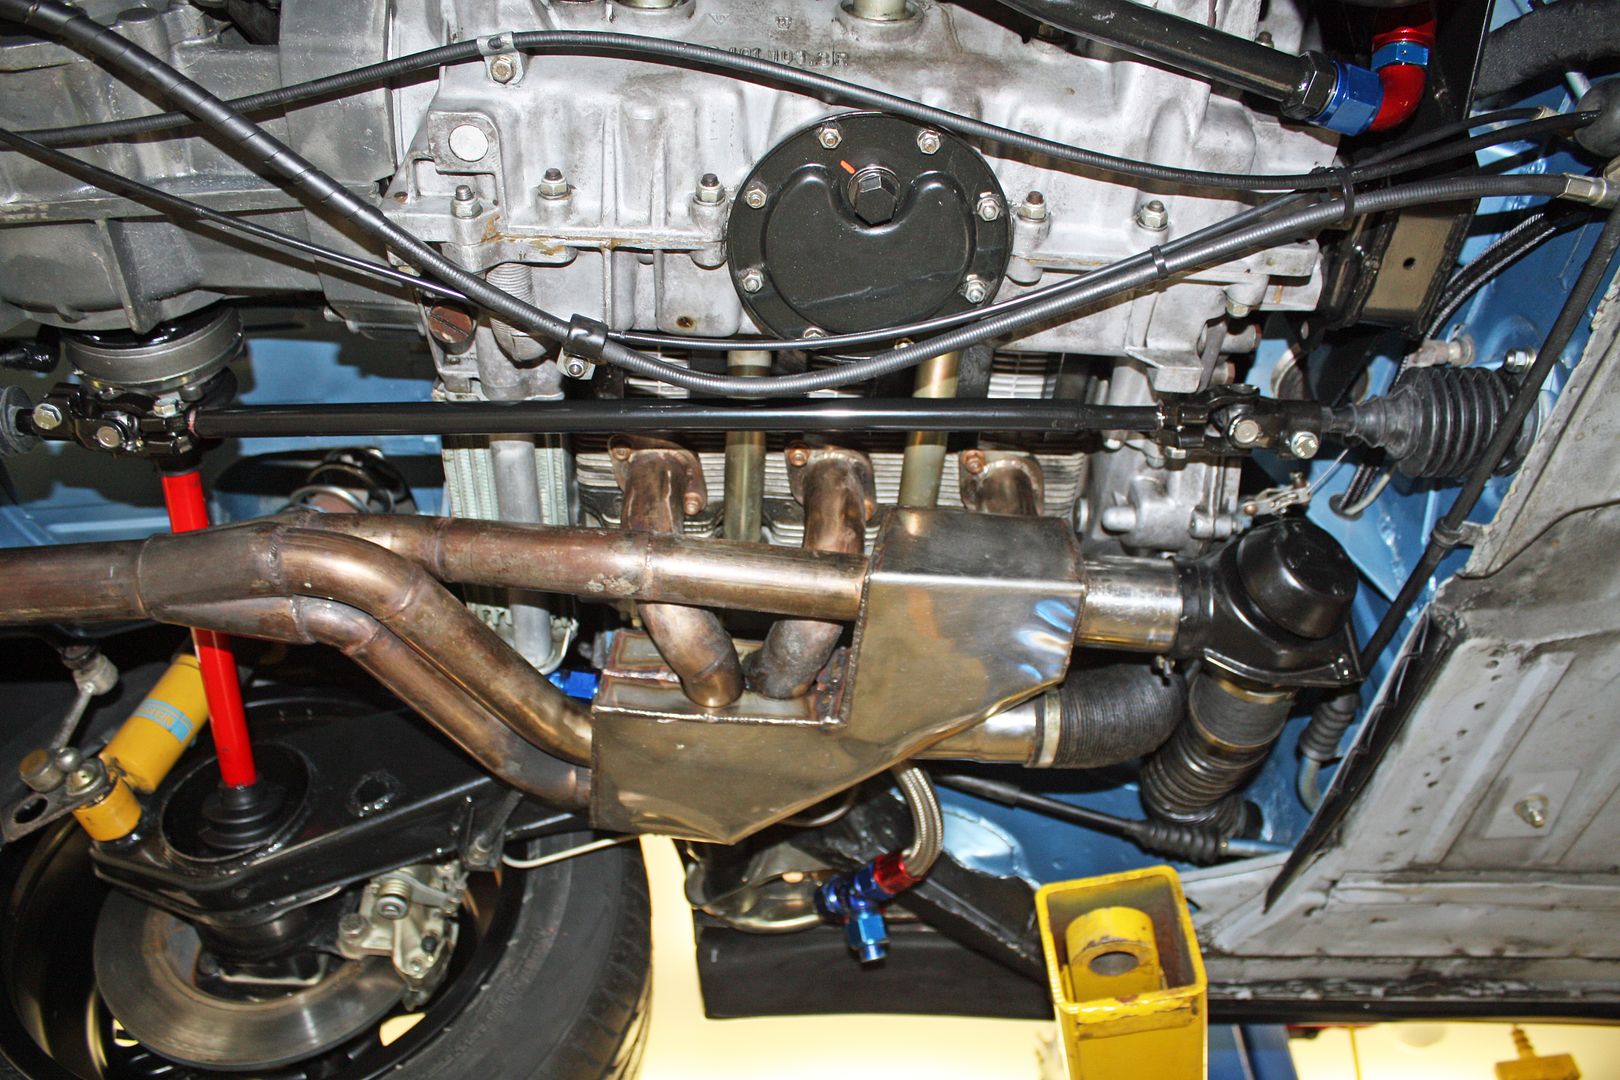
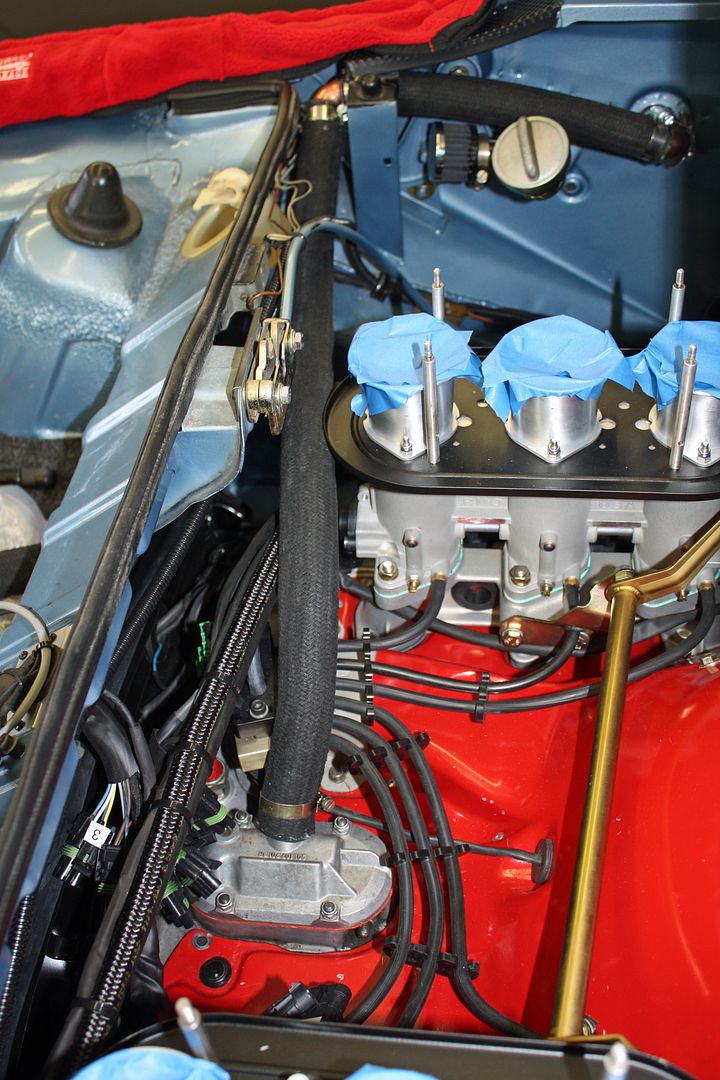
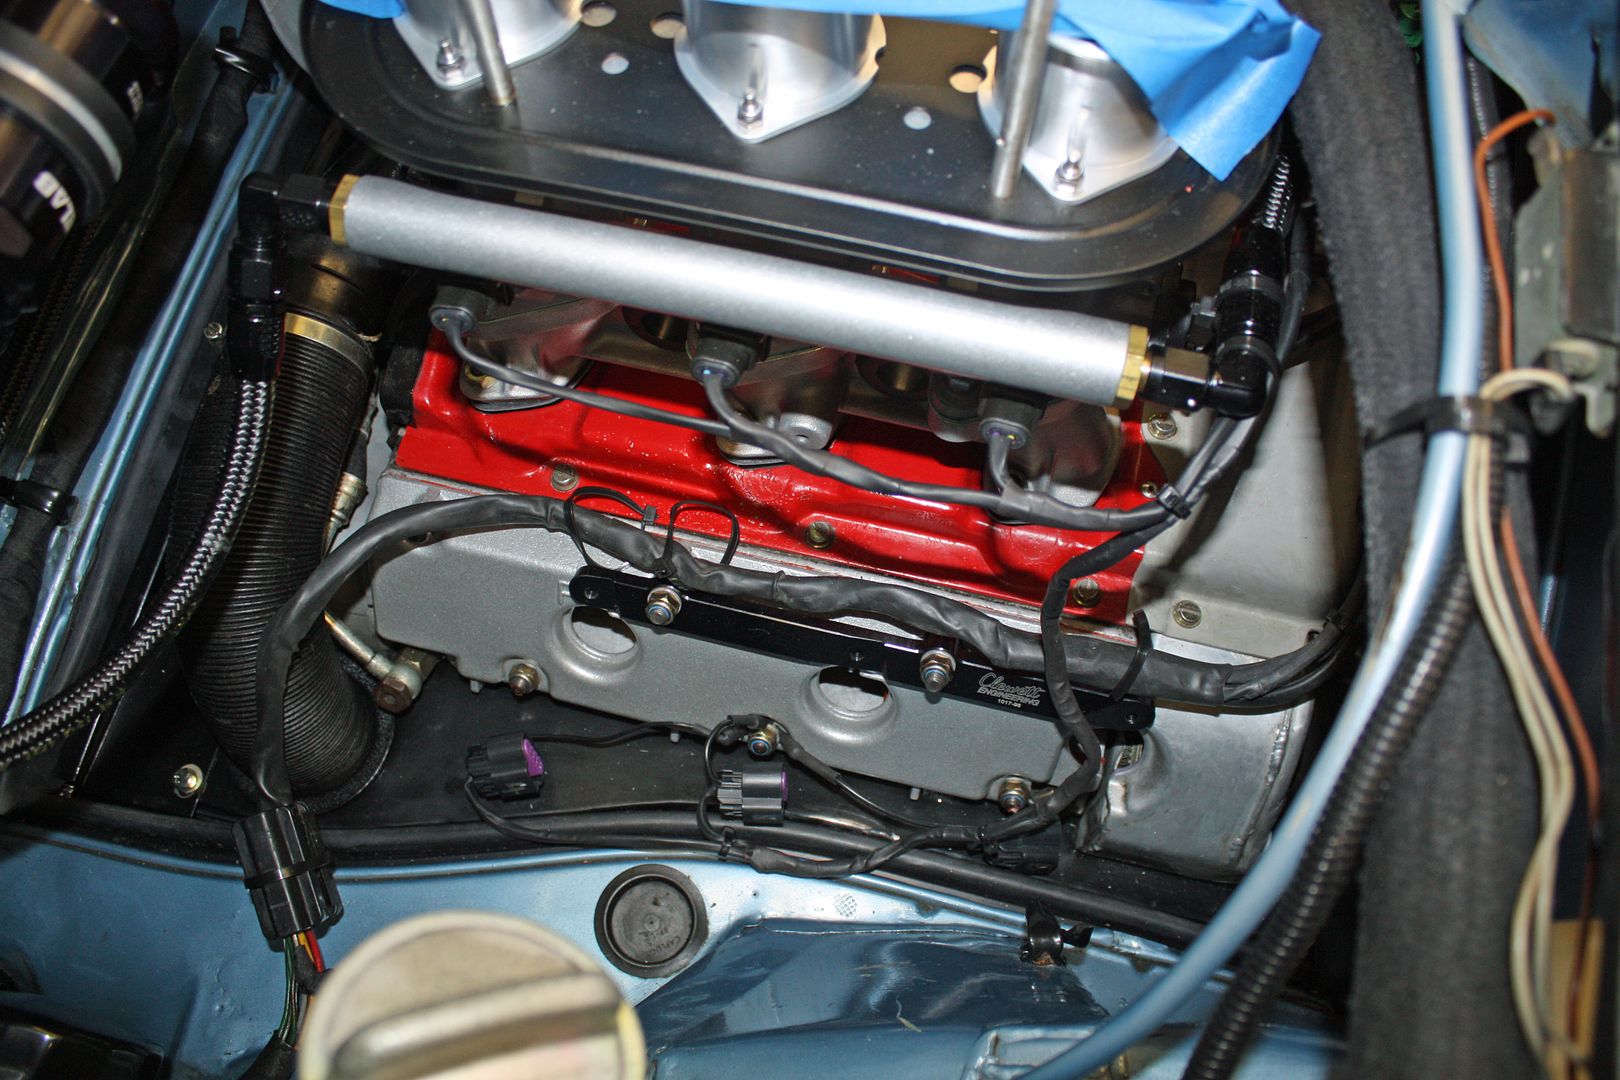
After mowing leaves (the grass is growing slowly but the leaves are still falling), i did have time to install the fuel hoses to the fuel rail.

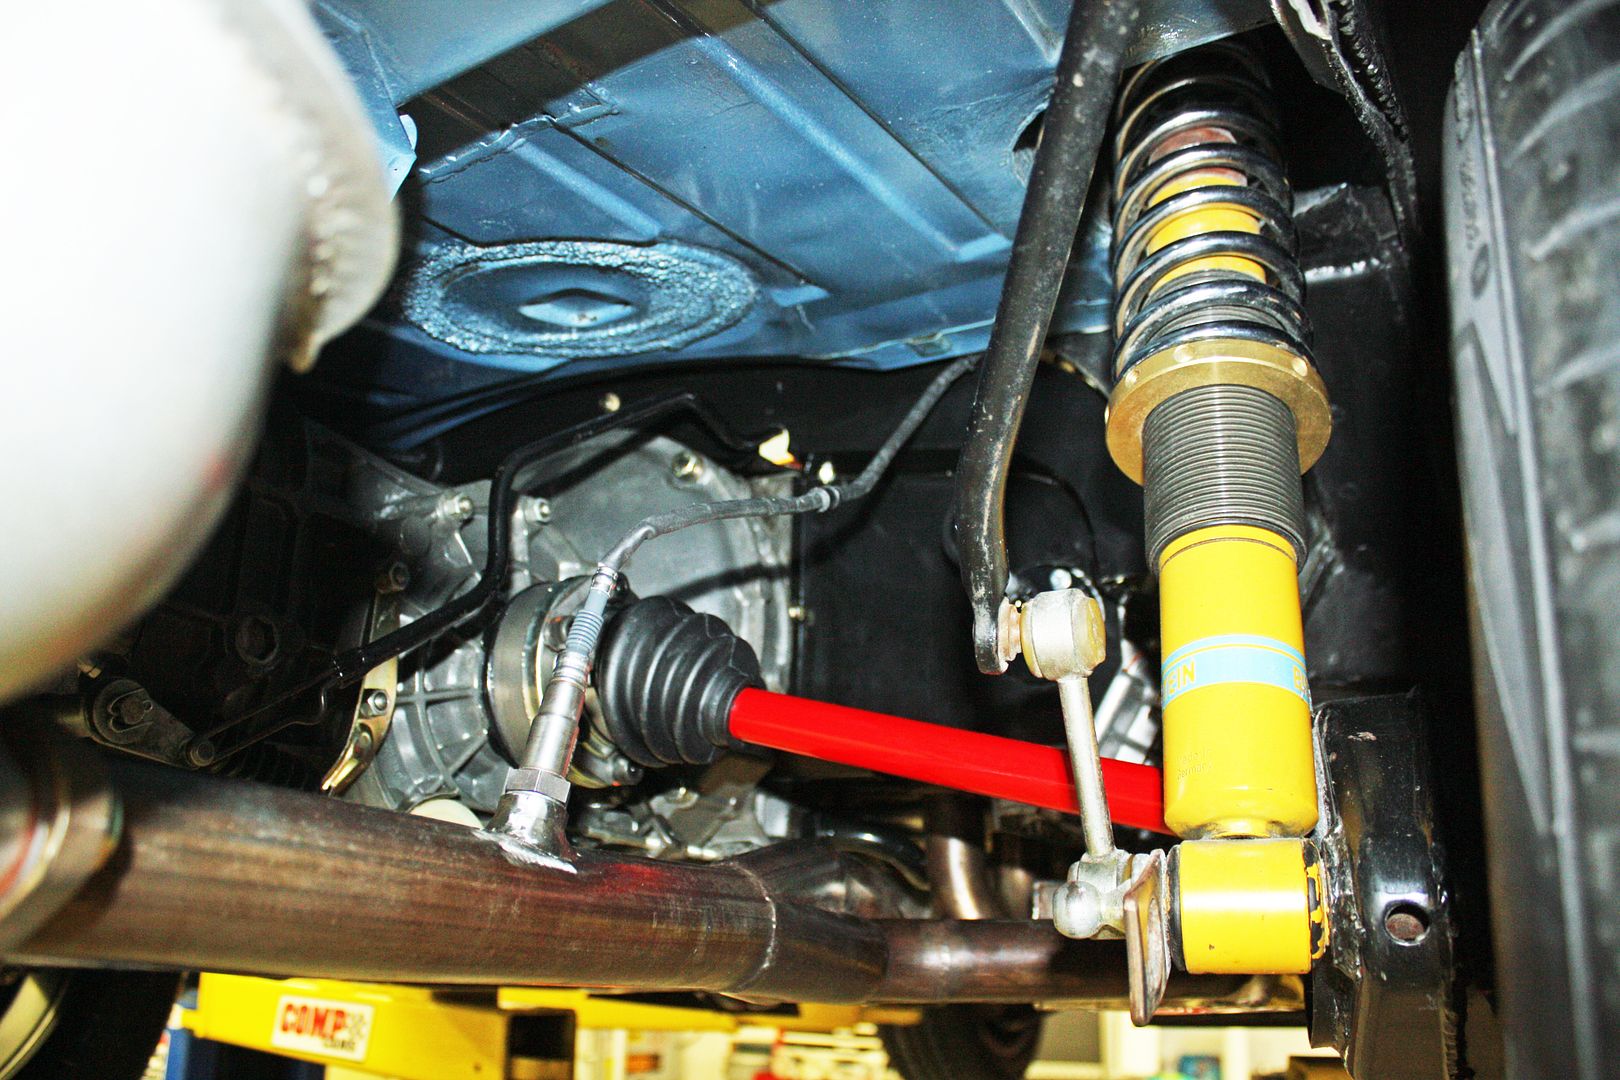
With the shift rod installed, the bottom of the engine is nearly done. I have to install the O2 sensor, attach the ground from the transmission to the body, and run the cable from the battery to the starter.
 12-05-2018, 05:39 PM
#123
Racer
Thread Starter
I worked on some odds and ends today. I adjusted the clutch cable so that I can pull the clutch pedal 3/4" towards the rear. I had done a preliminary adjustment of the throttle cable. I had my wife push the gas pedal to the floor so I could see if the butterflies were opening all the way. They were, which was a surprise. I accidentally happened to adjust it correctly.
I worked on the seal around the engine tin to get it into place. Then, I ran the wire from the battery to the starter and fastened the transmission ground strap.

Next up was installing the O2 sensor. There was a ton of excess wire so I bunched it up and used a large shrink tube to secure it.
I also plugged in all of the ECU connectors.
Oil was poured into the tank. I tried to add gas but, fortunately, after pouring a bit in, I stopped to check for leaks. And I had a big one!! After cleaning up the gas, I put the car back on the lift to see what happened. It appears to have come out of the overflow tube as it was still wet. All of my connections at the tank were dry. Not sure how this happened. It was the end of the day so I decided to look into that in the morning. I must not have had the filler from my gas can far enough down into the tank.
Once I get that resolved, I should be ready for the first startup. Hopefully tomorrow will see that happening.
I worked on the seal around the engine tin to get it into place. Then, I ran the wire from the battery to the starter and fastened the transmission ground strap.


Next up was installing the O2 sensor. There was a ton of excess wire so I bunched it up and used a large shrink tube to secure it.


I also plugged in all of the ECU connectors.

Oil was poured into the tank. I tried to add gas but, fortunately, after pouring a bit in, I stopped to check for leaks. And I had a big one!! After cleaning up the gas, I put the car back on the lift to see what happened. It appears to have come out of the overflow tube as it was still wet. All of my connections at the tank were dry. Not sure how this happened. It was the end of the day so I decided to look into that in the morning. I must not have had the filler from my gas can far enough down into the tank.
Once I get that resolved, I should be ready for the first startup. Hopefully tomorrow will see that happening.
12-06-2018, 05:41 PM
#124
Racer
Thread Starter
No start-up today. My first job was to find out why I was leaking fuel. It was my fault. When I was redoing the overflow line, I lifted up the tank a bit so I could feed the line down to the hole. In doing that, I pulled the return line off at the tunnel. i pulled the tank, tightened up the clamp even more than I had before, put everything back together and added some fuel. No leak there.
However, at little bit later I smelled fuel. It was leaking at the return line at the firewall. There is that 90 degree brass fitting that I had rotated slightly to make it run parallel with the bottom of the car. In so doing, I had evidently loosened the fitting. Because I had to pull that line back towards the rear to get to the nut, I drained the tank and removed the tank again so I could unhook that line I had just fastened. After tightening everything using new clamps and re-installing the tank, I added gas and everything is finally dry. I did have some fuel in the tunnel so I removed the console, pulled back the carpet and opened the windows to let everything dry out.
All of this work was completed by 10:00AM so I could still have started the motor. Up to this point, I had not checked my clutch adjustment to make sure the clutch was working. I enlisted my wife, put the car in gear and had her push in the clutch. It didn't allow me to roll the car. I adjusted it even tighter, but to no avail. The last time she pushed the clutch in I watched from underneath and could see that the clutch fork was hitting against the rear part of the opening. I had not checked the clutch fork ball as this was the same transmission that had been in the car in the past.
I called Brad Mayeur to talk about this with him. He agreed that the ball needed to be shimmed if the clutch fork was hitting against the transmission. I also mentioned to him that the car now had a Kennedy Engineering flywheel and clutch. He said that changed everything. For one thing, on a Kennedy clutch, you do not adjust the clutch pedal so you can pull it back 3/4". Correctly adjusted, there will be no pullback as the throwout bearing places pressure on the pressure plate all the time. He said he has talked to Kennedy about this but they say there is no problem with their setup. Brad wonders about long term issues with that pressure.
My buddy Reese has a transmission jack that I have used more than he has. Since he lives just up the street, I walked up there and rolled it back to my shop. He also had a very thin wall 14mm deep socket that should work on removing the ball. Brad says that, after removing the muffler and unhooking everything, I should be able to move it back far enough with the axles still attached to get to the ball. He recommended beginning with a 1mm thick washer. He also mentioned that the threads have to be sealed as the ball threads open into the case.
So I get to have even more fun on this project!!! The weather is supposed to be terrible here this weekend so I wouldn't be driving the car anyway.
I have a question about the starter. When Reese saw it recently, he wondered if there was a more compact starter that would work. Any suggestions?
However, at little bit later I smelled fuel. It was leaking at the return line at the firewall. There is that 90 degree brass fitting that I had rotated slightly to make it run parallel with the bottom of the car. In so doing, I had evidently loosened the fitting. Because I had to pull that line back towards the rear to get to the nut, I drained the tank and removed the tank again so I could unhook that line I had just fastened. After tightening everything using new clamps and re-installing the tank, I added gas and everything is finally dry. I did have some fuel in the tunnel so I removed the console, pulled back the carpet and opened the windows to let everything dry out.
All of this work was completed by 10:00AM so I could still have started the motor. Up to this point, I had not checked my clutch adjustment to make sure the clutch was working. I enlisted my wife, put the car in gear and had her push in the clutch. It didn't allow me to roll the car. I adjusted it even tighter, but to no avail. The last time she pushed the clutch in I watched from underneath and could see that the clutch fork was hitting against the rear part of the opening. I had not checked the clutch fork ball as this was the same transmission that had been in the car in the past.
I called Brad Mayeur to talk about this with him. He agreed that the ball needed to be shimmed if the clutch fork was hitting against the transmission. I also mentioned to him that the car now had a Kennedy Engineering flywheel and clutch. He said that changed everything. For one thing, on a Kennedy clutch, you do not adjust the clutch pedal so you can pull it back 3/4". Correctly adjusted, there will be no pullback as the throwout bearing places pressure on the pressure plate all the time. He said he has talked to Kennedy about this but they say there is no problem with their setup. Brad wonders about long term issues with that pressure.
My buddy Reese has a transmission jack that I have used more than he has. Since he lives just up the street, I walked up there and rolled it back to my shop. He also had a very thin wall 14mm deep socket that should work on removing the ball. Brad says that, after removing the muffler and unhooking everything, I should be able to move it back far enough with the axles still attached to get to the ball. He recommended beginning with a 1mm thick washer. He also mentioned that the threads have to be sealed as the ball threads open into the case.

So I get to have even more fun on this project!!! The weather is supposed to be terrible here this weekend so I wouldn't be driving the car anyway.
I have a question about the starter. When Reese saw it recently, he wondered if there was a more compact starter that would work. Any suggestions?
12-07-2018, 05:06 PM
#125
Racer
Thread Starter
We are supposed to get a bunch of snow this weekend so I spent the morning getting fuel for the generator and making a run to Sam's.
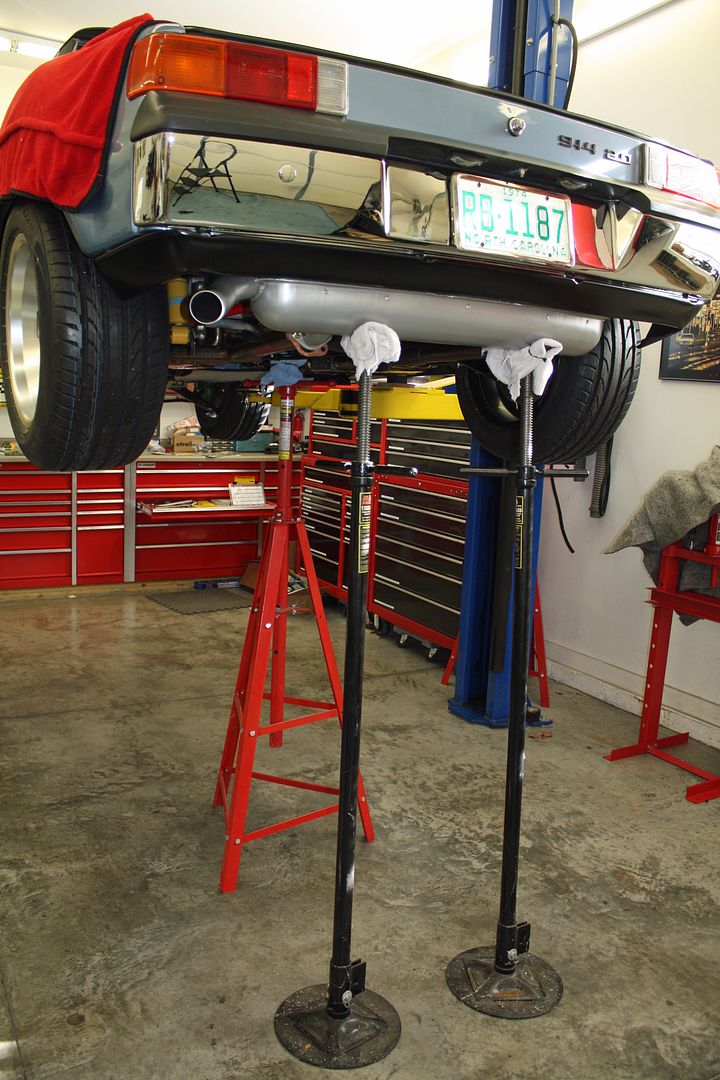
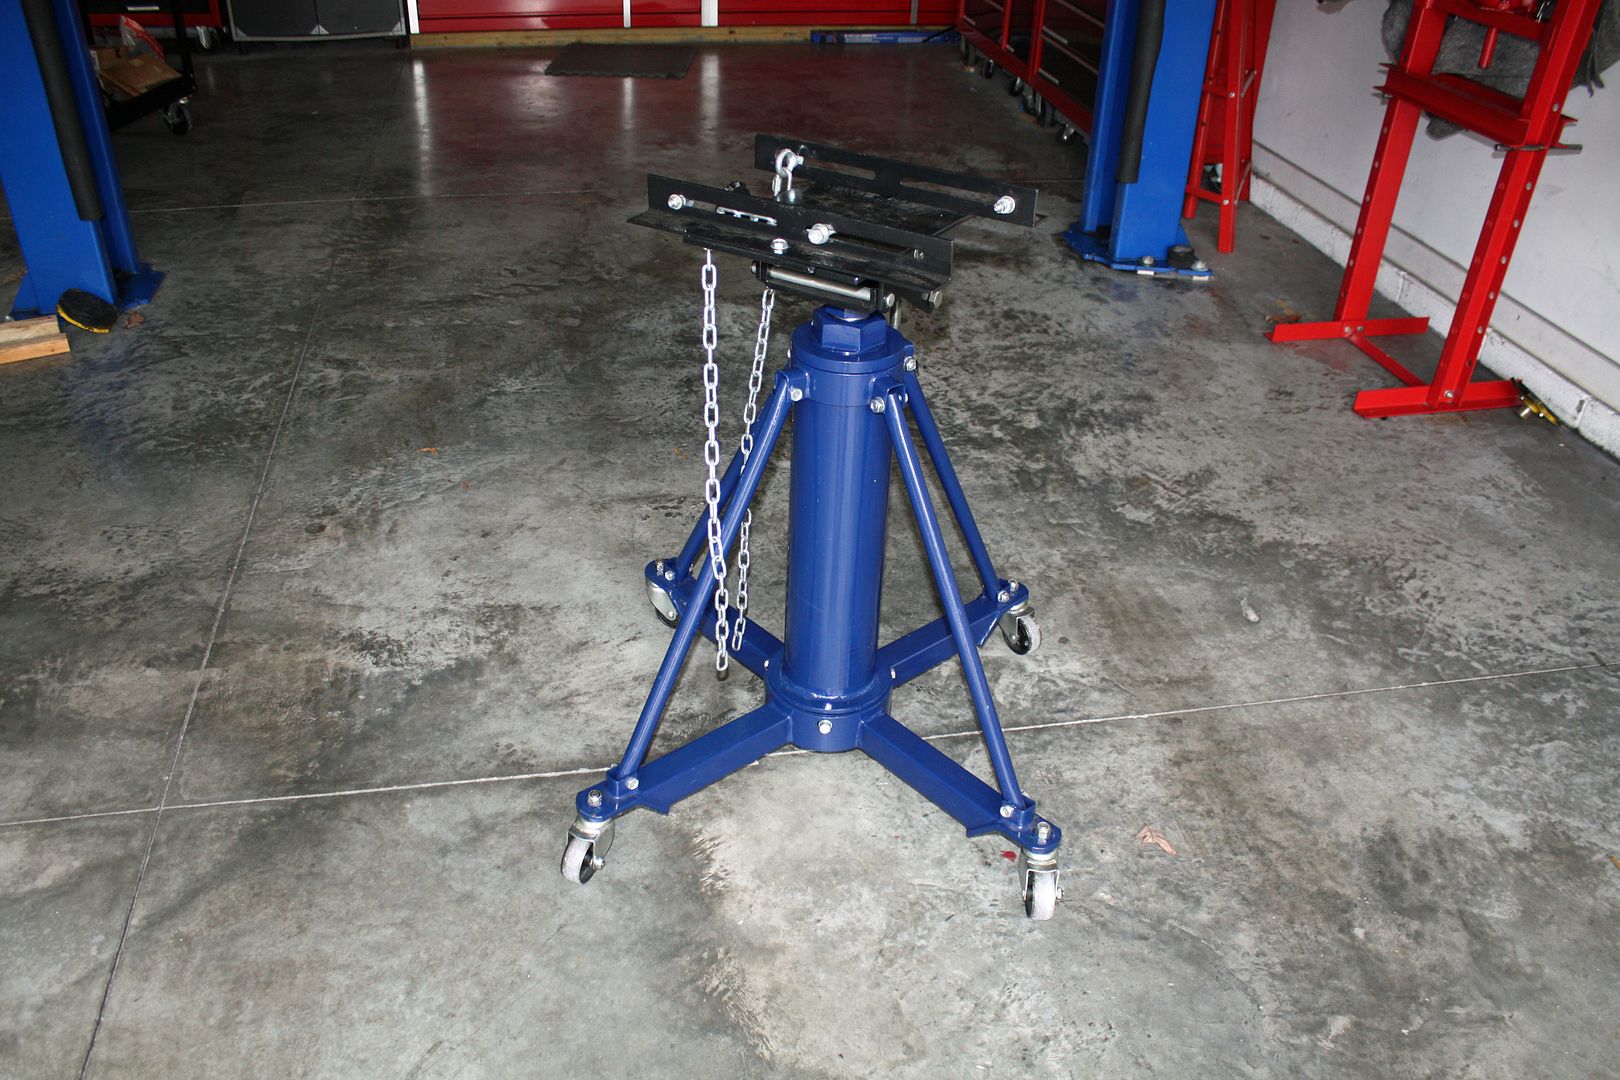
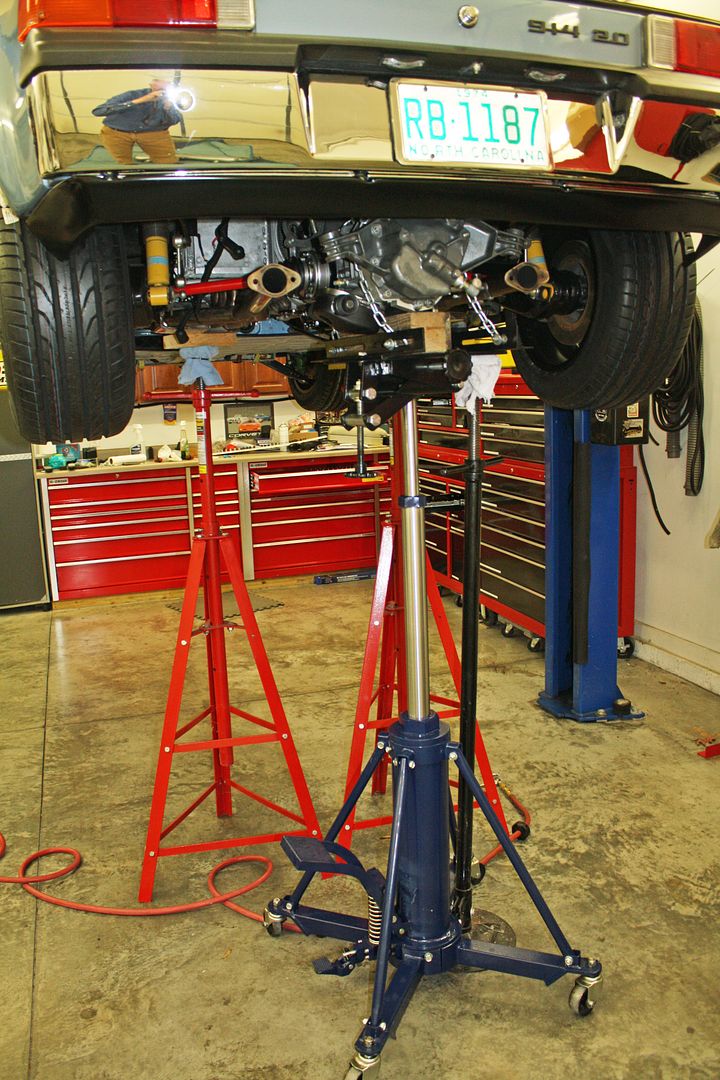
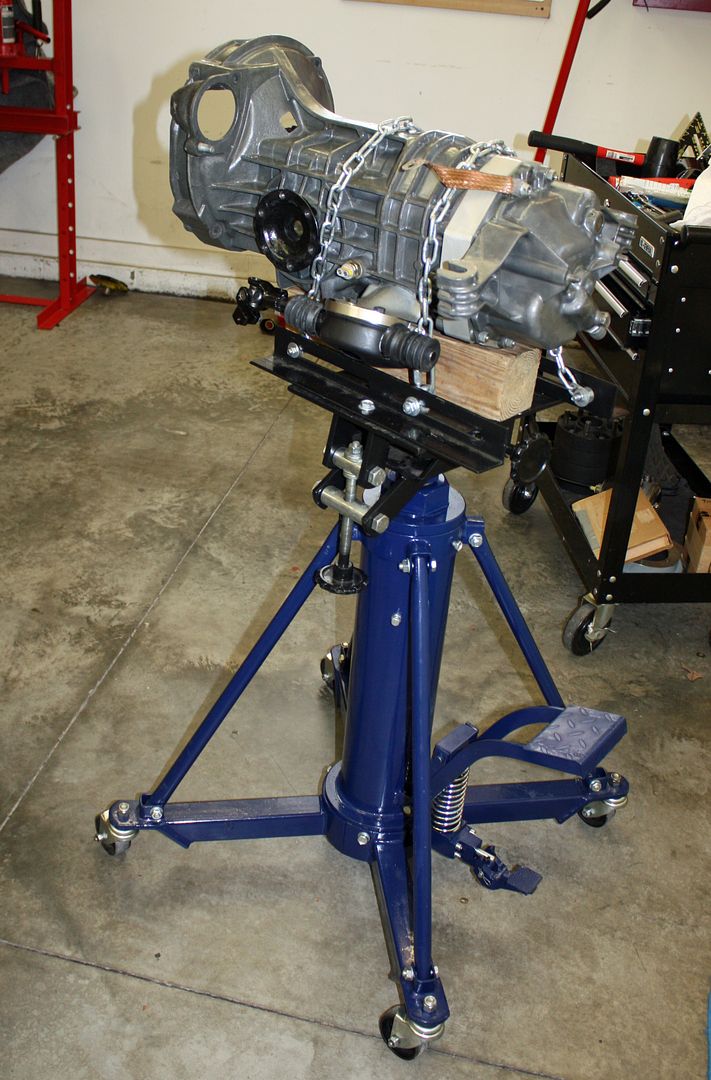
This afternoon, i removed the muffler and unhooked everything from the transmission. I also removed the starter. The support stands and the transmission jack are in place. Tomorrow I can separate the transmission and shim the clutch fork ball. Hopefully, I can just slide it back with the CV's in place as Brad suggested.
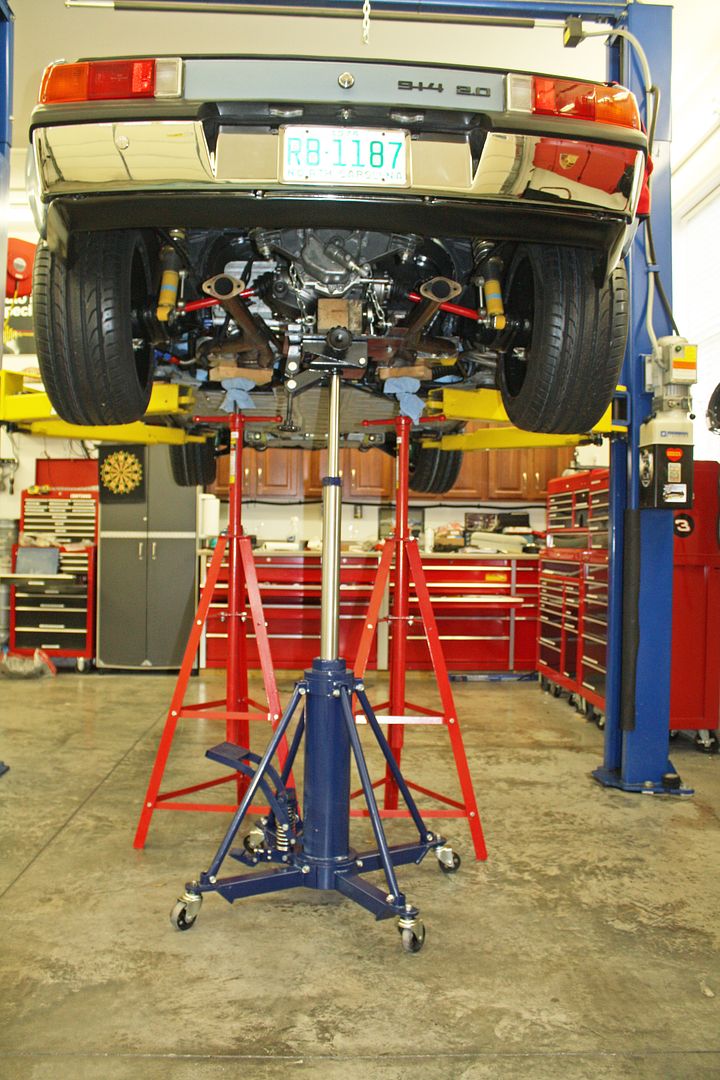
This afternoon, i removed the muffler and unhooked everything from the transmission. I also removed the starter. The support stands and the transmission jack are in place. Tomorrow I can separate the transmission and shim the clutch fork ball. Hopefully, I can just slide it back with the CV's in place as Brad suggested.
 12-08-2018, 05:42 PM
#127
Racer
Thread Starter
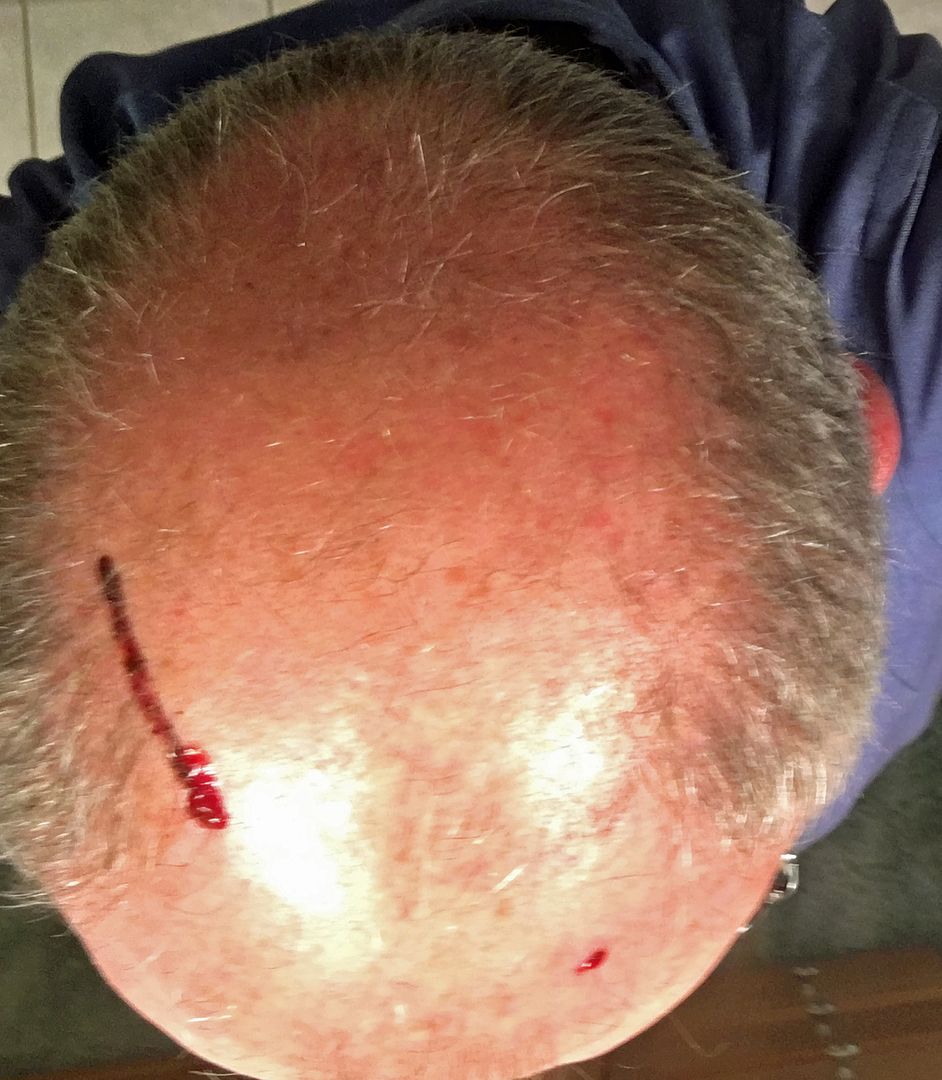
No sacrifice is to great when doing a car project!!!
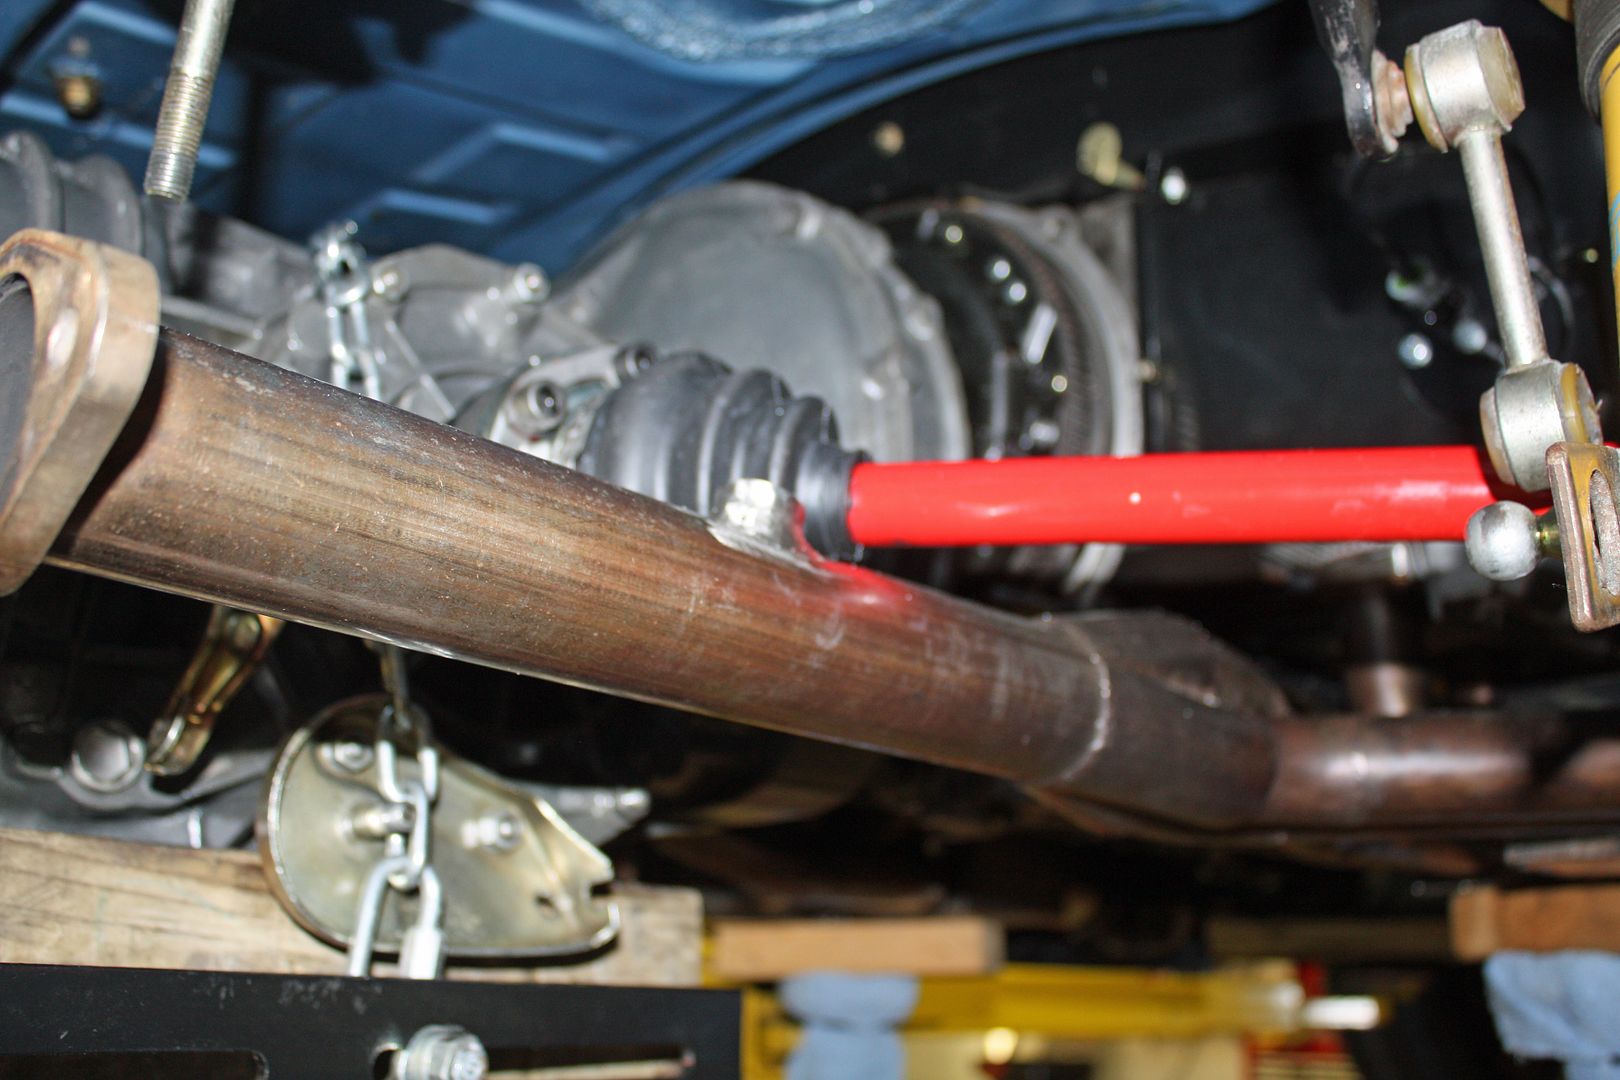
Separating the transmission from the engine went smoothly today. Brad's suggestion that I could slide the transmission rearward with the axles attached was correct. There is plenty of room to work on the clutch fork.
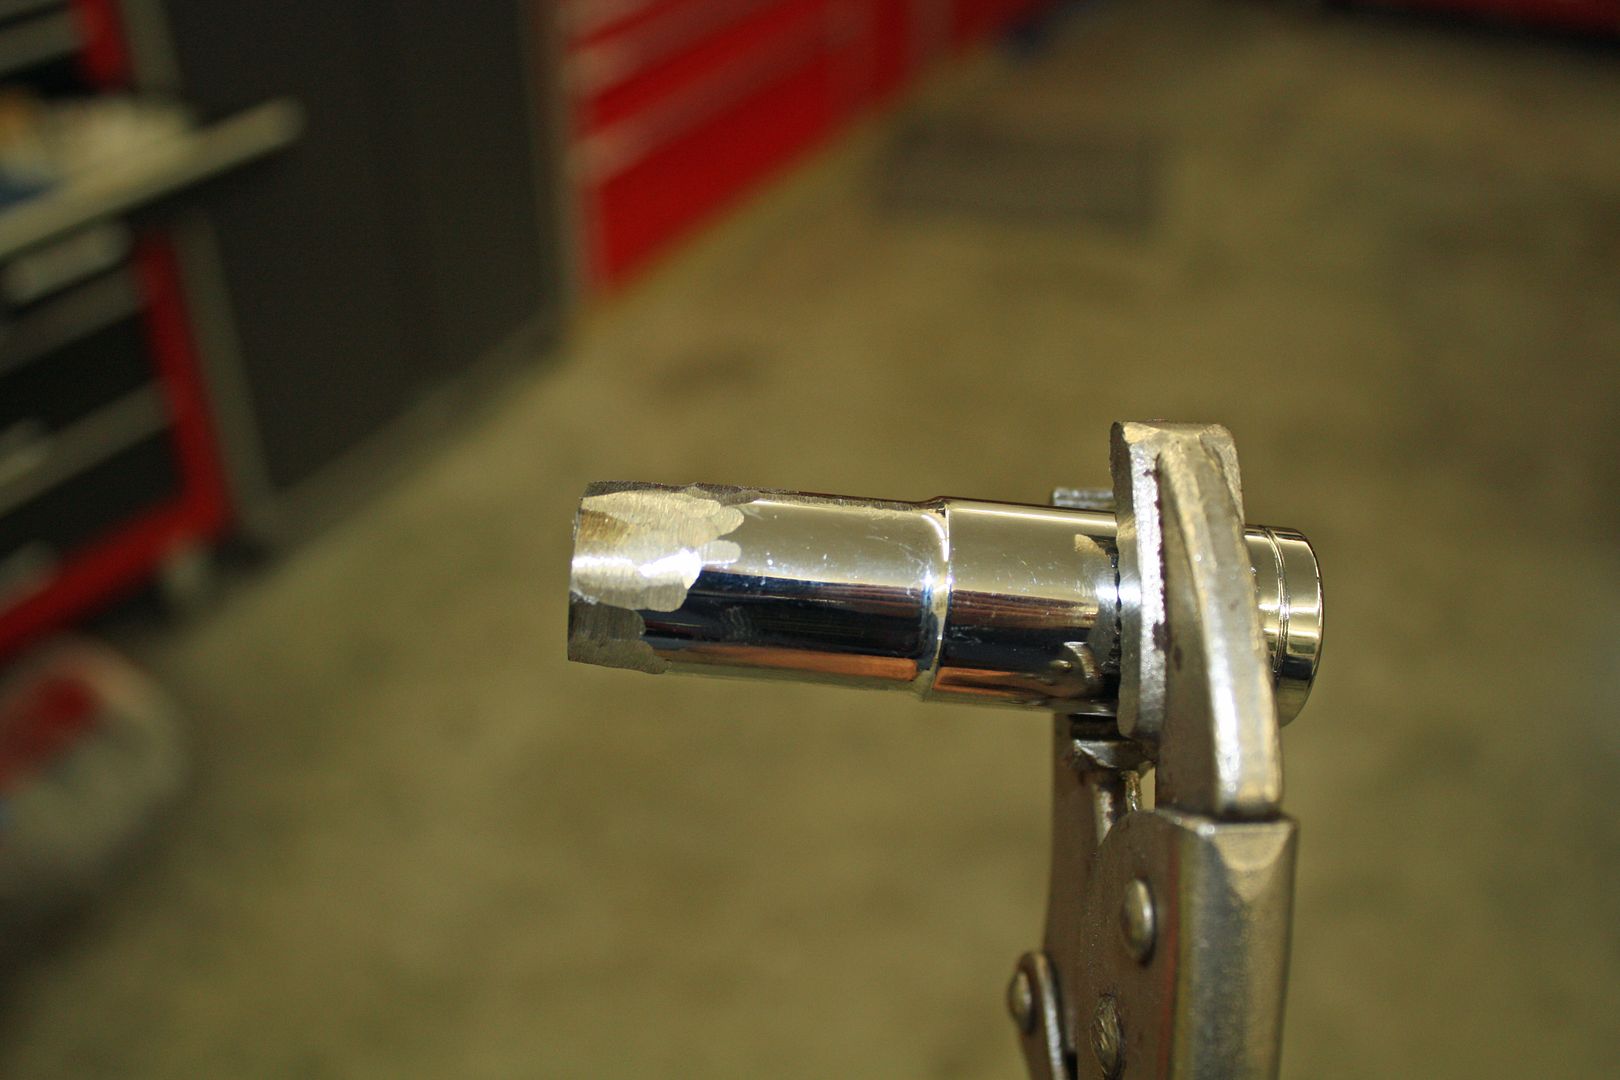
Removing the ball is another story. My neighbor had a fairly thin 14mm deep well socket but it wasn't even close to fitting into the area around the ball.
I spent a couple hours using a skill knife to make that area around the ball larger.. to no avail. I can now get the socket in there but not far enough for it to catch. I was tired of scraping and called it a day.
My next door neighbor is in charge of service for a large car dealership. I called him to see if any of his guys might have a thin wall 14mm socket. He is bringing a couple home for me to try. I have also ordered a new ball as this one already has the edges somewhat compromised.

Separating the transmission from the engine went smoothly today. Brad's suggestion that I could slide the transmission rearward with the axles attached was correct. There is plenty of room to work on the clutch fork.
Removing the ball is another story. My neighbor had a fairly thin 14mm deep well socket but it wasn't even close to fitting into the area around the ball.


I spent a couple hours using a skill knife to make that area around the ball larger.. to no avail. I can now get the socket in there but not far enough for it to catch. I was tired of scraping and called it a day.
My next door neighbor is in charge of service for a large car dealership. I called him to see if any of his guys might have a thin wall 14mm socket. He is bringing a couple home for me to try. I have also ordered a new ball as this one already has the edges somewhat compromised.
12-09-2018, 12:29 PM
#128
Racer
Thread Starter
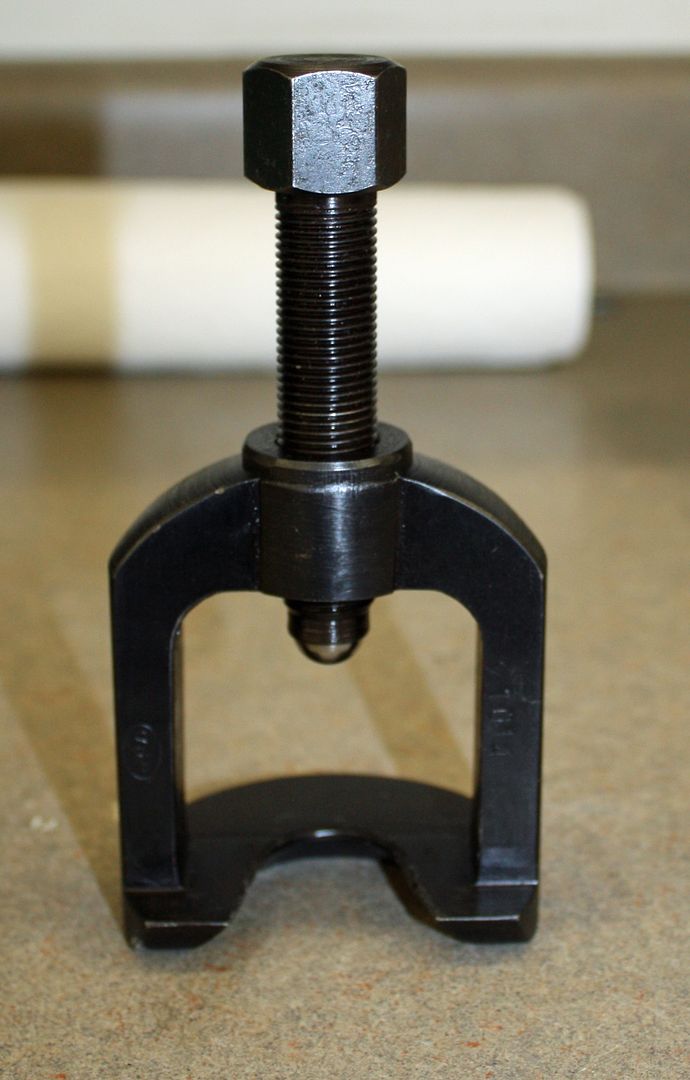
Brad mentioned buying a cheap socket to grind. It worked. The helicoil came out with the pivot ball.
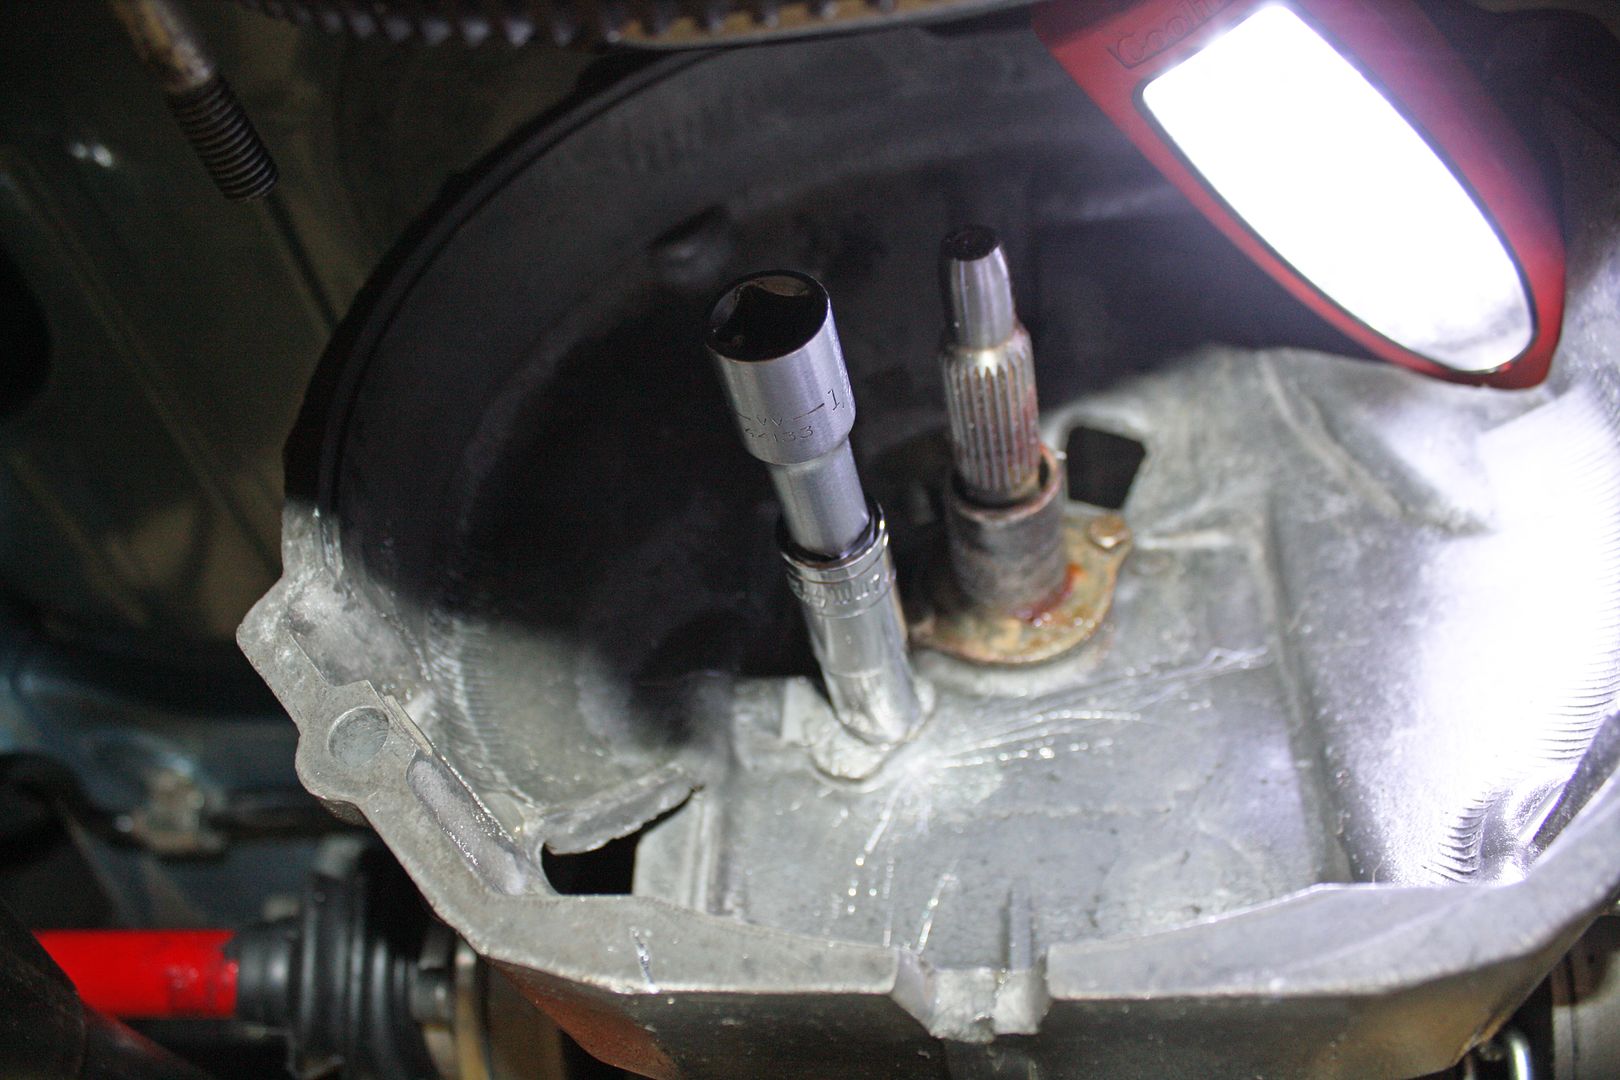
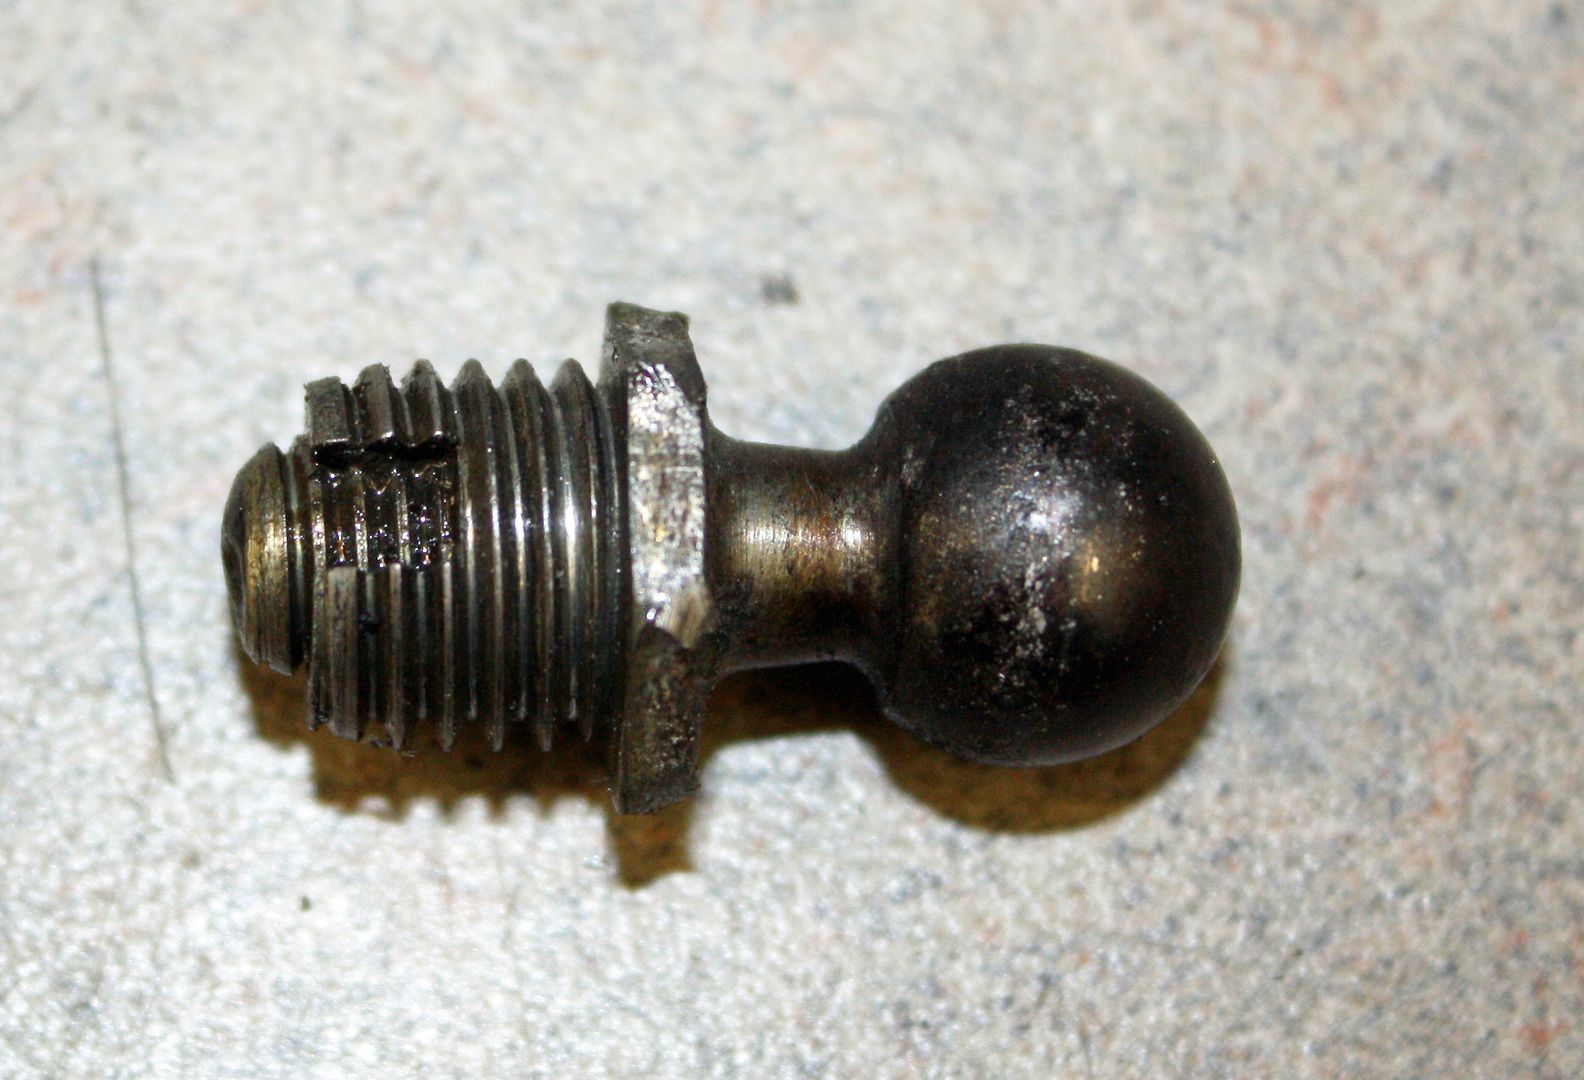
Brad suggested beginning with a 1mm shim, which, as you can see by the calipers, is not very much. He said a little makes a big difference. I found two thin washers that equaled 1.45mm. They also fit in the recessed area, although I don't think they would have without my enlarging the area yesterday.
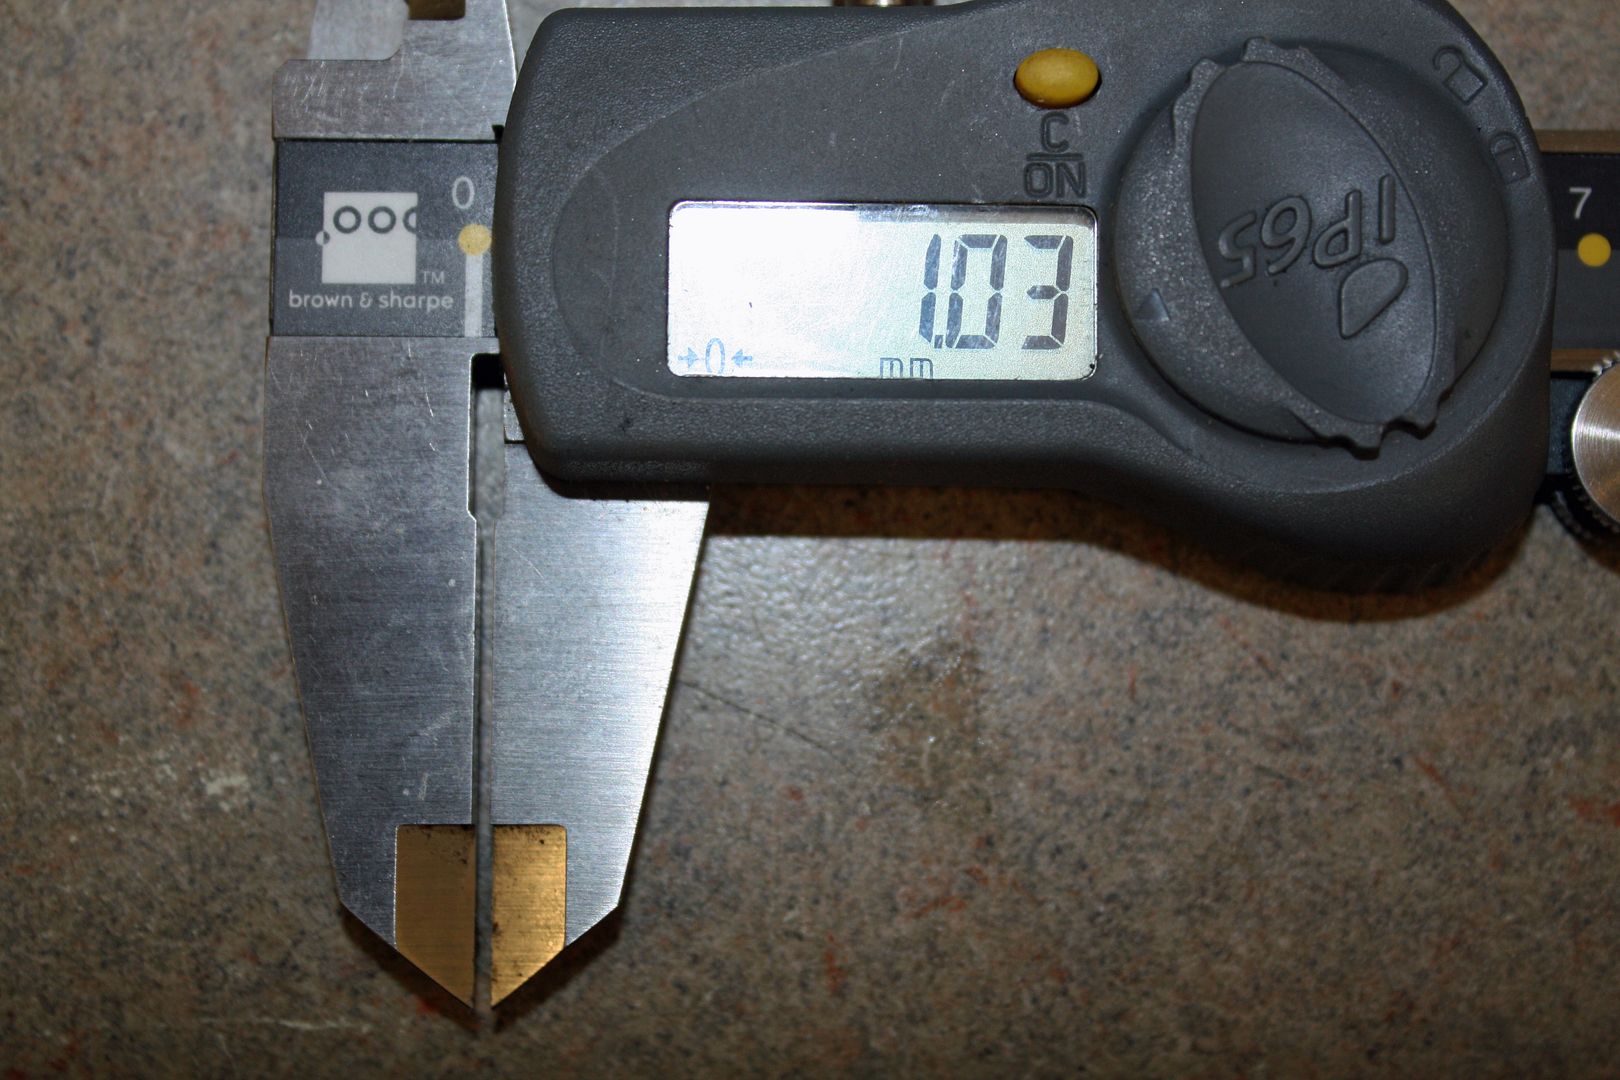
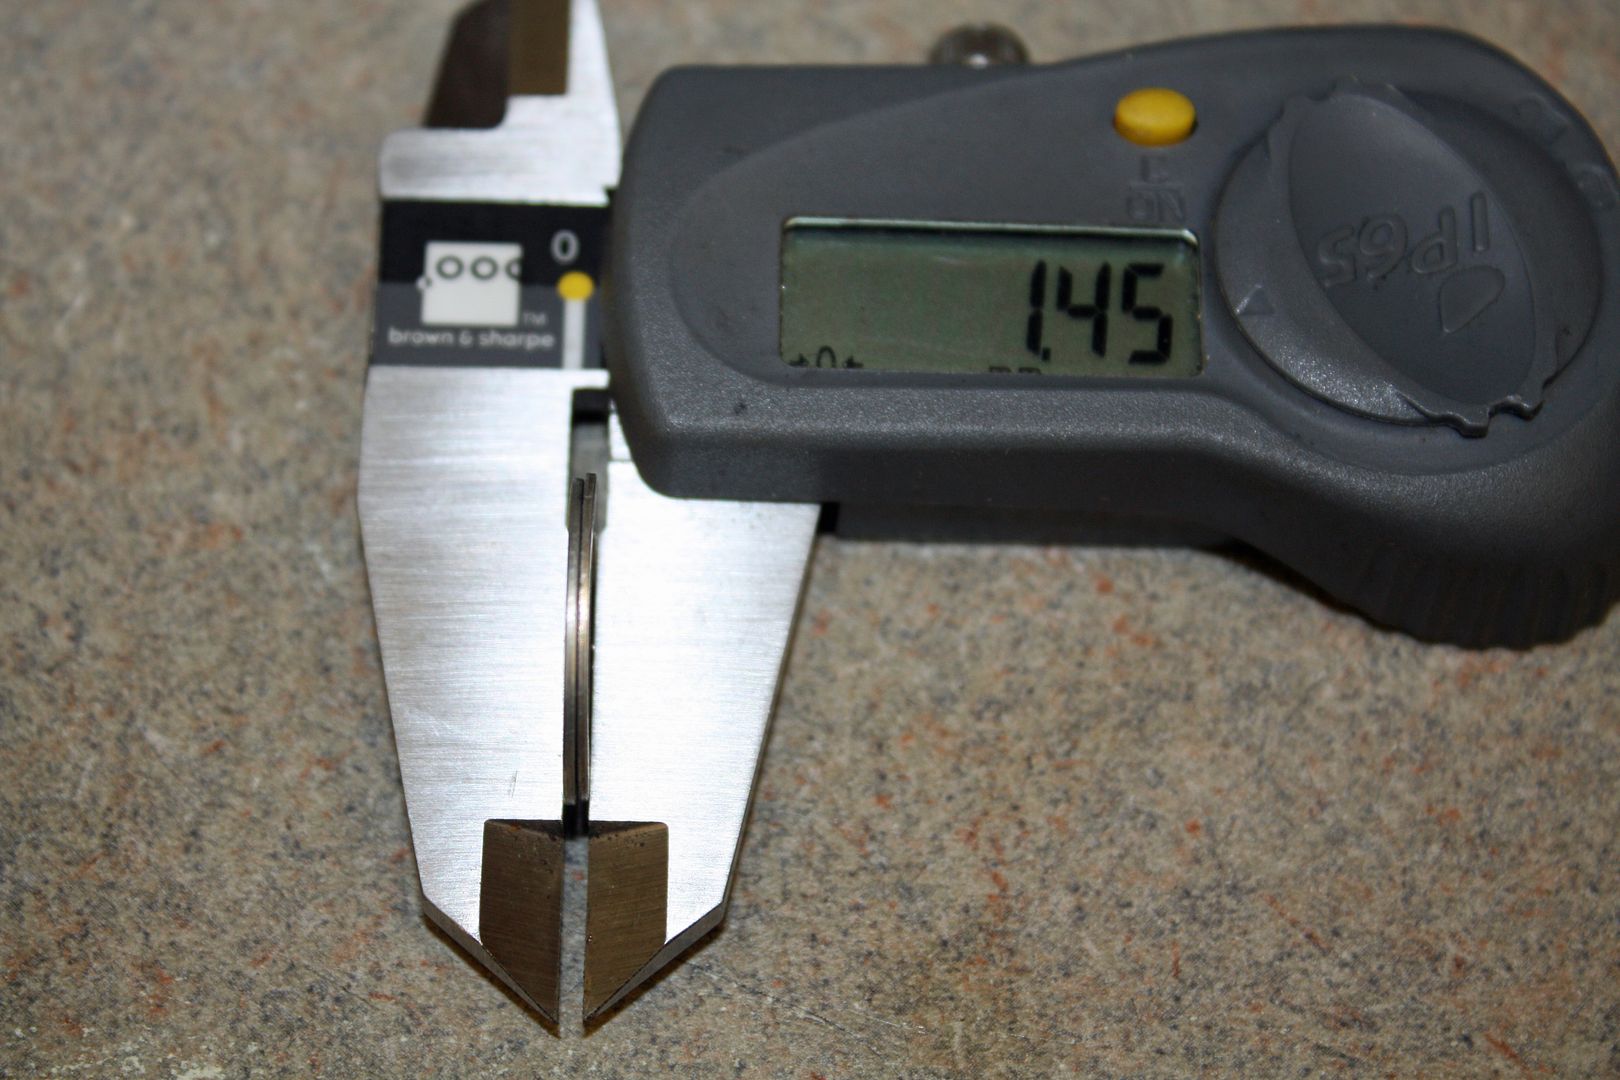
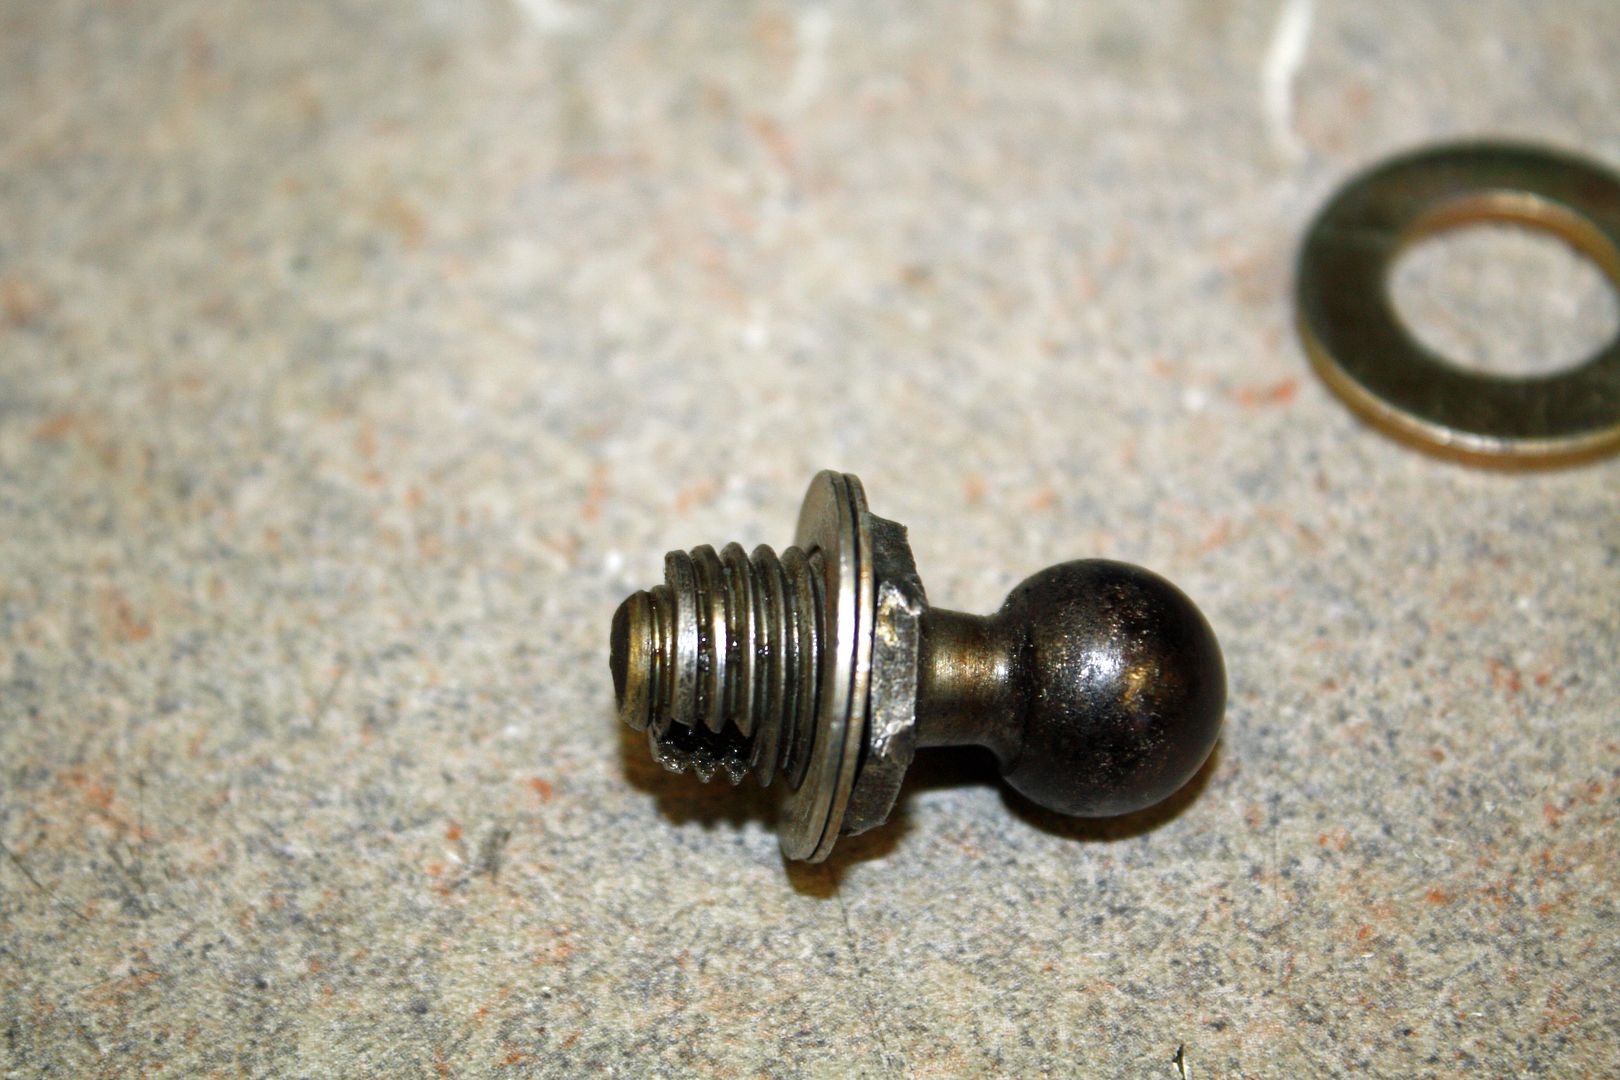


Brad suggested beginning with a 1mm shim, which, as you can see by the calipers, is not very much. He said a little makes a big difference. I found two thin washers that equaled 1.45mm. They also fit in the recessed area, although I don't think they would have without my enlarging the area yesterday.


 12-10-2018, 07:55 PM
#130
Racer
Thread Starter
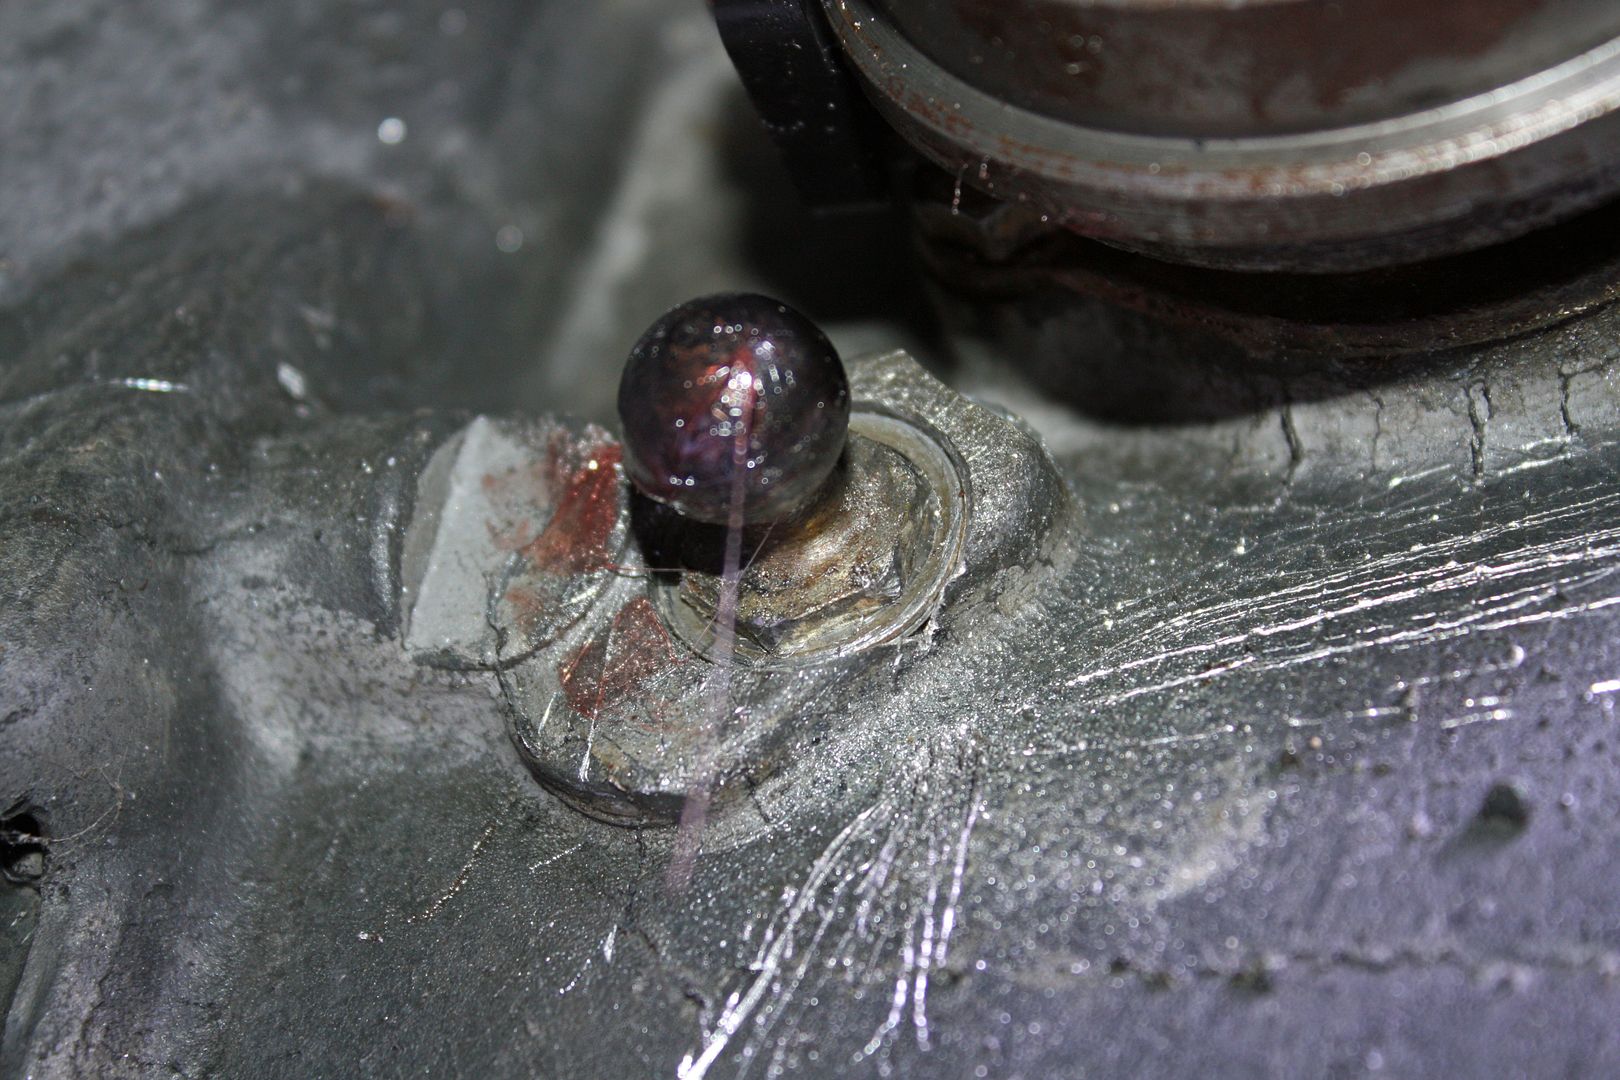
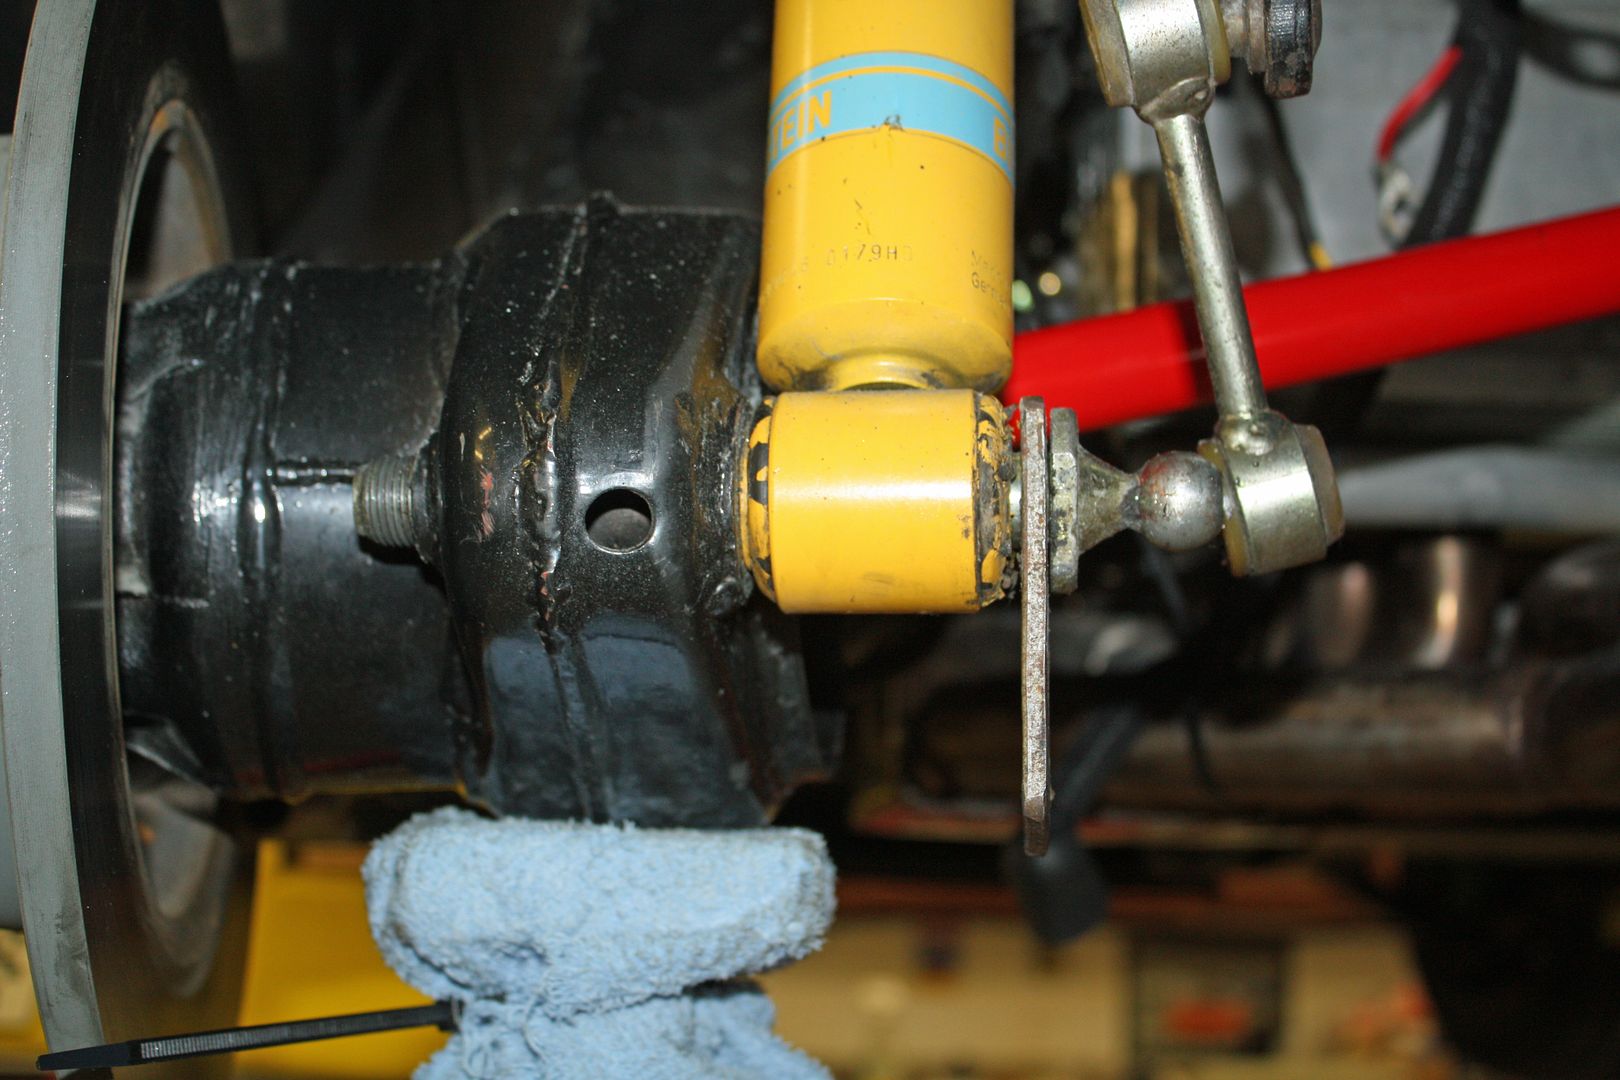
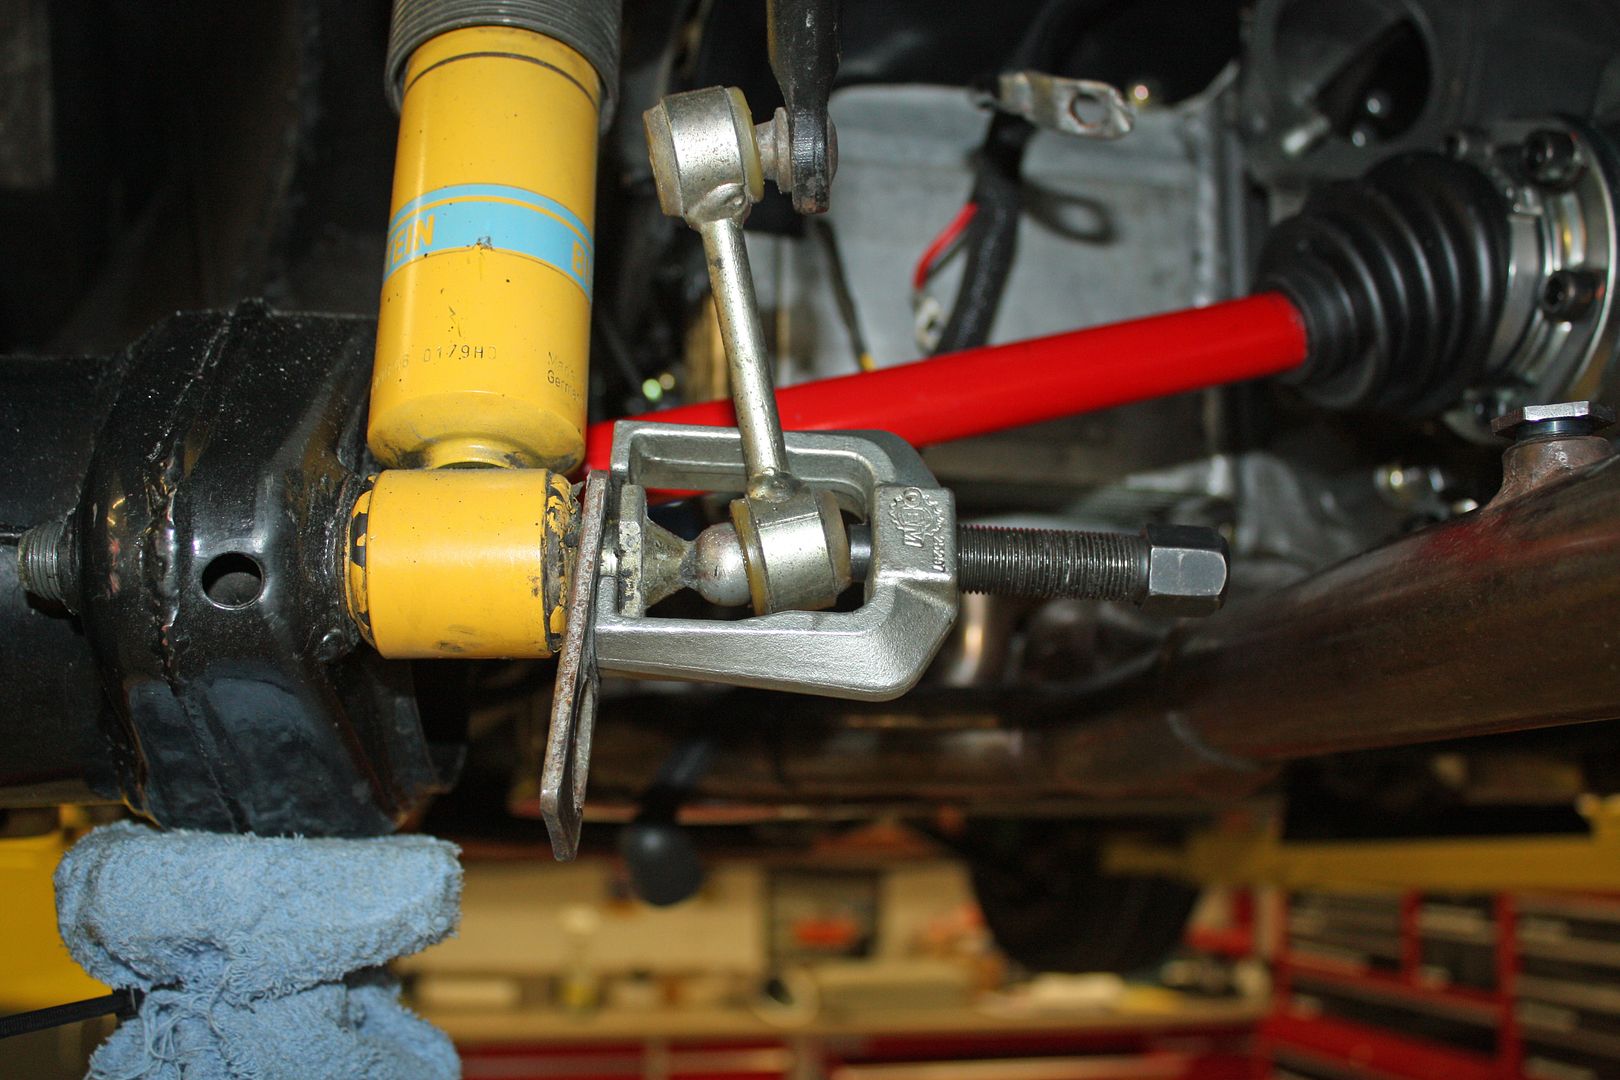
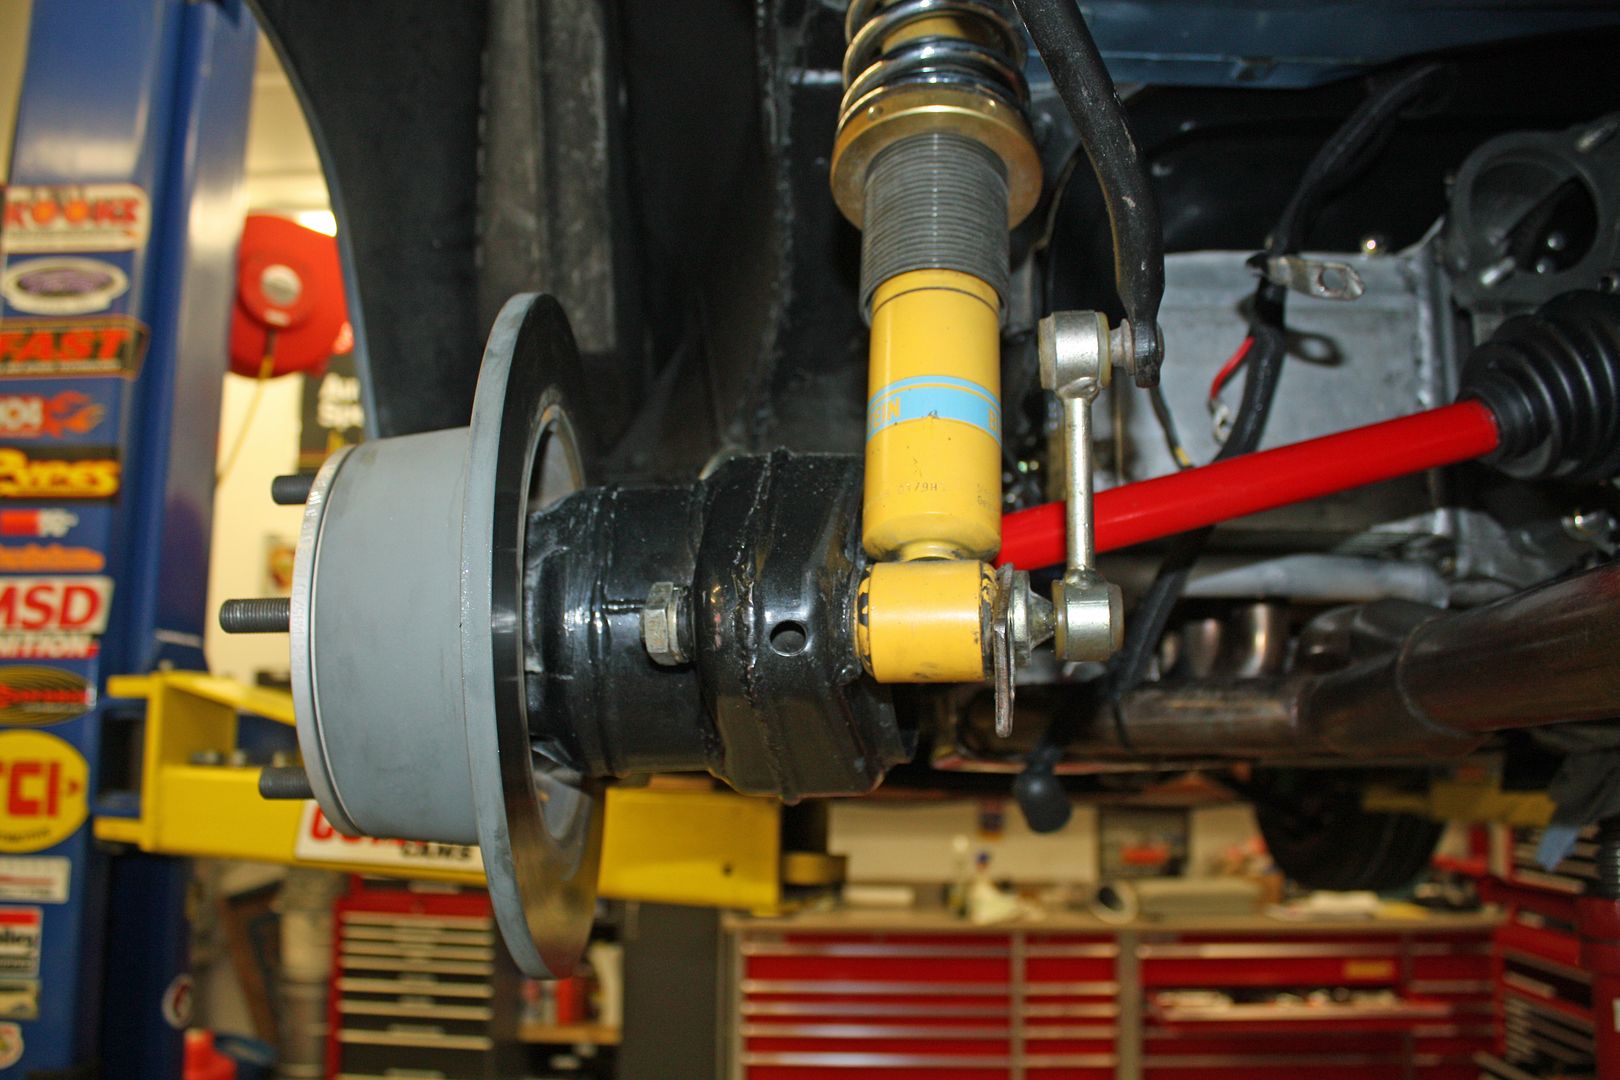
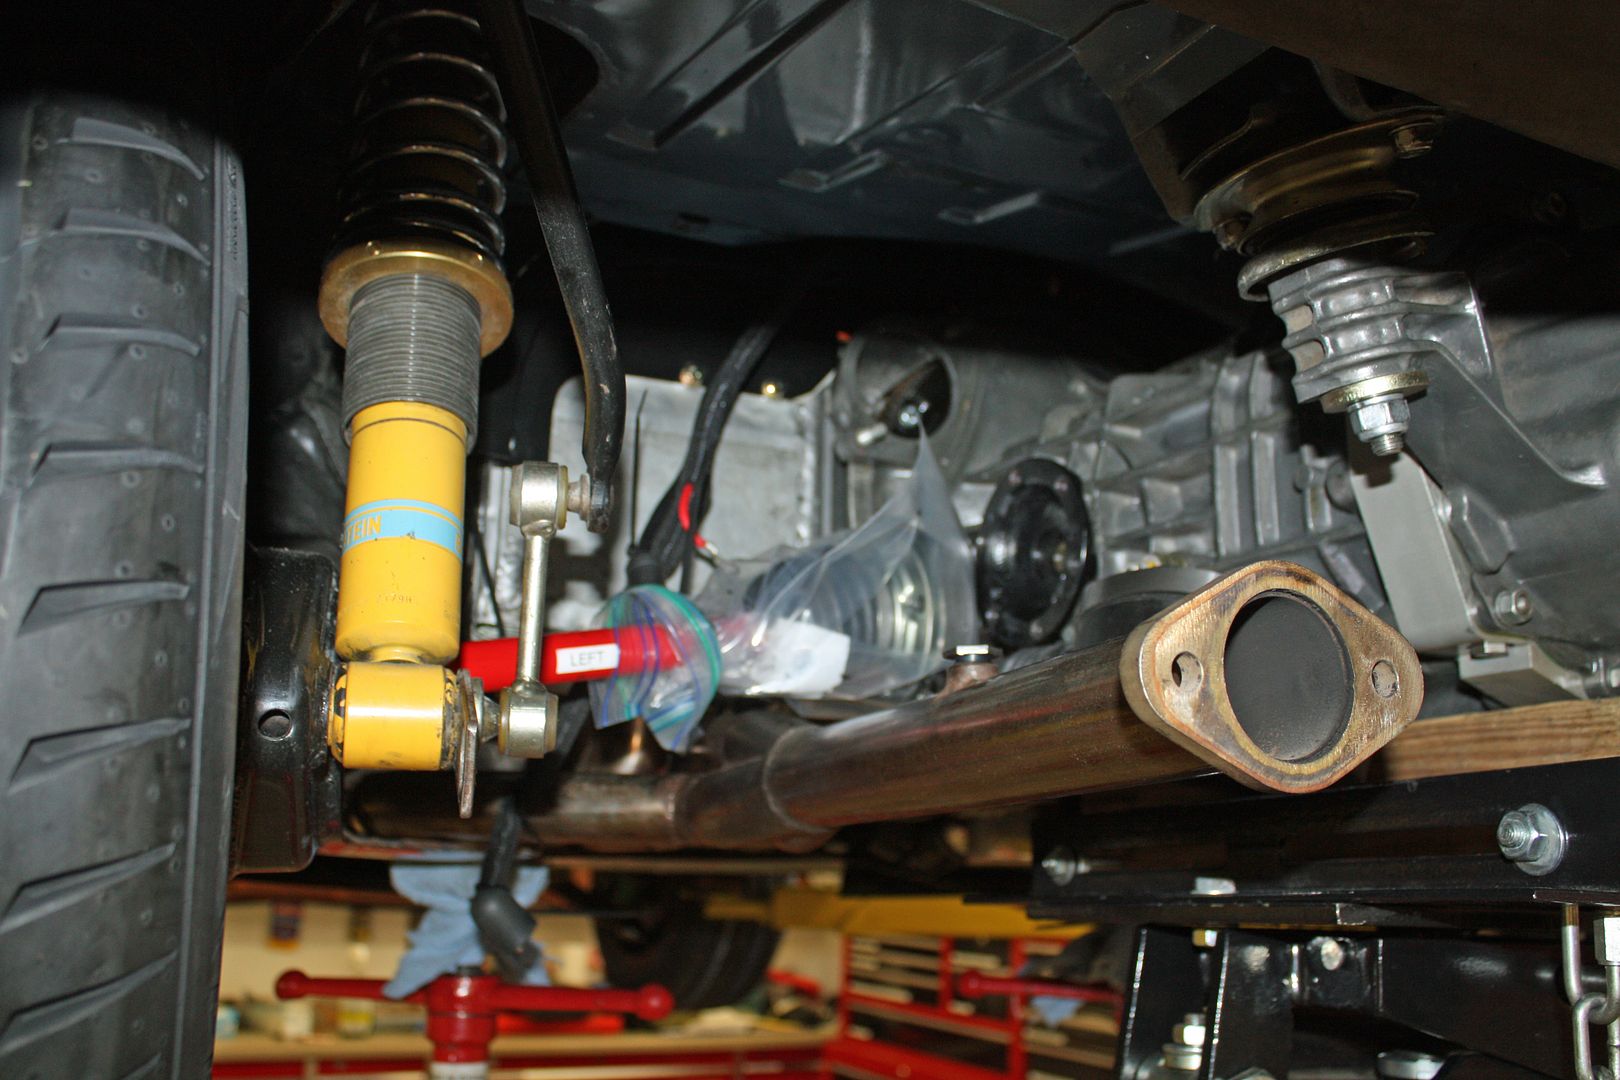
I had tried to install the sway bar links a couple days ago to no avail. After thinking about it, I decided to remove the shock absorber nut and slide the shaft out. In my "special tools" drawer, I found one that I thought would work by grabbing the rear of the shock mount. It worked well as I was able to press the link onto the ball.
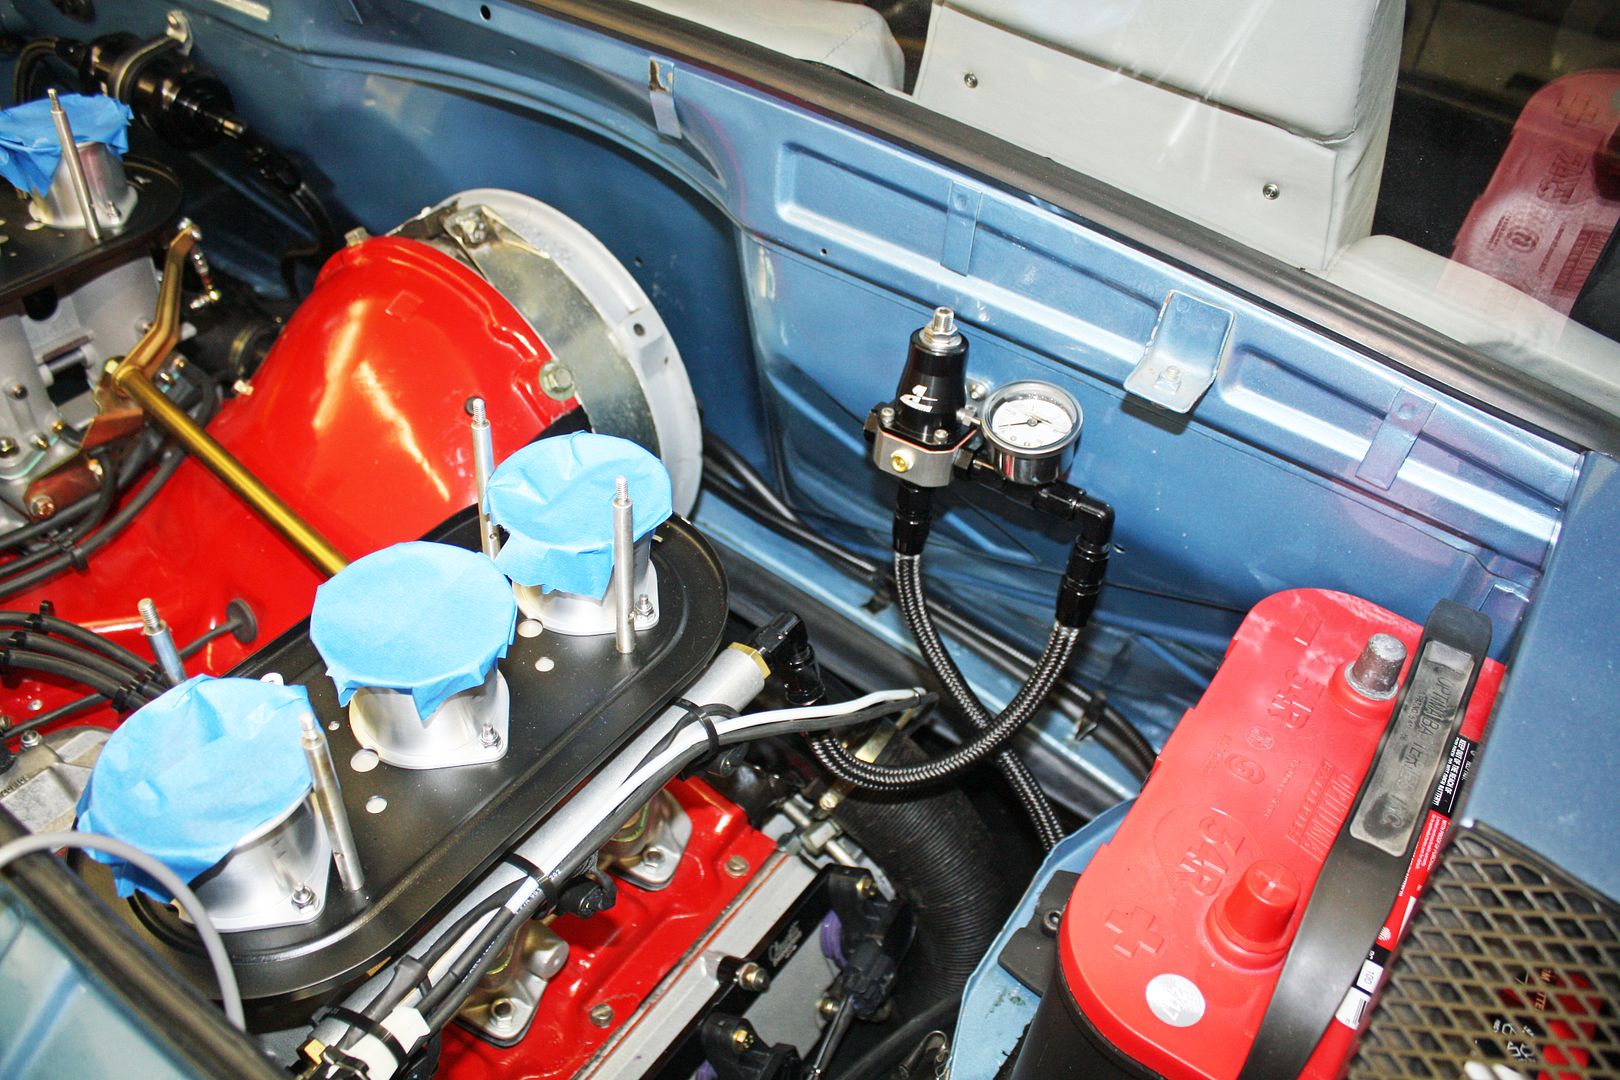
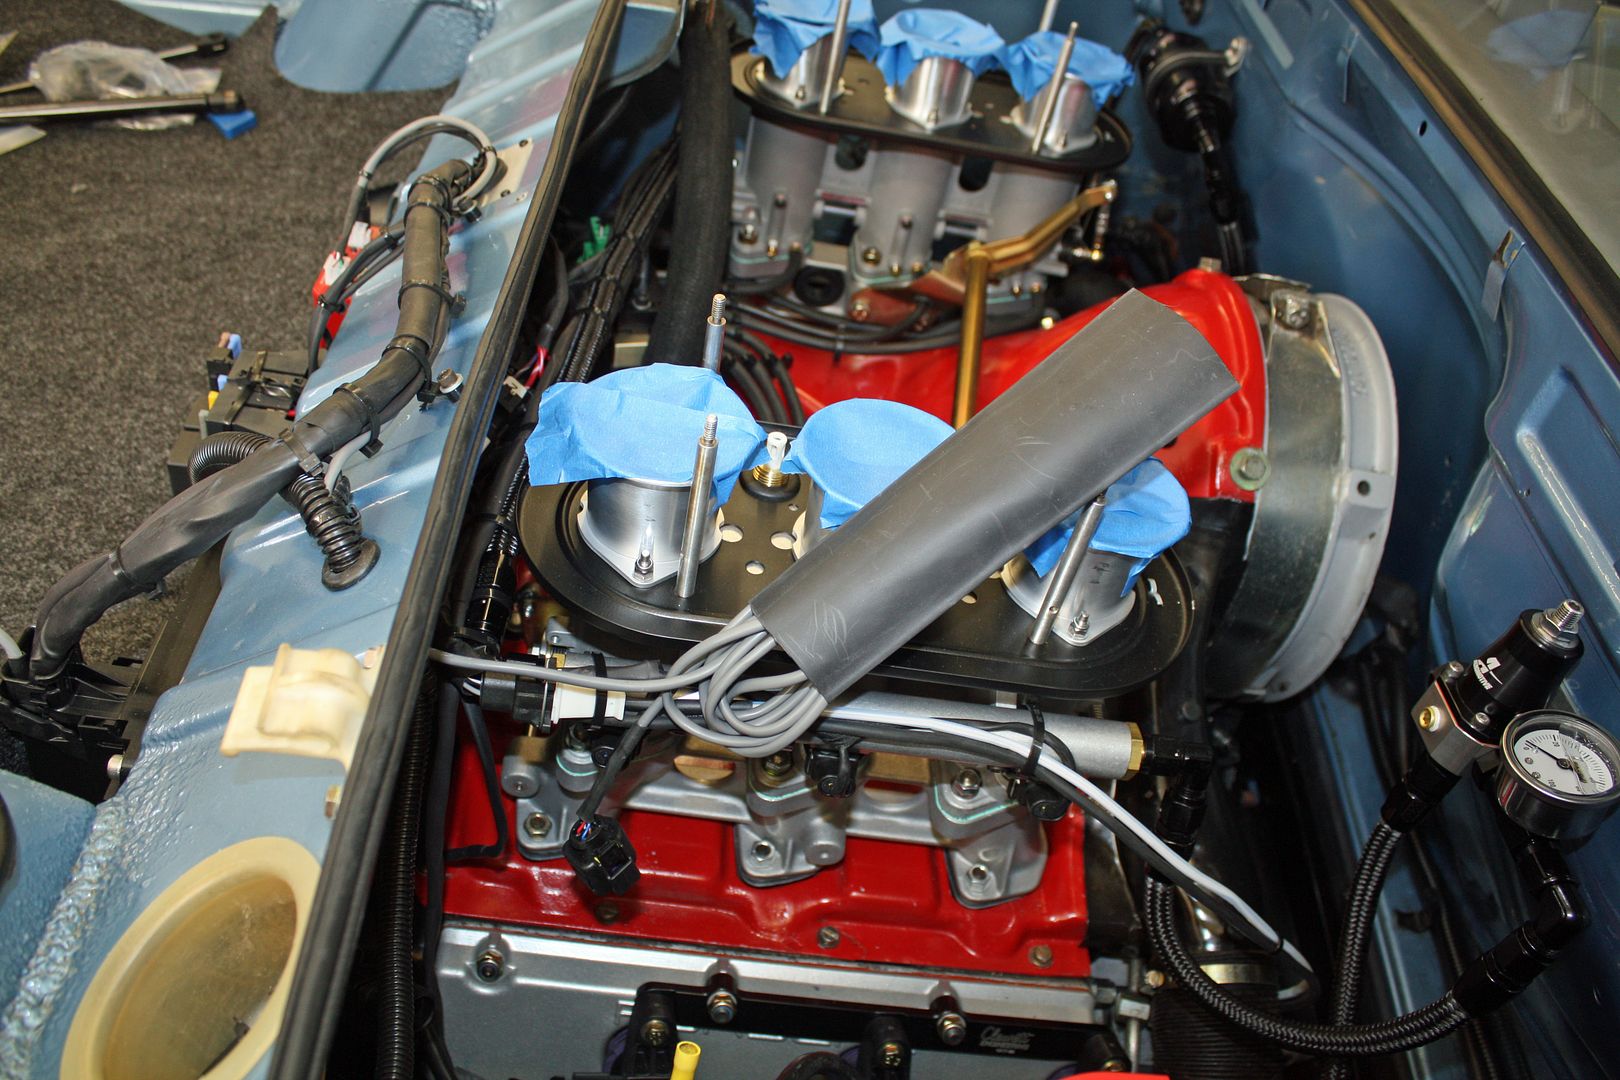
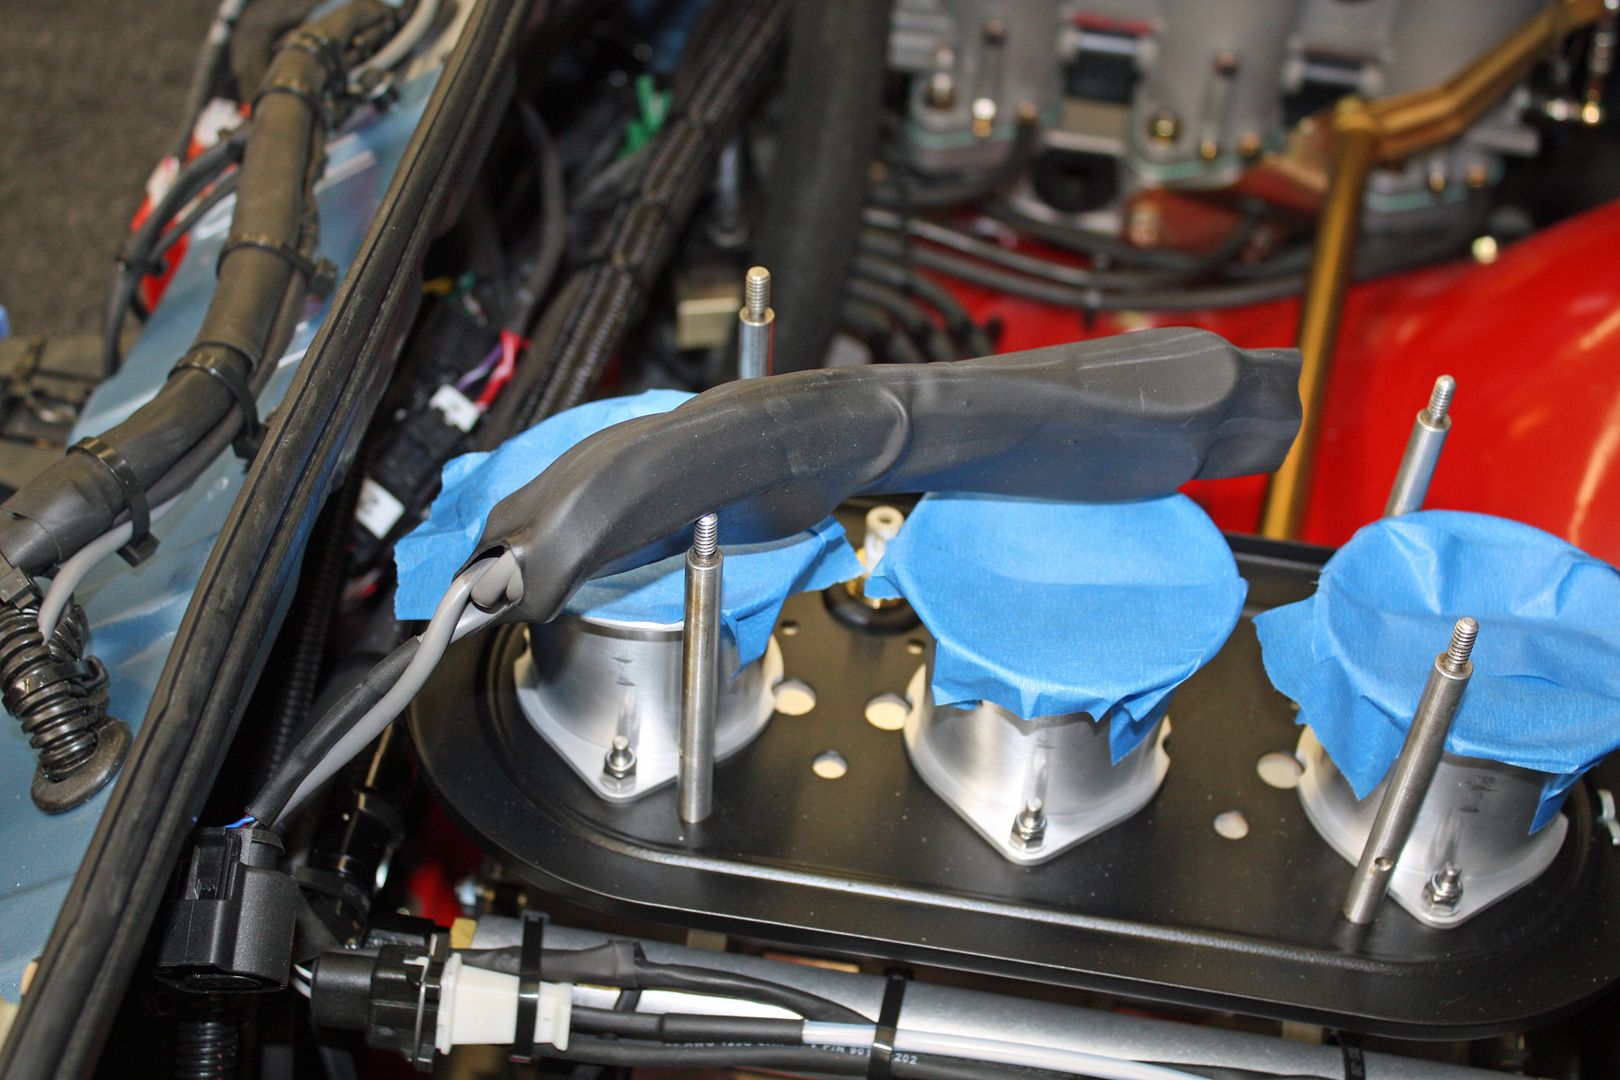
Since I had the throttle cable detached when I pulled the transmission, I wanted to make sure the butterflies were opening all the way. Since my wife wasn't in the garage with me, I decided to use my camera. I fastened the lens to the throttle body with a couple of zip ties. By snaking the monitor around inside the cab, I could see when the butterflies were open completely.

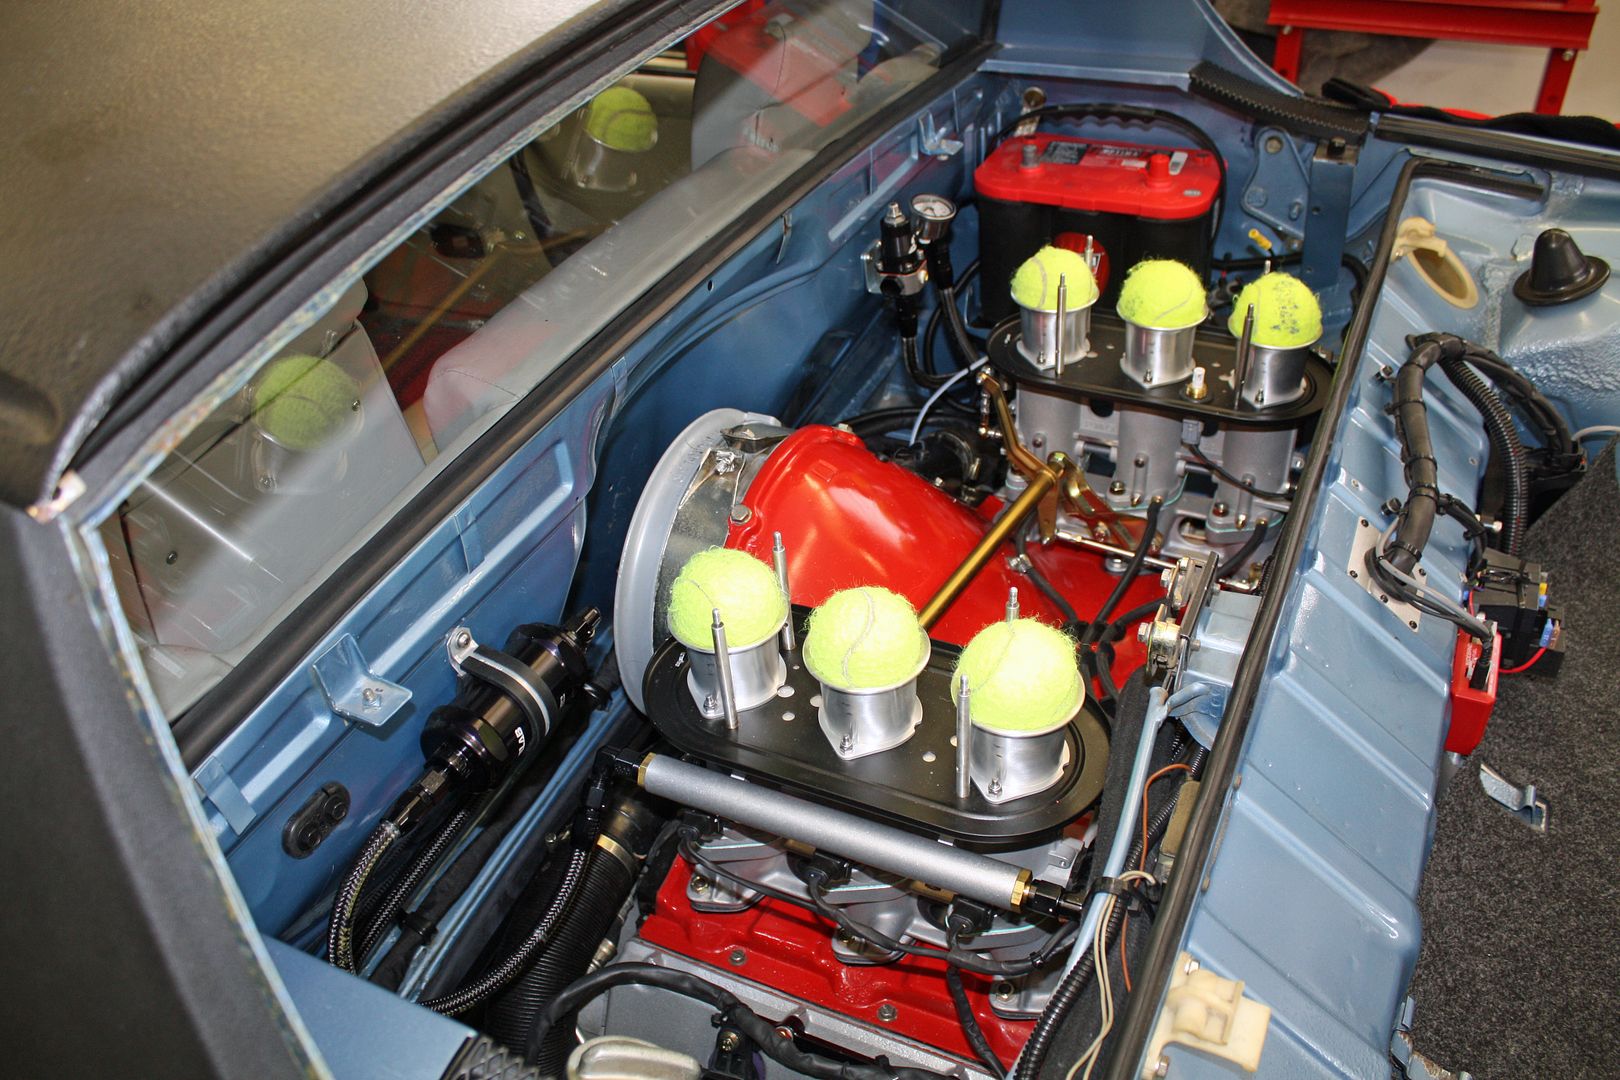
In anticipation of starting the car, I removed the tape on the throttle bodies and borrowed six of our dog's tennis *****. She is a ball playing fool and loves her tennis *****.
Now I was ready to start the car. I put in a call to Richard Clewett. While I was waiting for his return call, I cleaned the floorpan.
Richard returned my call just as I was finishing up cleaning the floorpan. I have a Mac Pro laptop. Since Electromotive's software is only Windows compatible, I had to download a program called Parallels that allows me to operate either out of Windows or IOS. I also had to download a program called TeamViewer so Richard could take over my computer to set the parameters for initial startup. I had him on speakerphone as he went from window to window inputting data.
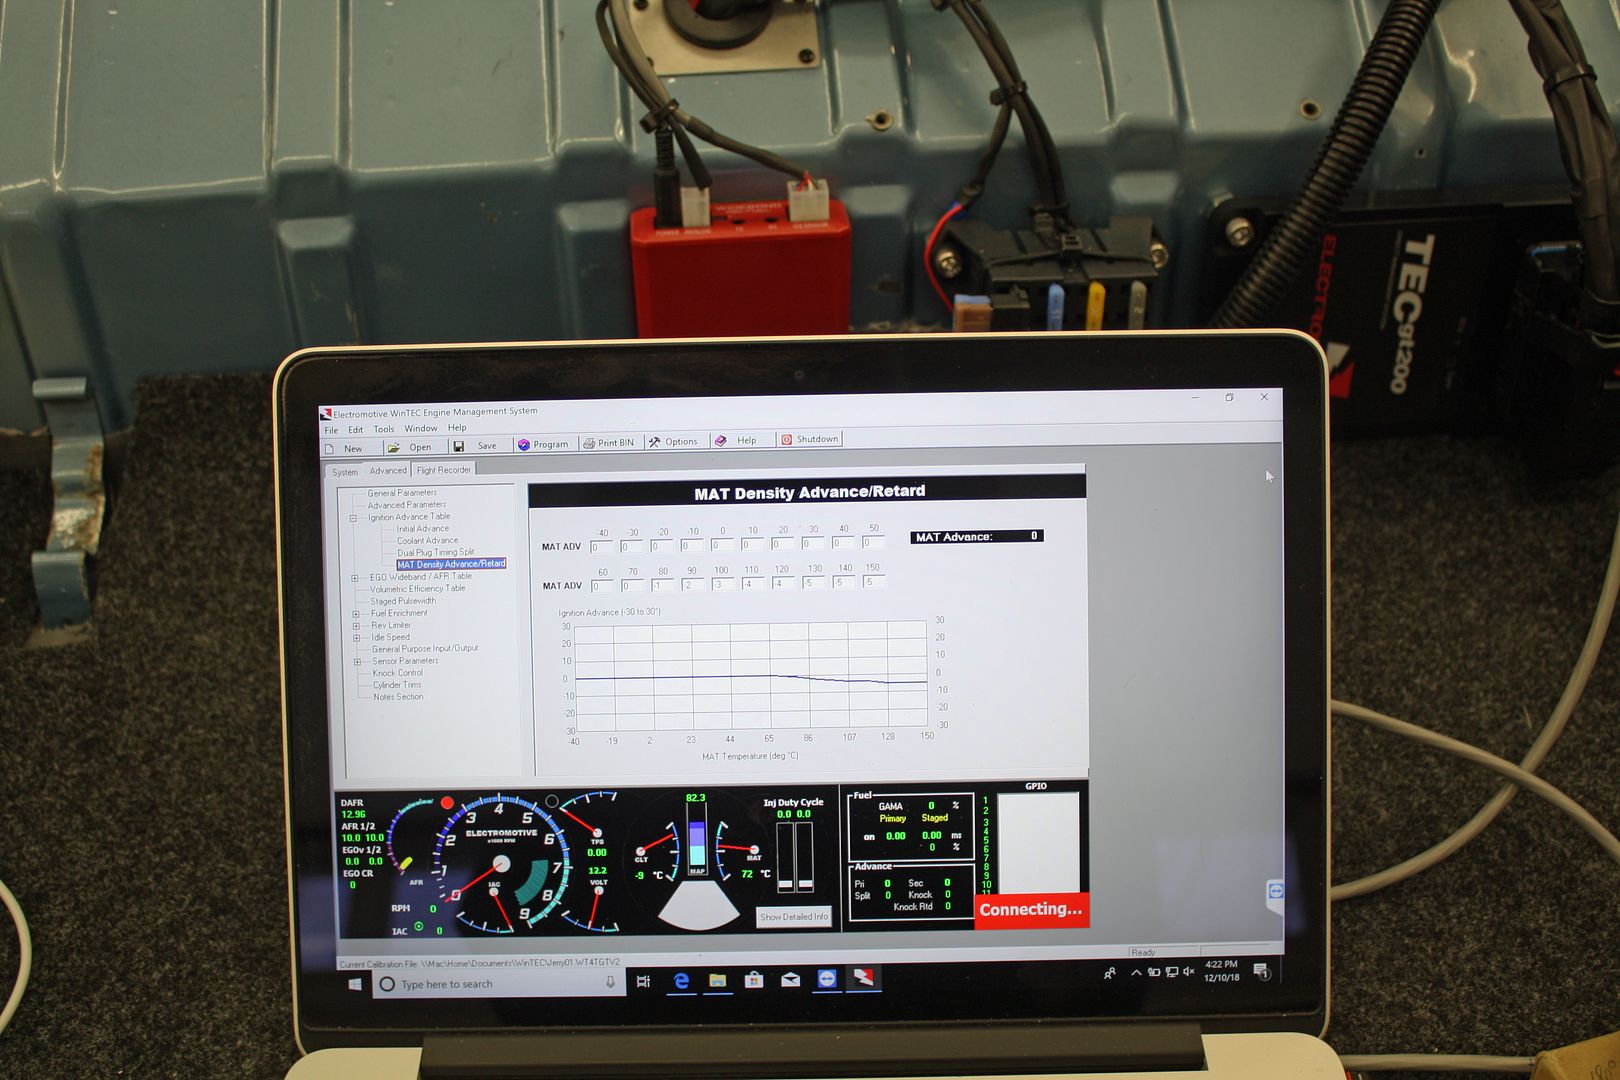
I set the fuel pressure at 50psi and we were ready to start the engine. I turned the key and the starter went "clunk". I am not sure what the problem is but wonder if it is related to the Kennedy flywheel and clutch. I am going to pull the starter tomorrow to get to the ring gear. I want to see if I can turn the engine with a prybar. Richard asked if the engine was free and I said it was based on turning it to set the valve clearance. He asked if I had tried to turn the motor over once I had the transmission hooked up and I had not thought of doing this. I also wonder if the starter gear needs to be shimmed because of the Kennedy flywheel.
So no go today. We also discovered that all the sensors are reporting for duty except the Throttle Position Sensor (TPS). I will troubleshoot that tomorrow as well. I am disappointed that we could not start the motor but I understand that there are many variables in putting this thing back together.


Since I had the throttle cable detached when I pulled the transmission, I wanted to make sure the butterflies were opening all the way. Since my wife wasn't in the garage with me, I decided to use my camera. I fastened the lens to the throttle body with a couple of zip ties. By snaking the monitor around inside the cab, I could see when the butterflies were open completely.


In anticipation of starting the car, I removed the tape on the throttle bodies and borrowed six of our dog's tennis *****. She is a ball playing fool and loves her tennis *****.

Now I was ready to start the car. I put in a call to Richard Clewett. While I was waiting for his return call, I cleaned the floorpan.

Richard returned my call just as I was finishing up cleaning the floorpan. I have a Mac Pro laptop. Since Electromotive's software is only Windows compatible, I had to download a program called Parallels that allows me to operate either out of Windows or IOS. I also had to download a program called TeamViewer so Richard could take over my computer to set the parameters for initial startup. I had him on speakerphone as he went from window to window inputting data.

I set the fuel pressure at 50psi and we were ready to start the engine. I turned the key and the starter went "clunk". I am not sure what the problem is but wonder if it is related to the Kennedy flywheel and clutch. I am going to pull the starter tomorrow to get to the ring gear. I want to see if I can turn the engine with a prybar. Richard asked if the engine was free and I said it was based on turning it to set the valve clearance. He asked if I had tried to turn the motor over once I had the transmission hooked up and I had not thought of doing this. I also wonder if the starter gear needs to be shimmed because of the Kennedy flywheel.
So no go today. We also discovered that all the sensors are reporting for duty except the Throttle Position Sensor (TPS). I will troubleshoot that tomorrow as well. I am disappointed that we could not start the motor but I understand that there are many variables in putting this thing back together.
12-11-2018, 05:19 PM
#131
Racer
Thread Starter
Not long after we got our first motorhome a little over four years ago, we began pulling a 2013 Fiat 500 Abarth behind it four wheels down. We loved that car and it was trouble free. After three years, we had put a number of miles on it, so we sold it and bought a low mileage certified 2017 in the same model. Because we bought the same car, all of my towing gear just needed to be transferred from one car to the other.
Not too long after I got the 2017 I noticed that it was using a lot more oil than the 2013 did. I began charting it and it was down to less than 700 miles before I had to add a quart. On the 2013 I usually added a quart between oil changes. I took it to the local Fiat dealer who couldn't find anything. So they marked the dipstick and told me to bring it back after driving it 600 miles as they evidently did not believe I knew how to count. I took it back with 600 miles and it was a quart low. So this morning I had to take it in where they will tear it down to see what the issue is. I have been told that I will probably be getting a new motor.
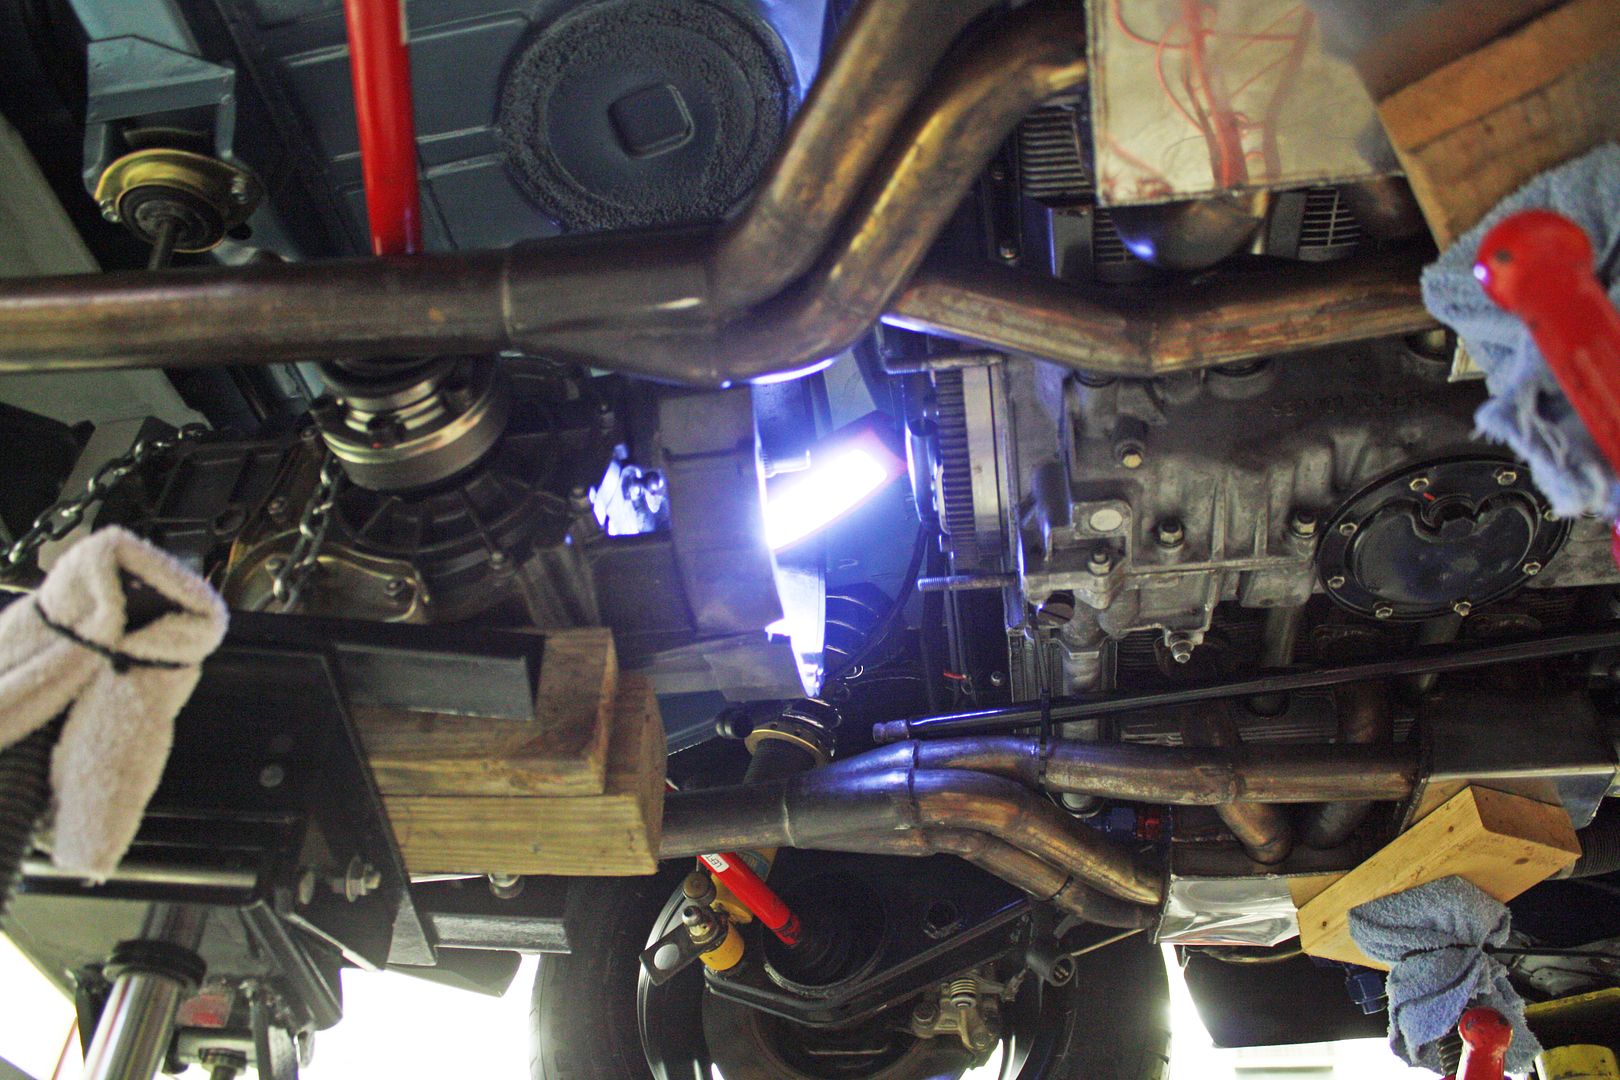
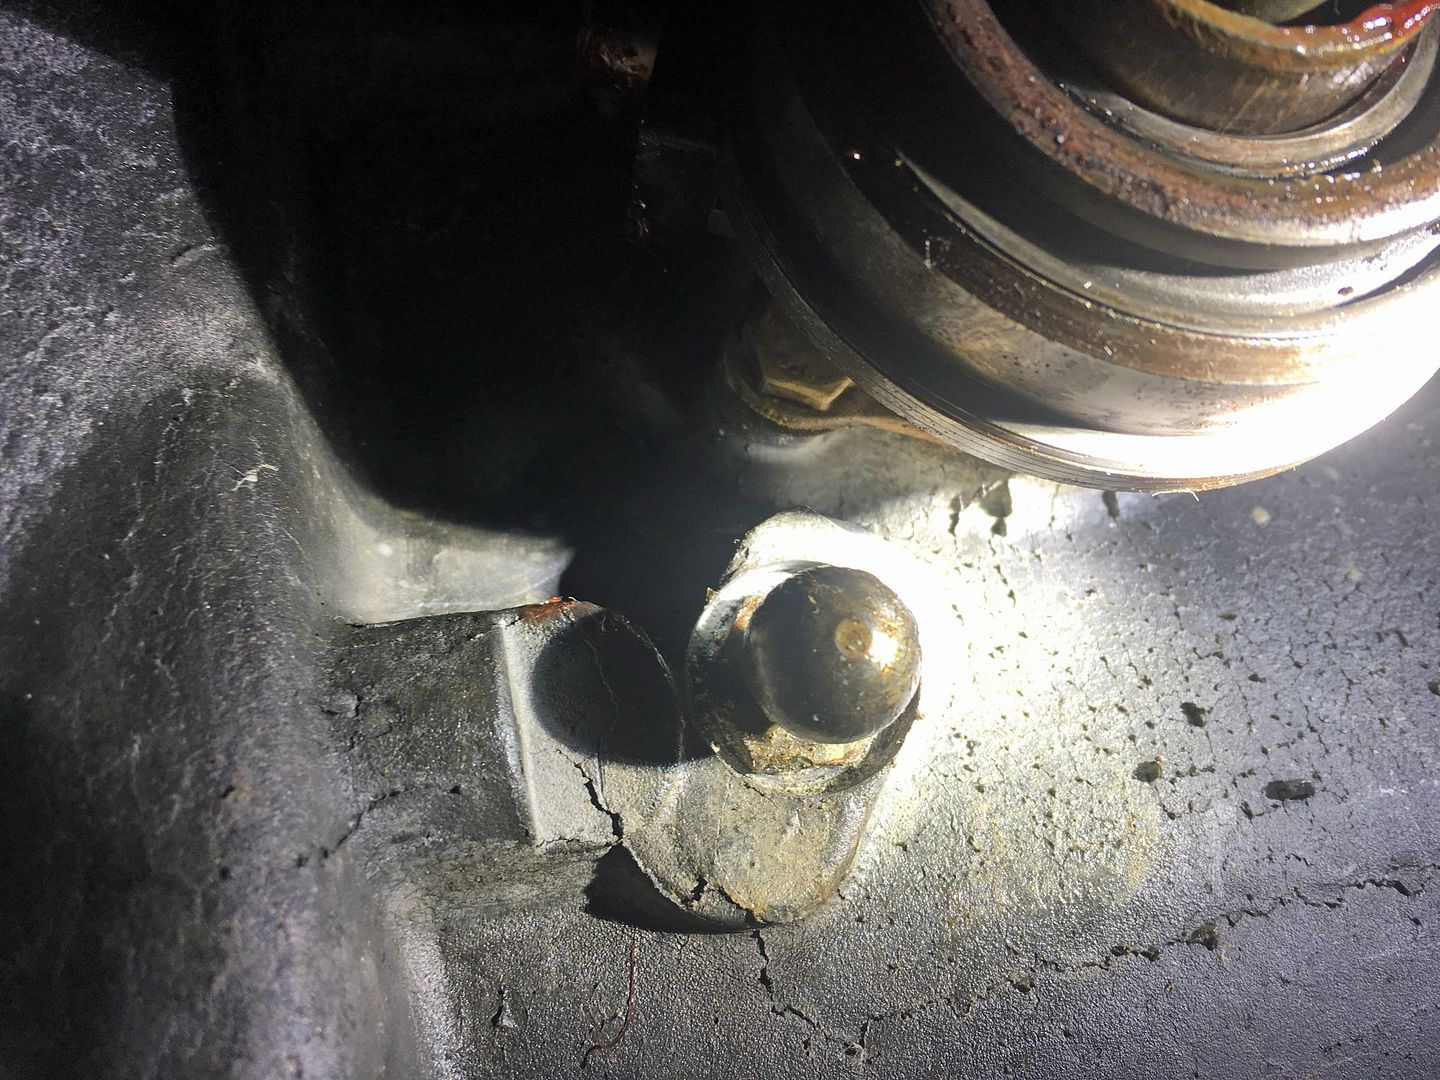
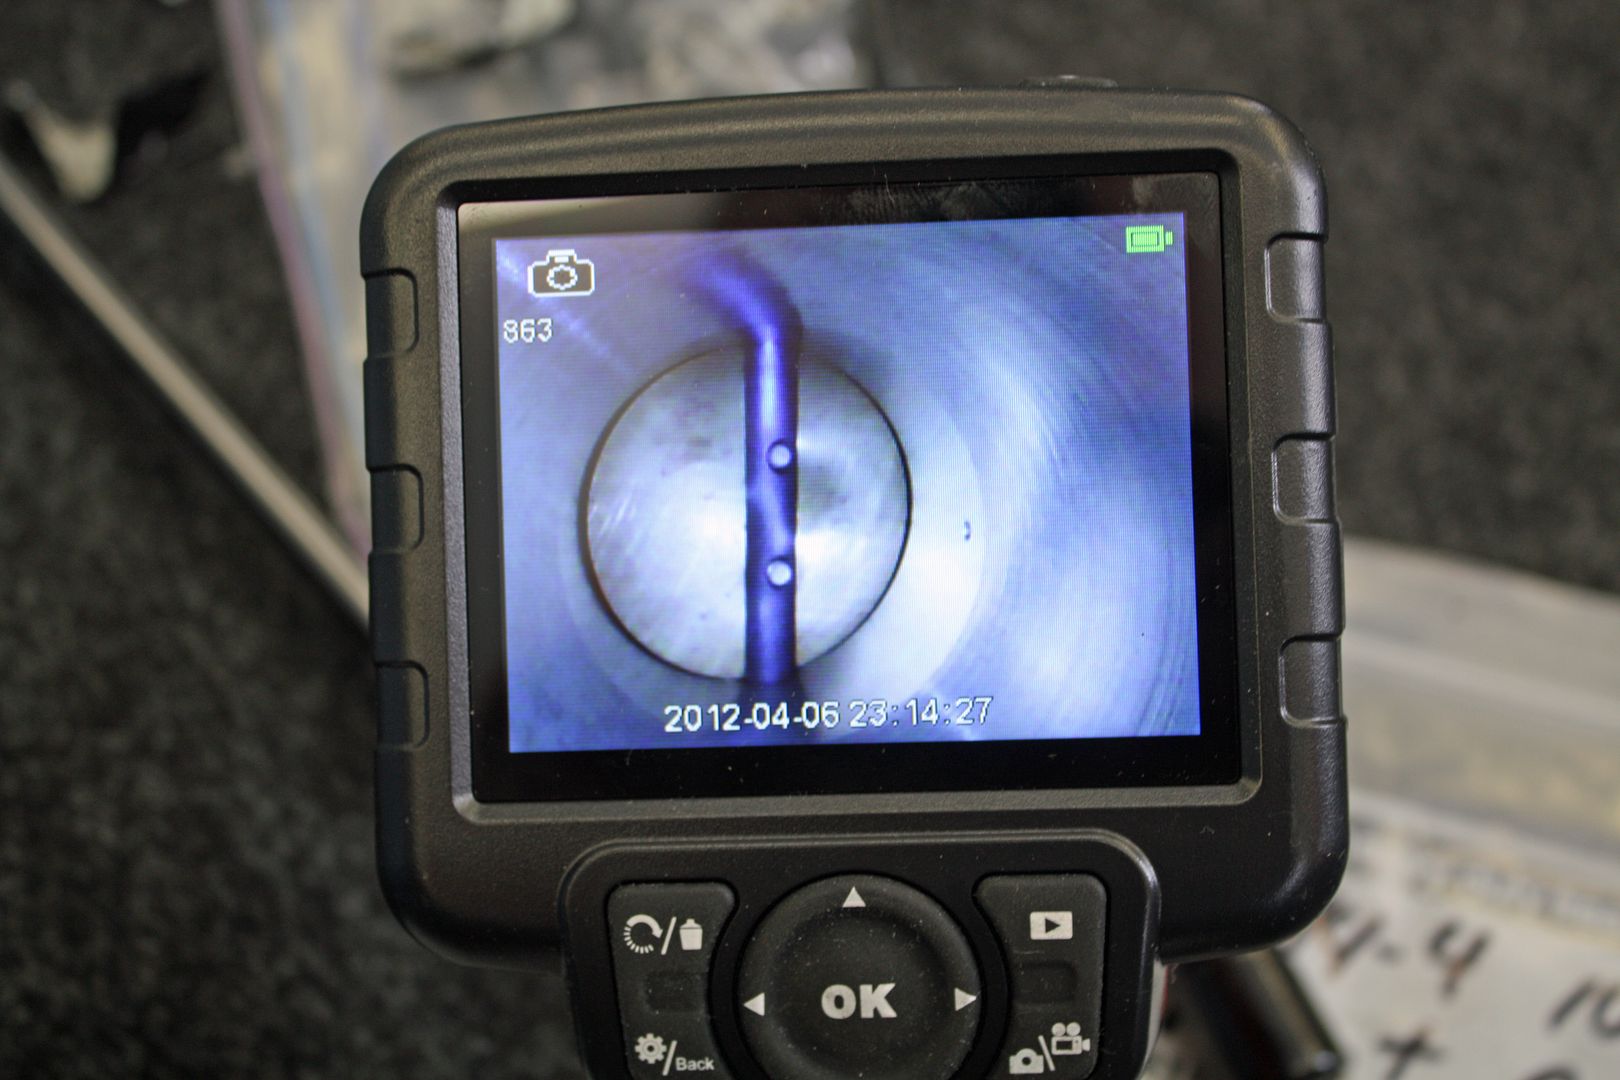
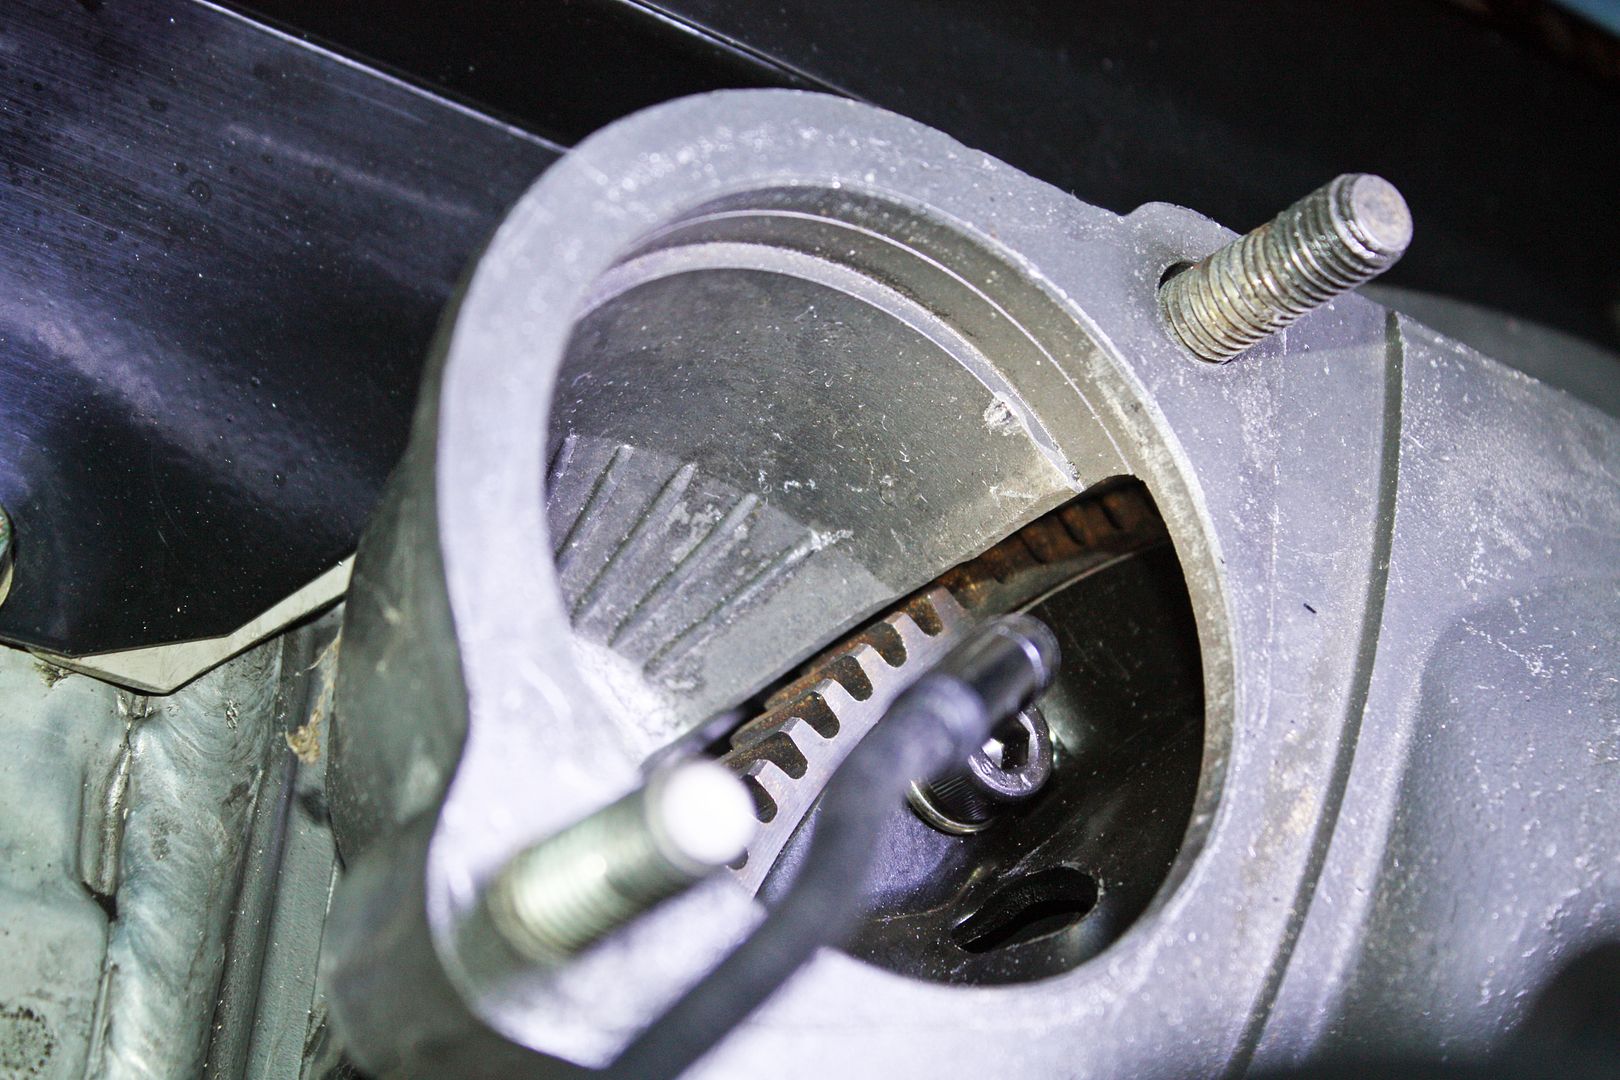
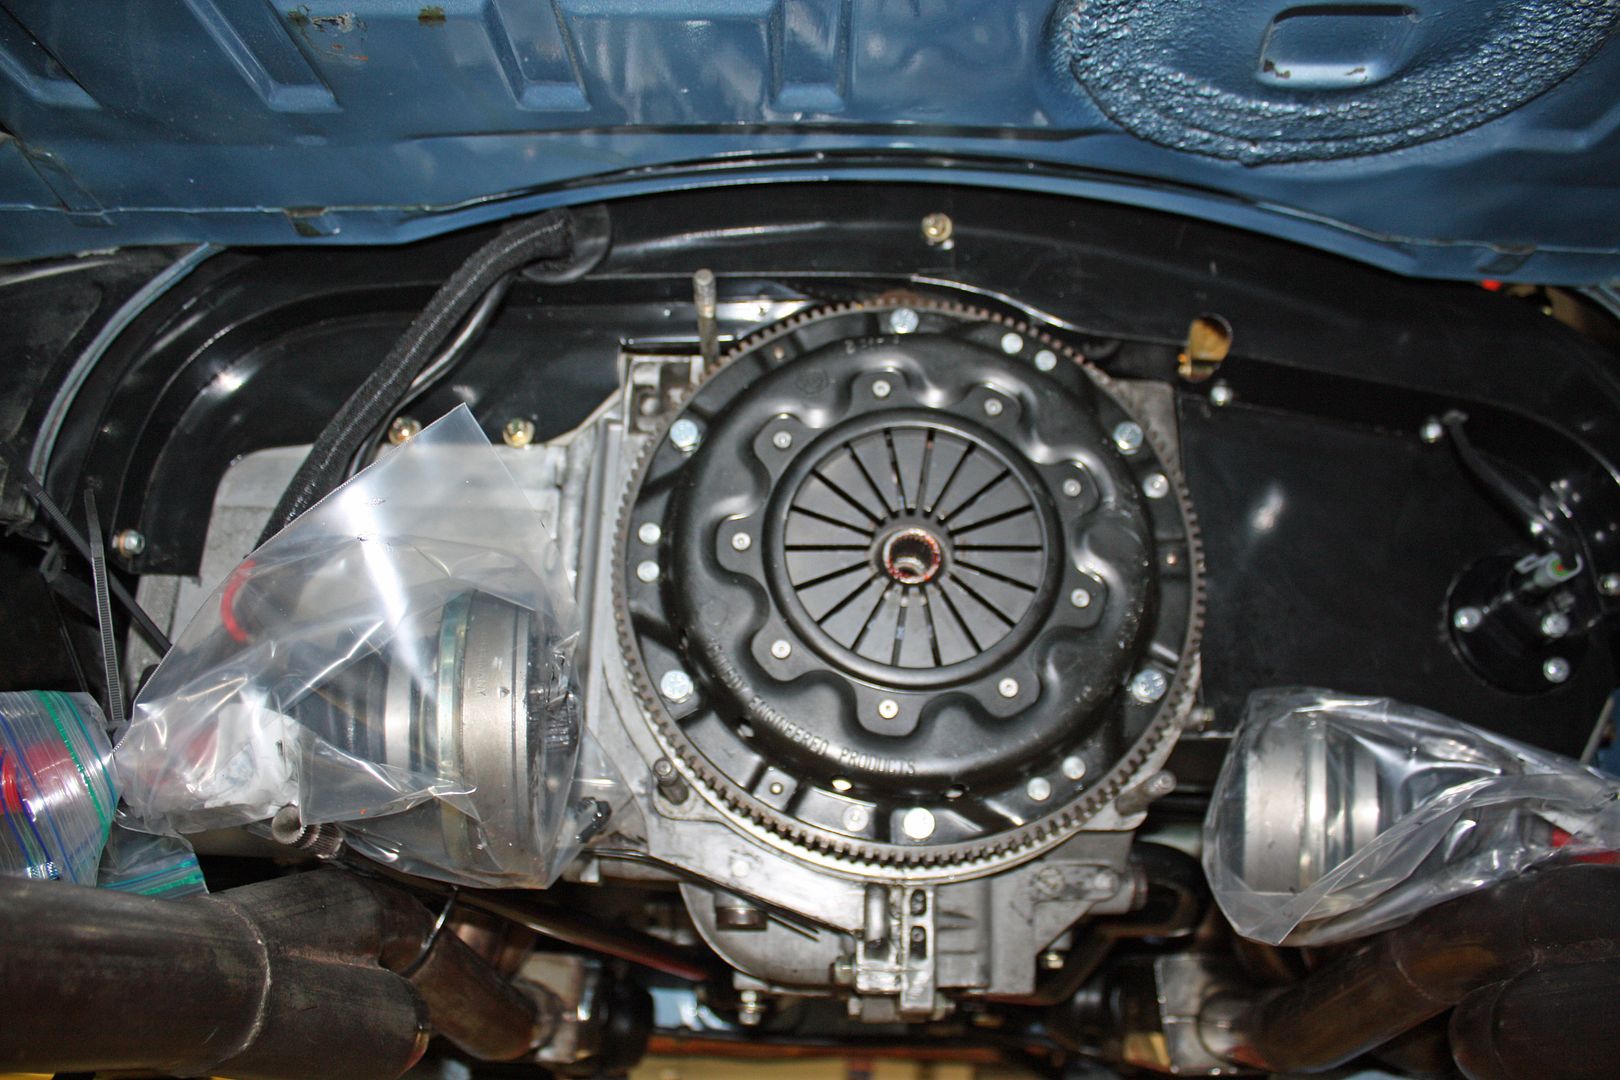
That trip combined with some Christmas shopping took up the morning. After getting into the garage after lunch, the first thing I did was to get out my troubleshooting camera. By looking into the clutch fork hole, I could see that the flywheel is very close. I also have a concern about the bolts I used on the pressure plate. I wanted to use 12.9 hardness bolts and the only ones I could fine were allen bolts with 8mm heads.
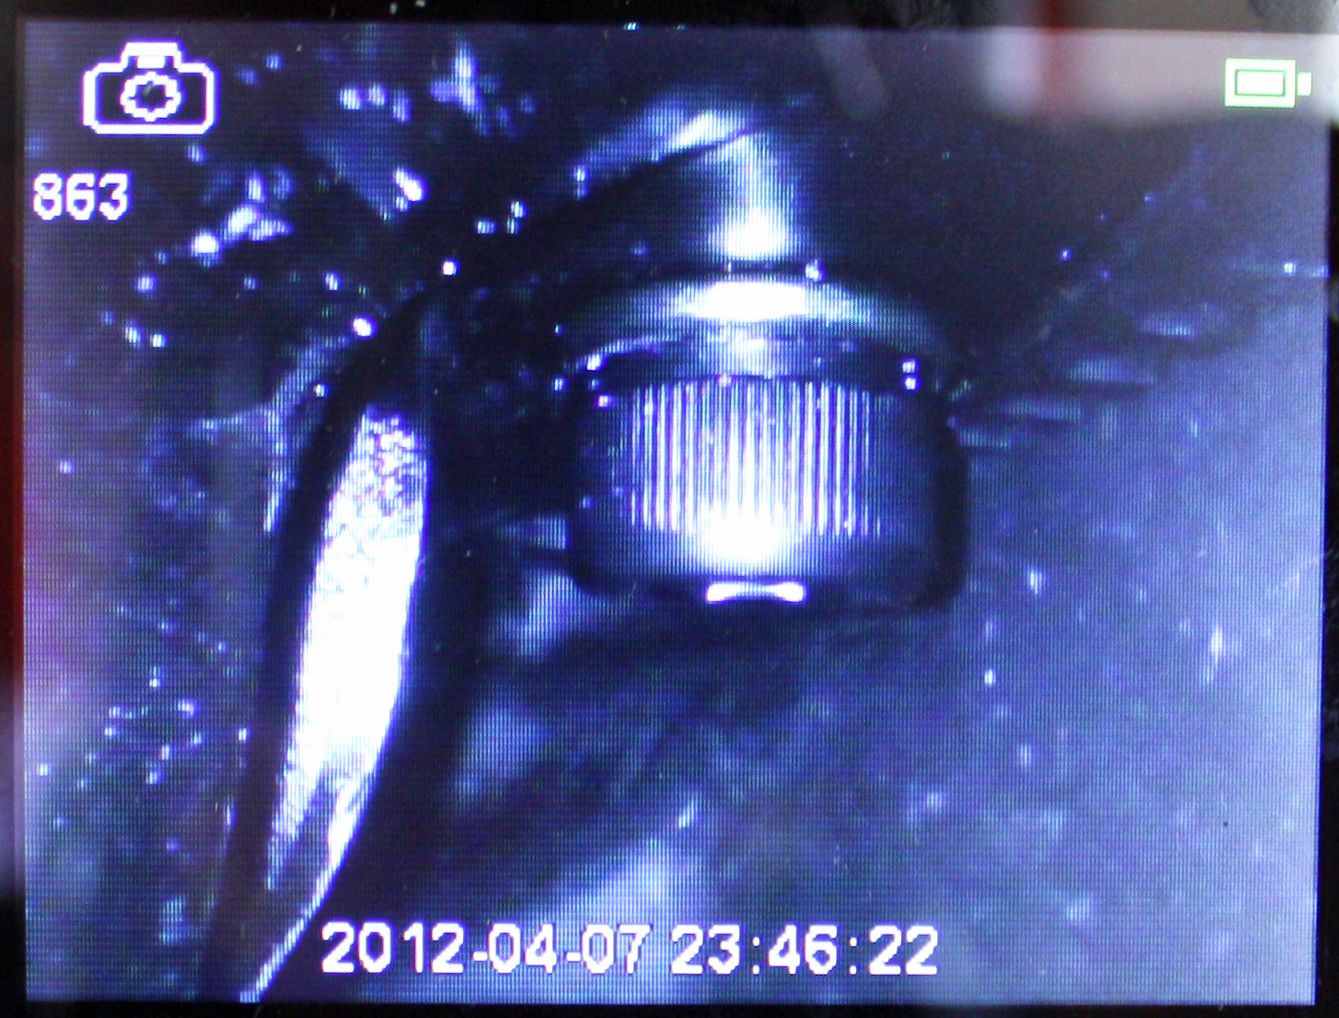
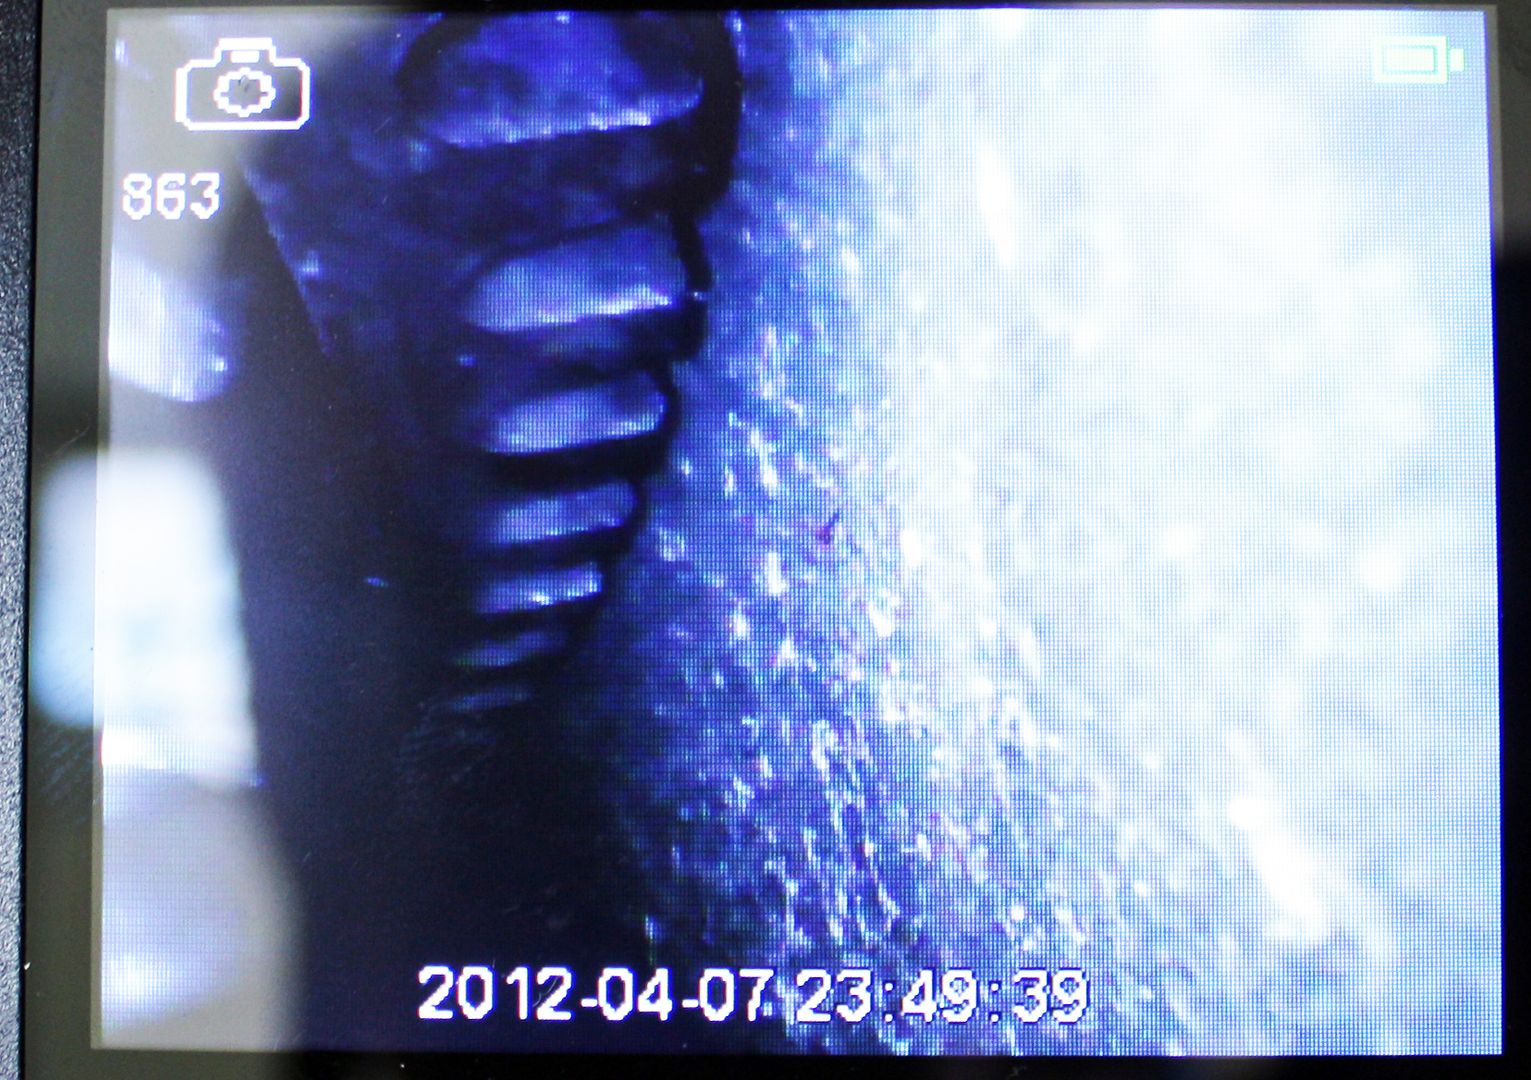
I then pulled the starter. Here again I could see the ring gear was very close but it was clearing. The allen head bolt is visible here as well. I used the camera here as well. I put a pry bar on the ring gear and nothing moved.
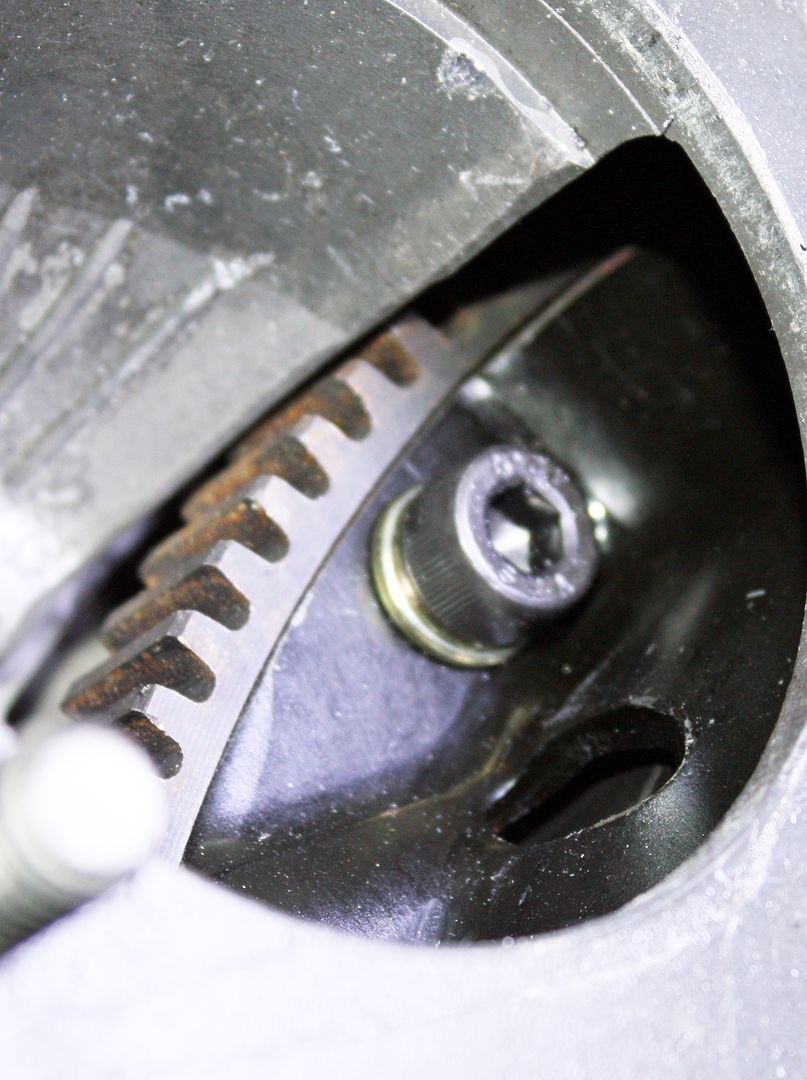

This is a Kennedy Engineering flywheel and pressure plate. I called them and they said the bolts could be the problem. The way to check that is to loosen the bolts and pull the transmission back a bit and see if I can turn the engine over. They did confirm that the stock starter works with their flywheel. I had the starter checked out prior to installing it and it passed with flying colors. Looks like it will come apart again!!
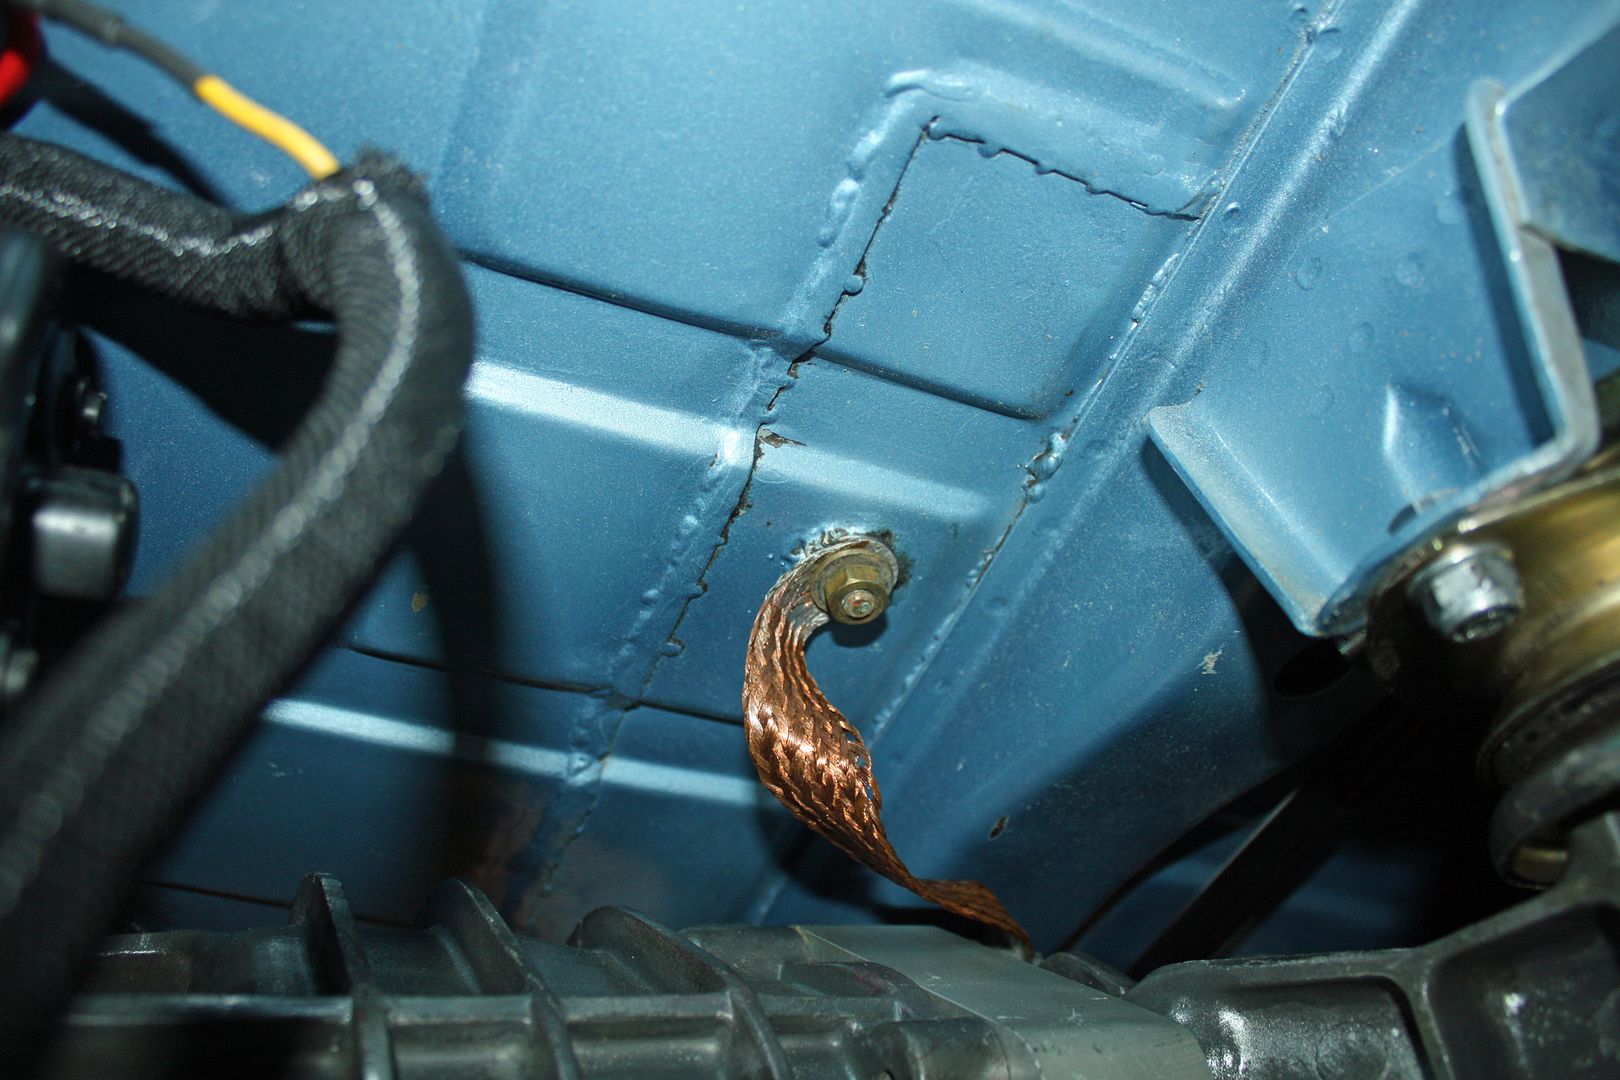
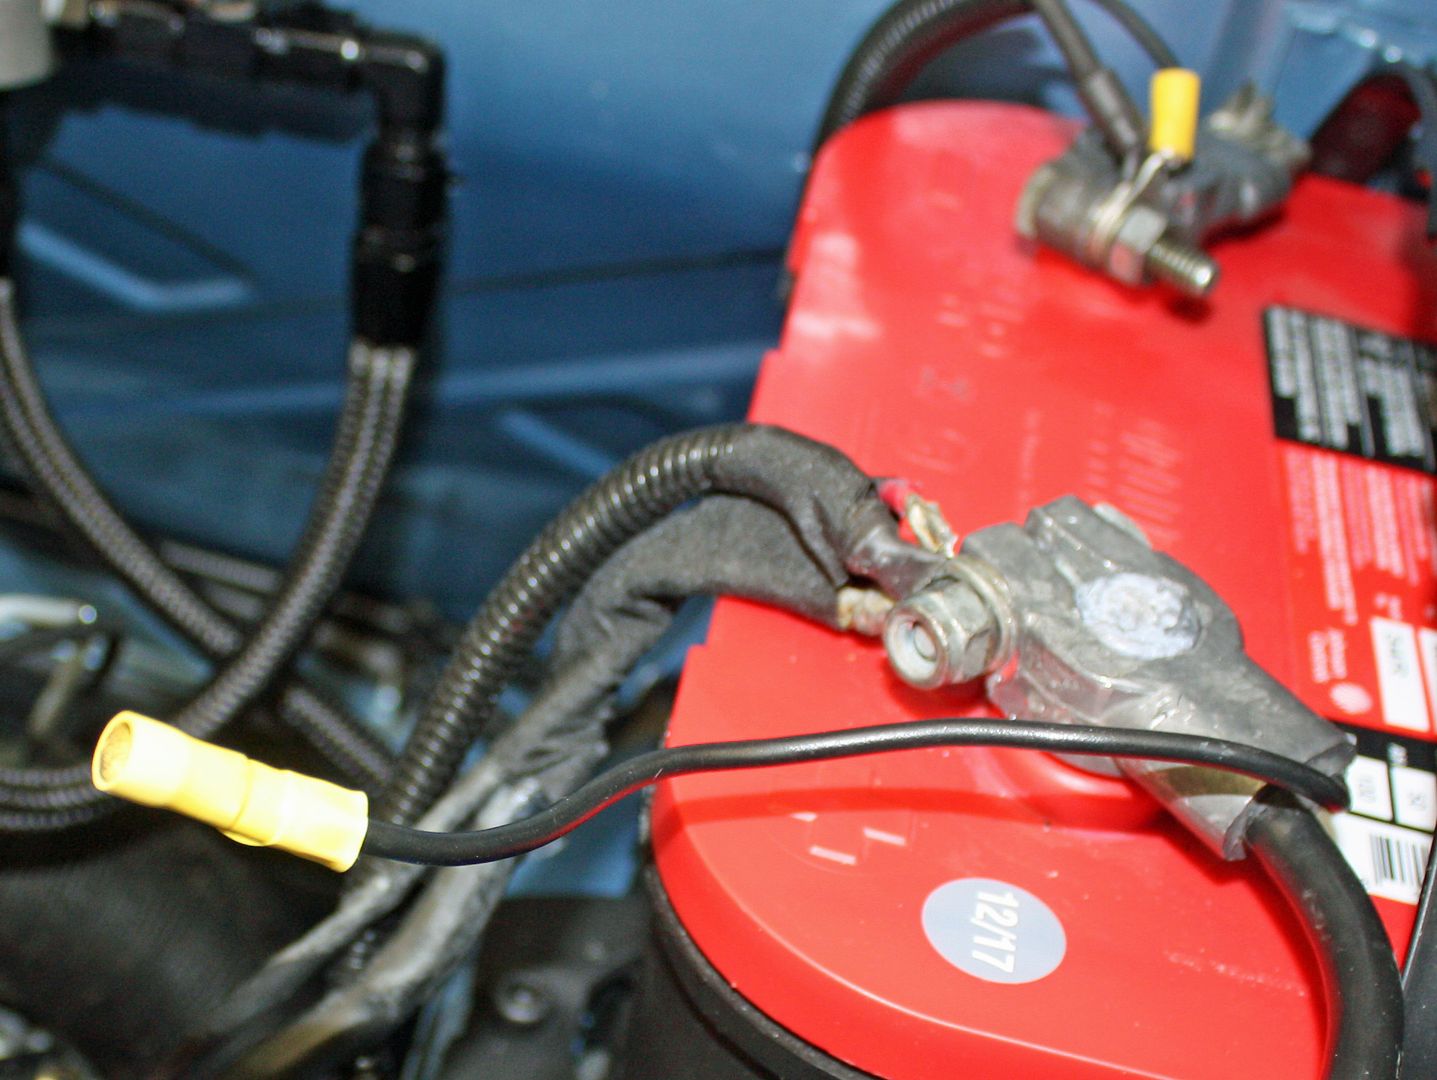
One other thing I have a question on. Can anyone tell me what this lead coming off the batter cable goes to?
Not too long after I got the 2017 I noticed that it was using a lot more oil than the 2013 did. I began charting it and it was down to less than 700 miles before I had to add a quart. On the 2013 I usually added a quart between oil changes. I took it to the local Fiat dealer who couldn't find anything. So they marked the dipstick and told me to bring it back after driving it 600 miles as they evidently did not believe I knew how to count. I took it back with 600 miles and it was a quart low. So this morning I had to take it in where they will tear it down to see what the issue is. I have been told that I will probably be getting a new motor.
That trip combined with some Christmas shopping took up the morning. After getting into the garage after lunch, the first thing I did was to get out my troubleshooting camera. By looking into the clutch fork hole, I could see that the flywheel is very close. I also have a concern about the bolts I used on the pressure plate. I wanted to use 12.9 hardness bolts and the only ones I could fine were allen bolts with 8mm heads.


I then pulled the starter. Here again I could see the ring gear was very close but it was clearing. The allen head bolt is visible here as well. I used the camera here as well. I put a pry bar on the ring gear and nothing moved.


This is a Kennedy Engineering flywheel and pressure plate. I called them and they said the bolts could be the problem. The way to check that is to loosen the bolts and pull the transmission back a bit and see if I can turn the engine over. They did confirm that the stock starter works with their flywheel. I had the starter checked out prior to installing it and it passed with flying colors. Looks like it will come apart again!!
One other thing I have a question on. Can anyone tell me what this lead coming off the batter cable goes to?
 12-12-2018, 06:17 PM
#132
Racer
Thread Starter
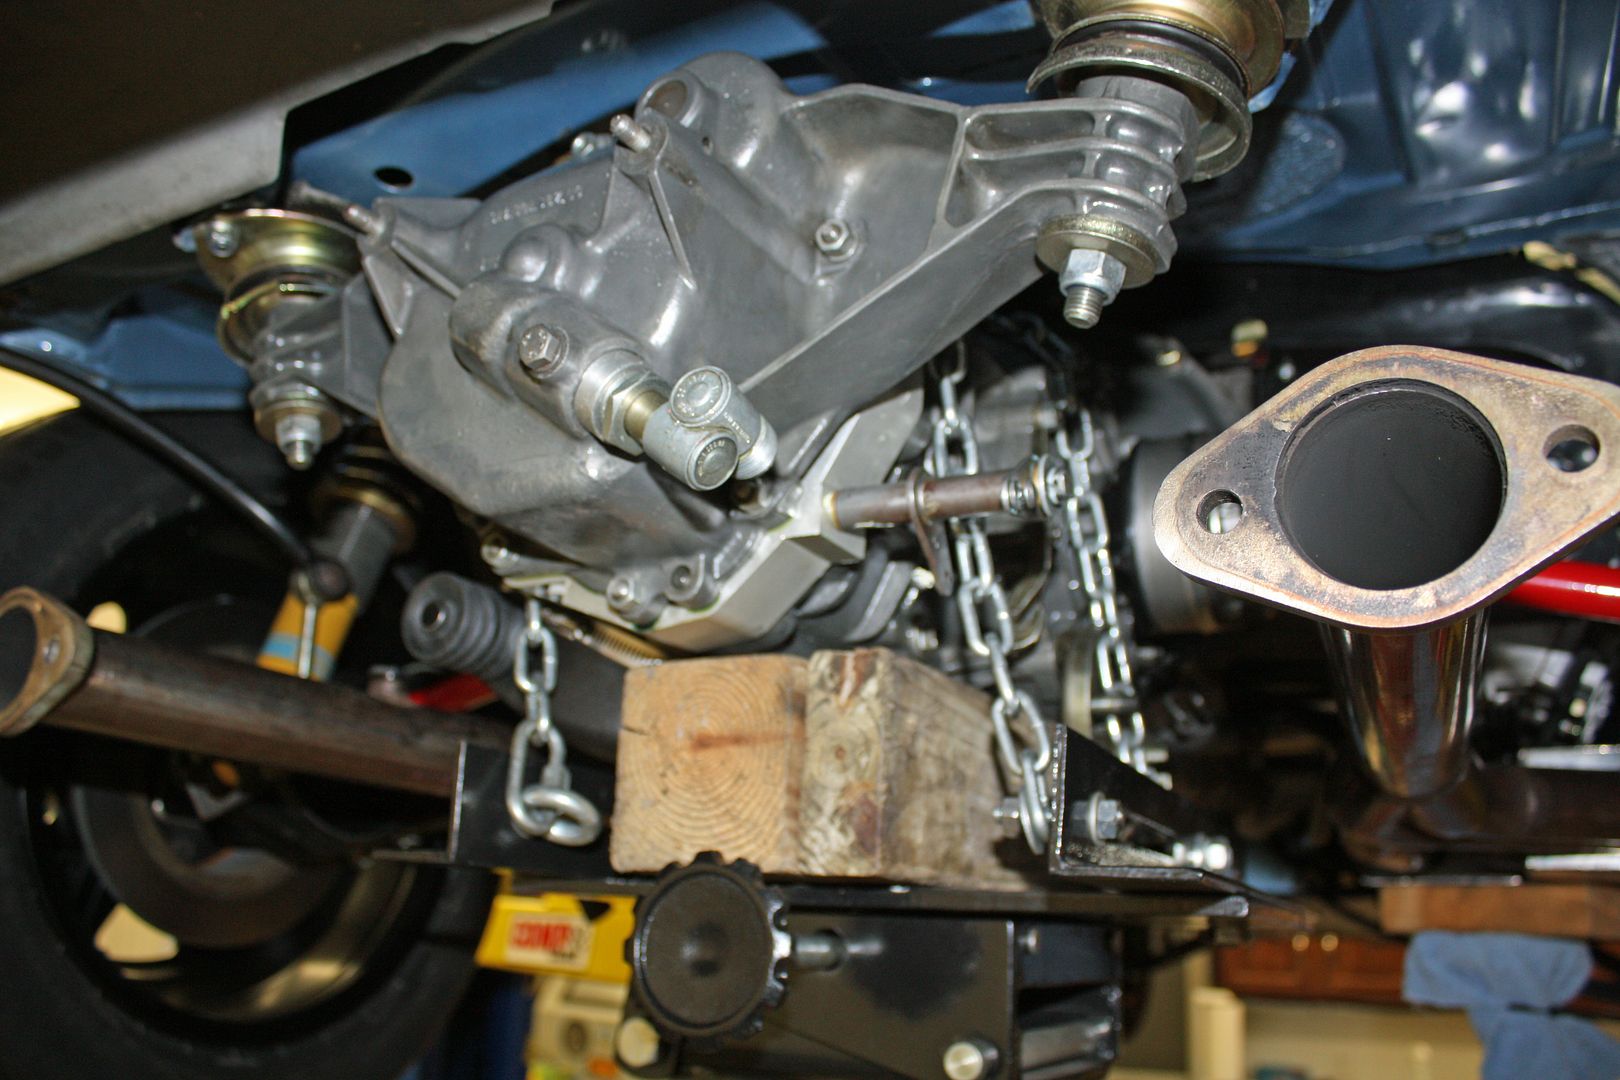
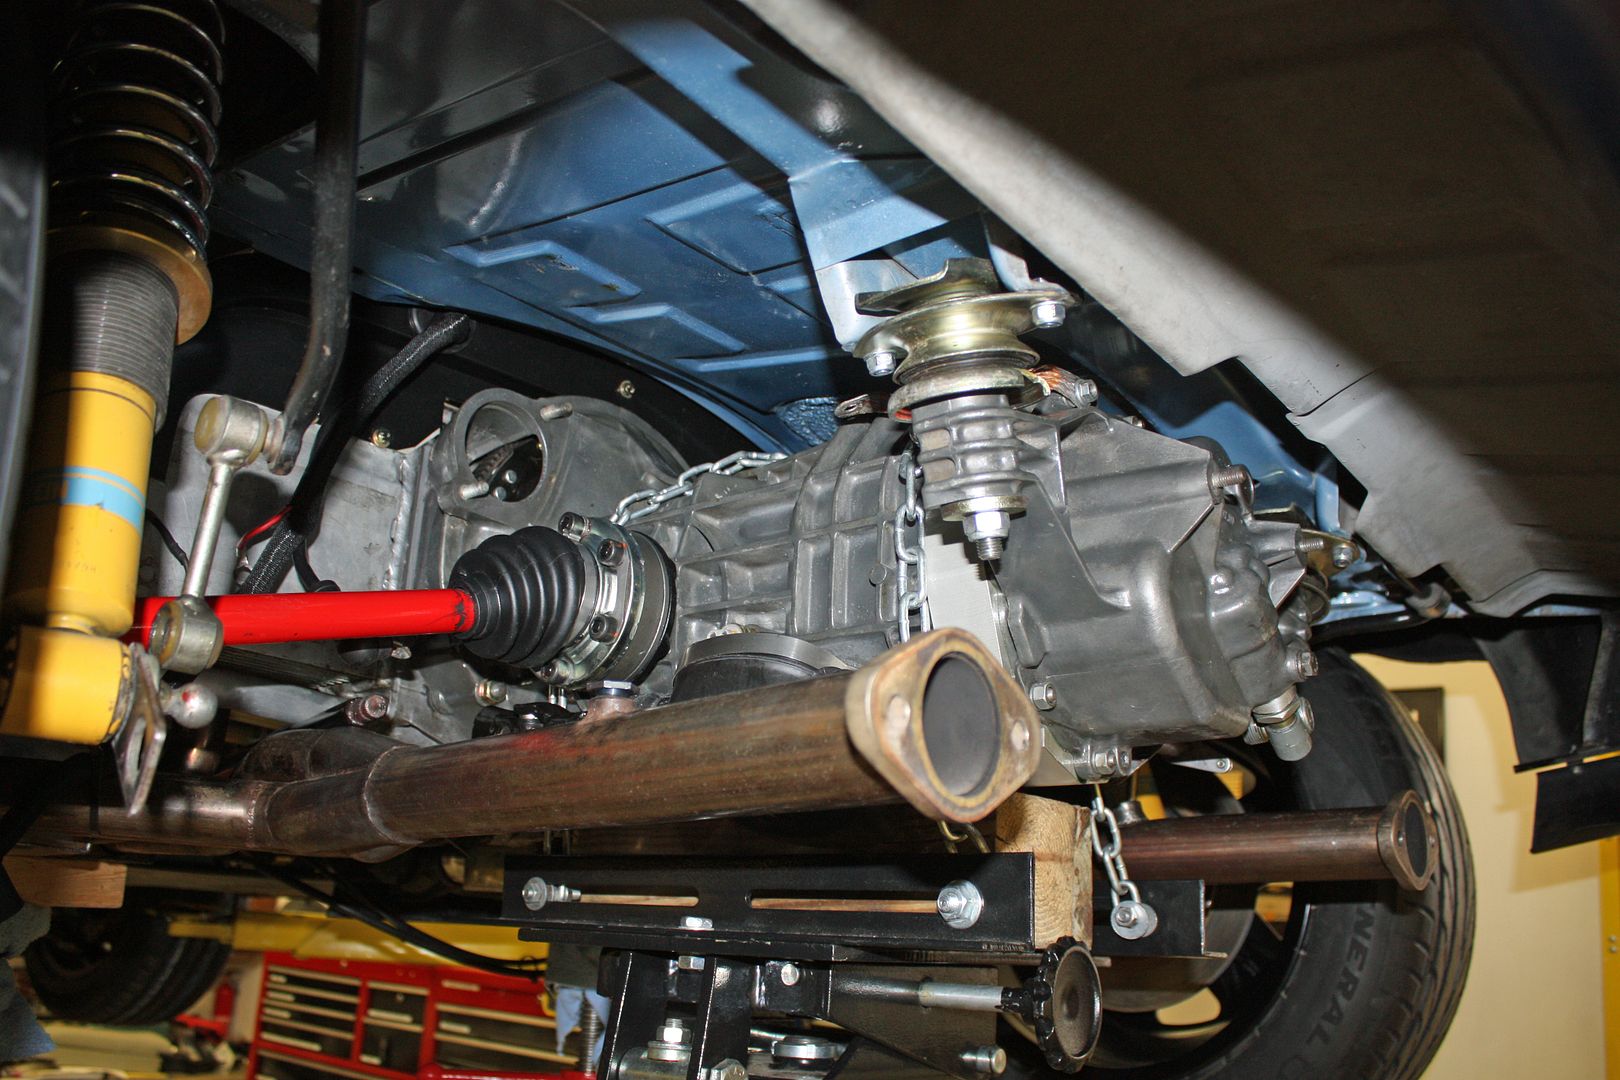
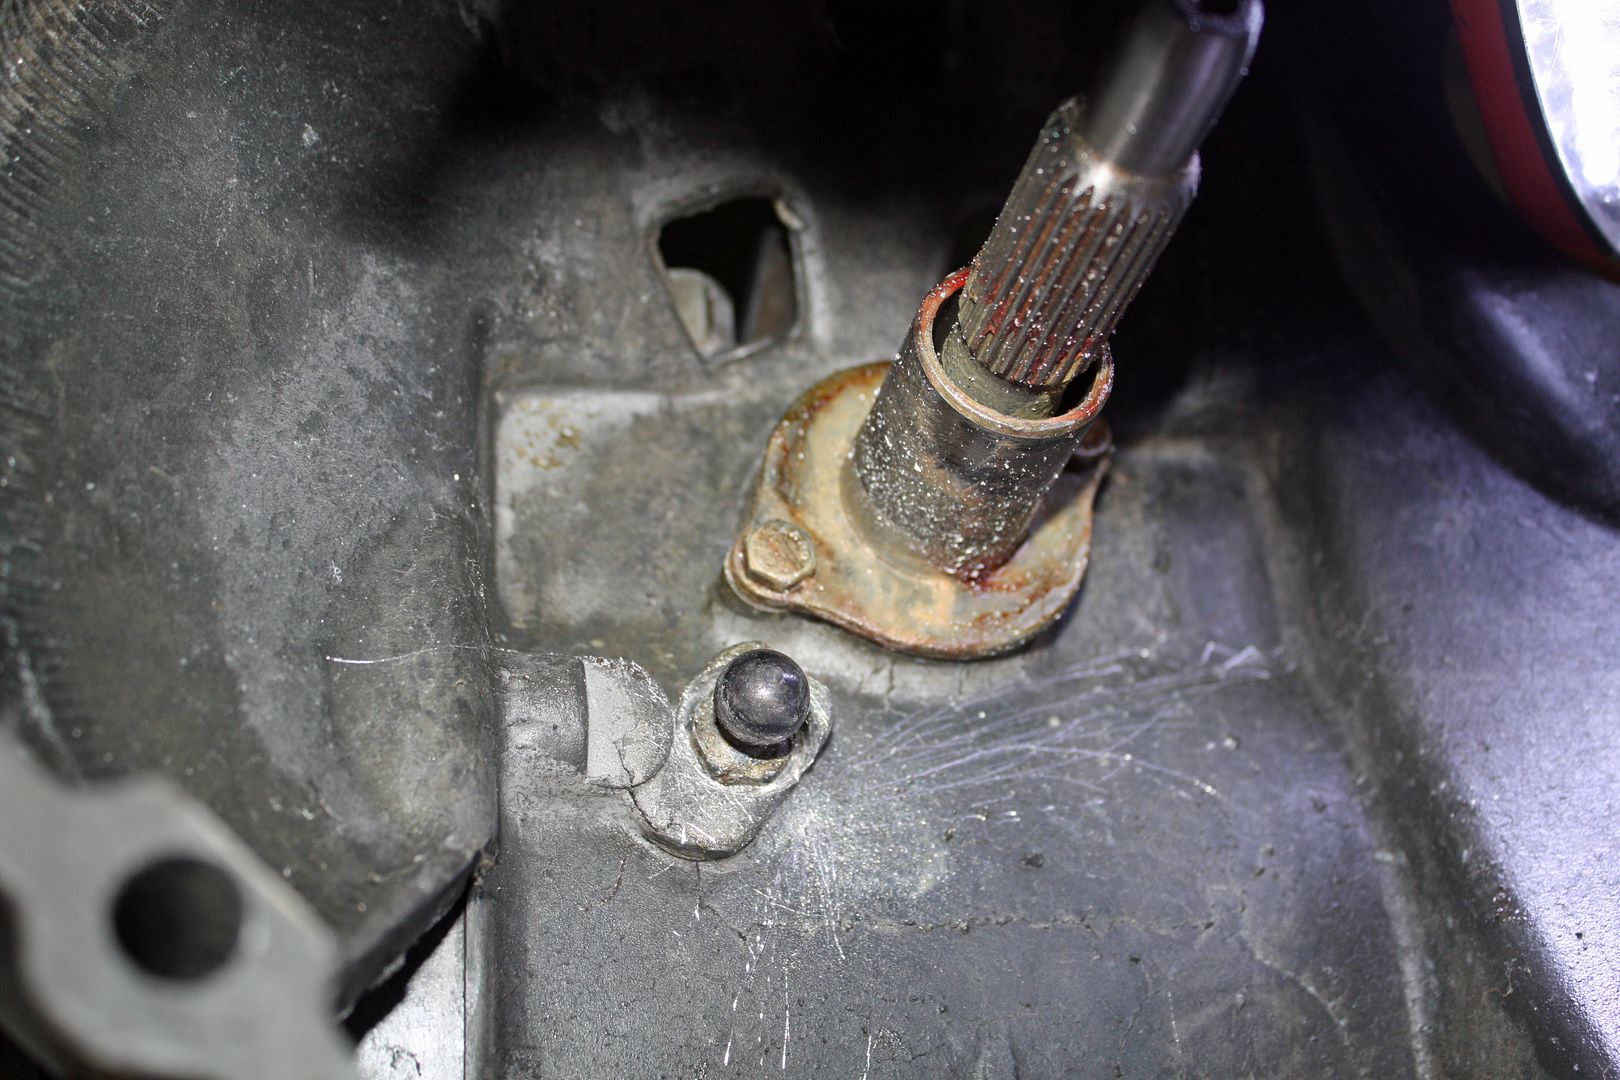
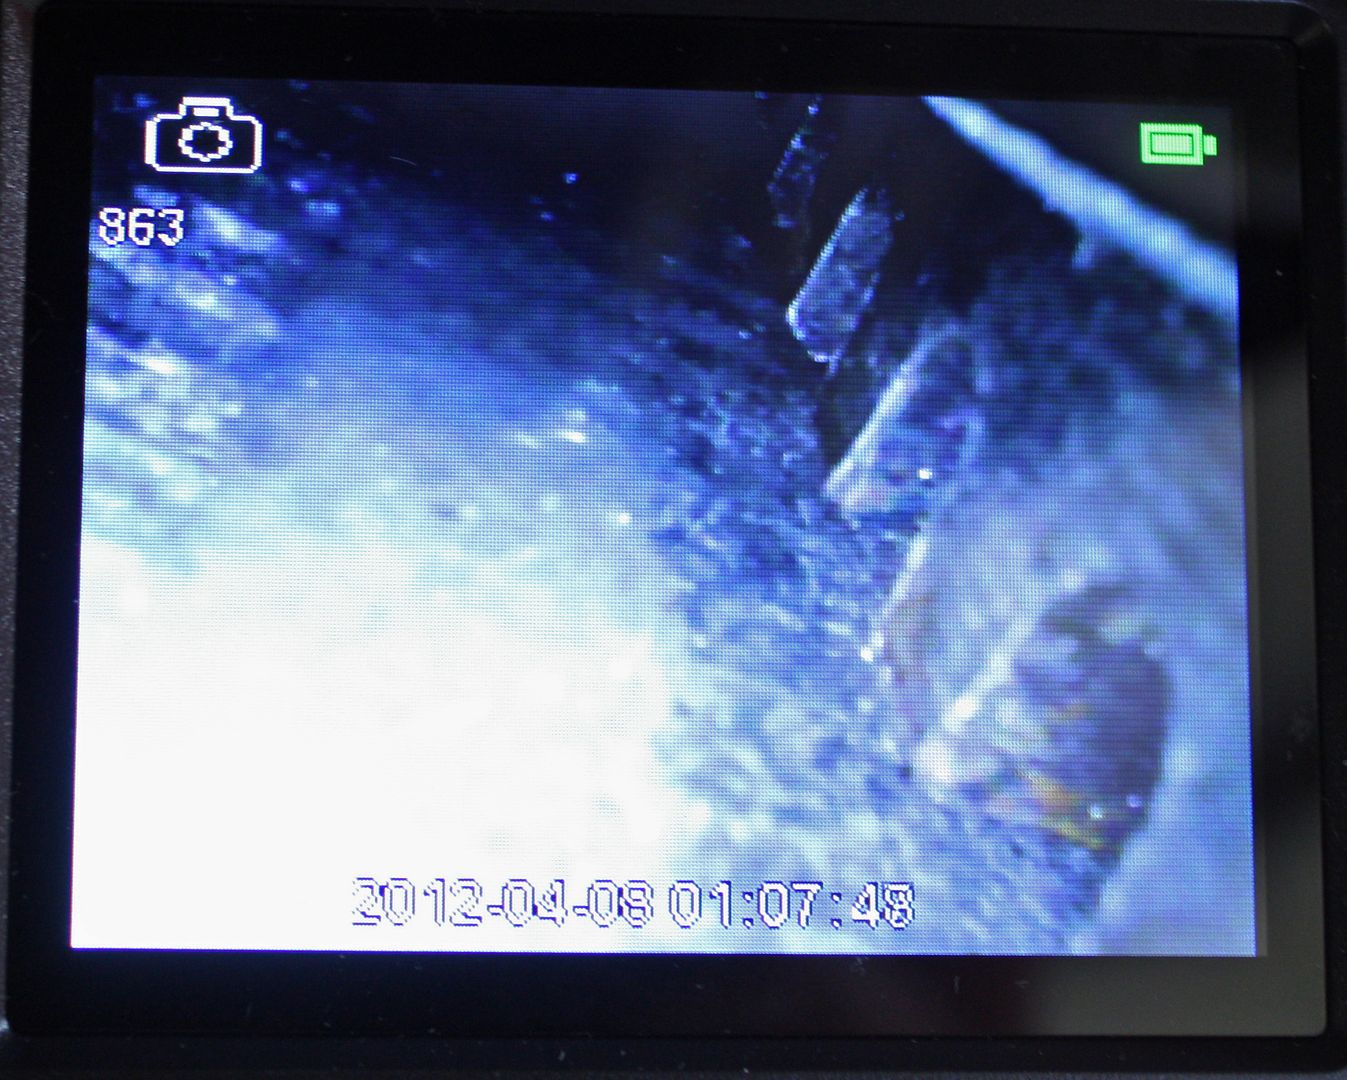
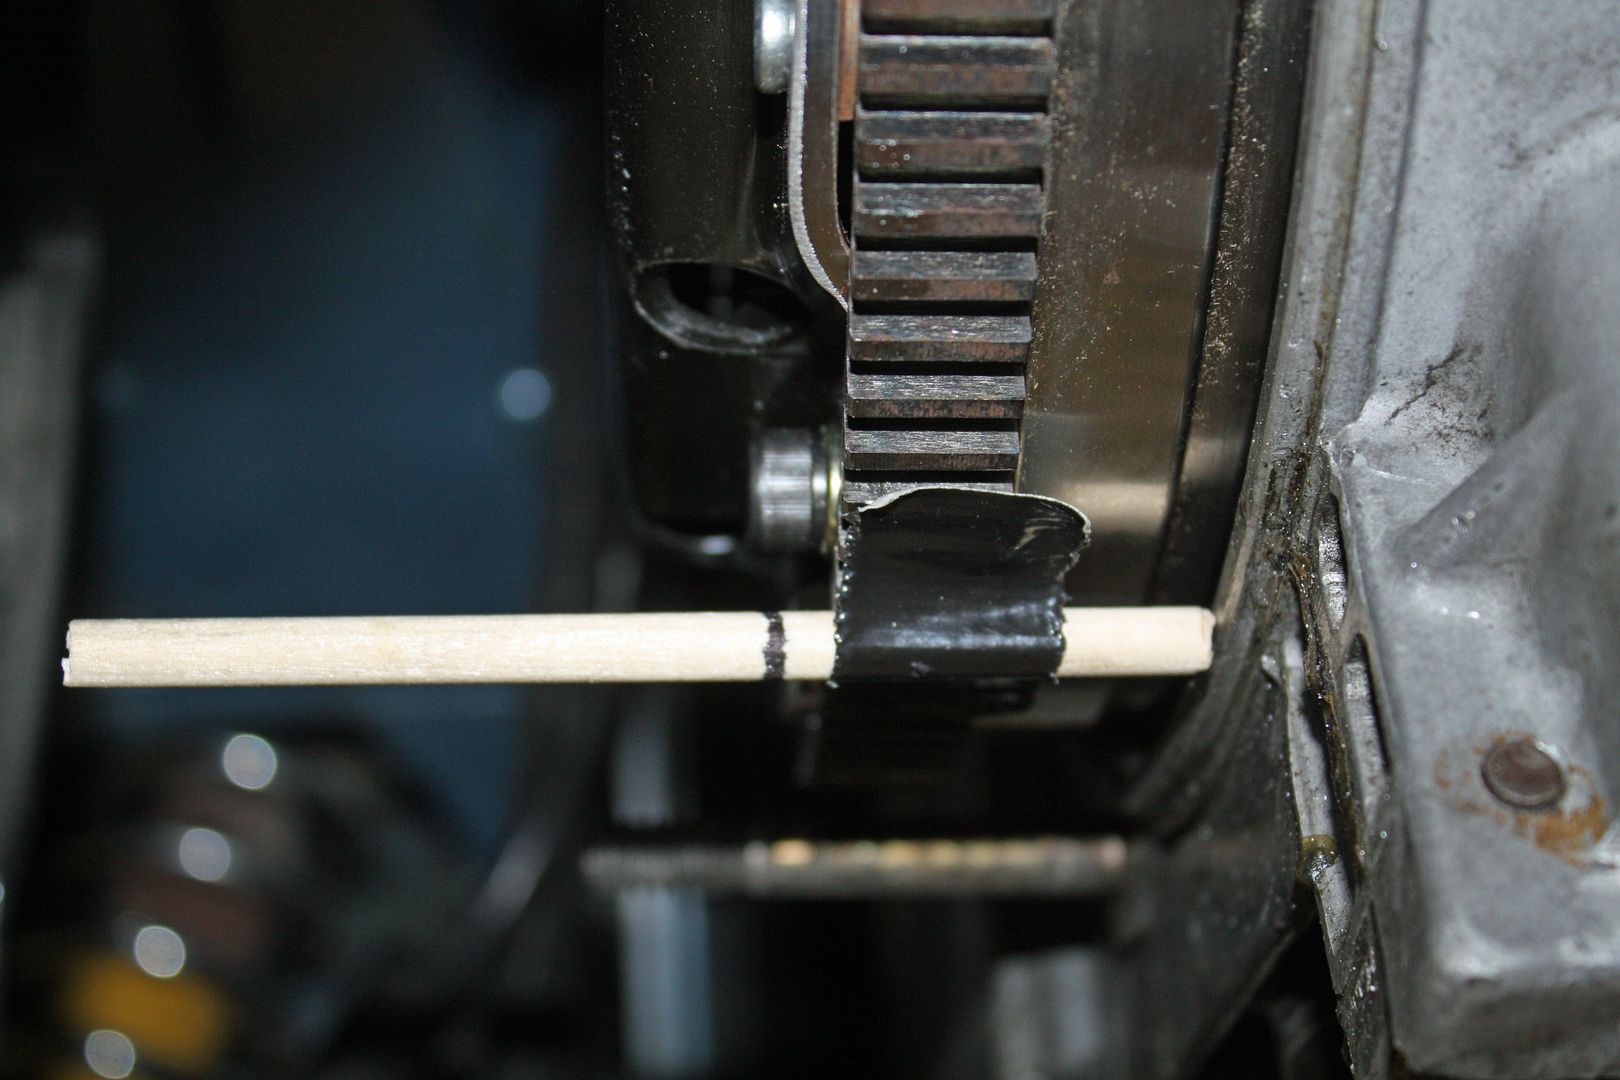
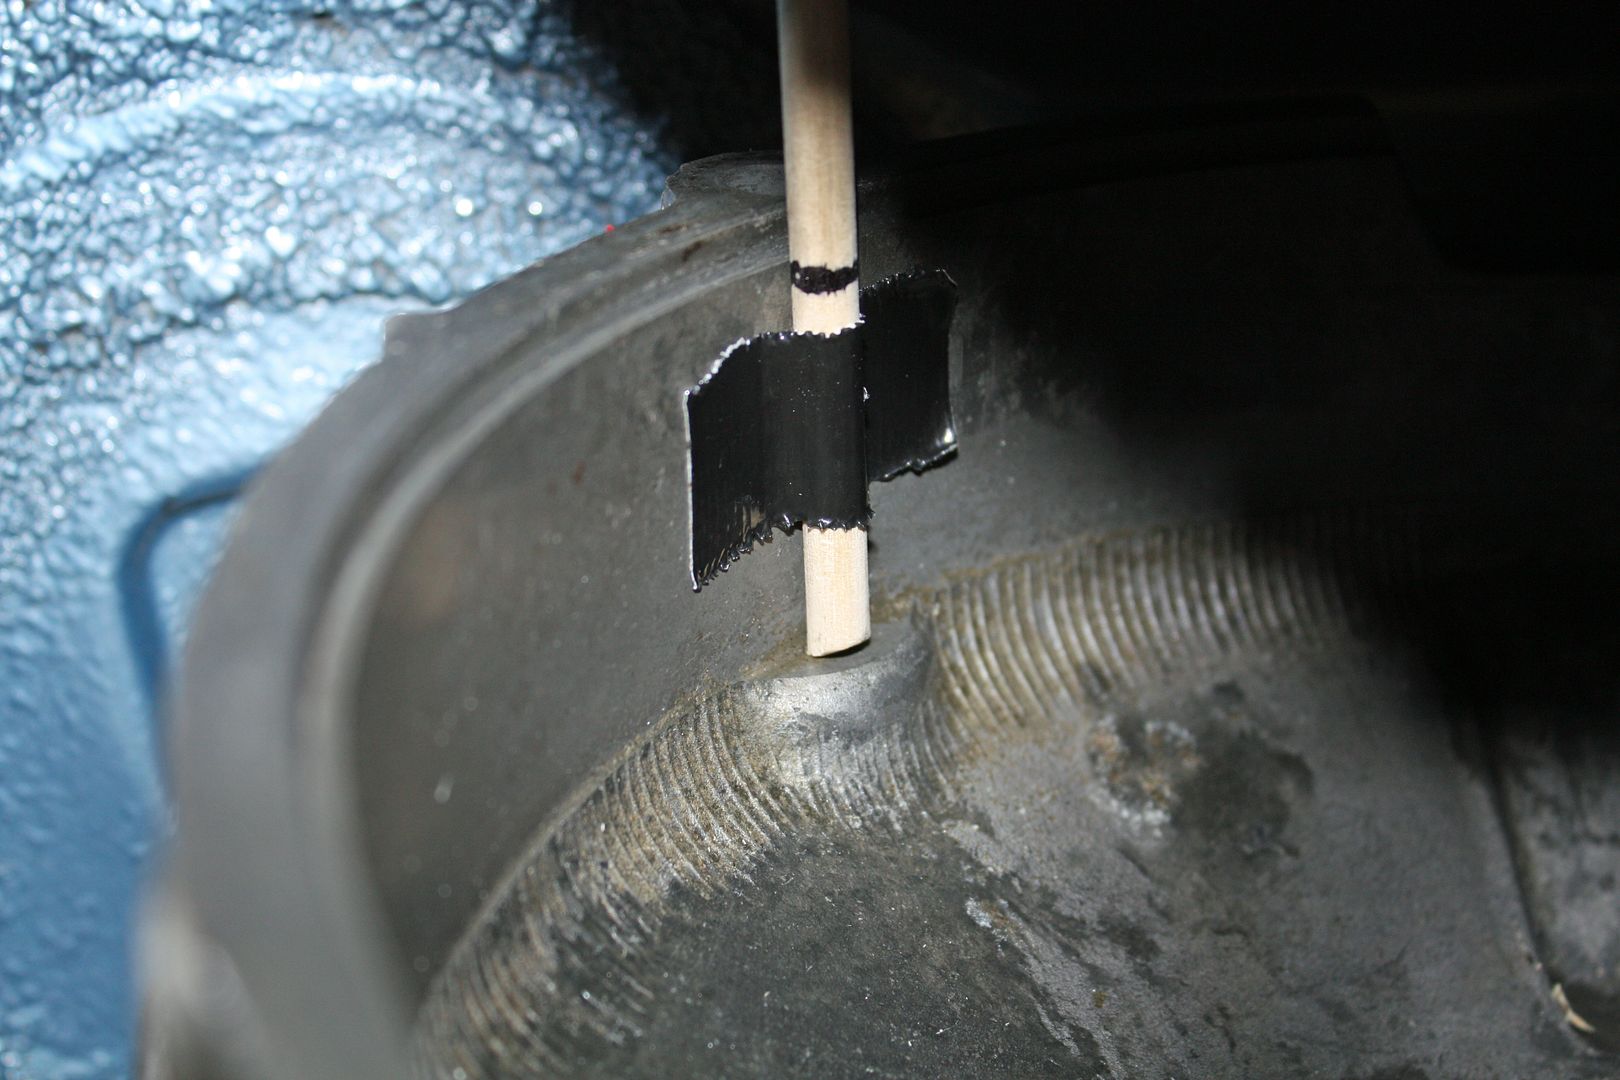
I pulled the tranny again. I was able to turn the motor using a pry bar on the ring gear. Using a wood dowel ( I kept it out of the engine this time!!!), I did an approximate measurement of the position of the allen bolt head. There are three places in the casting where there is less clearance. As you can see in the photo below, clearing those areas with the allen bolt would be close.
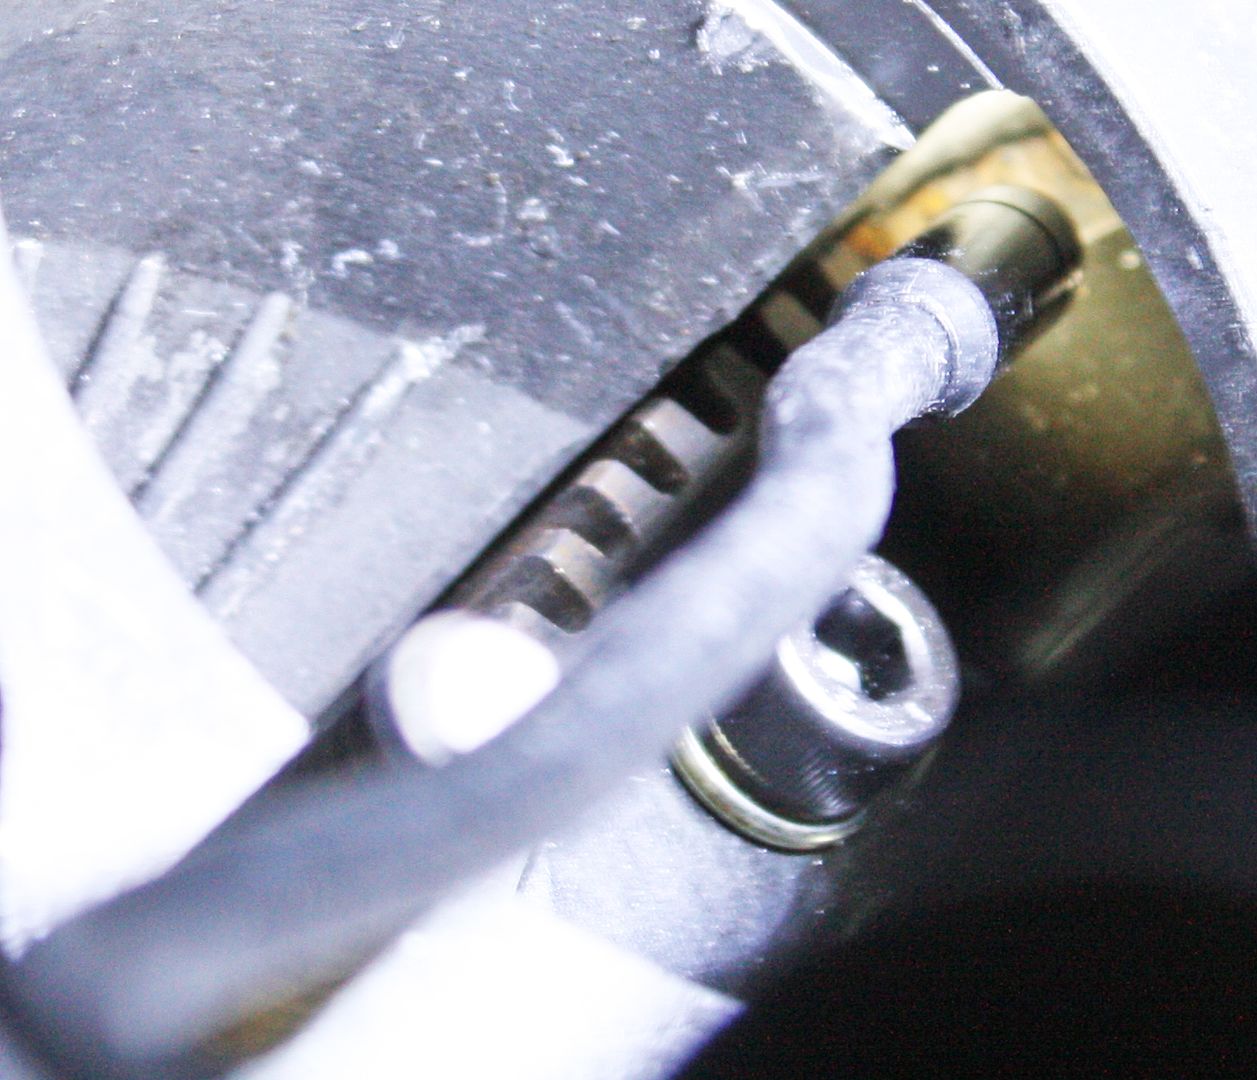
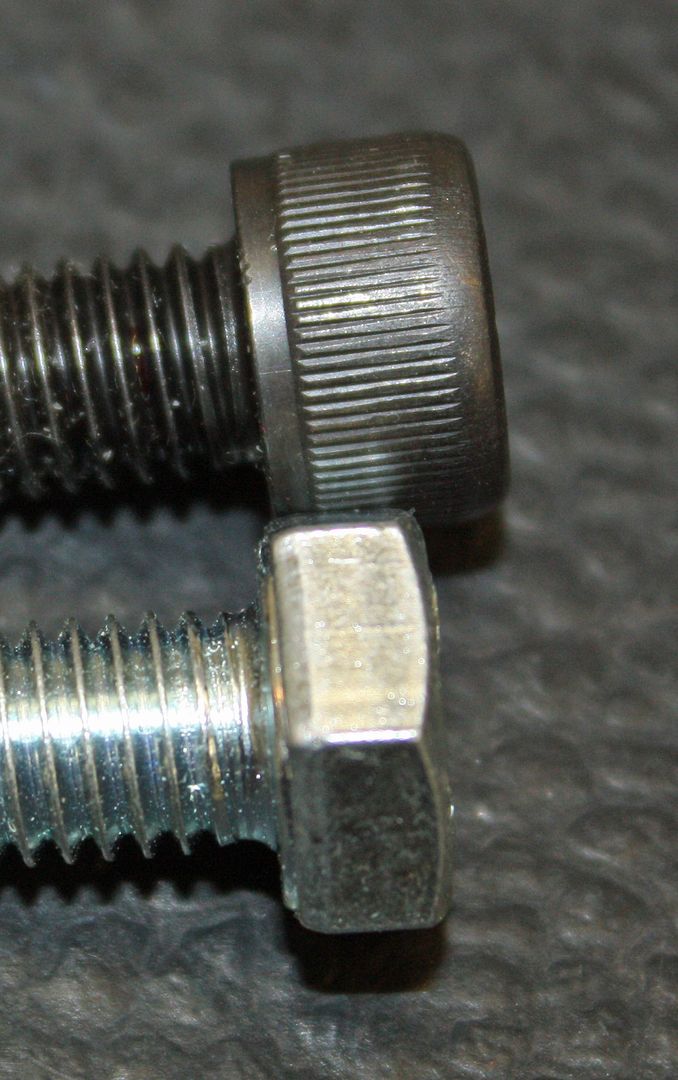
I found some 10.9 hardened bolts at our local Ace hardware. As you can see in the photo below, the new bolt's head is almost half as thick as the allen bolt. While I was in there, I added another shim to the clutch fork ball as I was nearly out of adjustment to get it to work. These three shims placed the clutch fork almost exactly in the middle of the hole.
I put everything back together, removed the positive lead from the fuel pump, and cranked the ignition. CLUNK!! I switched the wire that goes to one of the starter spades and tried it again. CLUNK!! That was disappointing.
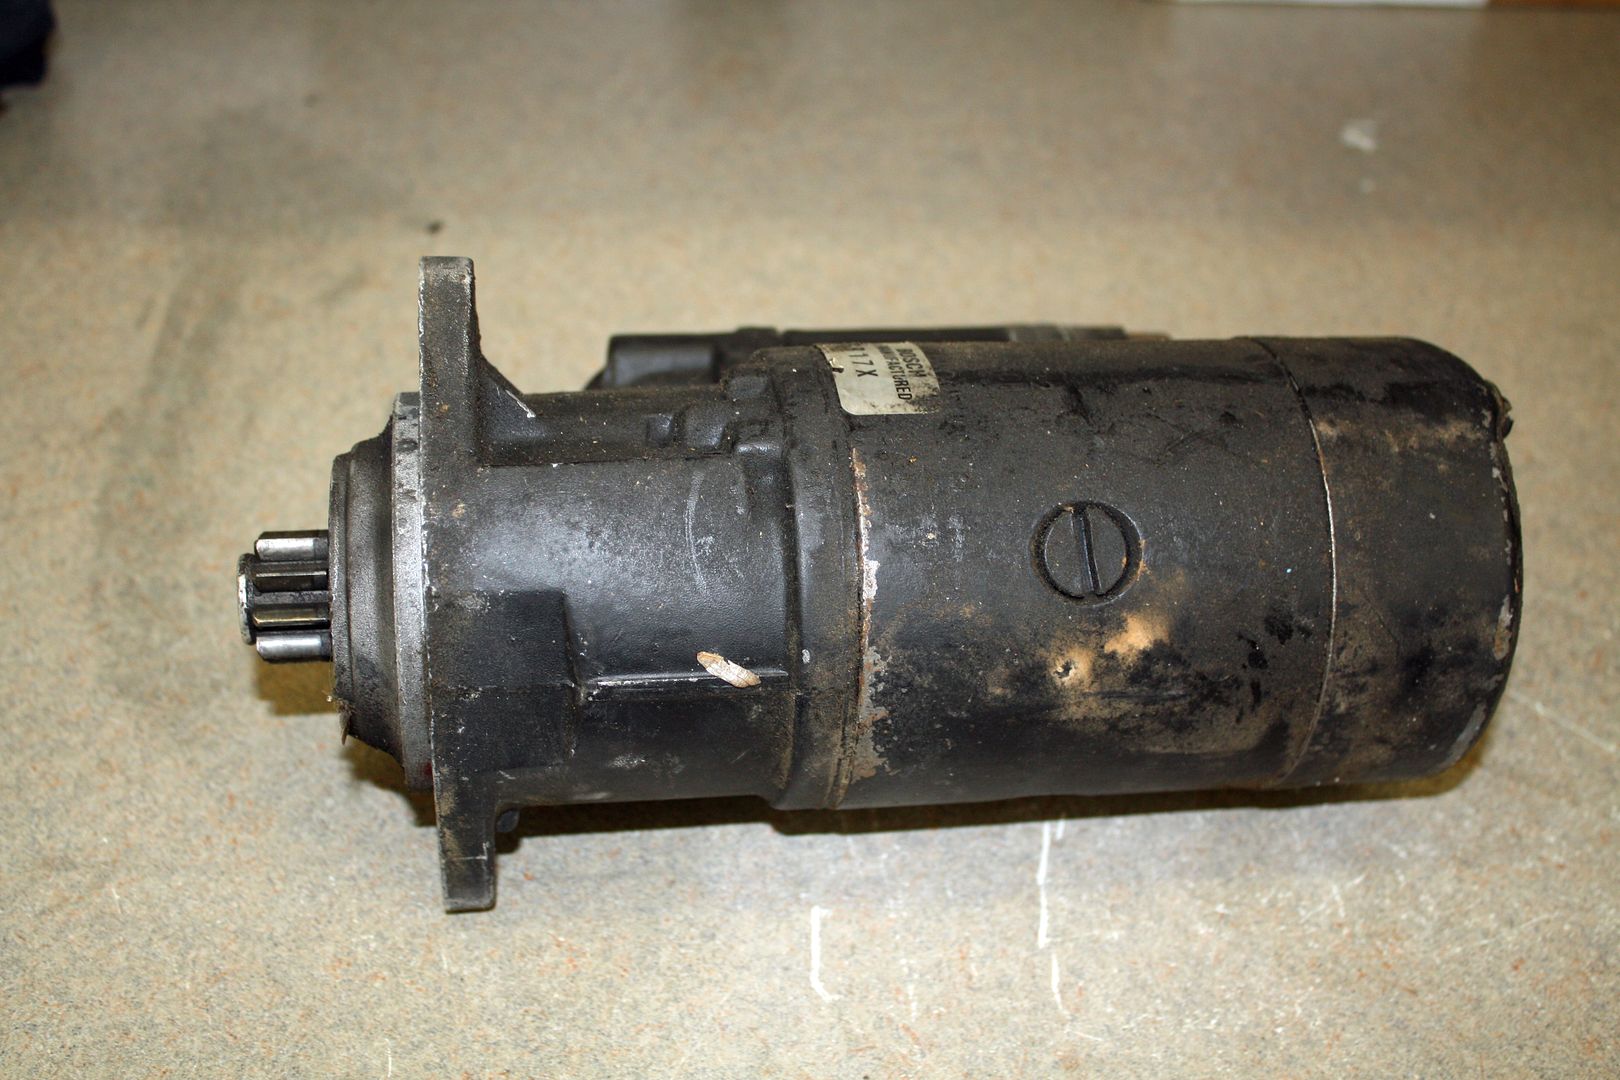
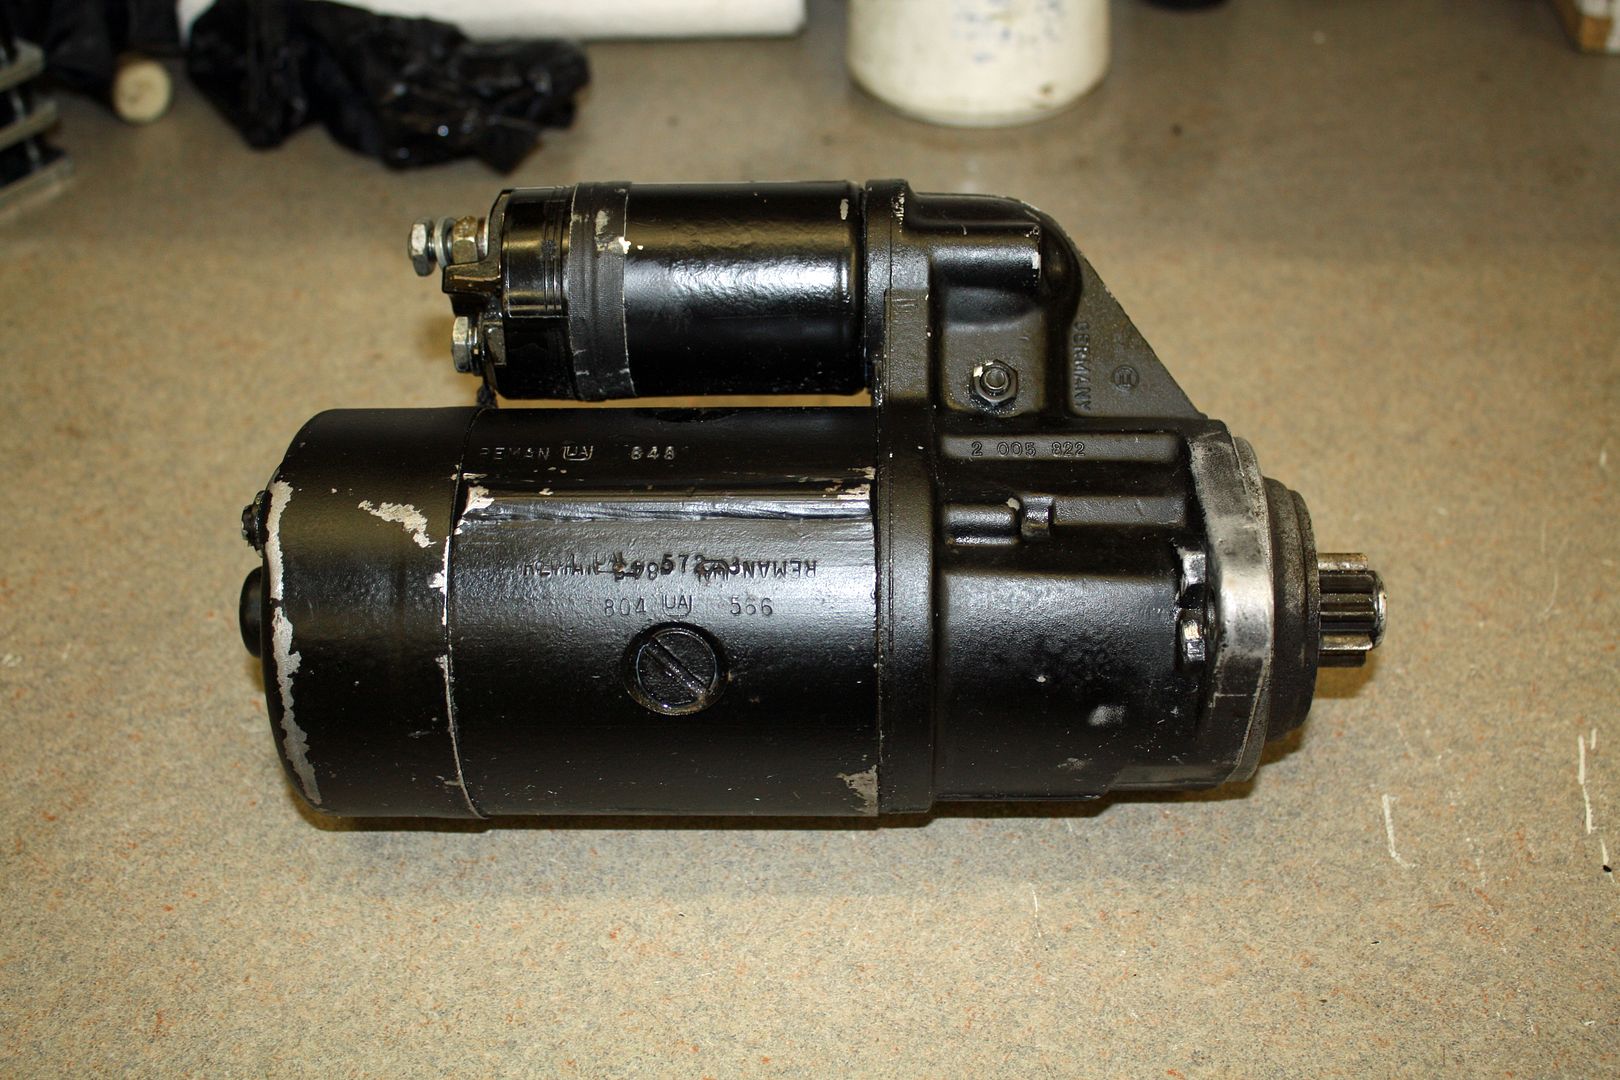
The car came with two starters. Last summer, I took both of them to a local electrical shop and had them tested. They both passed. One was dirty and one was clean. I put the clean one in the car. Now I am thinking I may have a starter problem. I dug out the dirty one and cleaned it up. By the looks of it, I would assume it was the one that was on the car.
By this time, it was late in the day and I was tired of messing with the car. So tomorrow I will change out the starter. If it goes clunk again, I will want to tear out my hair, if I had any!! I do these projects to stay busy during my retirement so I should be happy that I am having problems. Somehow, that thought doesn't comfort me.
I found some 10.9 hardened bolts at our local Ace hardware. As you can see in the photo below, the new bolt's head is almost half as thick as the allen bolt. While I was in there, I added another shim to the clutch fork ball as I was nearly out of adjustment to get it to work. These three shims placed the clutch fork almost exactly in the middle of the hole.


I put everything back together, removed the positive lead from the fuel pump, and cranked the ignition. CLUNK!! I switched the wire that goes to one of the starter spades and tried it again. CLUNK!! That was disappointing.
The car came with two starters. Last summer, I took both of them to a local electrical shop and had them tested. They both passed. One was dirty and one was clean. I put the clean one in the car. Now I am thinking I may have a starter problem. I dug out the dirty one and cleaned it up. By the looks of it, I would assume it was the one that was on the car.


By this time, it was late in the day and I was tired of messing with the car. So tomorrow I will change out the starter. If it goes clunk again, I will want to tear out my hair, if I had any!! I do these projects to stay busy during my retirement so I should be happy that I am having problems. Somehow, that thought doesn't comfort me.
12-12-2018, 11:19 PM
#133
Rennlist Member
12-13-2018, 11:01 PM
#134
Racer
Thread Starter
Still have a whole lot of clunking going on! The other starter gave the same results. I was able to get a wrench on the crank pulley. Before trying to rotate the engine, I decided to pull all of the spark plugs to make it easier. I couldn't get excellent leverage on that wrench but I had enough that the engine should rotate if it were free. It didn't budge a bit.
At this point I decided that the transmission needed to come completely out as I had a serious clutch problem. So off came the axles and, since I have had so much practice this week, soon it was resting on the transmission jack.
I dug out the pry bar and could easily rotate the motor via the ring gear. A call to Kennedy Engineering soon followed. I talked to Brett, the general manager, who is also their Porsche expert. After explaining the issue, has asked me to send him photos of the flywheel, the pressure plate, and the tranny. Photos is one thing I have in abundance!!
I also sent him photos of a number of measurements that I took with my calipers. After reviewing the photos, he wants me to remove the pressure plate and clutch, put the transmission back in place and then see if the motor will rotate. If it does, that eliminates the flywheel. If it does rotate, he want me to measure from the bolt up surface of the starter pocket down to the top of the ring gear. It should be around 1.43". So I get to put it together again.


At this point I decided that the transmission needed to come completely out as I had a serious clutch problem. So off came the axles and, since I have had so much practice this week, soon it was resting on the transmission jack.

I dug out the pry bar and could easily rotate the motor via the ring gear. A call to Kennedy Engineering soon followed. I talked to Brett, the general manager, who is also their Porsche expert. After explaining the issue, has asked me to send him photos of the flywheel, the pressure plate, and the tranny. Photos is one thing I have in abundance!!
I also sent him photos of a number of measurements that I took with my calipers. After reviewing the photos, he wants me to remove the pressure plate and clutch, put the transmission back in place and then see if the motor will rotate. If it does, that eliminates the flywheel. If it does rotate, he want me to measure from the bolt up surface of the starter pocket down to the top of the ring gear. It should be around 1.43". So I get to put it together again.
12-14-2018, 11:26 AM
#135
Rennlist Member
Wow, what a pain in the butt. However it does look like you are getting down to it and I hope this is the last tie you end up pulling the transaxle. Good luck and cheers.