
1987 Alternator + Fan/Housing (Vertex) Replacement
 08-21-2011, 03:10 AM
#1
Rennlist Member
Thread Starter
In an effort to give back to the forum - I'm posting some pics and "findings" after pulling the alternator and fan+housing and replacing them with a few updates.
The fan and housing were cracked in various places and this seemed like a fun do-it-yourself project. It was both fun and rewarding. Finding the housing was a bit of a dead end, so I opted for a Vertex Auto after market fan and housing.
I'm happy with the outcome and while I saved $ by doing it myself, I felt that learning more about the mechanics outweighed any monetary cost. Patience was key. Enjoy...
Here's some pre-pics :


Start of removal. Disconnected the AC belt by unscrewing the bolts that hold the compressor in place.

Removed the fan belt & pulley hardware. Pulled the housing/fan/alternator away from the fiberglass shroud.


More detailed images of the cracks.


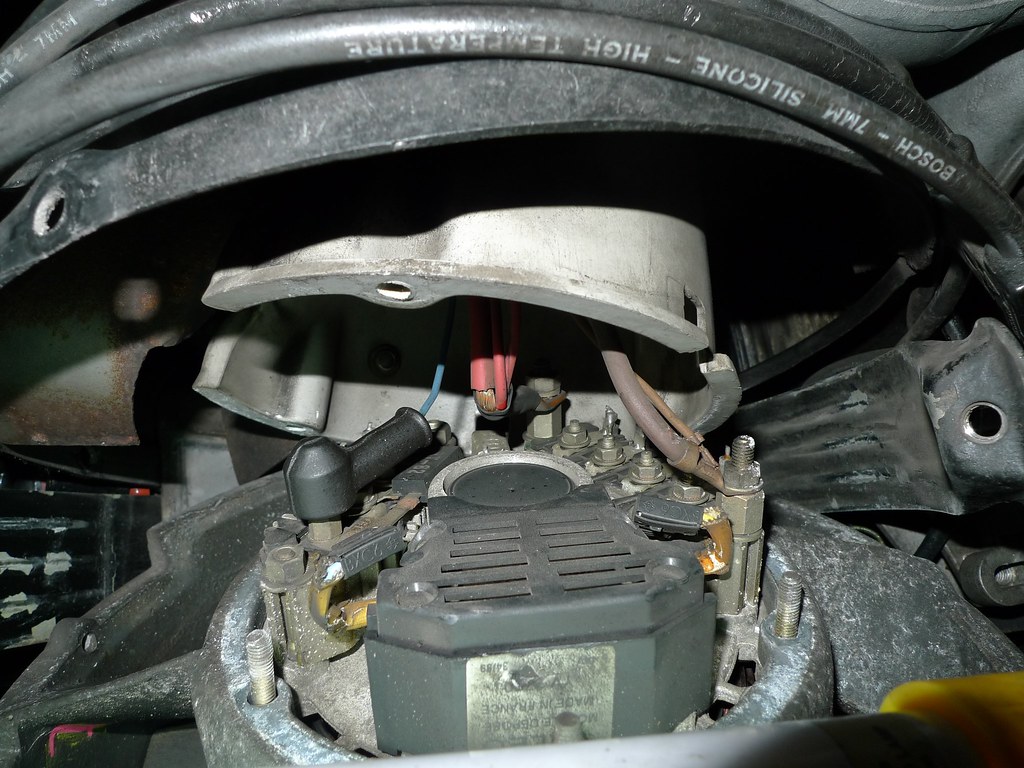
Images of the old alternator.


New alternator / fan and housing and strap from Rennline.


Painting the fan and housing. I could have opted to have 'em powder coated, however high temp engine enamel won me over instead.


Starting the assembly.


Mostly, everything is back in place.

Project completed and the pulley tightened. I felt that this required a few turns of the starter to properly seat for re-tightening. Did this 2-3 times.

The fan and housing were cracked in various places and this seemed like a fun do-it-yourself project. It was both fun and rewarding. Finding the housing was a bit of a dead end, so I opted for a Vertex Auto after market fan and housing.
I'm happy with the outcome and while I saved $ by doing it myself, I felt that learning more about the mechanics outweighed any monetary cost. Patience was key. Enjoy...
Here's some pre-pics :
Start of removal. Disconnected the AC belt by unscrewing the bolts that hold the compressor in place.
Removed the fan belt & pulley hardware. Pulled the housing/fan/alternator away from the fiberglass shroud.
More detailed images of the cracks.
Images of the old alternator.
New alternator / fan and housing and strap from Rennline.
Painting the fan and housing. I could have opted to have 'em powder coated, however high temp engine enamel won me over instead.
Starting the assembly.
Mostly, everything is back in place.
Project completed and the pulley tightened. I felt that this required a few turns of the starter to properly seat for re-tightening. Did this 2-3 times.

 08-21-2011, 11:54 AM
#7
Rennlist Member
Join Date: Apr 2010
Location: Cary, NC
Posts: 284
Likes: 0
Received 0 Likes
on
0 Posts
dive,
Excellent post and great picture progression! The end result came out great.
I'm saving this one.
I was also wondering about that ducting since I also have an '87 and do not have that in my engine bay. Now I know.
Appreciate the post and the pics.
Excellent post and great picture progression! The end result came out great.
I'm saving this one.
I was also wondering about that ducting since I also have an '87 and do not have that in my engine bay. Now I know.
Appreciate the post and the pics.
Trending Topics
08-21-2011, 02:55 PM
#9
Rennlist Member
Thread Starter
ivangene : The breakdown was as follows
- Rennline Alternator Strap : $89.95 (huge markup in my opinion!)
- Alternator, Paris Rhone (Rebuilt, Core Charge Applies) : $309.00 (-120.00 when i ship the core back)
- Vertex Porsche Alternator Fan Housing Upgraded Aluminum : $589.00 (ouch!)
- Vertex Porsche 911 - 11 Blade Alternator Fan - Aluminum : $298.00
- Paint : $24.00
====================================================================
Total bill is roughly : $1120.-
I'll say all said it probably took me 10 hours from start to finish, including the spraying of the new parts from Vertex. This also includes 2 hours in which I dropped one of the screws from the alternator strap after I had everything installed and had to remove everything and eventually found it and extracted and put everything back in again. That was fun! I know either the Stable or Cars Dawydiak here in SF could probably have gotten it done in less than 4, but I would not be any wiser.
The alternator strap from Rennline is nice, but the bolt they shipped was way too short and I ended up using the original one to tighten the housing down properly with the new strap.
I would have probably also taken a dremel to the hole on the inside of fan that mounts onto the alternator. I was a very tight fit and required a few taps to properly seat.
This is a semi-daily driver and I needed it back on the road, so I'm content with ceramic engine enamel on the Vertex parts. It can get scratched, but it's also easy to fix with a small paintbrush. If I had more time, I might have opted to have it powder coated... but it wouldn't have been as fun.
08-21-2011, 03:13 PM
#10
Parts Specialist
Rennlist Member
Rennlist Member

great info - Thanks
I too dropped a washer and had to pull back for a re-start
had you take it to a shop you would have been set back quite a bit more, good job on the DIY plus the satisfaction of doing something pretty cool to a pretty cool car !
I too dropped a washer and had to pull back for a re-start
had you take it to a shop you would have been set back quite a bit more, good job on the DIY plus the satisfaction of doing something pretty cool to a pretty cool car !

 08-22-2011, 12:31 PM
#15
Rennlist Member
Thread Starter
I didn't hammer on the studs - just noticed that now though.
Lorenfb : Are you referring to the alternator as the junk or the fan + housing? The alternator is being sent back to get back my "core charge". I'm not sure exactly what to do with the fan + housing. Was thinking of cleaning 'em up and mounting them in the garage. Kinda like what hunters do with their mounts.
Lorenfb : Are you referring to the alternator as the junk or the fan + housing? The alternator is being sent back to get back my "core charge". I'm not sure exactly what to do with the fan + housing. Was thinking of cleaning 'em up and mounting them in the garage. Kinda like what hunters do with their mounts.