When you click on links to various merchants on this site and make a purchase, this can result in this site earning a commission. Affiliate programs and affiliations include, but are not limited to, the eBay Partner Network.
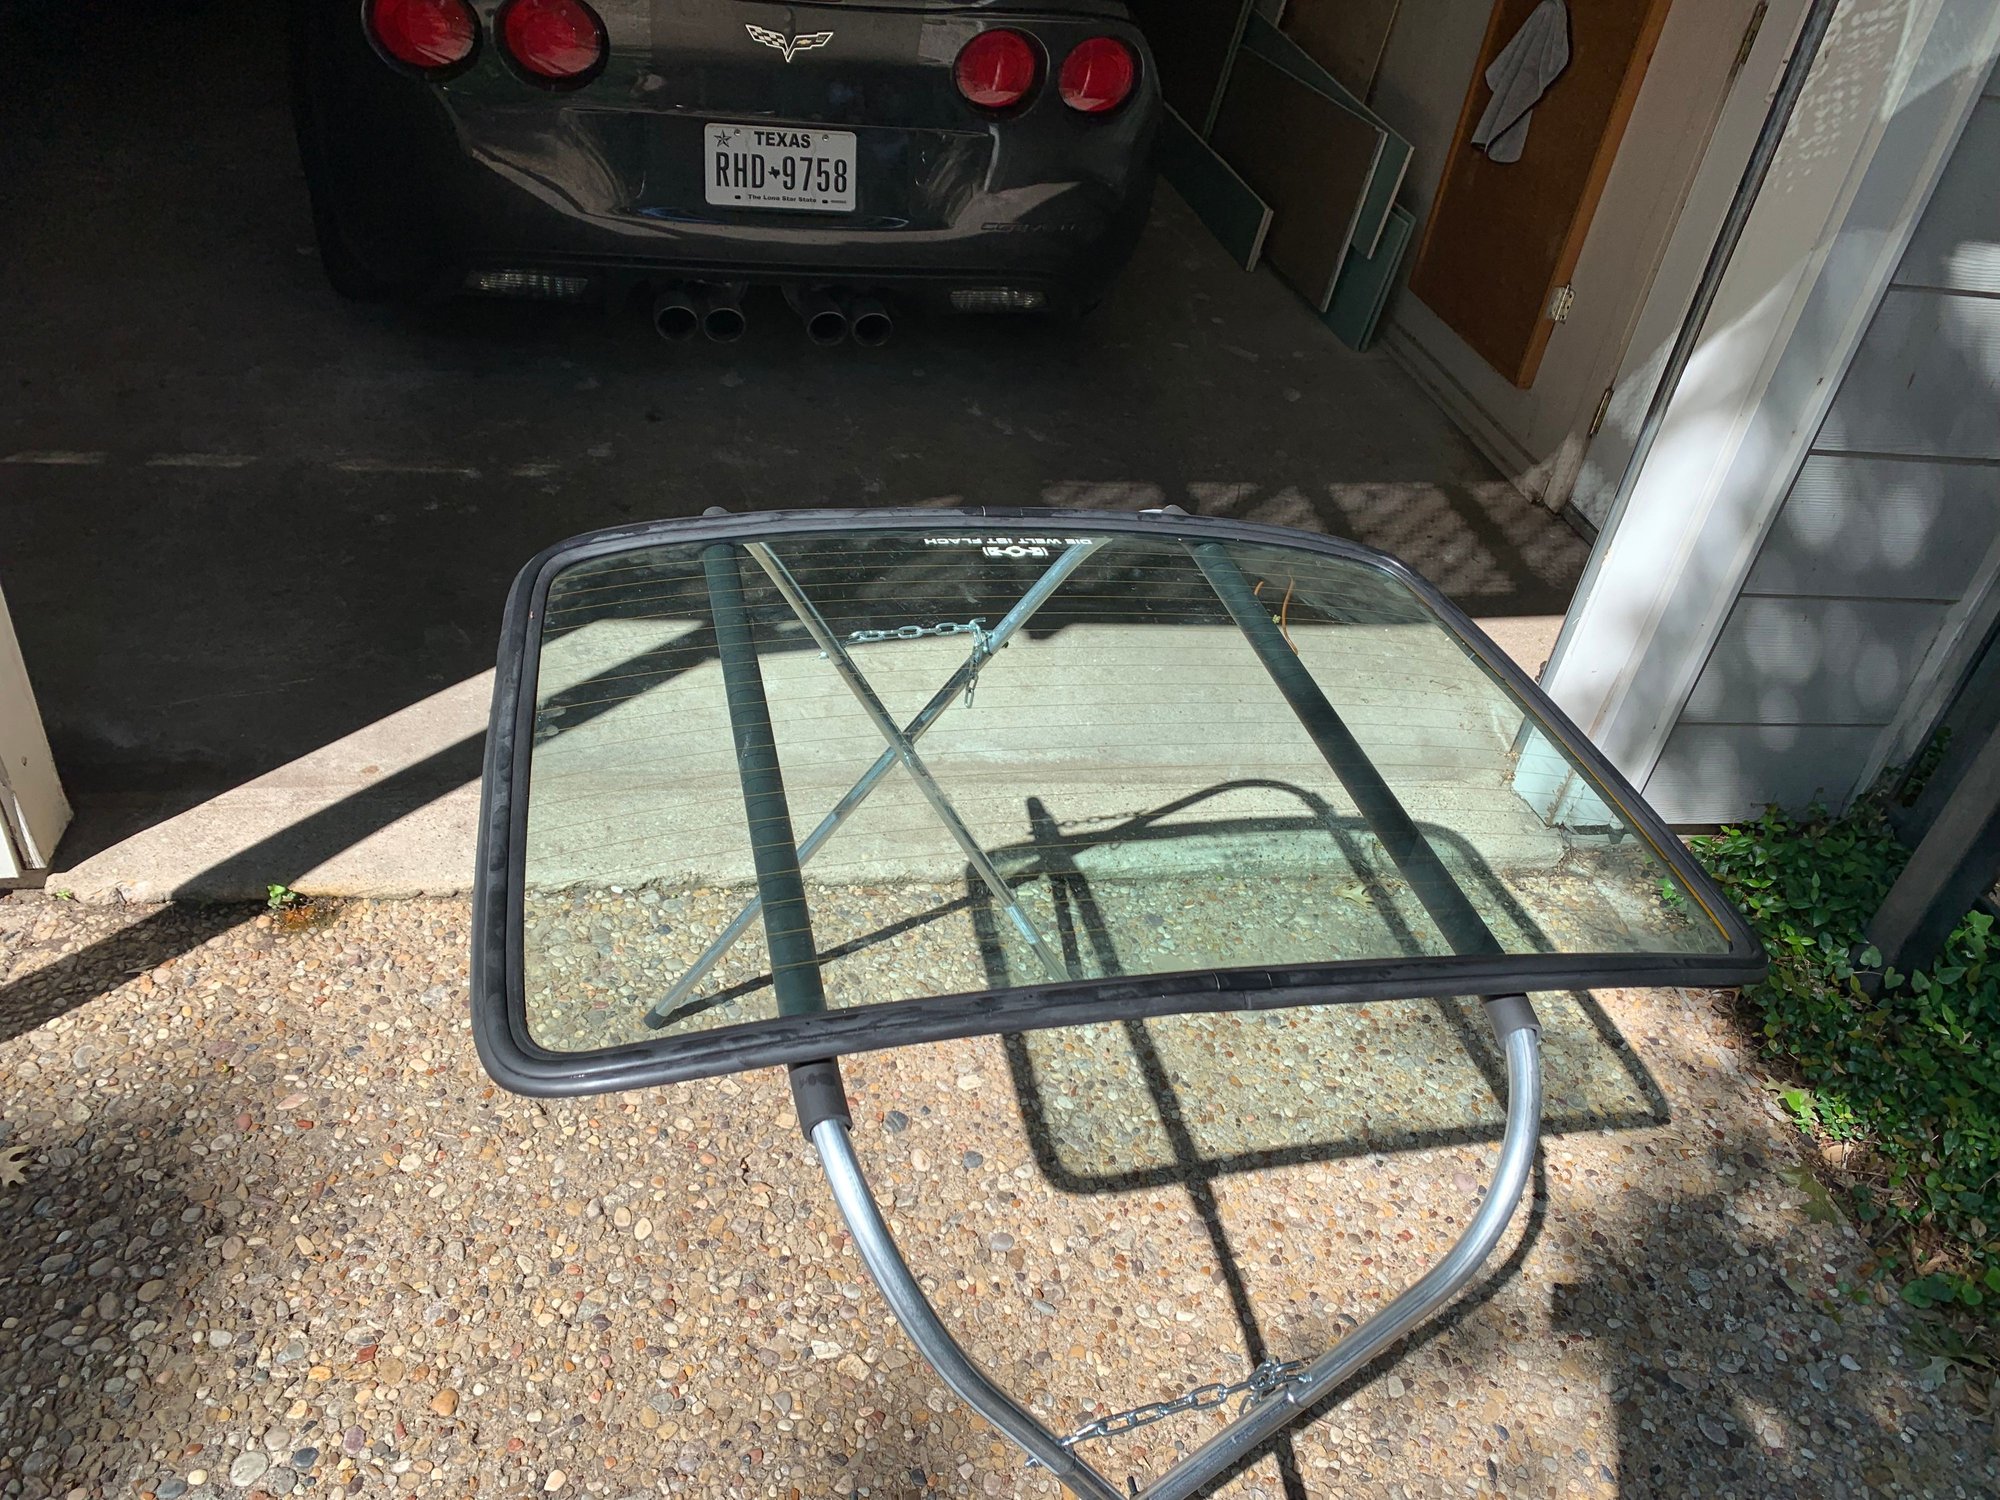
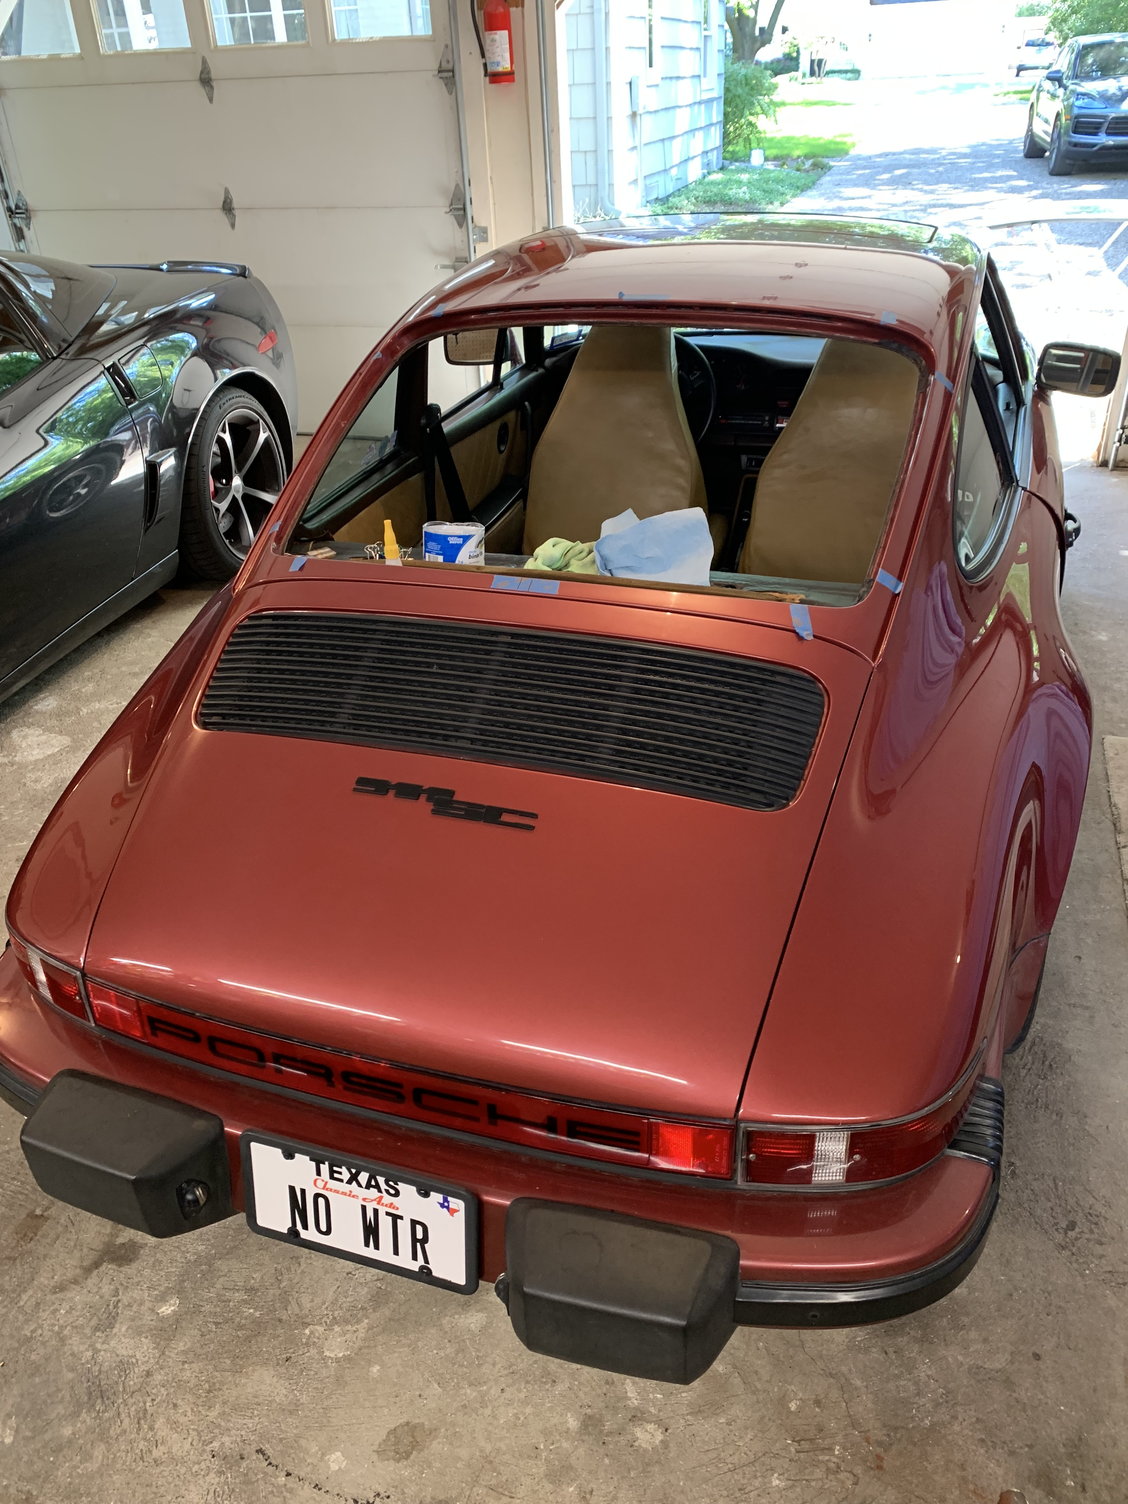
The Recent rains have revealed my 81 911SC coupe rear window seal has failed. Water was on both footwells in front of rear seat and I could see water staining on the brown headliner near the upper corners of the window.
New seal time. Use only Porsche rubber seal, about $155. Don�t cheap out here. The correct rubber is soft, pliable, and most importantly, the correct size.
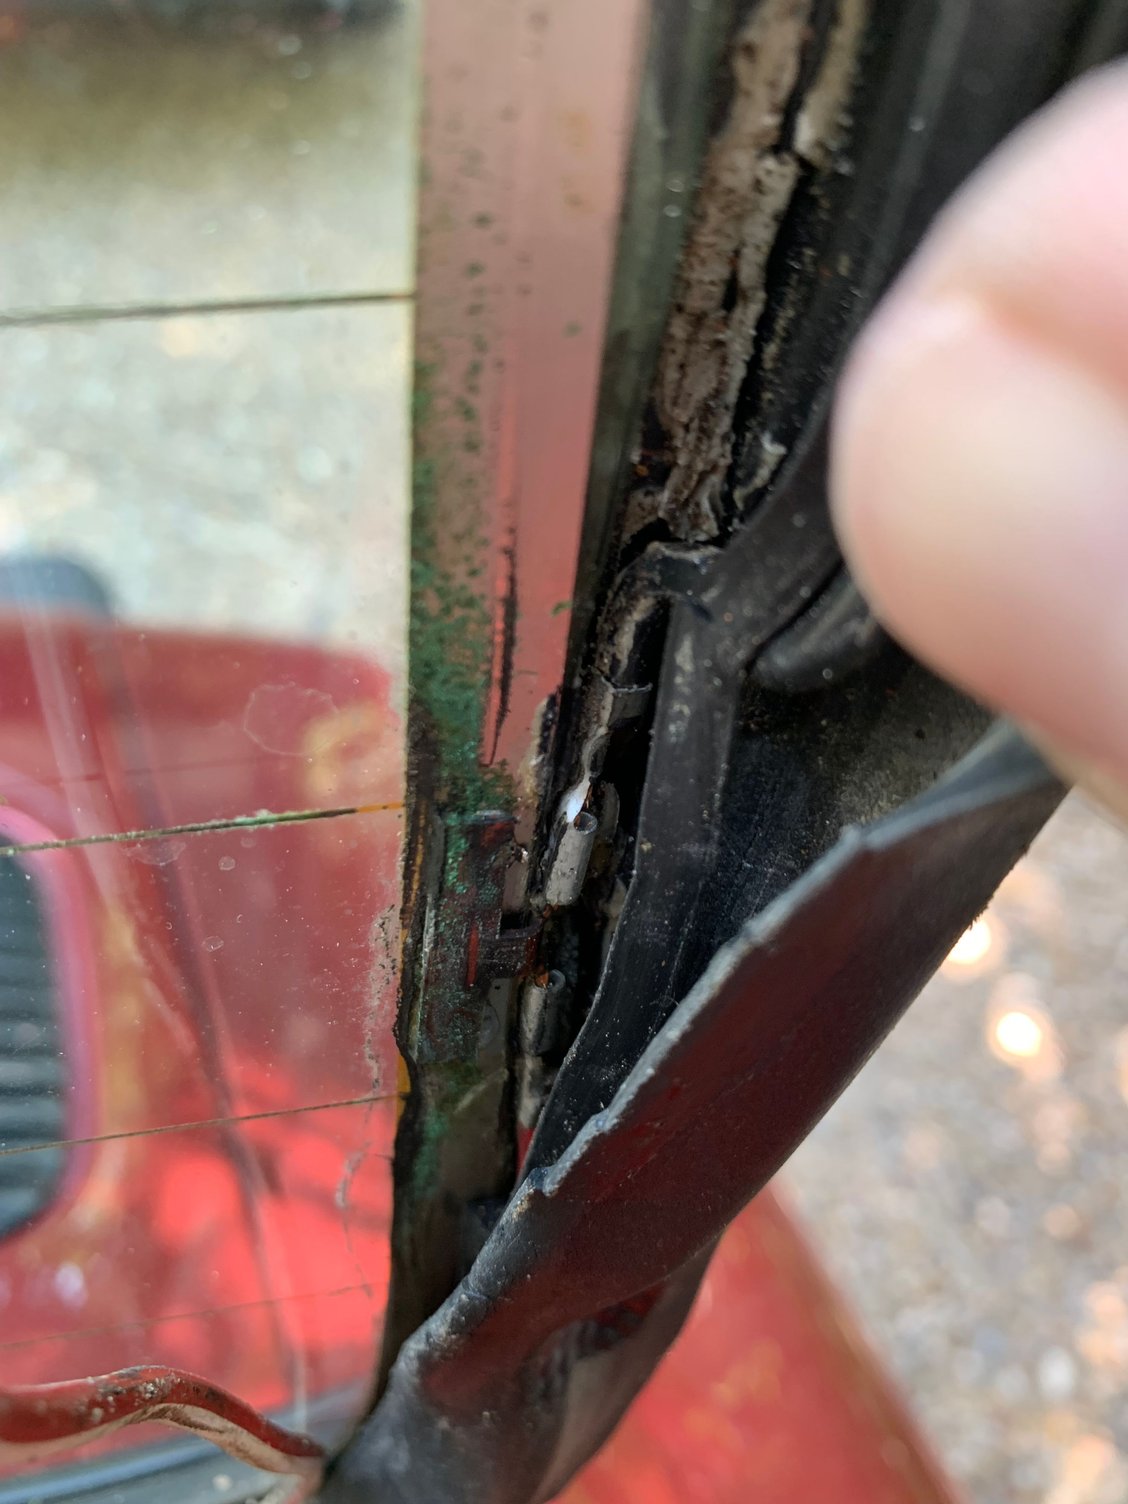
To remove the window, with your very sharp skill knife, on the inside of the car, pull back the locking rubber over the pinch weld and start cutting it away. Be very careful here no to cut so deep you slice the headliner. I was cutting mine away in 4-6� strips. I had the pinching rubber mostly removed across the top almost to each corner. I pressed up on the glass and it easily pushed up enough I knew I wouldn�t need to trim any more pinch weld holding rubber.
On the outside of the car, I was able to tuck my fingers under the upper corner of the window and slowly lift it up, and work my hands around the window to get it to release all the way around the opening.
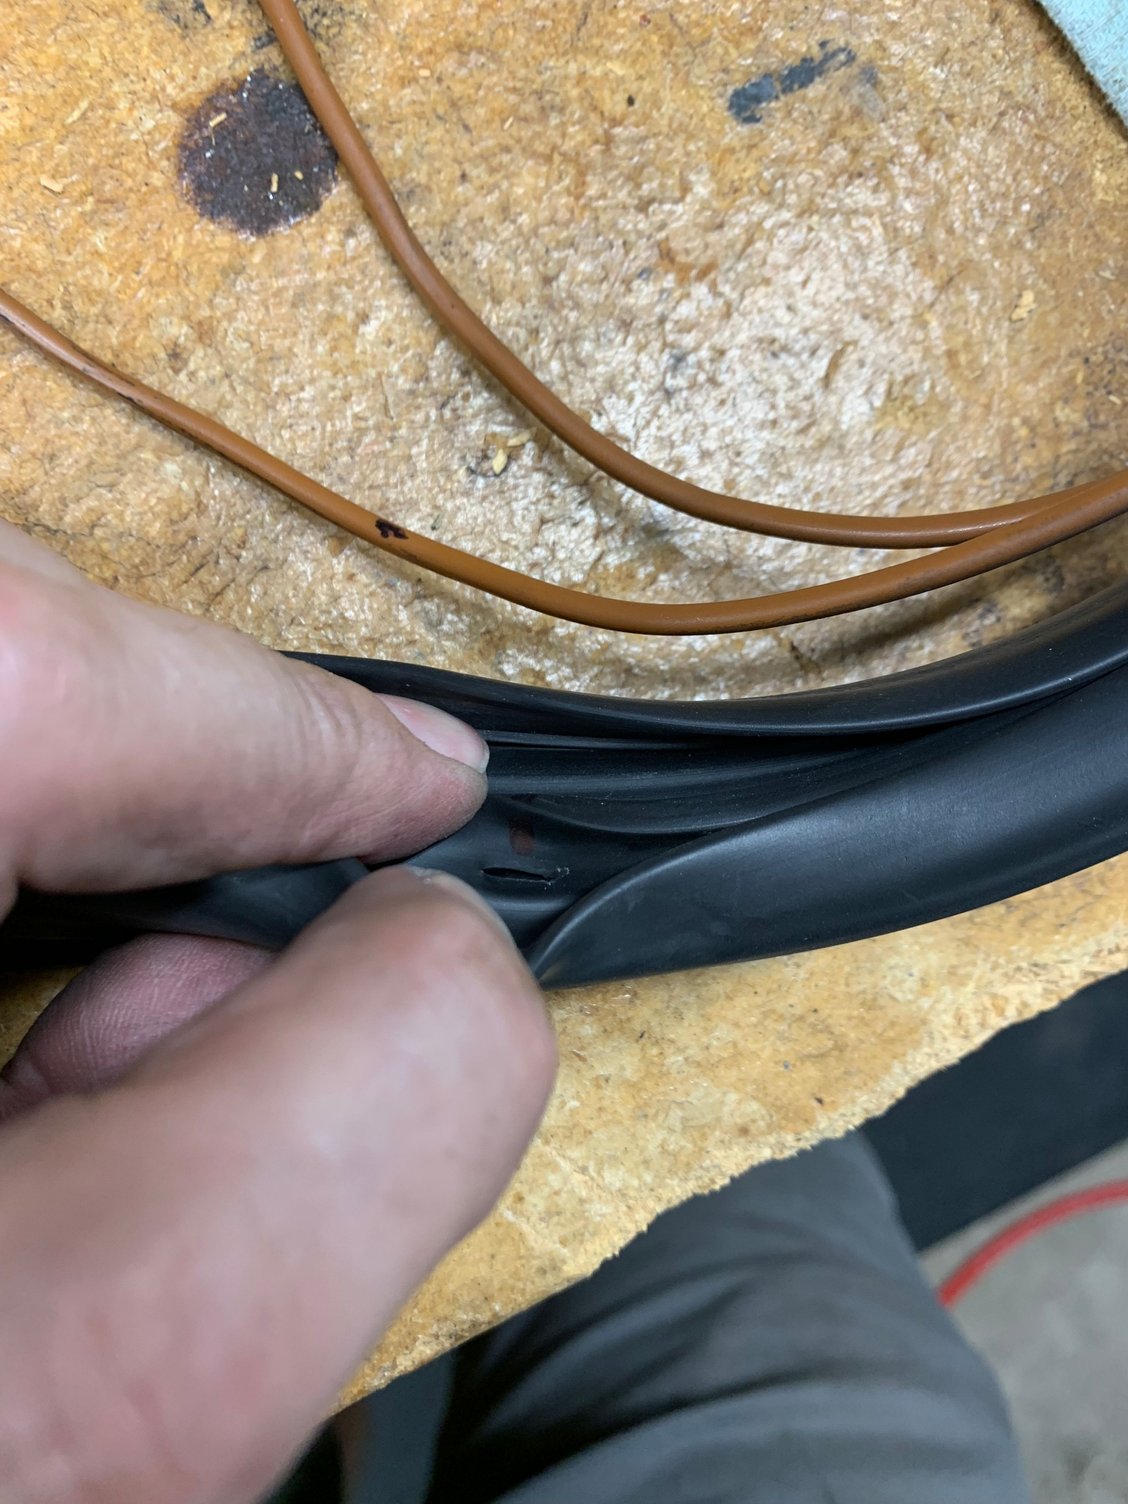
My car has the rear window defogger. If you car doesn�t, you can simply carry the glass away at this point. But with the wiring of the defogger running through holes in the rubber seal, and tucked into a channel in the rubber specific for the wiring, more steps are needed. On my 81, there are four defogger wires coming from under the rear parcel shelf lower corner, left-hand or driver�s side. The two brown wires have connectors so you can unplug them. (I actually removed the brown wires from the rubber first) The red/black and white/red wires don�t have connectors? On the underside of the rubber, you can see on the driver's side where the red/black and white/red wires connect to the window glass and thus you can unplug them, pull them through the little holes to free them from the rubber.
Note: I gave this some thought and after a while, realized getting the wiring in the rubber harness would be a lot easier if the glass was on a stand or workbench rather than on the car so I decided to cut mine, making connectors next to the brown wiring connectors on the rear parcel shelf area. Snip, snip the red/black and white/red wires -WITH CAREFUL consideration to leaving enough wiring on both ends to add connectors later.
With the glass free from the car, I set it on a glass or panel stand I bought at Harbor Freight for $17. The rubber seal was still on the glass. I placed it inside down so I could study the fragile aluminum trim still in the rubber. I say fragile because it bends very easily. We want to get it off keeping the original shape as much as possible, but it is basically impossible. I slowly worked the trim out of the rubber. I ended up with some waves in the pieces, but it is easily fixed later.
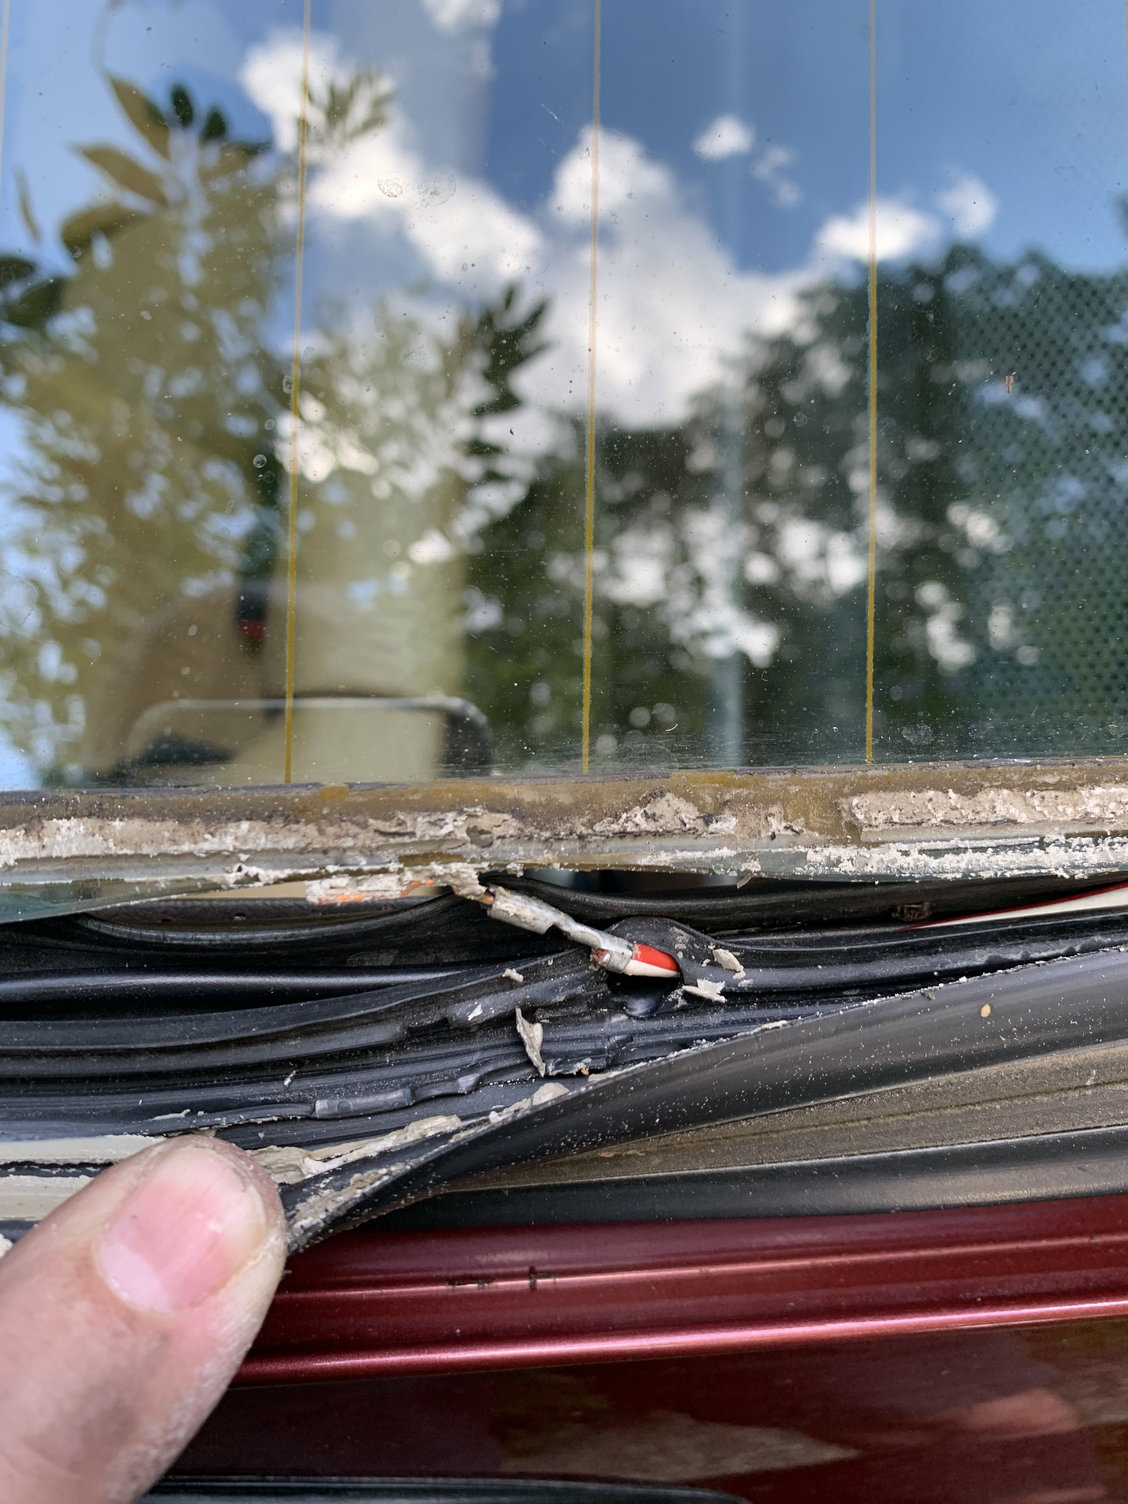
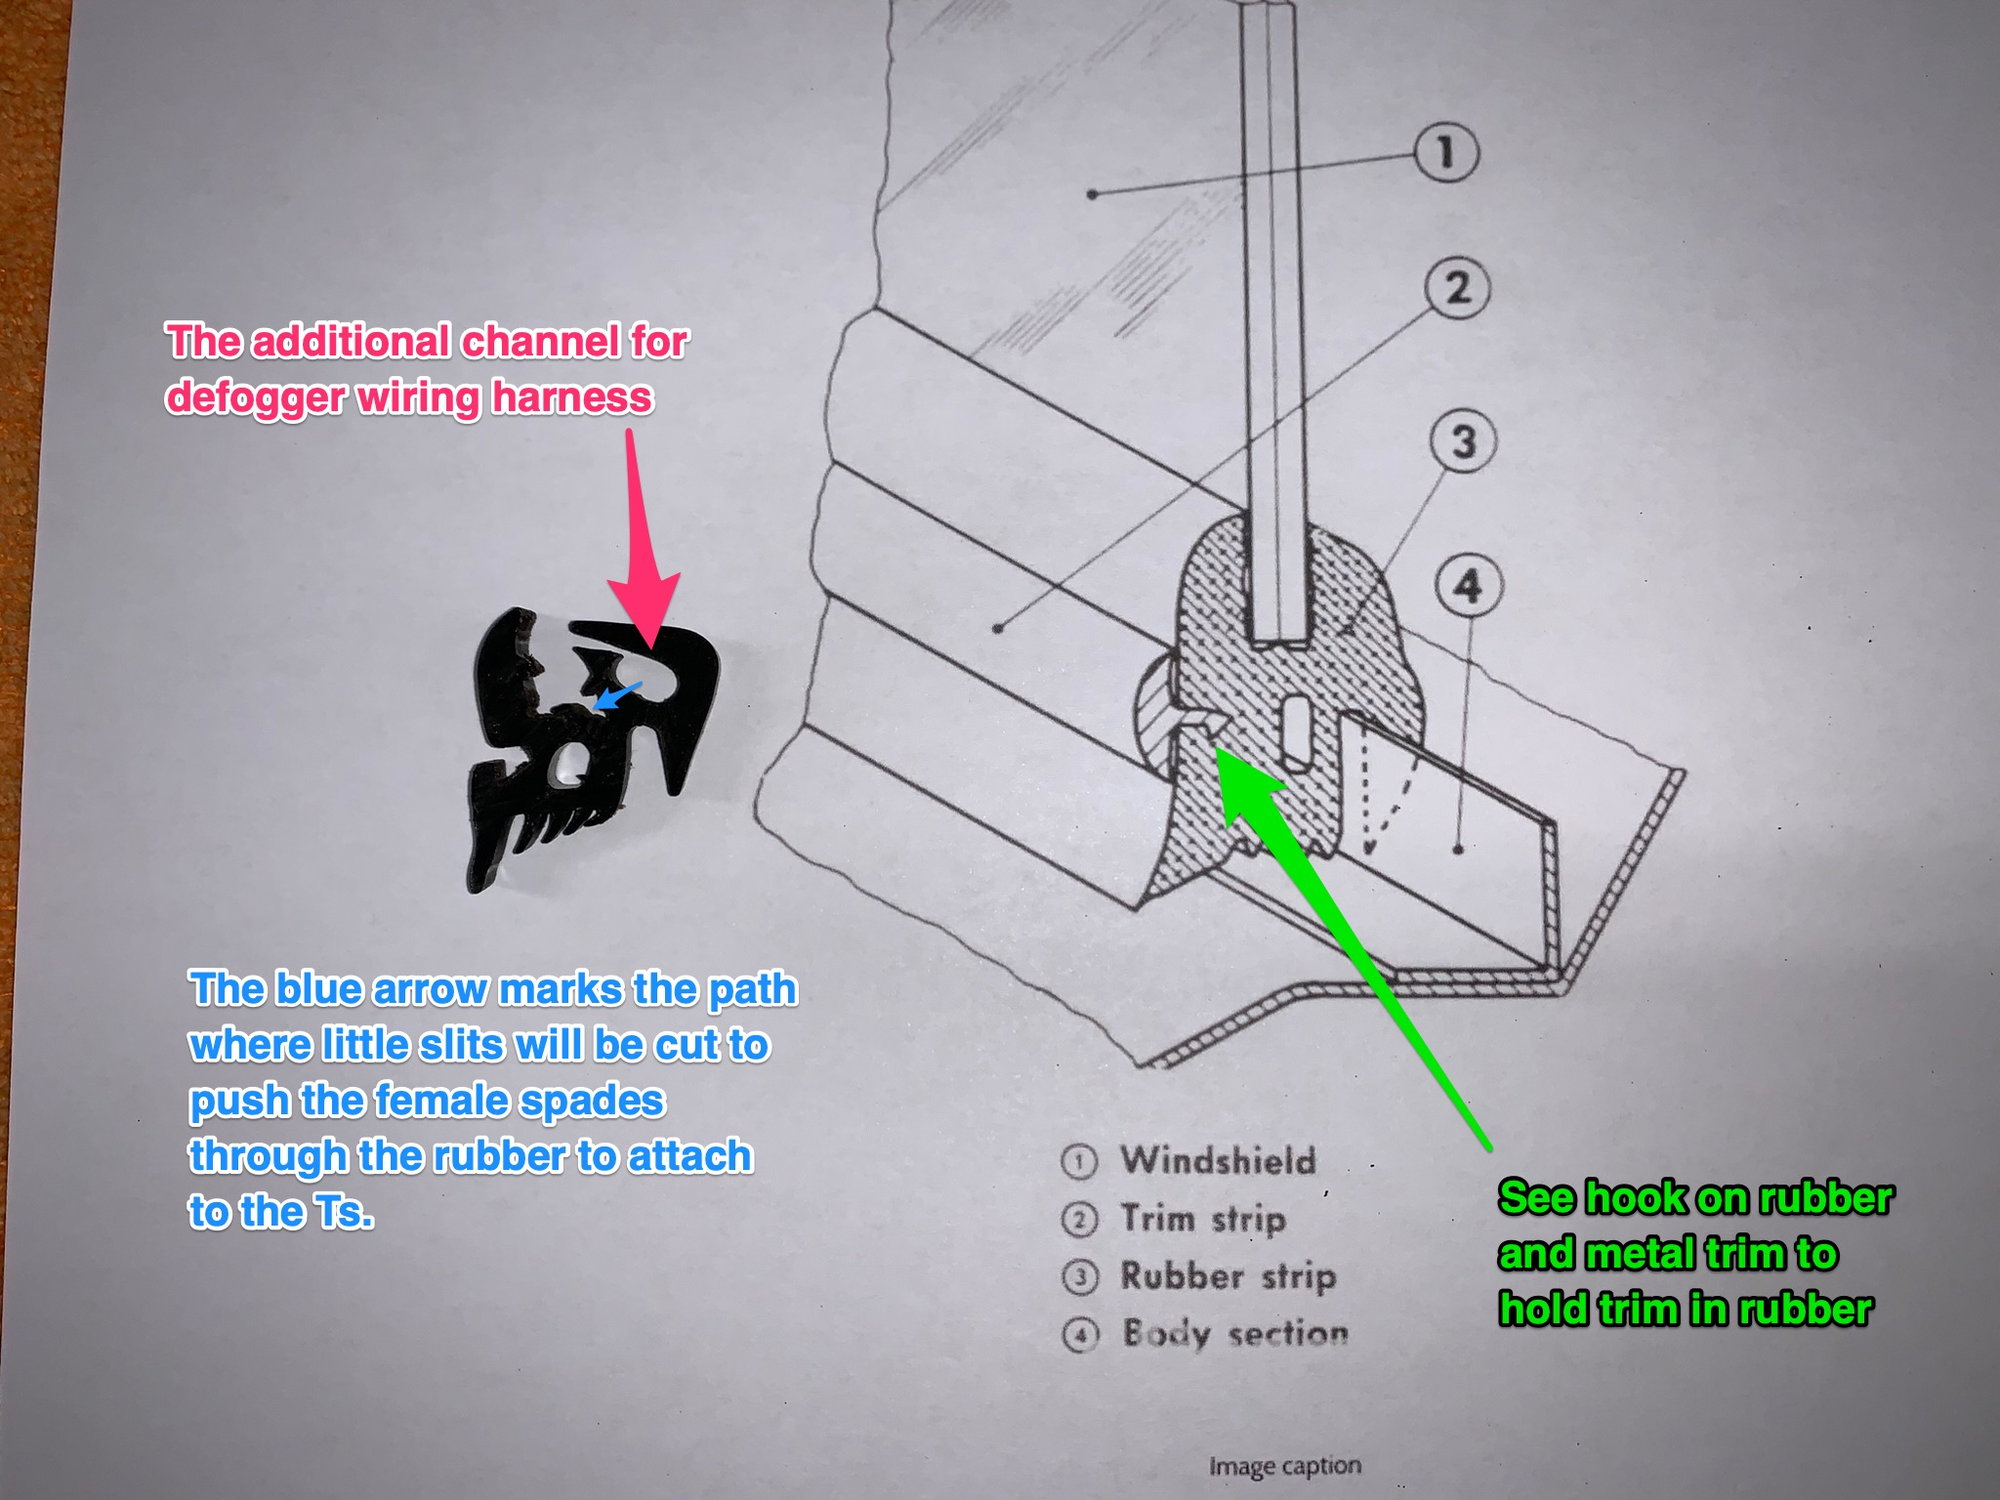
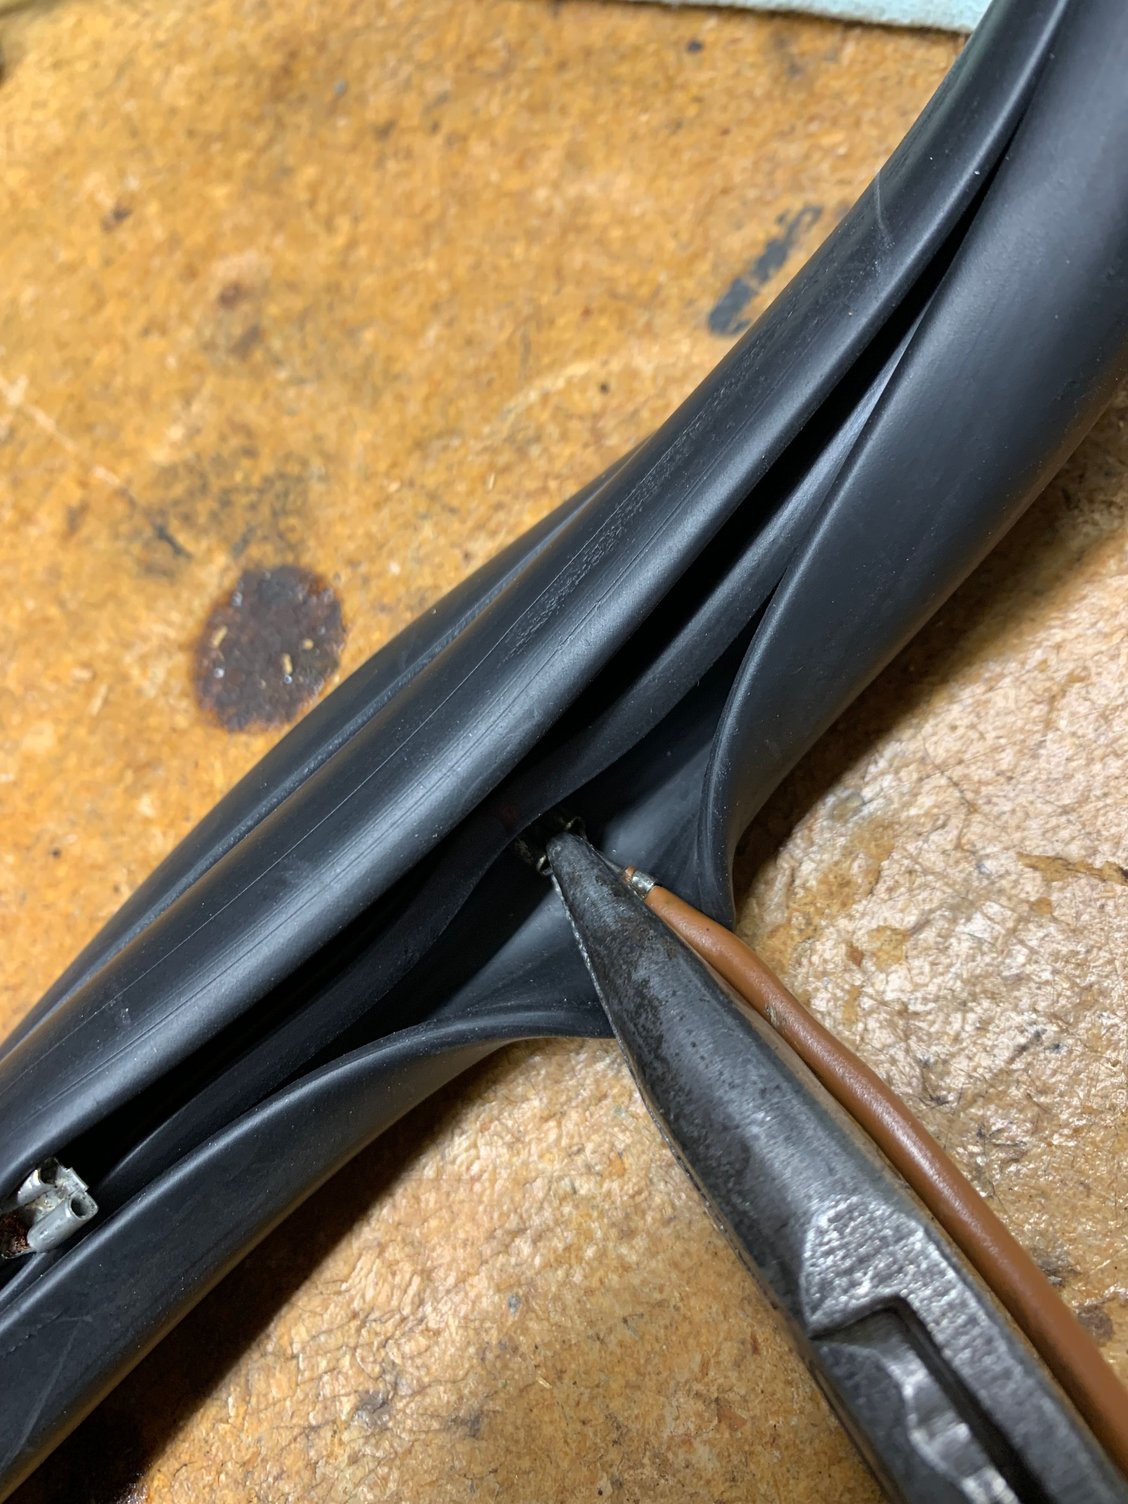
Now I flipped the window over so the inside of the glass is facing up. On the edges, you can now see the wiring harness connections to the defogger. On each side, left and right, there are three T connections to the glass wiring. The bottom T has two connections, the middle Ts have one and the top T has one. I drew out the wiring and have attached a photo. There is a black wire on each side still in the rubber and connected to Ts. Remove the black wire. Now you can remove the rubber from the glass. The window seal rubber has a different cross section than non-defogger rear windows as there is an extra channel to hide the wiring. See photo.
Spend time cleaning the edges of the glass where one might find dirt, old body dum dum, old silicone gel someone added hoping it would keep out water.
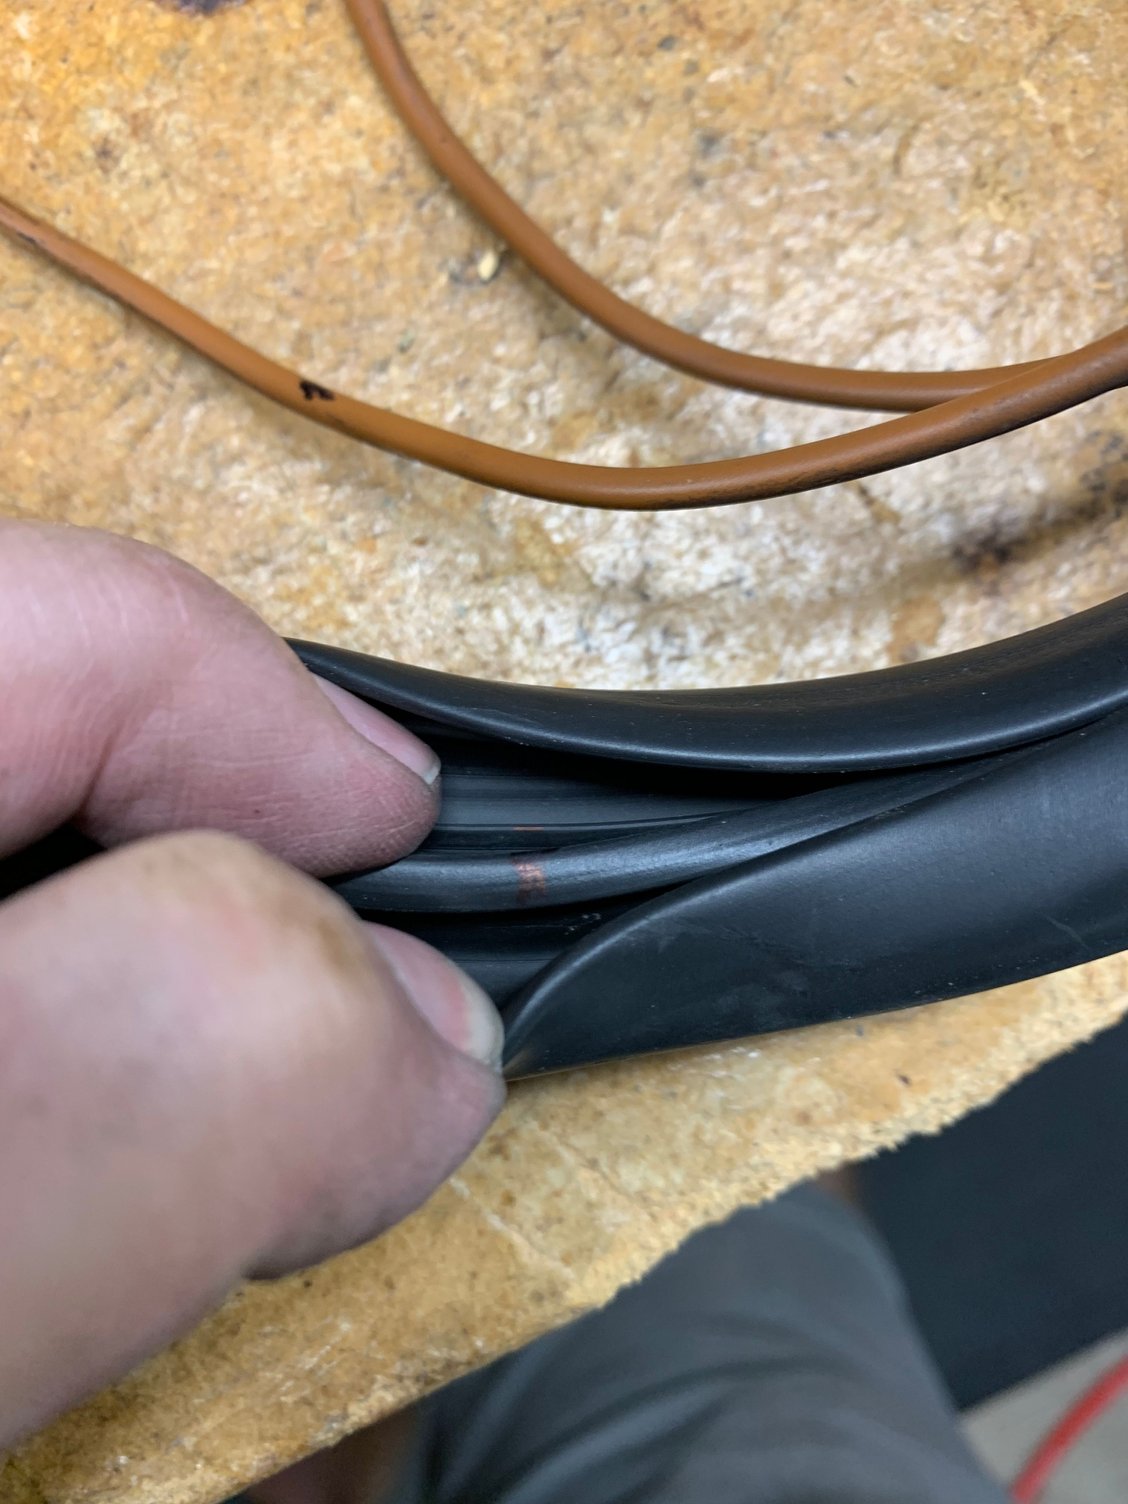
Lay the old gasket on the work bench with the top away from you, but flipped over, meaning the inside car layer is up. You will need to work the black wiring out of the grooves and you�ll find the last 2� or so of the wiring goes through a hole in the rubber where it attaches to its T connector.
Next, layer the new gasket rubber on top off the old one. The seam of the rubber (where it is joined together) should be at the top center of the gasket. Take a marker to note where the four holes for the lower corner where the defogger wires go through. Carefully use a drill and bore four small holes for those wires. Next mark where you will need holes from the wire harness channel through to the channel where the window glass sits. Here, I used an exacto blade to carefully slice a small slit just long enough for the female spade to slide through.
Now run your wires to their proper locations.
It is now time to prepare the new rubber seal, with the wiring in place, to be placed onto the window glass. I had the luxury of a hot sun - I left the rubber on the driveway hot concrete for about 30 minutes. It was very warm and pliable. I started at the top lining up the rubber�s seam with the center of the window glass logo. I had no problem sliding the rubber all the way around. I did have to pull on the rubber�s corners to stretch them into place, but it worked. Using a soapy solution to help glide it on is an idea others have used.
With the underside of the window facing up, you can pull back the glass rubber channel seal portion to use small needle nose pliers to carefully push the connectors onto their respective Ts.
Next, comes the one of the harder parts of the process. It is correct to install the aluminum trim onto the rubber prior to installing the window onto the car. My original trim pieces had some waves in them from the removal process. The corners basically kept their shape. I took the trim to the pinch weld of the window opening and pushed the trim to match the window opening.
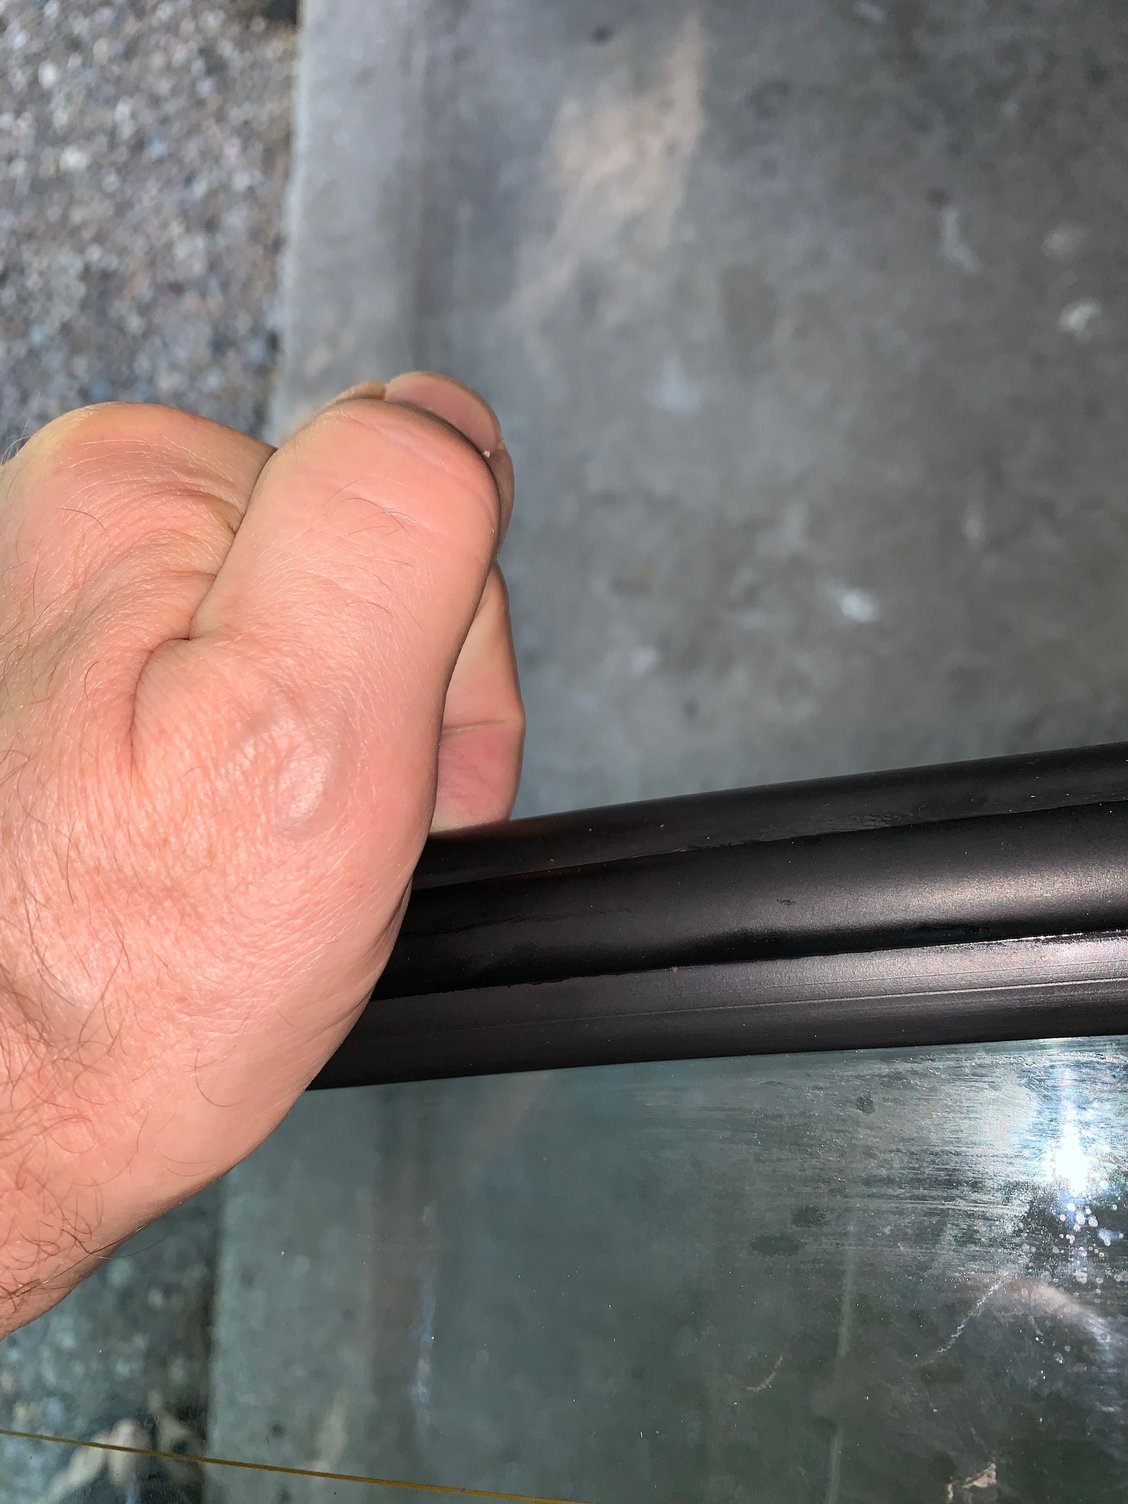
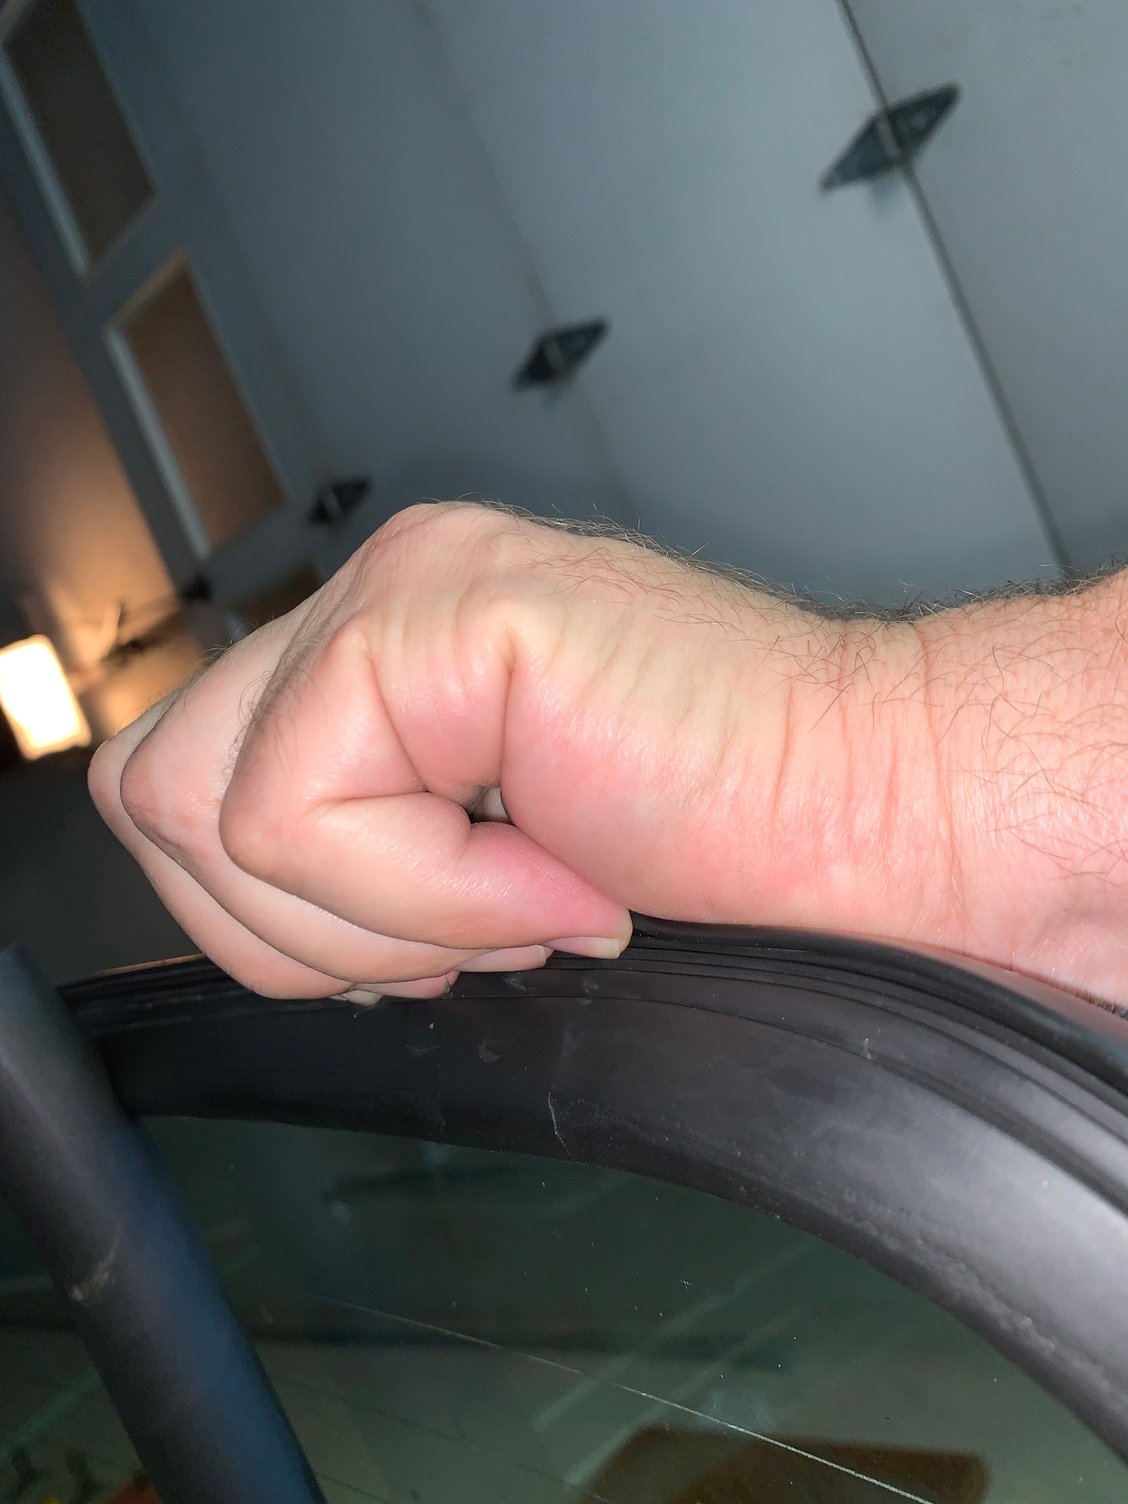
Study the cross section of the rubber to see the trim�s channel and you�ll see the rubber has a hook portion. The metal trim, has a hooked side too. The battle is to get the rubber up over the hook on the trim. I�ve seen a windshield installer work this problem in the past. Lubrication helps here. Glycerin, silicone spray, whatever you think. The trim, as you know, has two center cover pieces to cover the seam between the two. Use some kind of light grease or oil to slide the cover over to one side. I noticed prior to removal, when the trim pieces are installed, there was about 1/8� gap between them top and bottom, so I started with that gap in mind. I tried to take a photo of my hand in position to work the rubber over the trim hook. Squeeze with your hands and dig your fingers up trying to crush the rubber up under the trim. Once it is in, it should stay well. The corners are a pain in the butt, but keep after without distorting the trim.
Once the trim was installed, I carefully tapped the center covers to the middle - pay attention that the cover is hooked over both sides as it slides onto the other trim piece. I set the finished assembly on its stand in the sun for several hours. My idea was to get all the lubrication out, thus maybe the rubber will stay better on the trim hook.
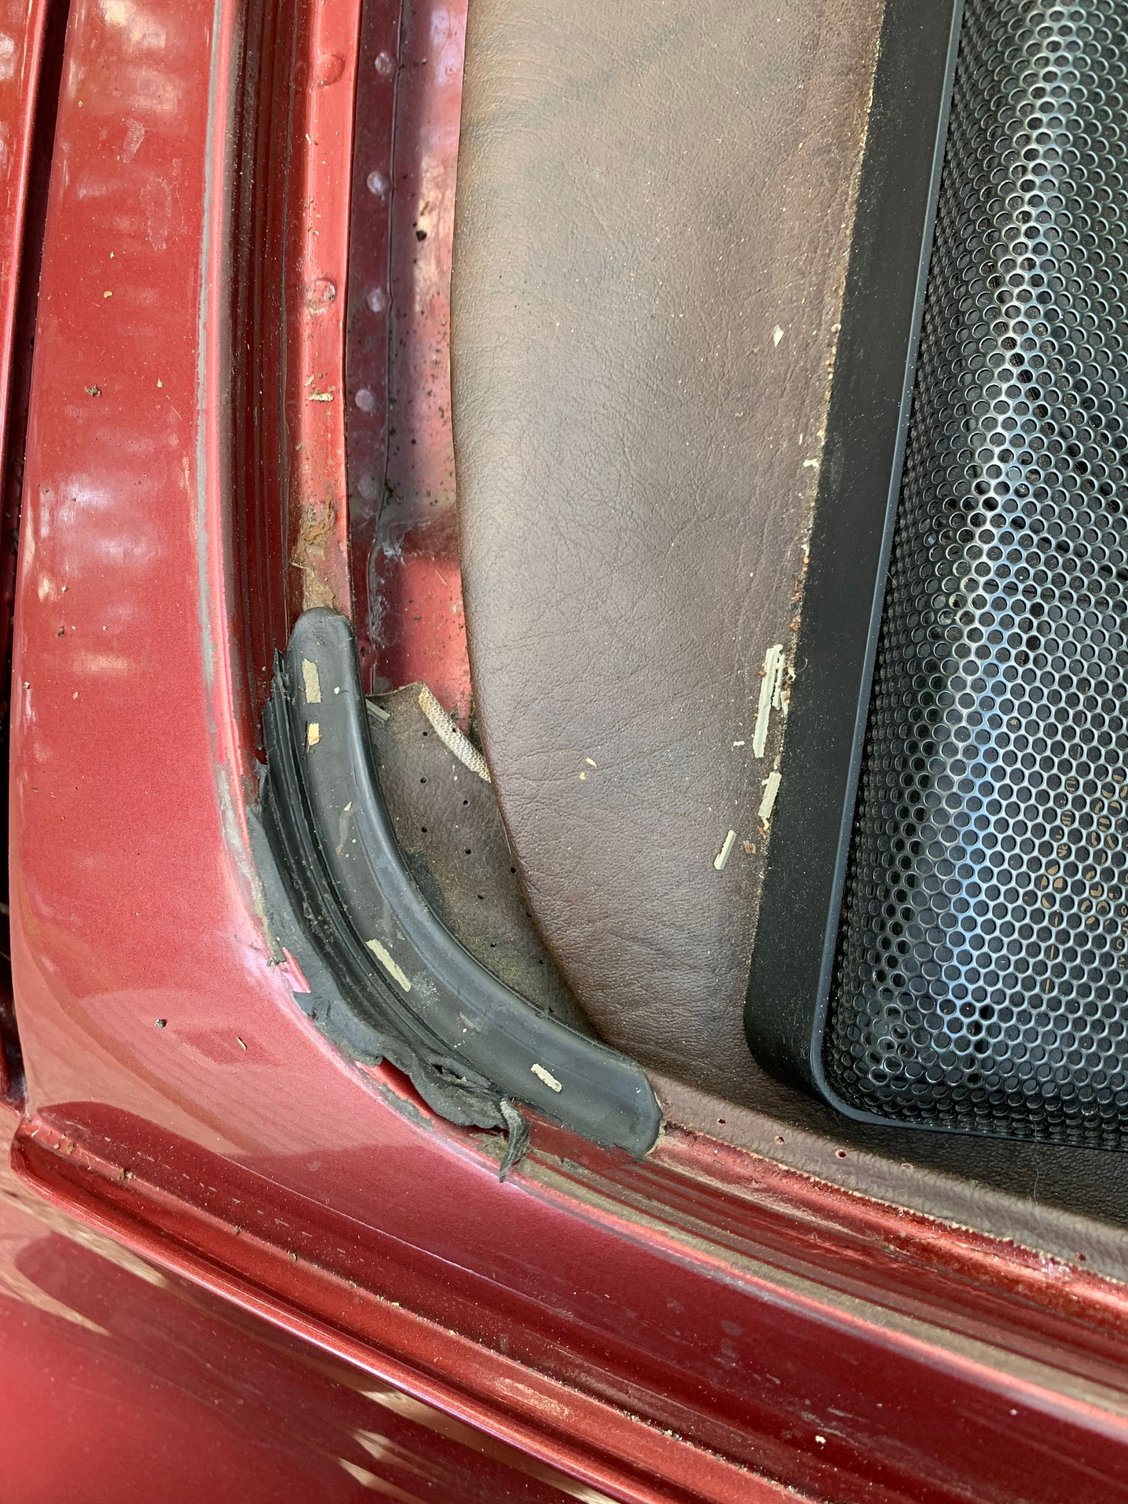
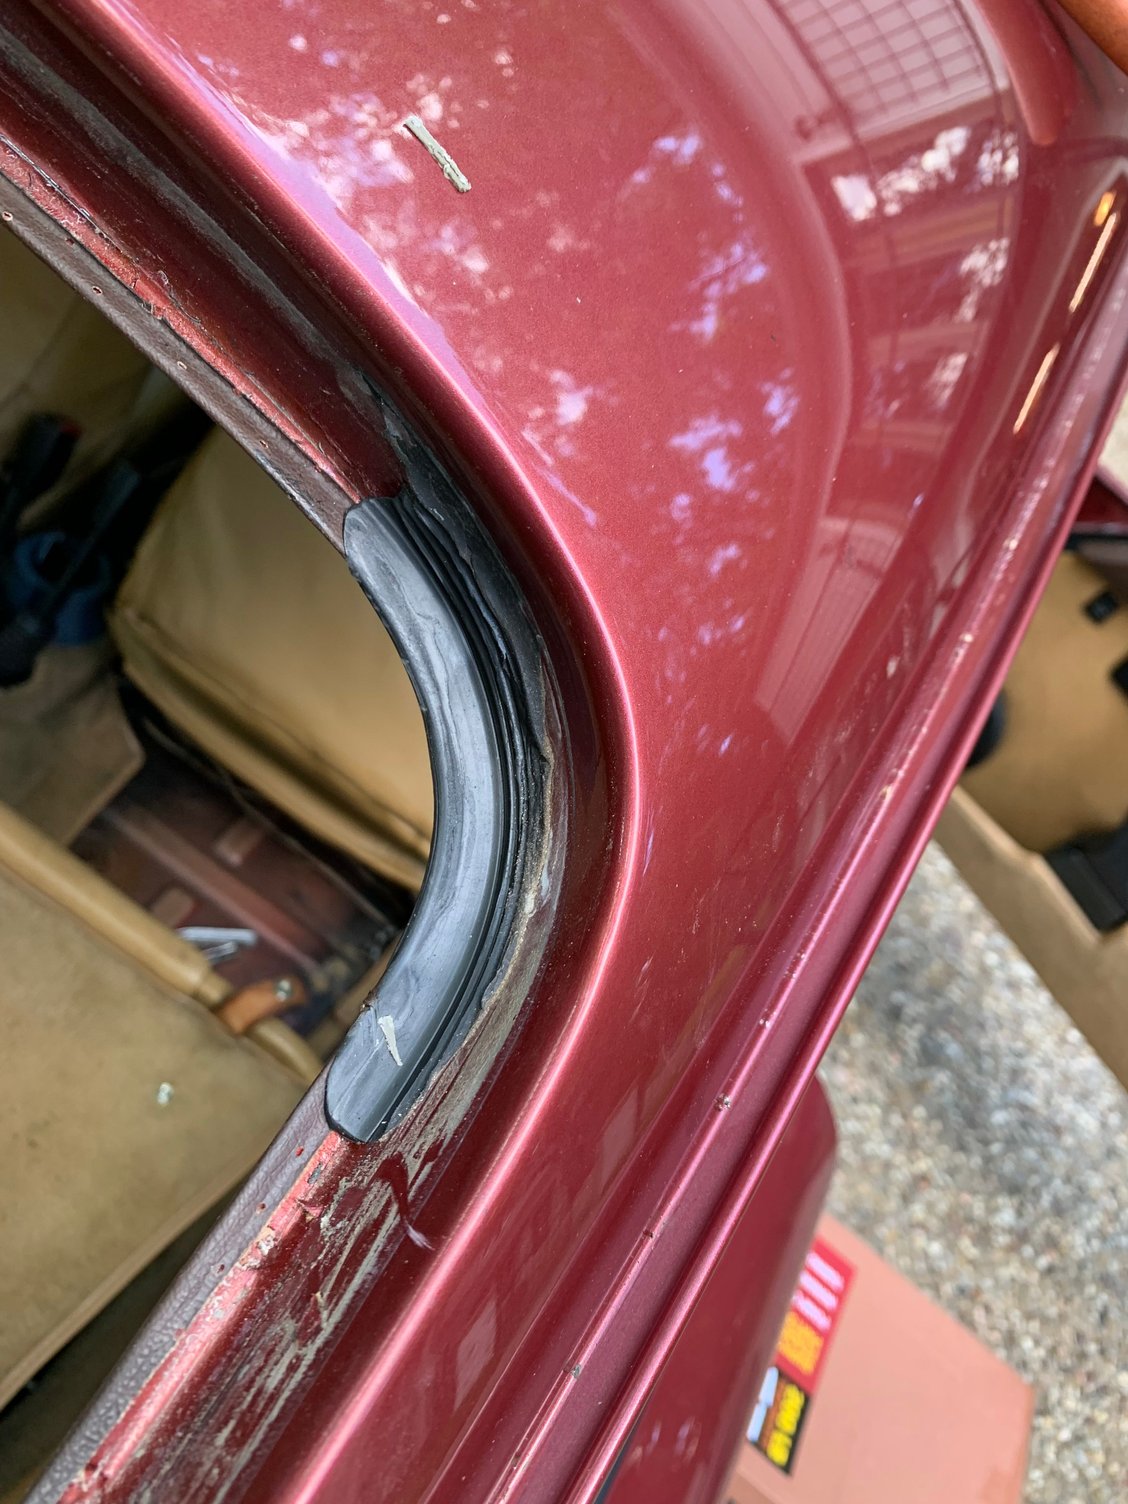
Car time - all four corners had factory installed body dum dum. I took some photos of old black sealer and put tape on the car to mark how far in both directions from the corners it was used. I used a plastic tool to carefully scrape the old sealer, thinking about how much was there and what it looked like shape-wise.
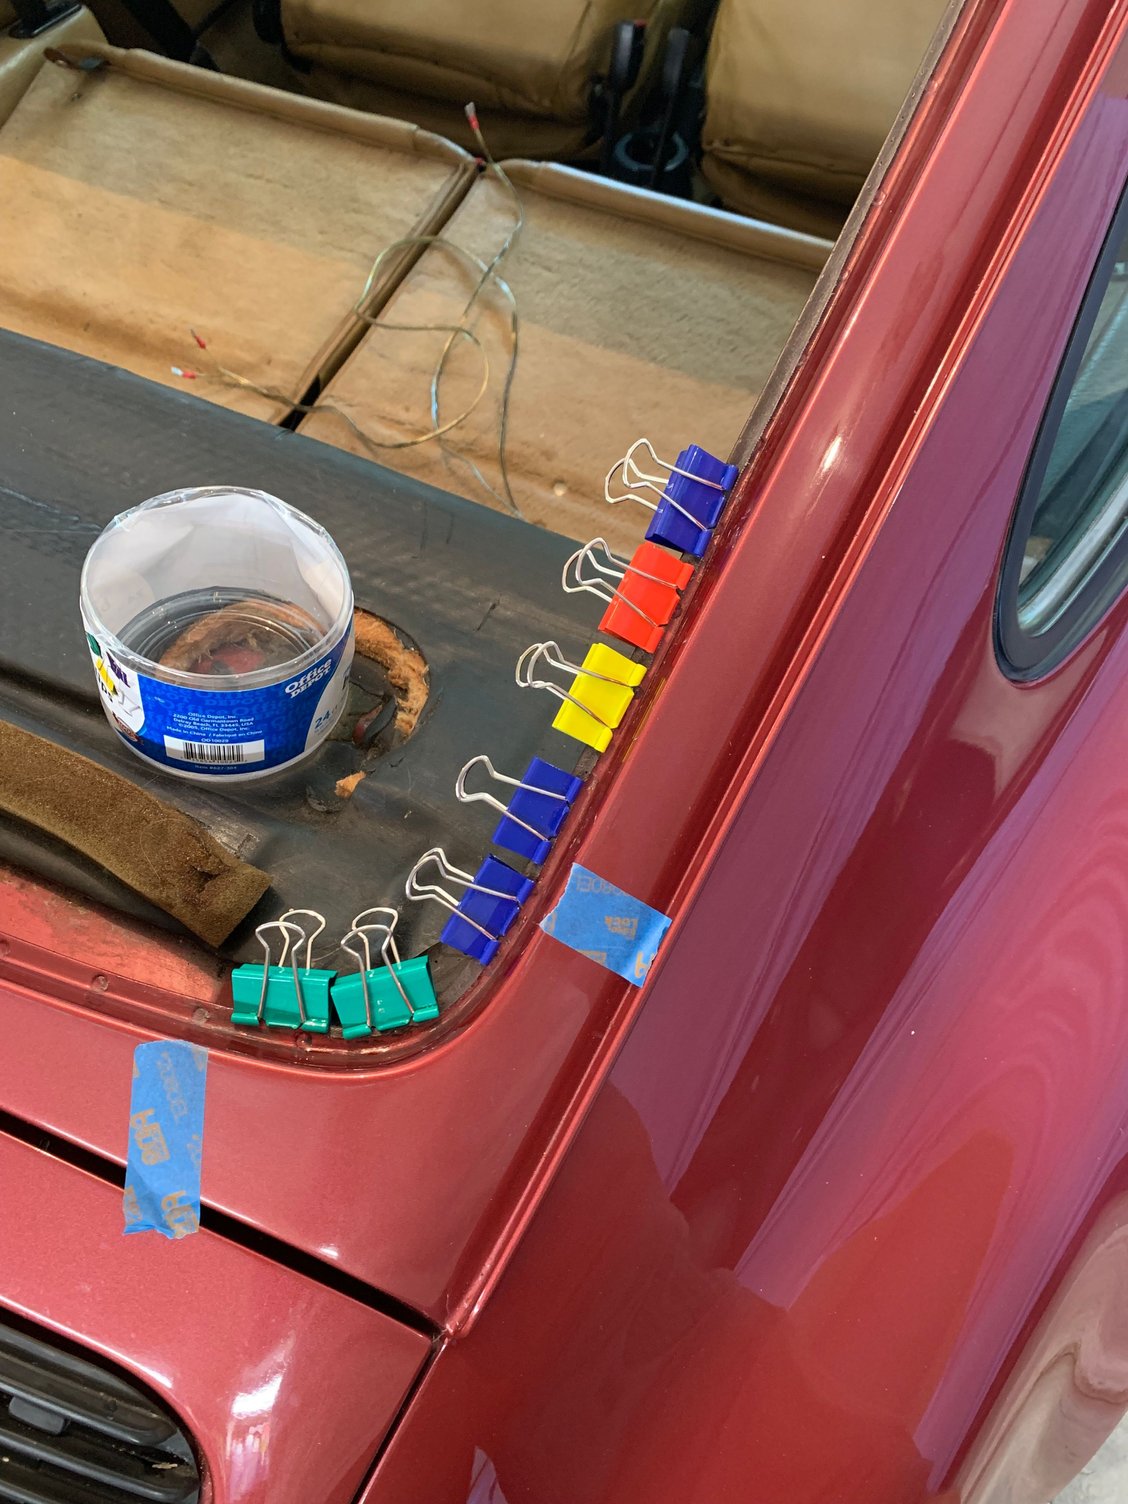
I noticed the headliner, which wraps around the pinch weld, was unglued in quite a bit and very importantly, the corners. Gorilla glue has a superglue bottle with a brush in the lid so i brushed a light coat on the pinch weld and then clamped the headliner in place. When it comes time to install the glass, we don�t want the headliner to come loose.
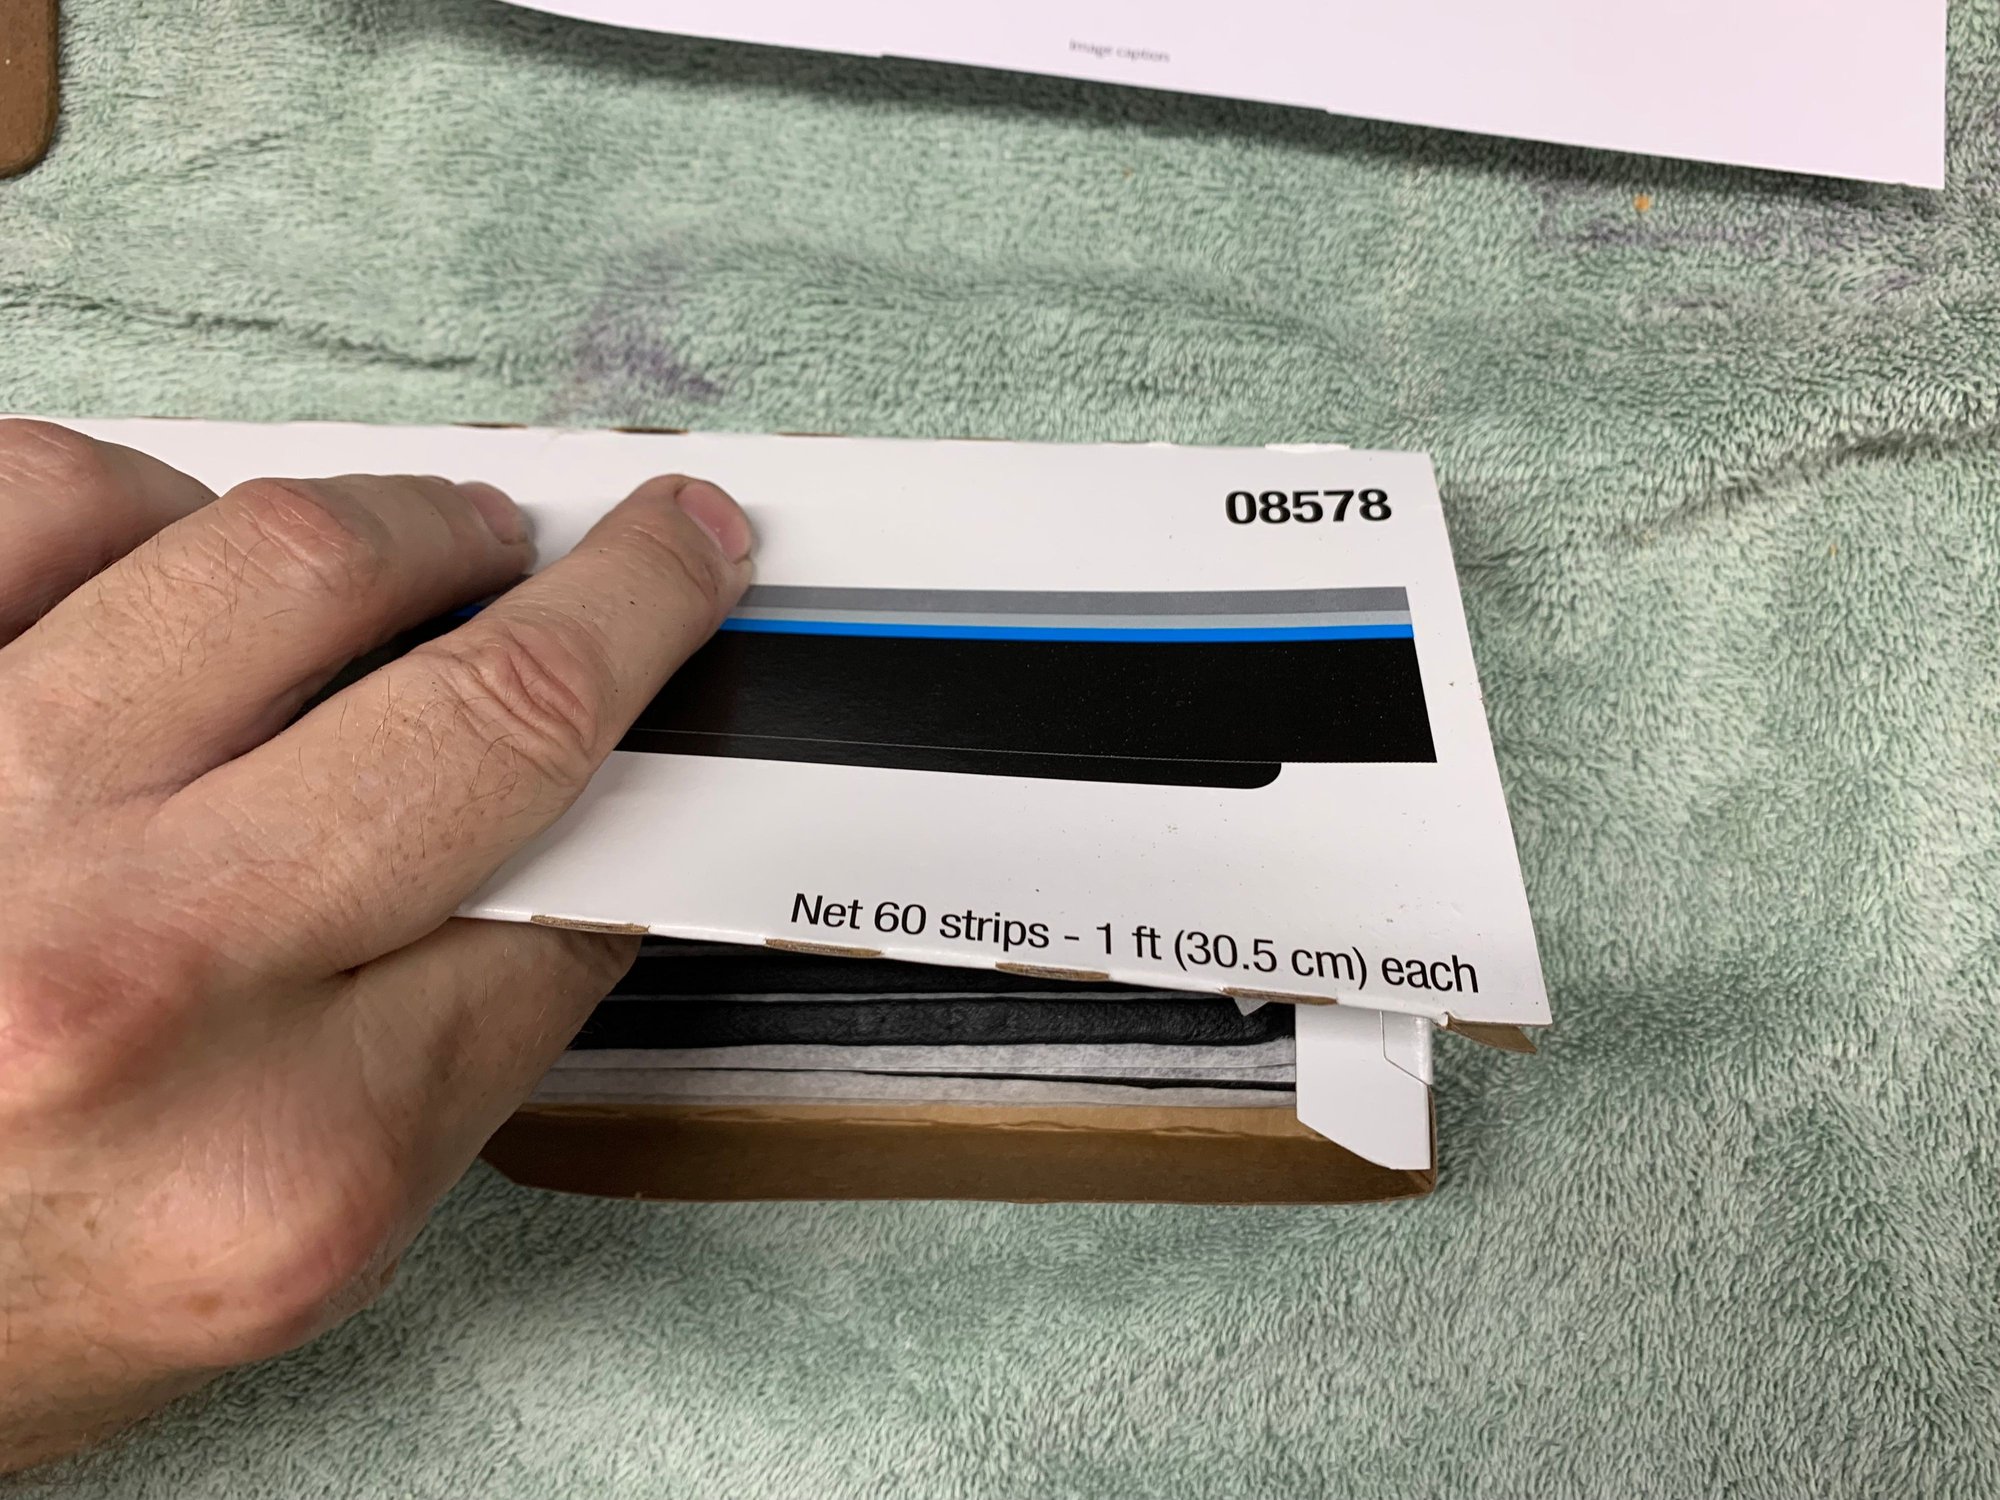
Back to the corners - Body dum dum is also called seam sealer or caulk strips. What you want is workable like playdoh. I bought a box of 3M Caulk Strips, product number 08578, for $25 at a paint/body supply store. You can recreate what was there thinking about what kind of volume you removed and work the caulk sealer into basic shape thinking it will crush/seal upon window installation.
Need to install wiring connectors for the red/black and white/red wires we clipped earlier.
The process of installing the window is such that a pull cord, when pulled out of the rubber channel, pulls the rubber over the pinch weld as it goes along. I used 16 gauge vinyl wiring as the outer jacket is very slick. Some folks use weed-eater string. Some use cord, but cord can be rough on rubber. Take a lubricant and put it all the way around in the pinch weld rubber channel. Your pulling wire needs to be long enough to wrap around the window, overlap by about 10� and then leave about 10� hanging out. For the rear window, we want to start at the top, so your loose wire should be hanging out of the rubber on the inside of the car at the top of the window. I used tape on the body and a marker to mark the position of top center to help with initial alignment.
Extra hands are now required. Hopefully, you�ll have two people, one for each side of the car. Lay the window into position, with the top and its rubber basically in position. The bottom of the window will be proud of the opening sitting too far down but don�t worry about that now. Center the window, left/right. On the inside of the car, it is time to start pulling a wire. You�ll need hands on the outside of the glass pushing down top center to assist getting window in position, and to keep it down enough so the rubber you pull over the lip stays in position. The extra hands are pushing and holding enough to hold what you�ve already pulled over the pinch weld but not so much pressure that you can�t work more rubber over the weld.
Have plastic hook type tools or be careful with metal hook tools to help any rubber areas not over the weld. Work carefully and and slowly work your way. Center almost to one corner. Then center the other direction and go ahead to try the corner. Then go back and get the other top corner. At this point, extra hands can be pushing on the glass upward so the bottom of the window will be dropping into position. Work your sides, then work the bottom corners. Then work the bottom center. On the outside, you�ll need to carefully pull up the sealing lip into position if they are not laying flat on the body. Use a plastic tool for this. (Harbor freight sells made-of-plastic door panel and trim removal kit for about $10)
Connect your defogger wiring. Carefully clean the glass. Do not shut the car doors with the windows all the way up for a few days. Let the rubber lubricant dry out. I have my car parked in the sun with the idea that the lubricant will boil/dry out to help preserve the window in its happy place?

 09-19-2022, 01:44 PM