When you click on links to various merchants on this site and make a purchase, this can result in this site earning a commission. Affiliate programs and affiliations include, but are not limited to, the eBay Partner Network.
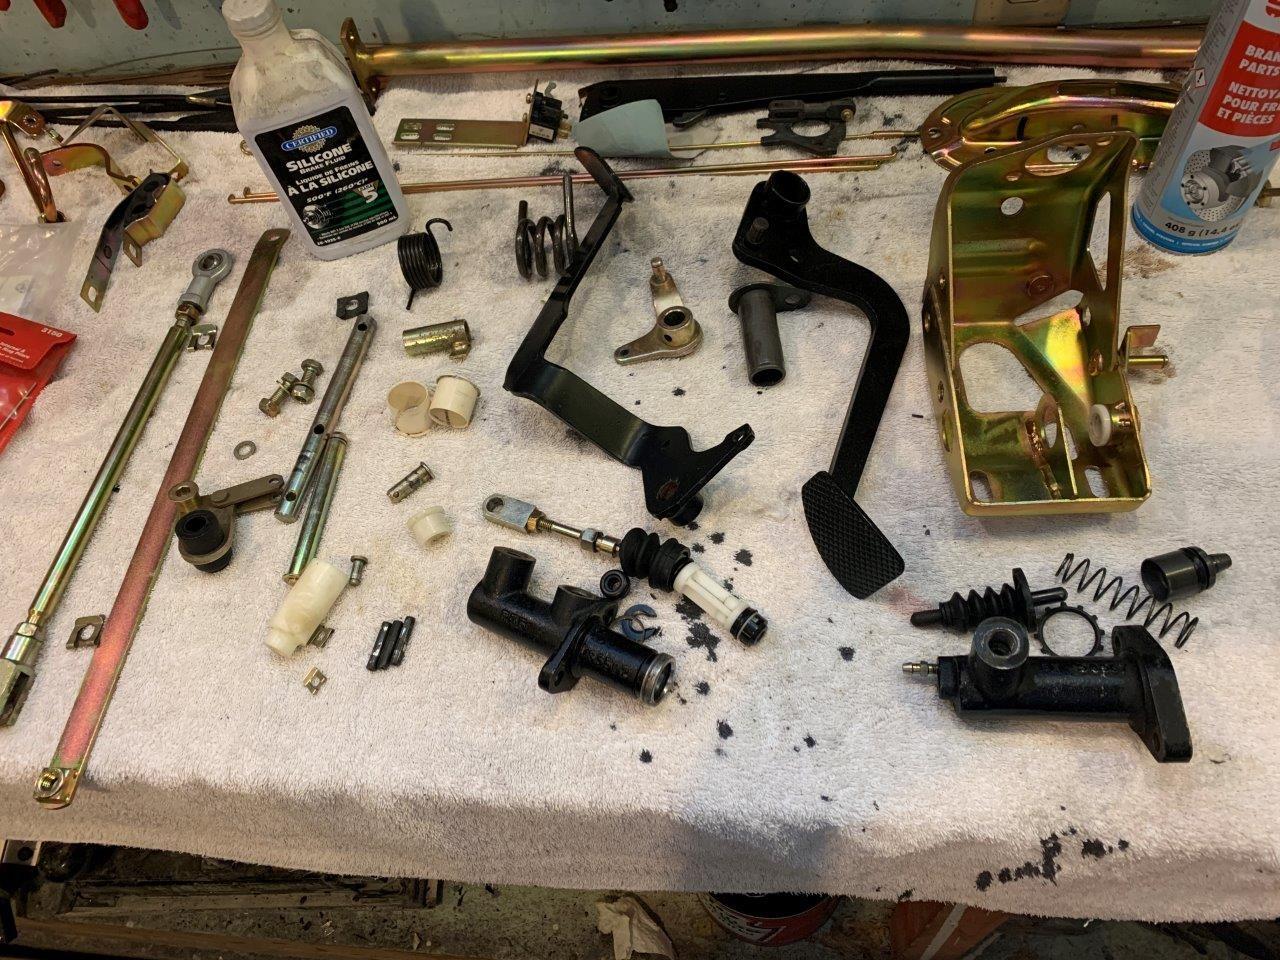
Update for today, not that exciting. Week was filled with picking up my replated parts and rebuilding the pedal cluster, e-brake and also finalizing some of the AC bracketry
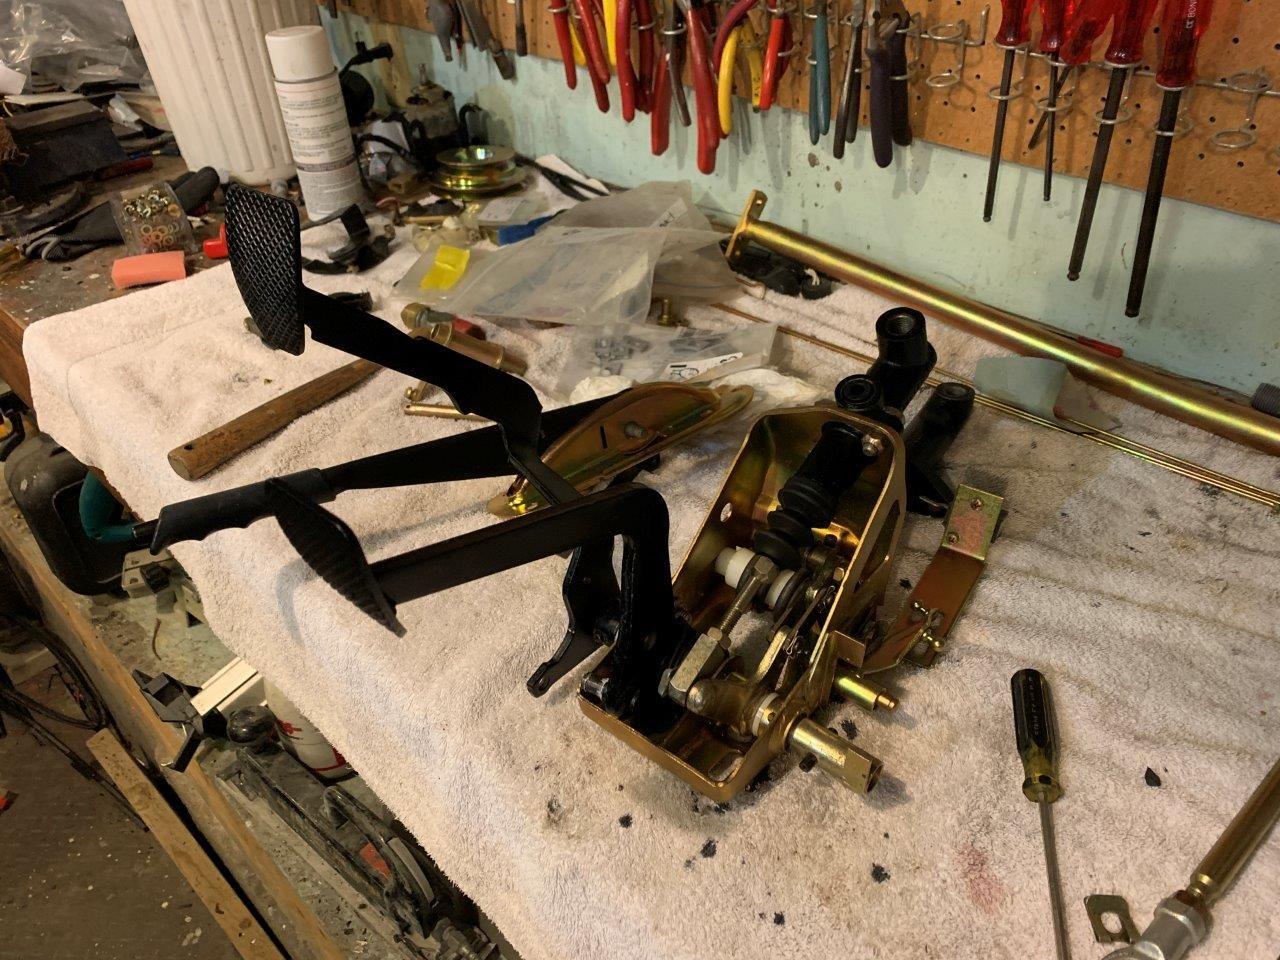
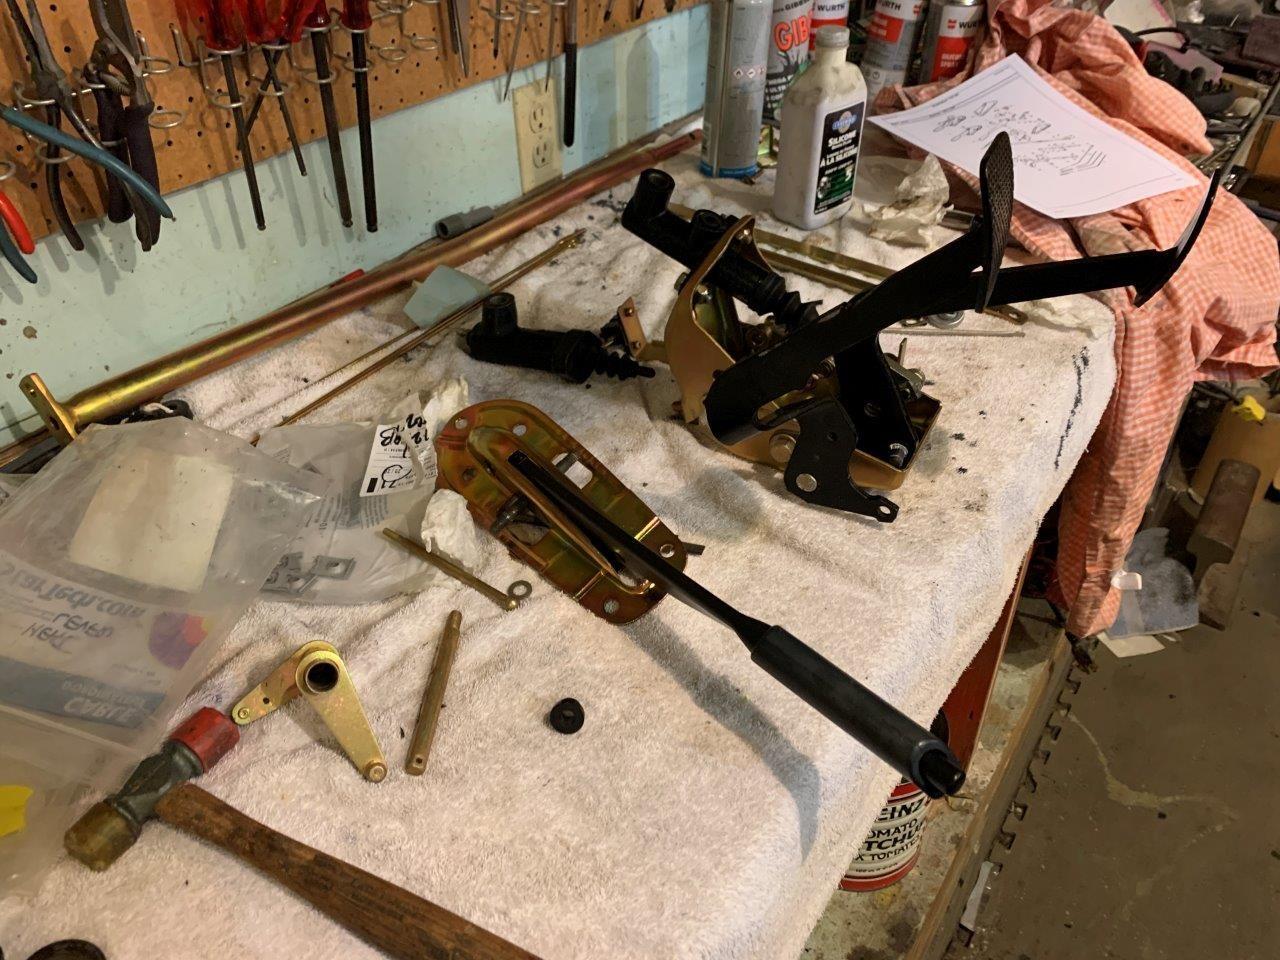
All the pretty parts, all in a row. I took apart the clutch cylinders to inspect them, they are all pretty good, plus since I use silicone brake fluid, I need to make sure that they are completely clean. So, ton of brake cleaner later, lot of careful inspection and these guys look good. Rube Goldberg has nothing on Porsche this assembly has more gizmo's and doodads than a Dollar store, but it all came together alright. I also refinished the e-brake stuff, it is pretty simple but I am still wondering how to put some sort of covering over the skinny little handle...I'd like to cover it in matching vinyl/leather to the interior, but haven't figured it out yet
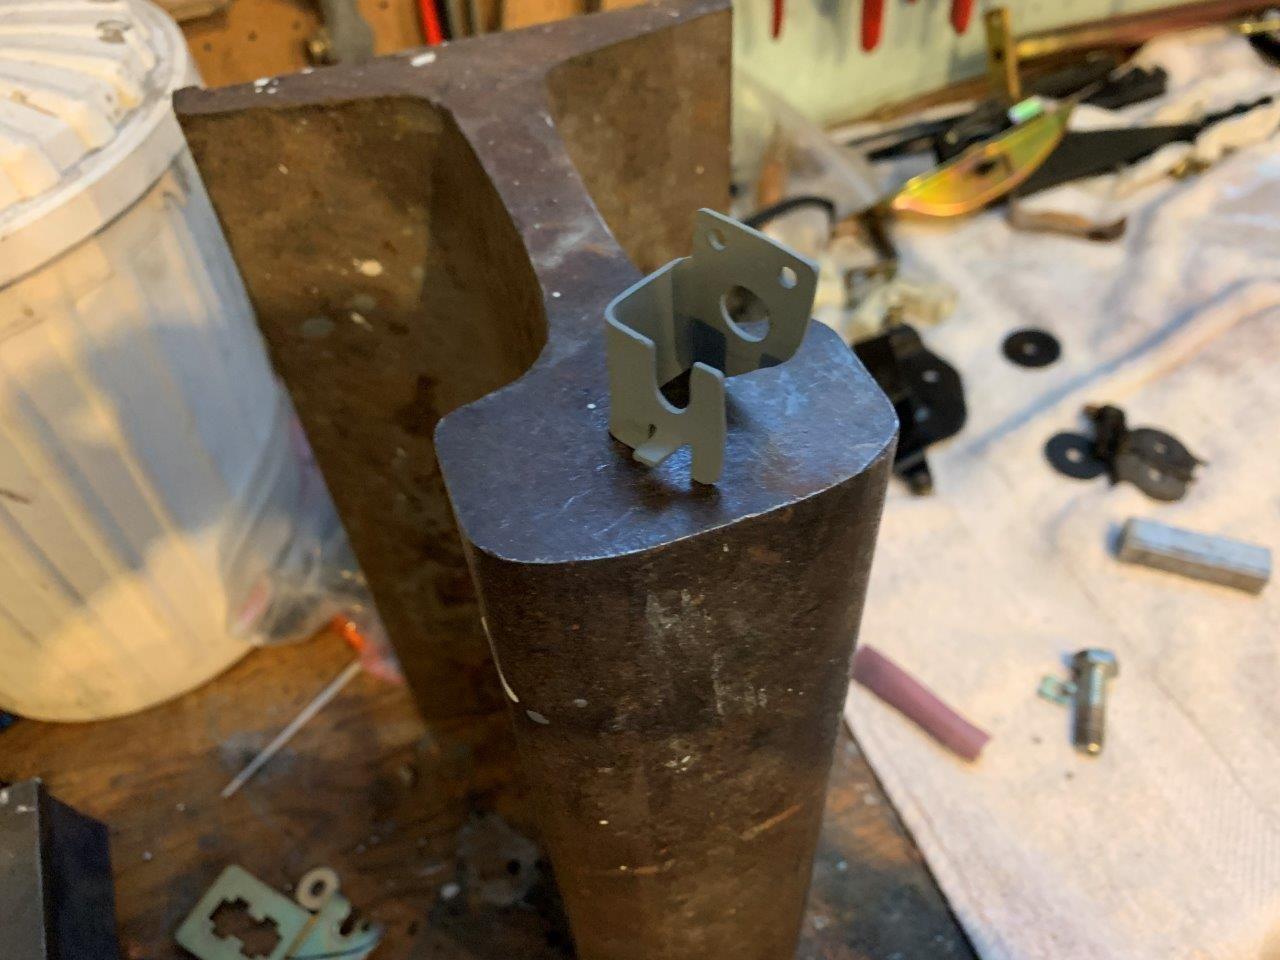
Also just about locked myself out of the frunk as the front release cable is not yet installed. I was going to put in the early set up which uses a metal tube, but near as I can tell, the only way to do that is before the front bulkhead is in place, so on to plan B...which is back to the '89 setup. Issue is that it uses a Bowden cable with some collars to hold it in place, and needless to say, the '73 front bulkhead does not have the holder.
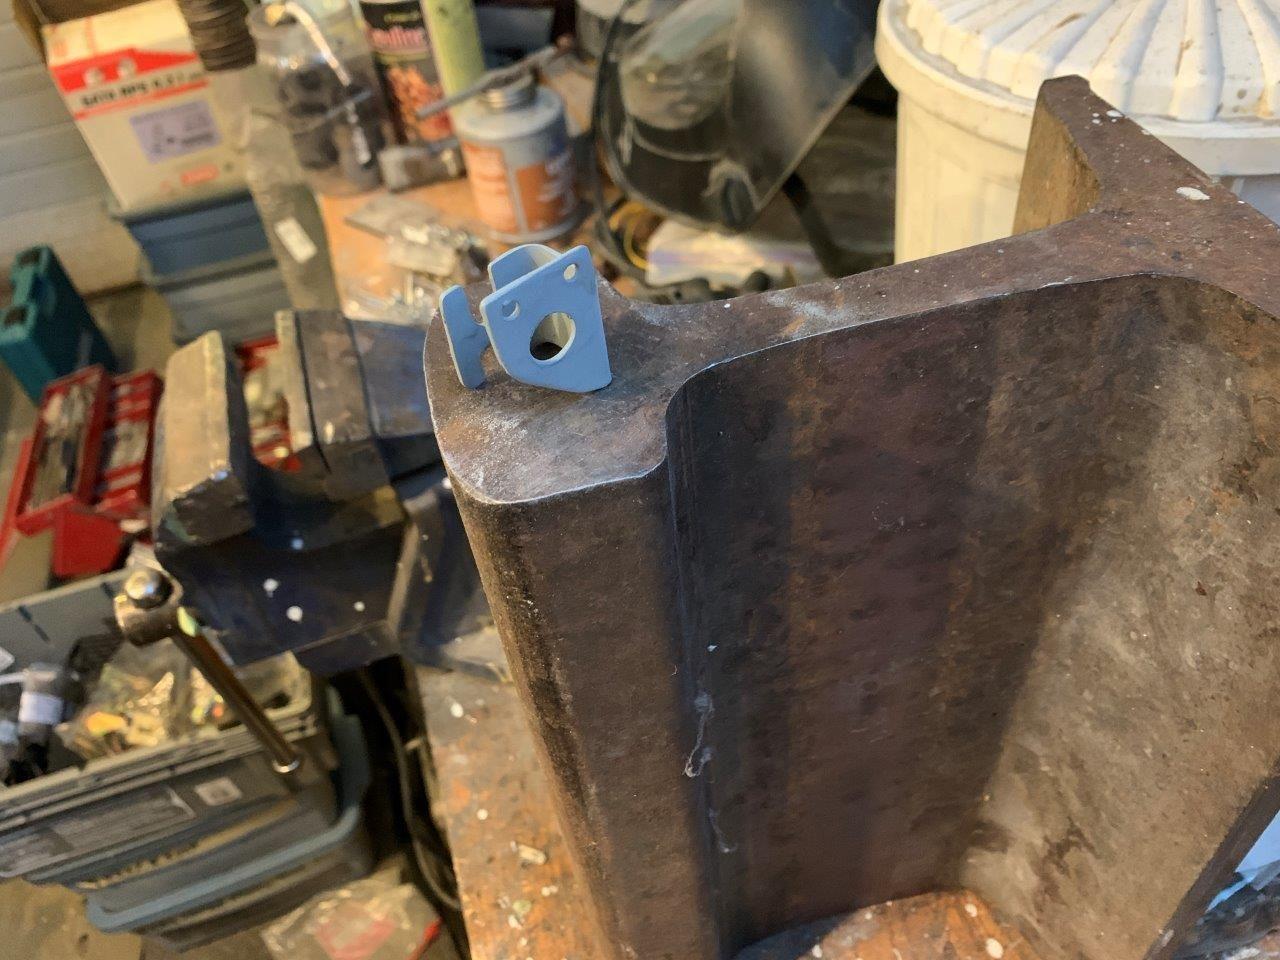
So I fabbed up this little doohickey, Wurth zinc coating is drying so no pics today, but I will put it in later today or tomorrow and should be able to align and test.
Took a few hours and a couple attempts, but here it is. Near as I can tell, this is just to keep the latch end from flopping as the real retention is on the inside pull....
I also got a shipment of high heat colour coded wires and Deutsch connectors from 4RCustoms...man, they have every colour of wire you want in multiple gauges and are willing to sell you short lengths...like 5 feet. So in my near future is building the rough harness for the engine compartment auxiliary wiring for EGT/CHT plus my lambda guage etc etc....all in the rear 964 box.
Ok, its official, aligning a longhood, hinges and latches is a pain on both ends of the spinal column.
This all started when I thought I had my hood aligned, put the latches in position, without putting a cable in and without aligning and then leaned on the closed hood and everything went "click" and I was screwed. Thankfully the fuel tank is still not in, so I crawled up into the frunk and flipped the latch lever manually......but sonofabitch! It did not pop up...still latched! Its **supposed** to be failsafe, if the cable is breaks or in my case not even connected, the hood unlatches to the safety latch position and you open it. NOW what!
More digging and wiggling and fiddling with wrenches through the little slots that were available and managed to loosen the top latch and I was able to pop it free. Huge sigh of relief...but what happened.
Well, turns out longhood latches are fussy about setup as the hole in the latch receiver is pretty tight and if you are offset more than a fraction, the latch pin will actually stick on the side of the receiver and you are stuck. Read a bunch about what to do and how to do it including a few horror stories about firmly latched hoods that required cutting to get undone. Probably this explains why the '74 and later short hoods have an emergency procedure, albeit involving removing the bumpers, to unlatch a stuck latch.
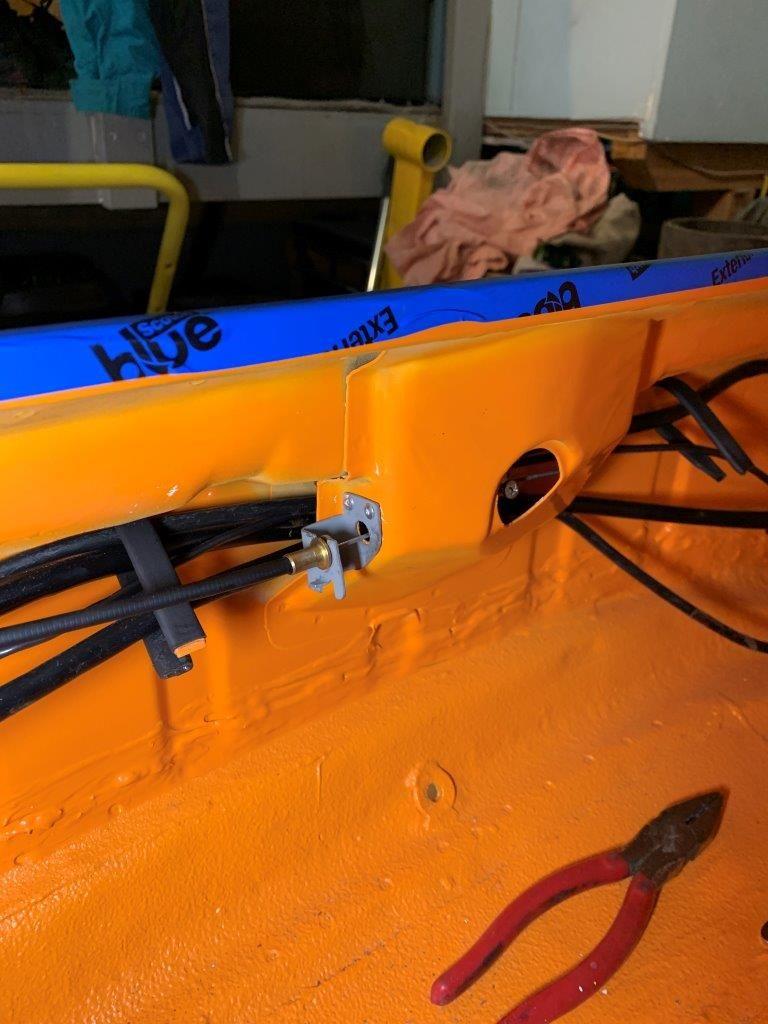
Well, enough fooling around. Got a proper hood cable for my '89 chassis, but there was no way to mount it at the actual latch...hence the doohickey as per the previous post. Here it is in position, nicely pop riveted. I also put a little tang on the bottom so I can put a cable tie in there to make sure it doesn't pop out. Here it is in position....
I might still trim that little tab sticking out, but not sure....this essentially replicates what the '89 latch did
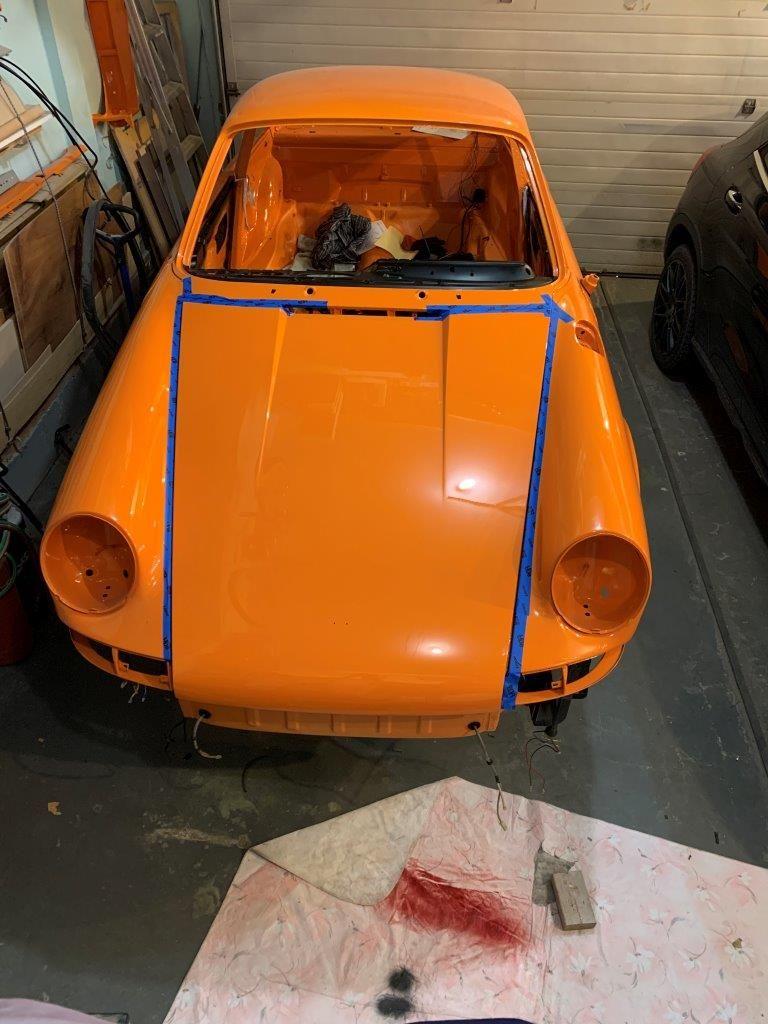
Then on to alignment, not for the faint of heart. Guts of it is to get the doors aligned in their holes to the rear fender (done), then align the hood to the front scuttle and finally align the fenders to the hood/door combo. My situation was complicated by the fact that I had to replace the hood with a new one from Porsche after the paint shop got it...they told me it would be more cost to fix the old one, and not as good long term, as it would be to replace it....so off I went. Who knew if the new hood would fit...hence the Porsche version rather than Dansk or similar, I figured my odds were better with Porsche. Anyway, you are aligning to a 3 mm gap which is about 3 RCH's in my opinion, mine was too low on the PS side and even using all the room on the hinge (it rotates for height adjustment) I still needed a washer under the rear hole of the PS hinge mount to get it to align. All good...just make sure before you put the hood shocks back in that you tighten all the bolts else the alignment changes. Don't ask me how I know.
Then, on to the latch. I took the spring and collar off of the upper latch, left the release cable disconnected and then put a block between the chassis and hood so I could see where the pin was relative to the hole in the receiver. Turns out, I needed to move it a fair bit, so I moved the hood a little laterally (slightly smaller gap on PS, larger on the DS which has a big effect on latch alignment due to the length of the hood. Once the pin went in smoothly, then put everything together and gingerly put the hood down. Thankfully it did not stick and so I was aligned. Hooked up the cable, played with the height of the hood when it is actually latched and here it is....closed...safely. Lots of blue tape to protect the nice paintwork....
I was supposed to have done all this alignment pre-paint and then drill a 1/8 pilot hole that I could use to align after painting....didn't know, didn't do....pay the price now
Aligned, latched and most importantly, can be unlatched by the wife easily and with no trauma
While I was at it, I put in the windshield washer tank to check on the AC lines run and so forth, all is good....the hanging connectors are for the ww pump and tank level warning light, figured I needed the weatherproof Deutsche connectors on that application. Condenser fan is just a stock connector...VW as it turns out. It all fits!
I had the same issue the first time I reinstalled and closed my hood. It stuck and took fiddling to release - if my gas tank was in I would have been screwed. I found that the post was adjusted too far in which caused it to jam tightly in the receiver. Any way, it took a lot of trial adjusting and then I was very nervous when I installed the gas tank because as you said I now have no emergency plan. Has been fine though.

 01-29-2021, 07:28 PM