When you click on links to various merchants on this site and make a purchase, this can result in this site earning a commission. Affiliate programs and affiliations include, but are not limited to, the eBay Partner Network.
I did not remove the shelf above the fuse panel - this is a time-saver, but it would be handy to have the shelf removed as a few bolts are hard to get at.
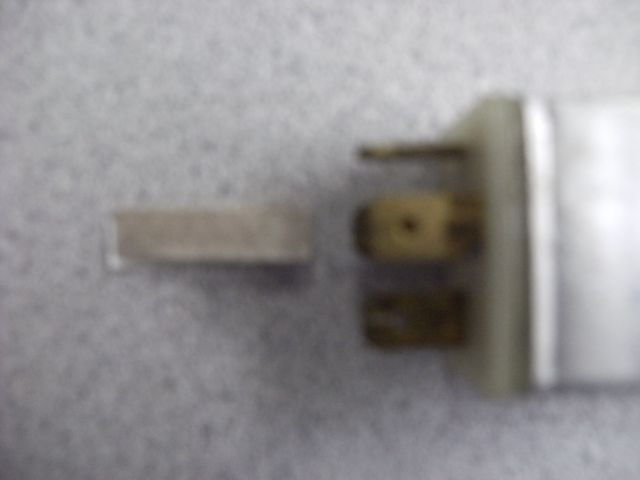
First step is to remove the wooden panel door.....
There are two bolts (10mm I believe) that hold the door on - here is the door removed and you can see the two holes where the door attaches. These bolts are tucked up in there pretty good - using a ratchet with the 10mm adapter worked best for me.
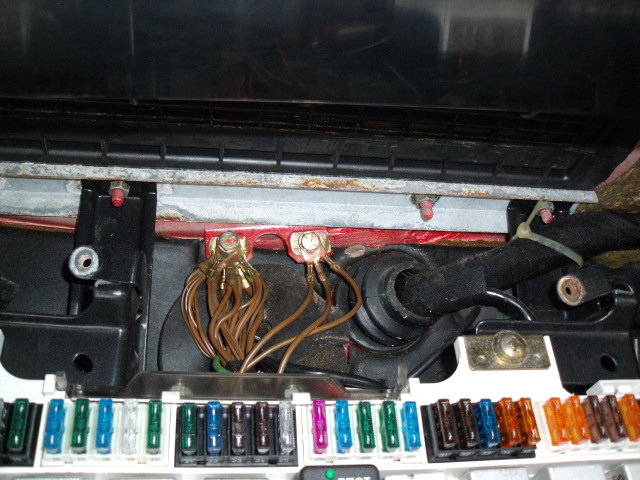
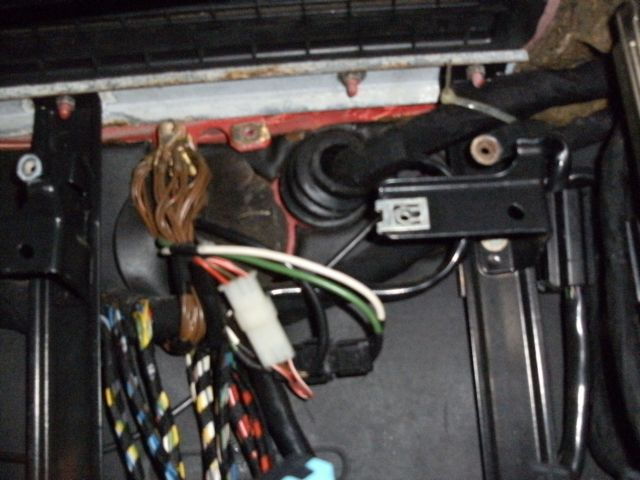
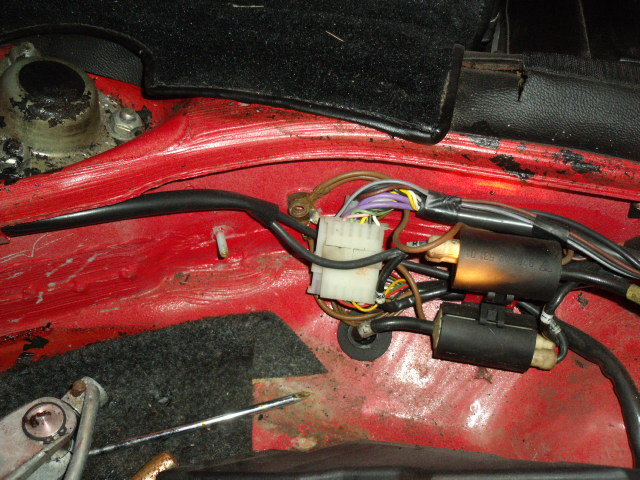
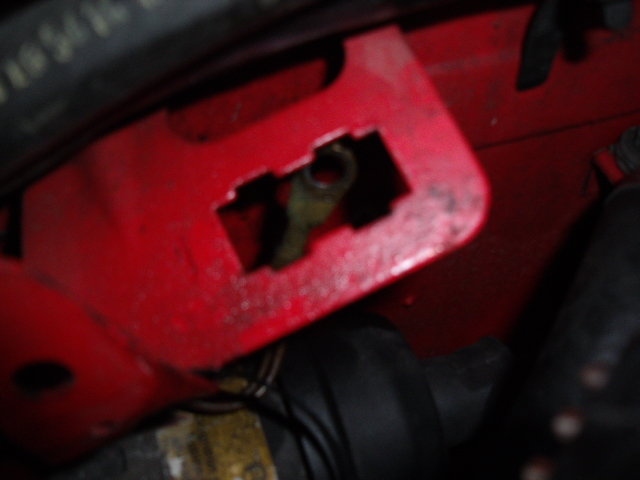
Now that the door is off, there are 2 brown wires up behind the fuse panel that need to come off. The bolt on the left contains a plethora of grounds, but the one on the right is what you want to remove.....
Now, there are two bolts on the top of the fuse panel that hold three red wires - they are under a plastic sliding cover - these need to be removed also. Here is the top of the panel, showing the two bolts sticking out at the top....
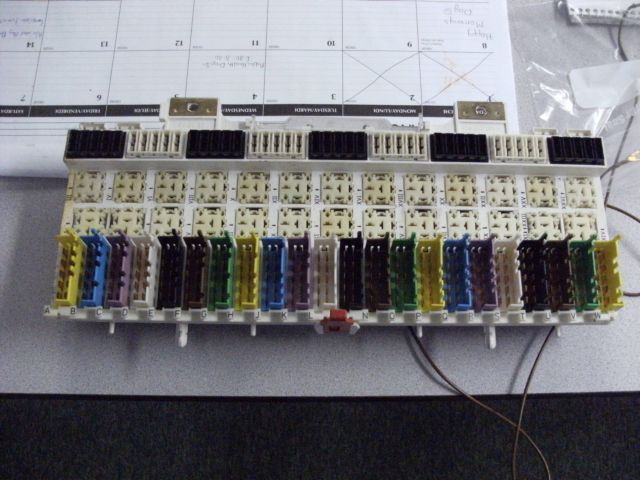
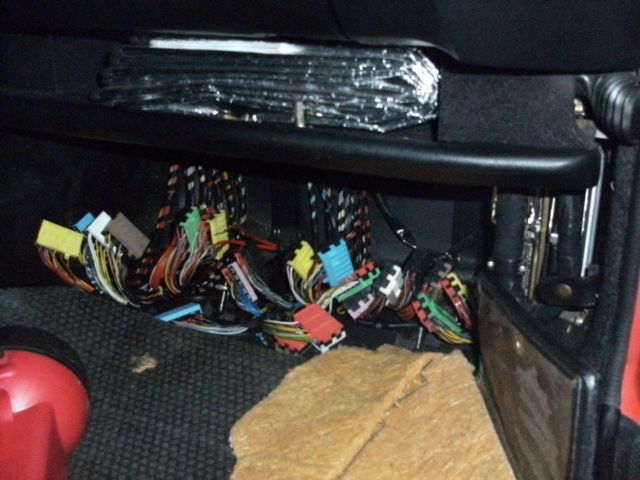
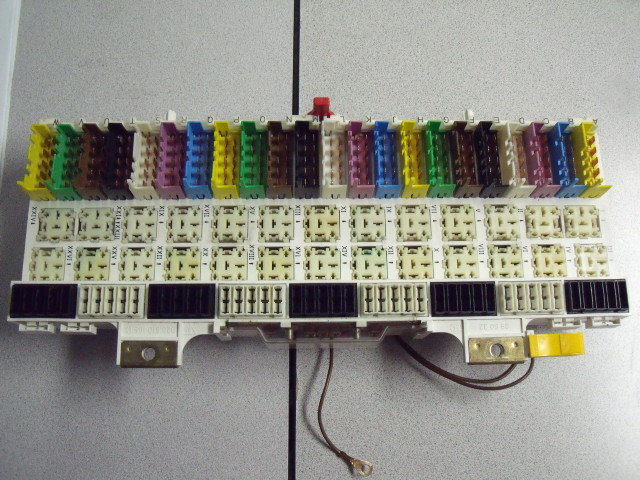
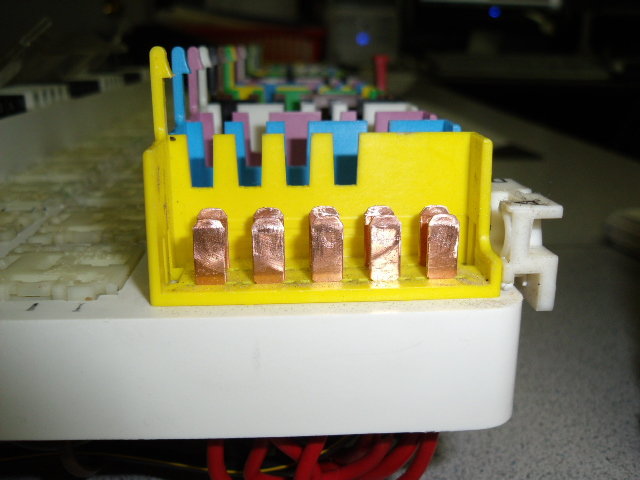
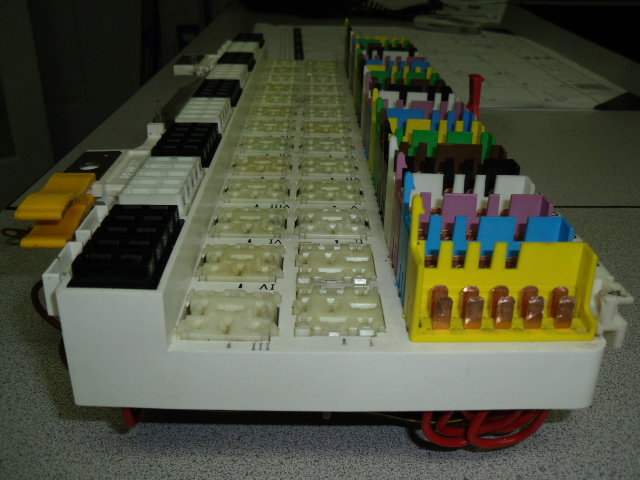
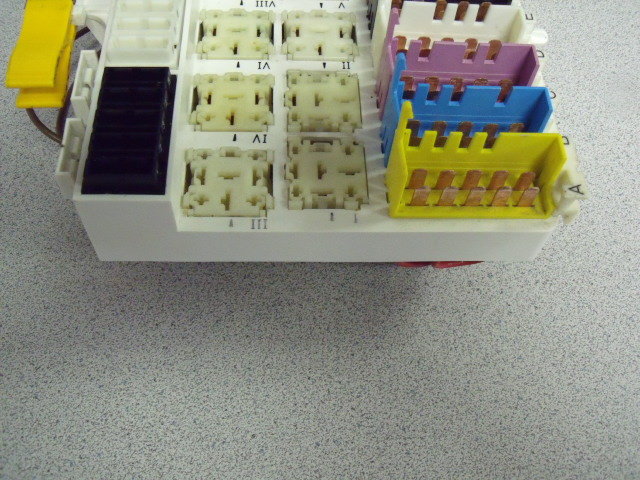
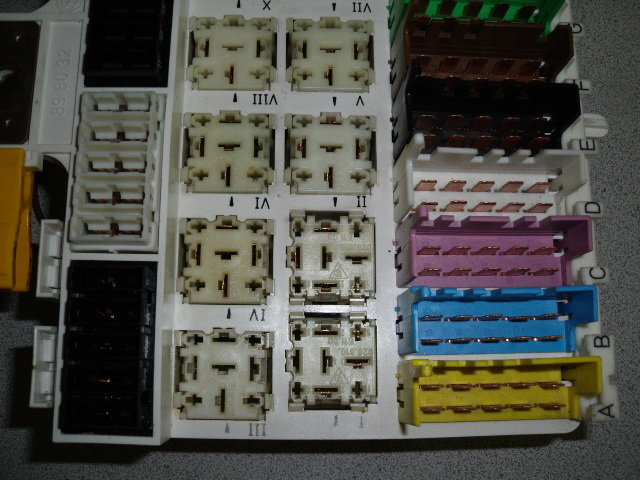
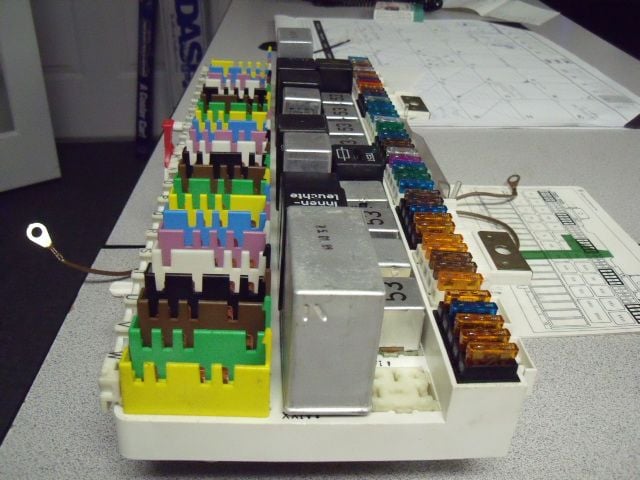
Now that the panel is "free", we need to unplug all the colored wiring harness plugs.
NOTE!!!! - BEFORE TRYING TO PULL THE PLUGS - PULL THE RED TAB AT THE BOTTOM OF THE PANEL TOWARDS YOU!!!! This red tab slides the bottom of the fuse panel left and right. The thing that slides needs to be to the left or "open". The small nibs on the bottoms of the plugs are locked in place unless you pull the red tab and it makes pulling the plugs very difficult. Some people have ignored this red tab and pulled the plugs without pulling the tab towards you - the job is A LOT easier with the tab pulled.
You can see the tab at the bottom middle in the pic below...
On the earlier models, the plugs have letters on them. The later panel does not rely on the letters, as the plugs will only go back in a certain way. At first I was worried because there are more than one of each color plug, but as you put the panel back in, it's kinda hard to put the wrong plug in the wrong spot as the wires are just long enough to reach where it has to go. Just make sure to not get the removed plugs too jumbled up after you remove them.
As you can see from the pic - the yellow plug from the first group of plugs on the far left will not stretch all the way over to go where the yellow plug from the second or third set is. It's pretty straightforward. Easiest puzzle I ever did.
Now pull that panel out and get ready for some cleaning....I pulled my panel because I found some sticky substance on the left side of the panel while changing a fuse. You can see the brownish substance in the pics below...
I assume it is carpet glue from this area....you can see the exposed glue....
I also pulled the panel because my voltage always read between 12-13, and would dip to between 10-12 (or lower) when lights were on/power window being used, etc. More on that at the end....
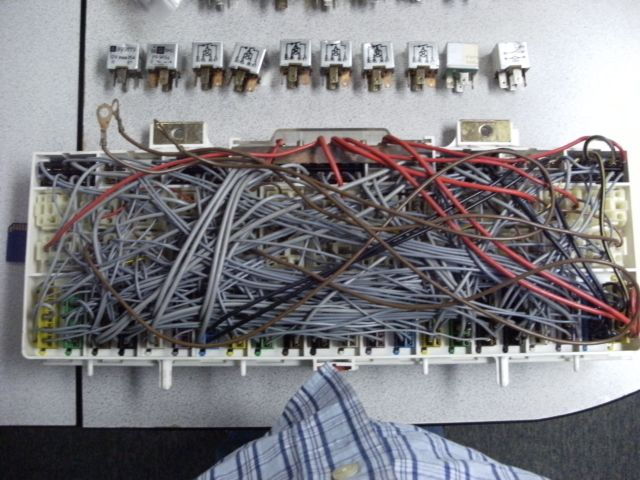
Panel out.....
No burnt wires in the back...
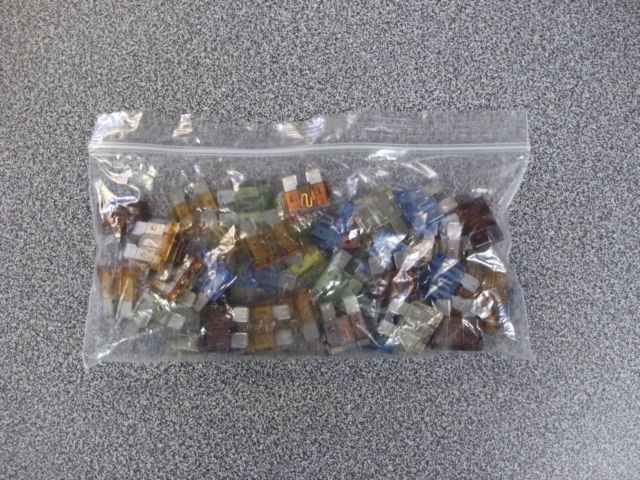
After pulling the panel, I then used the Porsche-provided fuse-puller to remove all the old fuses.
Old fuses...
New fuses about to go in...
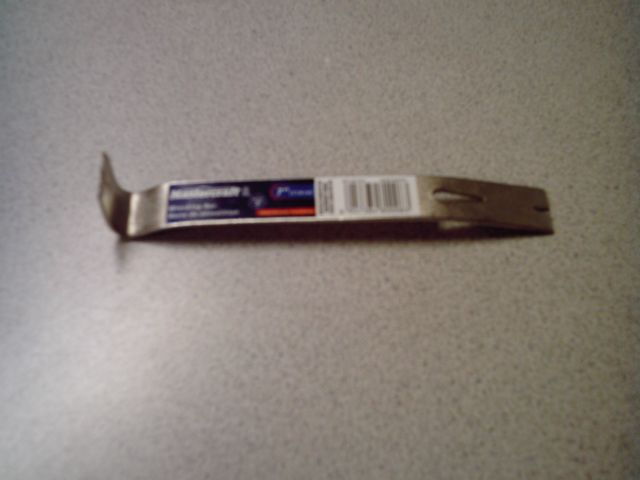
I bought a small pry bar to pull the replays....
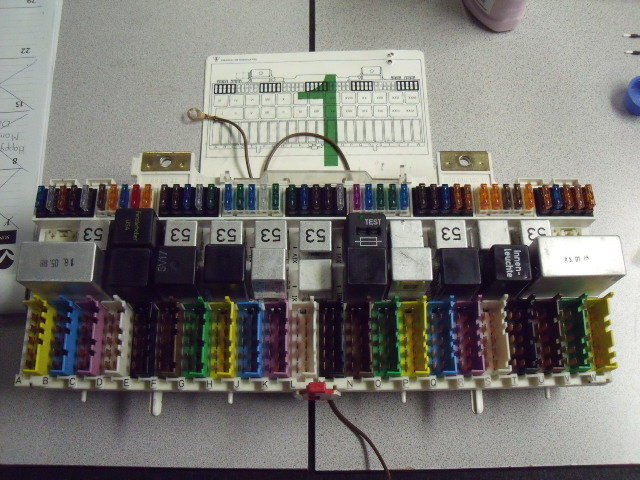
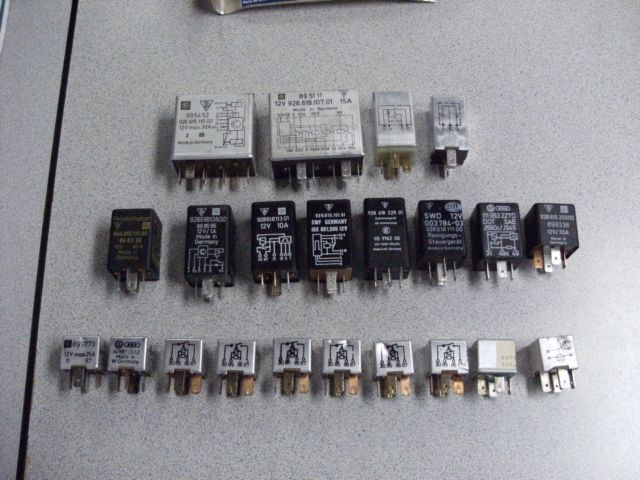
All the relays out of the panel...
Some of the relays were slightly dirty/corroded.......and some of the prongs on the panel were dirty also....
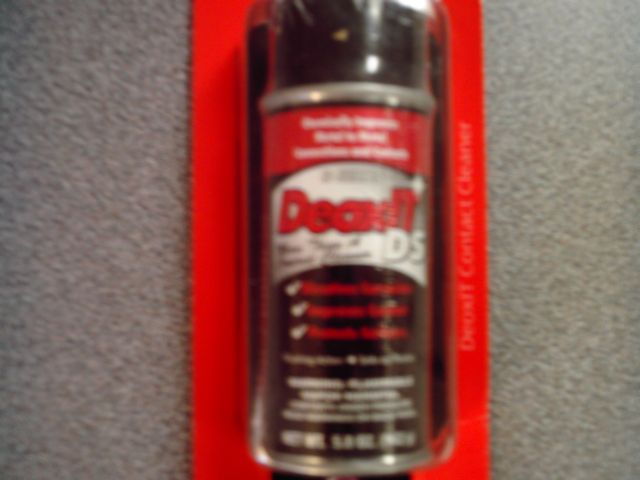
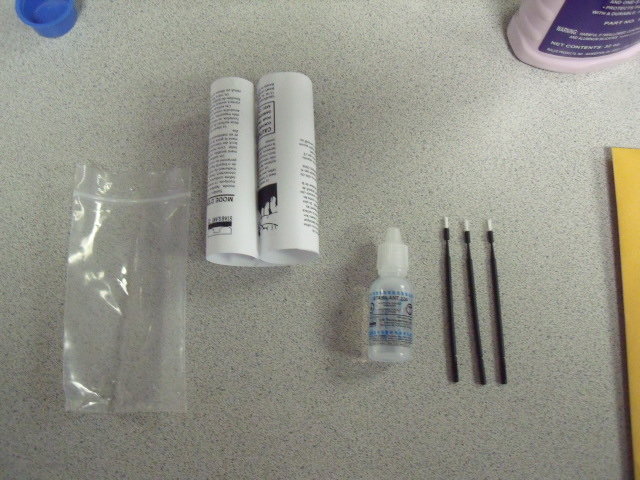
Time to start cleaning!! I had to buy some cleaning products.....
I bought.....
Deoxit - this runs around $20 a bottle, but was recommended here on Rennlist as the best cleaner. Oddly enough, the best place to find it is at music stores...who knew?
As soon as I had the panel empty....
...I sprayed Deoxit everywhere.....where the fuses go - where the relays go - wiring harness plug prongs - everywhere. I sprayed once from the front, let it dry for a few hours and then sprayed it again from the back side.
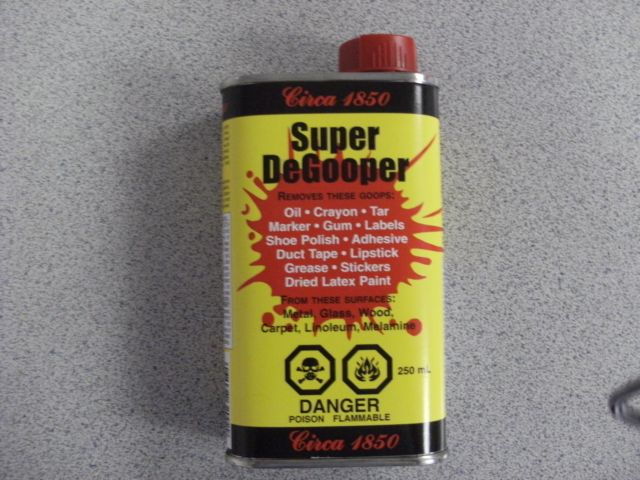
De-Gooper (for the carpet glue on the panel)
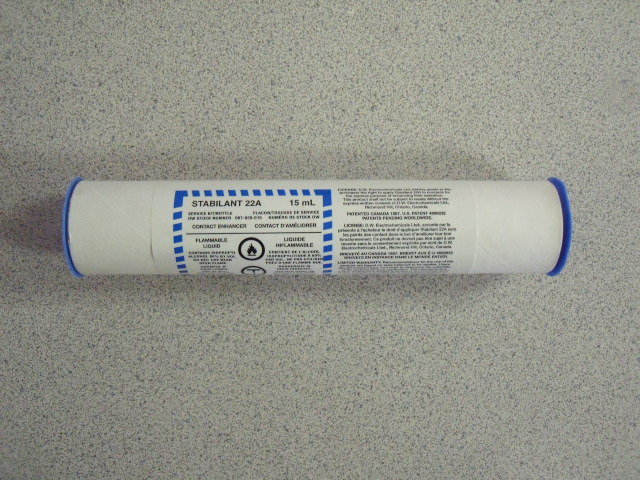
...and the most important thing.....Stabilant. I got the "22A", which is the non-concentrated version. Found it at a local electronics place - $65 for a 15ml bottle. If you want to see if it is available locally, try this link - http://www.stabilant.com/sizes01h.htm
It comes in this tube...
...and looks like this when opened...
After using it all over the panel, and on the cars ground points, I still had half a bottle left.
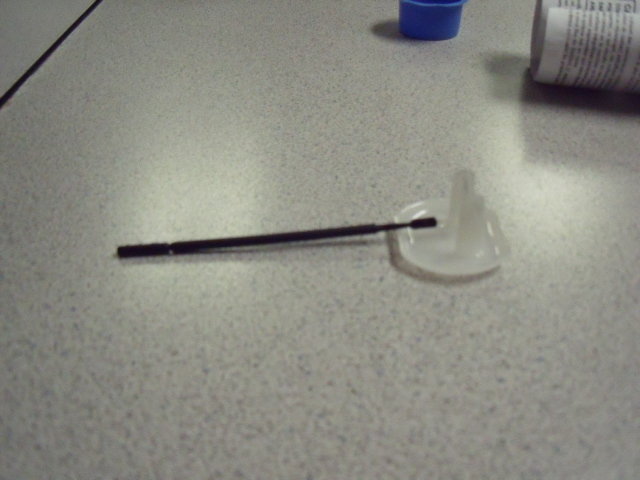
I poured small amounts of Stabilant (3-4 drops at a time) in an old safety plug thingy and brushed it out of that. I found it was a good Stabilant tray as I could use the prongs to carry it around without spilling, etc.
I also used some sand paper/dremel tool to clean the relay prongs/prongs where the colored harness plugs go back in.
I managed to use the dremel/sandpaper to clean all the relay prongs/fuse panel prongs...they all ended up looking like this.....
Here is the panel after cleaning - note the glue is gone...
I tried cleaning the contacts where the replays plug in. In other fuse panel threads, it was not advised to try and pull any of the wires in the back as they are fragile, so I cut small pieces of sandpaper the size of the replay prongs and folded them in half and used that as a cleaning tool.....
After filing in all the holes, I vacuumed all over the panel.
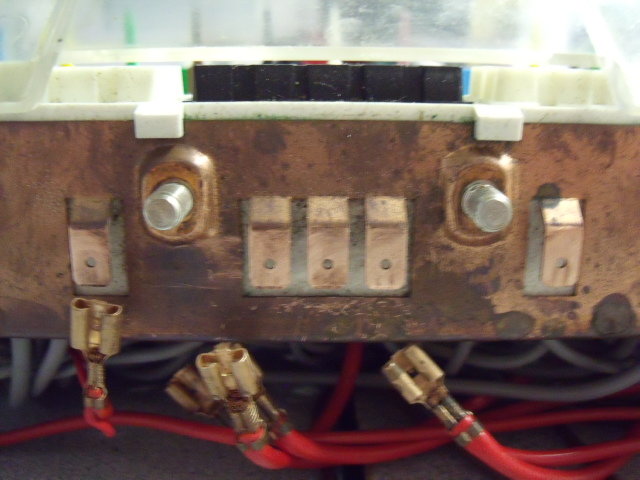
Before putting the relays/fuses back in, they were all pained with Stabilant. I also cleaned and applied Stabilant to the three prongs on the top of the fuse panel....
I put the panel back in; first hooking up the three brown wires, then the 3 red wires to the top of the panel (applying Stabilant as I went). When putting the panel back in, remember to have the red tab at the bottom pulled out (and to push it back in when all the plugs are in).
NOTE - on the bottom of the panel there are small white tabs. These tabs MUST fit back into the holes in the panel brace or the door will not shut correctly and hit the large silver relay on the far right. It takes some wiggling to get the panel to sit back in the right spot.
After I put the panel back in, I decided to clean the grounds on the car I could reach; then I put the battery back in. As I was attaching the last ground strap by the battery, I immediately noticed how much more it sparked as it made contact.
Here are the grounds I cleaned....
By washer pump.....
Strut ground #1...
Strut ground #2
Spare Tire area ground...
Headlight ground...
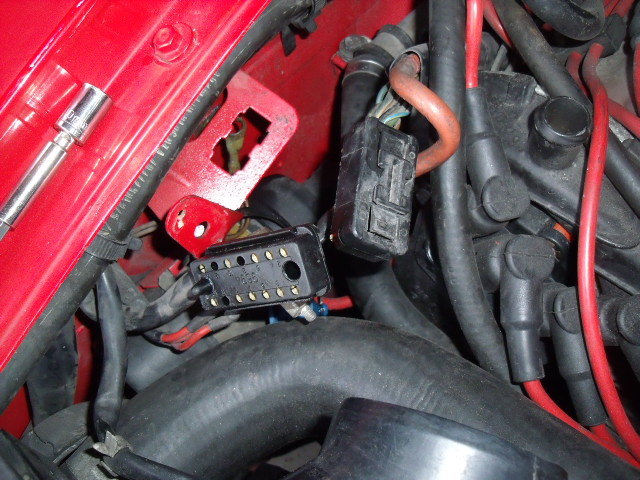
...and ground behind the 14-pin plug....
The car had been sitting for the past 7 months in storage, but when I put the key in, crossed my fingers and turned the key - BAM! It stated instantly and there was a noticeable difference in how bright the interior lights were.
I also had a slow sunroof - not any more.....and now my voltage reads 14 and dips to 13 when stressed. The entire car is getting much more power in general. Windows move faster, etc. etc.
Overall, it was defiantly worth the time to pull the panel and clean it (along with cleaning the reachable grounds). The car feels much more "crisp" overall and I love seeing the voltage gauge sitting at 14 and not having my dash lights dim when I use my windows.
Hope this write-up helps!
NOTE ADDED June, 2020
After doing all that cleaning, it turns out most of my electrical problems were due to several batteries I tried eventually not holding charge. I drive very short trips back and forth to work (and short drives around town) and my batteries would eventually lose charge and then fail to recharge fully on the odd long drives I did.
Ending up having the same problems with a Cayenne I bought and realized it wasn't the electrical in the car or the battery, it was just the lack of chance for the battery to charge back up. Bought some Genius Smartchargers and I leave both vehicles on the chargers almost all of the time. A fully charged battery makes the world of difference lol
Last edited by Jeff928S4; Jun 12, 2020 at 10:04 PM.
As for the ground I was able to reach and clean/apply Stabilant to - here they are....
1. Both sets of brown wires behind the fuse panel.....
The one set (on the left) that contains a bunch of wires was a bitch to clean/apply Stabilant - simply because there were so many connectors to paint.
2. Wire down by the headlight area....
Pretty straight forward.
3. Wires by strut tower - left and right.
These two were pretty easy to get at (with air intake tubes removed, of course). They were both really, really dirty
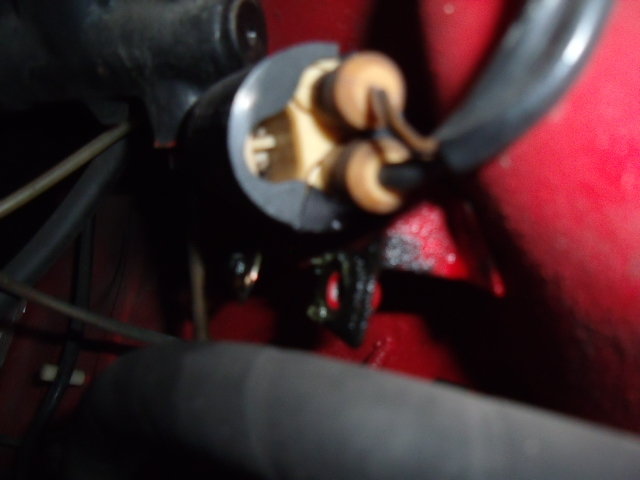
4. Coil bracket (drivers side)
Easy to reach and clean.
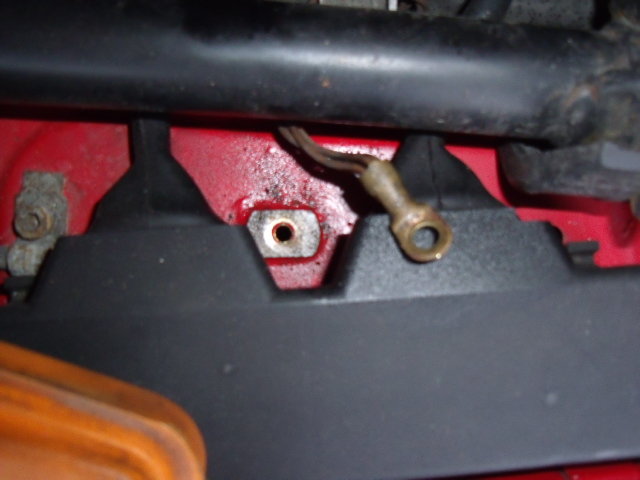
5. Behind the 14-pin connector
Now, this one was a bugger to get at.
I cleaned/applied Stabilant to the 14-pin connector and in the process figured out how to get at that ground.
You have to unplug the 14-pin connector and then slide the based of the connector to the left - then it comes out giving you a better view of the ground.
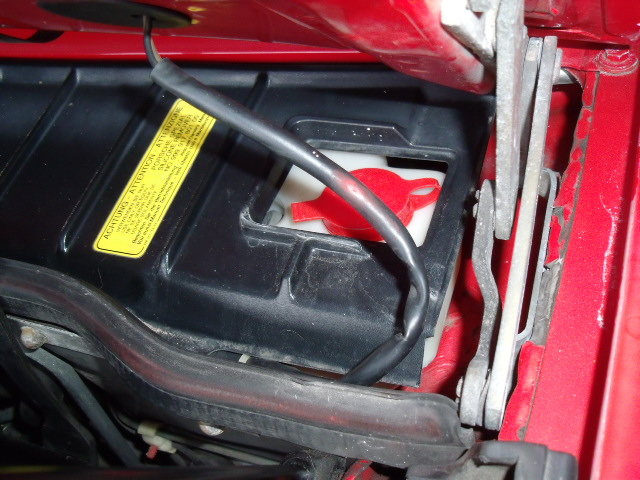
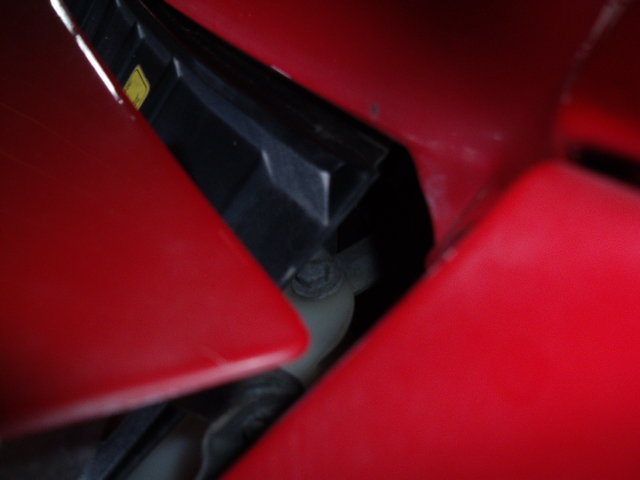
6. In the spare tire area
Another easy one to access/clean. Just have to remove the black cover in the spare tire wheel-well (one plastic nut holding it on)
Now, I saw somewhere that this is also a ground.....
...but when I went to find it, there was a washer reservoir or something there....
...and the nut to remove that reservoir was not user friendly....
So, I just zapped some Deoxit in the general direction till I had more time to get at it.
I also didn't clean the ground that is located in the driver-side footwell/by the steering column area. Just have to clean that one and the three underneath the car and they are all done!
On the earlier models, the plugs have letters on them. The later panel does not rely on the letters, as the plugs will only go back in a certain way.
Actually the later model plugs all have letters embossed on them too - just not quite so obvious.
Originally Posted by Jeff928S4
At first I was worried because there are more than one of each color plug, but as you put the panel back in, it's kinda hard to put the wrong plug in the wrong spot as the wires are just long enough to reach where it has to go. Just make sure to not get the removed plugs too jumbled up after you remove them. As you can see from the pic - the yellow plug from the first group of plugs on the far left will not stretch all the way over to go where the yellow plug from the second or third set is.
The right colored plug will only go in the correct socket - there is a coding scheme of interlocking tabs that prevents swapping (it would be hard to make it reach though I grant you). It is possible for a few plugs of the wrong color to be mated together - I guess it's also assumed you aren't that stupid or color blind.
Originally Posted by Jeff928S4
New fuses about to go in...
Only use good quality fuses - the ones you show look OK - the Chinese ones with the gold colored terminals usually are not...
Originally Posted by Jeff928S4
]
All the relays out of the panel...
I'm not sure I'd remove all the relays unless I suspected issues for some reason... in any case take before pictures and compare the relay locations to the diagrams before you remove any - familiarize yourself with the relay socket labelling - it can be very confusing - the label location wrt the relay is not consisitent - look at the pointer arrows
Only use good quality fuses - the ones you show look OK - the Chinese ones with the gold colored terminals usually are not...
The ones I used were "Power Fist" from Princess Auto - they had silver terminals.
Originally Posted by Alan
I'm not sure I'd remove all the relays unless I suspected issues for some reason... in any case take before pictures and compare the relay locations to the diagrams before you remove any - familiarize yourself with the relay socket labelling - it can be very confusing - the label location wrt the relay is not consisitent - look at the pointer arrows
I was not going to pull the relays, as some have said pulling 20 year old relays is not a good idea, but after the first couple came out so easily, I kept going.
I did take a "before pic" and also wrote up a lil' map of what went where using identifiable marking on the relays.
My lil' map went like this.....
"From right to left - top row...
Blank - #33 - $ - 53 - dent in relay - Test - 53 - 53 - 53 - 53 - black USA - 53 - blank"
Wally, Princess Auto seems to be a "Harbor Freight" style business (much smaller with 38 stores) and Power Fist is their brand name for stuff they have made in "developing countries".
Wally, Princess Auto seems to be a "Harbor Freight" style business (much smaller with 38 stores) and Power Fist is their brand name for stuff they have made in "developing countries".
Power Fist is very good for recreational work - if I were a mechanic I would not stock my tool box with them. I'd describe their stuff as "adequately robust, but not fancy". I have a few different Power Fist products.....from a nice Ball Hex Bit set (which was invaluable when changing out a broken door handle hinge) to a jewelers set that has served me very well for some time. The Princess Auto warranty is very good though.
Ya know, I really never gave much thought to which fuses to buy - I just avoided the really cheap ones. Any recommendations of which company makes the best fuses? Always easy to swap new ones in.
Nice detailed post! Not enough beer and patience in the world for me to do this. Nice job!
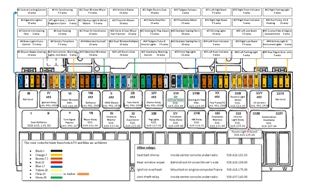
I made my own chart (for MY89 S4) of fuses/relays all on one page (legal size page...so everything could fit)...I got tired of flipping thru 3 pages...color coded as well.
Nice write up! Thanks for posting. Is the connection under the coil on the passenger side also a ground? Some of my grounds looked pretty funny today! Much better now.
9 Features and Characteristics That Only Porsche People Understand
Slideshow: Some brands build cars. Porsche builds traditions, obsessions, and a few habits that stopped making sense decades ago but somehow became part of the charm.
This Builder Is Turning Heads With Its Slantnose 911 Creation
Slideshow: A small Polish tuner has reimagined the Porsche 911 Slantnose for the modern era, blending 1980s nostalgia with widebody tuning culture and serious performance upgrades.
Porsche 911 GT3 Artisan Edition Pays Homage to Japanese Culture
Slideshow: Porsche has created a Japan-only 911 GT3 Artisan Edition that blends track-ready hardware with design cues inspired by traditional Japanese craftsmanship.
Porsche Reveals Coupe Variant of the Electric Cayenne With a Fresh Look
Slideshow: Porsche's latest electric Cayenne Coupe blends dramatic styling with supercar acceleration, turning the brand's midsize SUV into a 1,139-horsepower flagship.


