When you click on links to various merchants on this site and make a purchase, this can result in this site earning a commission. Affiliate programs and affiliations include, but are not limited to, the eBay Partner Network.
If you have carbon door sills, have them slap a piece of PPF over them as to keep them pristine! They will get super scratched up otherwise!
That's a great idea! But funny enough, I didn't get the carbon door sills because I was worried they would scuff, but never considered that you could PPF them. Doh!
I do know how Suntek's pattern shows that done, Renee showed me although I'm cutting it off at a line aligned with the top of the window in the rear hatch where it is very narrow.
In the full install a single piece runs all of the way from the front base of the A pillar back across the outer edge of the roof to the back of the rear quarter in a single piece with no cut. As you correctly guessed, that piece cuts off at that seam/channel a few inches above the door. Then a separate single piece covers the whole center section of the roof. So there is a seam at the channel just like you said.
Thanks! And that seem that aligns with the top of the liftgate is exactly where I would seam it if it needs to be custom made into 2 pieces. I'll talk to my installer next week as he's doing my friend's CGTS first before mine.
More details please, equipment list, etc. so I can replicate your success up North. Thx.
Call them. You can DIY, they will sell you the amp pre-loaded with their DSP maps, etc. and everything is plug-and-play. I'm in the Midwest (nowhere near Oregon!) and ordered a kit from them a few weeks ago. If you don't want to DIY then any good local stereo shop should be able to do the install for you.
Originally Posted by mr965
I just picked up my car from Musicar NW. Nick did the install and HOLY CRAP! The difference is incredible. I didn't order the Bose so I could apply that money to this upgrade for the standard sound system. I'm beyond blown away. I'm now resorting back to my days of the 80s and enjoying the sound system up loud. The clarity and imaging is amazing. I was previously quite happy with the OEM system in my Tesla but damn this Stage 2 upgrade from MusicarNW blows it away! I'm amazed at how far sound systems have evolved.
Oh man I am SO EXCITED to hear this!!! I can't wait!
When I ordered it, Nick said "Should be ready to ship out in ~2 weeks." Today is exactly two weeks.... I don't want to call and annoy him but man I wanna call "Did it ship yet?!?!" lol
That's a great idea! But funny enough, I didn't get the carbon door sills because I was worried they would scuff, but never considered that you could PPF them. Doh!
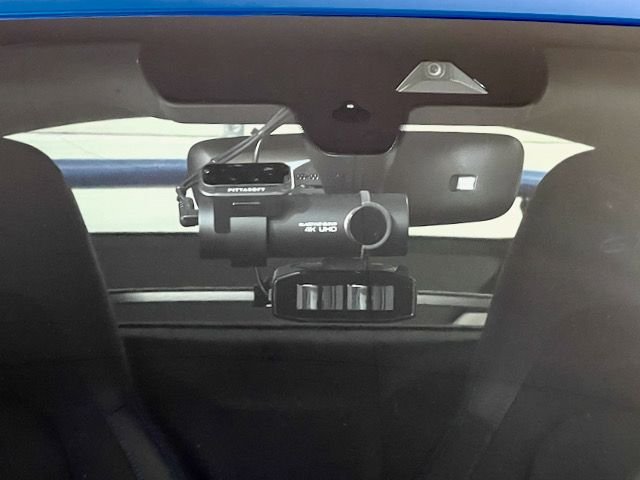
This morning I finished up the hardwiring of my Redline 360c radar detector and the BlackVue 900s front/rear dashcam. It was my goal to get it all tucked up as tight to or behind the mirror as much as possible and I'm happy with how turned out. Except where the wires drop down to the devices, all of the wiring is tucked out of view and the Blackvue Power Magic Pro is tucked in under the passenger fuse box where the dip switches can be reached by only taking off the fuse box panel door.
In the first photo you can see the dashcam lens (with polarizer) almost perfectly centered and well clear of the radar detector below. The detector is mounted as high as the adjustments will go for the Blendmount, which is rock steady despite my worries it looked like it might wiggle some.
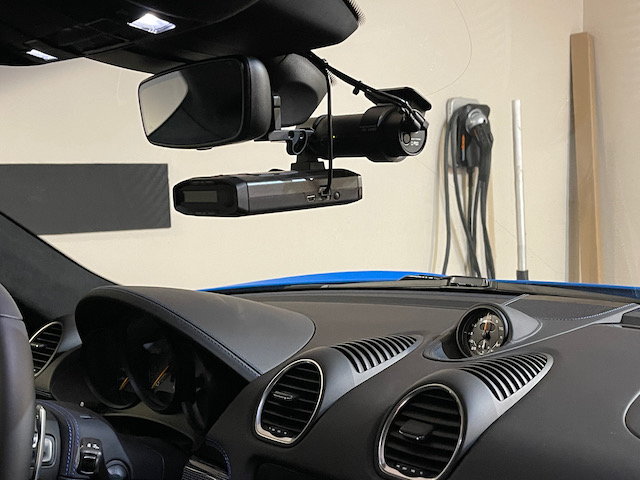
The second photo shows some details and shows how the passenger gets to live with the view of the wiring details, which I made as neat as I could.
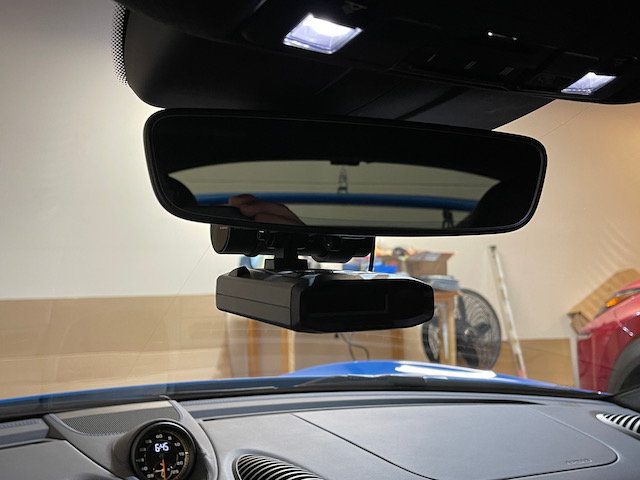
The third photo shows it from the driver's point of view, with the rear view camera subtly noticeable as a small lump in the top center of the mirror view. It is mounted on the back edge of the upper plastic trim above the back window where it almost tucks up out of view.
With the T-Design9 memory module already installed, that does it for all of my electronics. I took it all out for a couple of more hours of break in drive and it was all rock solid and rattle free.
I have the Zunsport grilles in black, and you are correct, my car is a 2021 GTS. Install was easy, fit is pretty good, and I like the look. I did dislodge one while washing off those bugs�need to be a little more gentle, I guess!
Hopefully my CGTS 4.0 will be here next month. So far I've bought her a no-drill front license plate holder and a CTEK charger / maintainer. She's going to stay pretty much stock. I might add grilles in the front as it does seem odd that the only ones are further in.
Nice and clean install. Did you remove the pillar a bit to tuck the wires coming down the sides (A pillar?).
Do you have a photo of that that you can share?
On my other cars, it is pretty easy but the porsche interior is so tight (high quality) i found it hard to squeeze the wire in.
You are right the trim is pretty tight!
I didn't take many photos. For tucking the wires, I just used a trim tool to pull back trim pieces about a quarter inch as I moved along which was enough the get the wires inserted There were 3 wires in my case, the detector and the dashcam power cords and the dashcam wire to the rear camera. In some places I used a second trim tool to push them a little deeper in the gap. I didn't remove the A-pillar trim, I just ran the wires under the top of it and then came down on the right side (passenger side) under the A-pillar trim next to the rubber door seal, tucking it under as I went.
The only trim piece I popped off was the piece covering the fuse box.You need to do this to get to that ground point under the front carpet as shown in this photo.
The only part that threw me for a few minutes was figuring out that I had the fuse taps in the wrong way so I wasn't getting power initially. They need to be installed with the wire coming out of them facing up, not down, to get the power from that single contact in the open spots in the fuse box.

 10-11-2021, 12:53 PM