
Need help replacing vacuum actuator
 04-06-2004, 06:57 PM
#1
Addict
Rennlist Member
Rennlist Member
Thread Starter
I got the pod, center console and dash out.
I can see three of the vacuum actuators and it looks like they are fixed in place by some metal clips. (What a pathetic way of attaching anything...)
Now I can see how the footwell flap and the dash flap on the right could be replaced, but what about the one for the center "comb" vent?
I was really hoping that I am done disassembling the car any further.
I assume that if I could just get the "arm" that is attached to the actuator of the "comb" flap I could probably rebuild the actuator in place.
Has anyone done this? I ordered the stuff from DR and tried to ask him, but he would not elaborate... ?
Also, any more surprises on the last one I haven't looked at under the blower?
Definitely more time consuming then I anticipated.
Cheers,
Sab.
 04-06-2004, 09:54 PM
#2
Rennlist Member

Well, you are almost home. The center vent actuator's diaphragm can be replaced with some creative work. I did not have to pull the dash.
Here's a link to the way I did it on my 86.5: Greg Nichols Tips- Center Vacuum Actuator Replacement
Enjoy.
Here's a link to the way I did it on my 86.5: Greg Nichols Tips- Center Vacuum Actuator Replacement
Enjoy.
04-06-2004, 11:19 PM
#3
Addict
Rennlist Member
Rennlist Member
Thread Starter
Thanks, that seems like a good way of doing it.
When taking this baby apart it really shows that it was designed 30years ago and certainly not on a CAD workstation...
When taking this baby apart it really shows that it was designed 30years ago and certainly not on a CAD workstation...
04-06-2004, 11:59 PM
#4
Addict
Rennlist Member
Rennlist Member
Those damn vacuum actuators are a real nuisance.
In my '90, the passenger side air bag made it impossible (as far as I could see) to reattach the arm as suggested in the Nichols tip and John Pirtle's great write-up "Vacuum Actuators", at least without removing the air bag, which I really didn't want to do.
So I wound up going in through the front...

Note that you can see through the hole the arm that has to be detached/reattached when you replace the diaphram.
You don't have that hole, you say? Well, you probably don't have the stopper, either...

Should the actuator ever fail again, it'll be a much quicker job next time.
BTW, this is a good time to mount the ARM, too:

In my '90, the passenger side air bag made it impossible (as far as I could see) to reattach the arm as suggested in the Nichols tip and John Pirtle's great write-up "Vacuum Actuators", at least without removing the air bag, which I really didn't want to do.
So I wound up going in through the front...
Note that you can see through the hole the arm that has to be detached/reattached when you replace the diaphram.
You don't have that hole, you say? Well, you probably don't have the stopper, either...
Should the actuator ever fail again, it'll be a much quicker job next time.
BTW, this is a good time to mount the ARM, too:
04-07-2004, 01:22 AM
#5
Addict
Rennlist Member
Rennlist Member

Join Date: Jul 2003
Location: Saskatoon Sask. Can.
Posts: 182
Likes: 0
Received 0 Likes
on
0 Posts
On my cars I disabled the comb flap actuators and use the center vent air control lever to adjust the amount of air out of the center vent. If you consider doing this wedge the comb flat open and plug the vacuum line. I am not sure what the center comb flap is intended to do because it always allows some air to exit out the center vent. For me manually opening and closing it is not a problem. If your fresh air vent actuator is leaking you can repair it latter just be sure you can get to the vacuum line after the console has been reinstalled. I had access to it on the left side where the carpet filler goes. Plug the vacuum lines until you are ready. To get to the defrost actuator you need to remove the pod. I found it easier to replace the diaphragms than try replacing the whole body as John Dozman suggests. Good luck.
04-09-2004, 09:01 PM
#6
Addict
Rennlist Member
Rennlist Member
Thread Starter
Thanks everyone, I rebuilt the three actuators under the dash without removing them as sugested. It worked great.
I plugged the fresh air flap line and placed a small stick in it to the machanism to keep the flap up (I will get to that actuator later...). I replaced the internal temp sensor and gave it a test. Cold air on the coldest setting and all flaps working. It actually does not build up frost on the windshield anymore now, but as soon as i moved up the temperature lever a bit.... HOT AIR... (what a misery, I already thought the project was a failure)
I took a closer look at the external temp sensor and the cable was all chewed up. Looked it might have rubbed on the tire a bit. The cable was a quick fix and gave it another try, WORKS LIKE A CHAMP. Hot cold, keeps cabin temperature at desired setting, all flaps work.
Besides I replaced the dash and seats, feels like a new car.
I would have never mastered this one without rennlist.
Thanks,
Sab.
09-11-2006, 06:02 AM
#7
Cottage Industry Sponsor
Lifetime Rennlist
Member
Lifetime Rennlist
Member

Originally Posted by Ed Scherer
Those damn vacuum actuators are a real nuisance.
In my '90, the passenger side air bag made it impossible (as far as I could see) to reattach the arm as suggested in the Nichols tip and John Pirtle's great write-up "Vacuum Actuators", at least without removing the air bag, which I really didn't want to do.
So I wound up going in through the front...
Note that you can see through the hole the arm that has to be detached/reattached when you replace the diaphram.
You don't have that hole, you say? Well, you probably don't have the stopper, either...
Should the actuator ever fail again, it'll be a much quicker job next time.
BTW, this is a good time to mount the ARM, too:
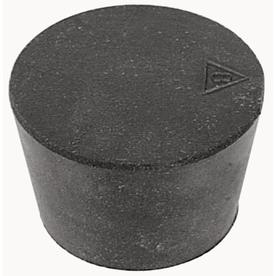
And what does that stopper consist of? I mean, what's behind the visible disc to hold it in there?
Trending Topics
09-11-2006, 09:27 AM
#8
Addict
Rennlist Member
Rennlist Member
Originally Posted by Nicole
What tool would one use to cut a hole that large and perfectly round?

Find an appropriate stopper first, and then select the right size hole saw (you are probably more limited on stopper sizes than hole saw sizes).
Originally Posted by Nicole
And what does that stopper consist of? I mean, what's behind the visible disc to hold it in there?
Last edited by Ed Scherer; 02-12-2010 at 01:36 AM.
09-11-2006, 02:06 PM
#9
Rennlist Member

Good hardware stores often carry chromed metal and/or plastic/rubber plugs/covers in a variety of sizes. They're made similar to the old-fashioned snap-in lids for 35mm film canisters, with a ridge to catch the edge of the hole. Also similar to those plugs sold by offoce supply stores to fill the wiring pass-through hole in the top of a desk.
I'd probably call the thing that Ed pictured a "stopper" rather than a plug.
I'd probably call the thing that Ed pictured a "stopper" rather than a plug.
09-11-2006, 05:03 PM
#11
Cottage Industry Sponsor
Lifetime Rennlist
Member
Lifetime Rennlist
Member
Thank you, Ed!!!
Since I have none of these lying around here, I'll have to make a trip to the hardware store. Now I have a better ieda what to ask for...
Originally Posted by Ed Scherer
you are probably more limited on stopper sizes than hole saw sizes
09-12-2006, 02:25 AM
#12
Rennlist Member
Hey Giovanni,
For the DR-look ARM-1 install, you take the ARM 1 circuit board and LED panel out of its casing, it fits in the A/C button panel in place of the seat belt warning light bulbs. Remove the inboard two light bulb sockets and it's almost a perfect fit.
It's just a matter of drilling the holds for the LED's to pop through. I used a bit the same size as the LED for the openings, and then used a big drill to countersink the holes a bit.