Porsche 993: How to Replace Fuel Pump
When a fuel pump is not performing at its optimal level, your car may experience stumbling or stalling under acceleration and have a general lack of engine power. Similarly, if your pump has already gone bad, your car will not start at all. Replacing the fuel pump can ensure your car will operate with adequate fueling and prevent you from calling a road service to tow your precious Porsche home.
This article applies to the Porsche 993 (1993-1998).
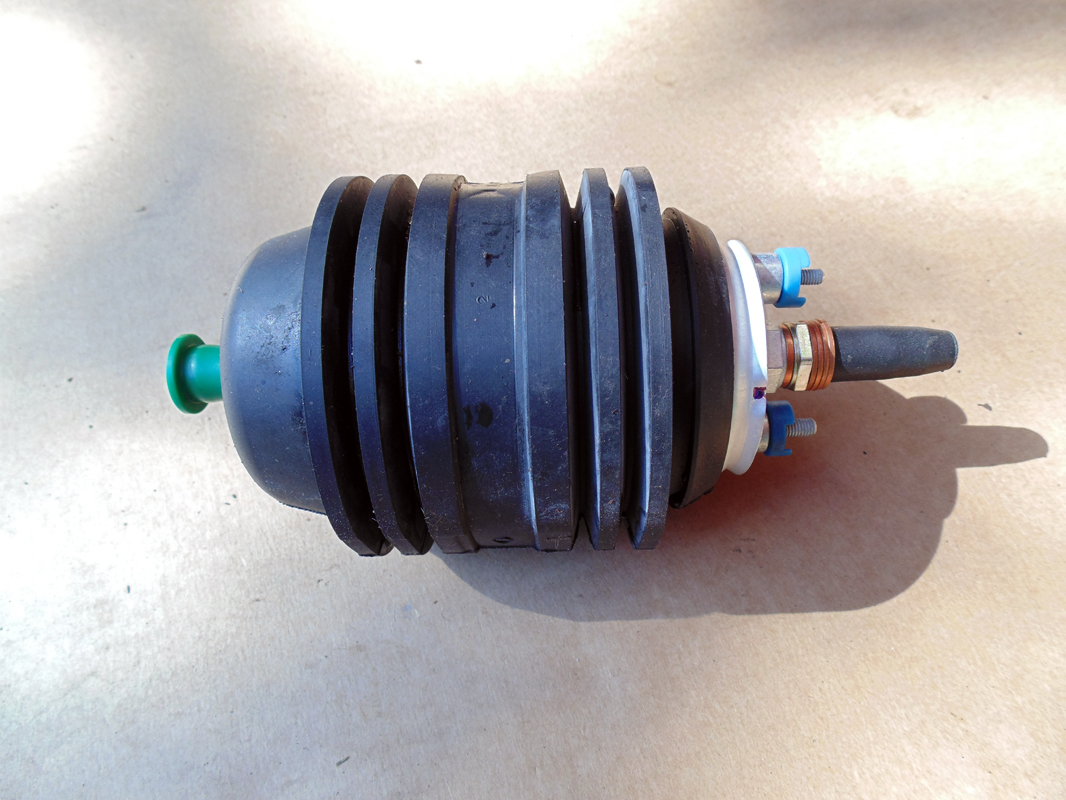
The fuel pump is the "heart" of the fuel system. It delivers gasoline from the fuel tank to the fuel injection system and eventually the engine. When the fuel pump is not performing properly, your engine does not get the fuel it needs to perform at its best. In fact, many fuel injection and driveability issues are often linked back to an underperforming fuel pump. It is worth noting that the fuel pump found in the 993 is of an axial-flow design that is lubricated and cooled by the fuel that is pumped through it. Running the fuel tank extremely low or completely out of fuel can damage the fuel pump. So, if you are having difficulties starting your car, have poor engine performance, or have a noisy fuel pump, replace it before it is too late.

Materials Needed
- 1/4" or 3/8" ratchet
- ]8mm & 10mm sockets
- 17mm & 19mm open-end wrenches
- Phillips screwdriver or 7mm nut driver
- Floor jack
- Jack stands
- Shop rags and/or catch pan to collect emerging fuel
Warning
This job requires that you work underneath the vehicle. Make sure the vehicle is supported by jack stands at all times when working underneath it. You will also be working with gasoline which is extremely flammable. It is important that no source of ignition is present.
Step 1 – Raise the car
Raise the car and support it with jack stands at each lift point.
(Related article: Porsche 993: How to Jack Up Your Porsche - Rennlist.com)

Step 2 – Gain access to the fuel pump
The fuel pump is located just behind the front axle on the passenger side. It is covered by a small protection plate. Remove the bolts securing the plate with your 10mm socket.

Step 3 – Remove the fuel pump support bracket bolts from body
Remove the three fuel pump support bracket bolts with your 10mm socket. Maneuver the fuel pump out of the body for easier access to the fuel lines and wiring.
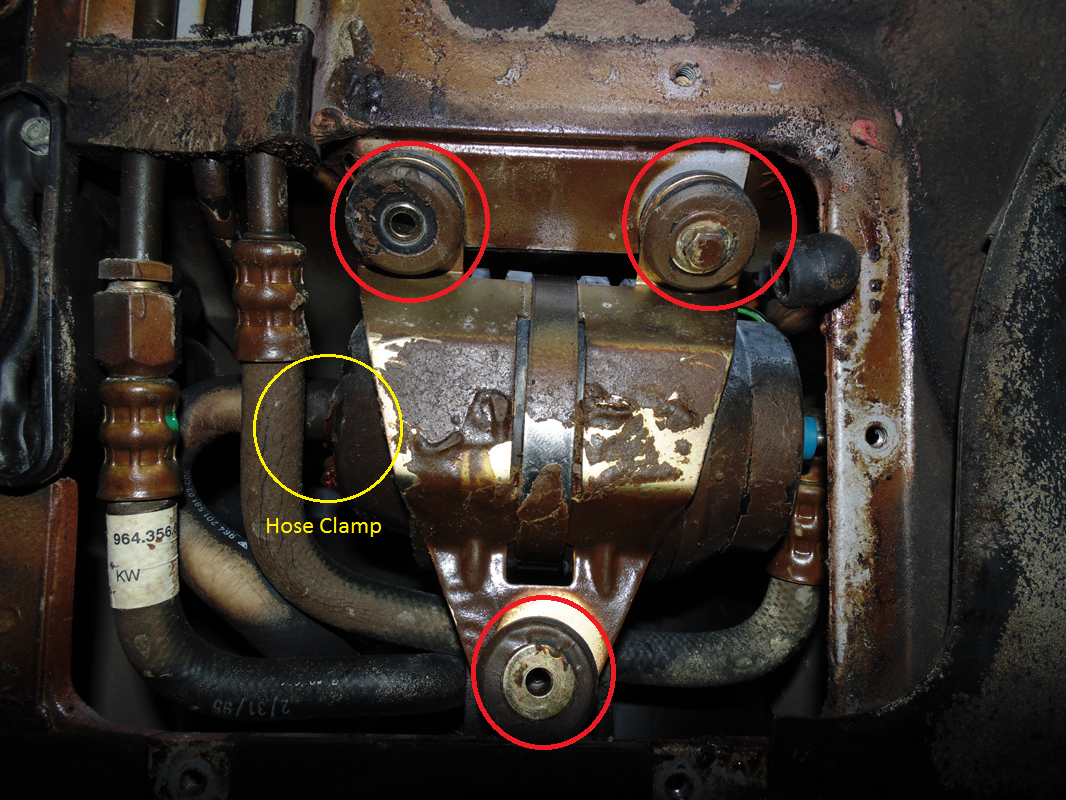
Figure 3. Fuel pump support bracket. 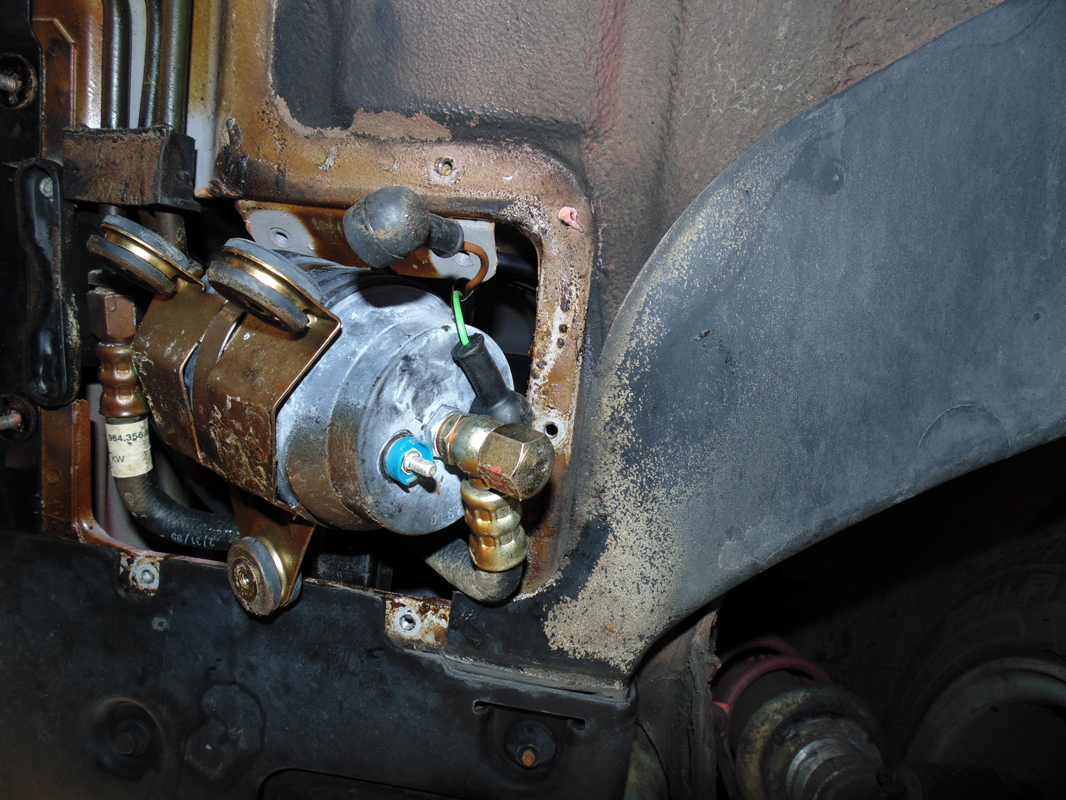
Figure 4. Removing fuel pump from body.
Step 4 – Disconnect fuel lines and electrical wires
Disconnect the fuel fitting using your 17mm and 19mm open-end wrenches. Hold the 17mm wrench stationary while turning counter-clockwise with your 19mm wrench. Remove the electrical wires.
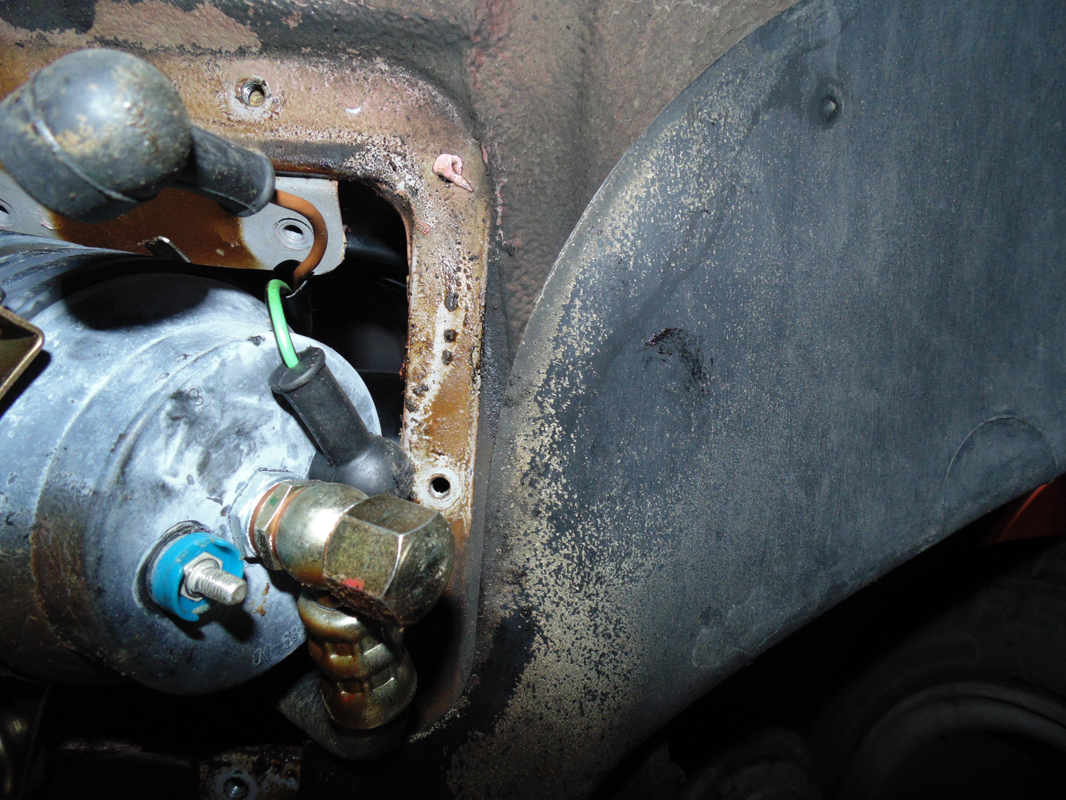
Remove the hose clamp on the other end of the fuel pump and remove the hose. (See Figure 3 above). Have shops rags or catch pan handy to collect emerging fuel. Remove the fuel pump from the car.
Step 5 – Transfer support bracket and insulator to new fuel pump
Remove the hose clamp holding the support bracket to the fuel pump with your 7mm nut driver or Phillips screwdriver. Next, remove the rubber insulator from the fuel pump by removing the lid and sliding the insulator body off the pump. Install the rubber insulator and support bracket onto the new fuel pump.
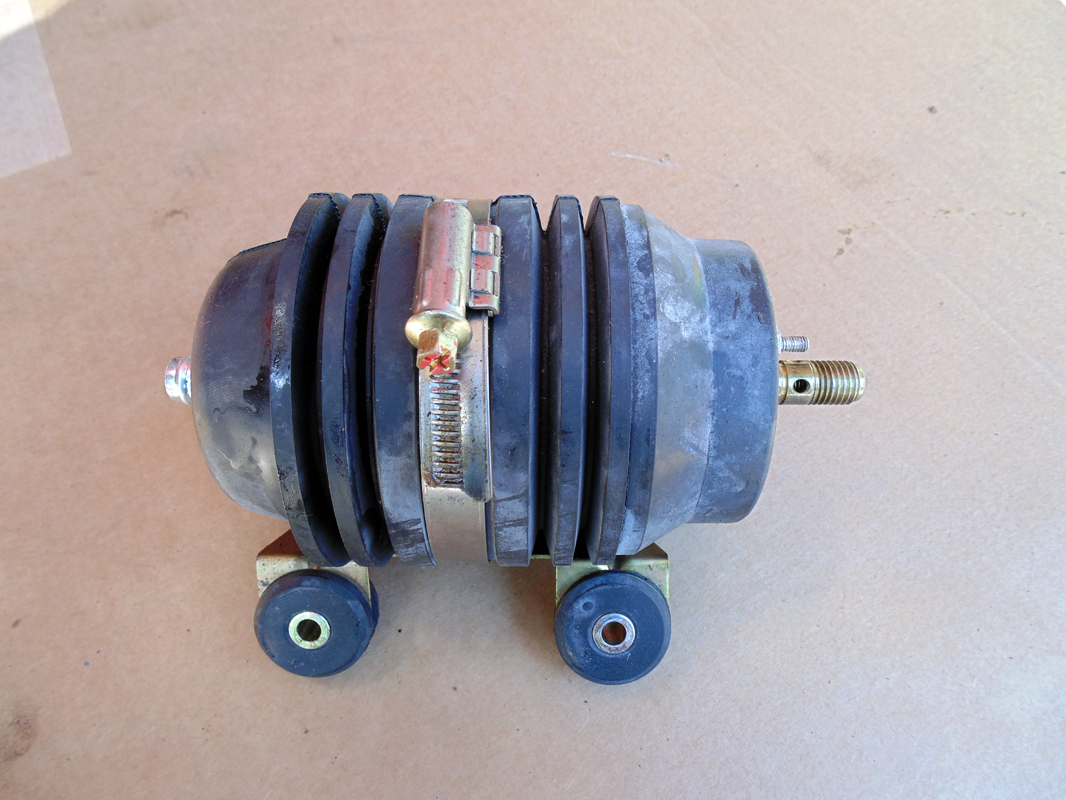
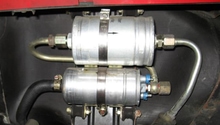
Figure 6. Fuel pump with support bracket and rubber insulator. 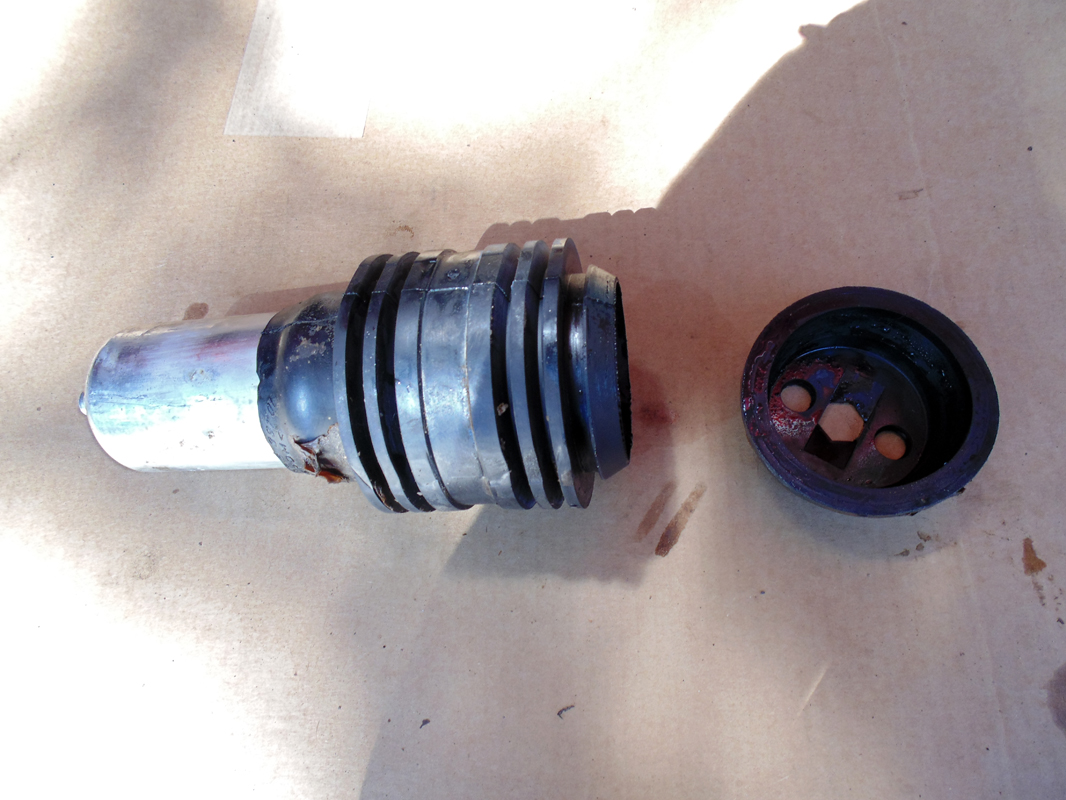
Figure 7. Removal of rubber insulator.
Step 6 – Install new fuel pump and check for leaks
You can now install the new fuel pump in the reverse order of the procedure above. Make sure all fuel lines are tightened securely and the fuel pump is being held firmly in place. Once everything is re-installed, start the car and check for fuel leaks. If fuel leaks are present, shut the engine off immediately and check the tightness of all fittings.
Related Discussions
- 993 Fuel Pump DIY - Rennlist.com
- Stock vs Aftermarket Fuel Pump - Rennlist.com