When you click on links to various merchants on this site and make a purchase, this can result in this site earning a commission. Affiliate programs and affiliations include, but are not limited to, the eBay Partner Network.
Yellow submarine - I don't find anything on p-car.com about the hydraulic adjusters. I imagine it goes something like rotate piston to TDC, remove rocker, remove/replace cartridge, replace rocker, go to next cylinder?
Probably should be done since I have come this far, just not sure of the procedure.
Looks like I will struggle with exhaust gaskets at the cylinder heads since removing the exhaust system means they need to be replaced. Tips, tricks?
Another round of parts ordered. Distributor shipped off to Rennsport in Portland for belt replacement and any other required service. Various parts soaking in parts washer. Fan and other bits out for paint/powder coat. And now - tonight - I will attempt to remove exhaust gaskets from cylinder heads without swearing or bleeding.
Has anyone changed the cam chain cover gaskets without removing the engine? I mean, I can probably have the engine out in an hour or thereabouts but I had hoped to leave it in this time around (not even sure why).
Has anyone changed the cam chain cover gaskets without removing the engine? I mean, I can probably have the engine out in an hour or thereabouts but I had hoped to leave it in this time around (not even sure why).
I've only done this with the engine out. But looking back, I'm not sure you could take off the rear engine tin to have access to the covers when the engine is bolted in. I bet that there is a trick that I don't know about, but this is what I've noticed. Another issue would be loosening the AC mount to get at the "hidden" right side bolt ~ this could be tricky with less space around with the engine in.
Has anyone changed the cam chain cover gaskets without removing the engine? I mean, I can probably have the engine out in an hour or thereabouts but I had hoped to leave it in this time around (not even sure why).
Plenty have done it (I have not) but it involves a lot of tear down, some of which you have already done. There is one cover nut behind the ac support bracket. Some remove the crank pulley to remove the bracket. I think others have been able to remove the cover nut by loosening the ac bracket, but the bracket is still in the way which will affect your cleaning the area and getting a torque wrench on that nut. The only 'trick' is removing the bracket without removing the crank pulley, but at that point what is one more pulley amongst friends?
The consensus is to do the covers with the engine out,... but If you don't have an engine stand and a way to move you engine around etc, there is argument for doing it in.
So I decided it is time for a tune up. Plugs, wires, caps, rotors, and of course the "while your in there" stuff like distributor belt, valve cover gaskets, alt brushes, and a thorough cleaning. I have put 40k miles on the car since I purchased it and have done nothing other than appropriate oil/filter/tire changes.
I can say, and many of you already know, this is kind of a b*tch of a job. Luckily I have a lift so that helps immensely. I have come this far, and the distributor simply will not budge. I have searched this forum and found many interesting ideas, and have even tried to put some of them to use. All to no avail. My distributor will move ever so slightly both back/forth and up/down, but that is it. I do not want to put it all back together without replacing the distributor drive belt, I simply will hate myself.
Ideas? Encouragement? I am on a beer break as I type, so I have that handled.
The amount of filth I am finding (111k miles on car) is both fascinating and terrifying. I will spend as much time cleaning and detailing as I have so far with disassembly.
You are almost there....are you going to UPDATE the wiring harness???
Second round of parts arrived yesterday. Also managed to get all 6 of the exhaust gaskets removed (don't ask me about that).
Hydraulic lifter cartridges were in this round of parts, so going to replace them today and then button up the valve covers (cleaned/degreased) with new gaskets.
Is there any prep work on the lifter cartridges? When I service/replace the hydro lifters on my 76 VW bus I have to disassemble the new ones, drop them in an oil bath and then re-assemble and install. I assume there's no need for all of that with these cartridges (they are so itty-bitty and cute)?
Oh, and I ordered SAI block-offs from Patrick Motorsports so y'all know where I'm headed with that little lump of excess weight.
Is there any prep work on the lifter cartridges? When
I seem to recall some old postings where filling them with oil is done. A search of the forum will prove this. My concern would be that the seals being new on the cartridges may delay full lubrication making for a lot of noise and scoring cartridge walls and pistons accelerating the wareout of the new part.
I would not disassemble them. I would see if submerging them in oil and cycling the piston does the trick as the seals are very small and potentially easily damaged. Others could provide you with a definitive response to your concern.
Seems that soaking in oil is an option, not _required_. I am going to replace all 12 today without soaking in oil first. Engine will not be run for at least a couple of weeks (Dizzy out for rebuild), but when I do get ready to fire it up I will pull the DME and let it crank over and build pressure.
Seems that soaking in oil is an option, not _required_. I am going to replace all 12 today without soaking in oil first. Engine will not be run for at least a couple of weeks (Dizzy out for rebuild), but when I do get ready to fire it up I will pull the DME and let it crank over and build pressure.
For what it's worth, we dropped the engine in my C4 last week and Jerry P. at European Performance Engineering in Natick highly recommended replacing all twelve lifters (see picture below). The car has 115,000 miles and these parts are know to wear out internally. The lifters cost about $80/piece, but now is the time to replace them and you'll be good to go for another 100,000 miles.
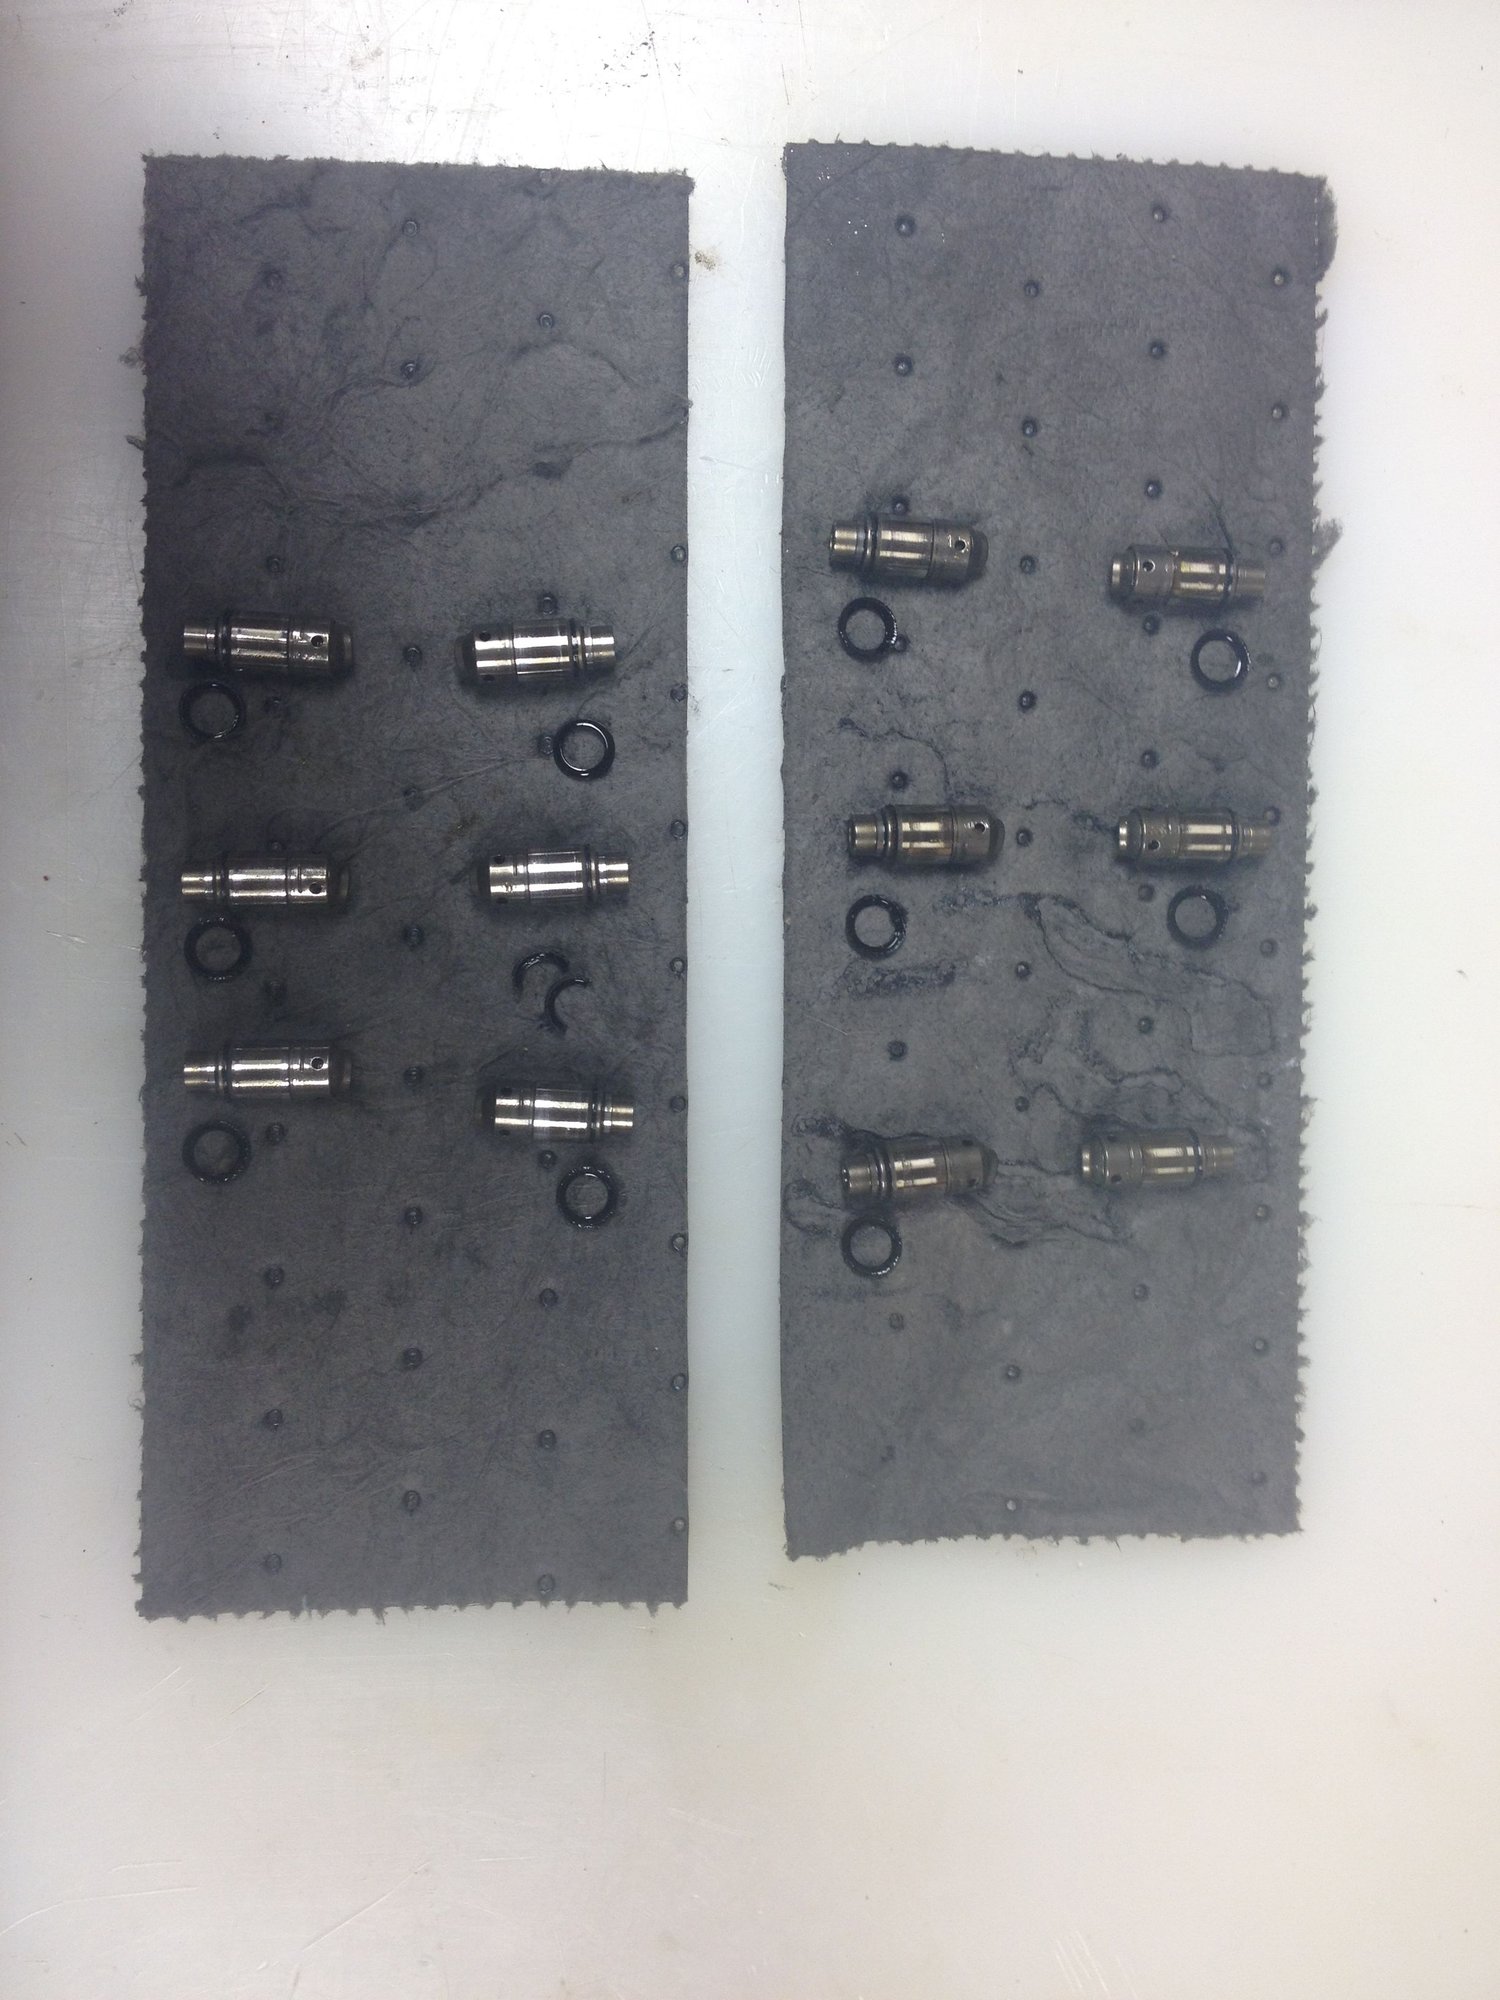
All 12 hydro lifters replaced. Note that none of them were making noise when I started this project (plugs & wires) but at 111k miles, with little to no service records on the car, this was certainly a good time to do this job.
Pretty sure that the process of removing the lifters from the rocker is what broke the seals. But they were all brittle to the touch. So as stated, it was a good time to do this. The fact that I now don't see the other "half" of the seal for the #3 ex lifter means I gotta take it apart again and look for that.
Next, lowering the engine to attempt cam chain cover gaskets with engine in.
Cool wrenching doolin thanks for posting up the pics makes the Monday coffee break
Good habit you have there of lining up the old throw away parts so you know what came from where so if you need to go back in you know where to look.
As far as some of those seals, yours look good, well, better than others have posted. SOme have found some completely gone, that may be the case with your # 3 or it may be sitting in there. Worth a look.
On the chain covers, I did the lower donuts only and noticed some of my studs came undone. I used Mike J's technic to retighten the stud first then install donuts and torque. Interesting the drivers side was like this and now its dry. The passenger side, the nuts all came off leaving the studs in place. I thought great, since that was less work. Wrong. The passenger side still seeps. I will redo those and see if it helps. I guess my point is it wouldn't hurt whether the stud backs out or not to tighten it down a little before putting the donuts back on.
On the ac bracket, I would loosen all nuts but leave in place. Then remove one nut and tighten it down ontop of another one. Then try and remove the inner one and the stud should come out. If you remove the studs this way, the bracket should slide out to the side with out necessitating removing the crank pulley. I have not done this but would be interested to know if it works.
So I decided it is time for a tune up. Plugs, wires, caps, rotors, and of course the "while your in there" stuff like distributor belt, valve cover gaskets, alt brushes, and a thorough cleaning. I have put 40k miles on the car since I purchased it and have done nothing other than appropriate oil/filter/tire changes.
I can say, and many of you already know, this is kind of a b*tch of a job. Luckily I have a lift so that helps immensely. I have come this far, and the distributor simply will not budge. I have searched this forum and found many interesting ideas, and have even tried to put some of them to use. All to no avail. My distributor will move ever so slightly both back/forth and up/down, but that is it. I do not want to put it all back together without replacing the distributor drive belt, I simply will hate myself.
Ideas? Encouragement? I am on a beer break as I type, so I have that handled.
The amount of filth I am finding (111k miles on car) is both fascinating and terrifying. I will spend as much time cleaning and detailing as I have so far with disassembly.
Steve, when I got to your house last week there seemed to be more parts than that...I thought you car exploded...I'm really not looking forward that this next winter....
So I decided it is time for a tune up. Plugs, wires, caps, rotors, and of course the "while your in there" stuff like distributor belt, valve cover gaskets, alt brushes, and a thorough cleaning. .


 12-07-2014, 06:36 PM