When you click on links to various merchants on this site and make a purchase, this can result in this site earning a commission. Affiliate programs and affiliations include, but are not limited to, the eBay Partner Network.
For those keeping score, I'm down 0 and 2 to the car.
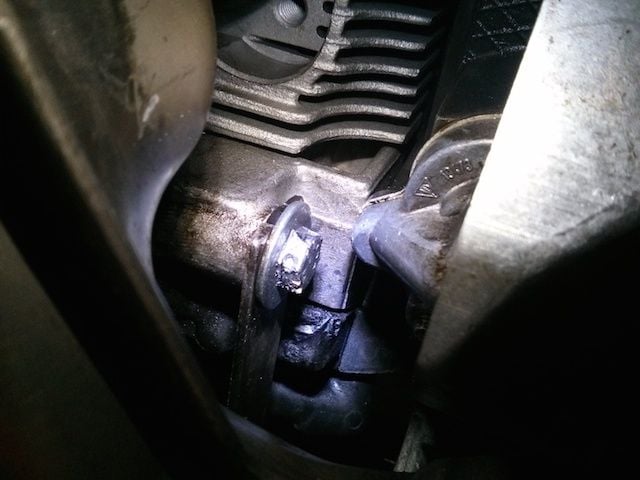
The last round resulted in an ER visit, three stitches, and still the bolt remains... taunting me. I see it in my sleep. 13mm of terror.
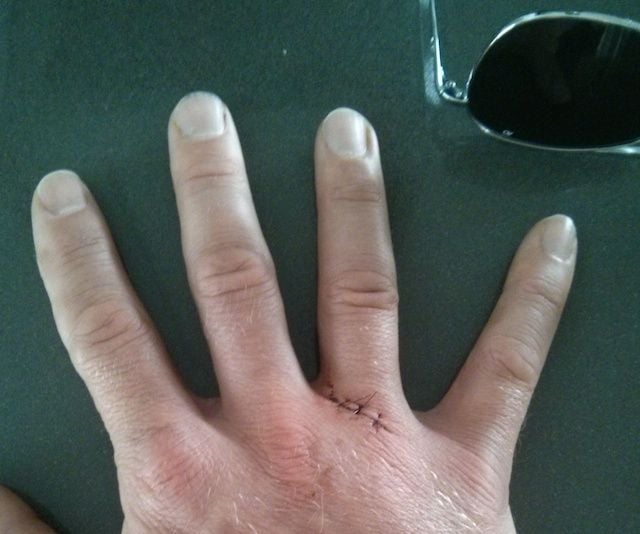
Here's a picture of the bolt and what it did to me. I will get even.
In all seriousness, clearance isn't terrible, but you can't get a nut extractor or drill on the head of the bolt. I can get to it cleanly from the side to hammer on it or put vice grips on it. Neither works, unfortunately.
You need to wear mechanics gloves when its getting dicey - sorry to see your hand damage! How the hell did you do that - slip and hit the sheet metal?
When I get a rounded off bolt or allen headed bolt, I try a few methods:
- hammering in a hex or torx socket to see if it can get enough grip
- grabbing it with vice grips or the equivalent
- tapping at it with a sharp small chisel on its edge to start it turning
- THEN (and usually it ends up here) I use a die grinder with a carbide bit and just grind the head off the bolt. A die grinder is like a super dremel - more industrial and gobs more power. Anyways, I mill the top of the bolt off to just above the washer or surface, then it either comes off with some hand pressure, or I use the chisel to start it rotating.
once the pressure if off the Fastner, they usually come off easily.
As for the famous 13mm one that is behind the chain tensioner that holds the bottom of the muffler bracket, that one can be a bi*ch. I have a special ground 13mm closed end wrench that can fit in the small gap, I avoid using open end wrenches on this one since its usually a bear to remove.
This one is a good candidate for the chisel on the edge technique. If it comes out its really stuck, out comes the die grinder and a few minutes later it WILL come out.
Best of luck, and please wear gloves (and safety glasses when you are grinding, etc.).
When you replace the bolts, remember to use some antiseize on them so they do not bind in the aluminum housing, and tighten them up security but not overtorqued!
Sorry to see you hurt yourself.
You mentioned earlier that you used "heat cycles", what did you use for heat source and how much heat did you apply. If you take a MAPP gas torch and heat the area around the bolt, you should be able to move it, aluminum expands more/faster than steel. The trick is to put on enough heat, but not too much as you can melt the aluminum. You can buy temperature paint sticks at the welding supply store, that way you have control over how much heat you are applying.
Check HERE for paint sticks, they come in a vast array of temperatures.
How the hell did you do that - slip and hit the sheet metal?
Yep. Loosening the heat exchanger bolt. When it gave way, my hand went full speed into the engine tray support bracket.
Originally Posted by Mike J
- THEN (and usually it ends up here) I use a die grinder with a carbide bit and just grind the head off the bolt.
Roger that. I still don't see how I'll get a new bolt back in. Based on other threads, the bolt is too long to insert without removing chain tensioner cover or more. I'm worried if I cut this one off, I'm stuck in a super-crazy major project to get that cam cover (or whatever it is) out of the way.
Originally Posted by Mike J
I have a special ground 13mm closed end wrench that can fit in the small gap, I avoid using open end wrenches on this one since its usually a bear to remove.
I tried a flare nut wrench that will fit. Not quite a box wrench, but better than an open wrench. Unfortunately, the nut already too far gone from previous handiwork.
Originally Posted by crg53
what did you use for heat source and how much heat did you apply.
I used propane, and about as much as I was comfortable using given all the plastic and gaskets around there. It's not the best place for a lot of heat. I'm a bit nervous to try anything hotter in that spot.
Why Bother - Go at it from the Top - Forget about it.
I did my wires and the "Bitch Plug" is exactly that!!
I recomend a Buddy help you out - Must have A Pair of Long Legs preferasbly dressed in a Minny Skirt with Long Arms having a thin wrist to approach this job from the Correct Angle.
ACTUALLY i DID A Write Up on Changing The Bitch Plug - I TOOK NOTHING APART
Heres is the Title / Link - You can read it all or My Input was from Post 26 to 32 ? See Link
Yah, understand about the bolt length. The chain tensioner is not a big deal to remove/replace, you would also need to remove the little head shield. You can often just reuse the gasket for the chain tensioner, it has a flat gasket with a built-in O ring for the seal.
I have had lots of gashes and skinned knuckles working on these cars and after a while you get a sense when gloves would be good protection - but I will admit, I sometimes am in a rush and skip that step, and the sometimes results in some bleeding. Your cut is IMPRESSIVE though, and a worthy bragging point!
Don't get why all the complaining about #6 upper - just remove the sheet metal and the vent pipe with a few bolts, and then just use a few different extensions - it's really easy. Sometimes you have to use a magnet in case you need to break down the extensions. It can be harder the first time since you are going through all the bolts then (which often are overtightend or worn), but after that the next time should be much better.
There seems to be some myth about how hard it is, maybe I have done enough so I know exactly which of my tools fits where (done in the dozens by now), but it's not difficult. Maybe it's all relative.
I used propane, and about as much as I was comfortable using given all the plastic and gaskets around there. It's not the best place for a lot of heat. I'm a bit nervous to try anything hotter in that spot.
Just a note: Propane is pretty much useless in getting enough heat on a stuck fastener. At minimum you need MAPP gas, and better yet is Oxy-Acetylene.
With propane's relatively low heat, you end up spending too much time trying to heat the task at hand.
just bite the bullet and drop the heat exchanger. gives you room underneath for vise grips or chisel.
once loose the bolt came out and cleared the chain tensioner housing, in my case anyway.
good cut, will learn you to wear leather gloves when working on the car.
well, maybe not. I still figure whatever job I'm doing will be small so no gloves and end up with a sliced hand or smashed finger.
Tell me about it...started to drop the heat exchanger and sliced my hand.
I can get vise grips and a chisel on it now. My chisel is starting to just cut a sliver out of the bolt head. It is not moving.
In thinking about Mike's comment on the chain tensioner cover...What do you all think of this approach:
Remove cat
remove chain cover heat shield
remove chain tensioner cover and tensioner
Remove stuck bolt with a bolt extractor (my craftsman set seems to be able to grab anything)
If above fails, grind off per Mike J's recommendation
With the chain tensioner cover out of the way, thread in new bolt.
Reseal chain tensioner cover, and bolt it all back up.
This doesn't seem too bad assuming I can get the heat shield off by just removing the cat and a few bolts.
I just broke free the left side one. It was a nice day so I decided to go after my left valve covers. I was thinking about your car as I was applying torque to that bolt... The left one is easy peasy though as you can get a 6point socket on it. I was looking at the right one, I see your predicament - it's tight. How old are your vice grips? I ask cause the teeth do wear down. If it's not newish, I'd splurge on a new pair and try that first, as tight as you possible can ie two hands to get it to lock. If that didn't work I'd jump to Mike's number 5 suggestion. Sorry about the hand...
M- having done this on 2 993s, I know exactly what you're going through with this infamous bitch bolt. I tried everything from Kroil to Freeze-off, but the damn thing wouldn't budge. Maybe it did help a little. Ultimately, what I did was put my 13mm open wrench on, as I try to turn counter clockwise use your other hand to apply torque to pivot the bracket itself also in the counter clock direction. Once the top bracket bolt is removed, the bracket will pivot from the bottom bitch bolt. It finally broke loose after several attempts with this maneuver. I did both cars this way. Wasn't easy but it worked.
This is a common challenge when doing a major service
The bolt head (discussed above) on the muffler bracket is not exactly to spec
A 1/2 wrench actually fits better.
A thinned down box end works well, as Mike mentions regarding 13mm
It is still not easy to loosen. It isn't touched often so it is really comfortable where it sits.
A spray of penetrant and a good, solid, quick crack of the wrench is key
Extra leverage helps a lot as the wrench is usually in a non optimal position.
A piece of pipe, or your preferred method of wrench extension, does the trick
 10-22-2014, 09:20 AM