When you click on links to various merchants on this site and make a purchase, this can result in this site earning a commission. Affiliate programs and affiliations include, but are not limited to, the eBay Partner Network.
Ilko - You generously sent me a volume control rocker switch for my CR210 years ago!
If I produce another run of these, I will send you a set. Send me a PM.
Ilko - You generously sent me a volume control rocker switch for my CR210 years ago!
If I produce another run of these, I will send you a set. Send me a PM.
Would love a set if you produce more. Sent you a PM too!
Ilko - You generously sent me a volume control rocker switch for my CR210 years ago!
If I produce another run of these, I will send you a set. Send me a PM.
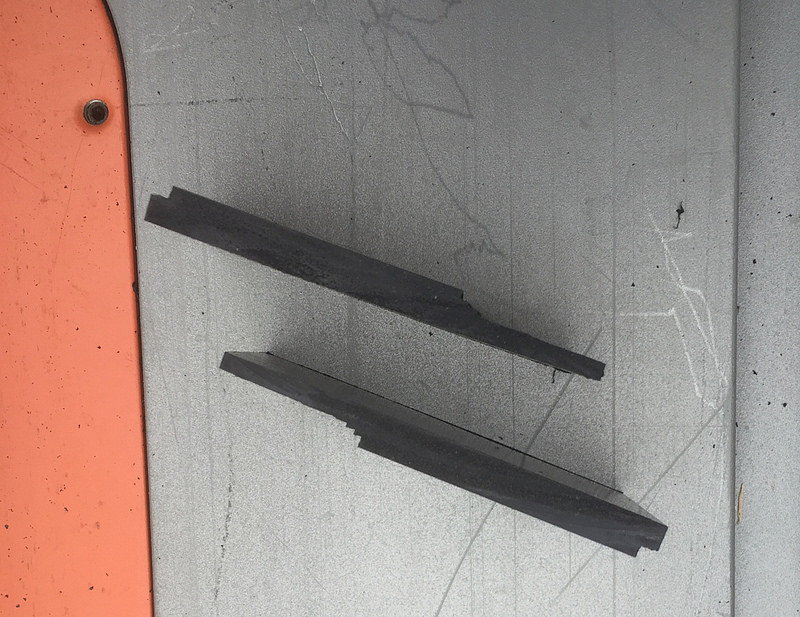
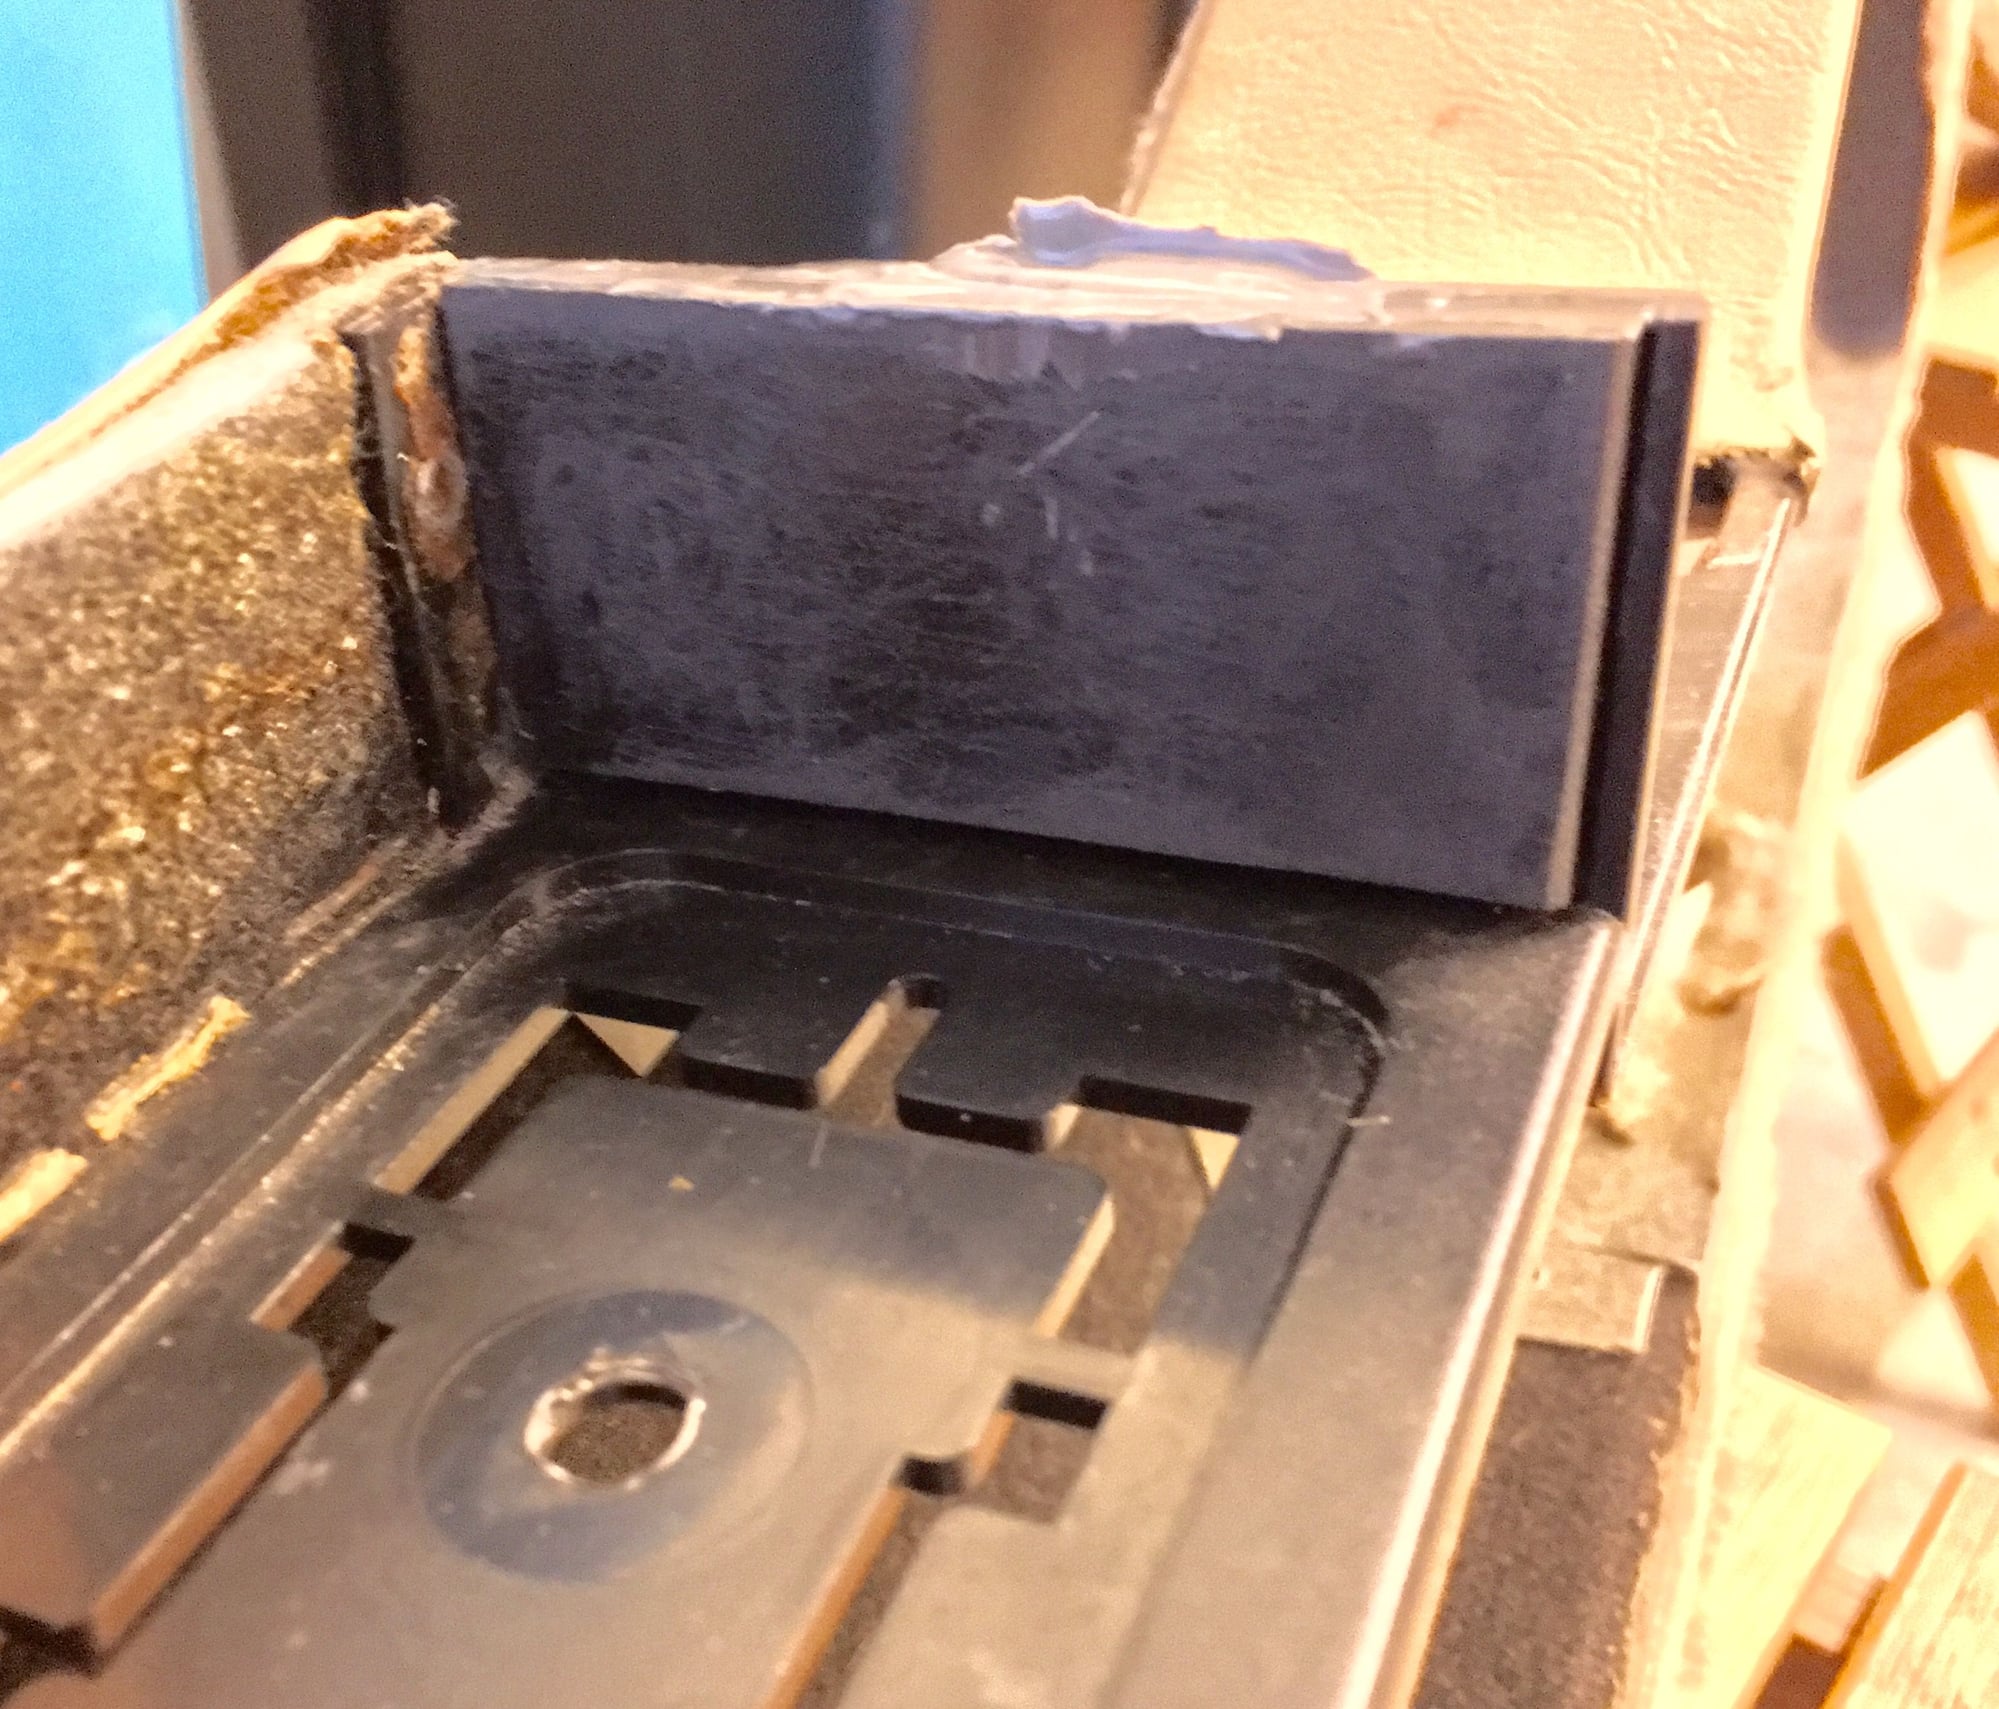
I did this four years ago on the C2 and just finished up the same repair on the C2S.
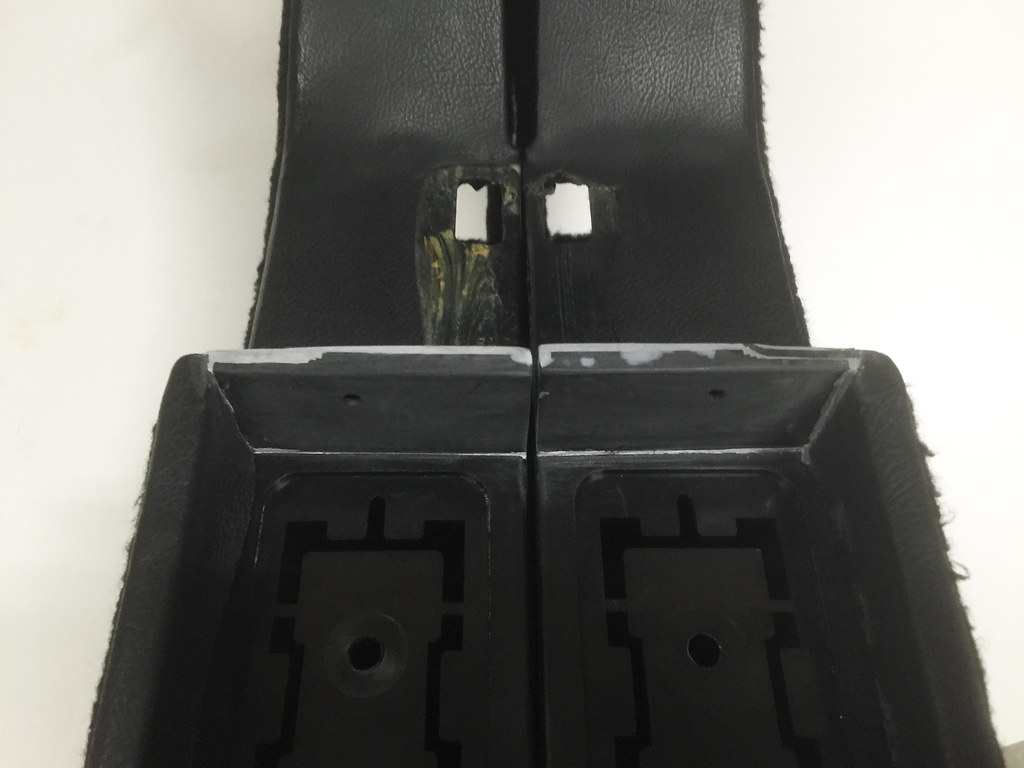
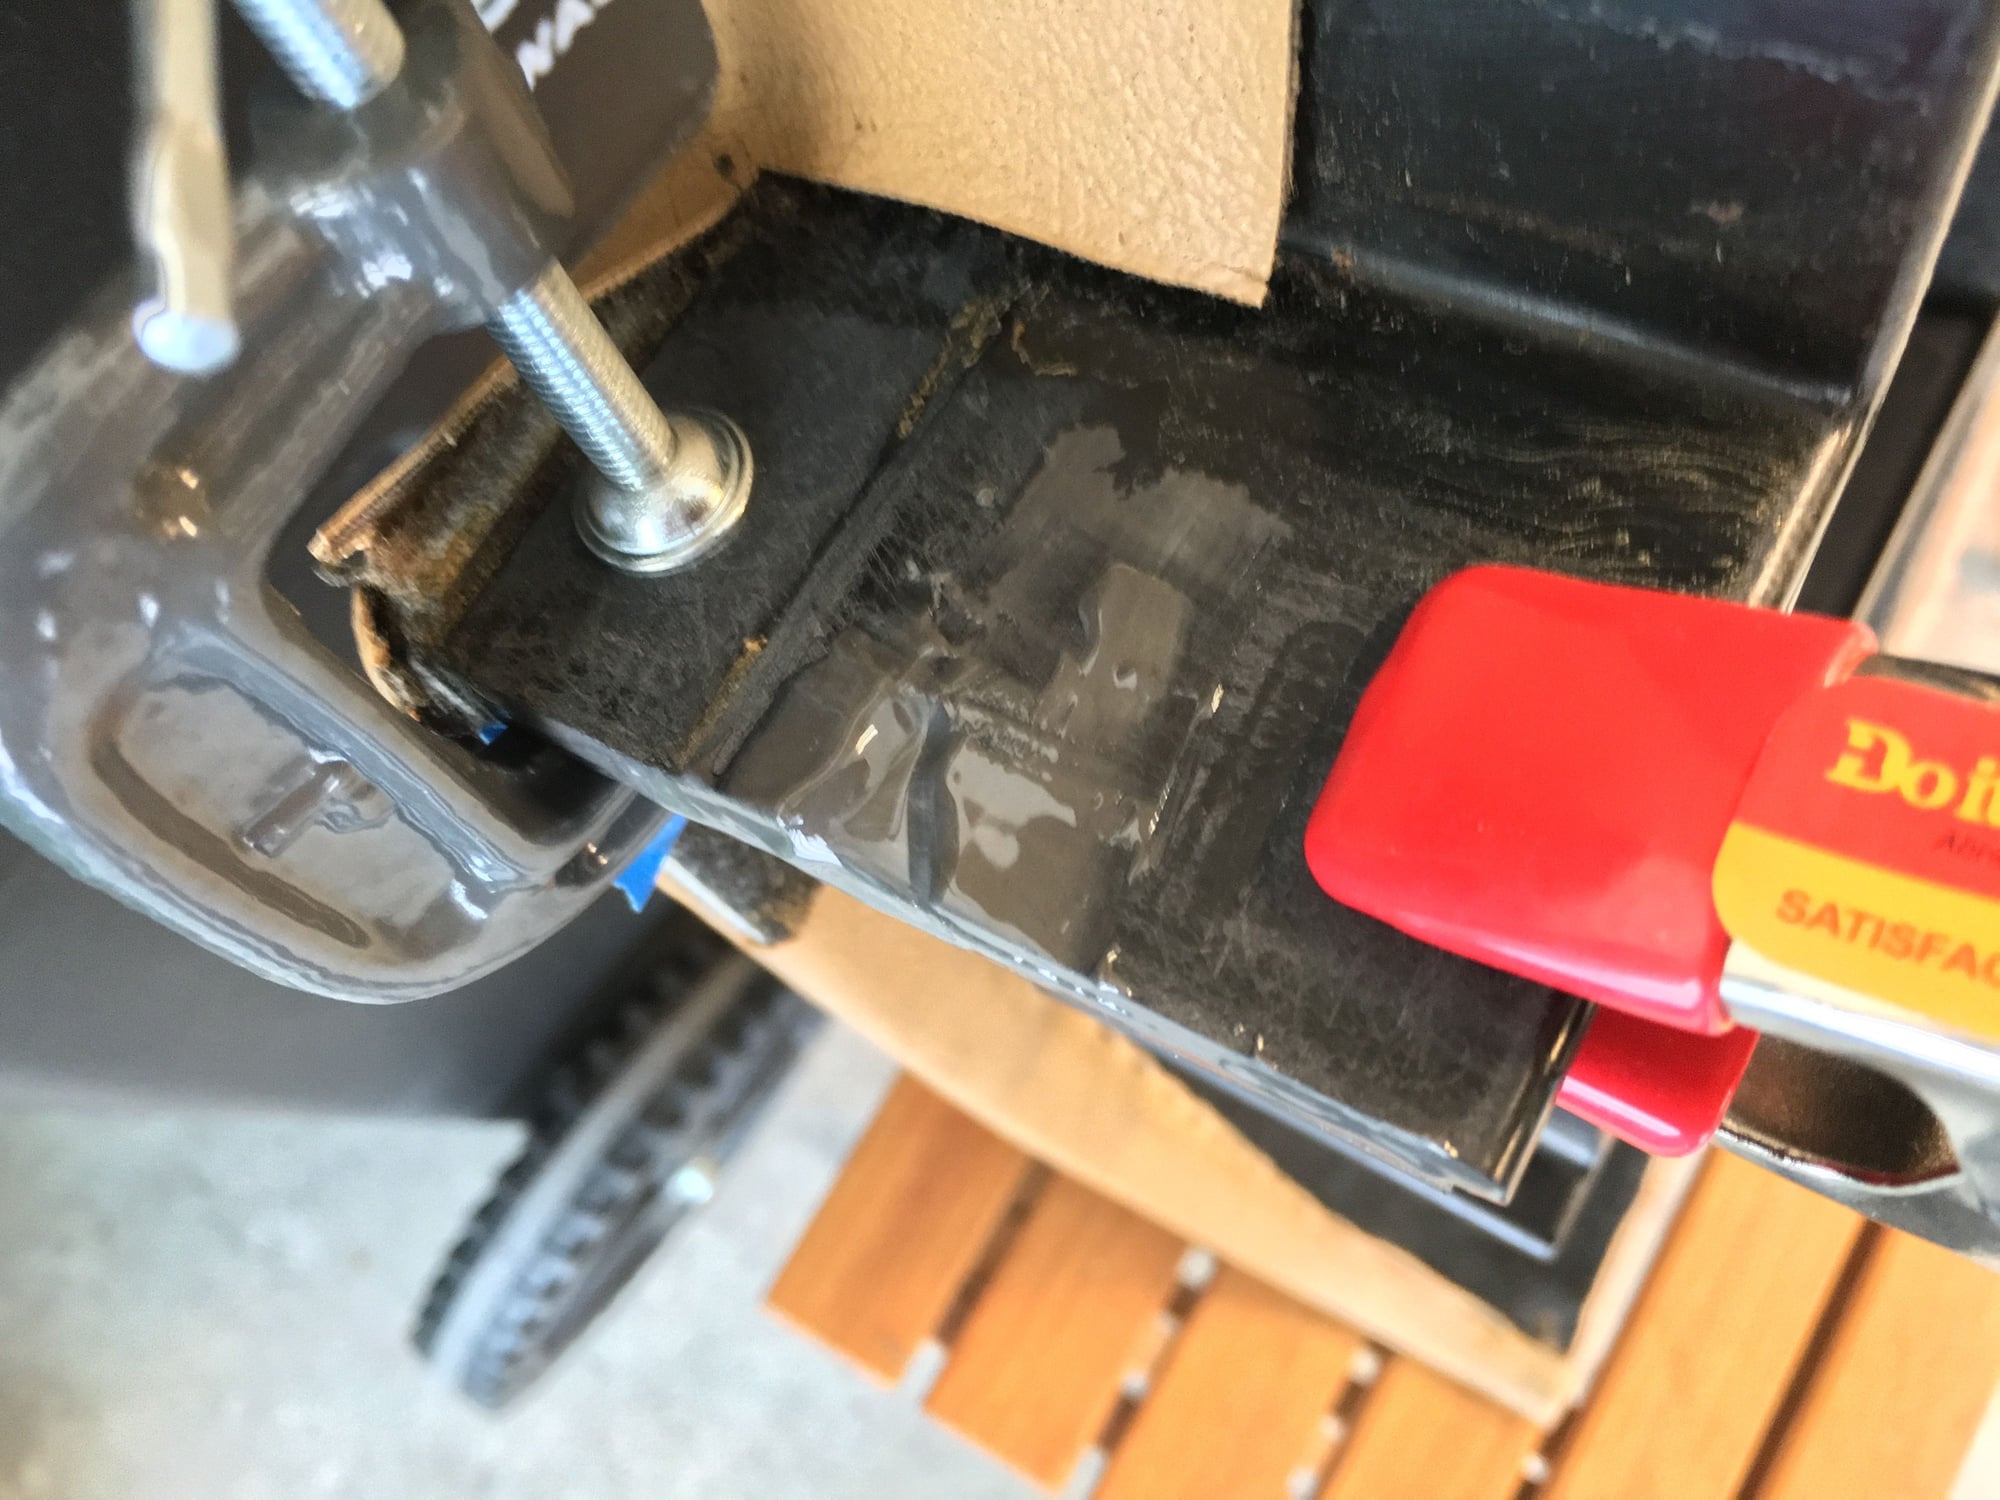
I bought a 4" ABS slip cap from the local plumbing store for about $6 and started cutting away. One slip cap will do for both sides and is about 1/4" thick.
I used JB-Weld again, as it is a perfect epoxy to shape, sand and paint.
Drilling the holes can be a bit tricky but with the 90� attachment on my dremel tool I was able to get in there perpendicular to the surface, but because of the limit on the size of the drill bit, had to grind it out a bit to allow for the screw to go trough freely. Longer screws are required.
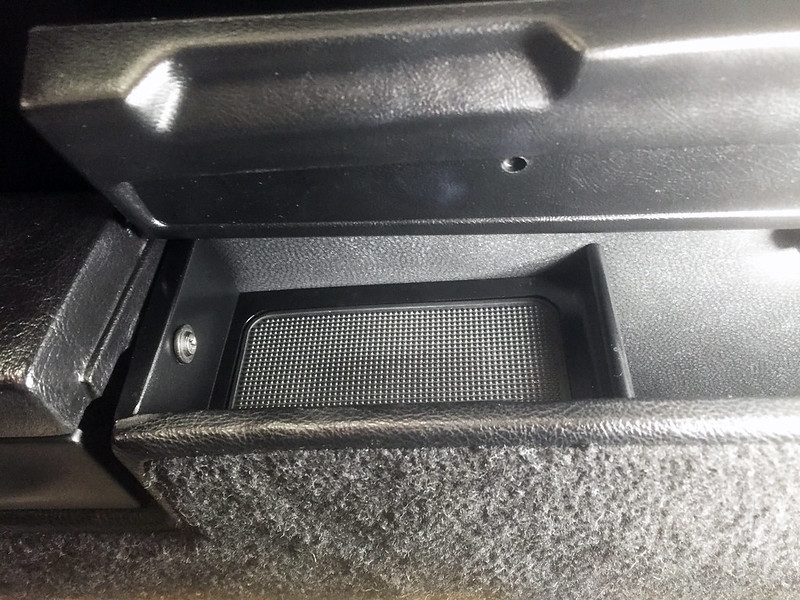
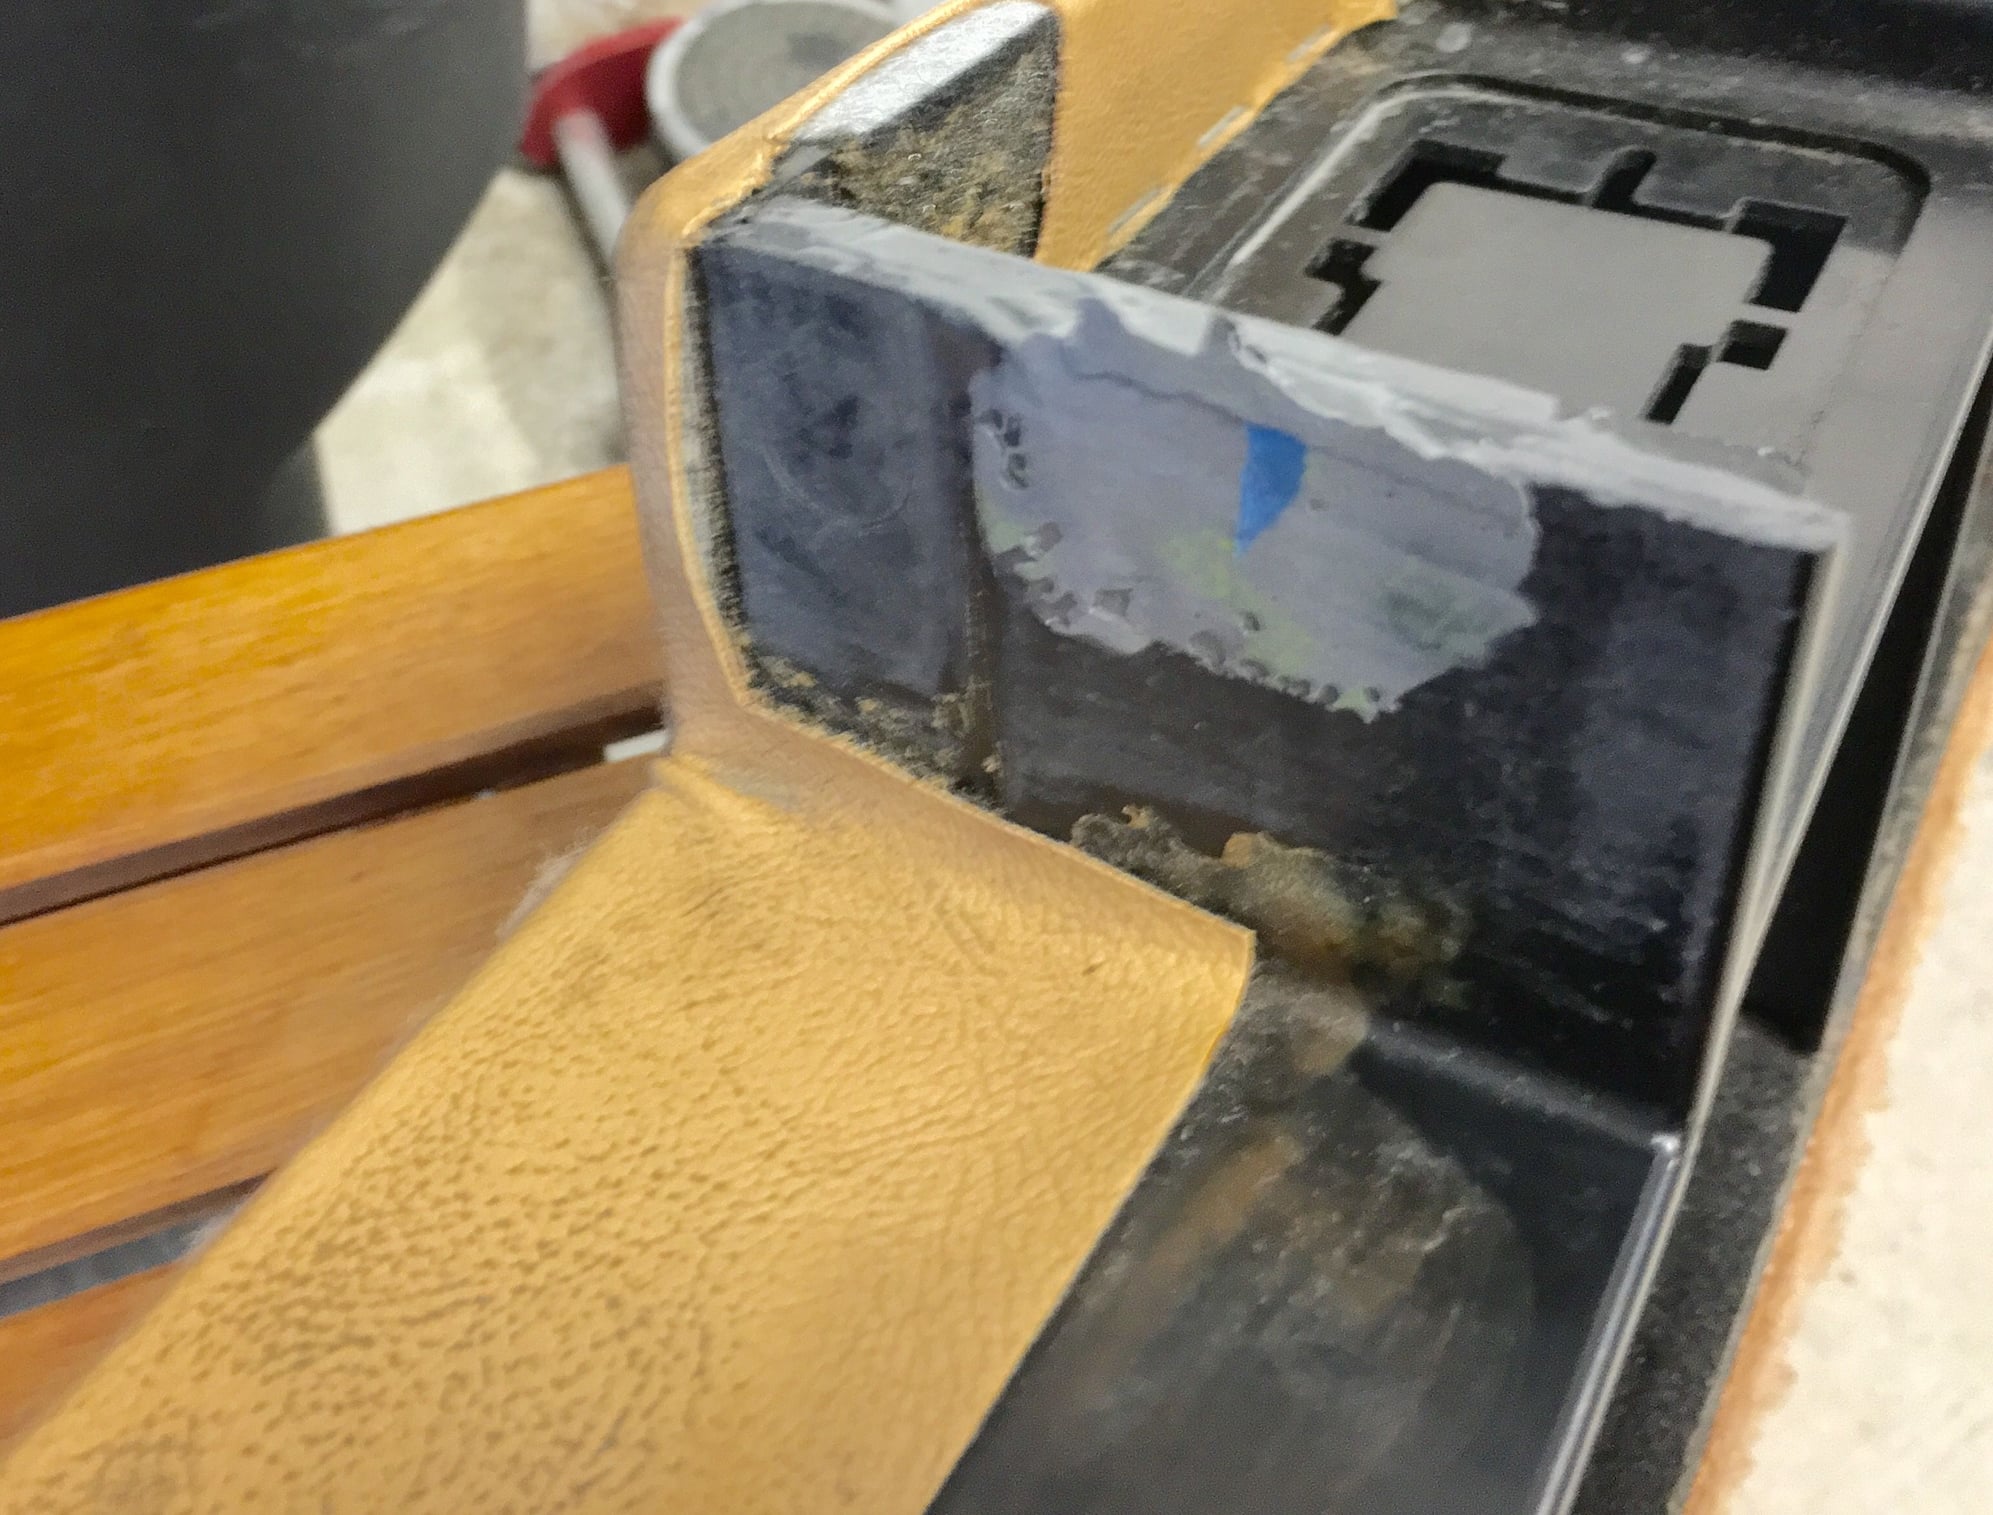
Sand the surface once more, mask with tape and paper, then a couple of coats of the Semi-Gloss rattle can and done!
Cheers
That is a beautiful job, Jo-hans. I am about to attempt this but am inexperienced with JB weld. Can you detail the manner in which you used the JBW? I am imagining that the JBW is grey, and you used it like peanut butter and jelly in a PBJ sandwich .... Did you sandwich the JBW between the two black pieces of ABS plastic .... Squeeze until the JBW oozes out .... Let cure .... And then sand until smooth?
That is a beautiful job, Jo-hans. I am about to attempt this but am inexperienced with JB weld. Can you detail the manner in which you used the JBW? I am imagining that the JBW is grey, and you used it like peanut butter and jelly in a PBJ sandwich .... Did you sandwich the JBW between the two black pieces of ABS plastic .... Squeeze until the JBW oozes out .... Let cure .... And then sand until smooth?
Thank you.
Thanks - I am having fun with these little repair jobs.
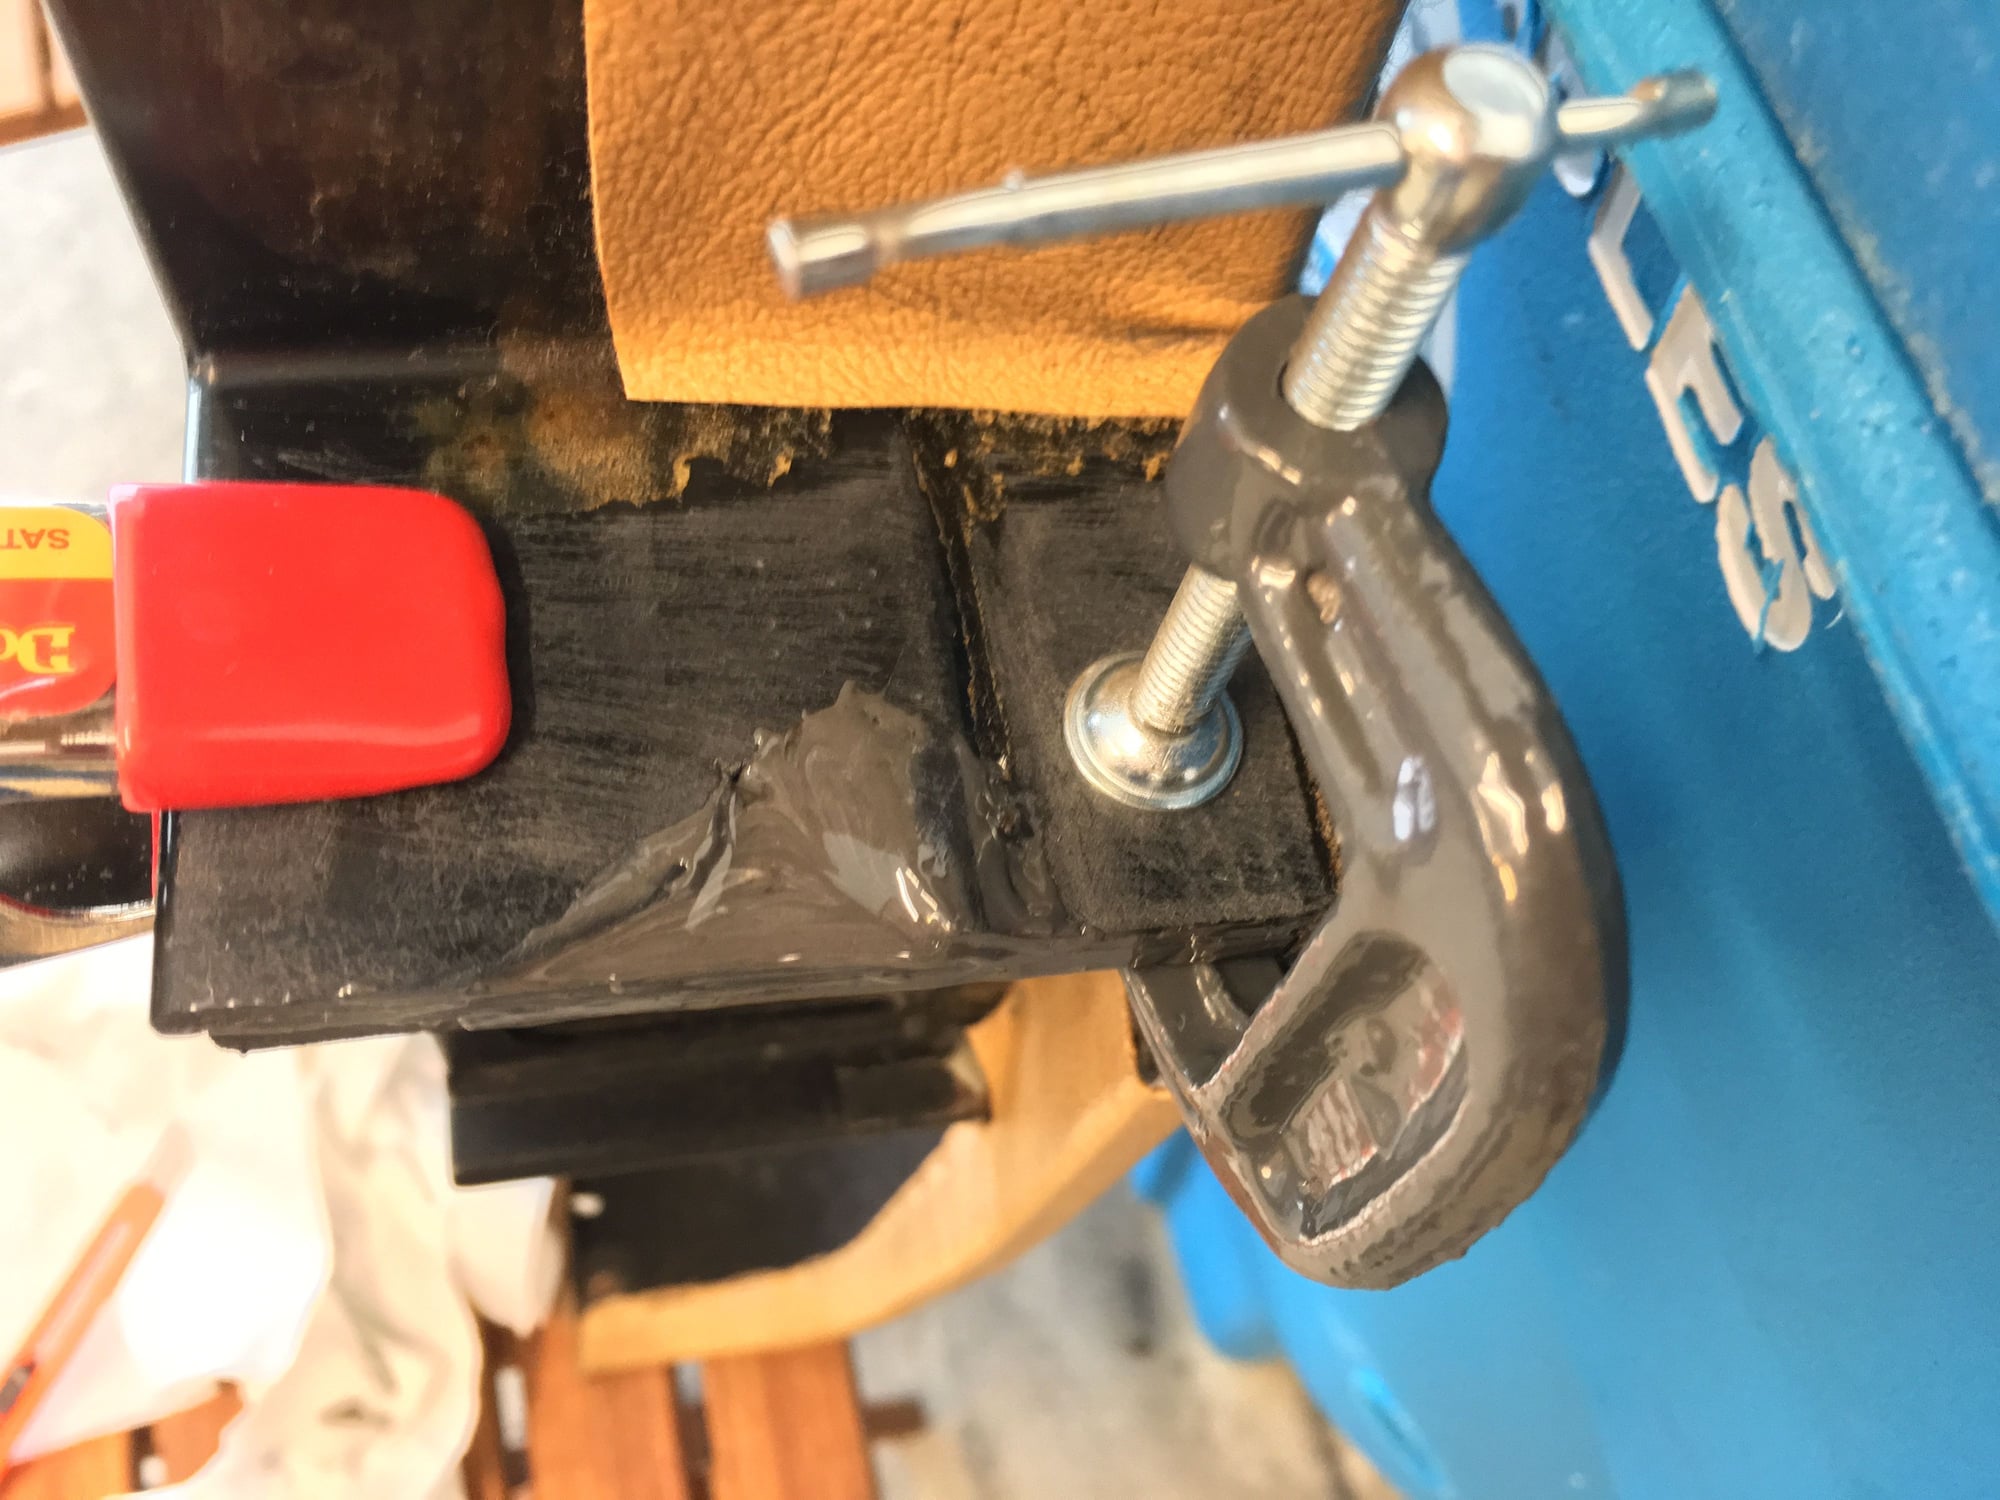
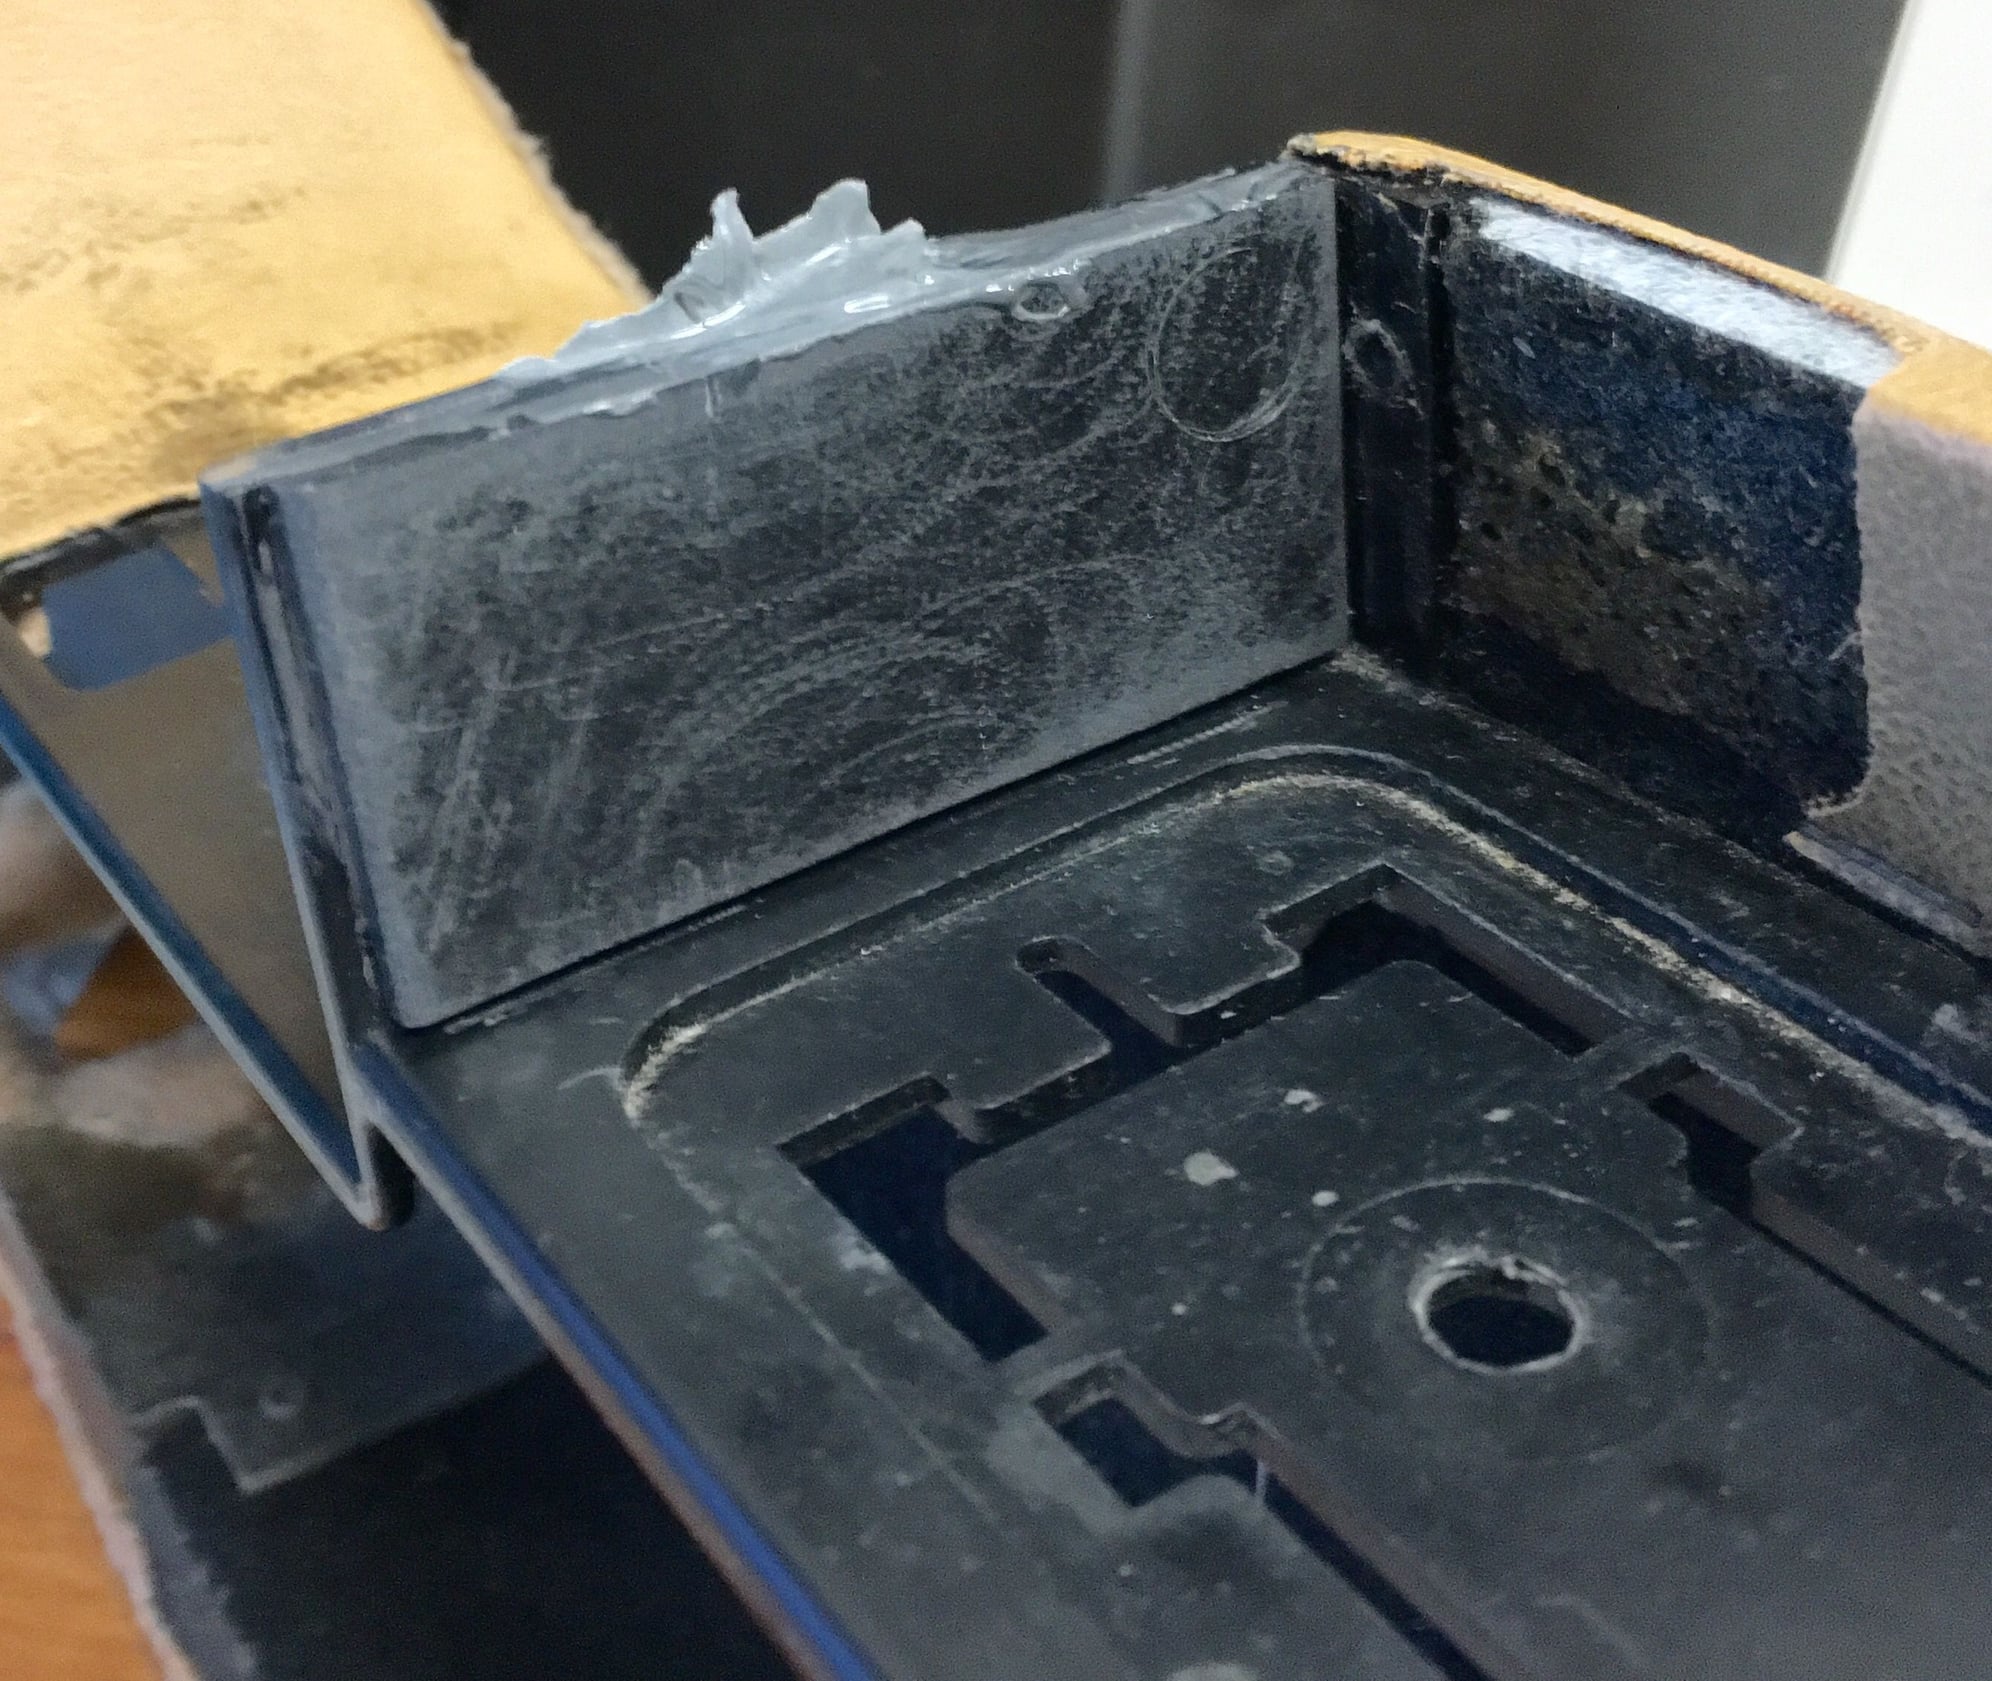
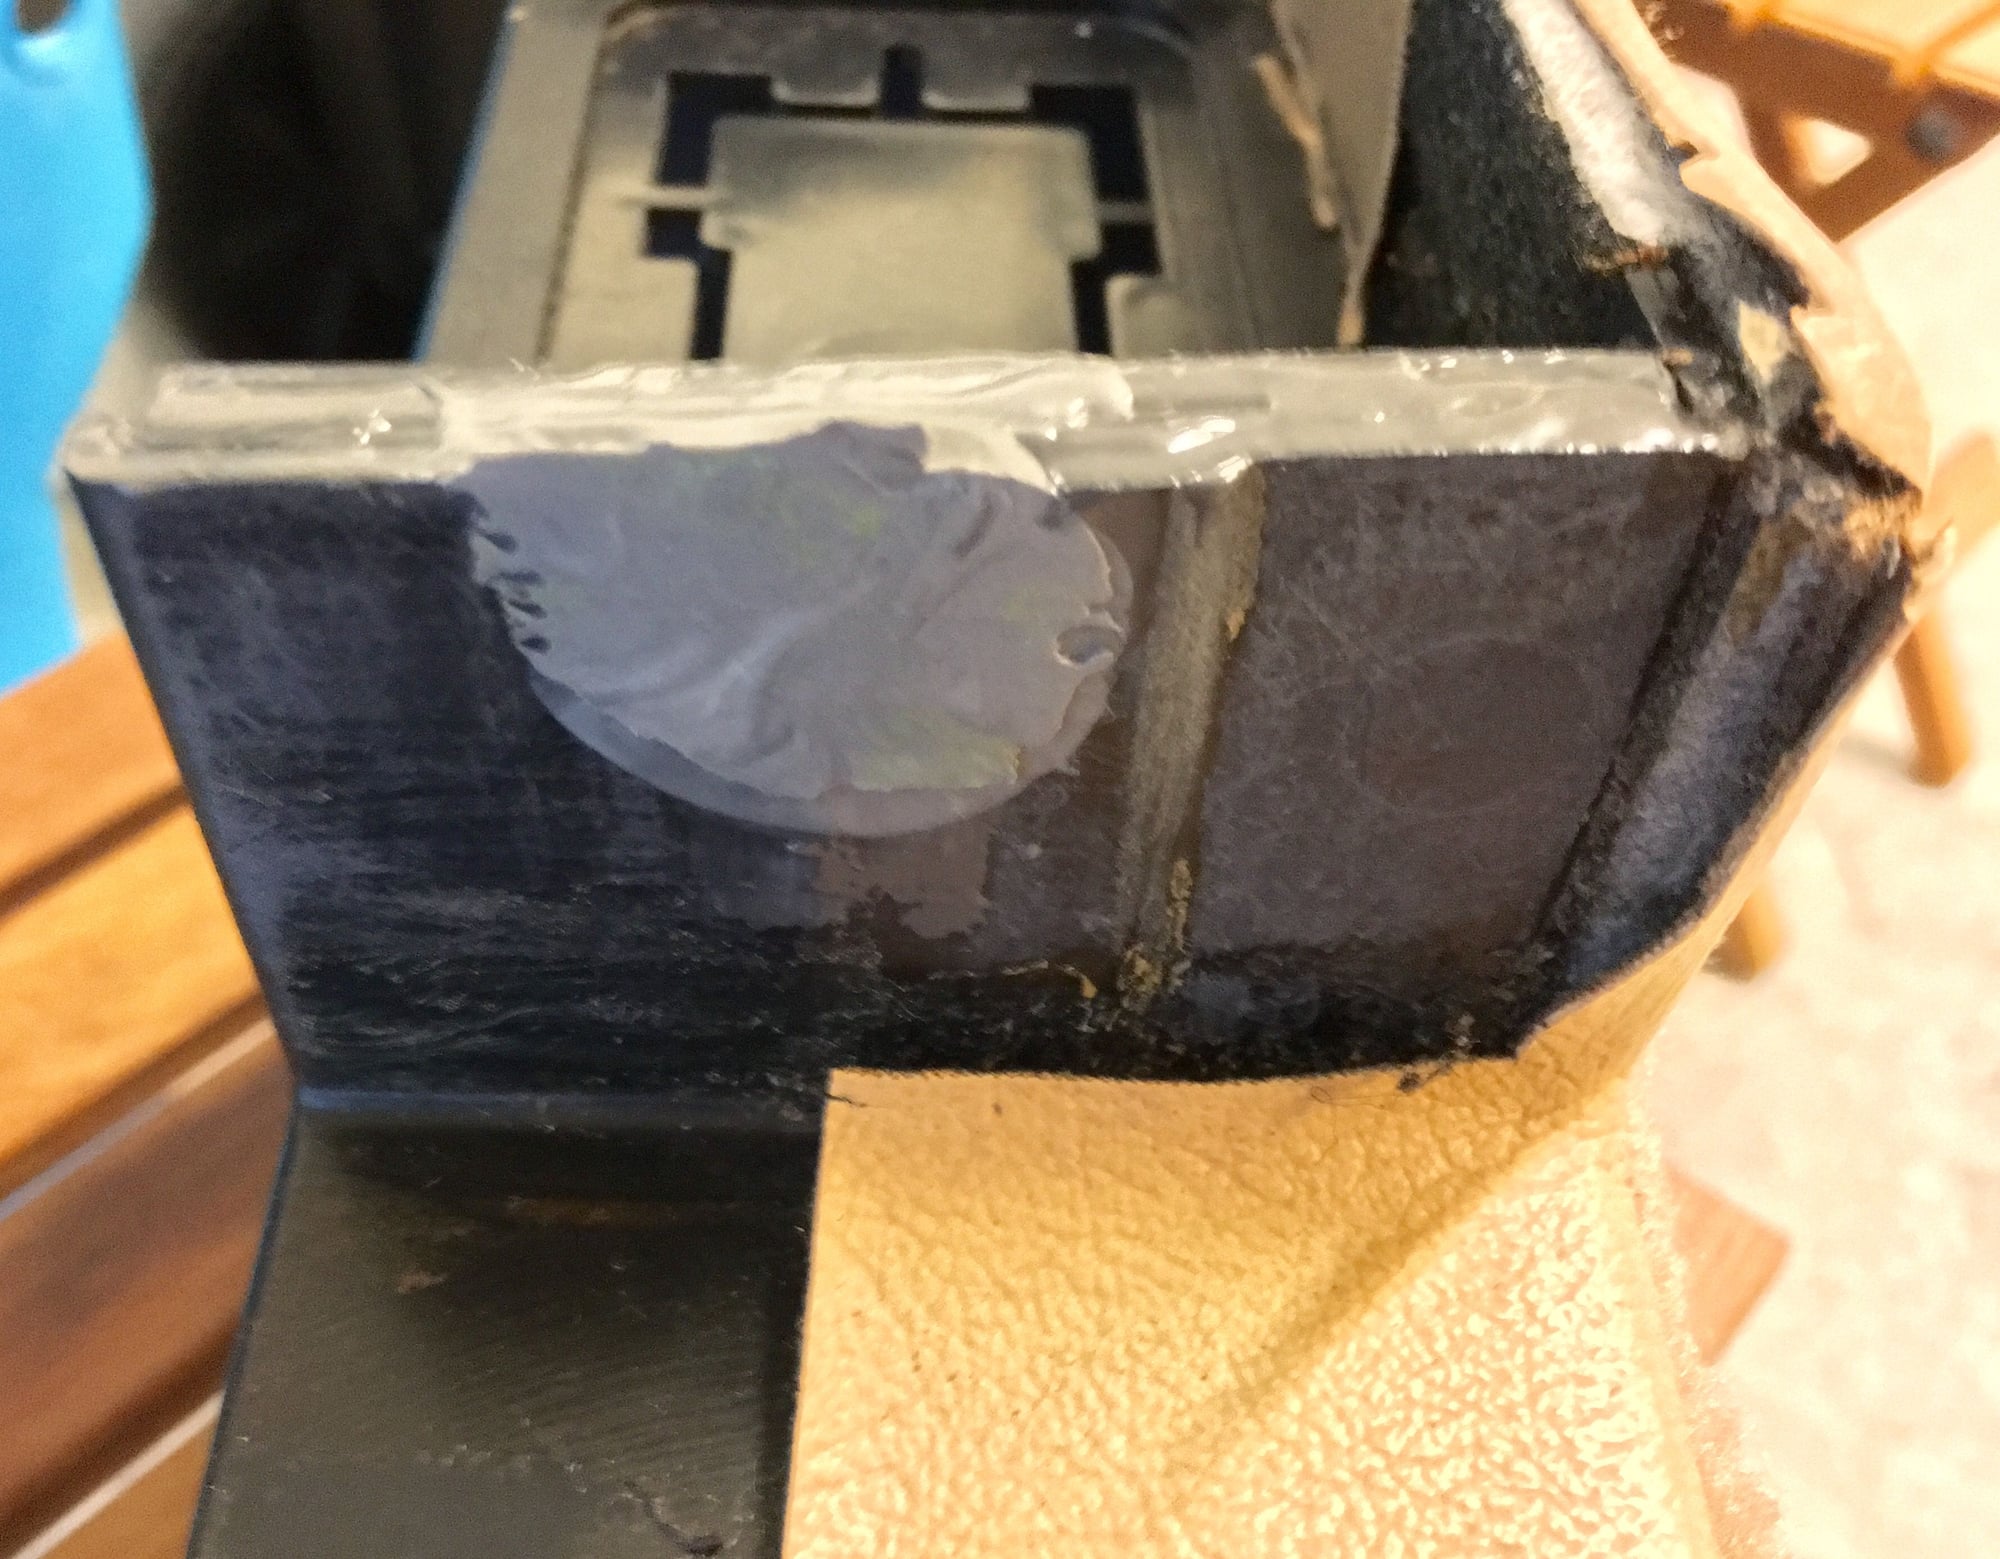
You pretty well described the procedure I used. Before applying the JBW make sure to remove all brittle plastic from the repair area and rough up the surface with some sand paper. I used a 1" metal spatula to apply the JBW, enough so that when the reinforcement piece goes in, enough of it will ooze out to fill the gaps. You may want to remove any access. Put a small clamp on it. Watch for the first few hours that the JBW does not run all over the place. After a few hours you can shape/clean it up in the corners with a KDS blade as it will be soft enough but not so sticky anymore. You can scrape it as well with a flat screwdriver or chisel. After a day it will be hardened and you can apply more in the broken areas to build it up, enough of it so you can sand back to a flat surface.
I used a small air sander with #120 grit paper to finish to a nice flat surface all around.
Drilling the hole for the screw is a bit tricky but triple measure, triple check, before drilling. (Maybe measure the broken area for the hole position before starting the repair)
Mask around the area to be painted. I painted the complete storage box.
Thanks! Jo-Hans! Repair with JB Weld currently in process with Beside the Box's plastic ABS plates --- I first sanded everything down with an 80 grit electric sander and scored the pieces with a sharp blade to promote adhesion. Observation - JBW kind of runs all over the place the first few hours.
I'll need to build this JBW up over multiple applications. This will take a few days.
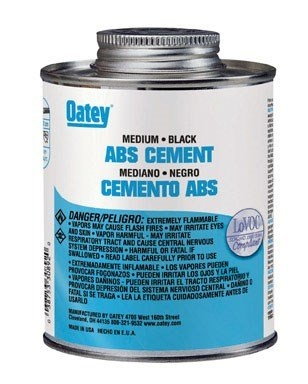
Jlaa - Since both pieces are ABS plastic, I believe the best glue to hold the reinforcement in place is ABS cement. abs cement
Thanks BTB for your gracious generosity... I sent you a PM. Unfortunately unlike your scenario, my door pocket attachment point were missing great hunks of plastic ... So I have to use something to build up the void that i can eventually drill through. Hence the JB Weld. I suppose I could have ABS cemented your lovely plates onto the remaining door pocket plastic and then JB Weld the voids. But, uh, at this point I dont think those plates are ever coming off with all the JBW I sandwiched there!
Jlaa - Thank you for the PM. And thanks for paying it forward with your extra wire connectors!
Now I see why you chose JB weld. Should be quite strong when done.
Second application of JB Weld. Trying to build up the void. I lined an old credit card with painters tape and clamped it together with the door plastic with the jbweld in between. When the jbweld cured, i easily removed the credit card (jbweld doesnt bond to painters tape).... Now I can start sanding to see what I have ...
Last edited by Jlaa; 03-04-2016 at 11:26 AM.
Reason: Typos
 02-02-2016, 03:58 PM