When you click on links to various merchants on this site and make a purchase, this can result in this site earning a commission. Affiliate programs and affiliations include, but are not limited to, the eBay Partner Network.
Back to it. Past few nights at work have been a beyatch, and this weekend went poorly. What was to have been an orgy of 928 work was a power surge followed by 12 hours of running on my generator, topped off by a power surge damaged heat pump. Yay.
So...to answer the various comments:
Chris Lockhart: We shall see, as I am not sure I want to spend the rest of my life trying to blast off all the rust on the non-friction surfaces of the rotors. Calipers, I am not sure about yet.
GT6ixer: Still teetering on some of that, though I am not worried about the soda blasting. It won't hurt the painted surfaces, and the duct tape will keep the seals intact.
I have been looking at home powerder coating systems, but have not pulled the trigger. I don't have room for an oven in my work shop. I had not thought about using a toaster oven. Thanks!
However, this does not answer the question about cost for 16 piston/seal kits...
OTR18WHEELER: Fear not, I am not restoring a driver. That is far beyond the scope of what I want to do. I want to drive the Red Witch. In the Navy, in Engineering, this would be what was called, 'Clean and Inspect.' I am disassembling, cleaning, identifying and correcting wear, then reassembling. I am returning it to proper functionality. I am going through these various systems for wear and or safety related reasons. I am not falling down the hole of making everything shiny and pretty. I am falling down the hole of making everything work as it is supposed to. For example, I am replacing the brake hoses because they are 30 years old. The fact that I am installing new stainless steel braided hoses has no bearing.
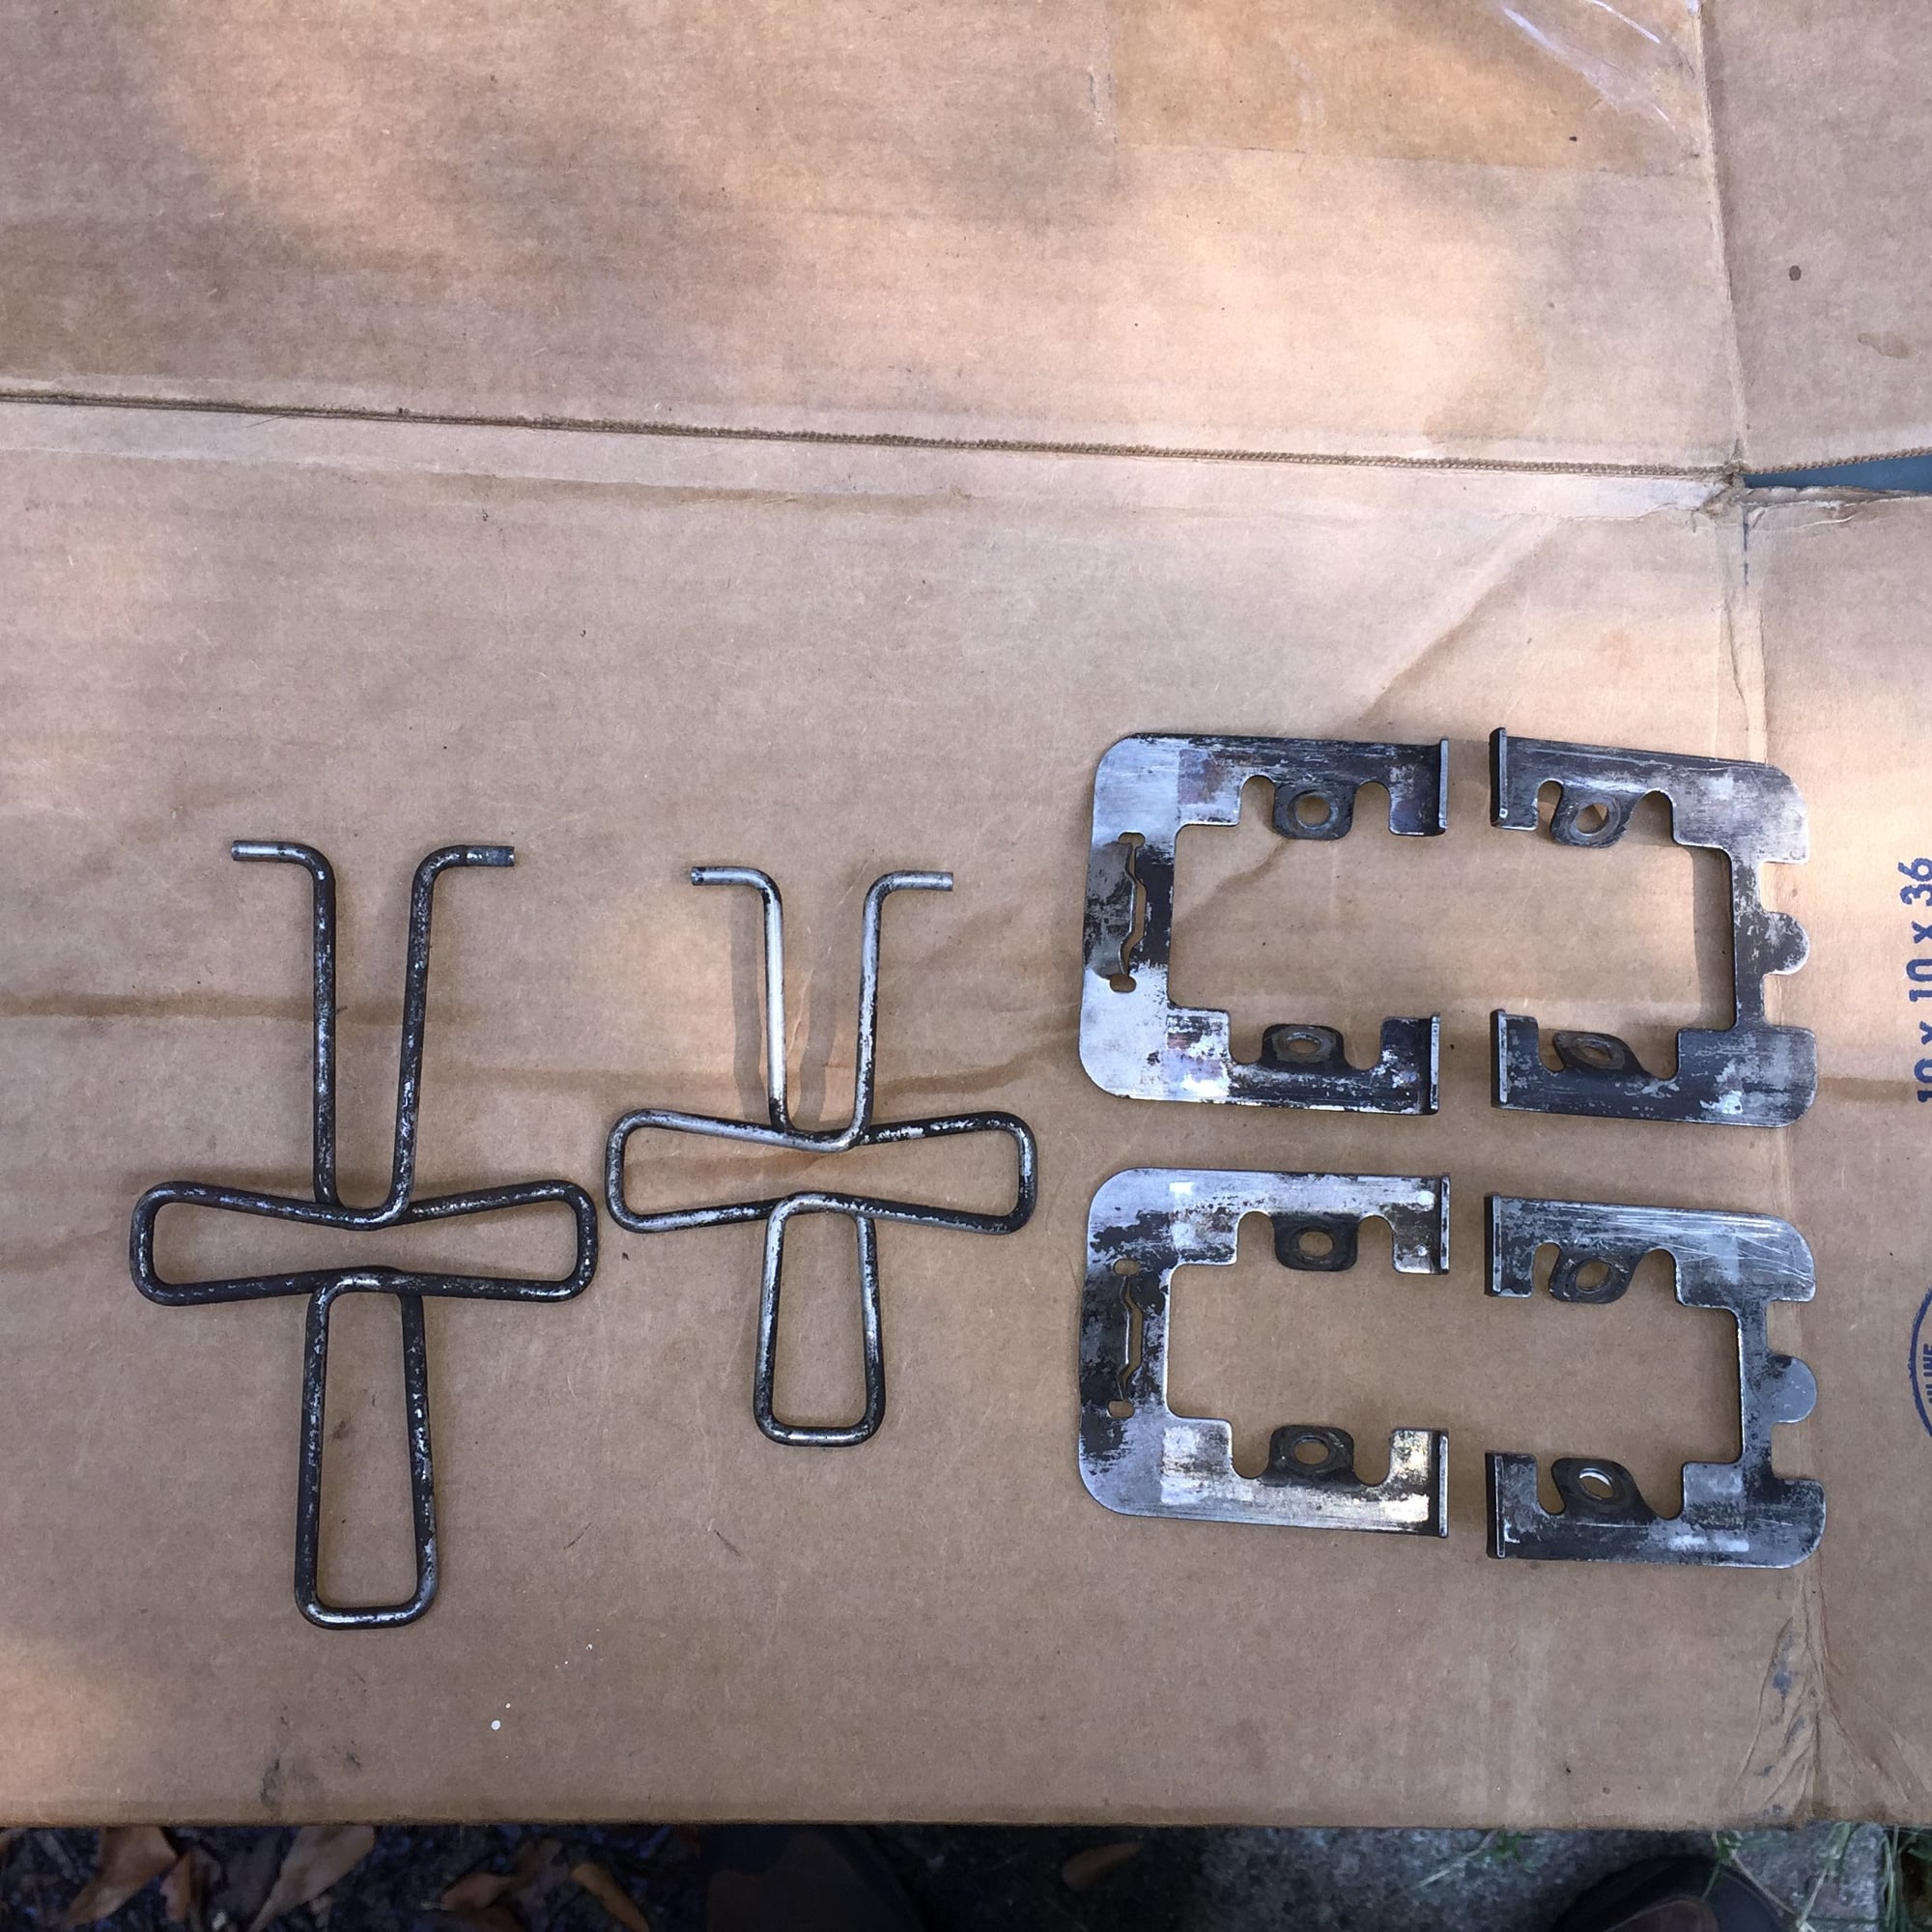
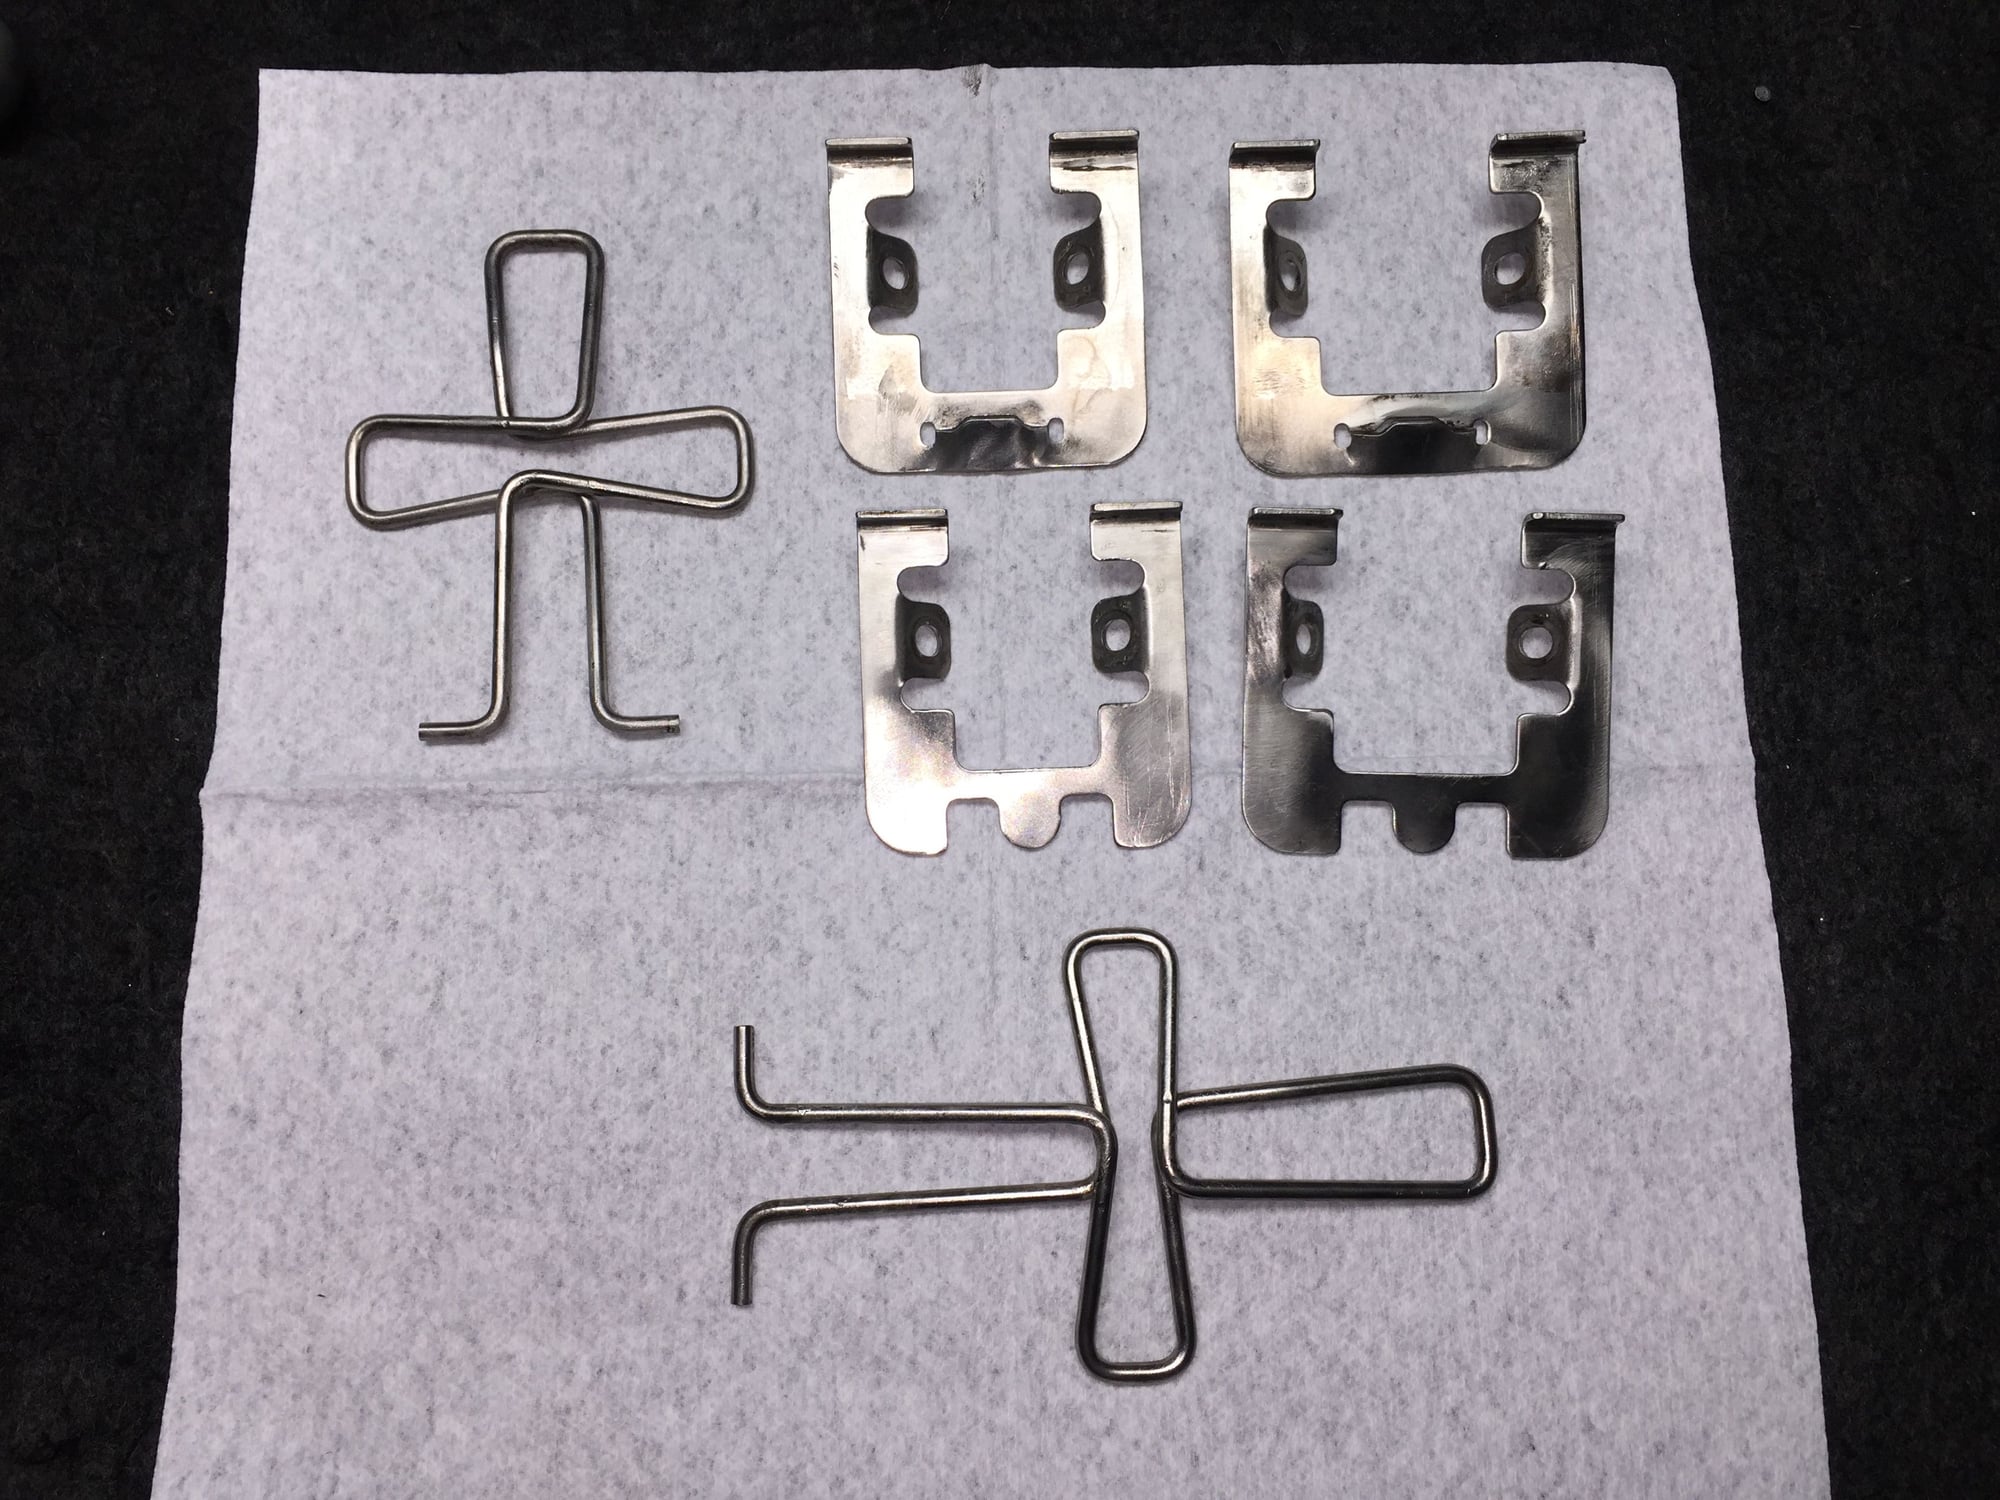
I have been trying various cleaning methods for the stainless steel pad springs and the spring plates on two of the calipers. To some effect.
I have scrubbed them with mineral spirits, they have soaked in the heated parts washer, they have soaked in my heated ultrasonic cleaner, and have soaked in my bucket of carb dip. They are better, but not done.
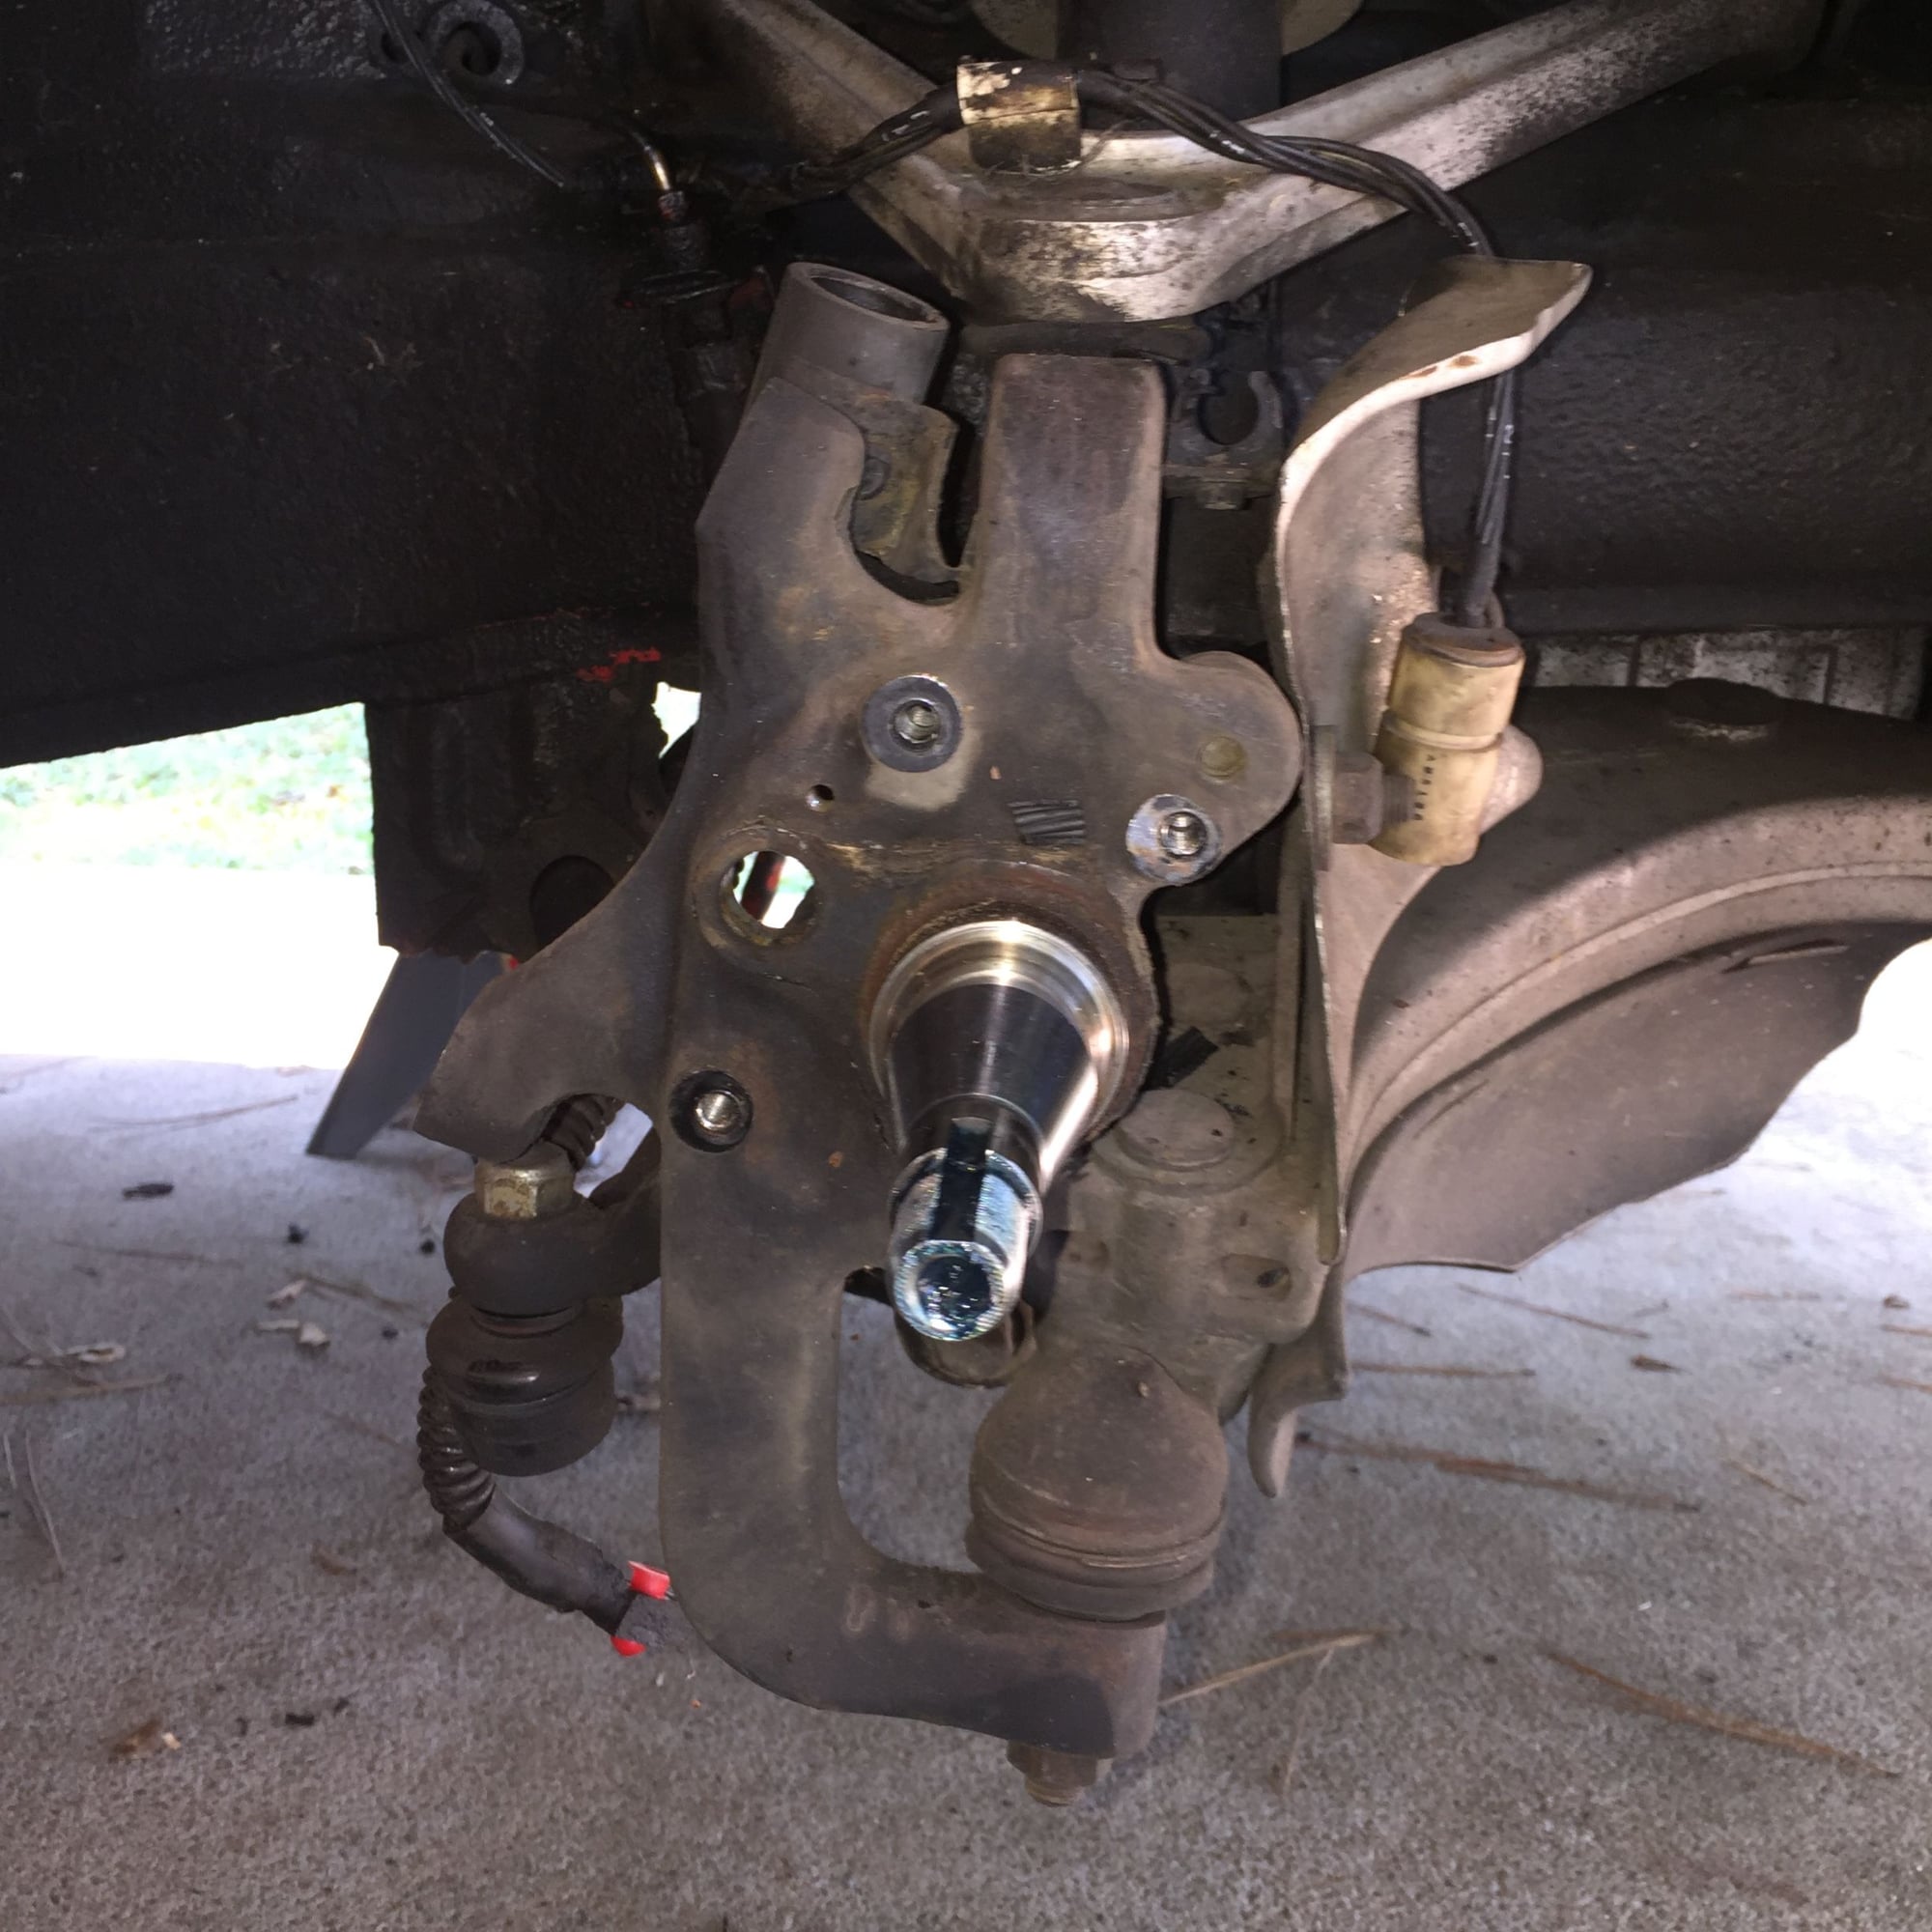
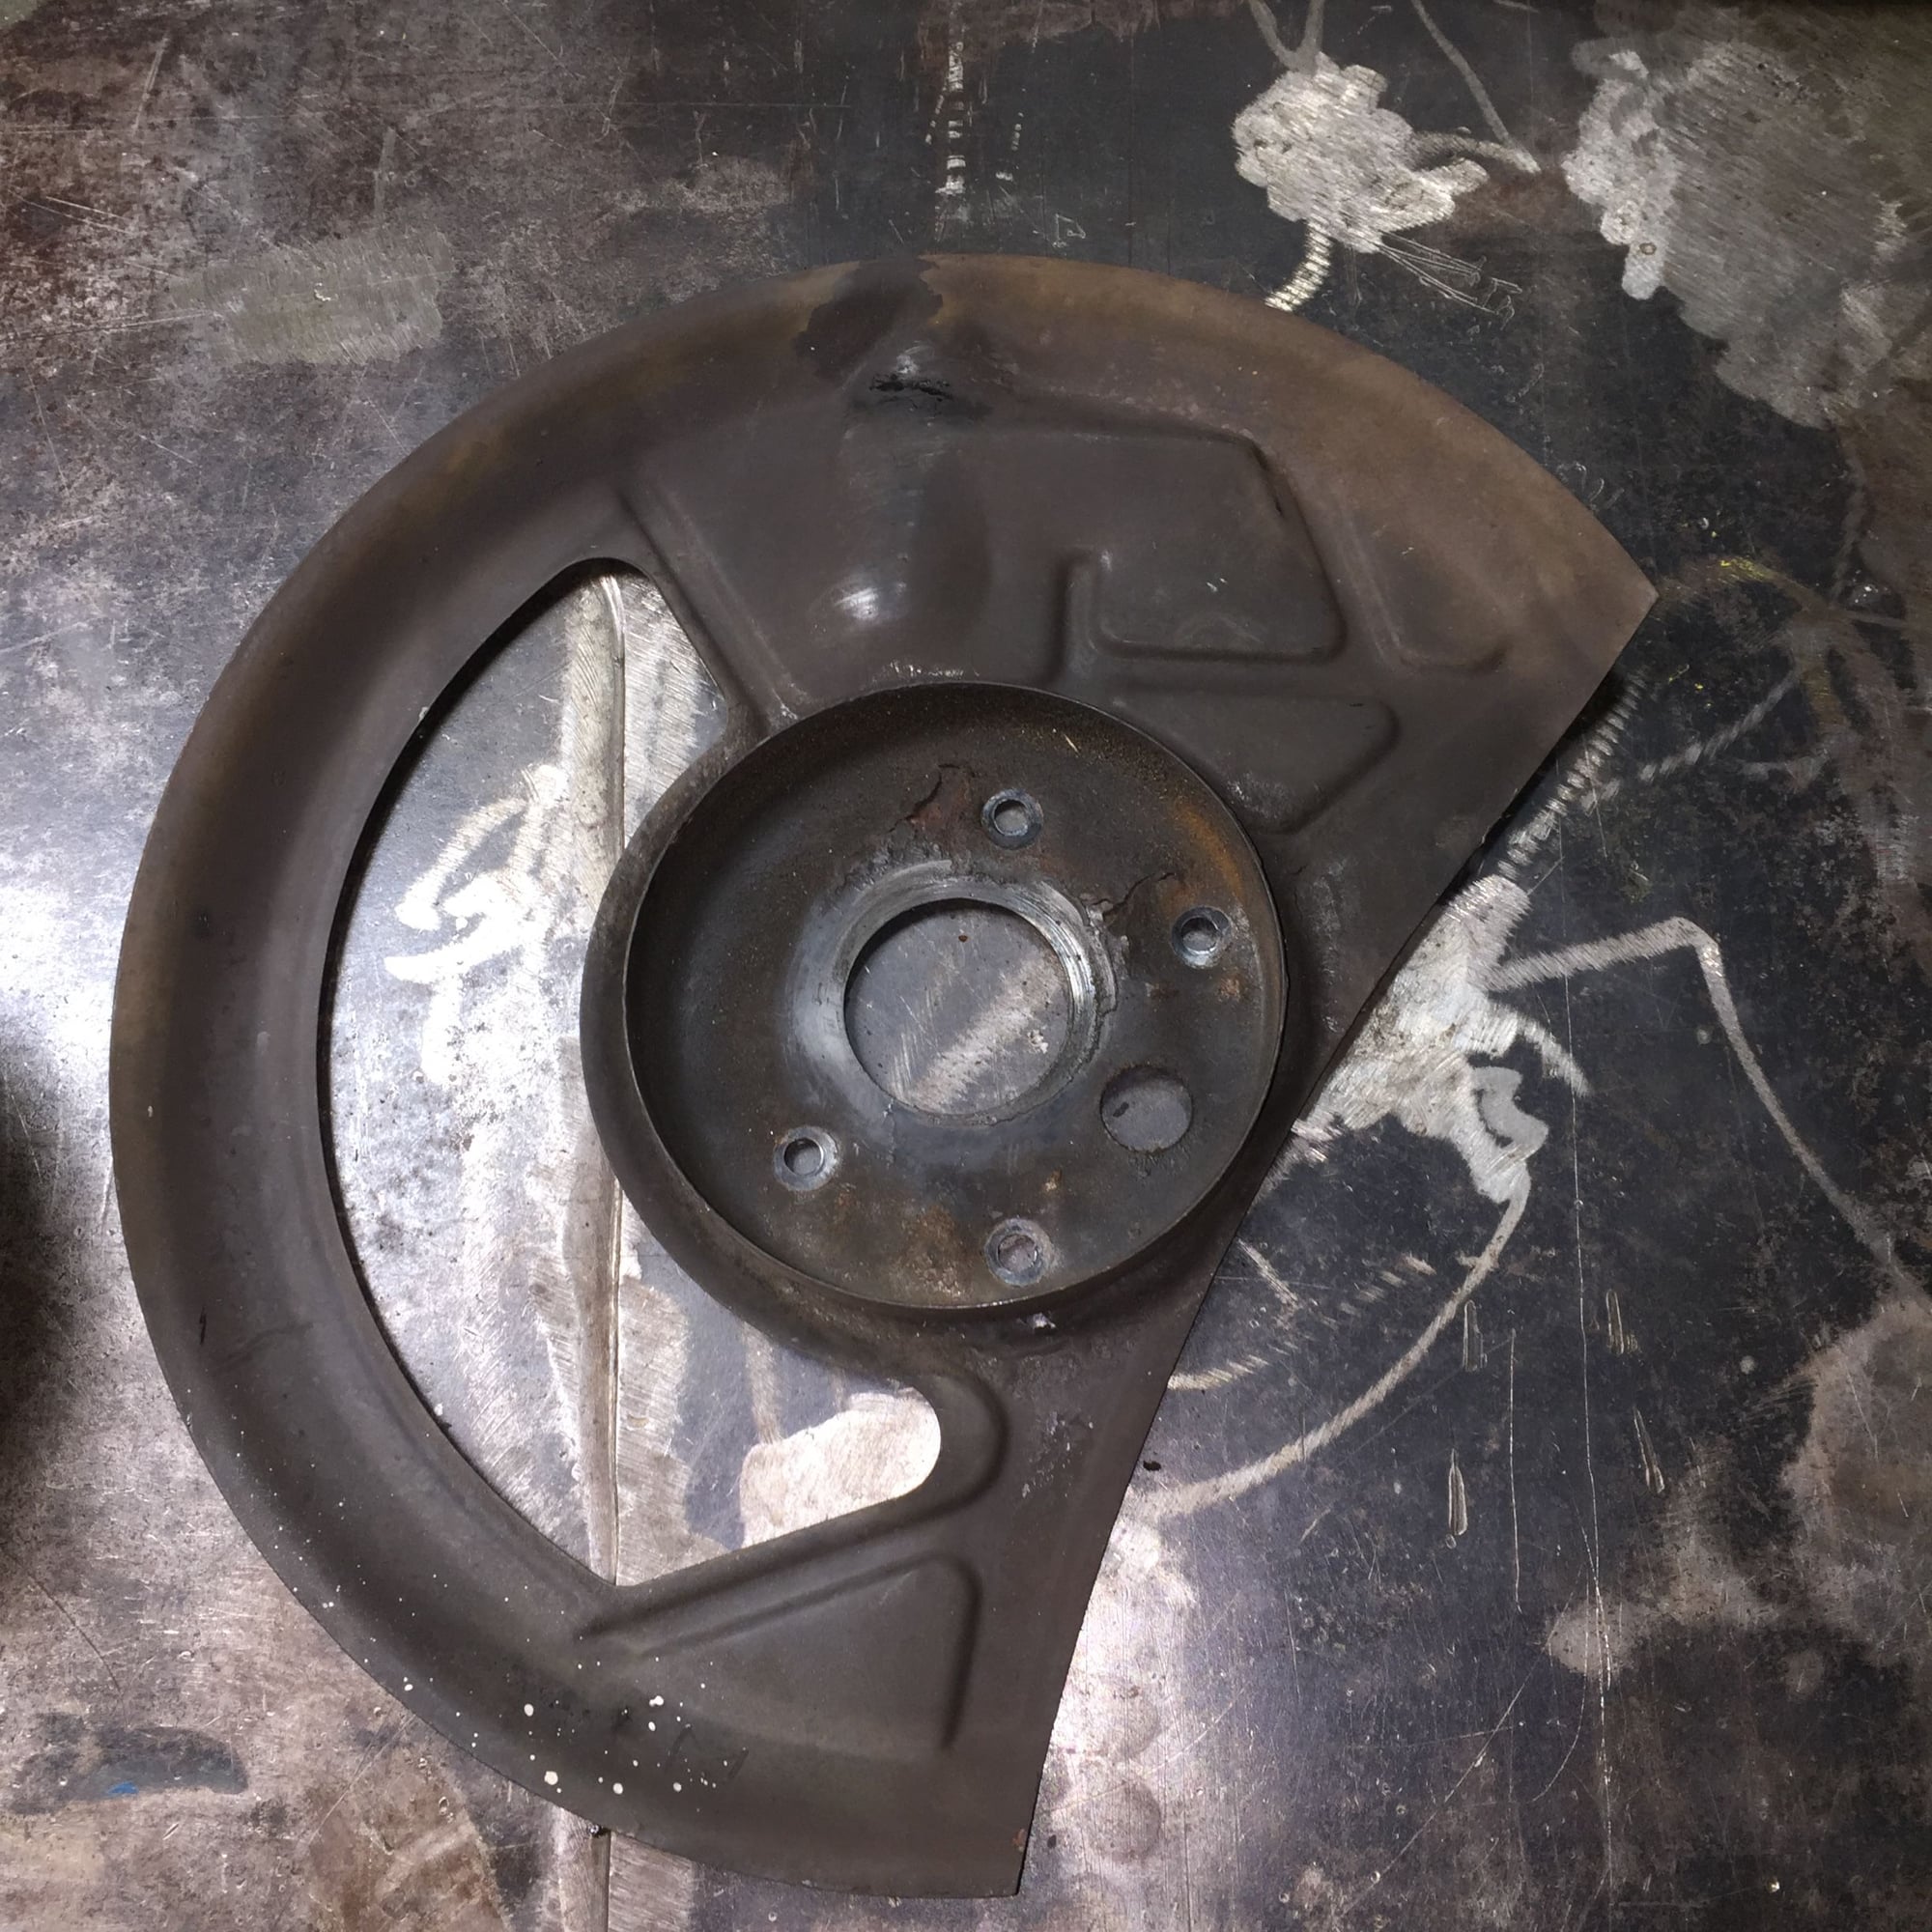
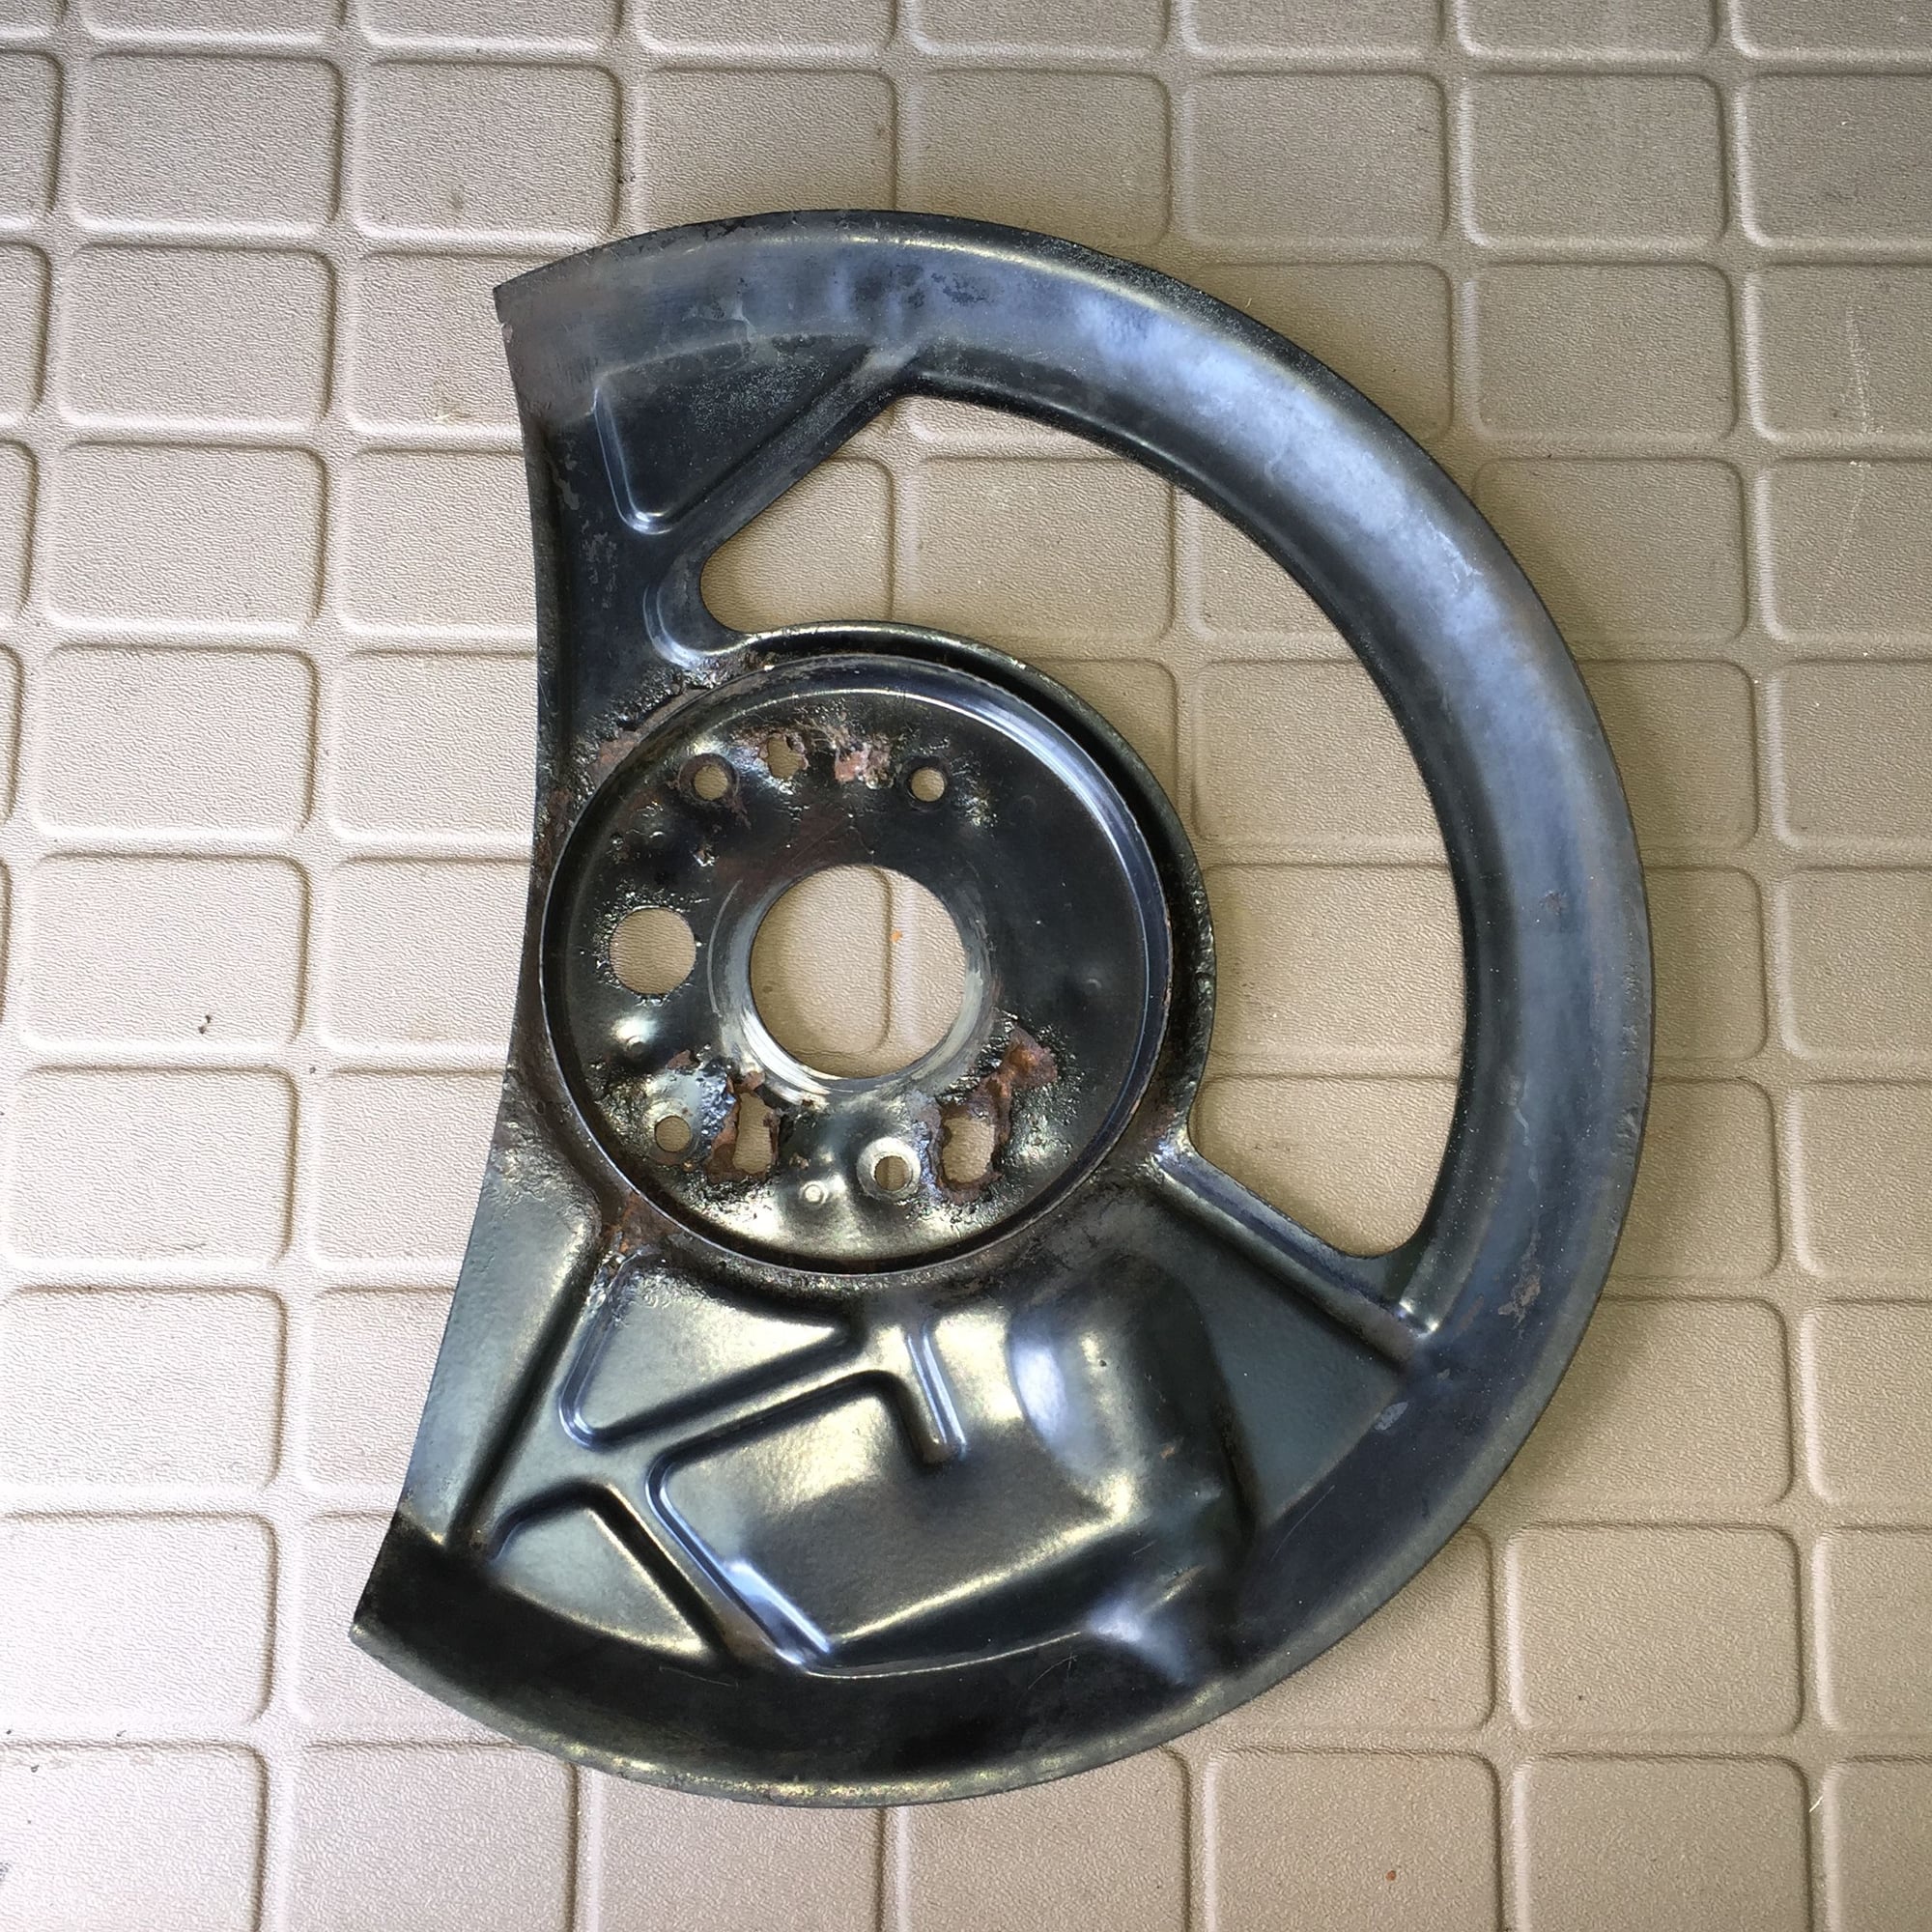
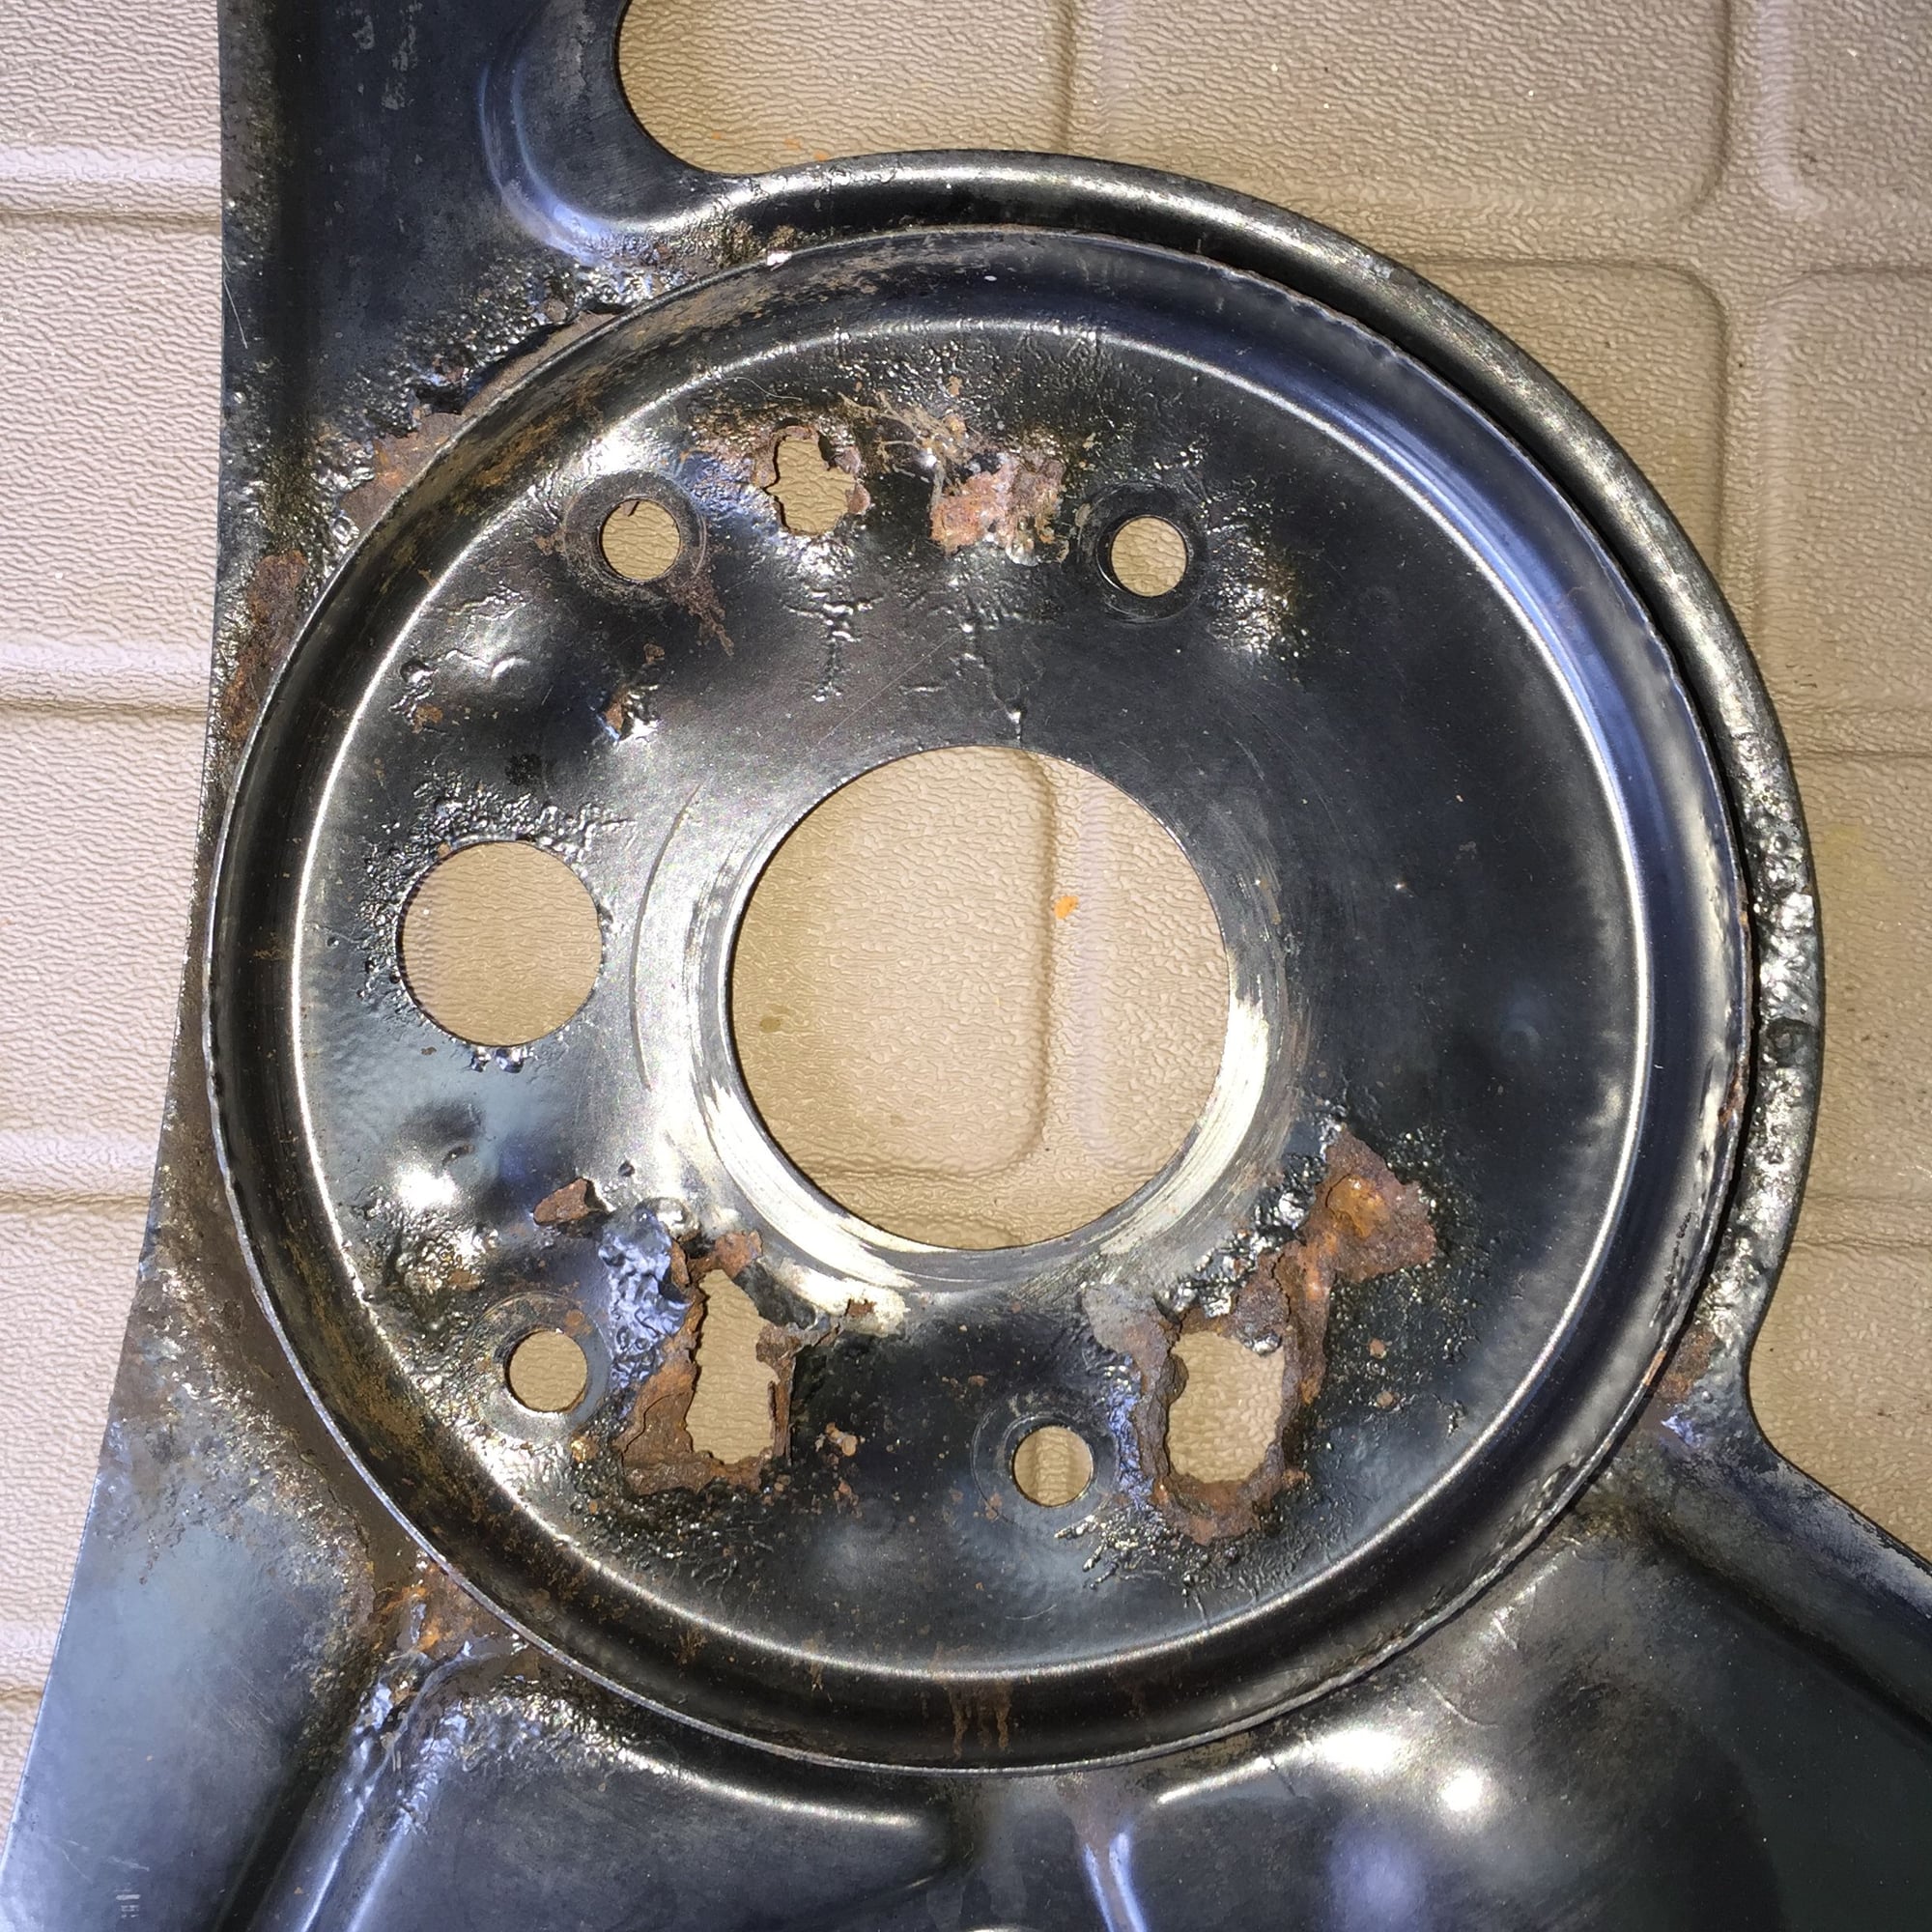
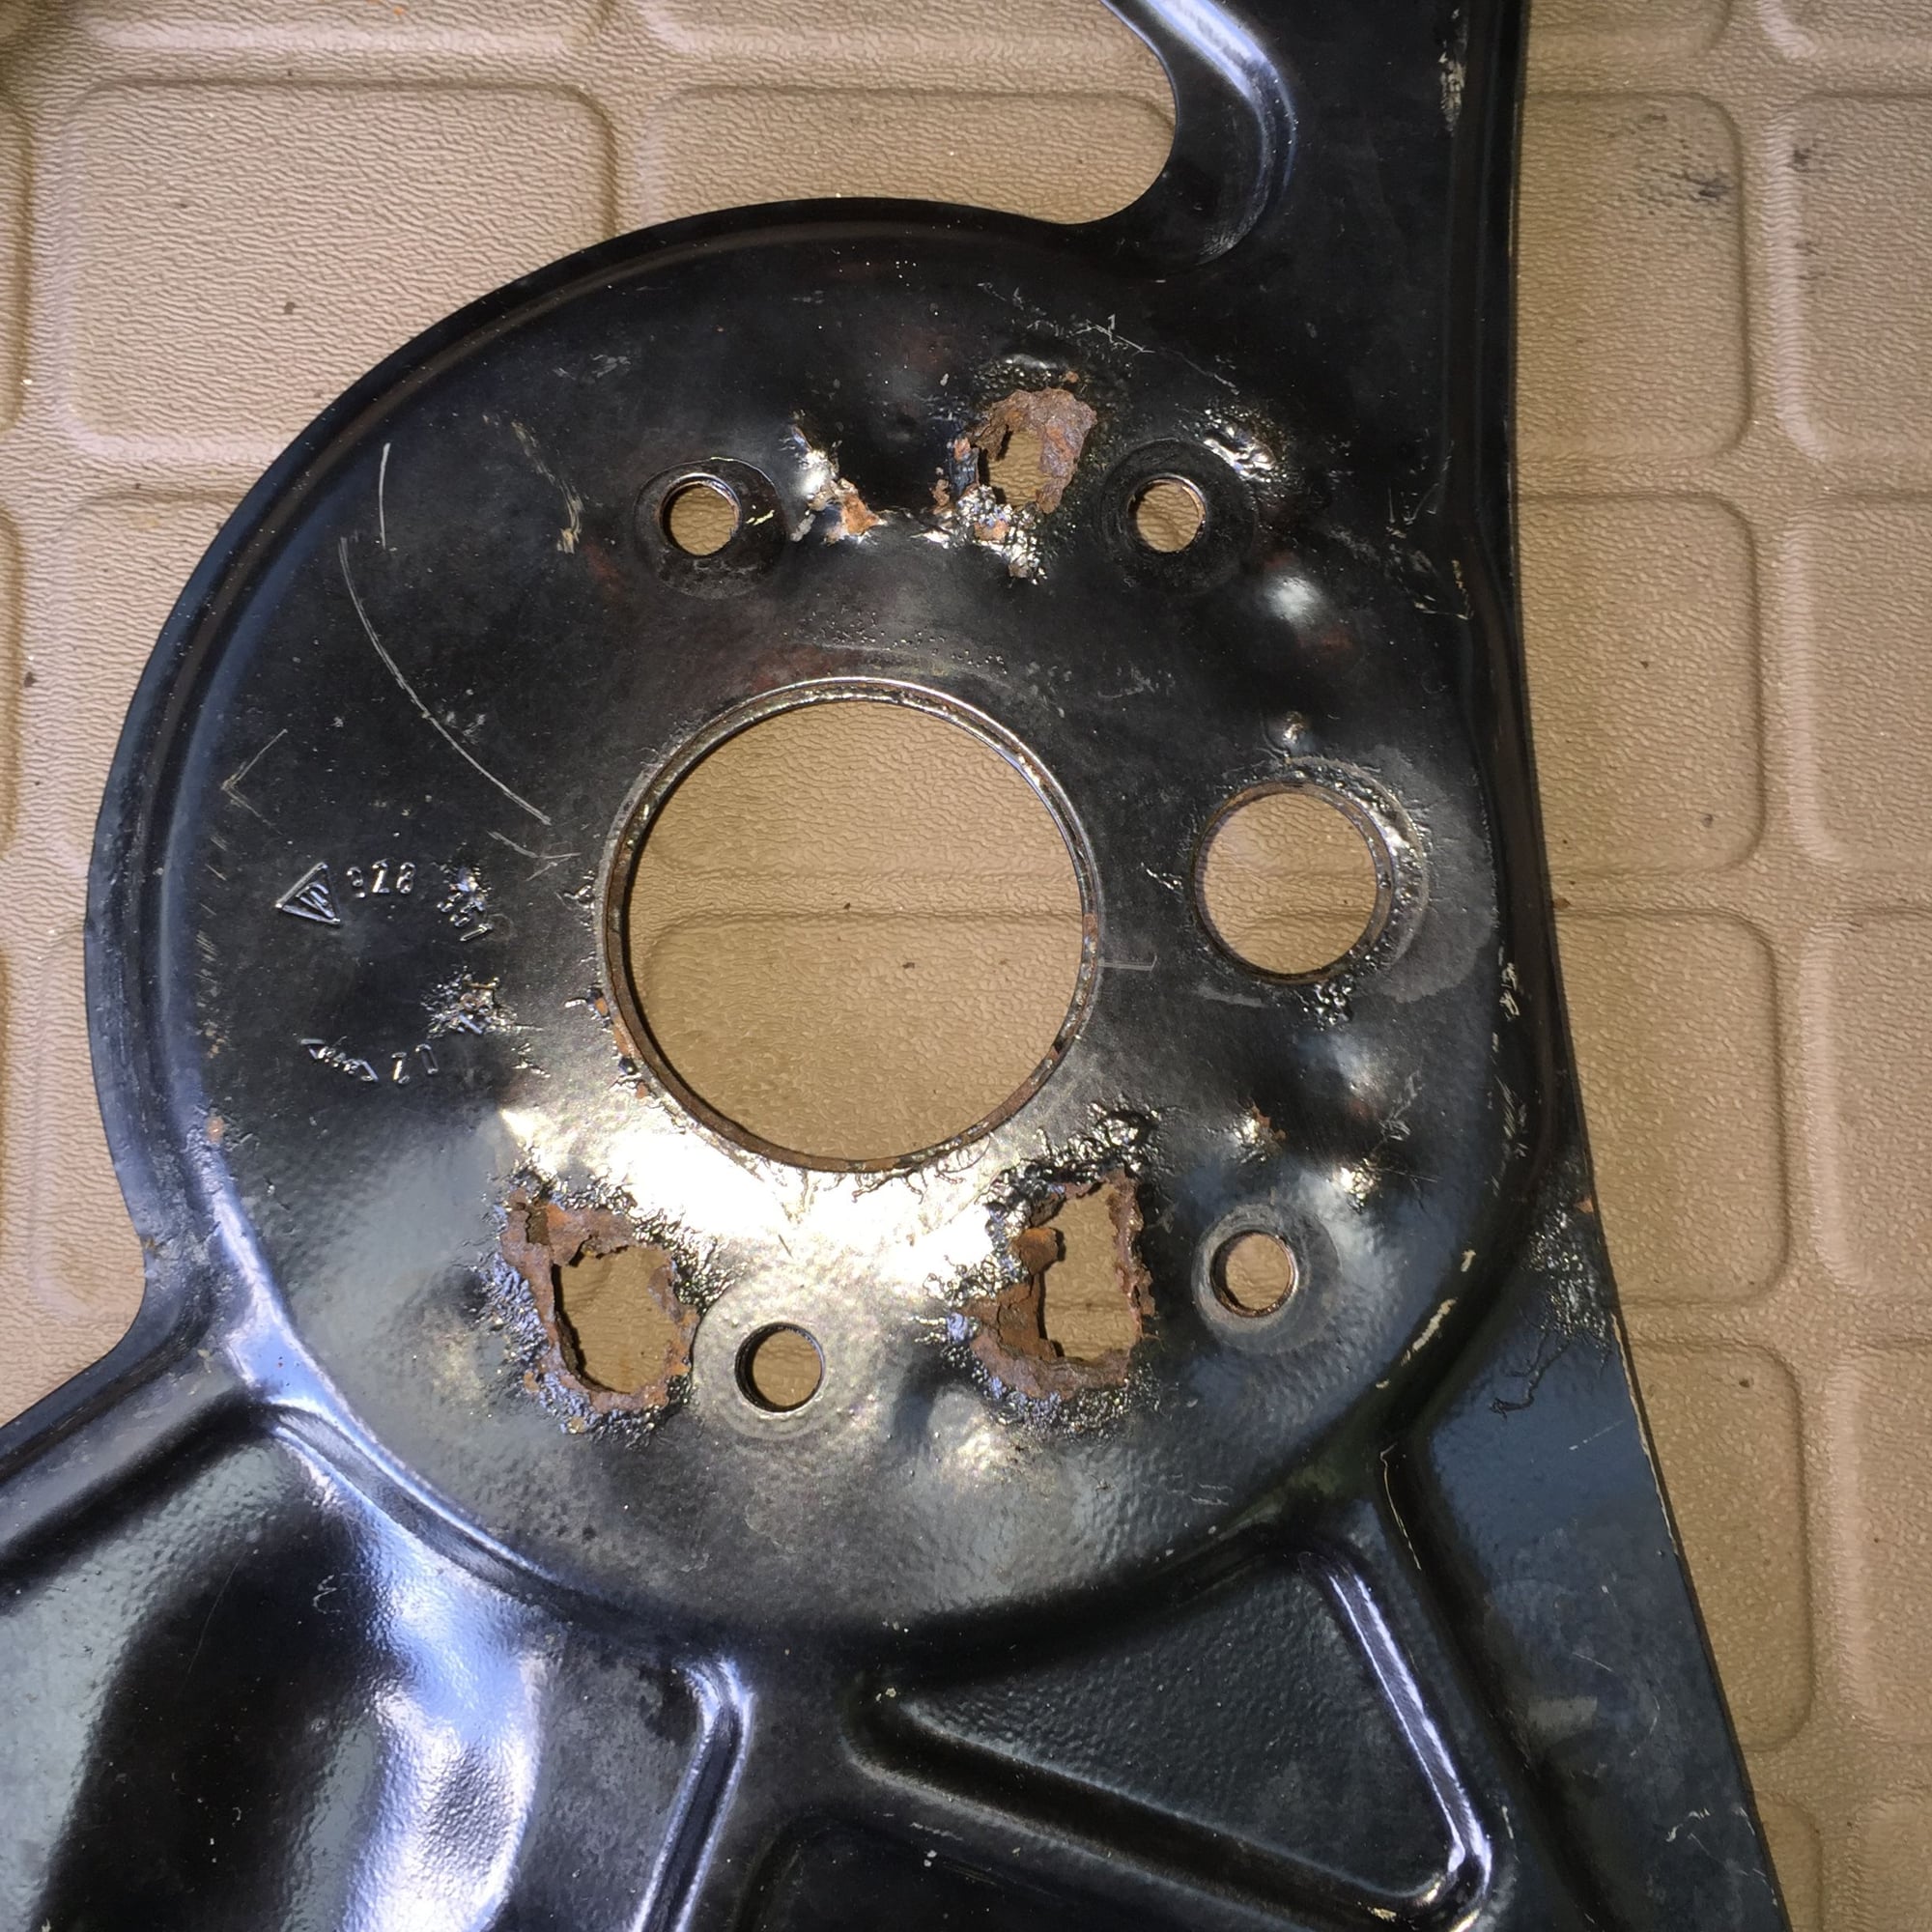
I have removed the passenger's side front wheel hub, bearings, and disc rotor shield. Of course the bearings and grease look fine. The adjustment felt fine, I was able to just move the washer with a screwdriver. Howerver, it was worth it because I found the source of the rubbing noise from the front hub. Rust has formed between the two layers of the disc rotor shield. It has ballooned out, causing the back of the seal to rub. The shields are rusted through. I will once again be on the phone to 928 Intl. for more used parts.
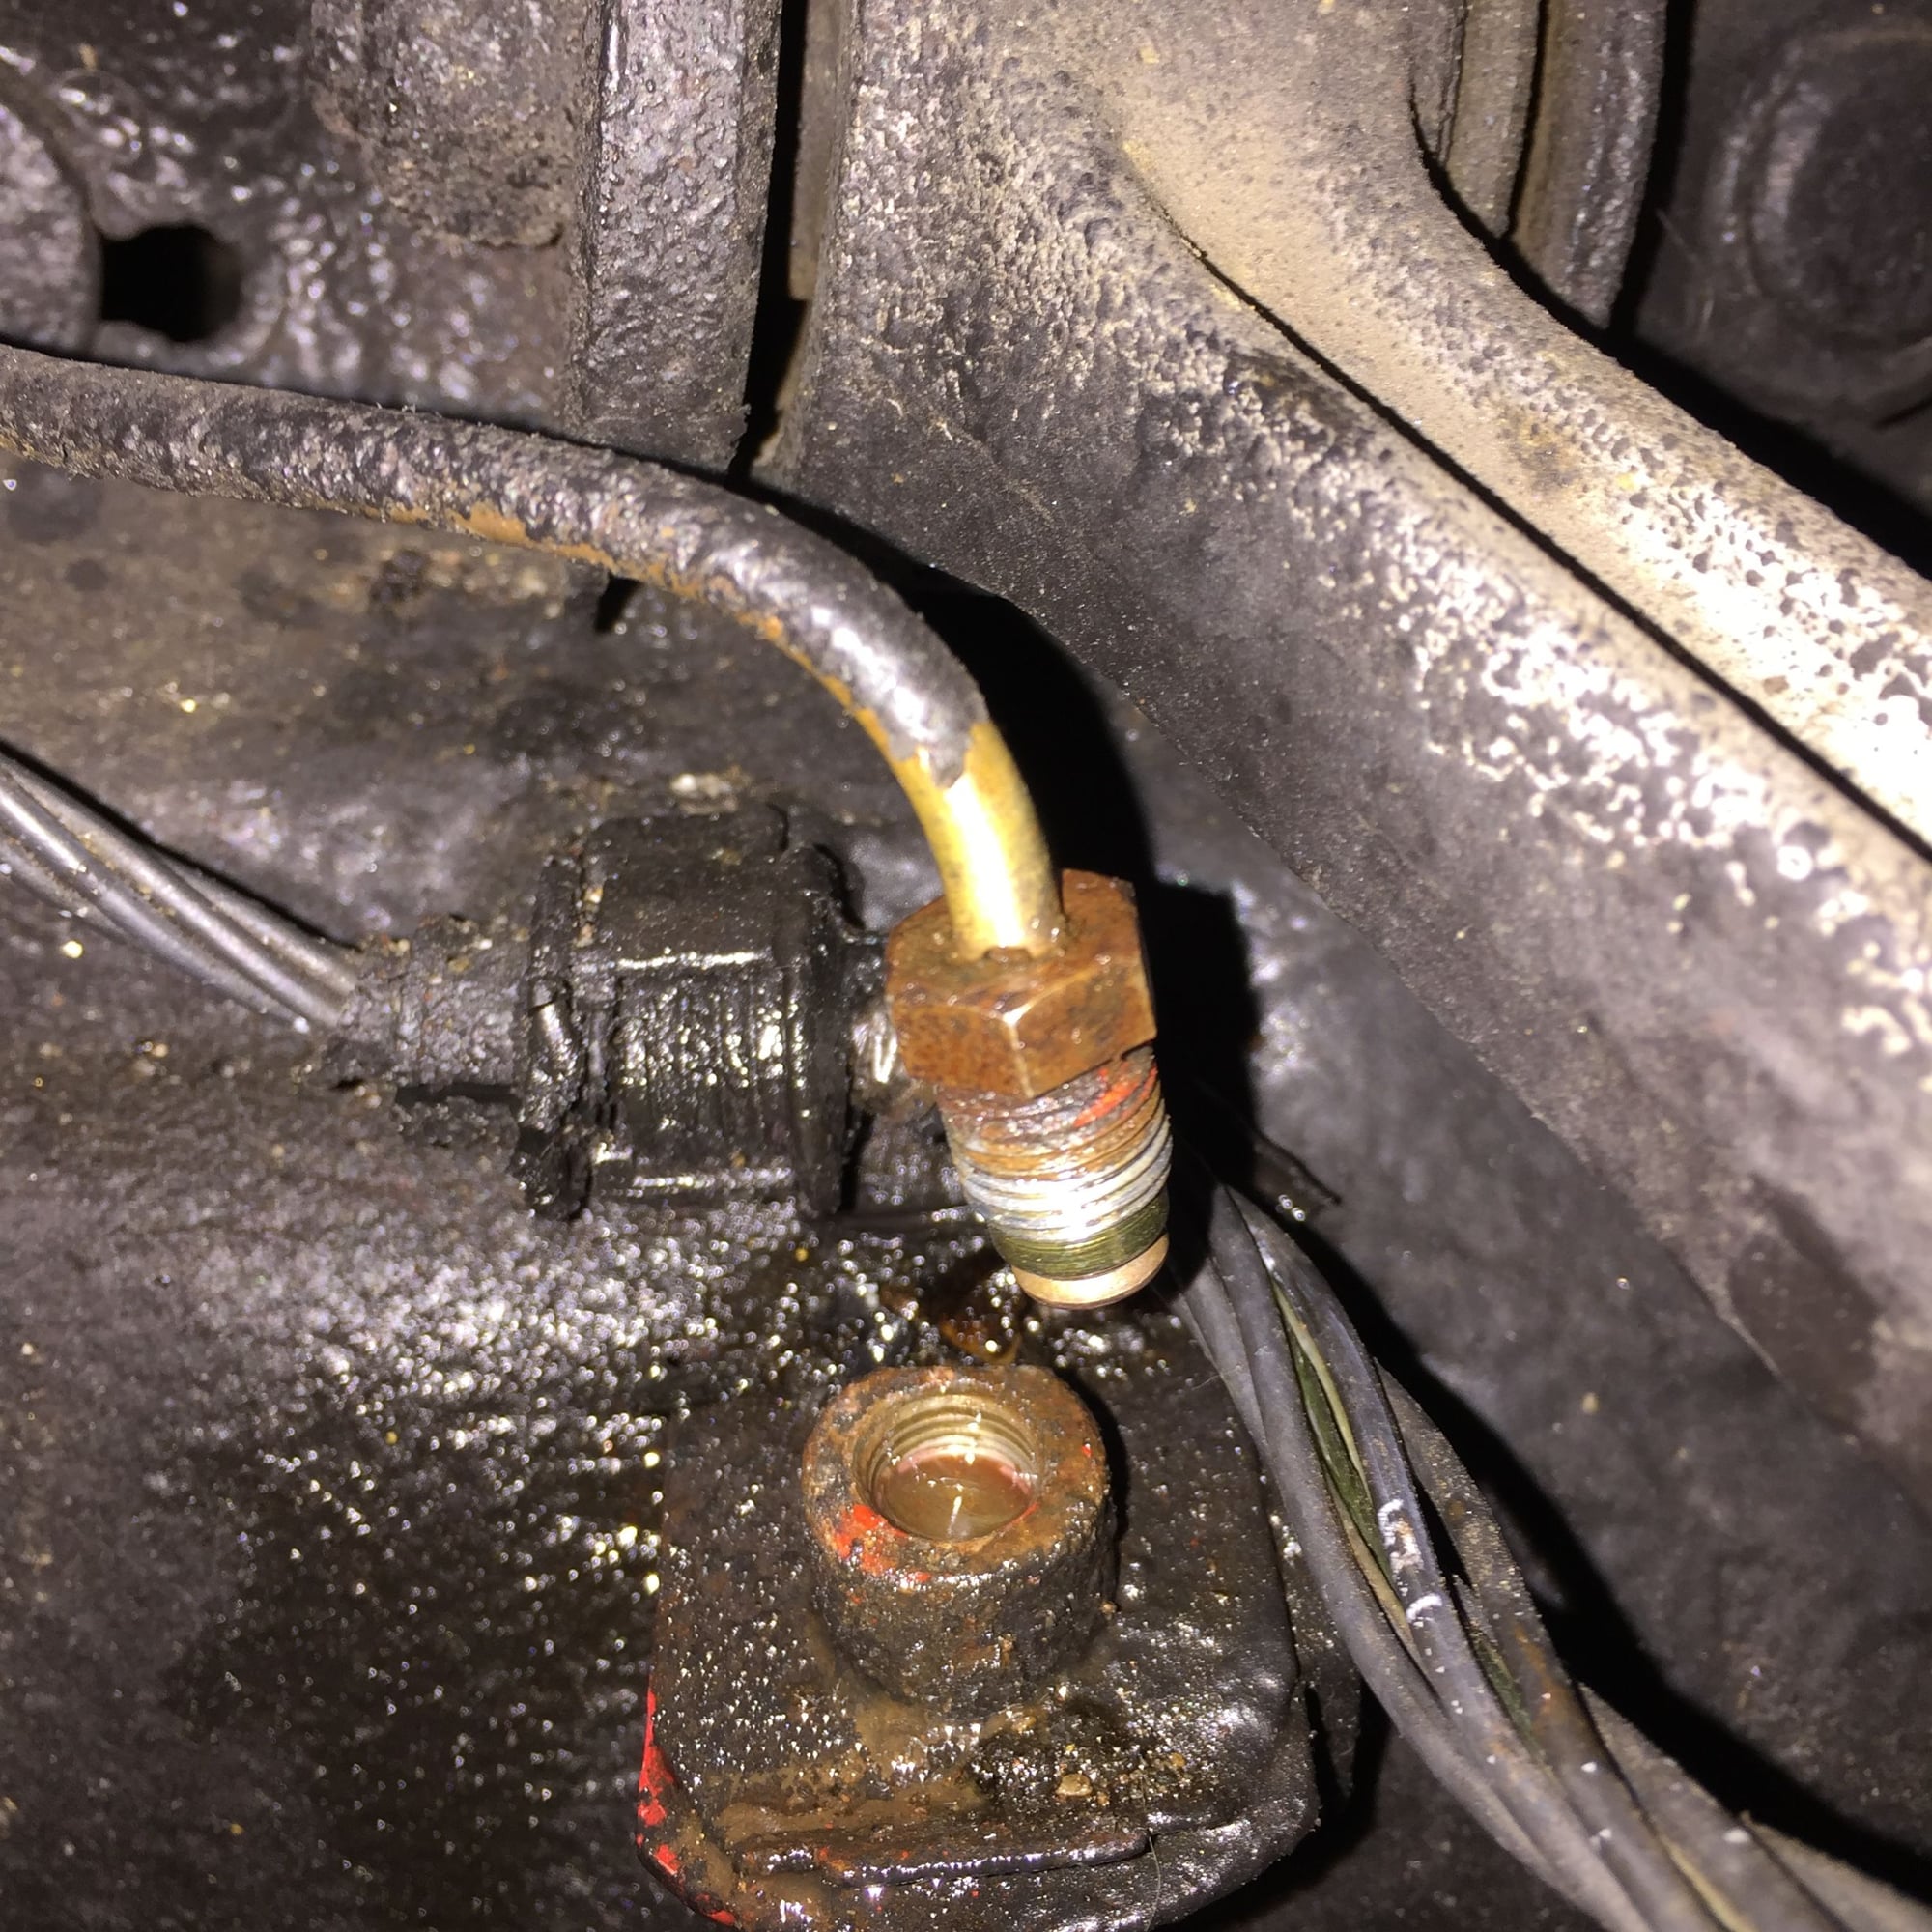
On a good note, I got the passenger's side front brake hose to come free from the hard line, and got the hard line nut to turn.
On a good note, I got the passenger's side front brake hose to come free from the hard line, and got the hard line nut to turn.
Telltale silver on that nut, evidence of the anti-seize that some forward-thinking person used on the threads? I can recommend that you continue the practice, plus add some in the nut around the tube on assembly. The original tube is pretty corrosion-resistant on its own, but the steel nuts will rust (and swell...) enough to damage the relatively soft tube next time they need to come apart.
Replacement tubing used to come with yellow cad plating on the nuts, while the newest ones are gray zinc that doesn't last as long. Worth keeping a casual eye out for old stock on local vendors' sales racks as you are out and about.
I'm not sure the protocol for hardline sections that have been sprayed with undercoating. Maybe a little solvent, then maybe some paint stripper if the solvent doesn't work? Fun stuff!
Any anti-seize on the brake lines will definitely be replaced. This is my first Porsche, but the next in a long line of brake lines I have worked with. Not only am I going to apply anti-seize, I am kicking around a few ideas on how to encapsulate said anti-seize. Meaning put a coating over it to keep road debris/water off of it. In the past, with clean brake lines and fittings, I have coated the outside of the flare and tube under the nut, then sprayed a generous coating of disc brake quiet on the whole shebang. Messy and ugly, but it kept the joint sealed.
Not sure if that will work here or not. Still thinking...
Good to know about older hard line. I will keep my eyes peeled.
As for the undercoating, it is becoming a head ache. I have pulled it off in sheets from the back of the car, and starting to in the wheel wells. I am probably going to start with mineral spirits and a toothbrush for the hard lines, then move up to a brass bristle brush. We shall see.
I have cleaned up two sets of spring plates and springs. I used a fine green roloc pad on the plates and a stainless steel wire wheel on a rotary tool for the springs. They came out quite well. However, I am kicking around the idea of soda blasting the spring plates to see what it does to the surface texture.
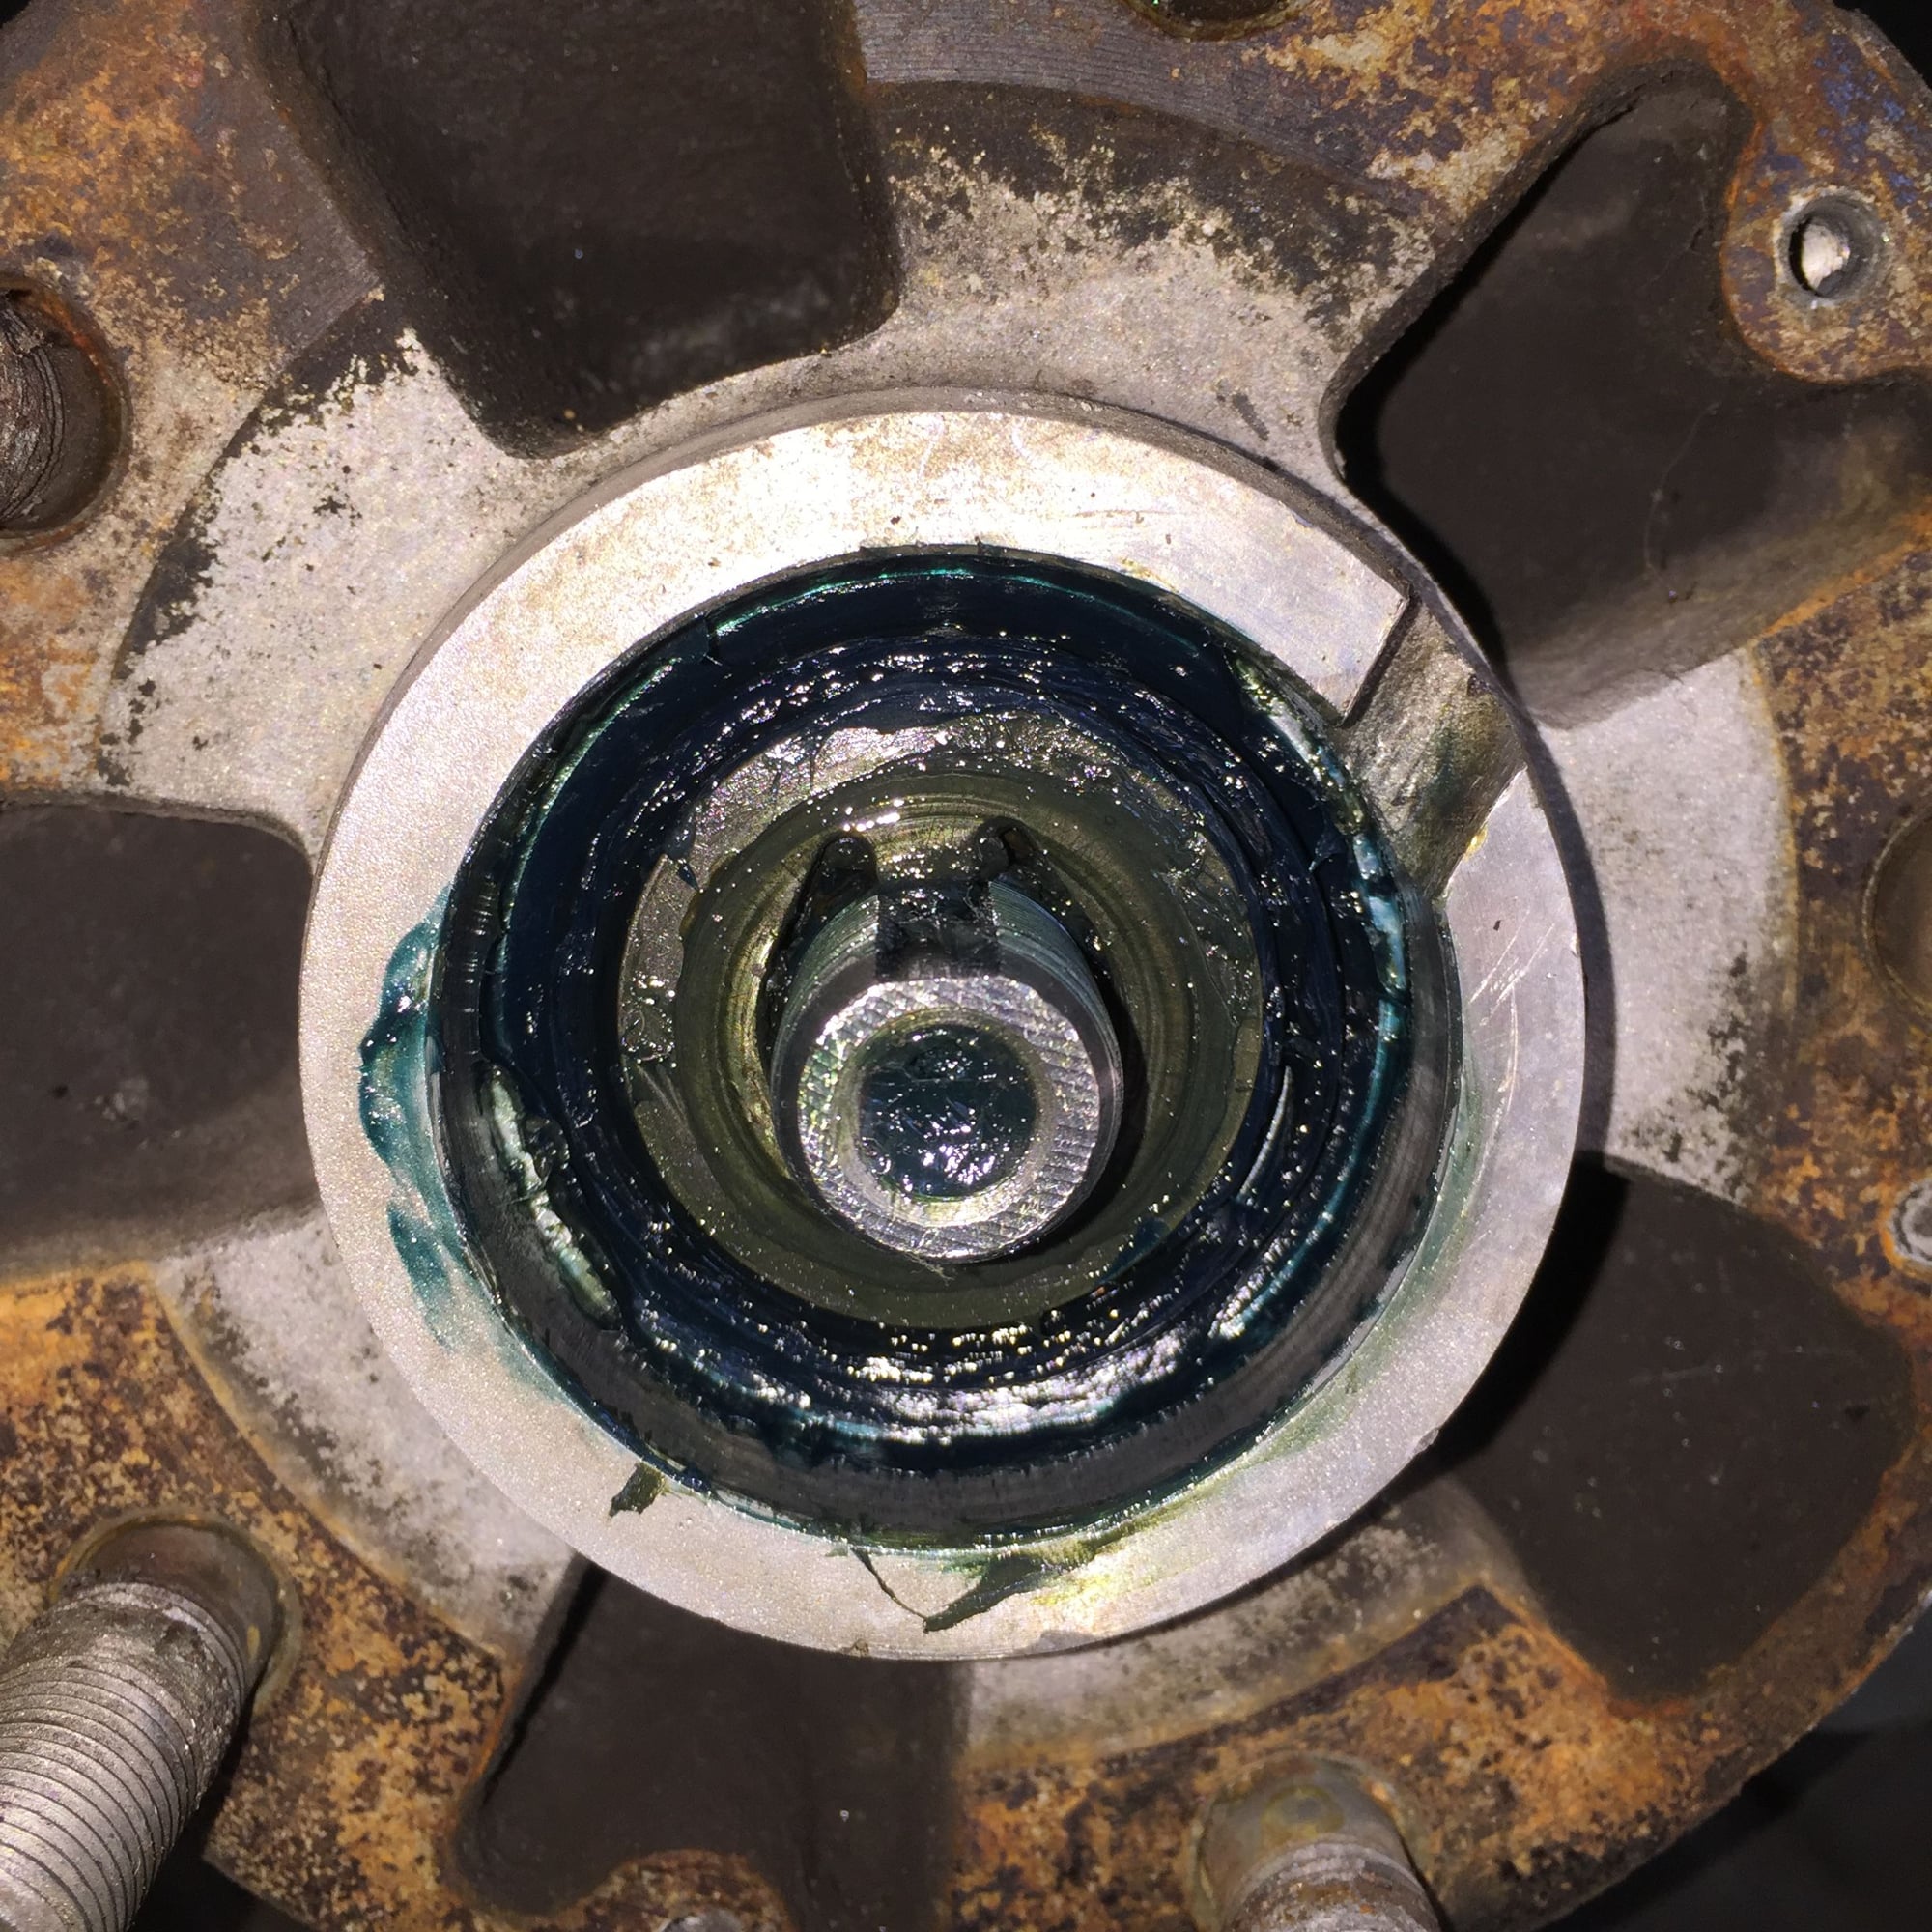
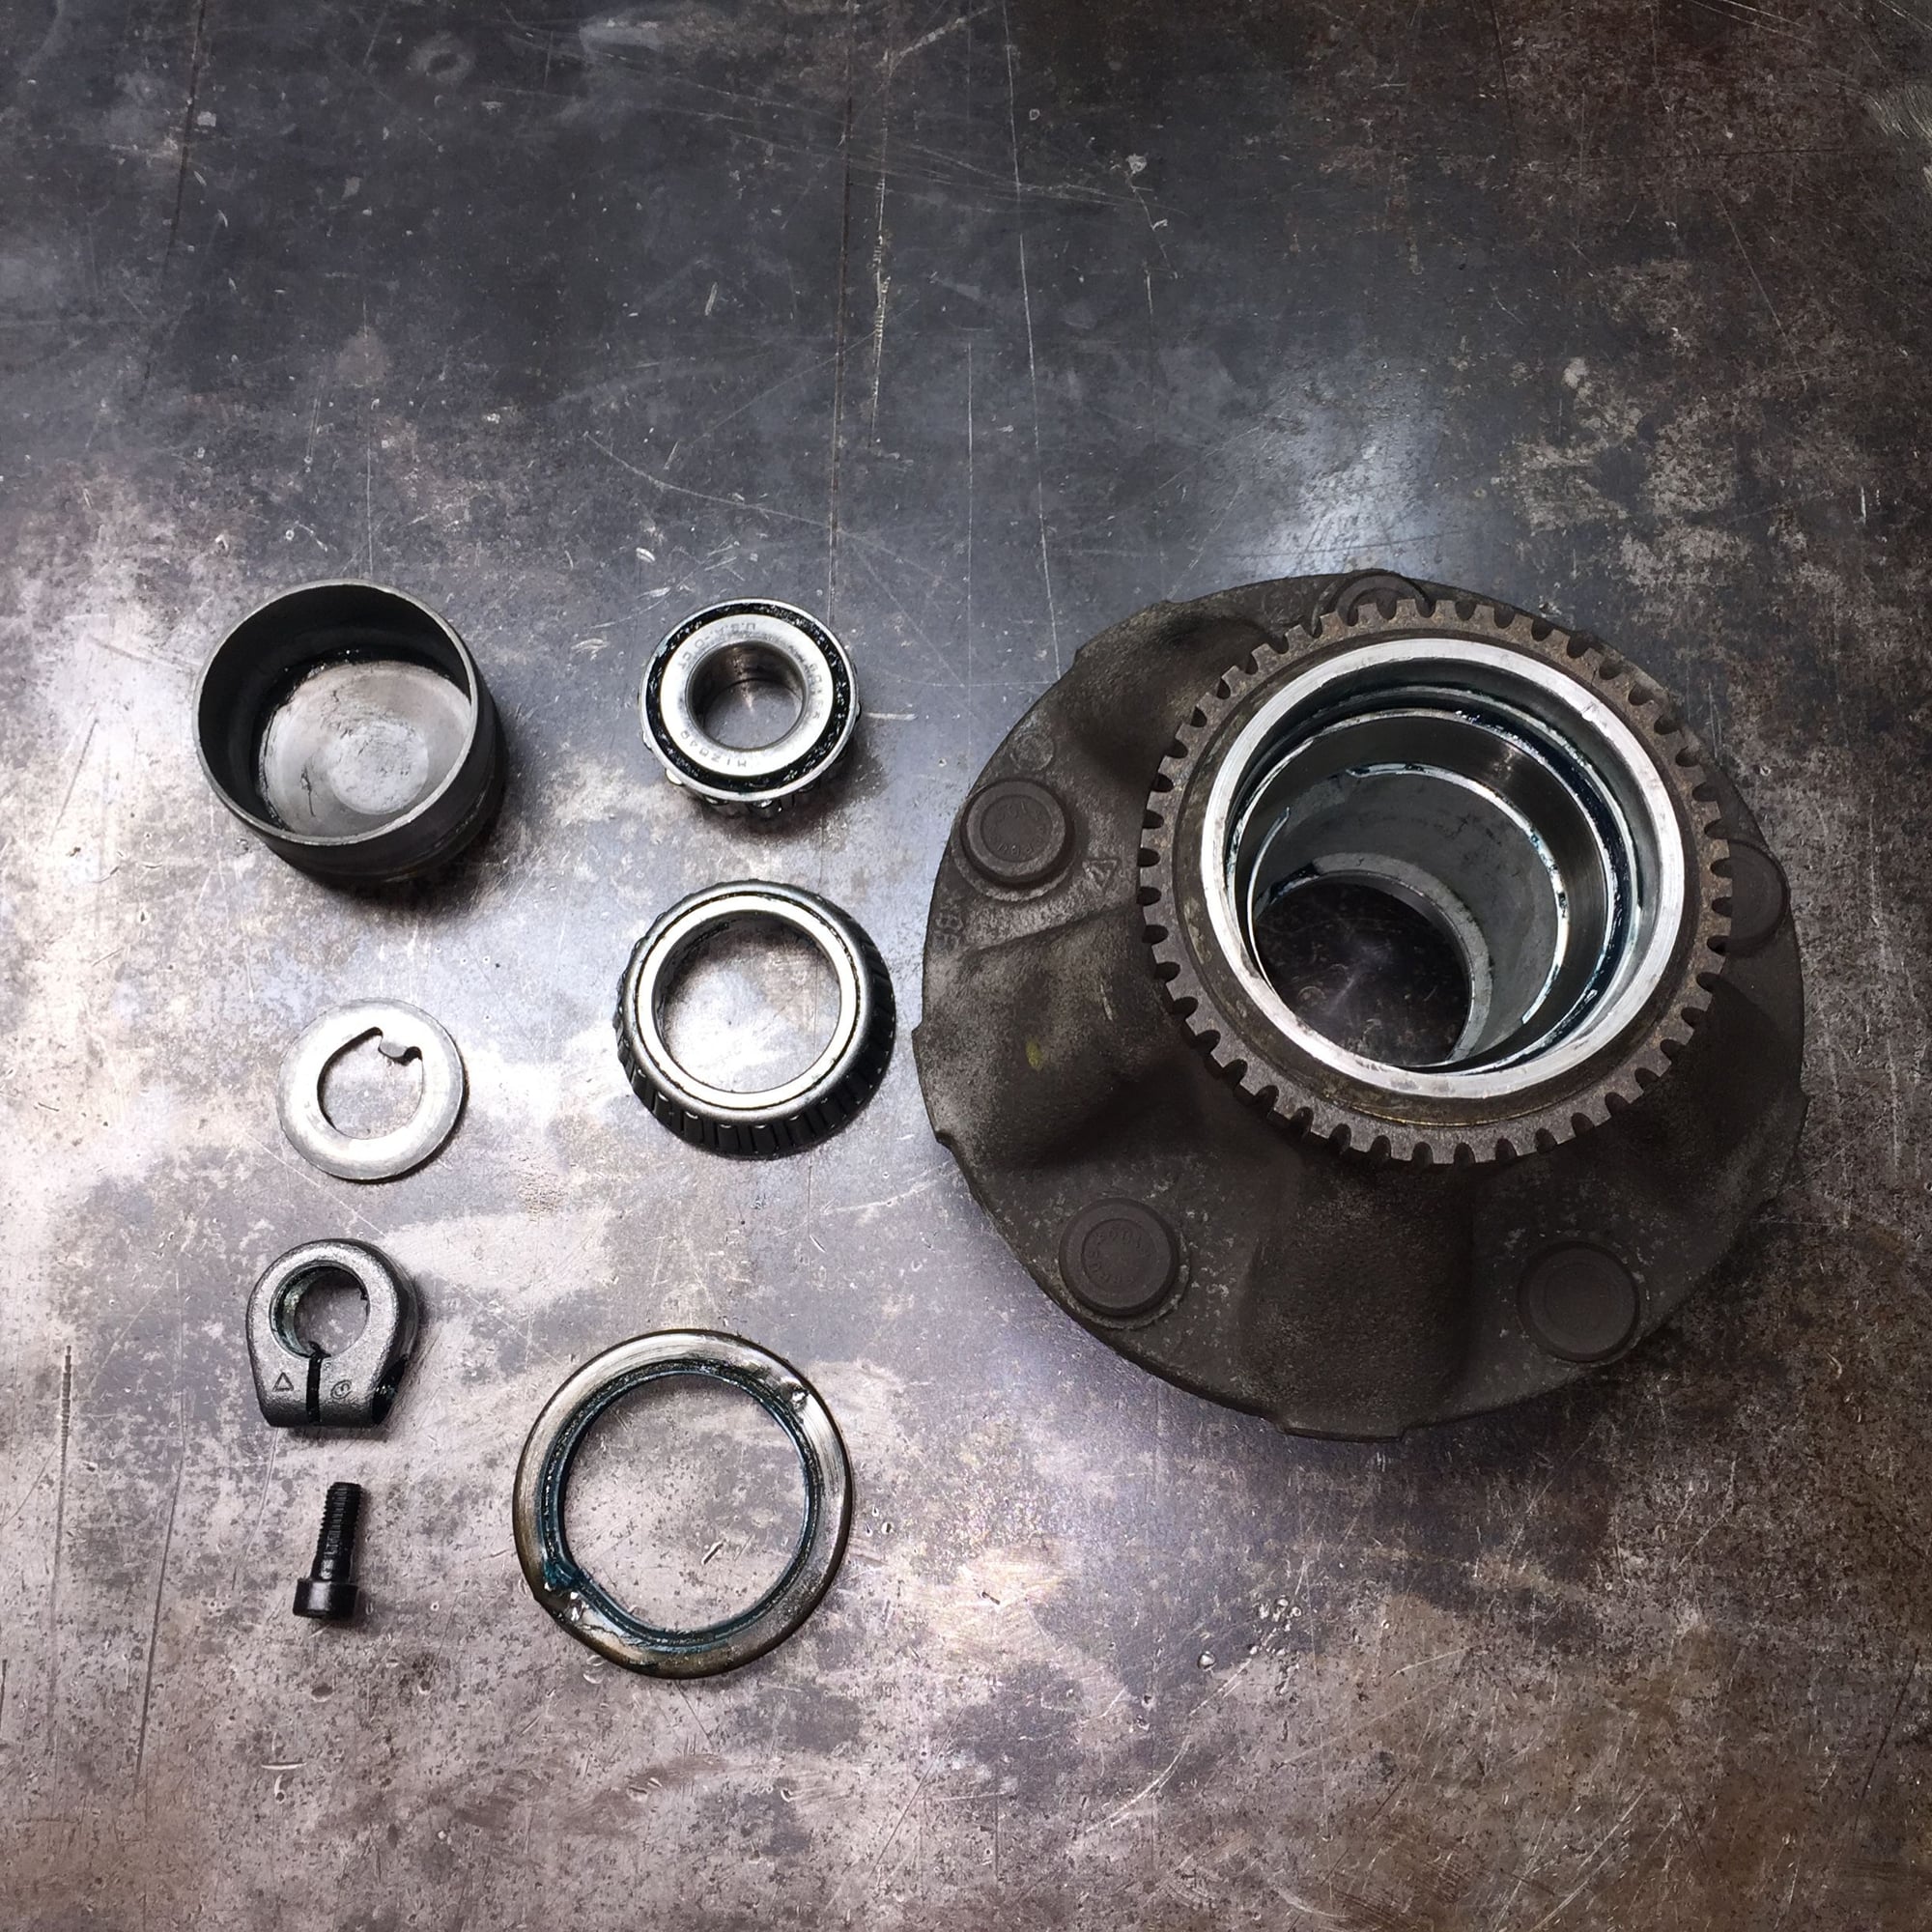
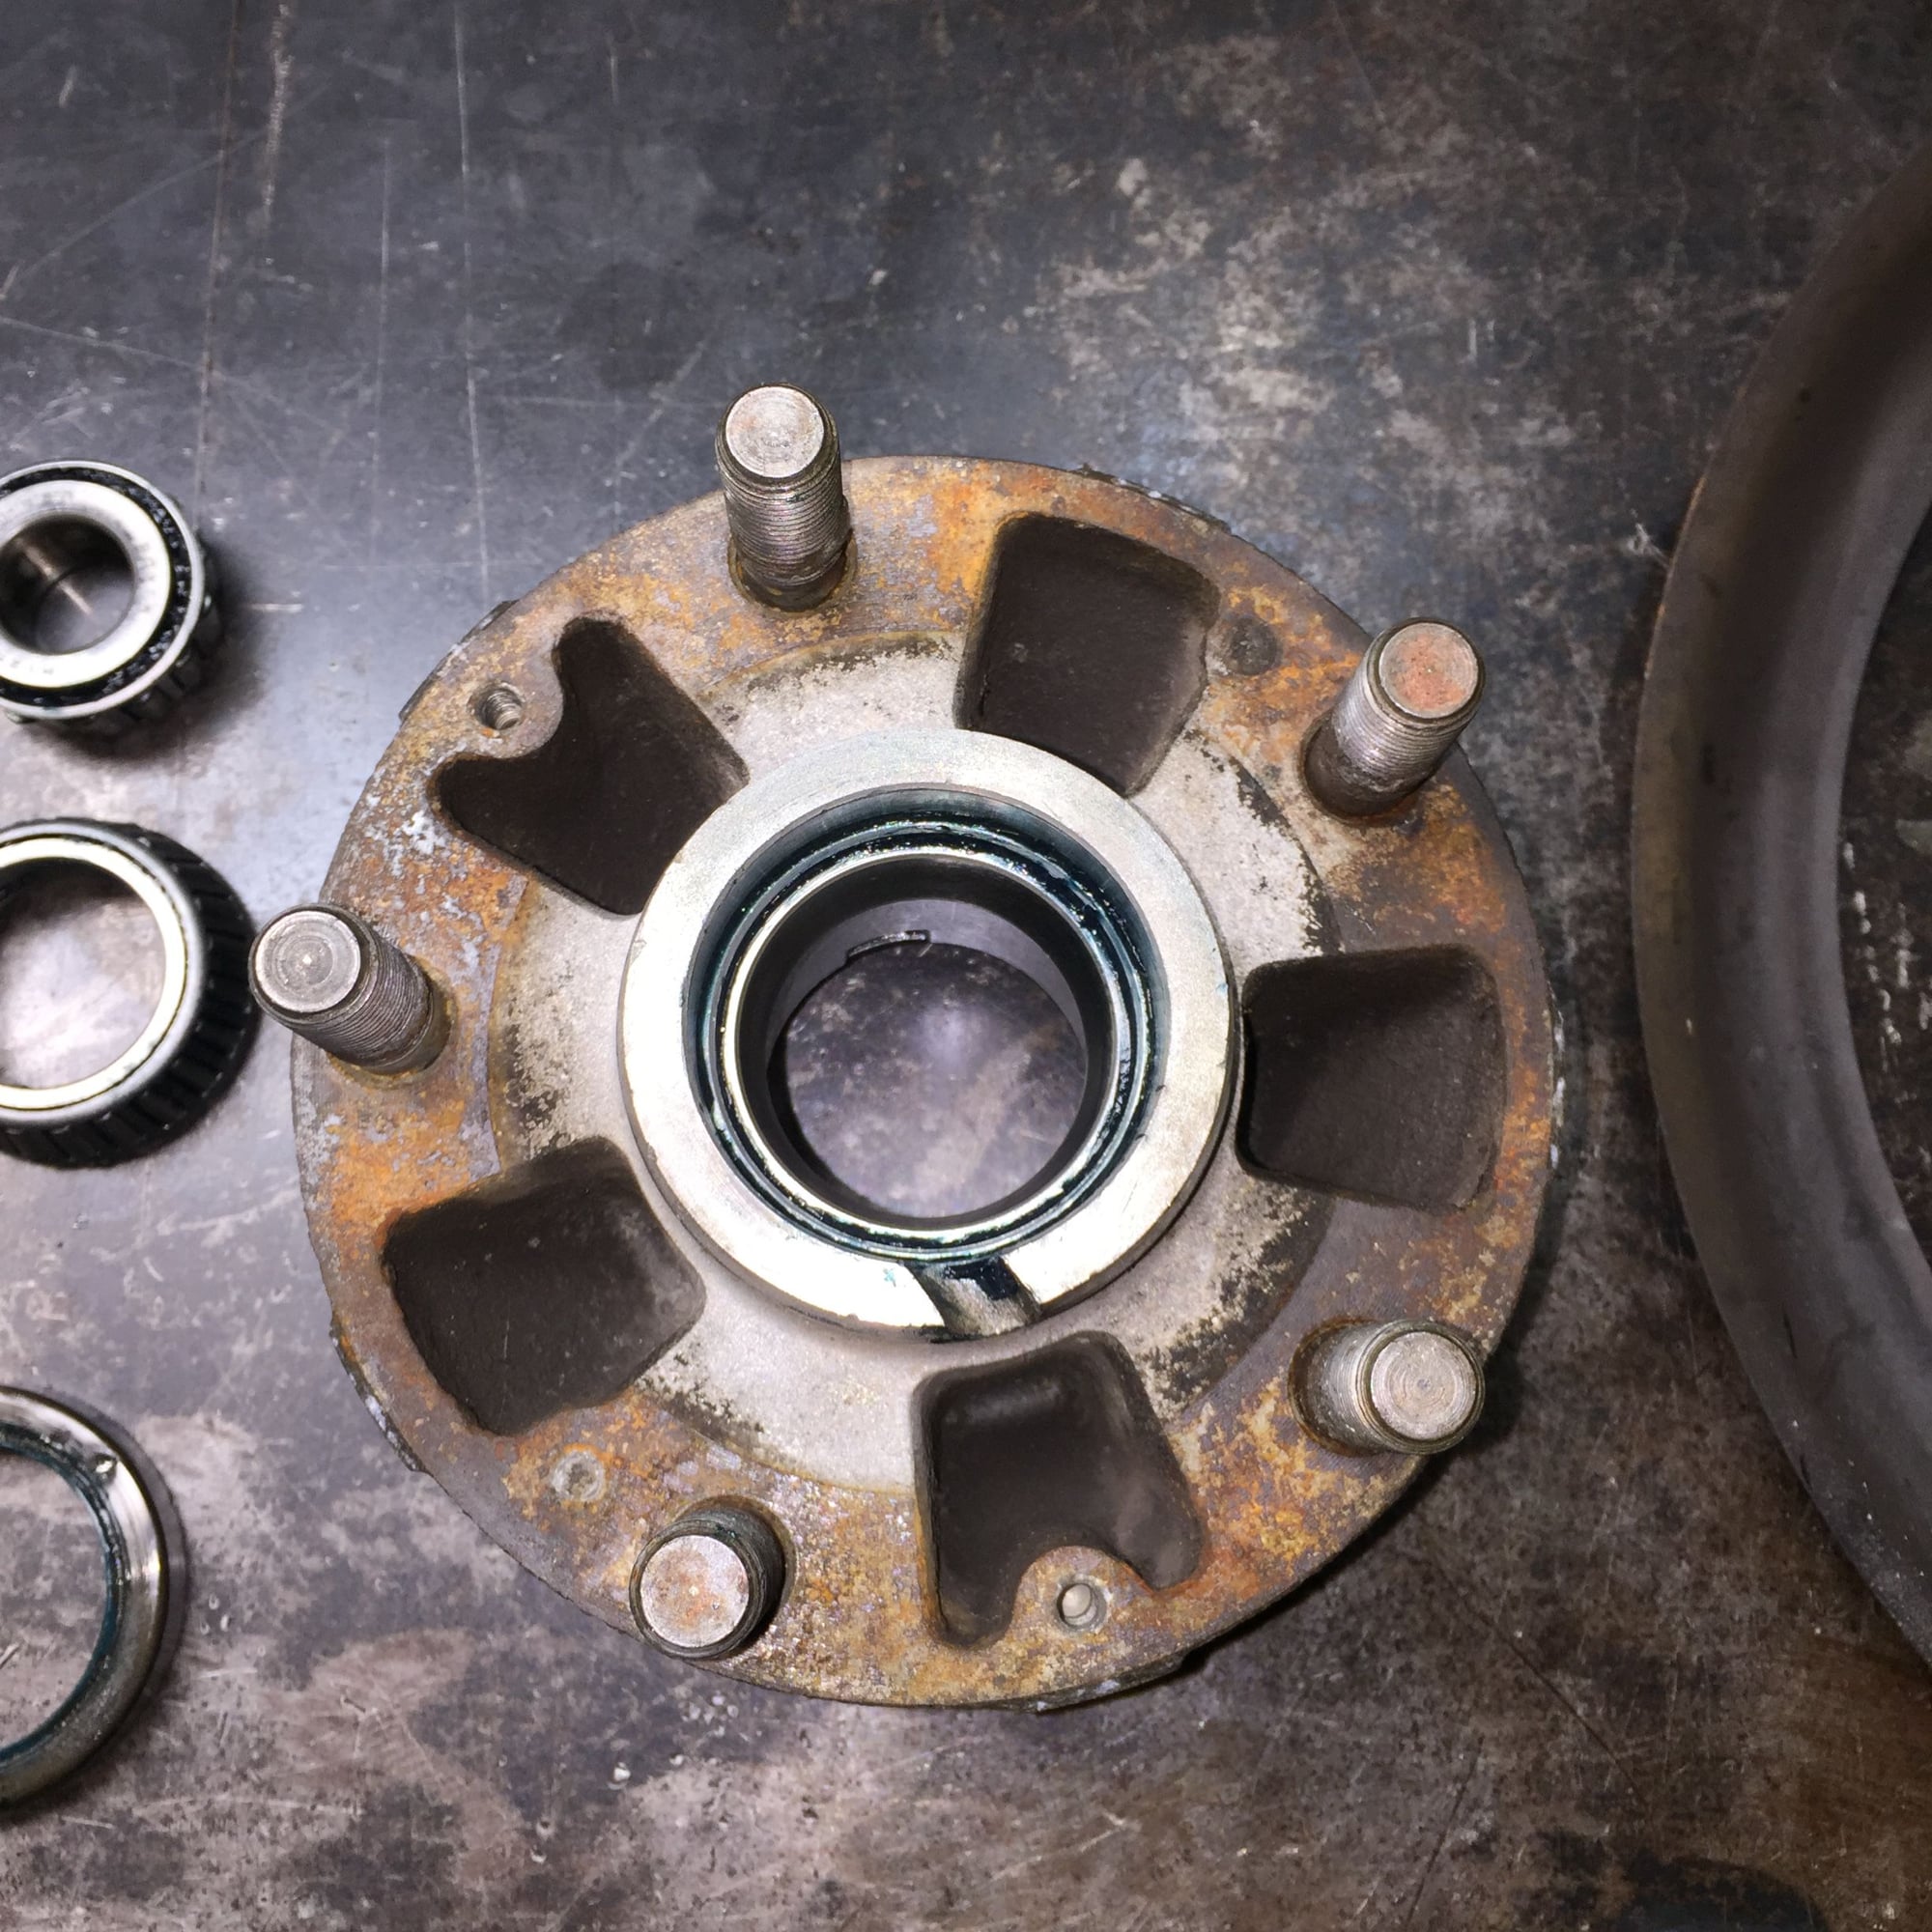
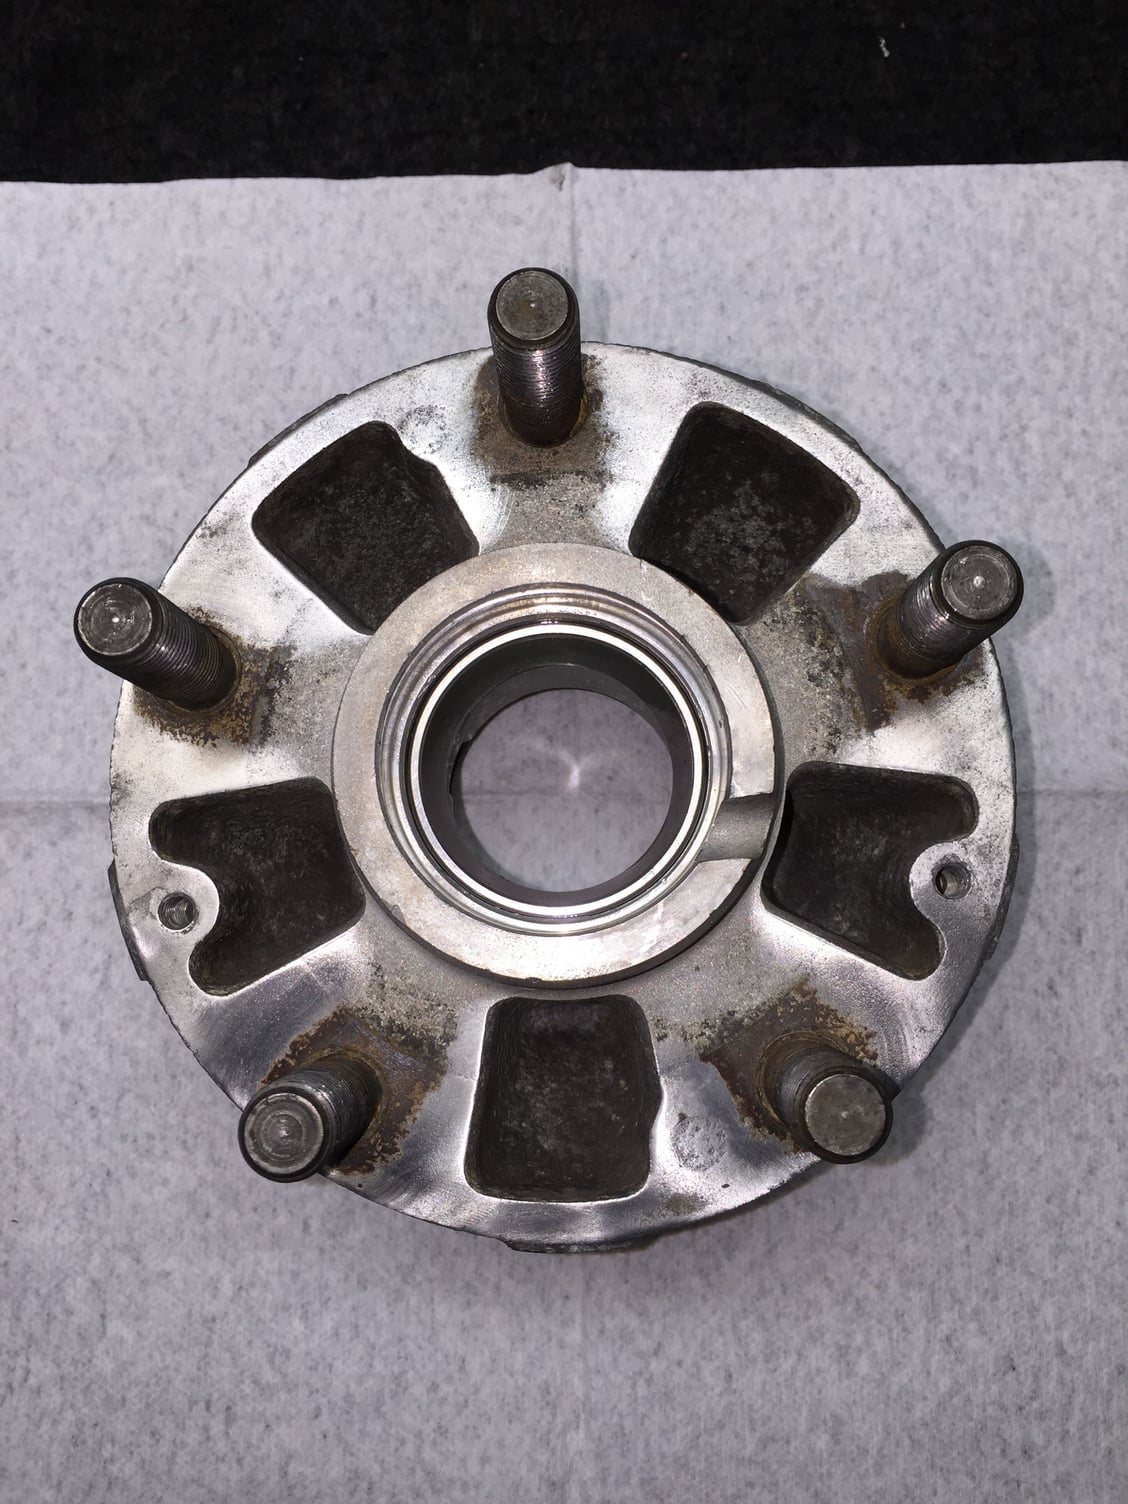
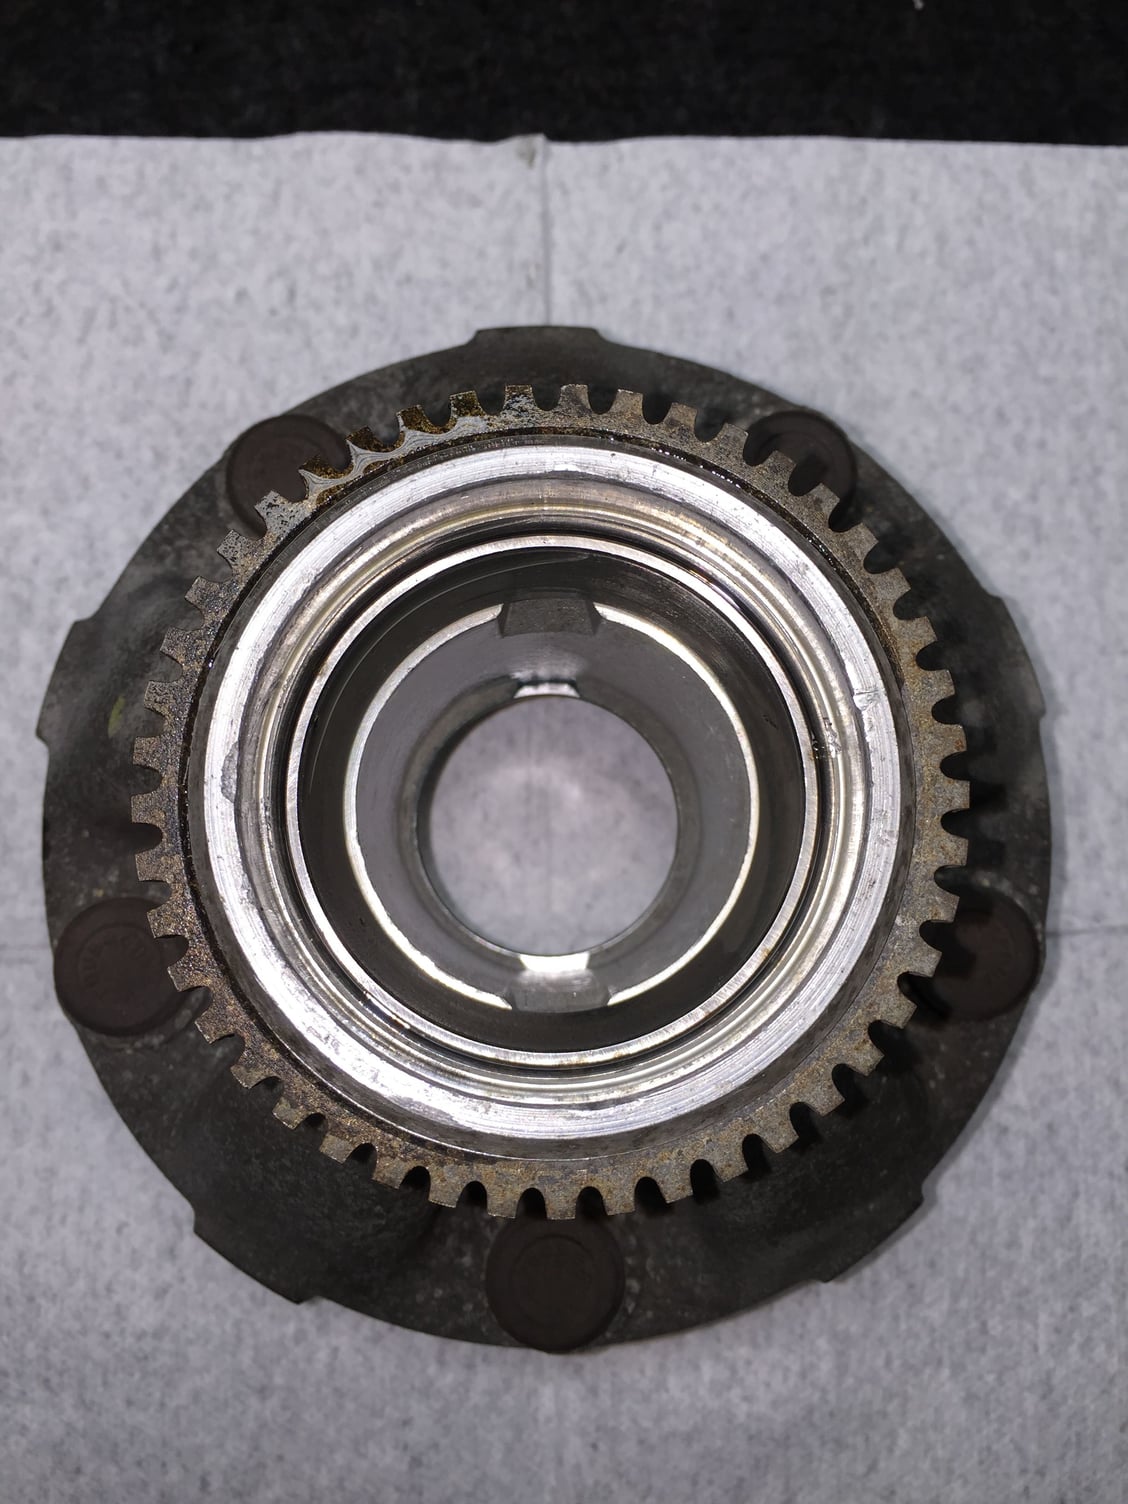
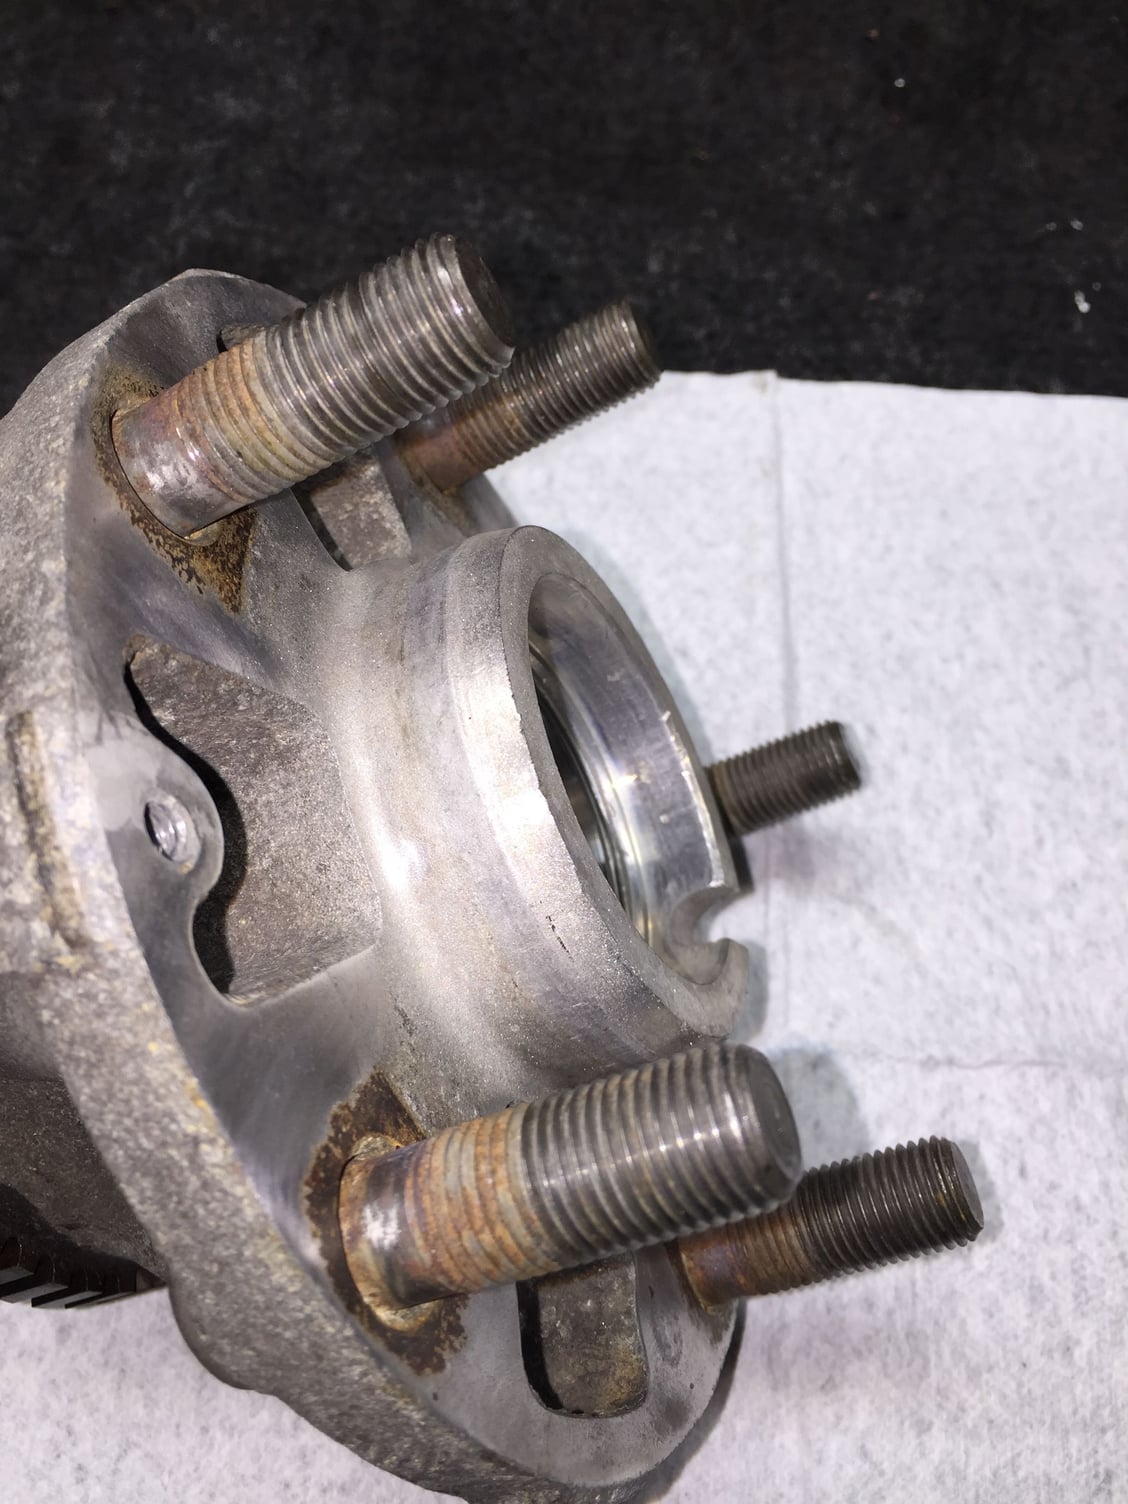
The passenger's side front hub is cleaned and ready to go. It has been scrubbed, all the grease removed from the cavity, lug studs threads chased, and rotor mounting surface cleaned with a fine green roloc pad.
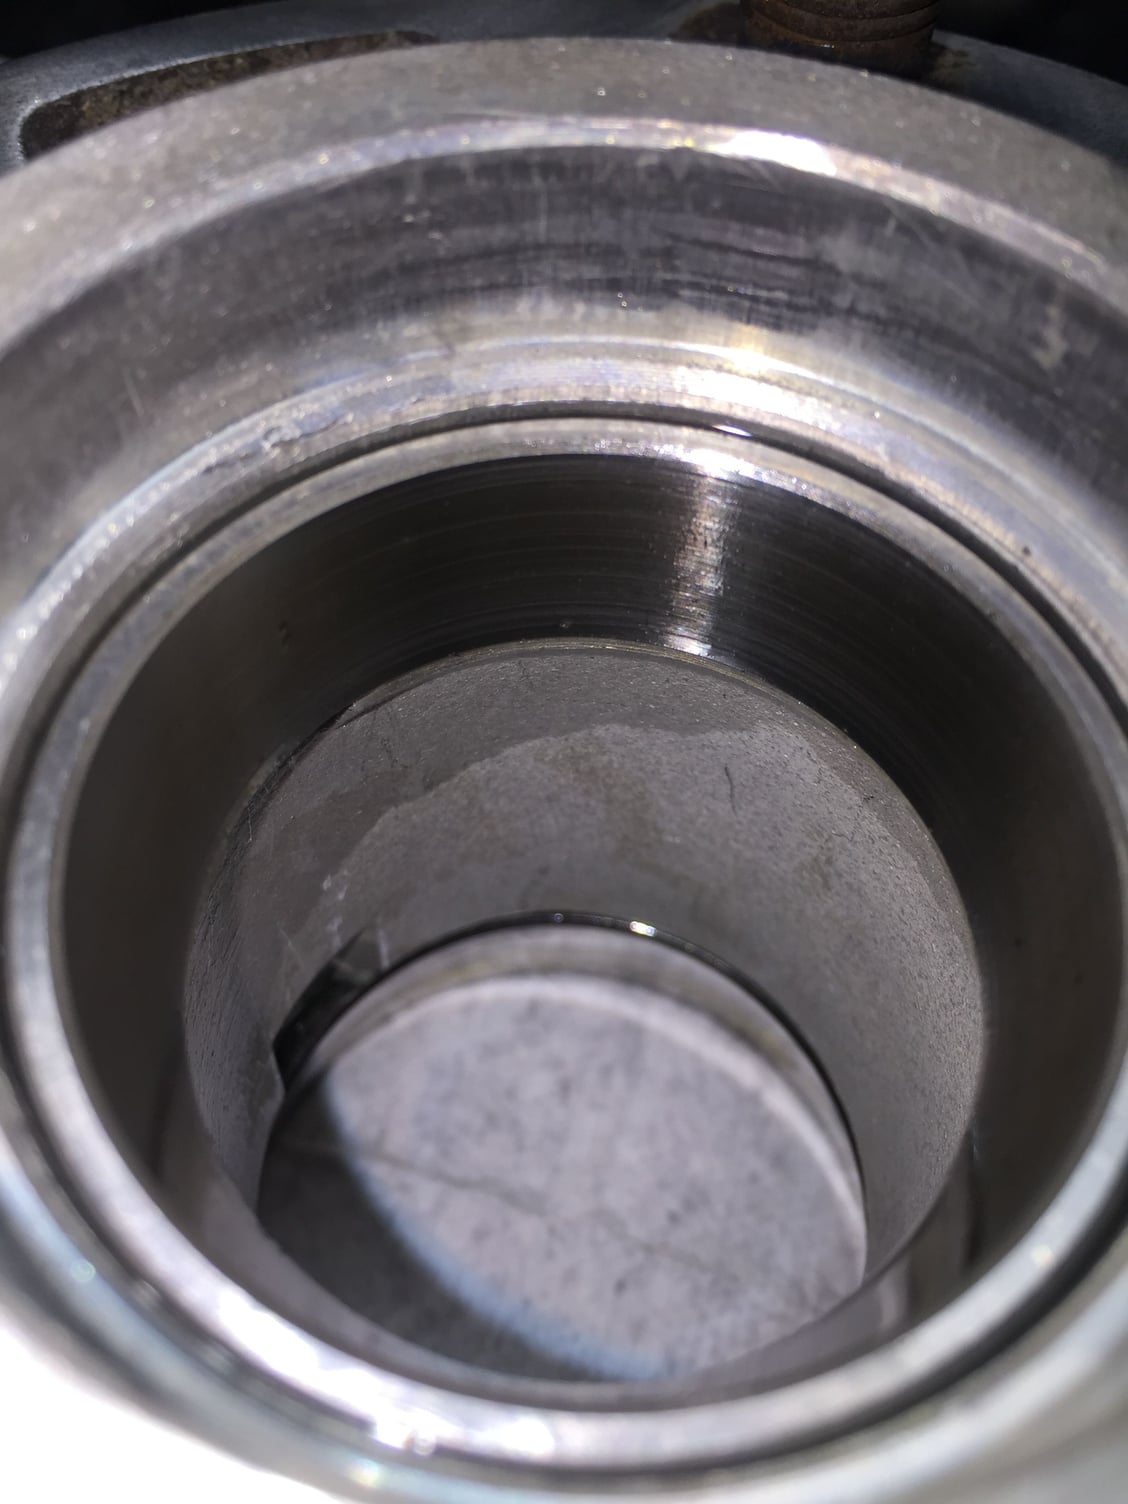
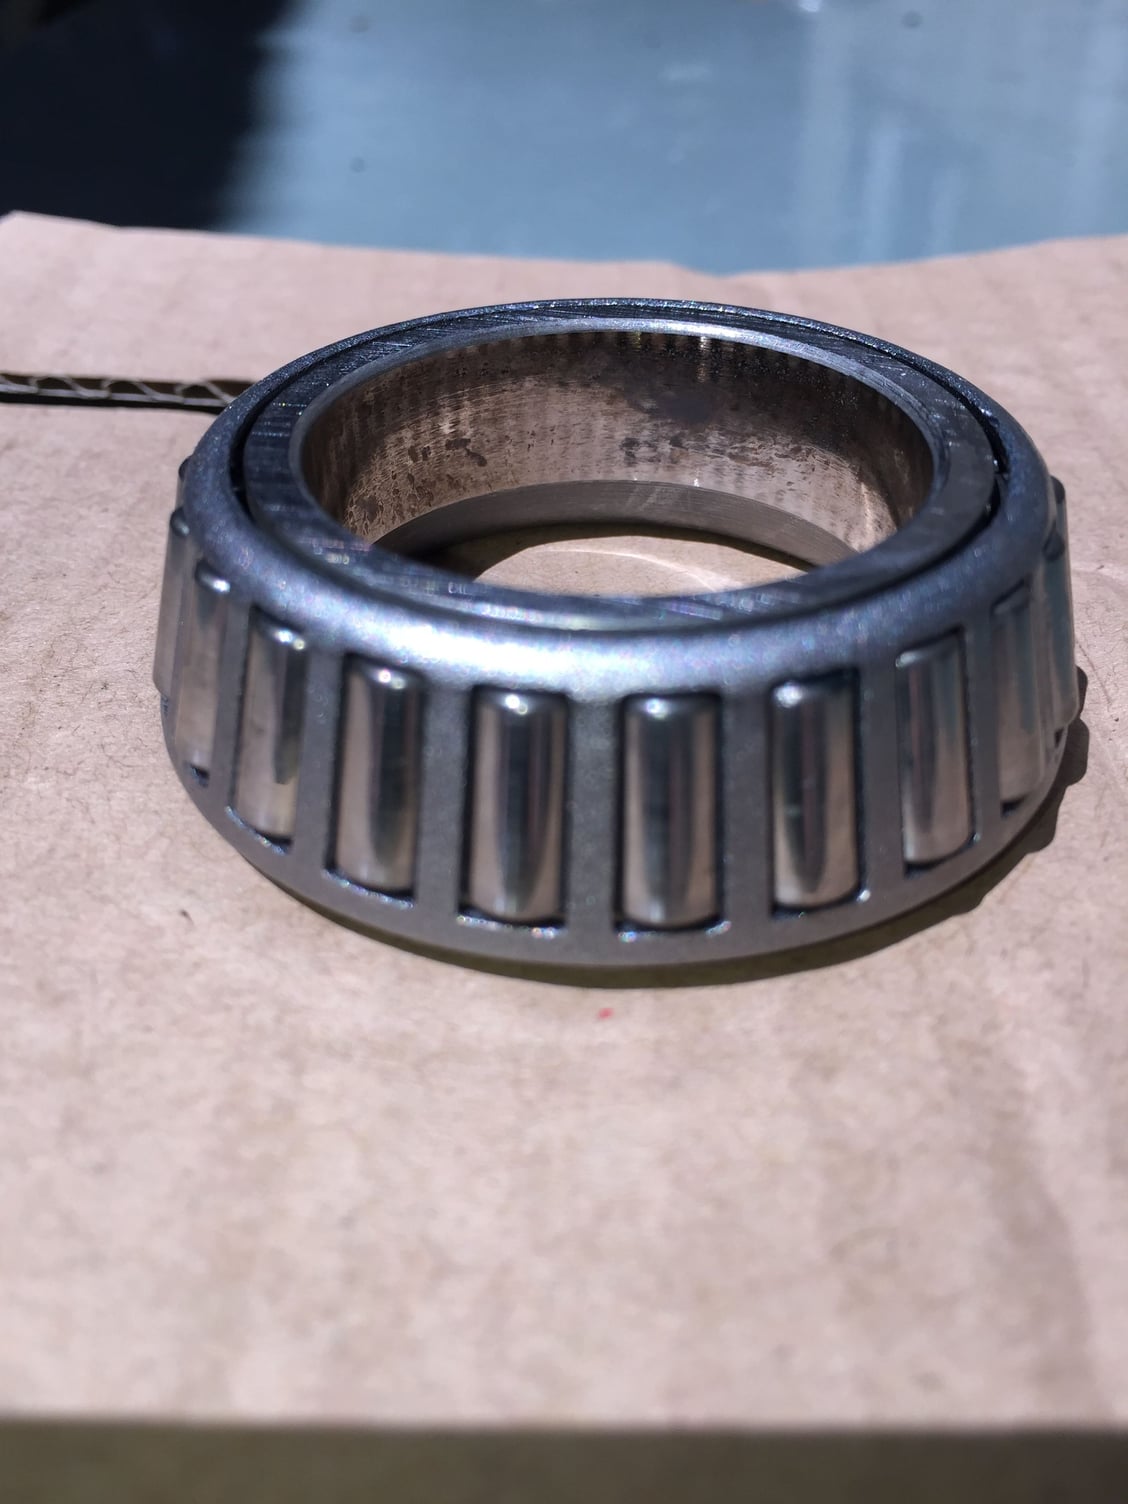
I trust the spalling on those bearing cups is sufficient cause for replacement?
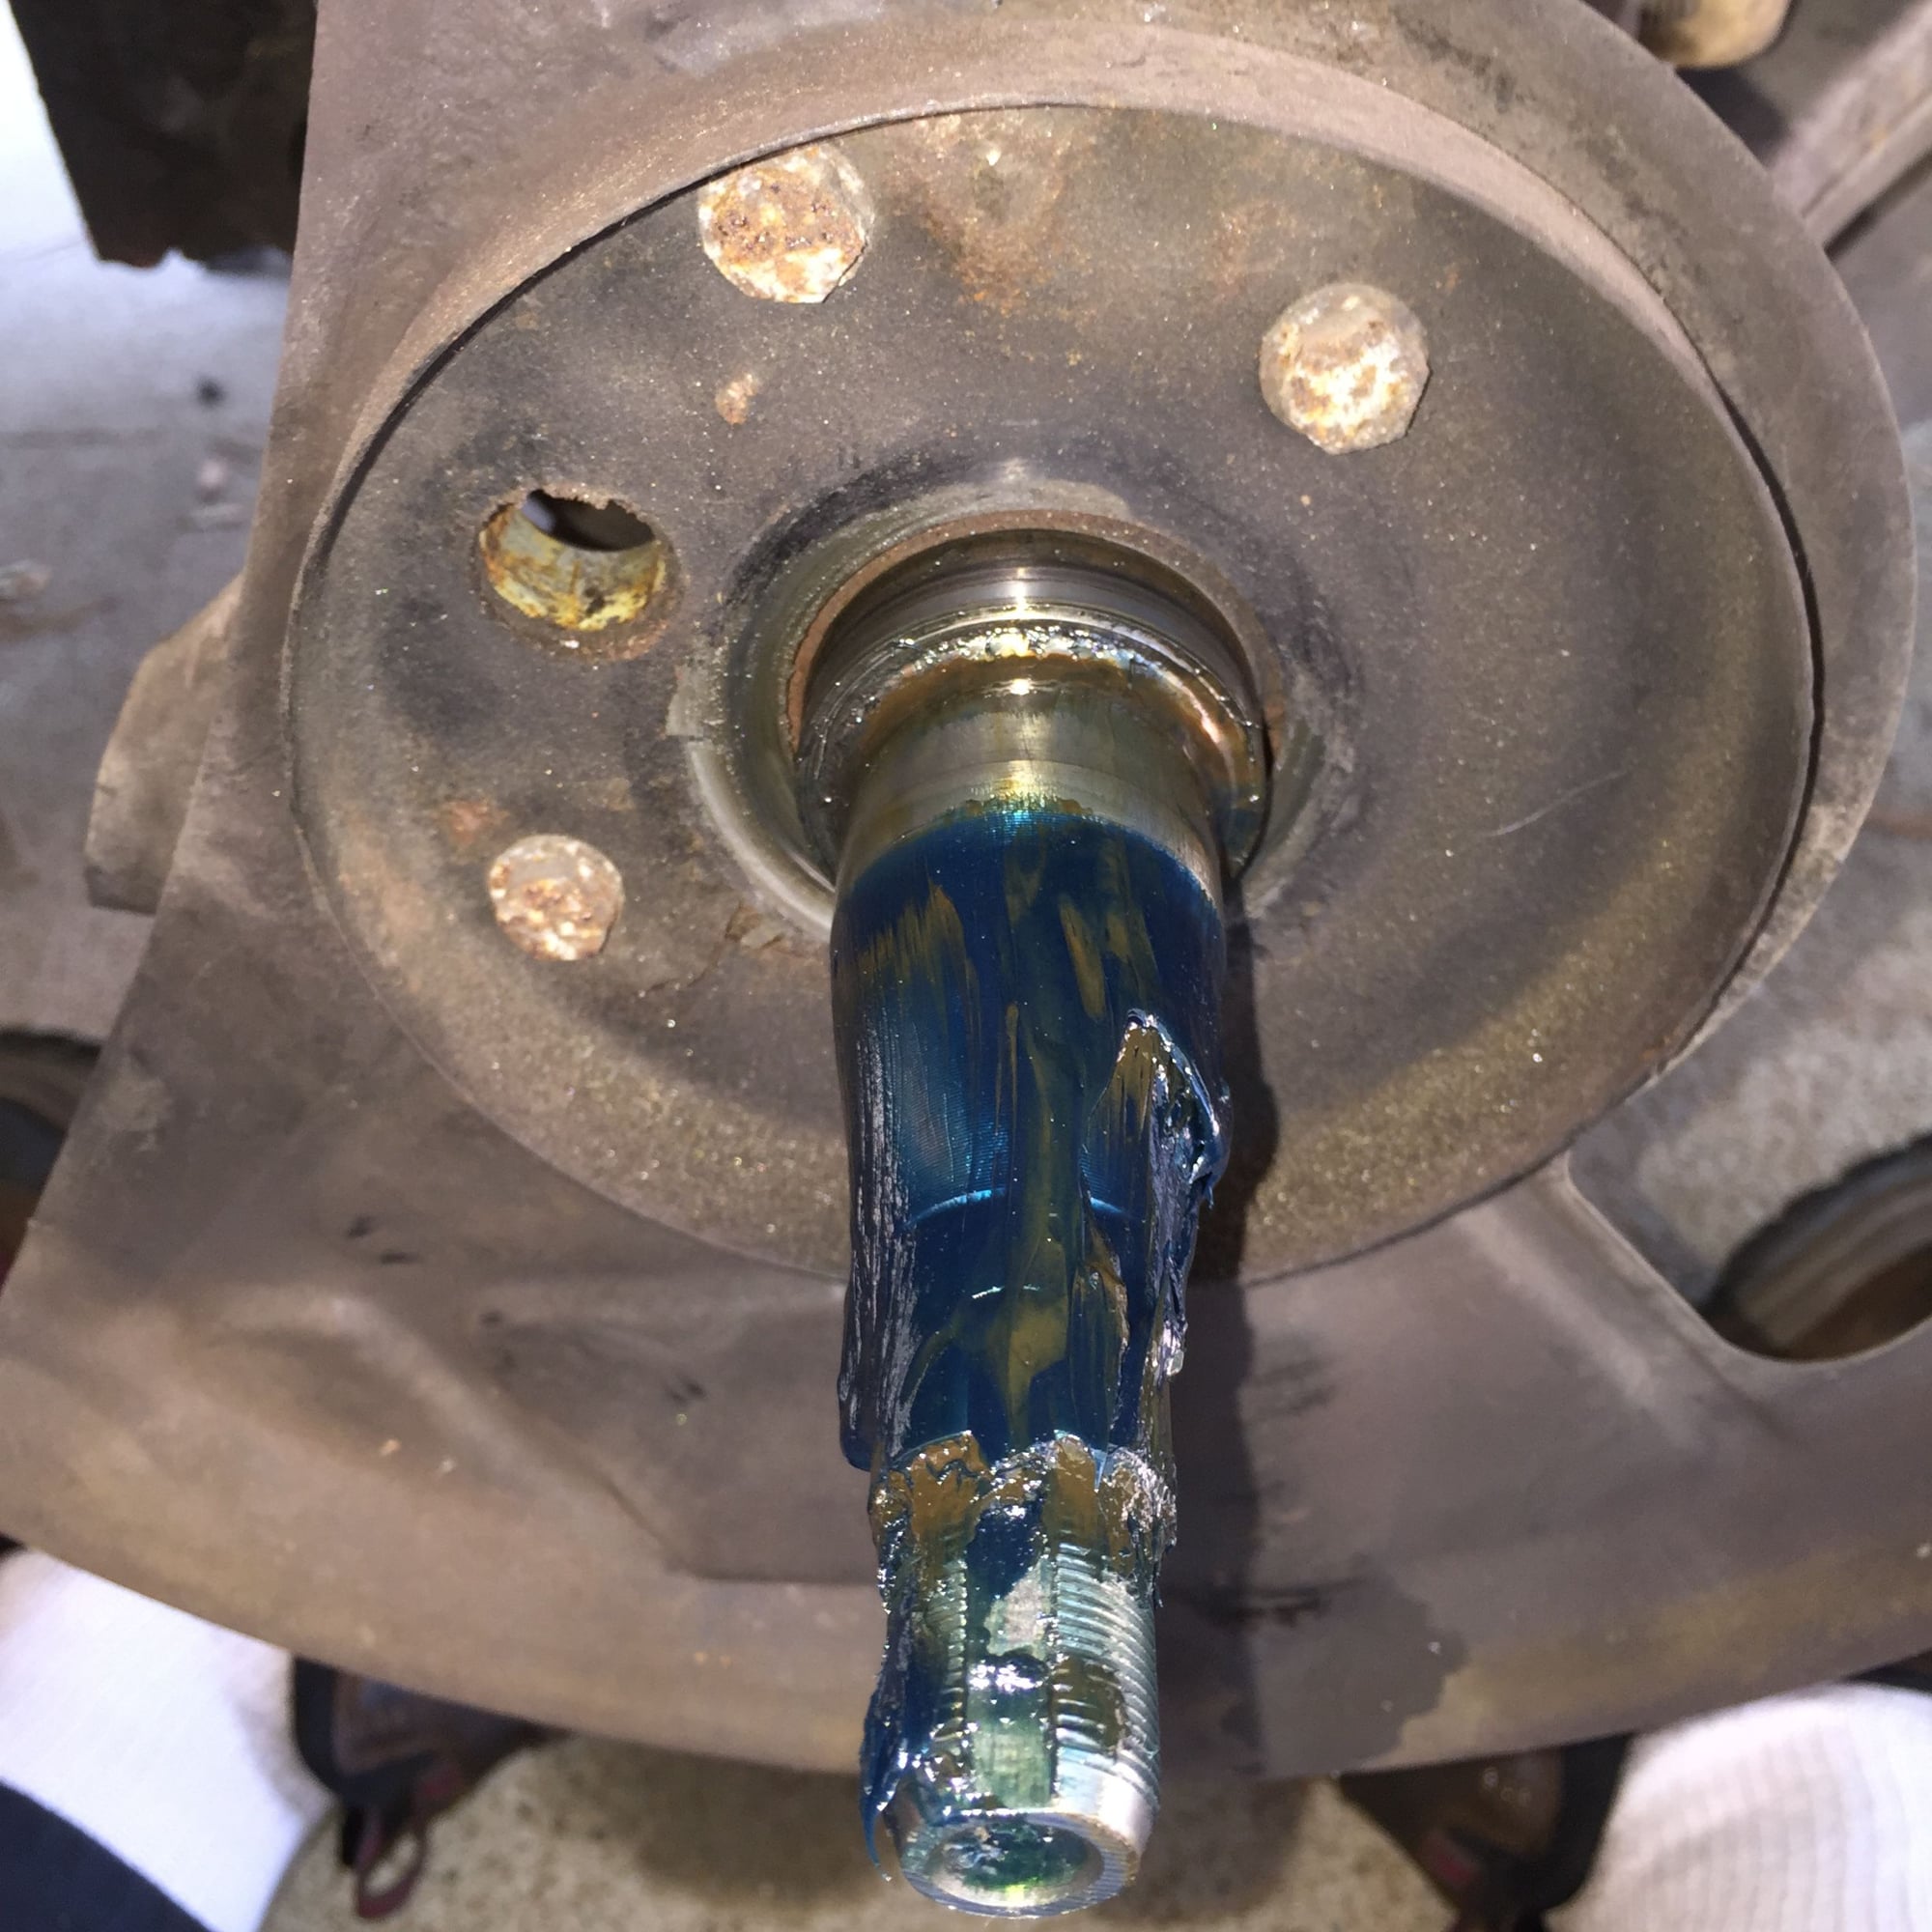
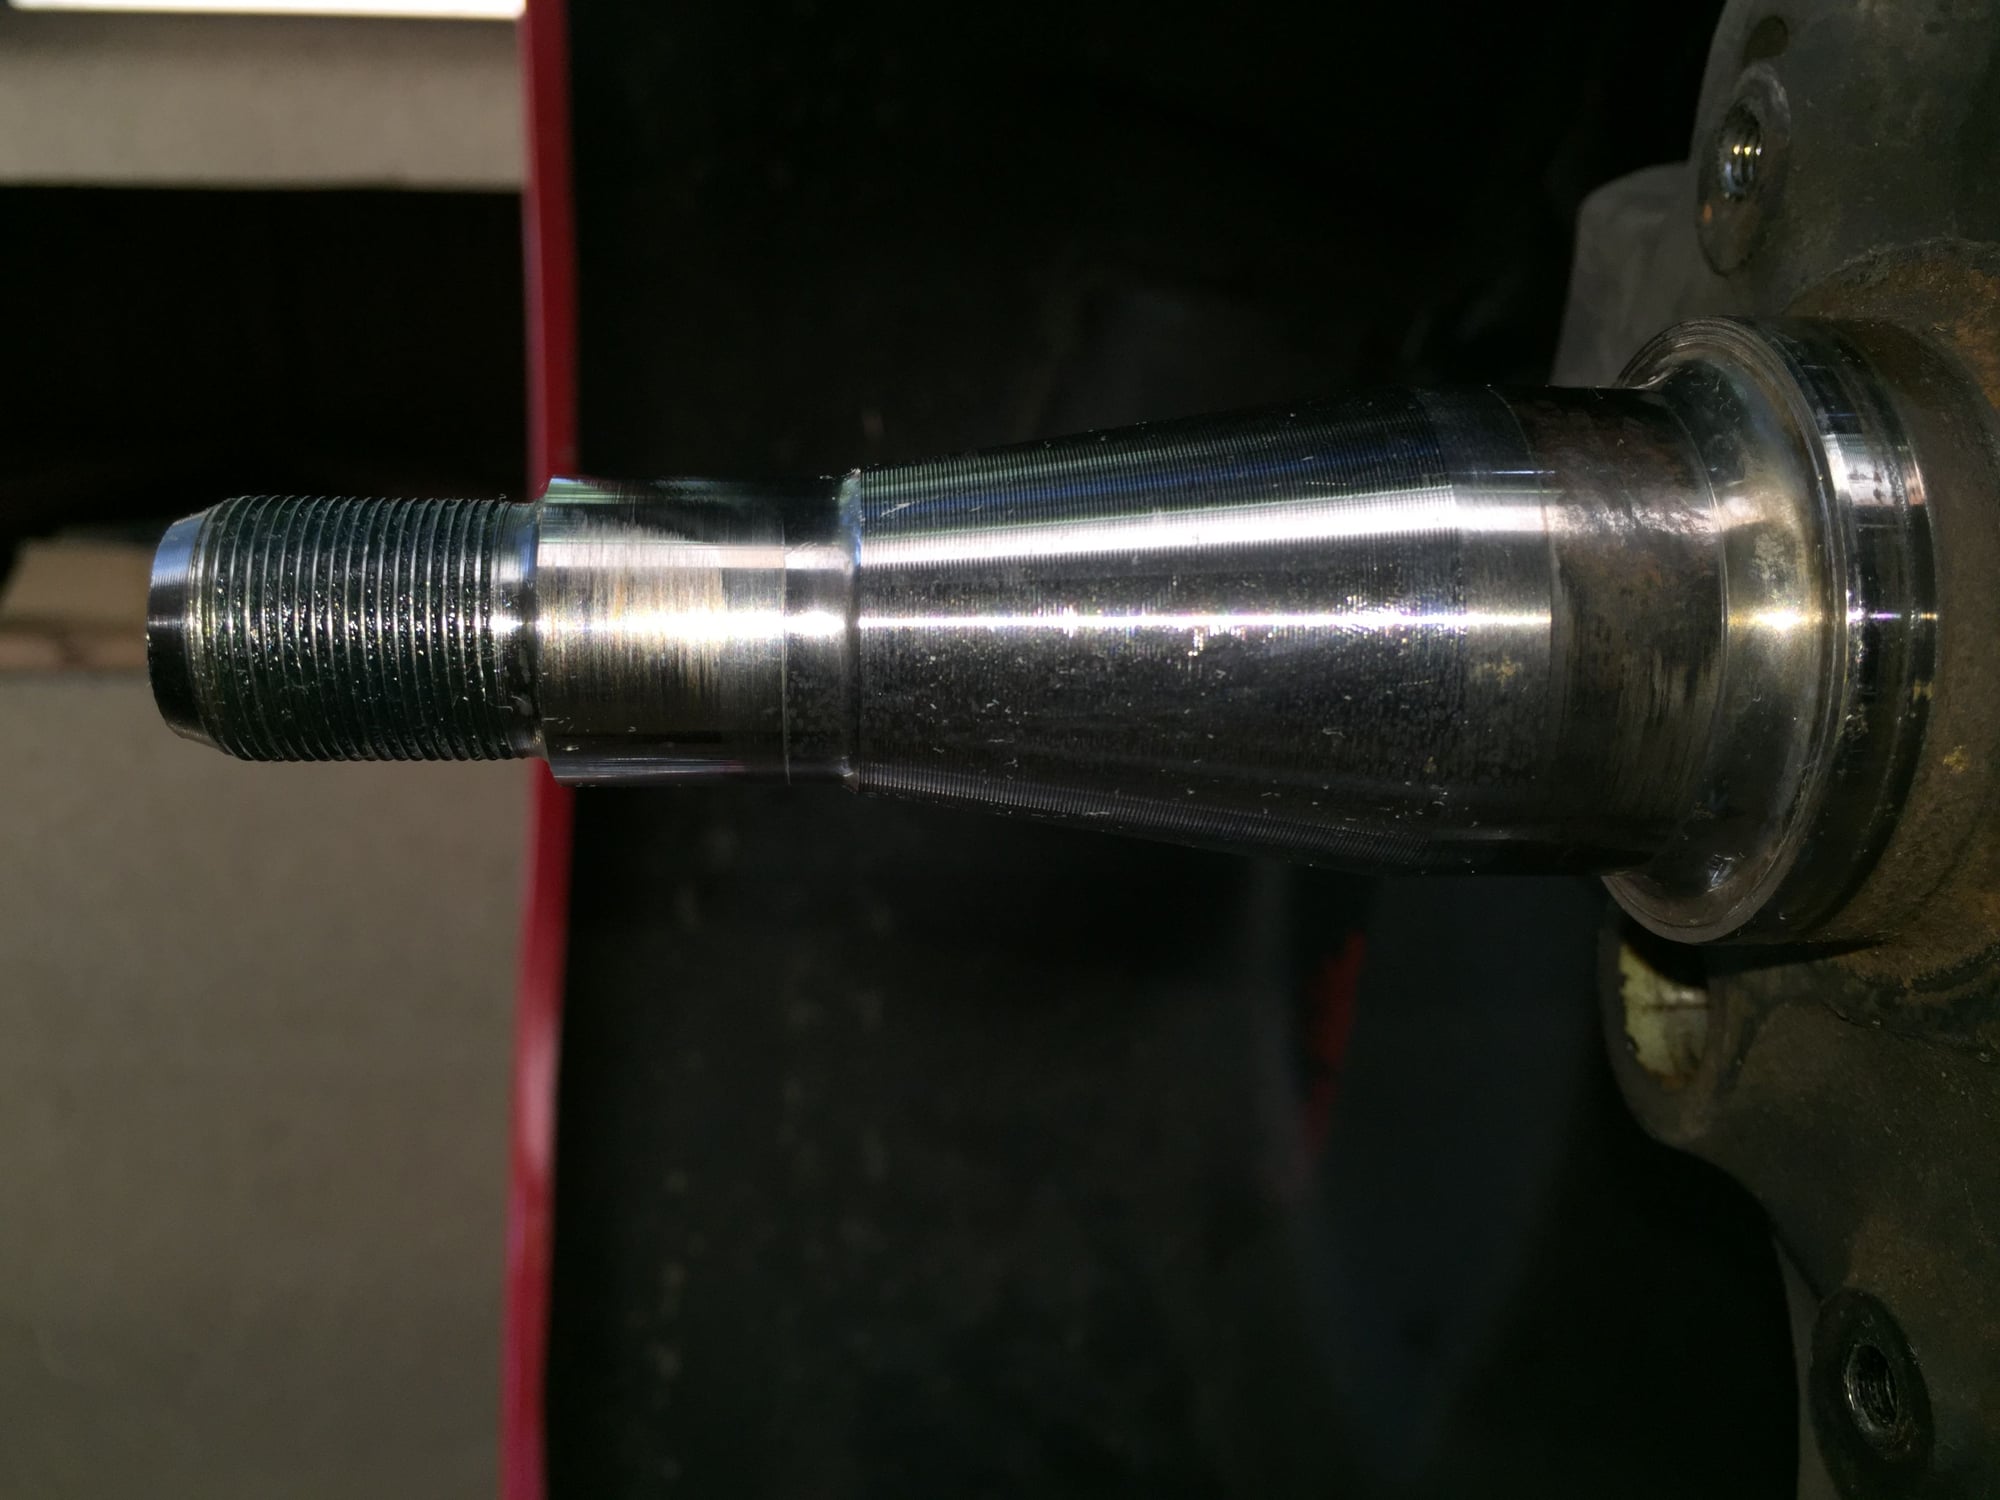
Grab a mirror and look at the underside of the big end of the spindle itself, where the cone for that inner bearing normally lives. The spalling is caused by excessive vibration, so you should look for wear on the spindle caused by that same vibration.
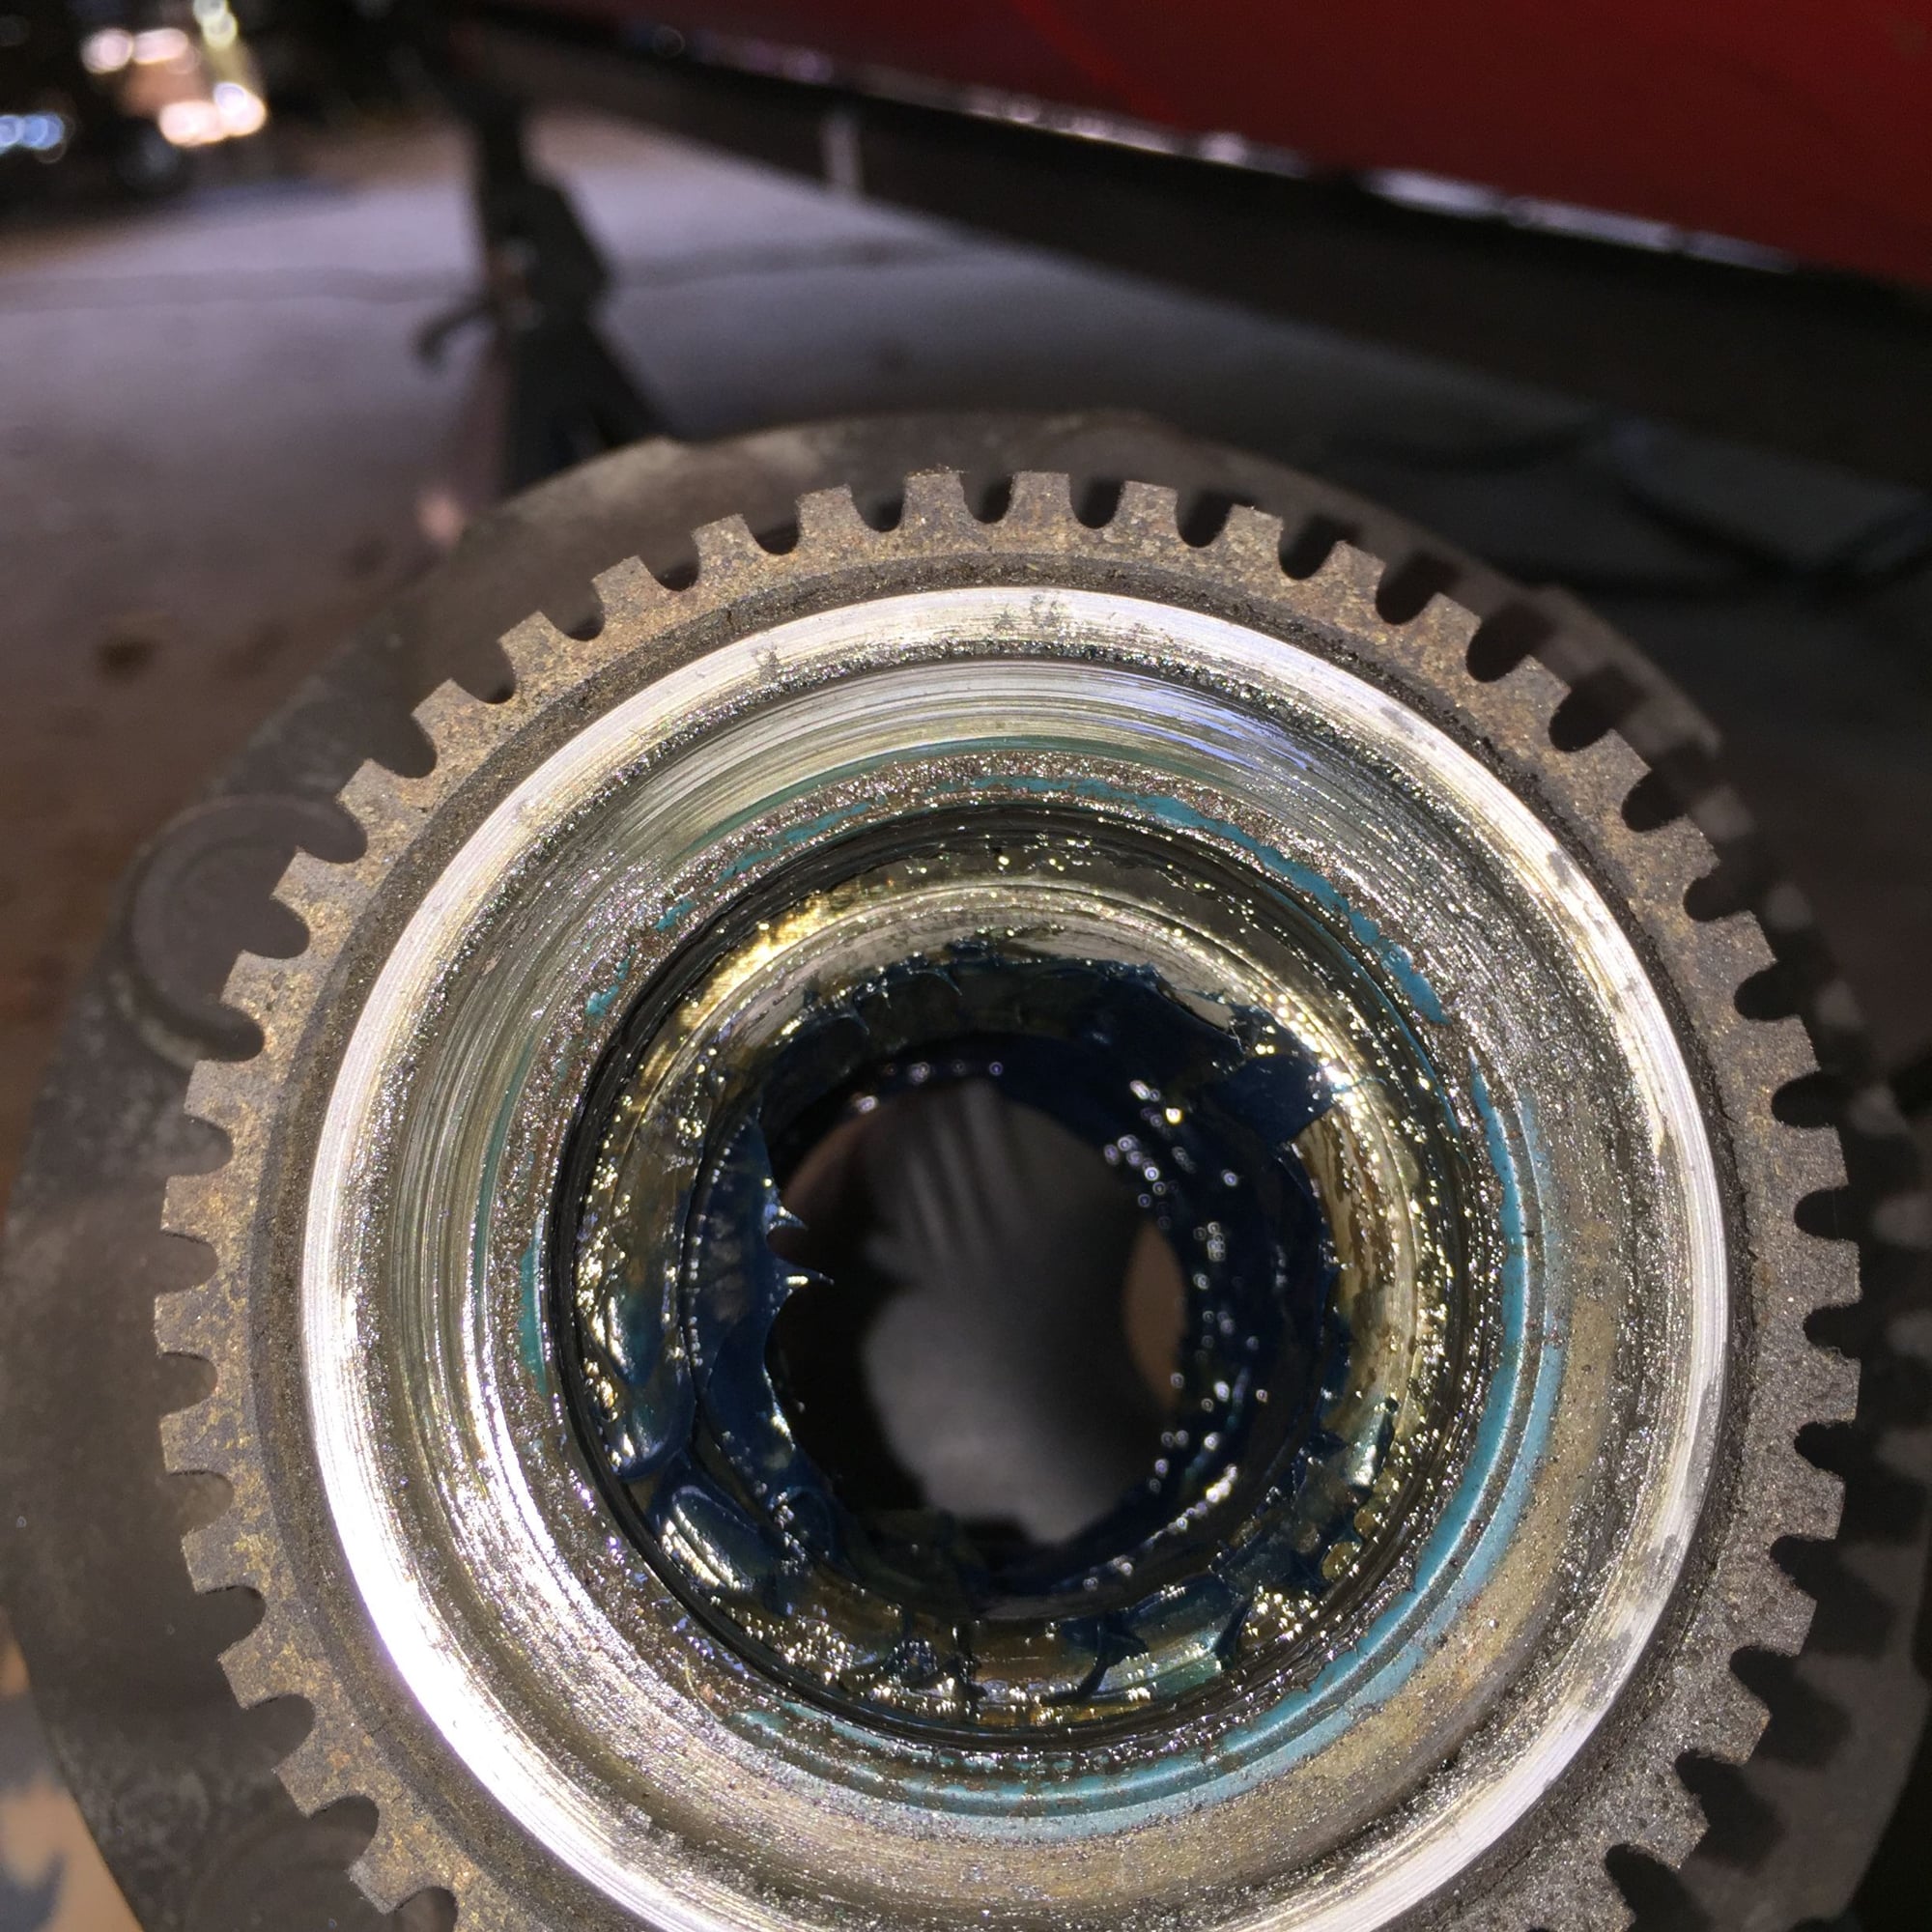
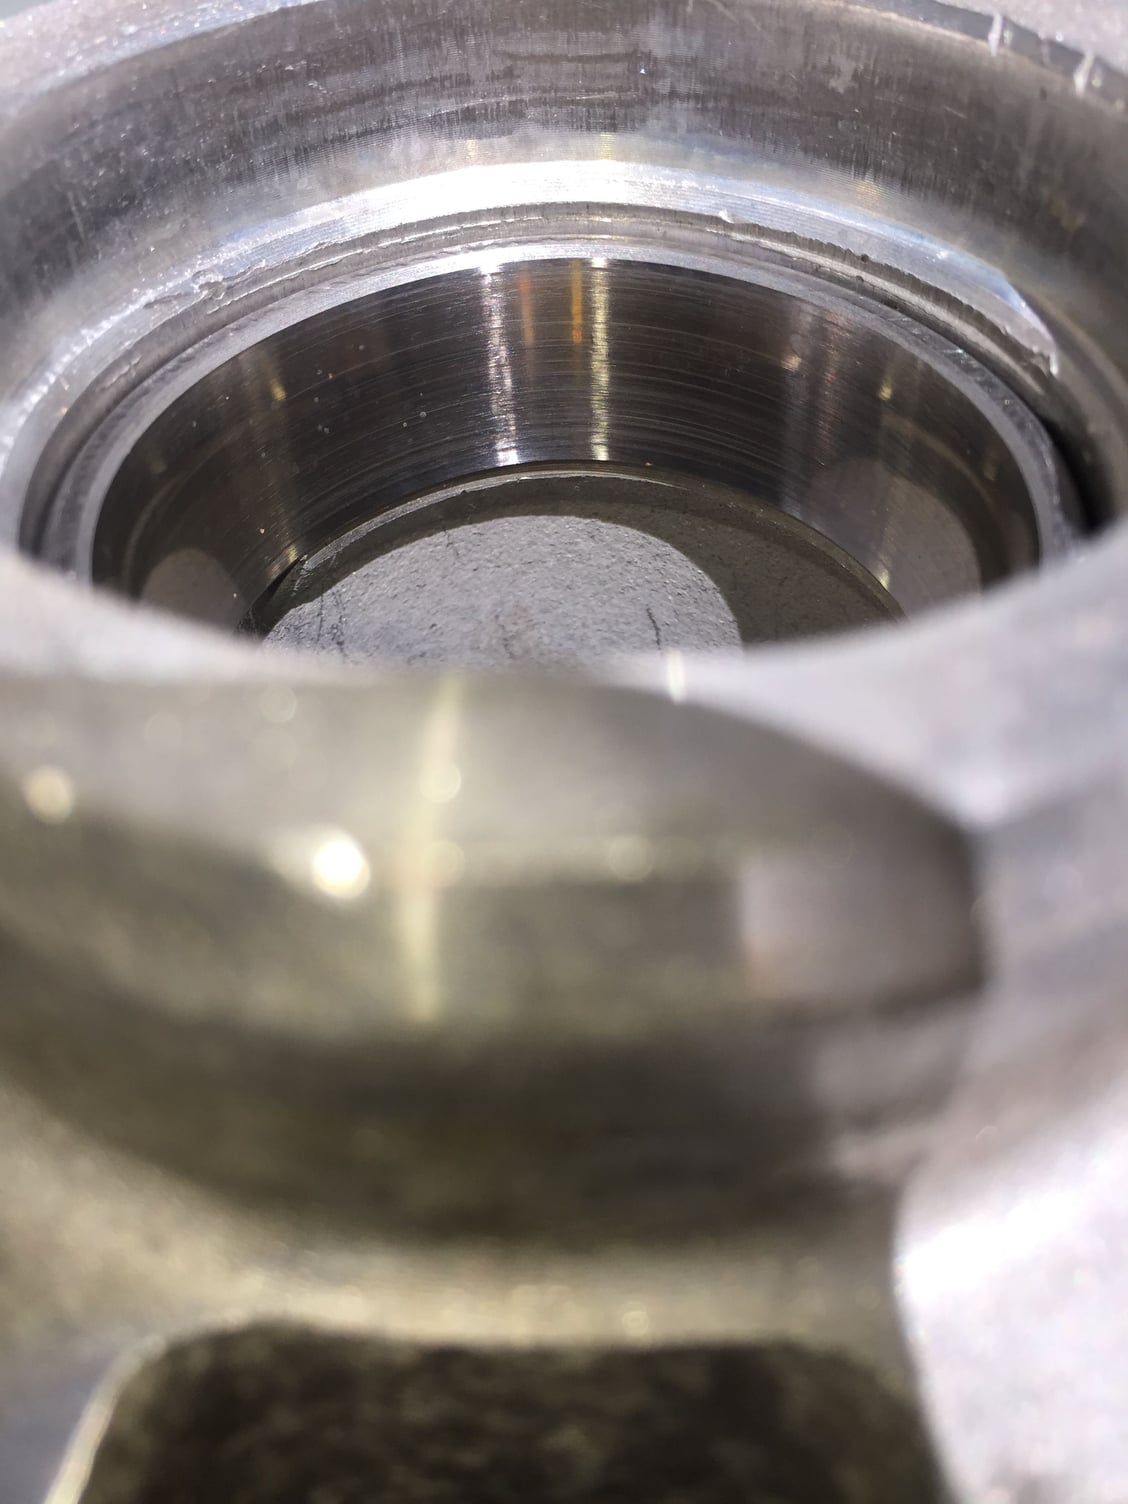
For those playing at home, the outer half of the bearing races in his hub show where there's damage from severe local heating. The metal there is blued from the heating, to the point where the metal has "lost its temper" and started to flake a little. If you look at the rollers in the "cone" section, they will be similarly damaged. Take the effort to split the metal cage that holds those rollers, and the small inner race of that bearing will be similarly damaged. Cycling the little flakes of metal through the hot bearing causes them to relocate to other places. The rollers still work their way around over the uneven bearing surfaces, causing vibrations. The "cone" section of the bearing is supposed to be a zero-clearance fit on the spindle. The vibrations will wear the spindle on the load-bearing face, in this case the bottom where the weight of the car pushes down on the bearing. In severe cases, the spindle metal will be heat damaged and discolored, mandating replacement. In lesser cases, the wear on the spindle will prevent the support necessary to keep the cup section aligned, making bearing wear rapid and uneven. Getting clearances set correctly is a major challenge, something that further contributes to shortened bearing life.
Easiest way to R&R the races is to pop the cleaned aluminum hub into the handy garage toaster oven for a while. Use welding or oven/barbeque gloves to handle the hot parts. The steel races will come out easily then without damaging the aluminum on the way out. In advance of this, pop the new outer races (the "cups") into the freezer to shrink them, so they will all but drop into the still-hot hub with minimum pressure and risk of damage.
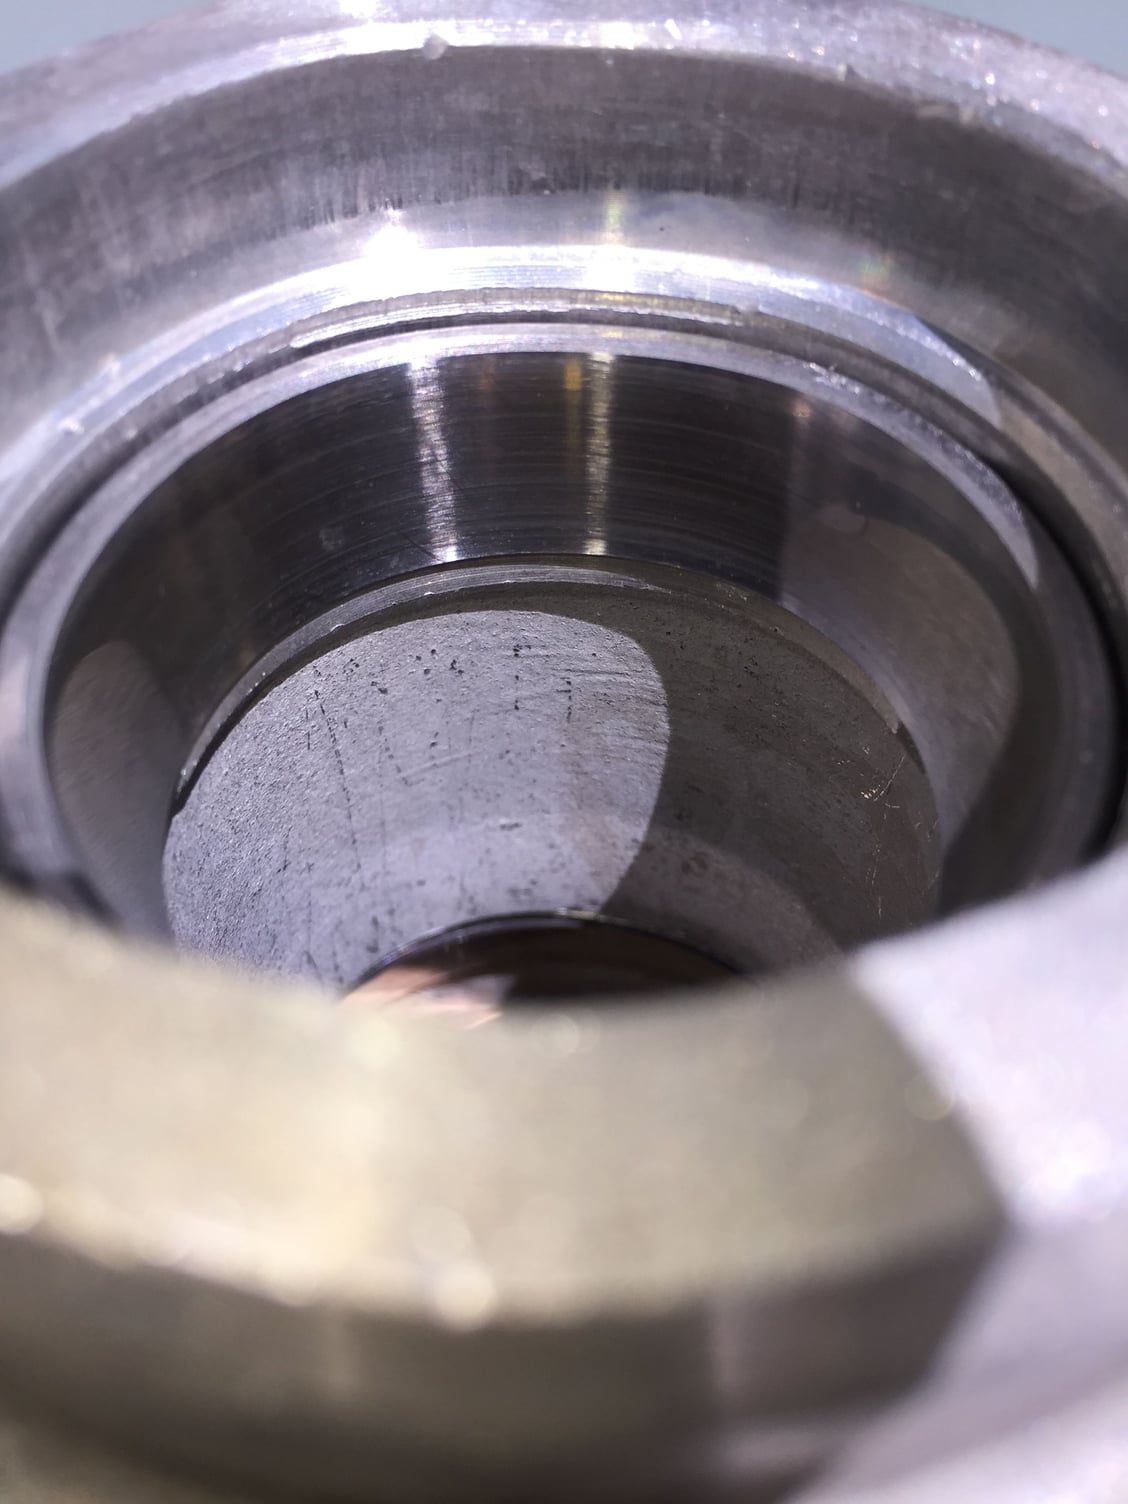
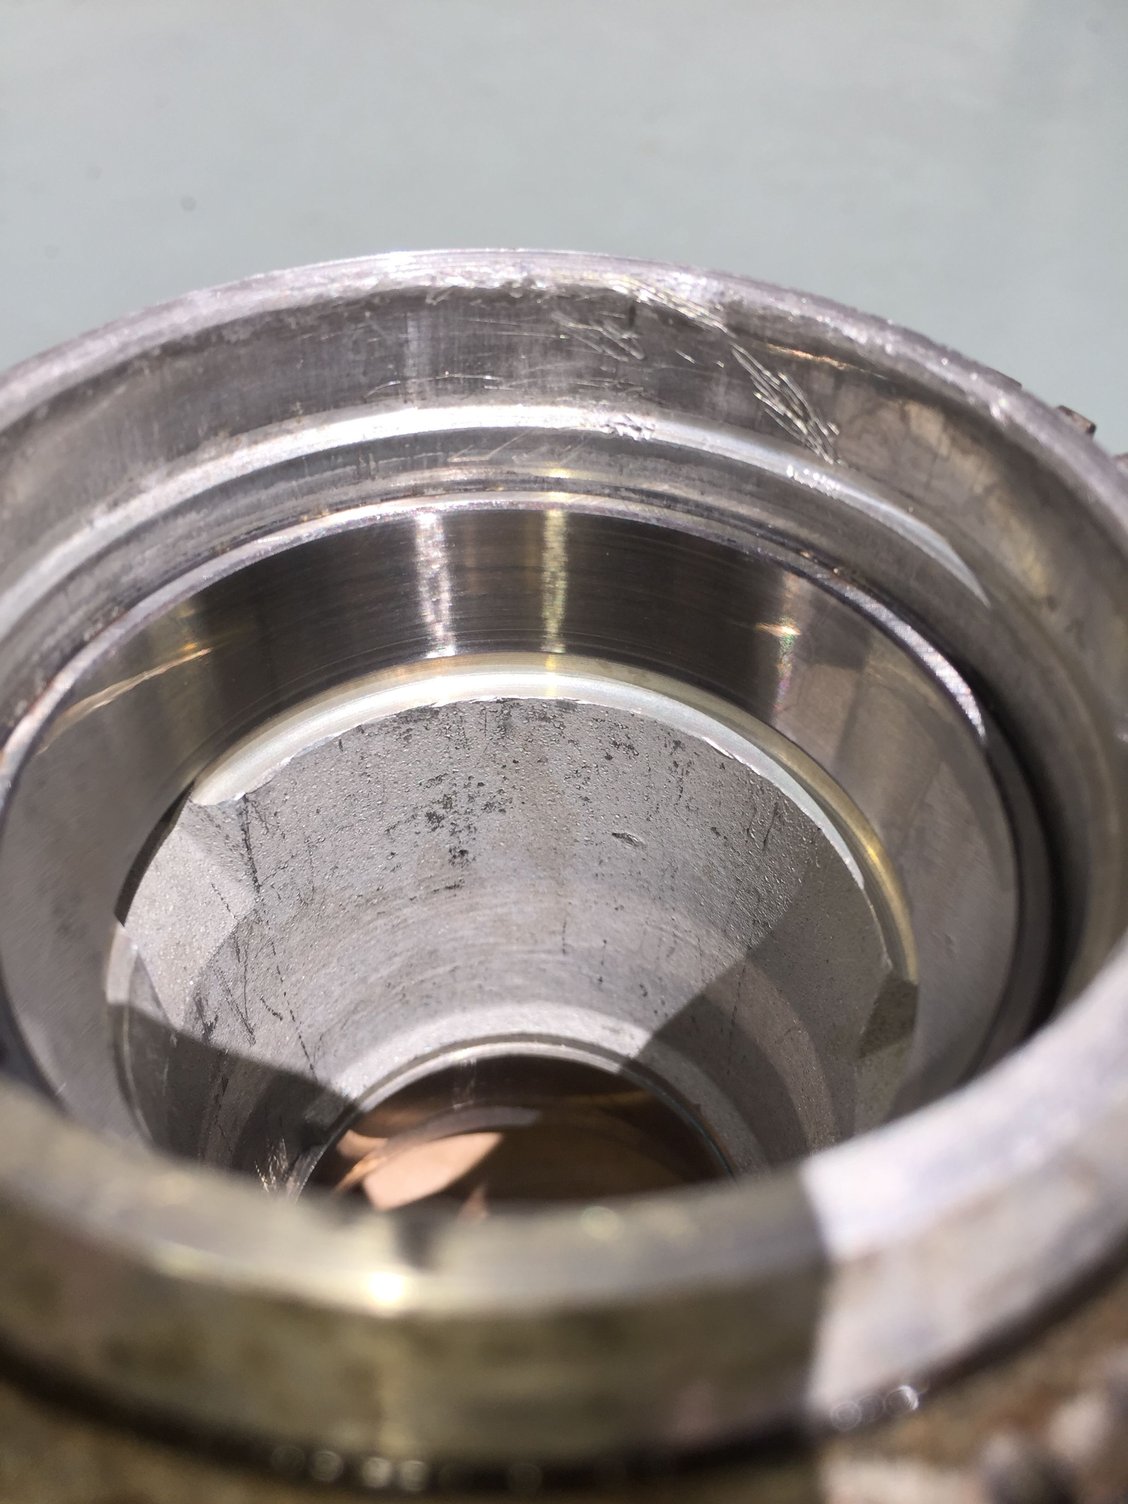
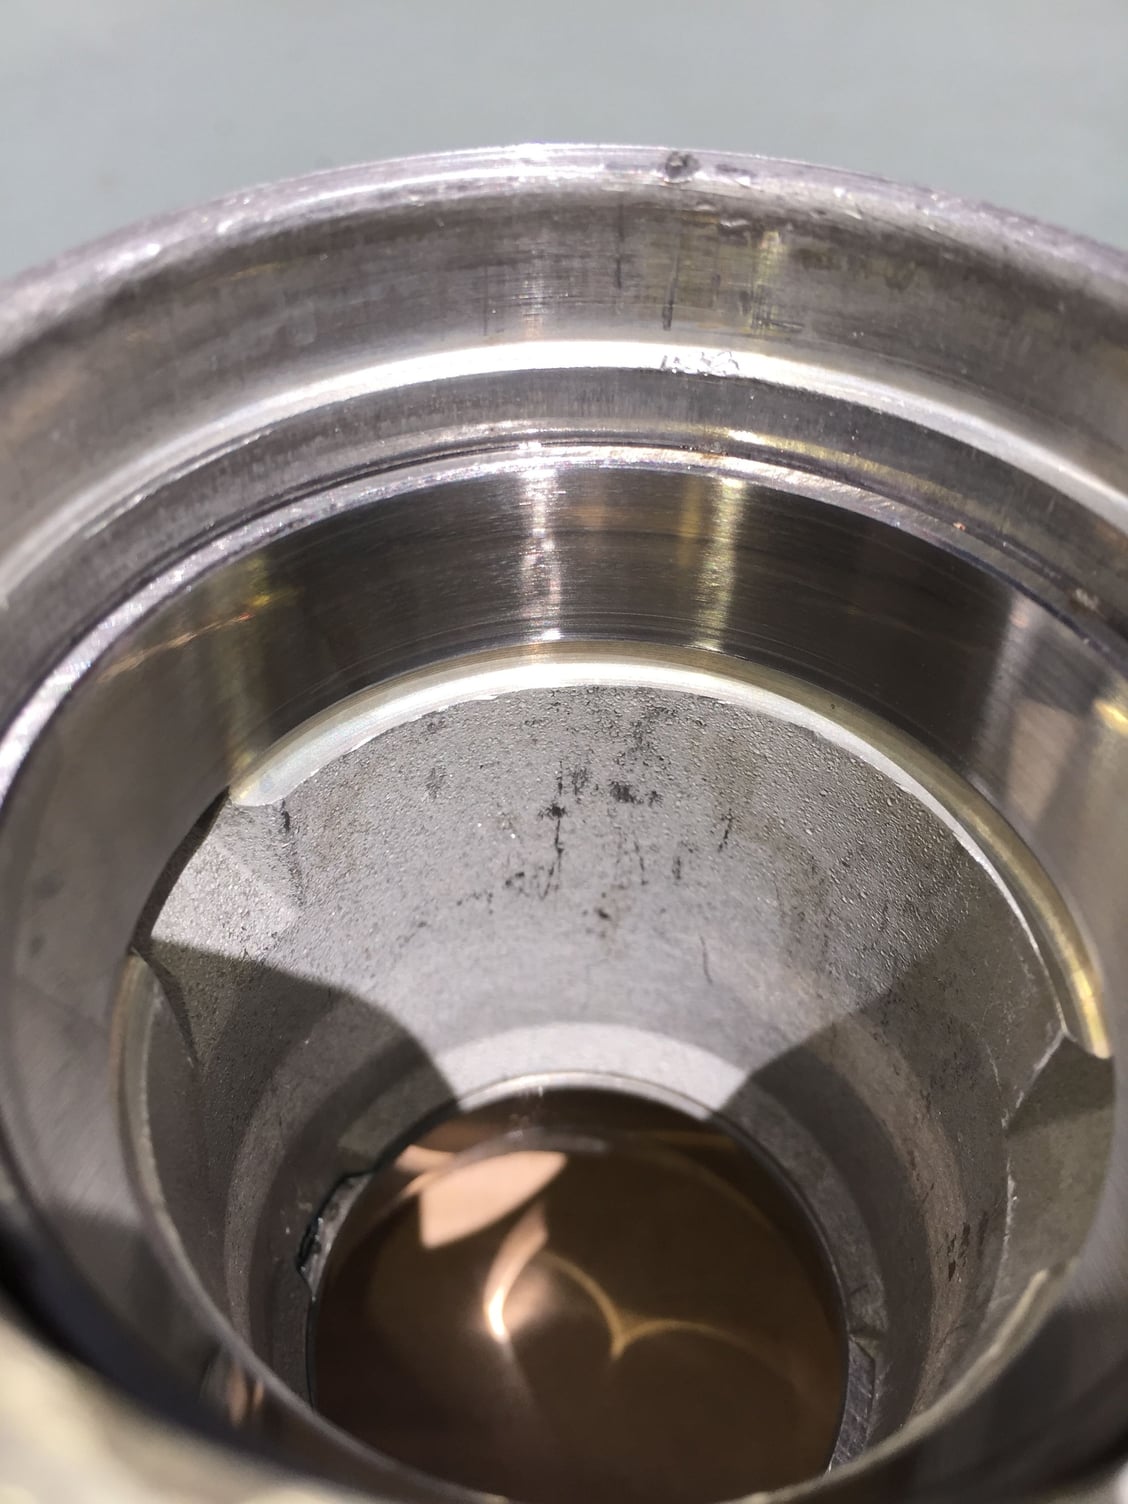
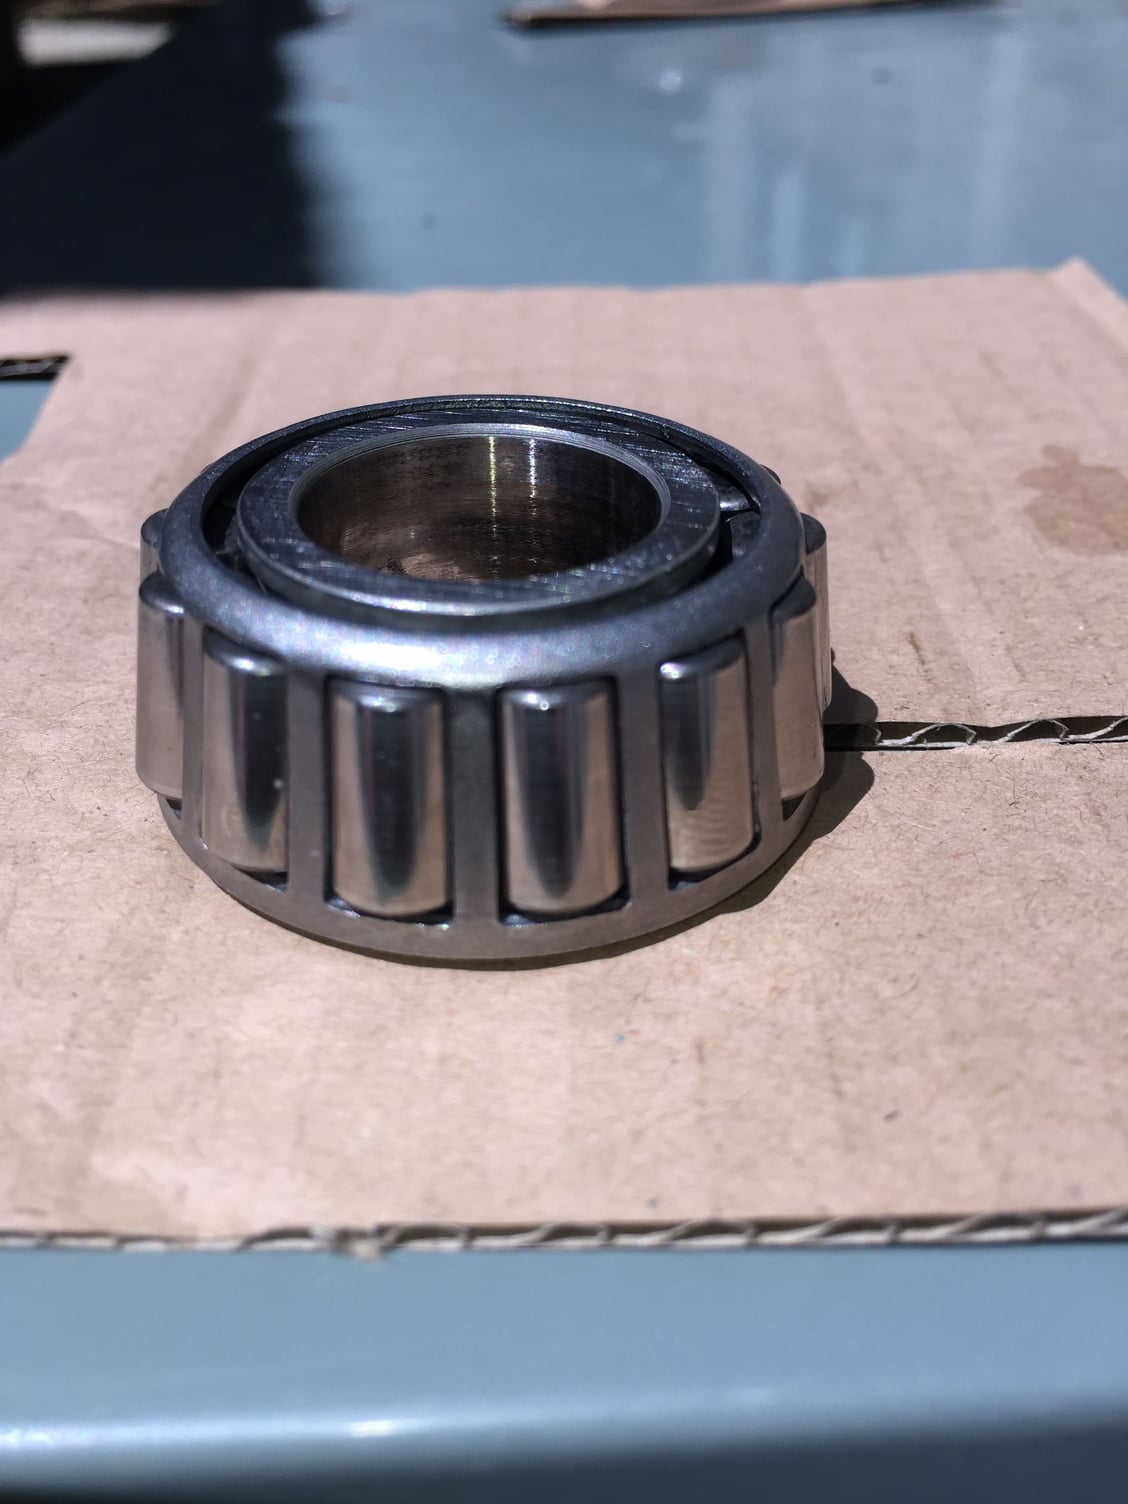
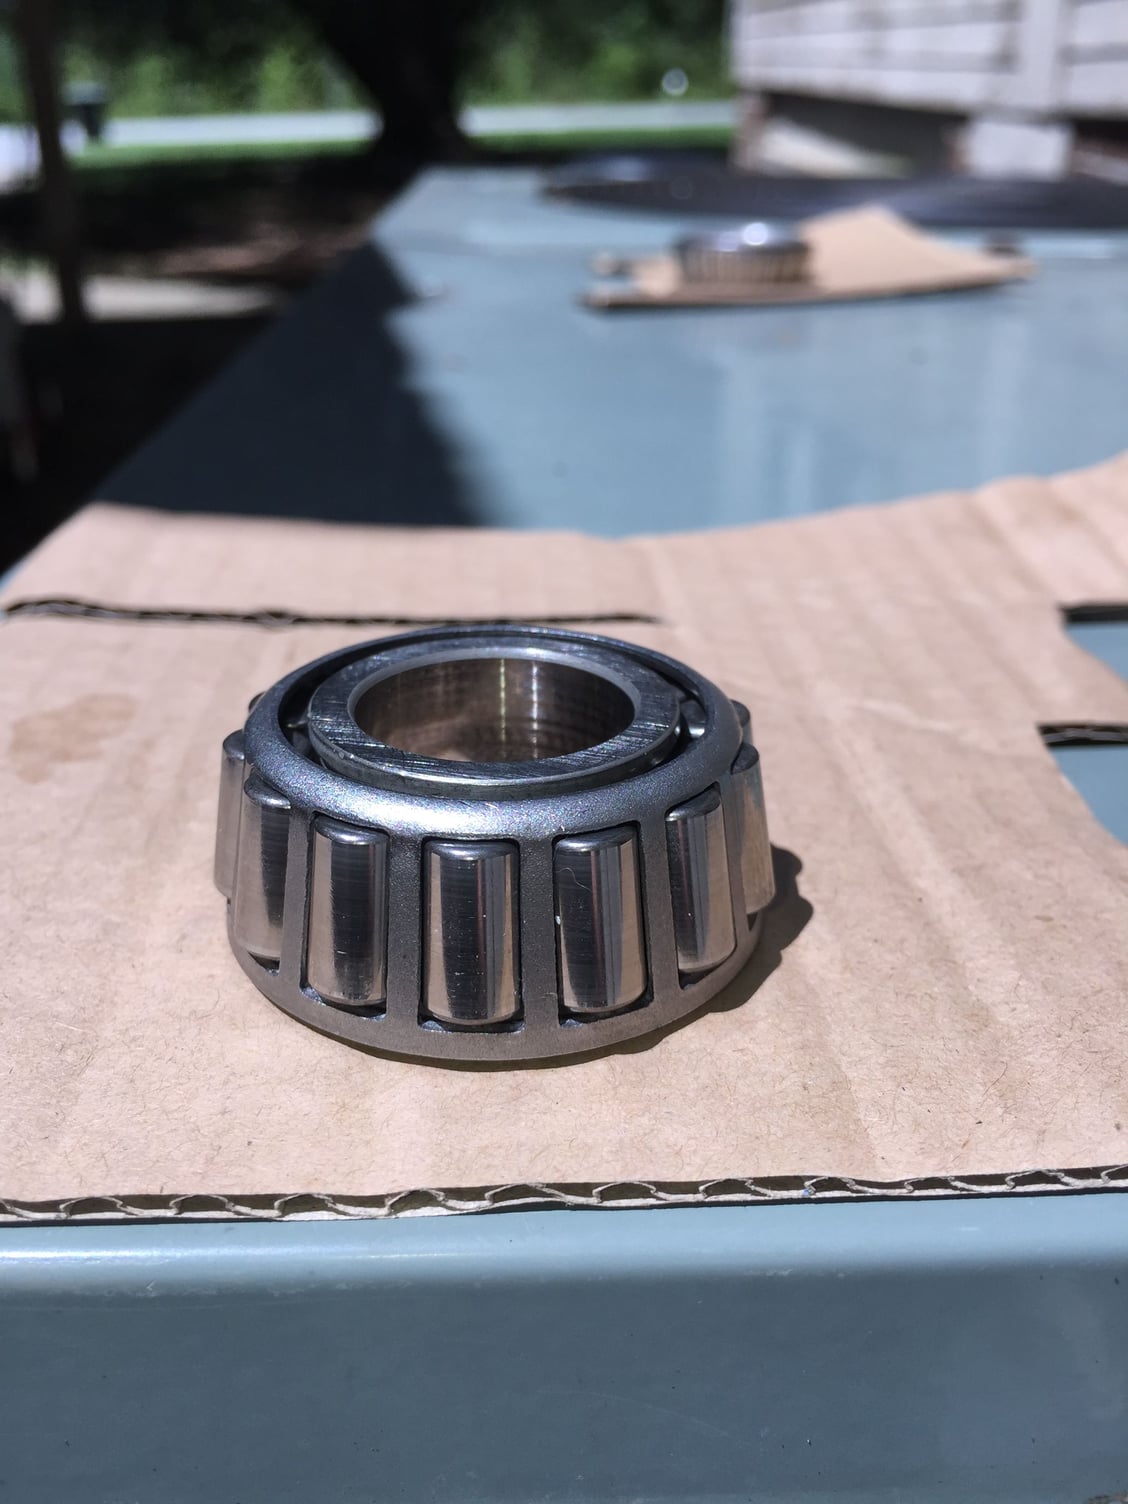
Here are some better photos, taken in the sunlight. I have both sides of each race and each bearing, as well as the insides of the inner races. I also took photos of the spindle.
Outer race.
Other side of outer race.
Inner race.
Other side of inner race.
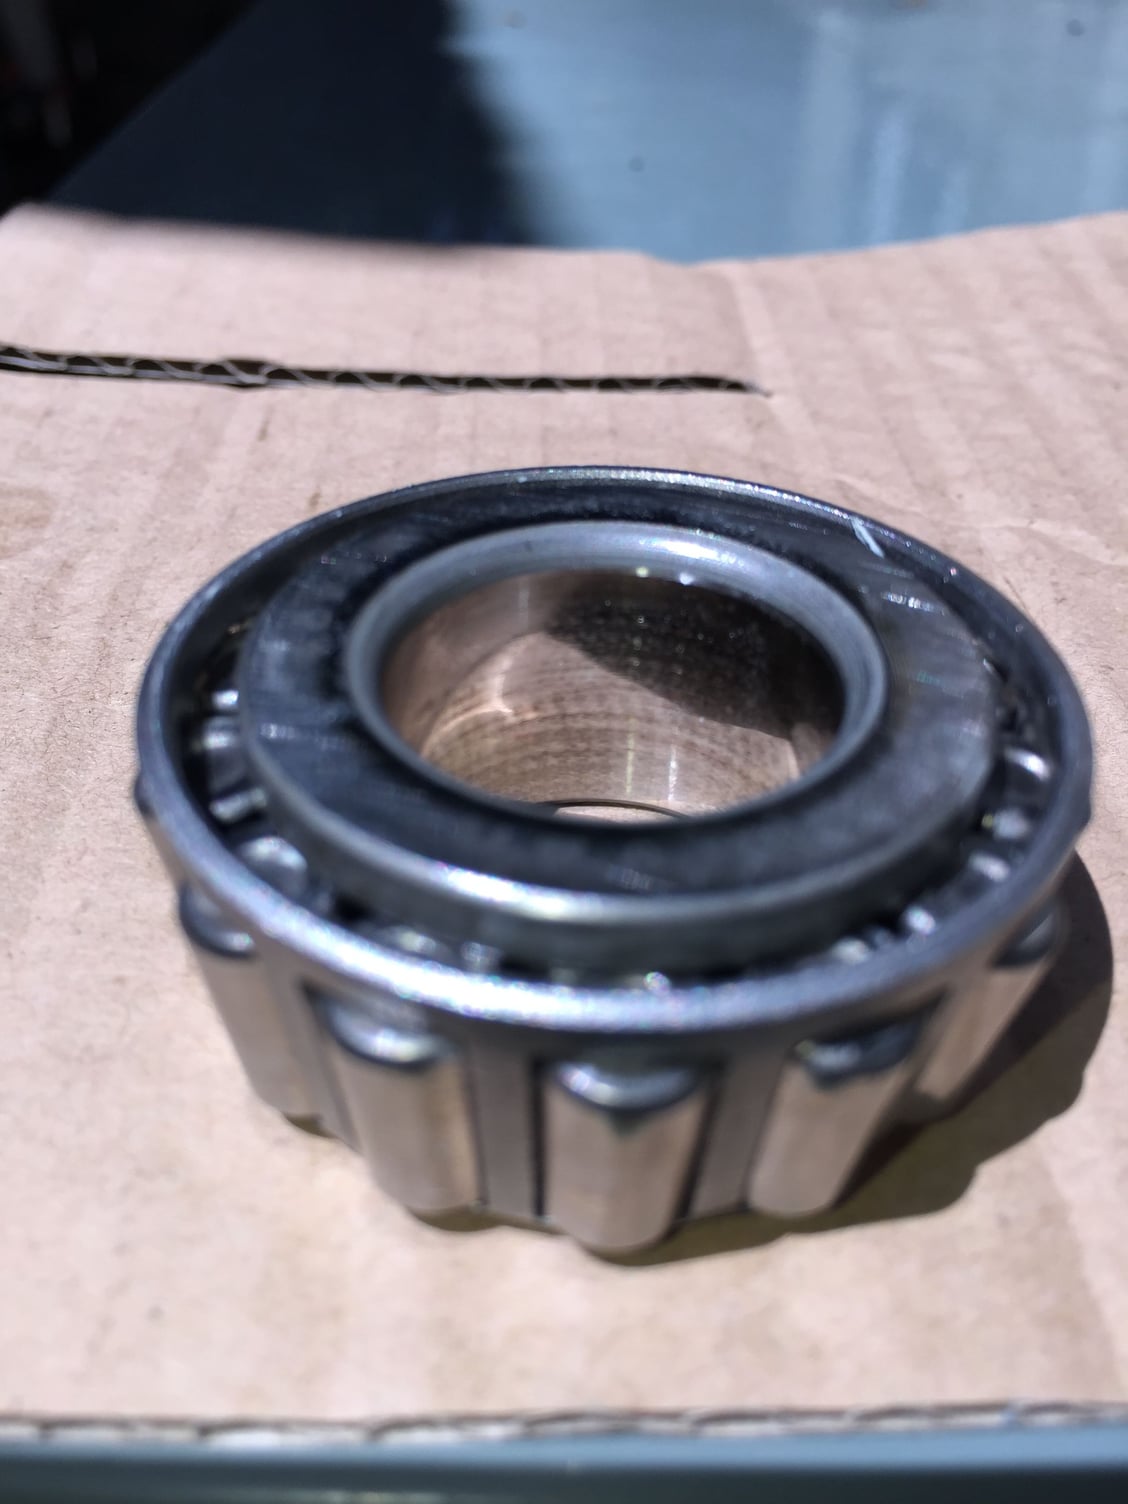
Inner bearing.
Other side of inner bearing.
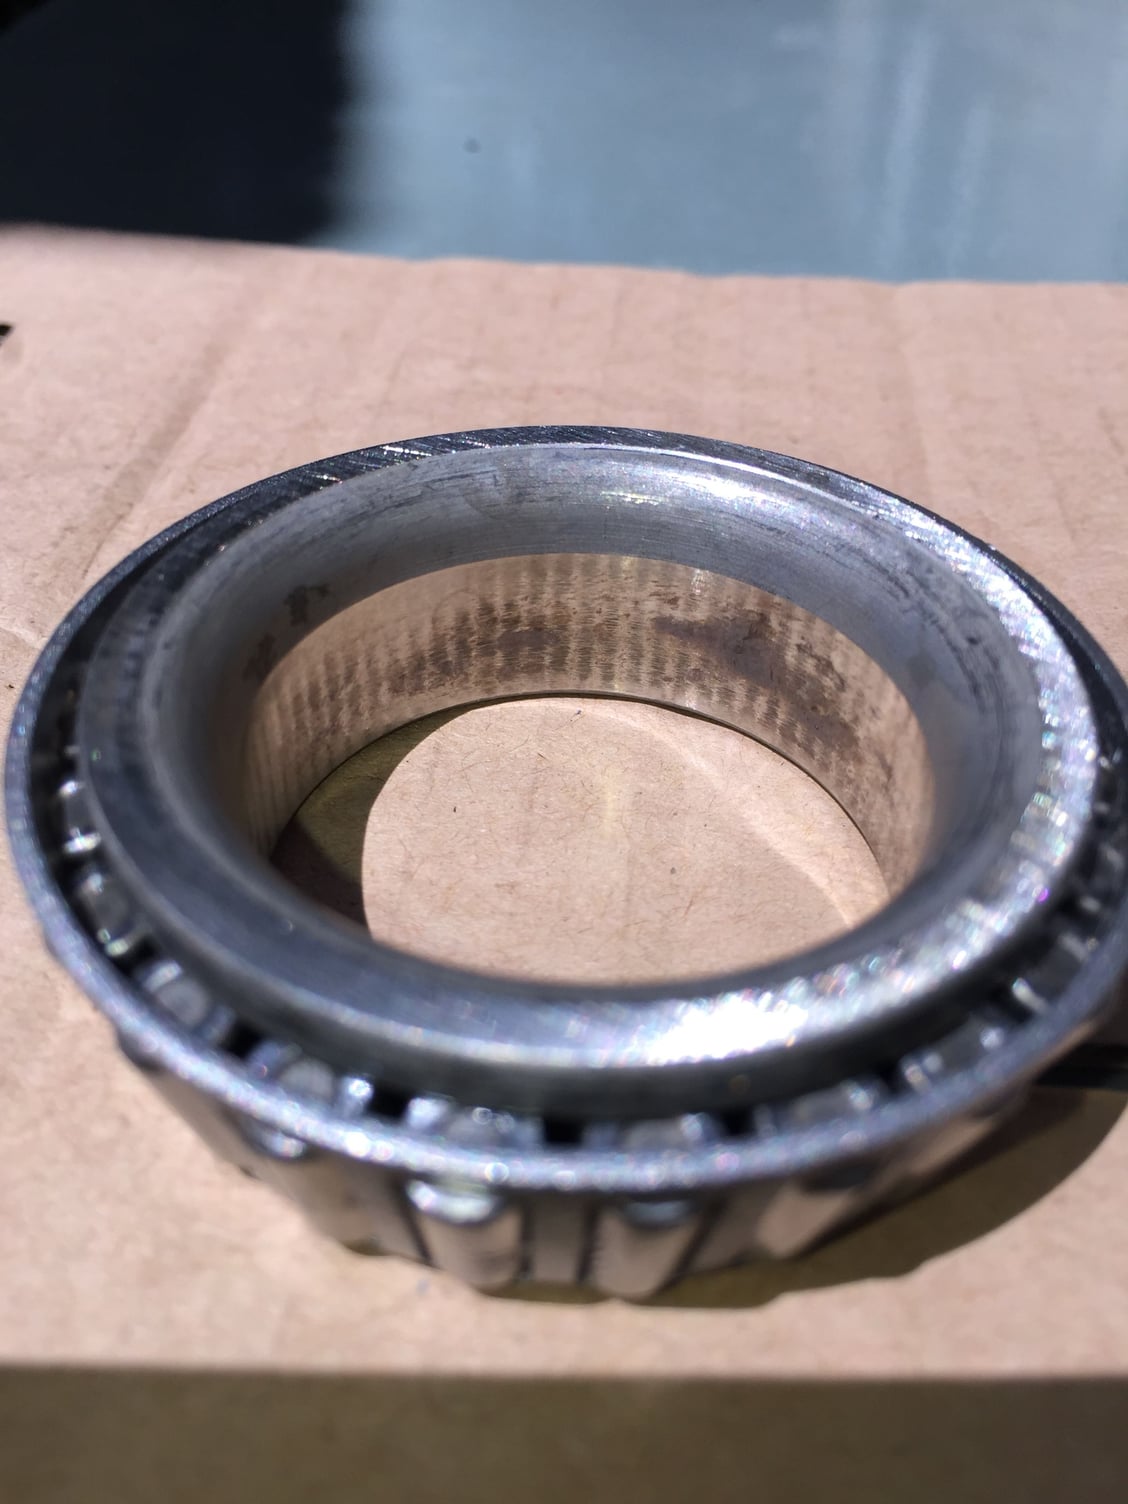
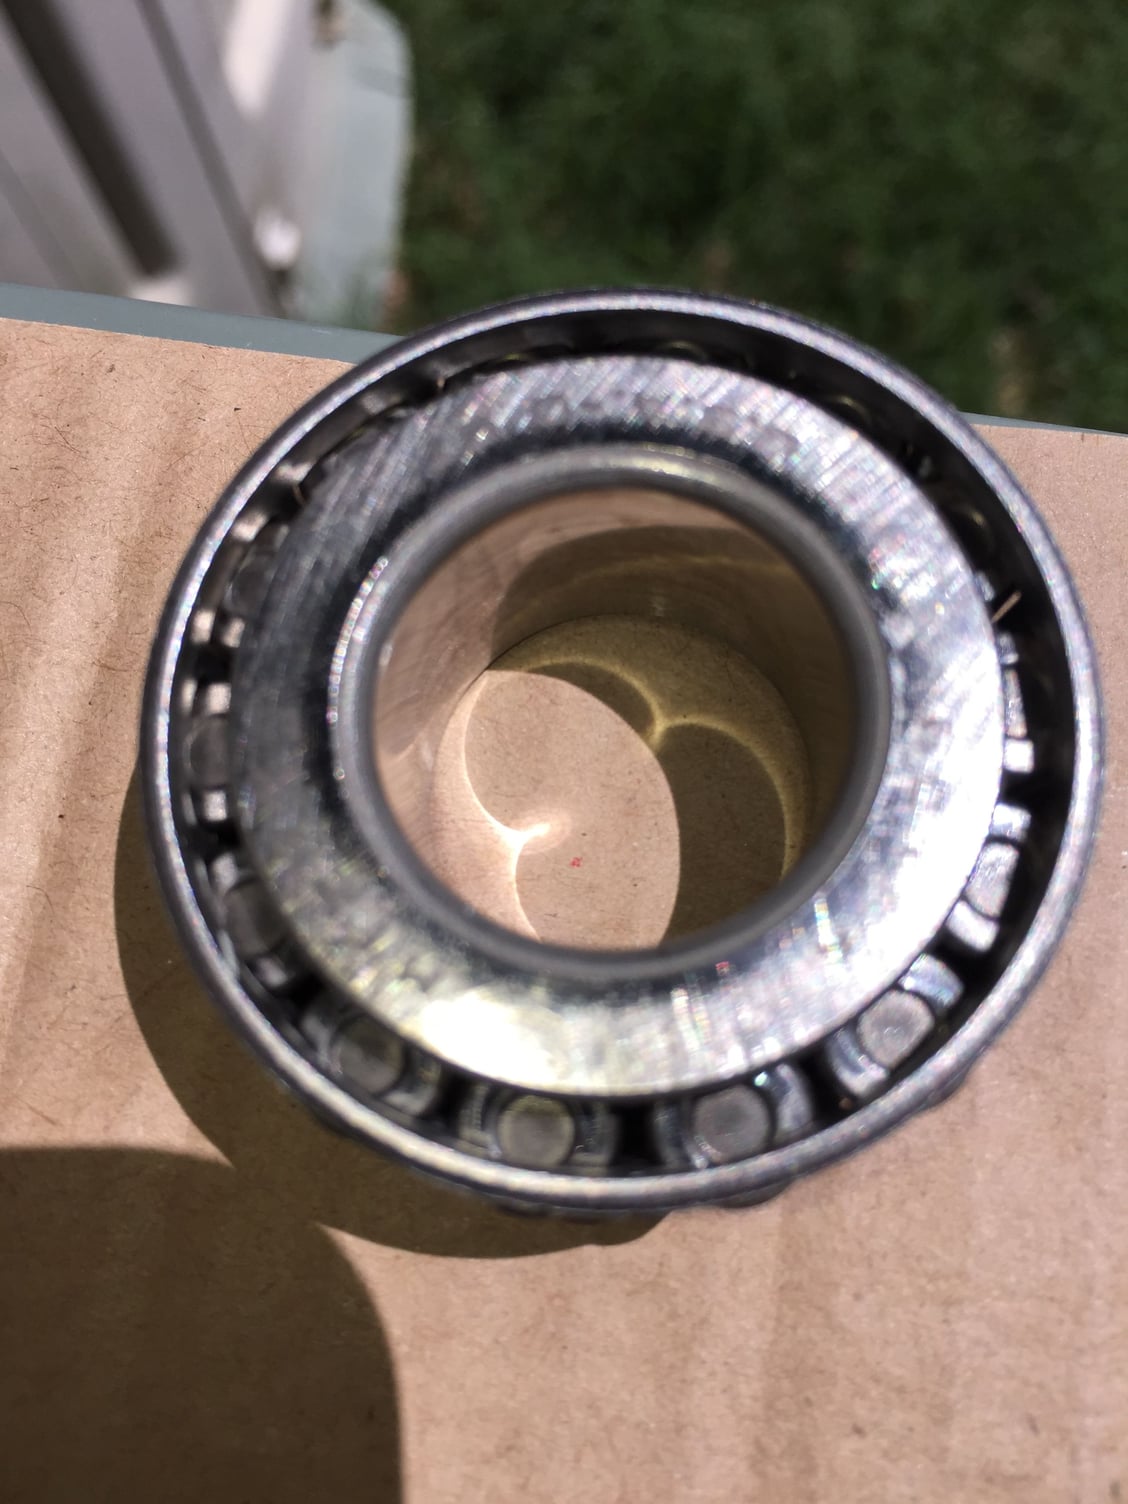
Inside of inner bearing inner race. Note marks.
Open end of inner bearing.
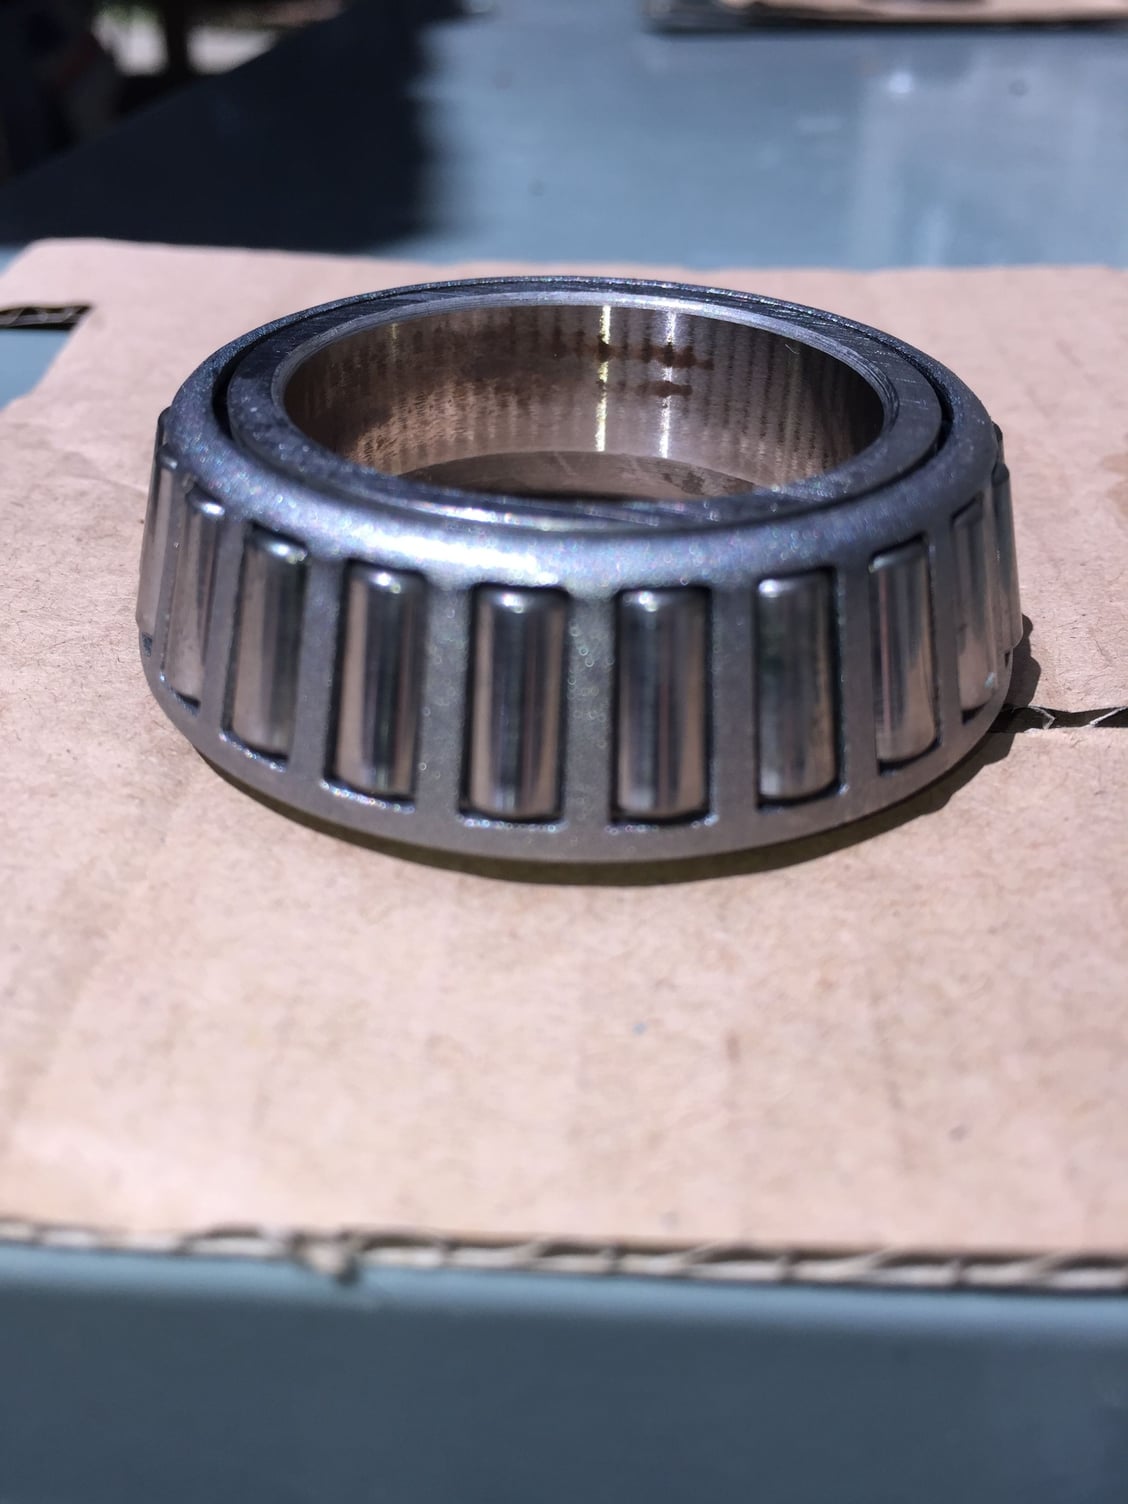
Outer bearing.
Other side of outer bearing.
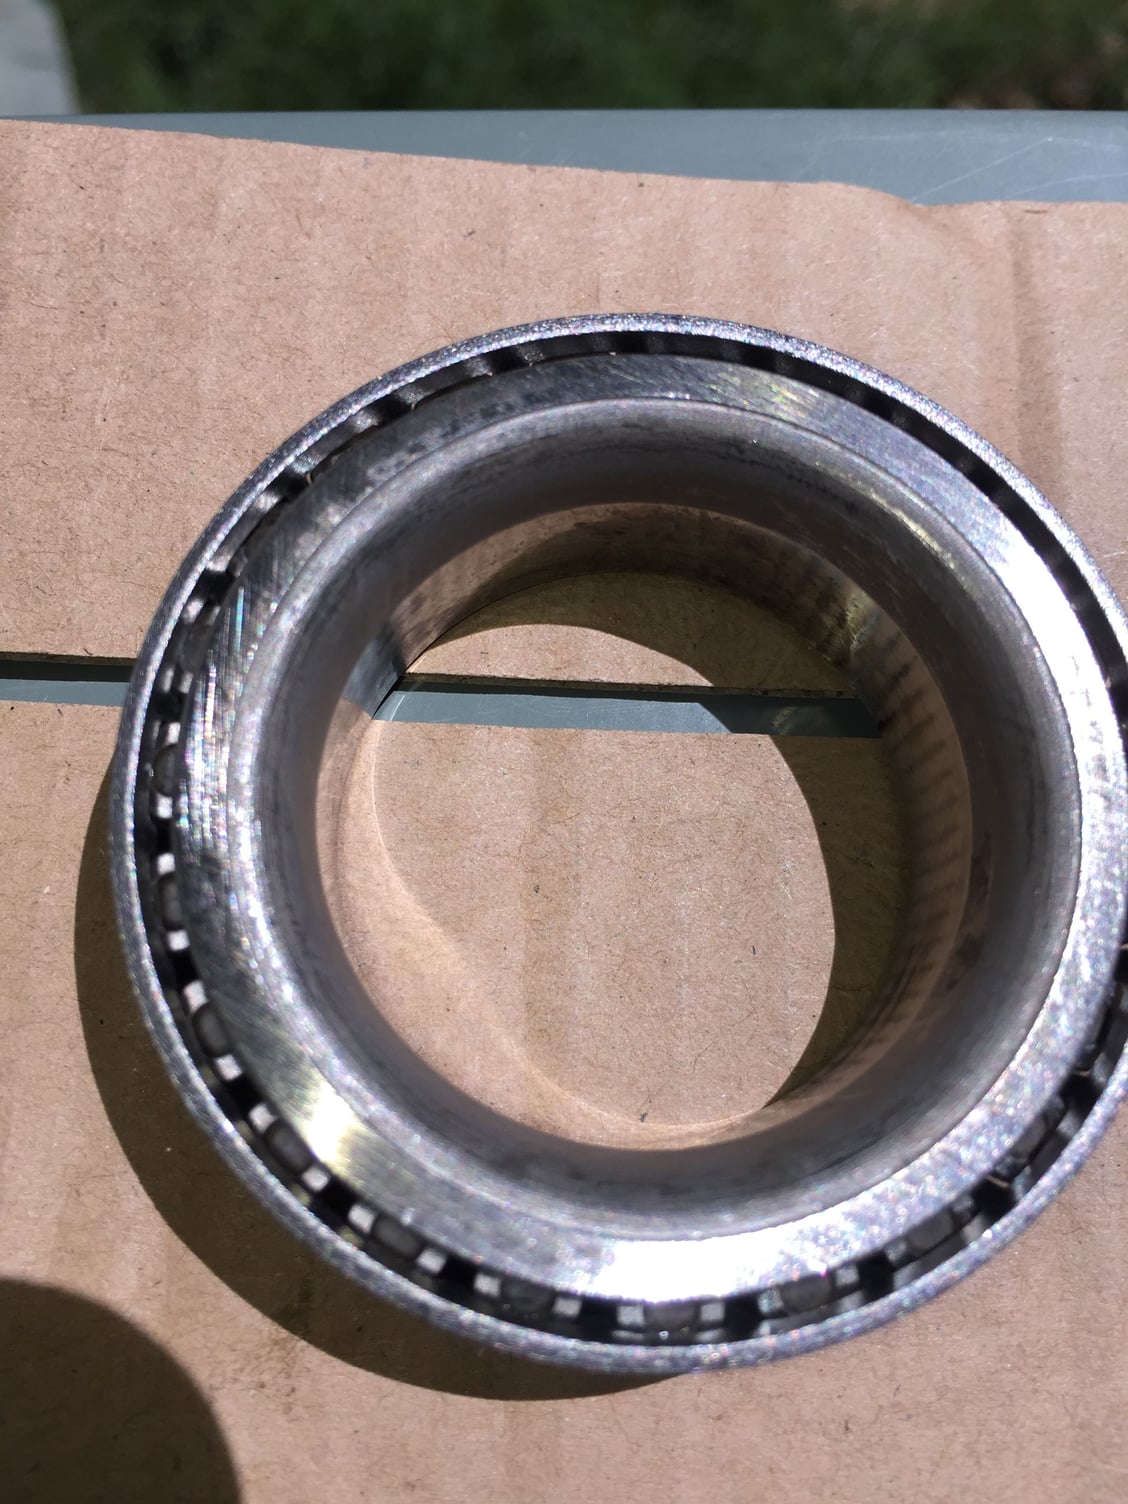
Inside of inner race of outer bearing.
Open end of outer bearing.
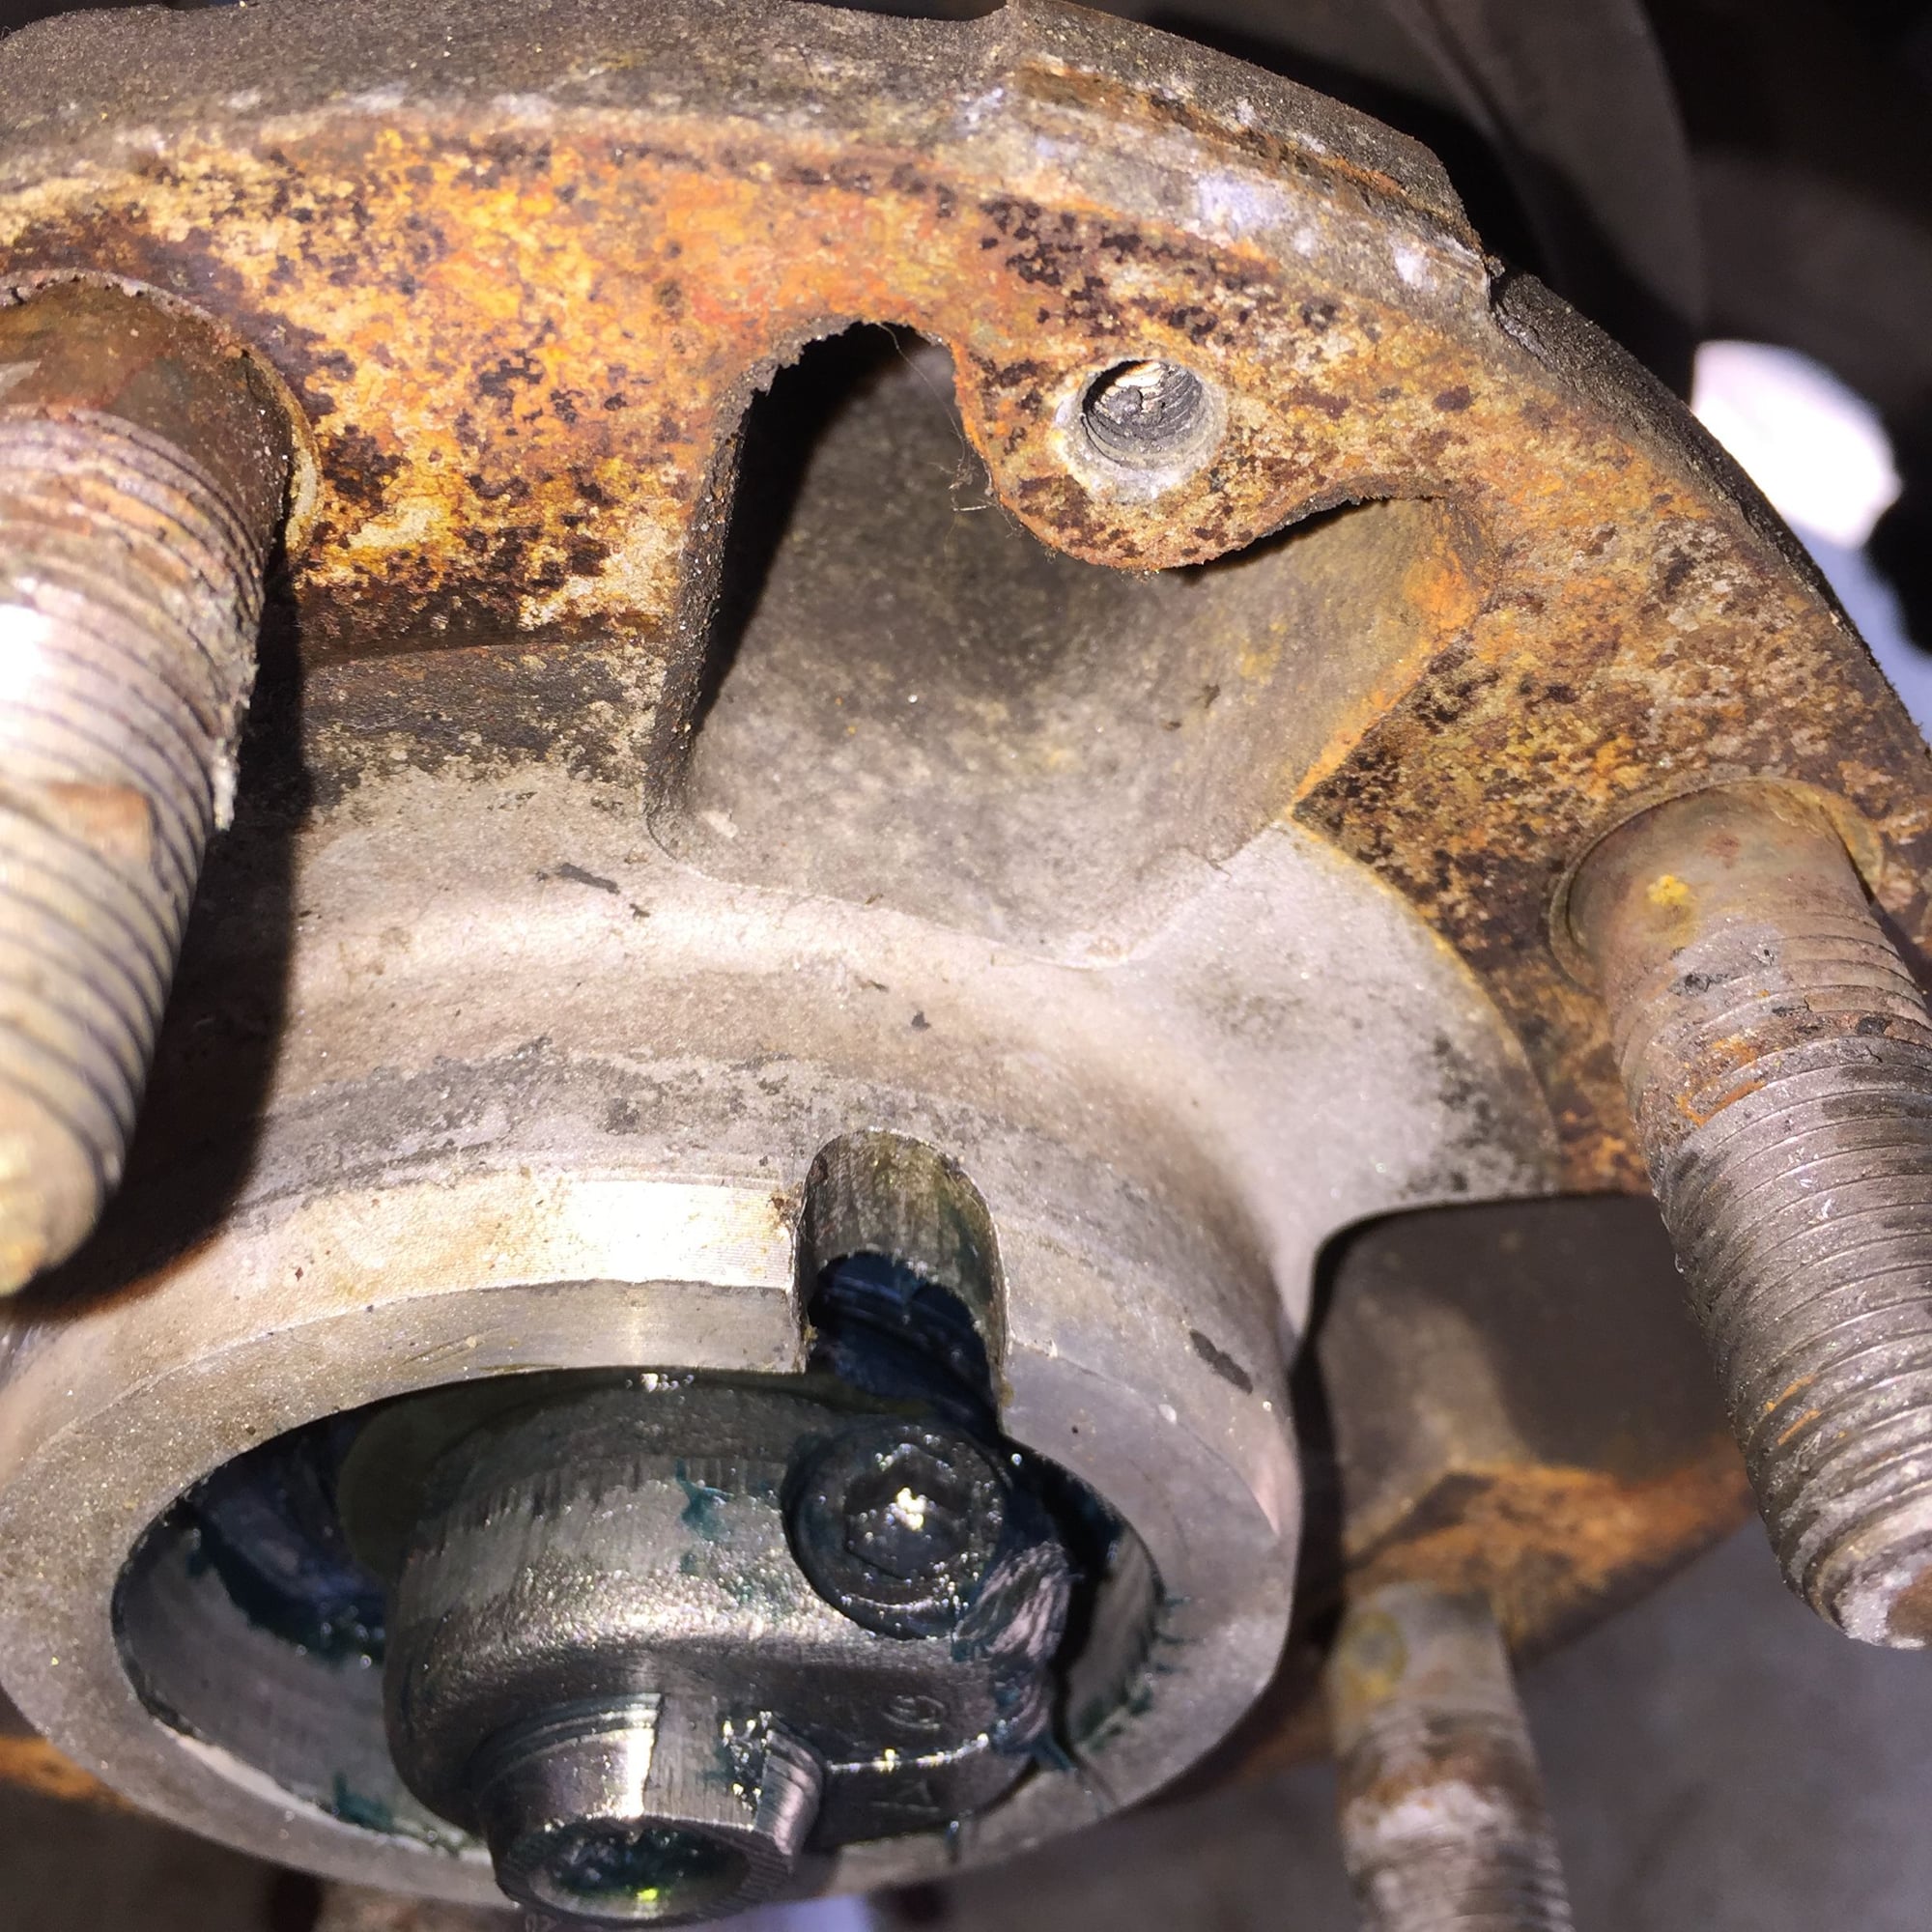
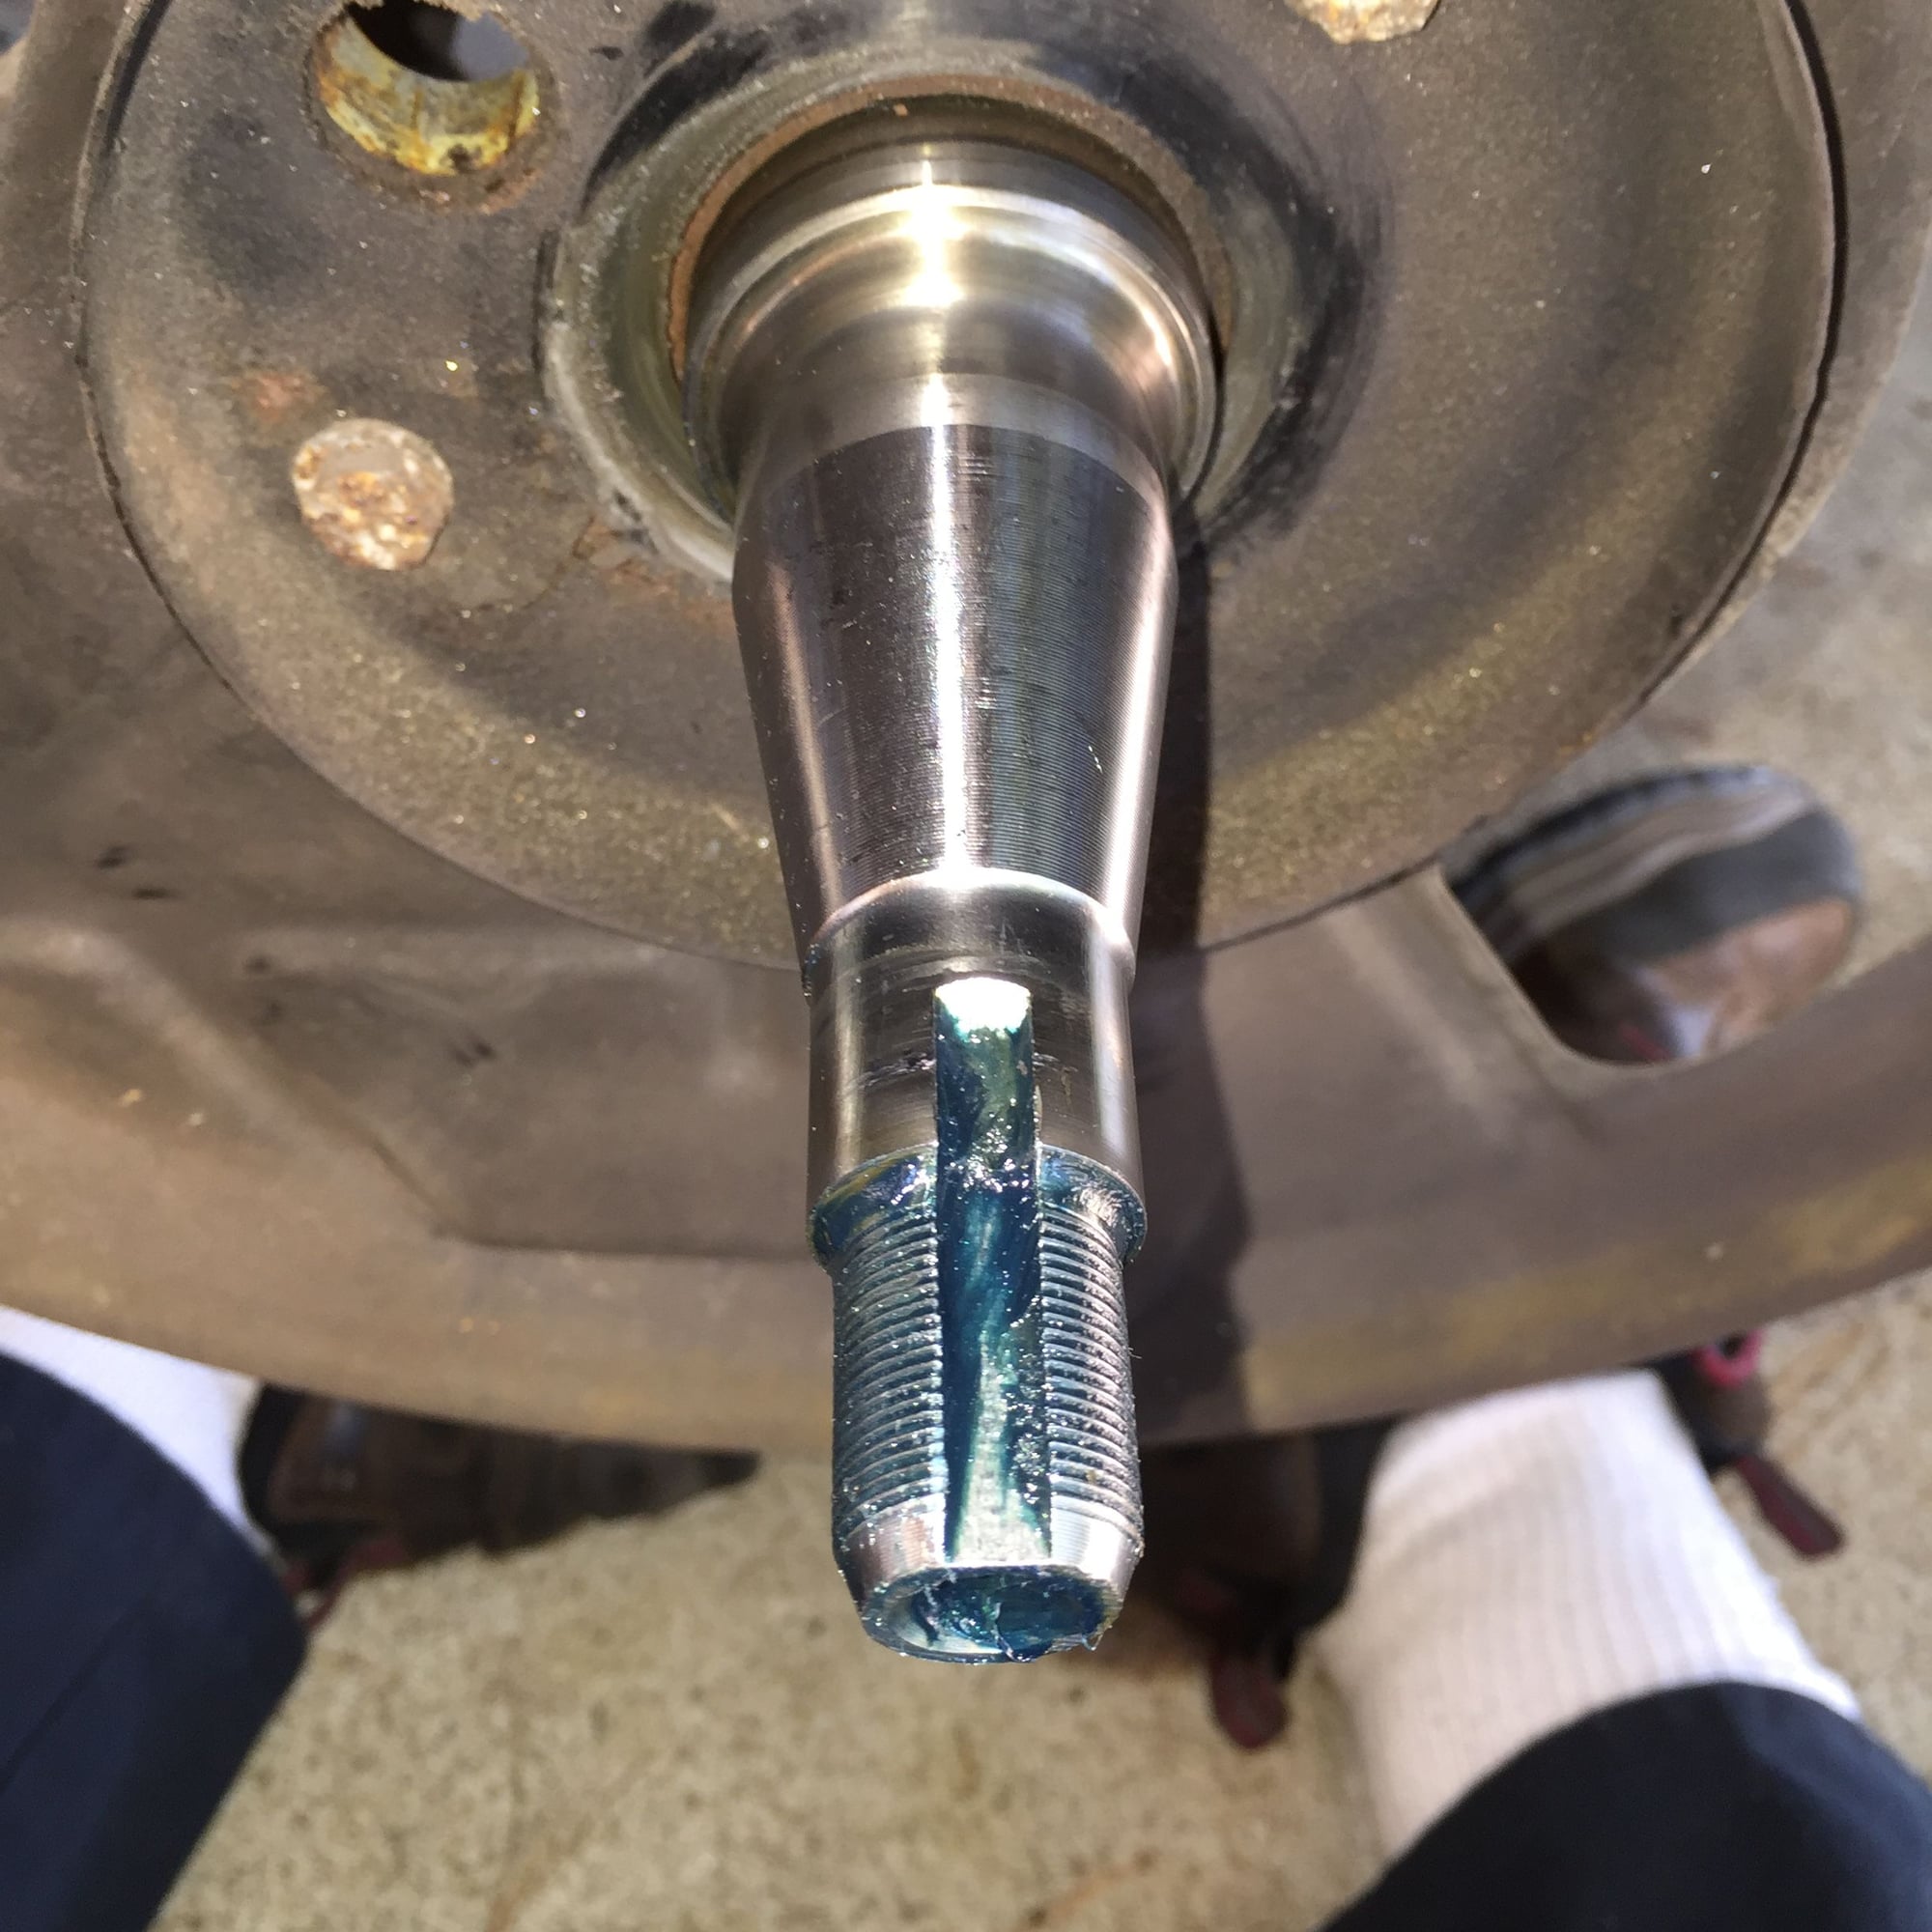
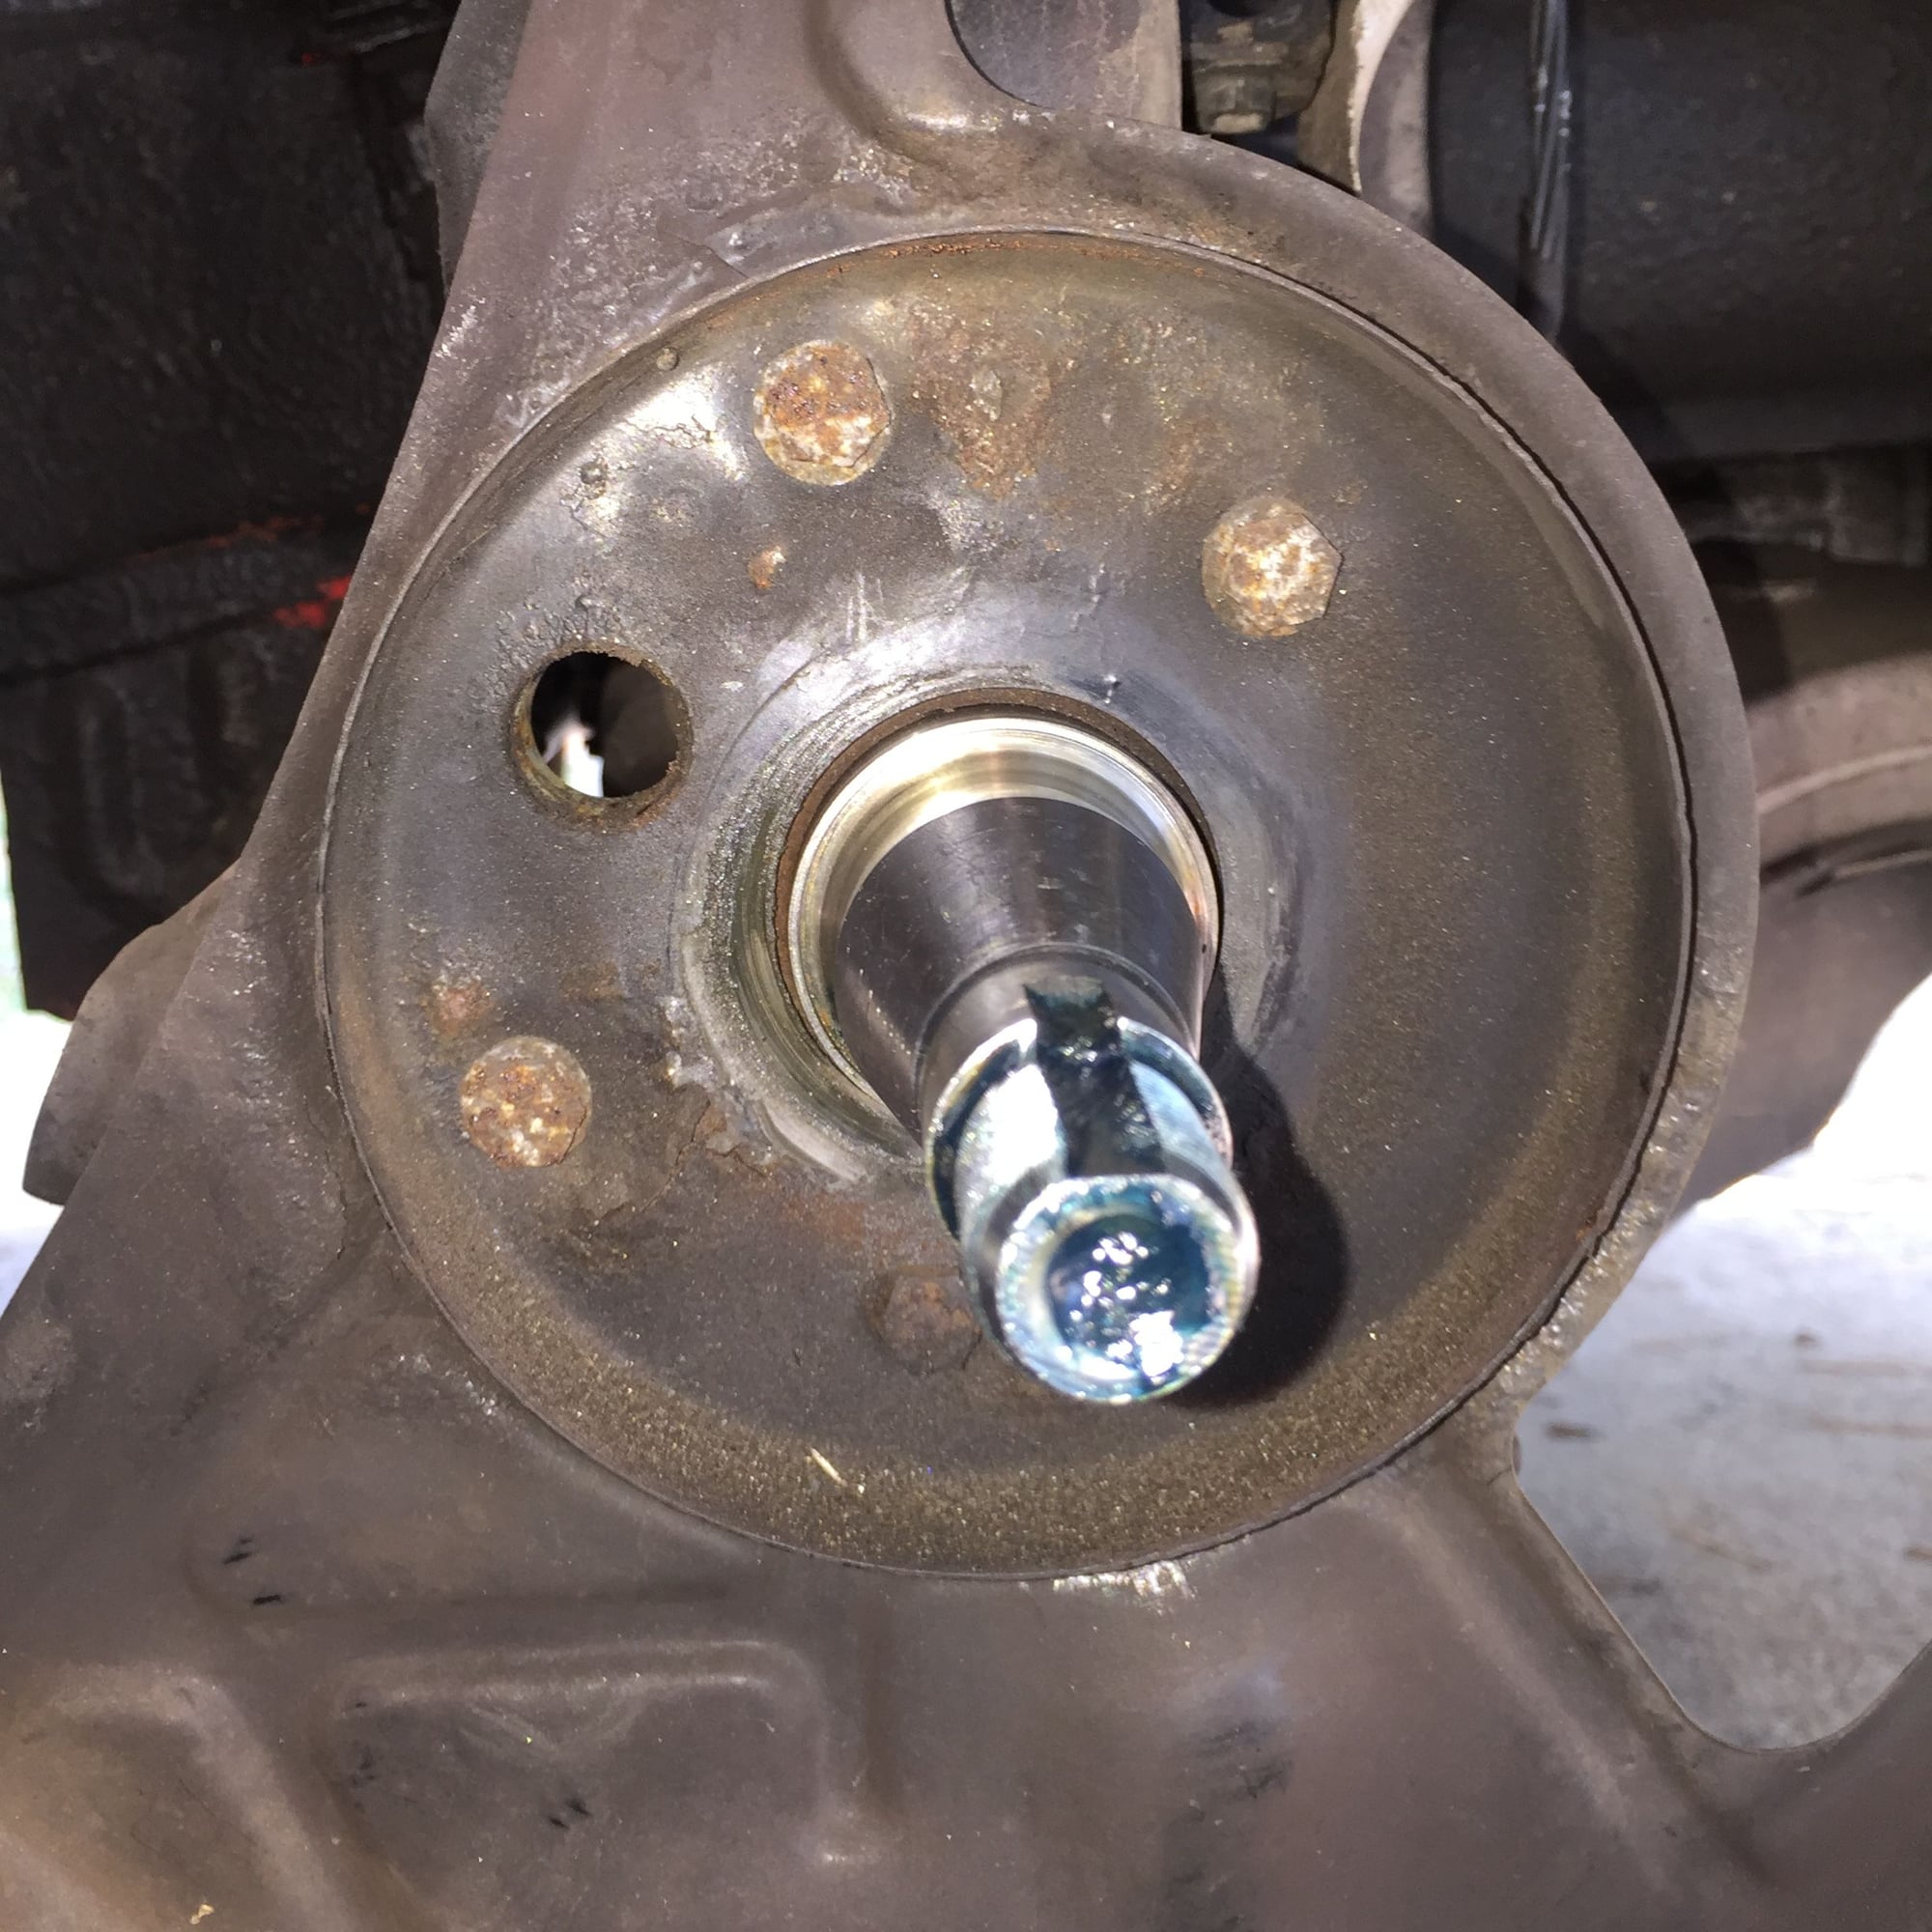
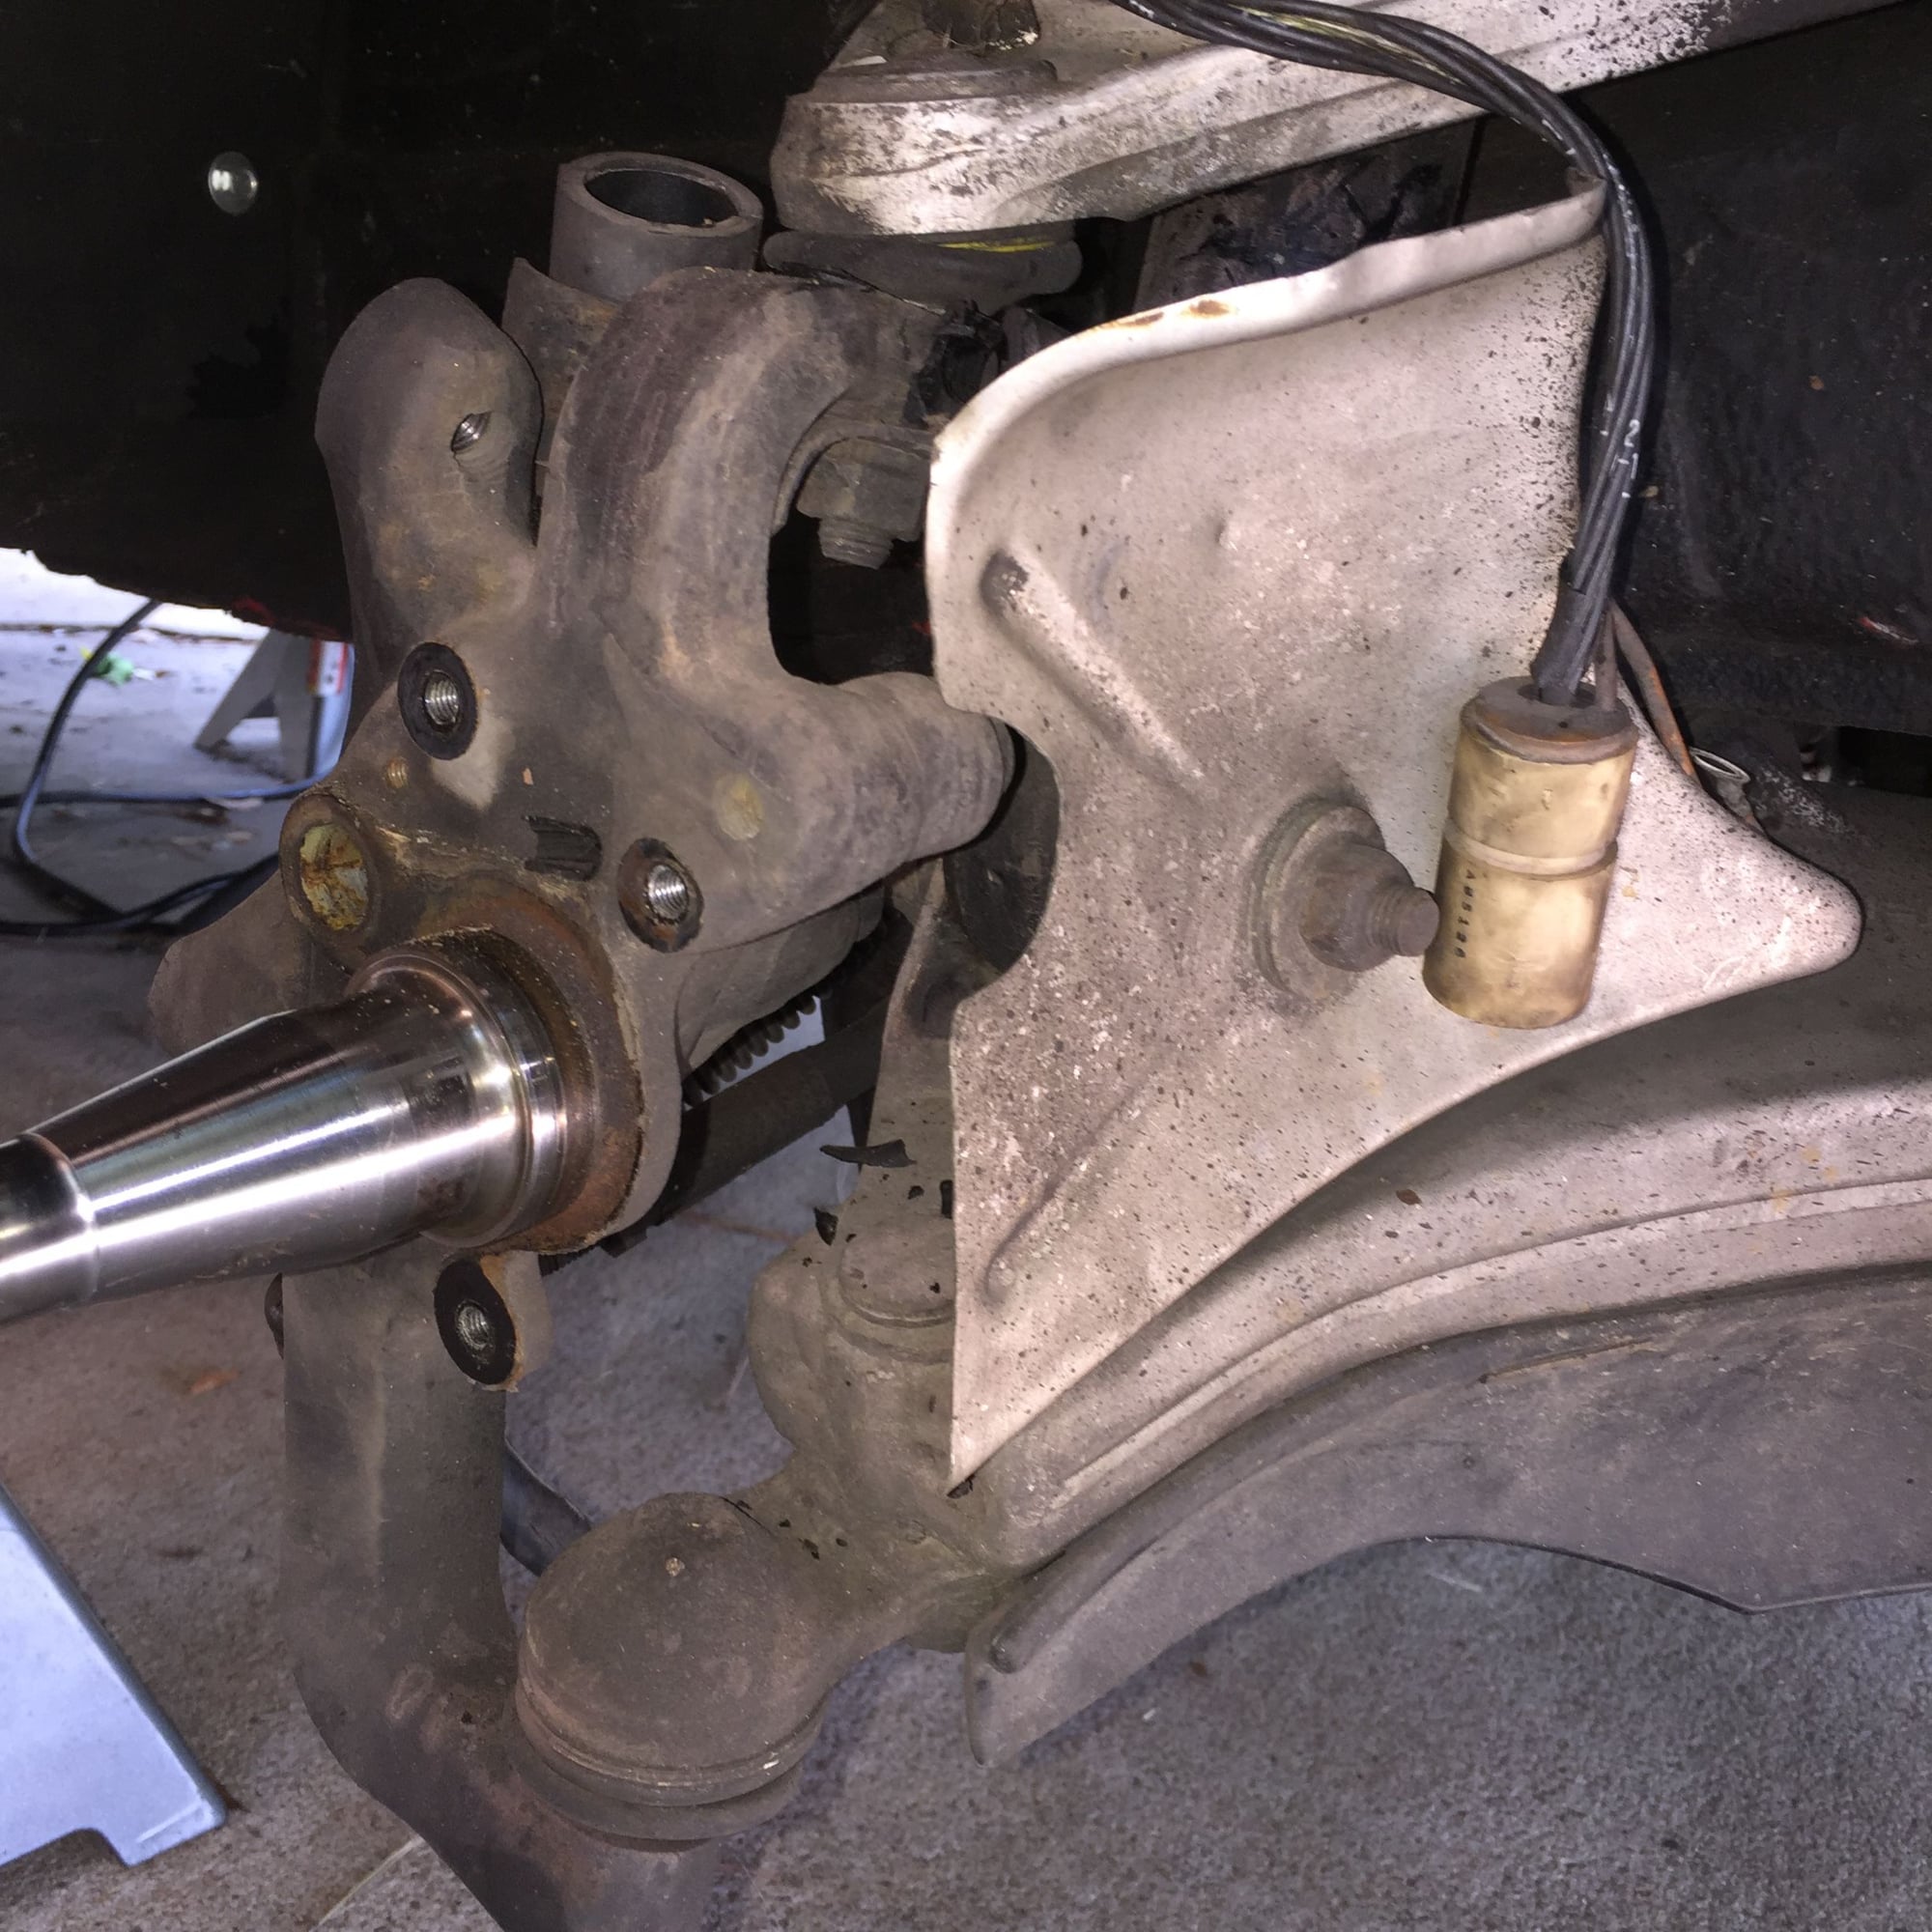
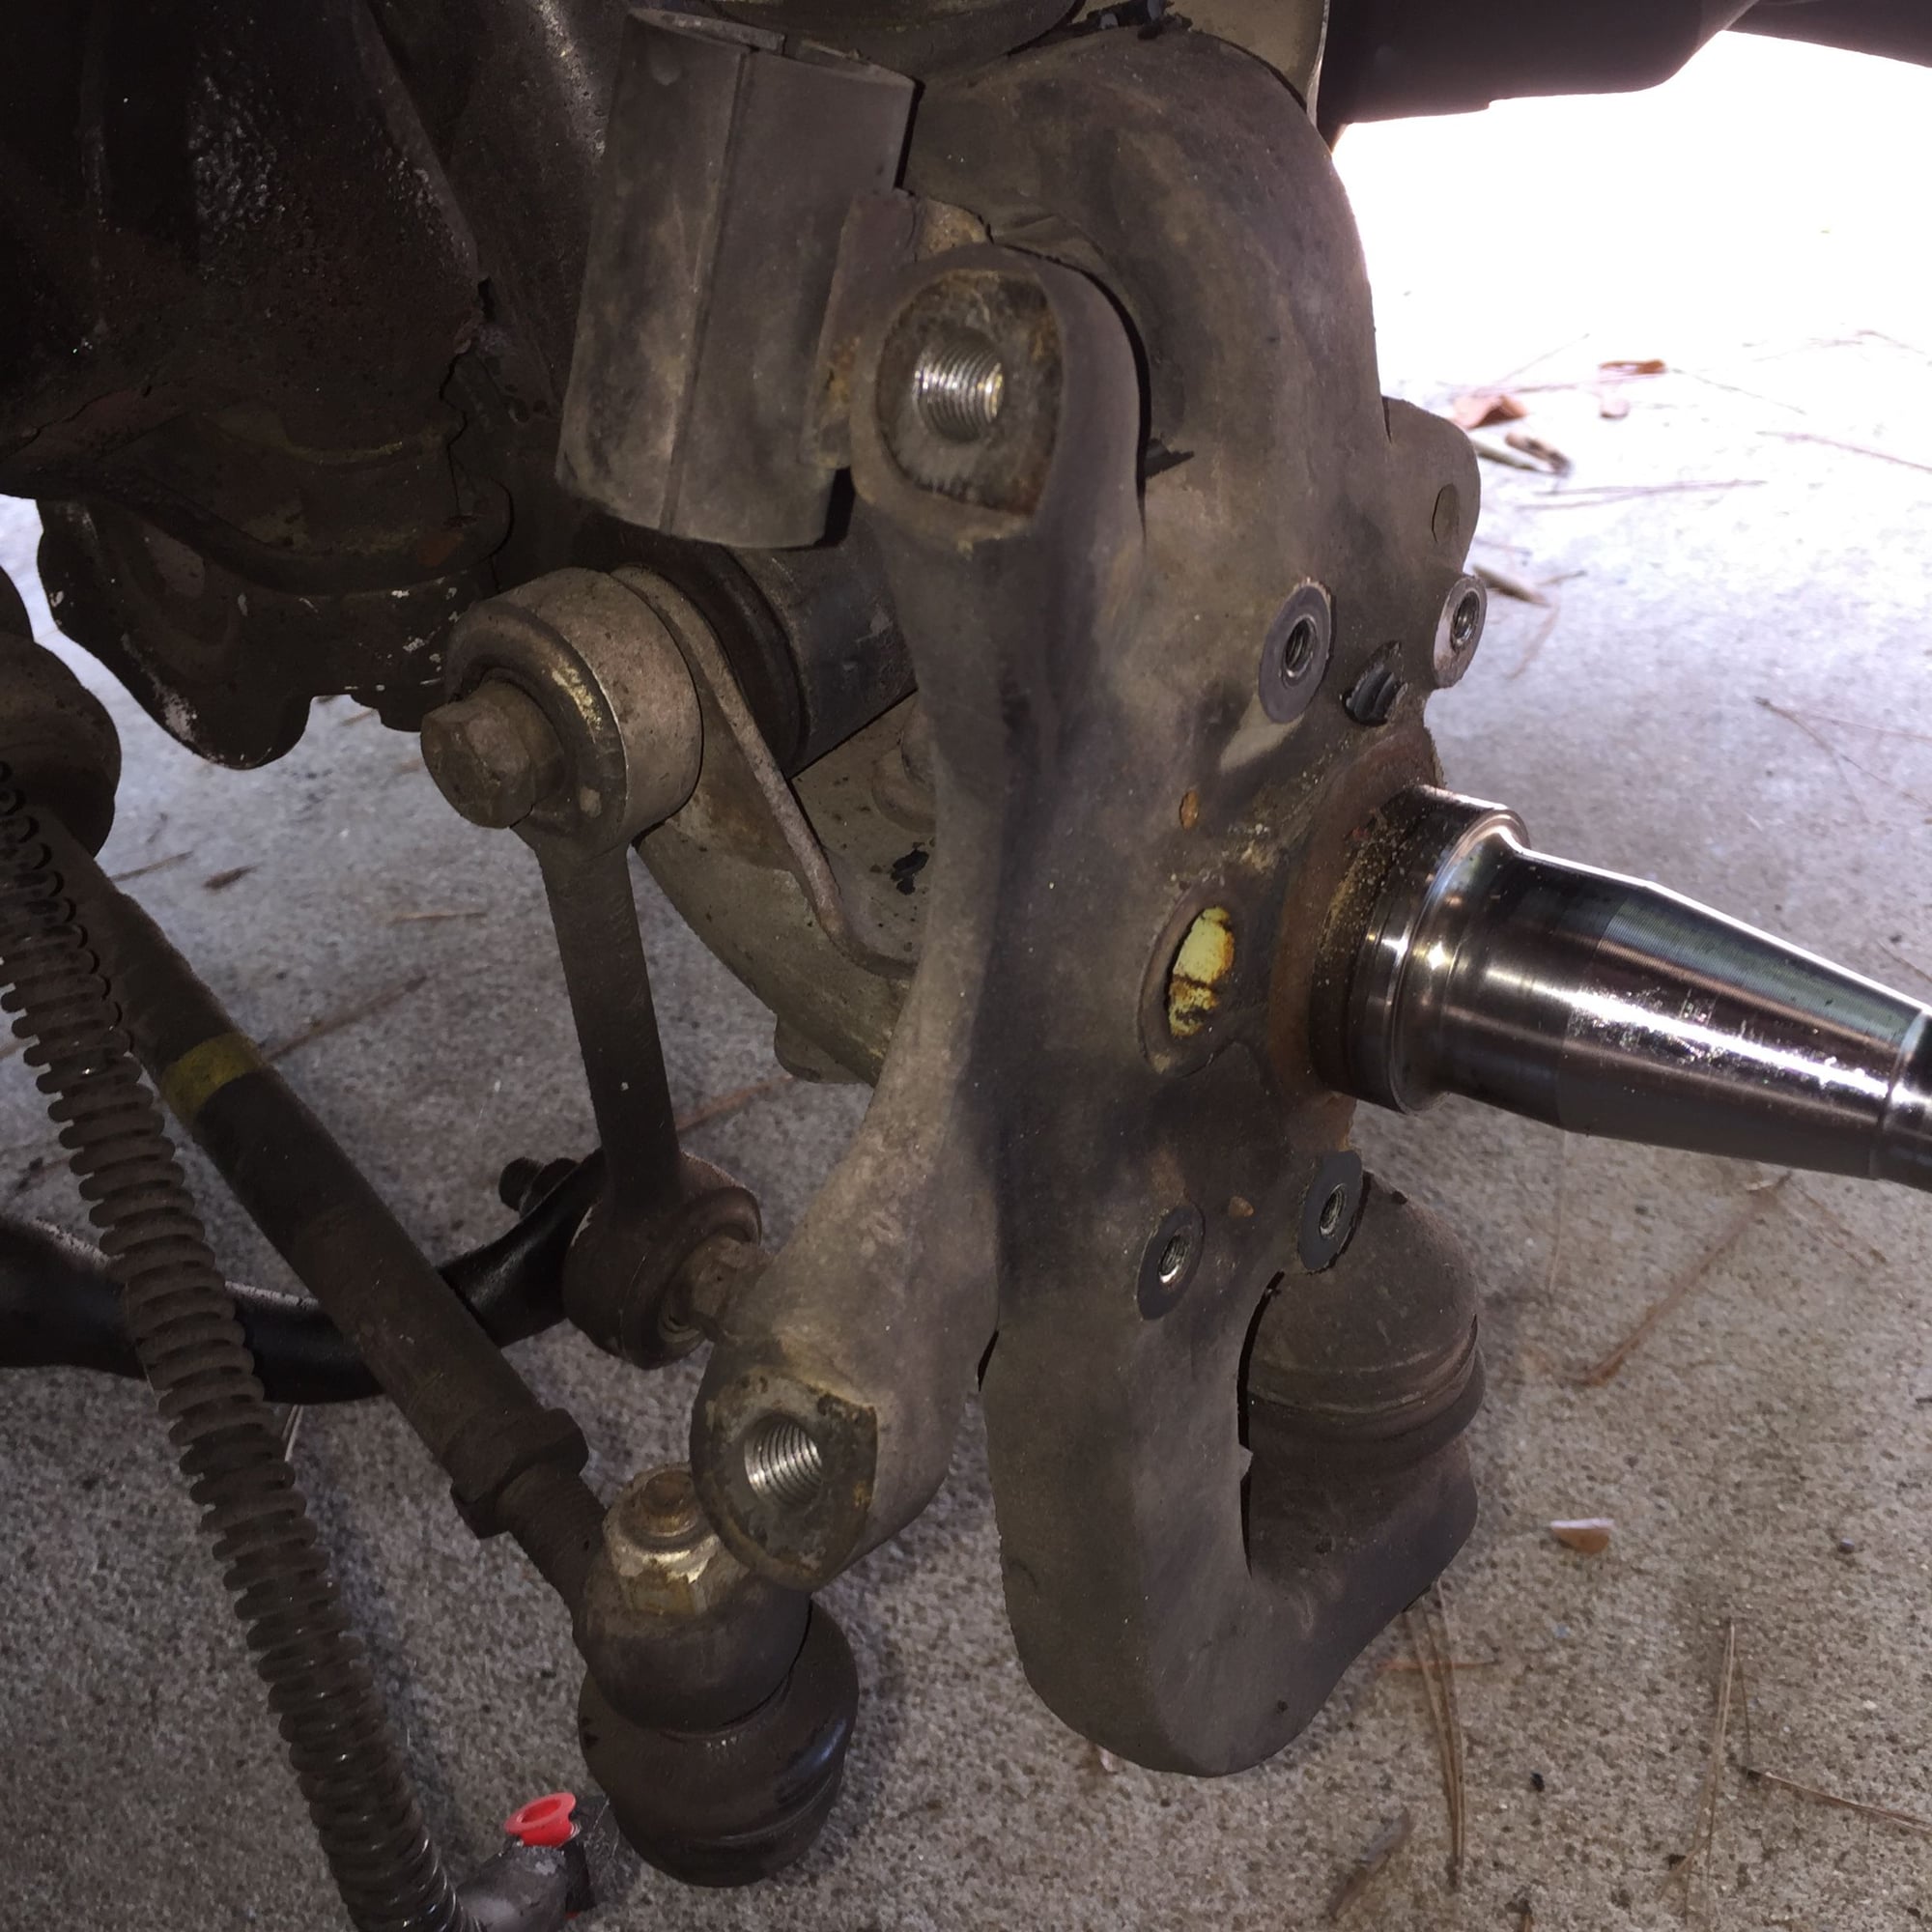
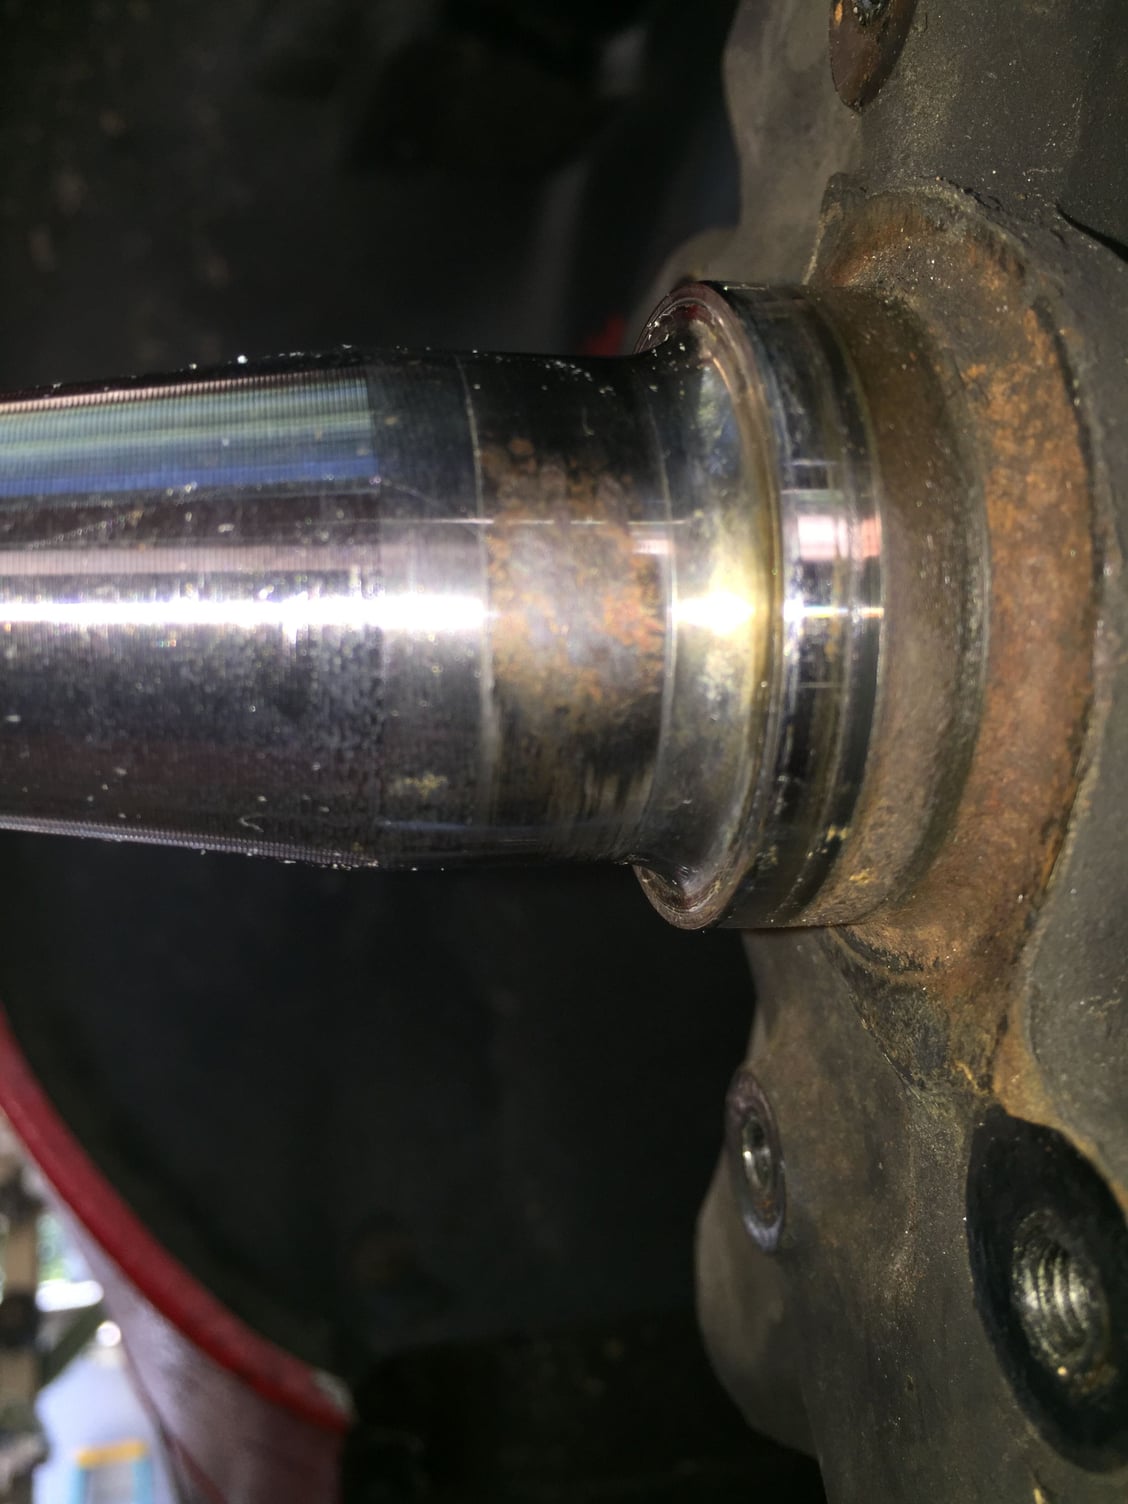
Passenger's side spindle, view is from directly below.
Wear or corrosion mark on inner bearing race, at approximately 5 o'clock.
I had interpreted these bearings and races as used, but serviceable. If I have to order a full set of front wheel bearings, then I will order a full set of front wheel bearings.
I have a silly question: when heating the hub in the oven to install the chilled races, what keeps the first race in place after the hub is again heated to install the second race?
Hmmm...the photos did not turn out as clear as I had hoped they would. Sorry.
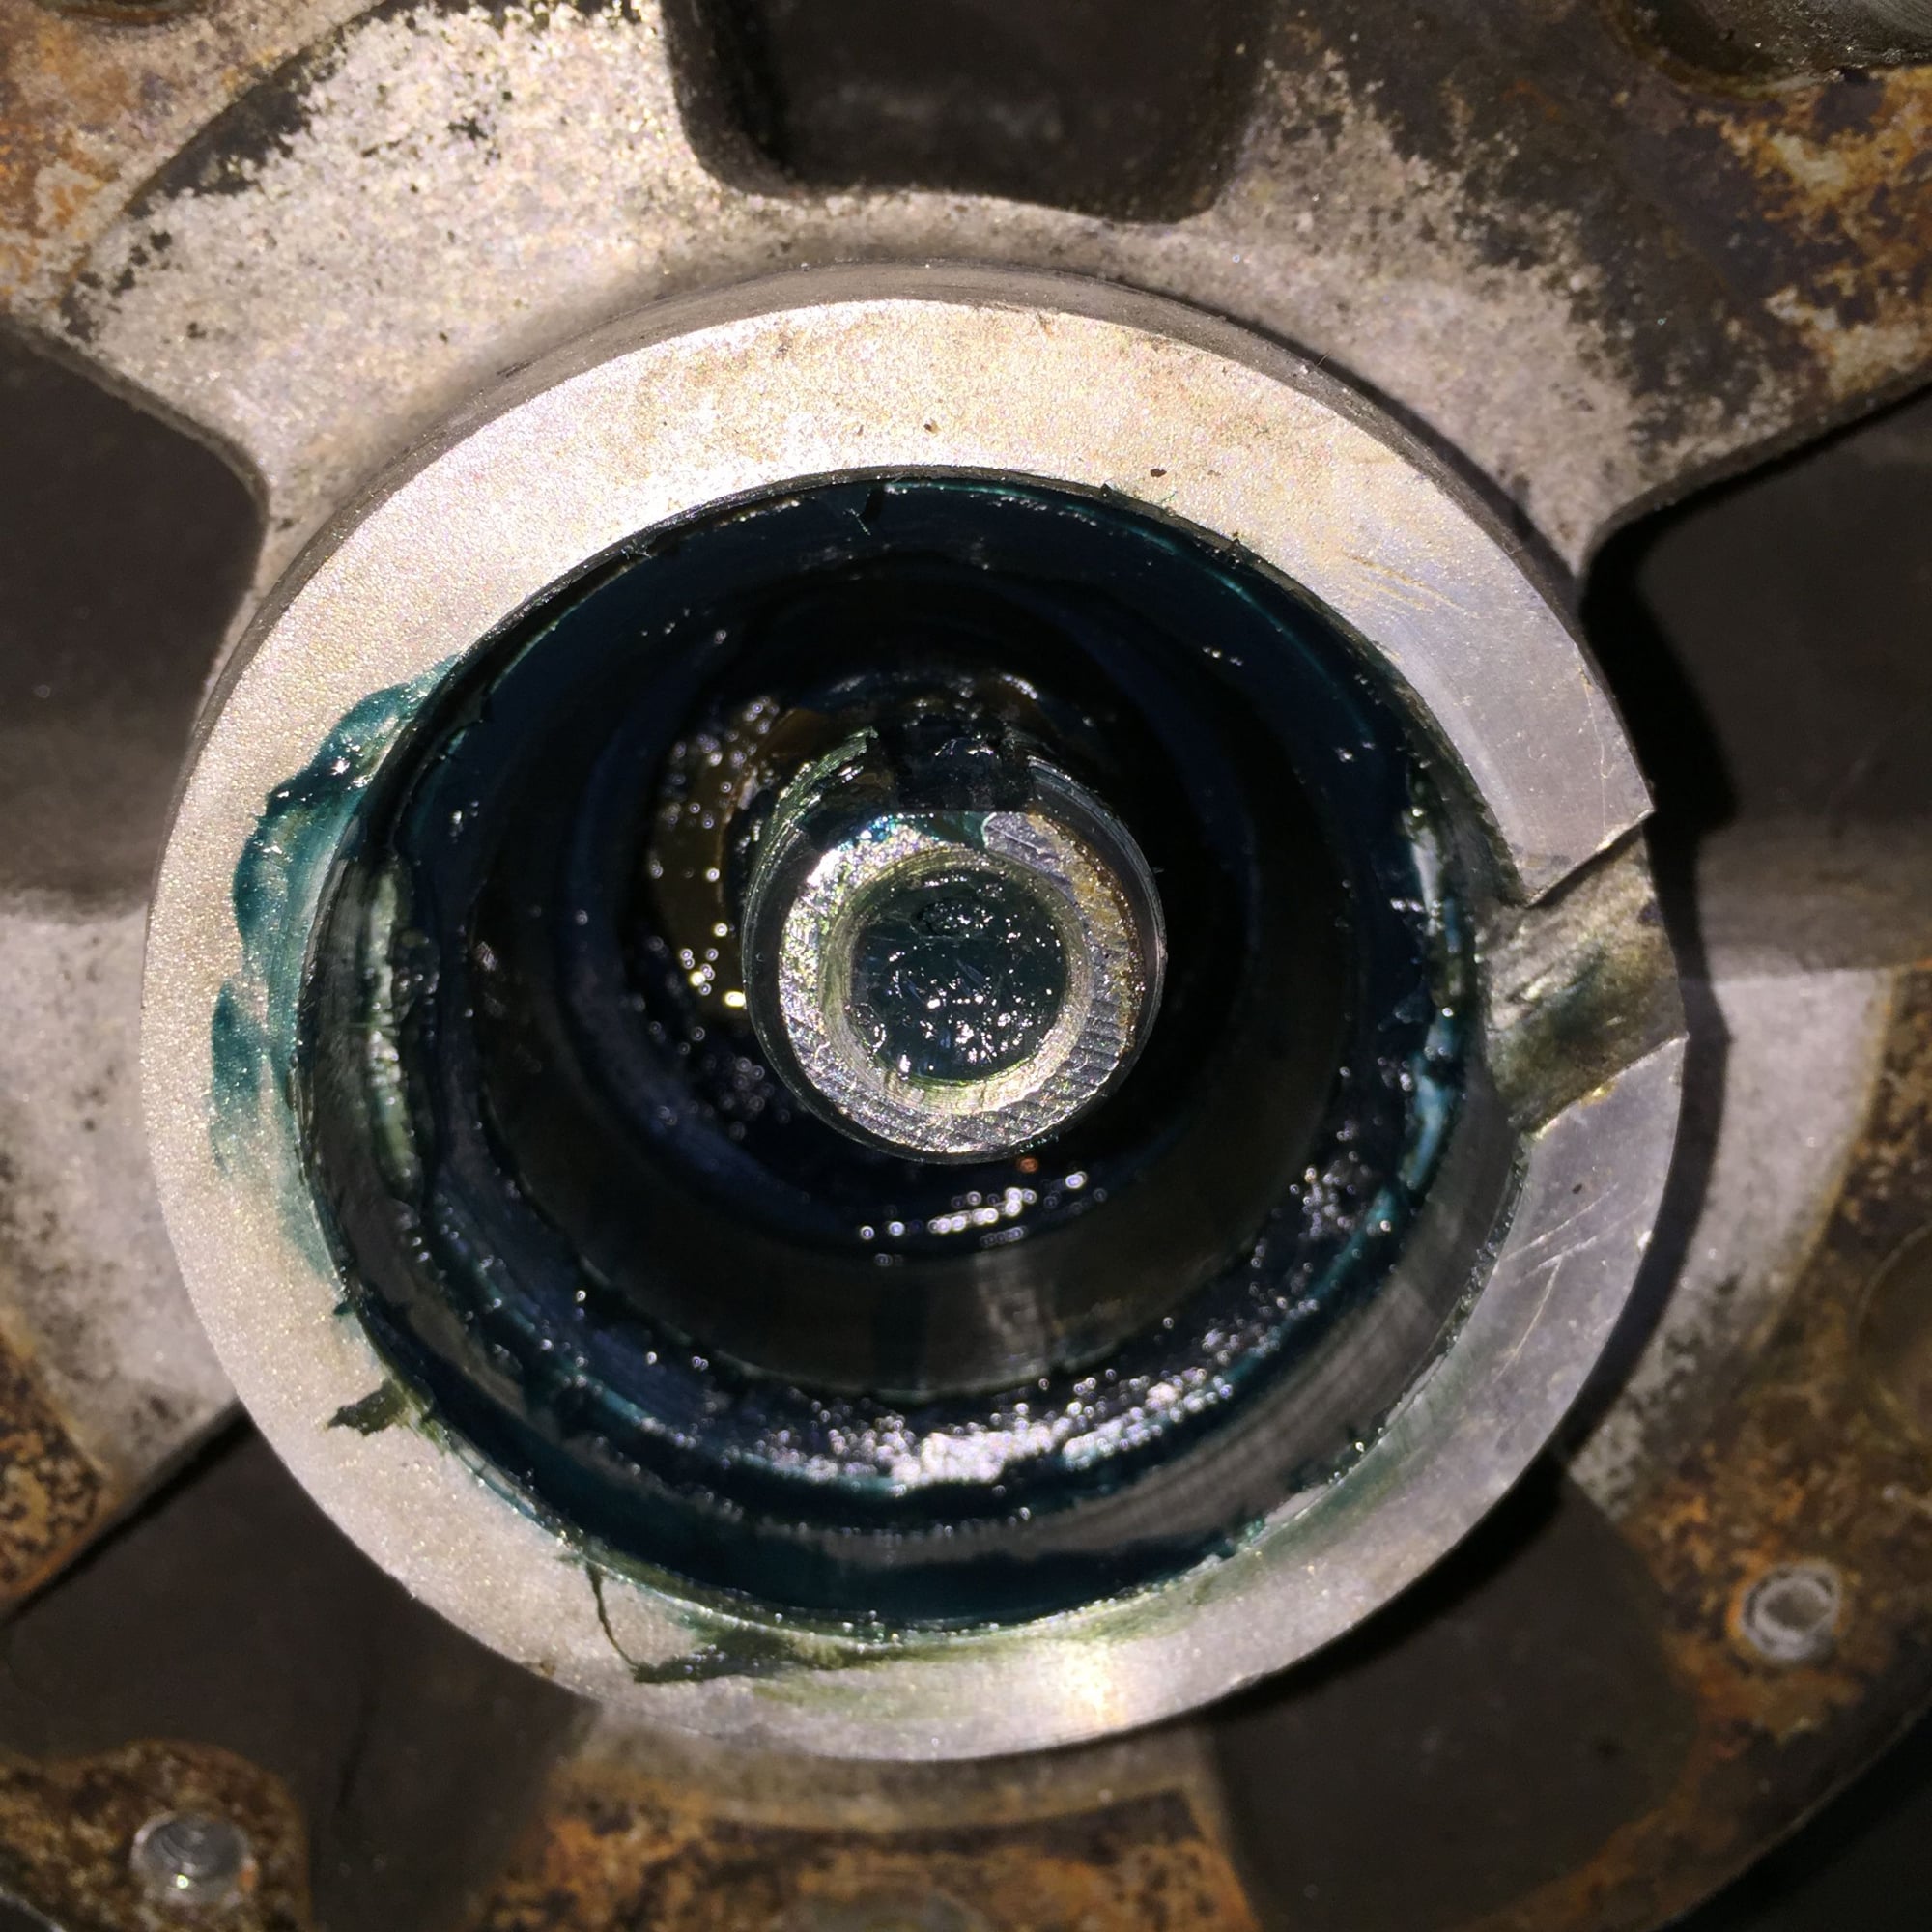
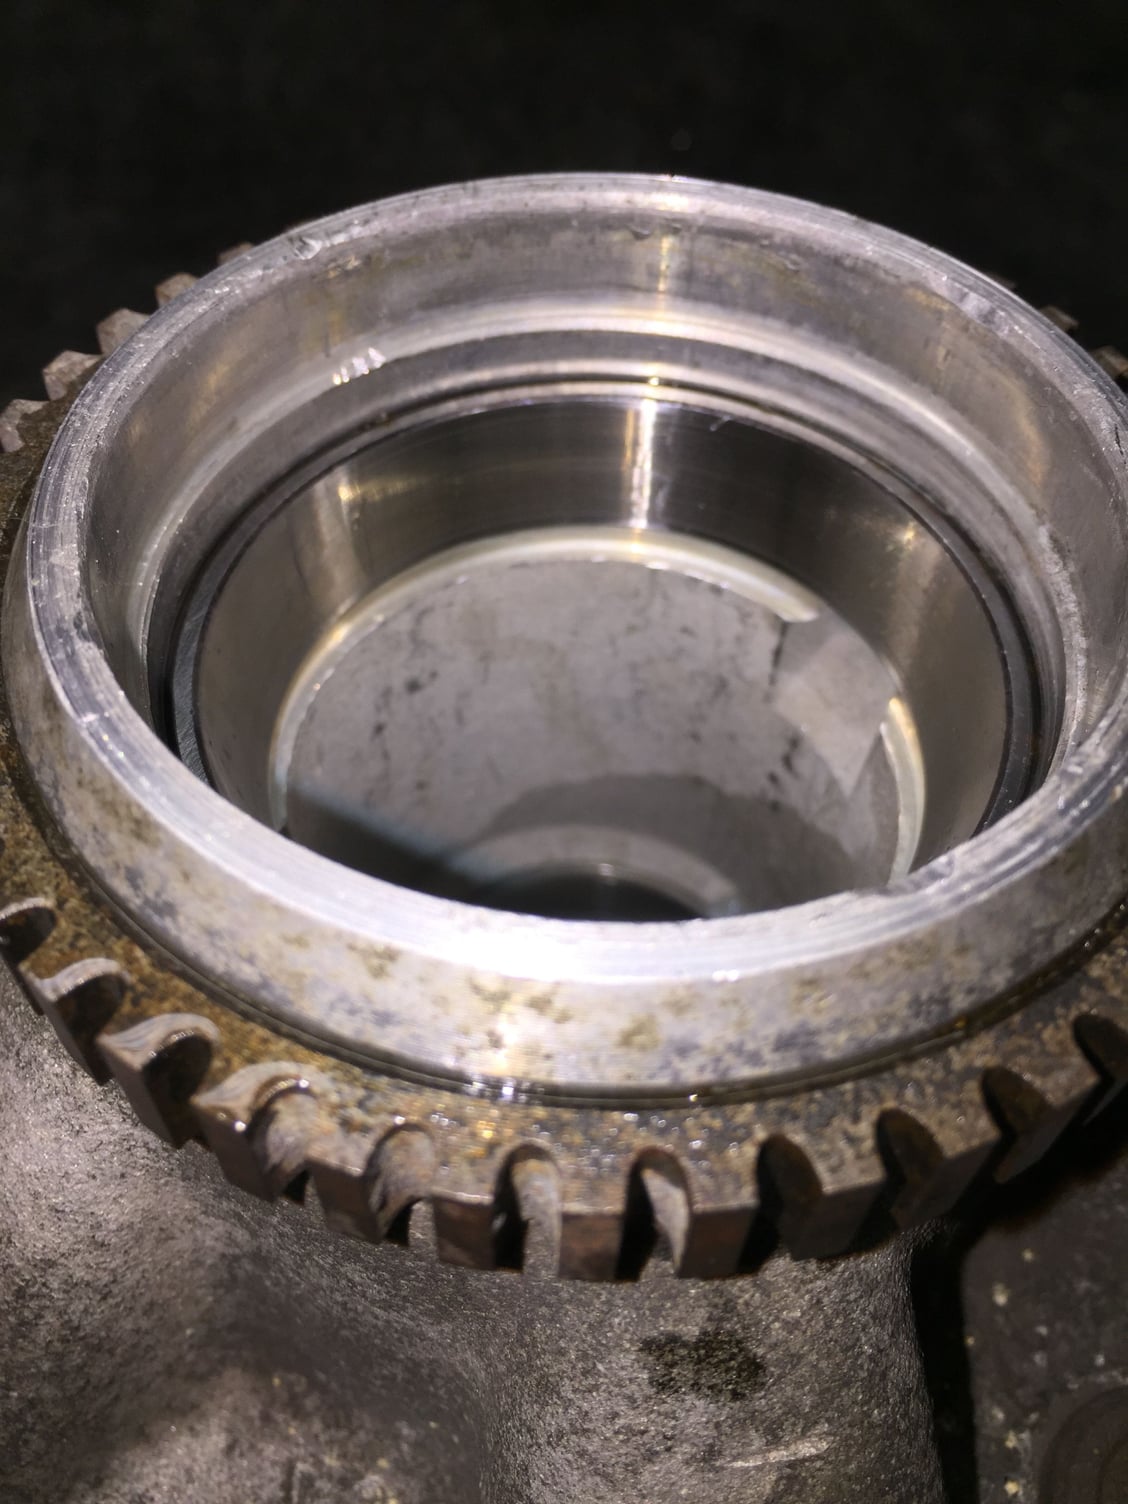
And, much closer now, I can see that the surfaces of the races are not as good as I had thought they were.
Considering all the fun available on the car, vs the cost of new bearings (low), I'm all for replacement. That grooving on the races, discoloration of the races and rollers, and the wear on the inside of the cones all point to need for replacement. In my opinion. Keep in mind that I'm very conservative about stuff like this, preferring to invest the relatively few dollars in the bearings now, vs a flatbed ride plus the same new bearings a year from now. I hate being stranded by stupid stuff, and would much rather take a little extra effort now and not worry about it again for another ten or twenty years.
The wear on the bottom of the spindle bothers me, and is coincident with the wear you see on the inside of the inner bearing cones. Grab your new bearing, still dry, and slip it onto the spindle up against the shoulder. Move it out a tad, and see if you can rock the bearing at all. It should be a firm fit with no rocking available at all. If it rocks, you won't be able to keep correct clearances when it's loaded. If it can spin on the spindle, it will. Then the film between the bearing and spindle becomes primary, fails, heats the bearing and the spindle on the way, etc.
Thoughts: The biggest mistake that folks make when installing repacked bearings in the aluminum hub is adjusting them too tight. Roller bearings demand enough room for a grease film between the rollers and the bearing faces, particularly important when the bearings and hub heat up. Get them too snug when cold, and the bearings will get warm. Heat transfers to the hub, which expands at a rate greater than the spindle expands. So the bearings have more pressure and even less clearance, more heat, etc. Bottom line, religiously follow the guidance about how to adjust the bearings. If you are going to err, do it on the side of loose rather than snug. I've watched "experts" adjust bearings with the wheel on, rocking the wheel and adjusting until the wheel had zero rocking. Then trashed a set of bearings and hubs by half way through a race session.
"If you are going to err, do it on the side of loose rather than snug. I've watched "experts" adjust bearings with the wheel on, rocking the wheel and adjusting until the wheel had zero rocking. Then trashed a set of bearings and hubs by half way through a race session."
I had to clean/repack my bearings when I replaced my brake disc shields which were in much worse state than above. I was cautious about not overtightening them but my mot guy has flagged slight play in both bearings. I was thinking I need to go back in but on reading that I wonder if that is the case
Follow the factory guidance on adjustment and you should be fine. My point was and is that adjusting them too tight is much worse than leaving them a tad loose. With worn bearings as Seth has shared, a lot of things change. The wear means that the surfaces are no longer "flat" where the rollers ride, so you can get to a point where the washer barely moves with the screwdriver, but the pressure at the grease layer is not close to even. Where his spindle is worn, the bearing no longer tracks perfectly concentric with the spindle, so wear will forever be uneven. Plus, it's a requirement that the clearance be checked with no weight on the suspension, so clearance you have unloaded will disappear when the car is sitting or driving. The bigger risk with the worn spindle is that the inner race (the "cone" part of the bearing) will walk around and wear the spindle even more. In extreme cases, that race will spin on the spindle and very quickly heat it to failure.
Lots of good reasons to use good bearings, keep them lubricated correctly, and keep them adjusted correctly. For the cost of a couple seals, one could easily justify cleaning and inspection at every brake pad change. Remembering of course that you would be looking into your crystal ball some to predict that they would still be fine until after the next pad change.
I understand dr bob. I agree. A full set of front wheel bearings is on order, and I am on the lookout for a used toaster oven.
Silly question: when heating the hubs to install the chilled races, what keep the first race from falling back out when you reheat the hub to install the second race?
I understand dr bob. I agree. A full set of front wheel bearings is on order, and I am on the lookout for a used toaster oven.
Silly question: when heating the hubs to install the chilled races, what keep the first race from falling back out when you reheat the hub to install the second race?
Seth K. Pyle
Seth--
The local Big Lots sells B&D basic toaster ovens for about $20.
The races will still be a slight friction fit unless you go way overboard on the temperature. As soon as the frozen race is seated in the heated aluminum hub, it will expand some and stay in place nicely. No worries about one dropping out. The aluminum will hold heat for a bit, so heating to get the old ones out and getting the new ones in may be a one-shot effort AFA as oven time.
Heating the hubs reduces the opportunity for galling the hub while driving the races out and new ones in. More than a few have been changed at ambient temp over the years, believe it or not. Still, some heat makes it all go easier with less pounding and less chance of damage.
Clean the hub thoroughly before heating, so you don't have to mess with melting and coking oil or grease.
Thanks for your input here dr bob. I've just recently finished replacing my front bearings, following the steps in the wsm, and was worried about the small amount of movement still present in the wheels. Glad to hear it is normal. I am still hearing some chattering from what sounds like the front drivers side wheel when driving slowly over a very uneven patched road, but it could be something else that is loose. My paranoia keeps telling me it is the bearings.

 08-03-2016, 03:48 AM