When you click on links to various merchants on this site and make a purchase, this can result in this site earning a commission. Affiliate programs and affiliations include, but are not limited to, the eBay Partner Network.
Clutch removal, please help me understand where shims should go ??
Hello, first time through removing the clutch assembly on my 1981 928s Euro 5spd.
Going slow and careful, some initial questions, and any help appreciated ! !
I read about inserting shims prior to removal, and I am trying to understand where these shims should go....
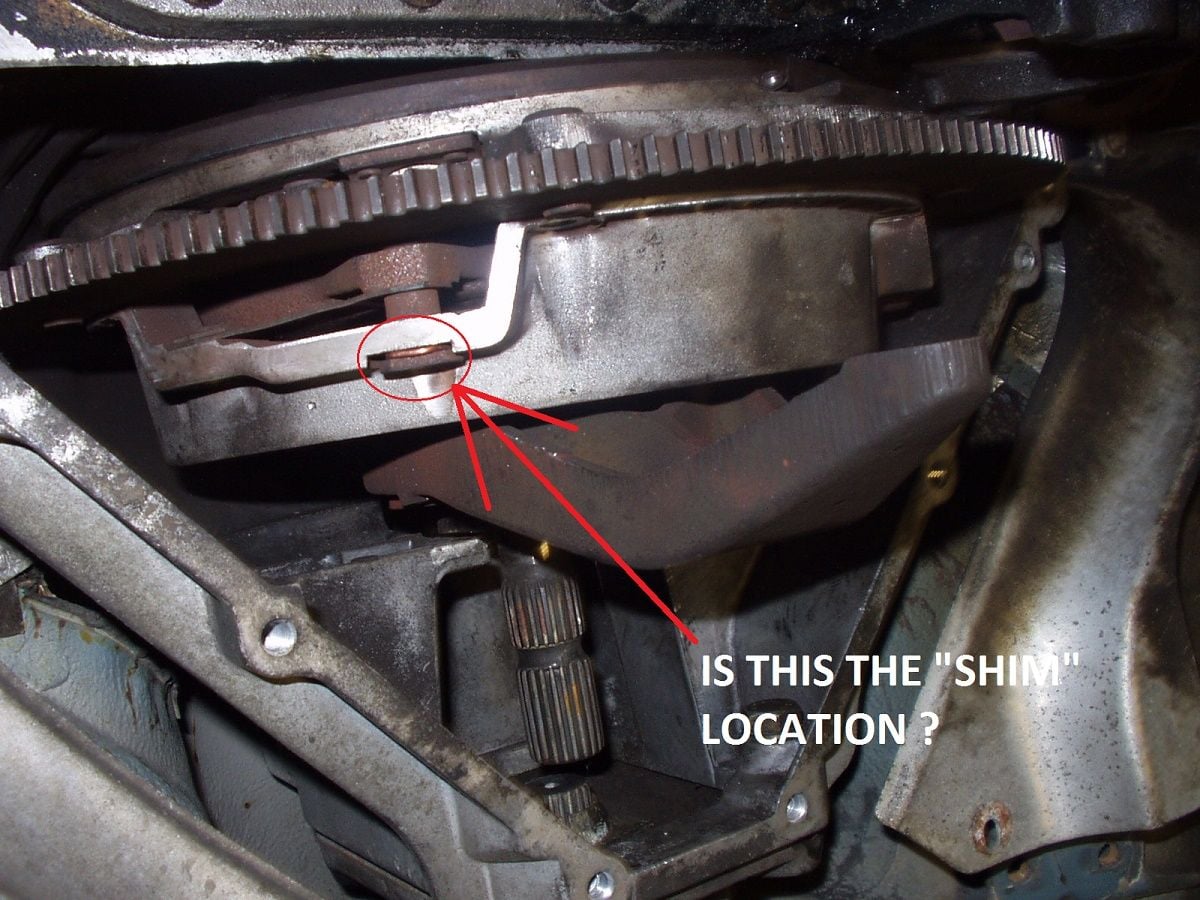
I found this archived photo, and what I believe may be a copper wire used as a shim? Am I looking at the right location?
Also, I have removed the pinch bolt nearest the clutch assembly, but there is what seems to be another pinch bolt which I can feel through an inspection hole aft of the first pinch bolt.
Are there 2 pinch bolts to loosen?
I did not install shims on disassembly but did during assembly. You can use clamps to move the flex plate to install the shims. I used clothes hanger wire.
The coupler has two pinch bolts front and back. There is a hole in the torque tube to fit a key. They must be removed to slide the coupler back.
.... I read about inserting shims prior to removal, and I am trying to understand where these shims should go....
I found this archived photo, and what I believe may be a copper wire used as a shim? Am I looking at the right location?
.... Also, I have removed the pinch bolt nearest the clutch assembly, but there is what seems to be another pinch bolt which I can feel through an inspection hole aft of the first pinch bolt.
Are there 2 pinch bolts to loosen? ....
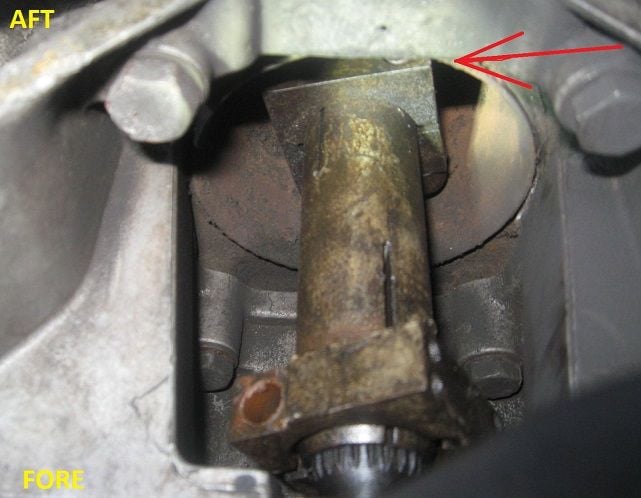
Yes, that is the correct location for the shims, which are shown a bit more clearly in the pic below, and yes you also need to remove the other pinch bolt you've highlighted, to be able to move the coupler.
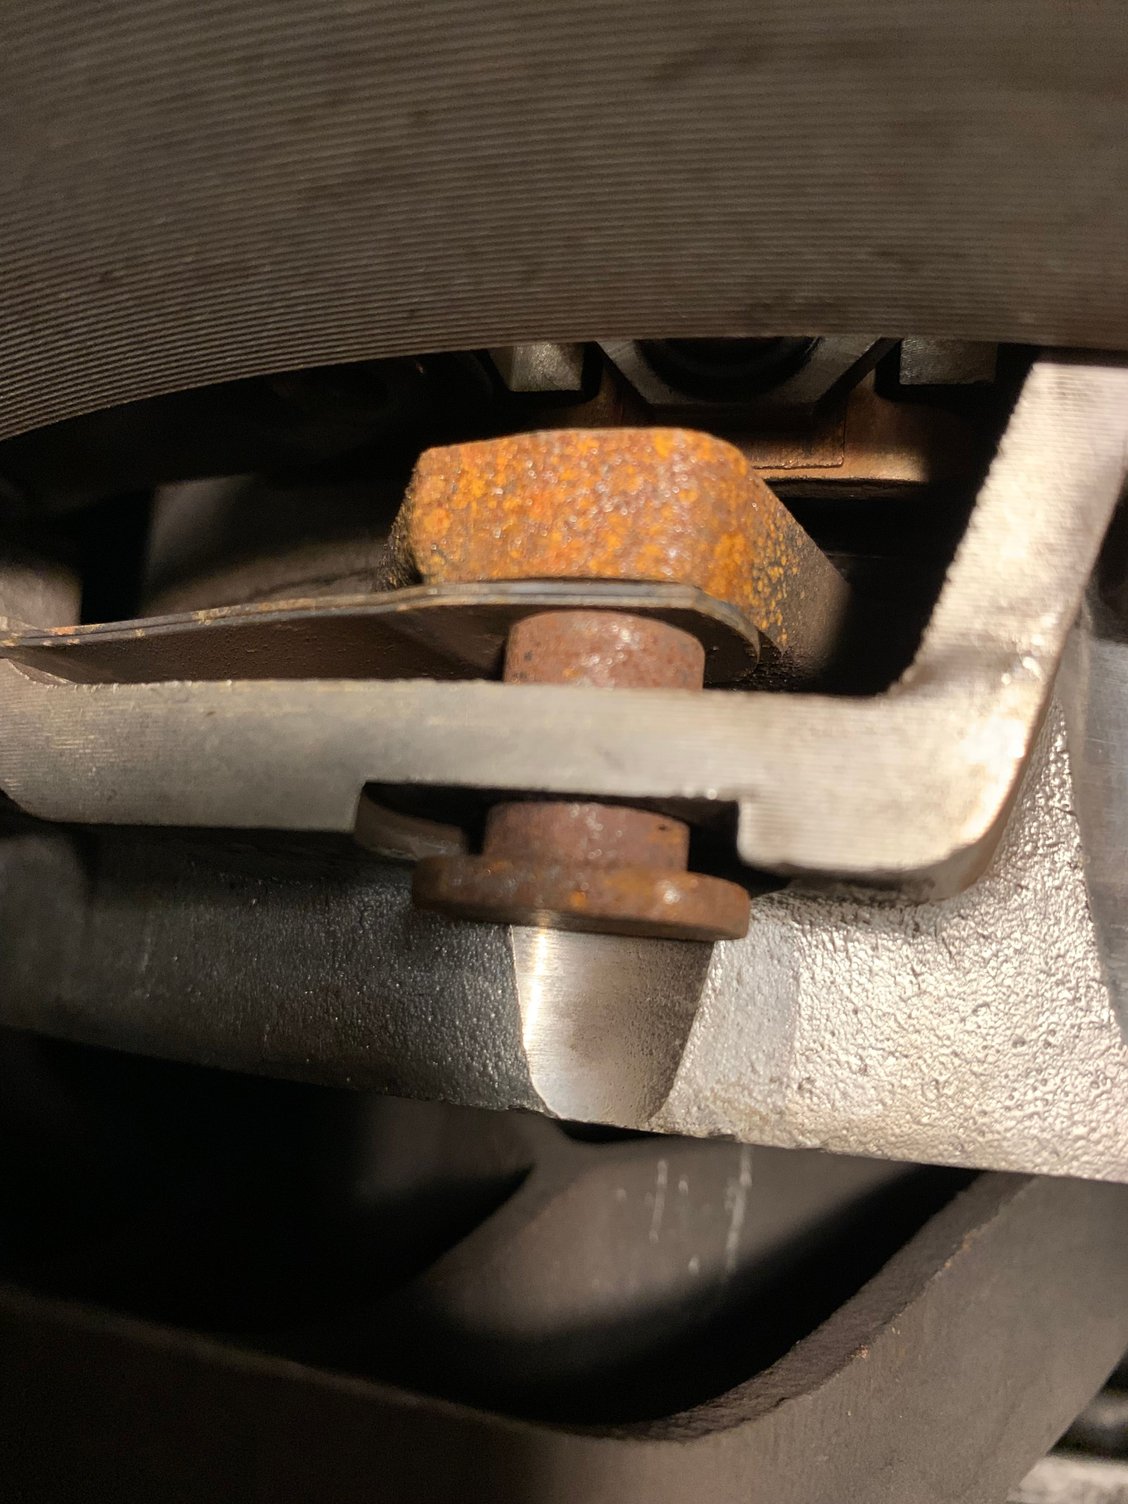
NOTE the thicker the wire the more clearance you have to remove the release arm from the ball.
NOTE If the clutch wont drop down then I would suggest that you loosen the 4 bell housing bolts so they are in about 3 turns then remove the two rear trans mount to cross member bolts and slide the TT back.
NOTE before setting the clutch assembly back into the car make sure that you remove the rear pinch bolt and center the drive shaft,
then install the bolt with a dab of blue loctite and torque to 66 ft/lbs.
Once this is done tighten the 2 lower bell housing bolts, this draws the assembly together.
then take the stub shaft and the guide tube and drive shaft collar fit these parts into the car.
What you want to do is mock up this assembly and then mark the stub shaft at the back of the guide tube so to set the depth of the stub in the pilot bearing push the stub into the pilot bearing then move it rearwards about 3 MM,
this will put the bearing surfaces together,
mark the shaft at the back of the guide tube.
then slide the collar into position and check that the collar lines up and that both of the pinch bolts can be installed.
This procedure makes it easy to set the depth of the stub once you have everything loosely fitted.
If you're having trouble installing the shims you can use a come along on the clutch arm or fork attached to the rear crossmember and tighten This will pull the pressure plate way back and let you to insert a 4 mm shim makes a lot easier at least for me. if you don't do this you'll need to press and have a hard time trying to remove the bearing.
If you use shims with big loops like in the pic Dave posted (post #3), make them out of fairly soft wire. I Made mine with the loops just a bit too long, and had to bend them towards the motor because they were hanging up on the inside of the bell housing.
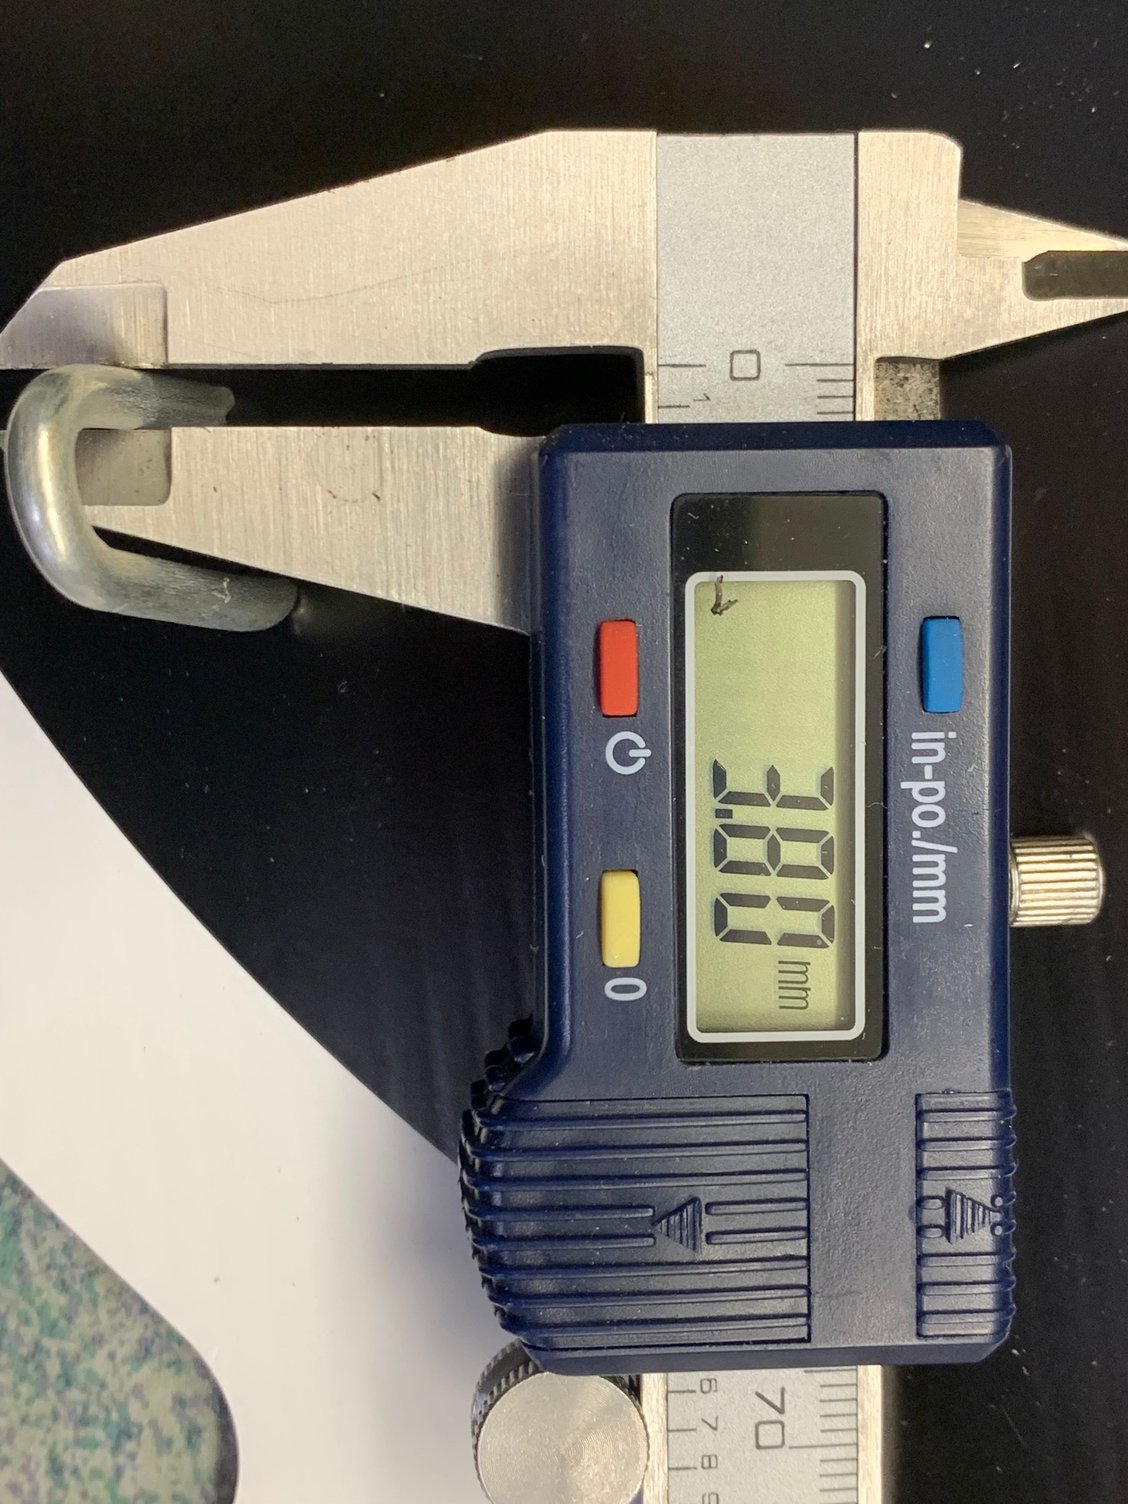
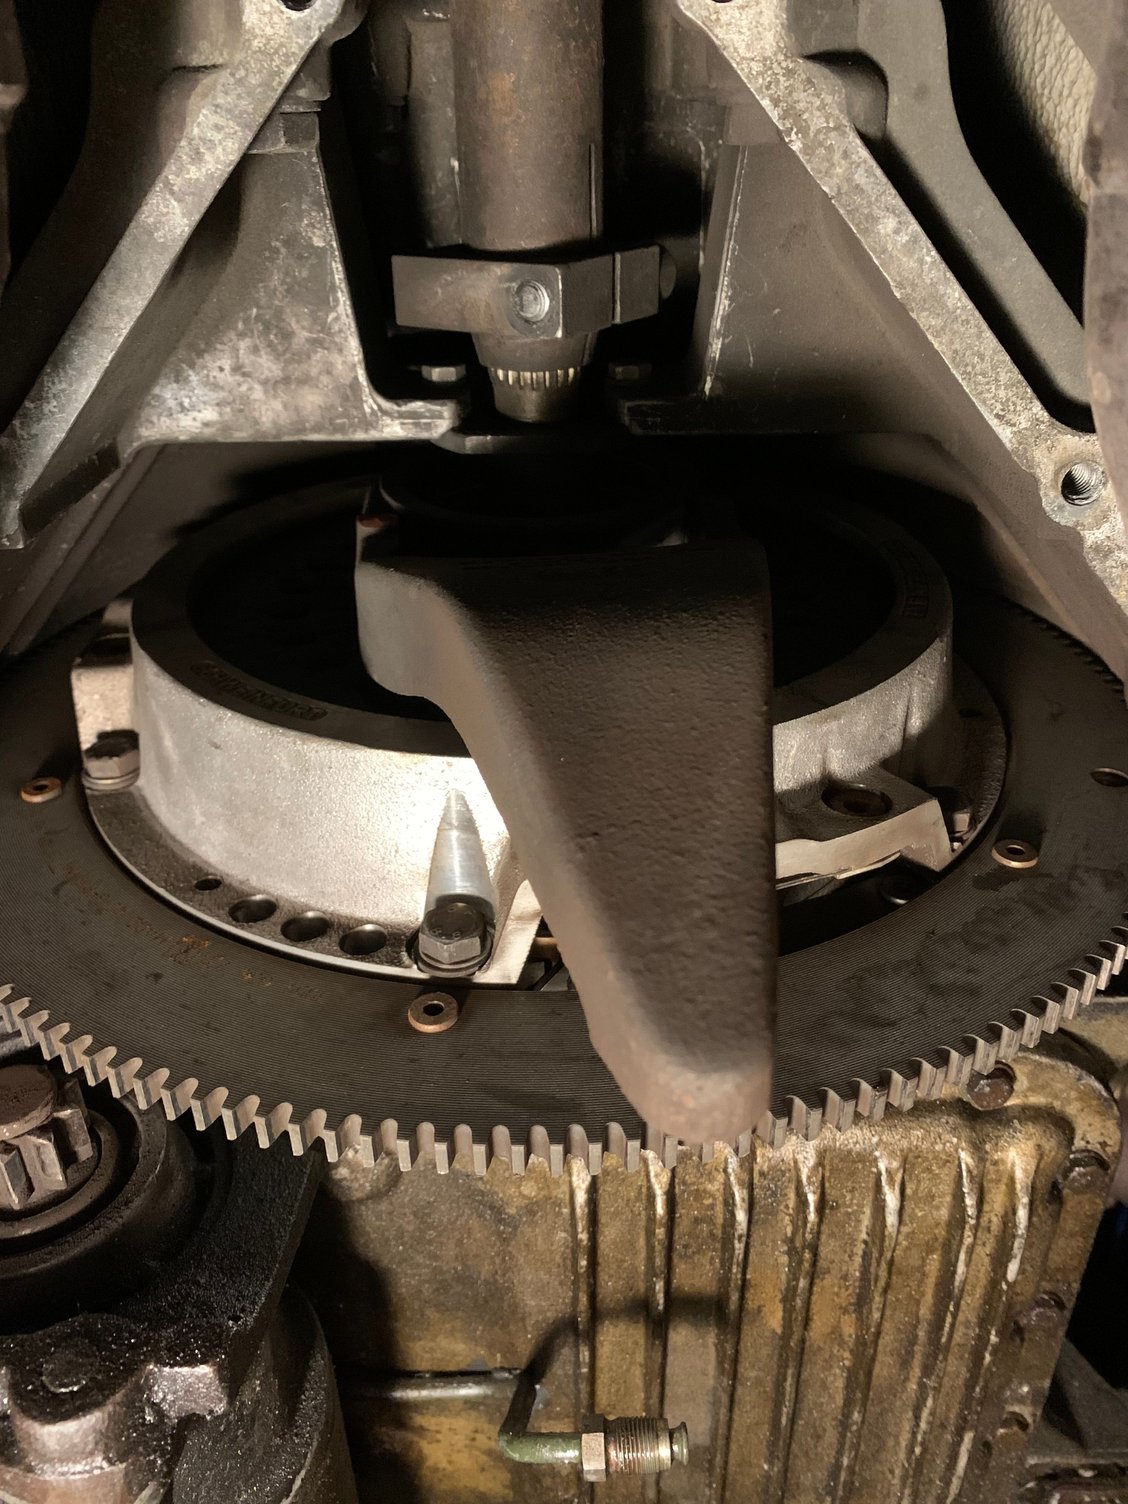
It�s been 9 years since someone posted on this thread so why not. I am at the stage where I�ll put my U shims in and undo the 2 pinch bolts so,
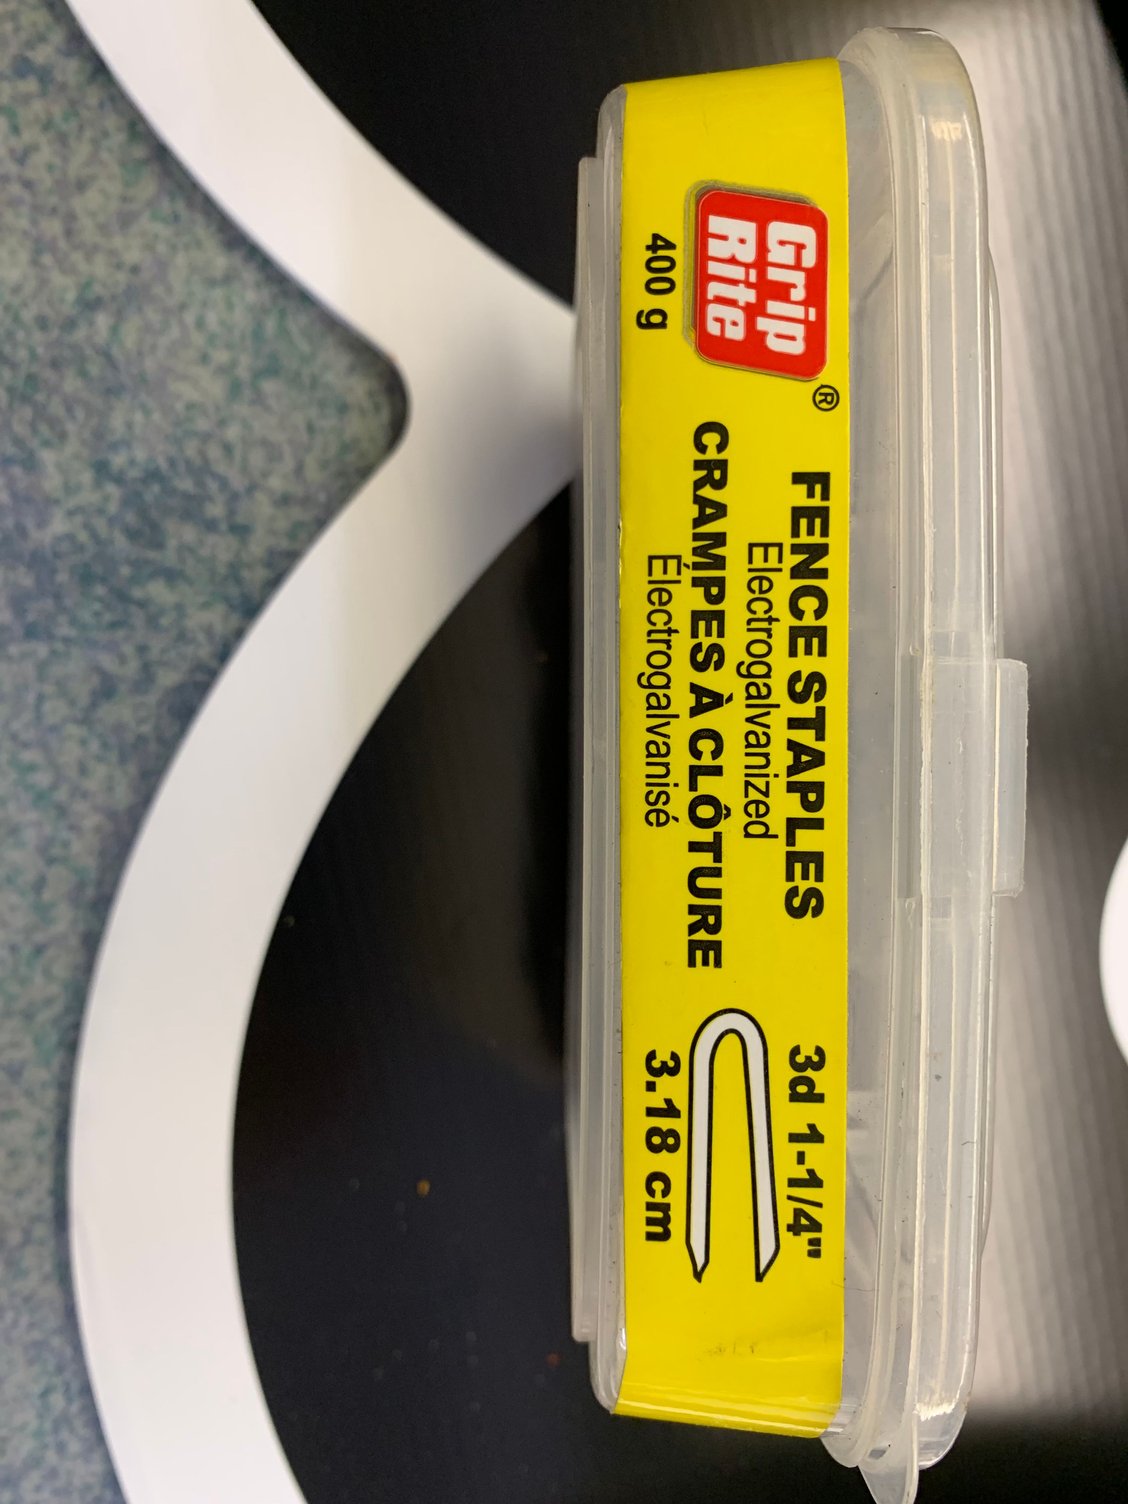
1) where I need to shim is already out by 3mm so I intent to use some 3.8mm fence staples that I�ll shorten (cut ends off) to make smaller. My question is, can I just hammer these in or must I pull the release arm back with a come along (ratchet strap)? I�ll probably try hammering first but thought I�d ask.
2) do I need to paint mark anything now? Later?
3) I�ve read there are locating pins or dowels but I don�t see any. Anyone have a picture and am I suppose to tap them towards the front of the car with a punch?
Pictures: Already looks far out without shim but I assume you need shins in so when unbolted from flywheel it doesn�t release / flatten. Fence Staple that I Will cut shorter. Width seems good Do I need to paint mark anything?
I've only pulled 2 of the earlier clutch packs, so I'll happily defer to others. I just pulled one yesterday & it was a bit of a different experience from the first one I did.
In yesterday's experience, I didn't have to manipulate the release arm to insert the shims either. I had to pry it rearward the first time. In each occasion, I've indexed the orientation of the ring gear to the flywheel.
Not sure if this was one-off or not, but 2 of the 6 bolts in my pressure plate had 13mm heads versus 4 M6 Allens. I indexed them as well despite there being no other differences, thread pitch or otherwise. Maybe someone has been in there before & the bolt orientation doesn't matter. I just figured, "Why not?"
Wow, a reply! Thanks, this is great! Just one question then: what are these magical dowels/pins etc? Did yours have any? I can�t see any.
Please read post 5 this will then stop you from hammering the dowel pins and allow the clutch pack to drop.
NOTE hammering on the dowel pins puts that hammering force into the thrust bearing.
NOTE if you look carefully on the front facing side of the flywheel you can see the dowel pins bores.
put the crank at TDC then mark the clutch pack to the flywheel. I use spray paint on both sides of the clutch/flywheel,
it makes it easy to see where things were.
NOTE when you pry on the release arm make sure the pry bar tool doesnt slip,
and then apply force to the diaphragm spring it will easily crack one of the fingers.
NOTE you can tap those wider shim s into the PP they should go in.
NOTE from the looks of things the clutch discs might be a lil bit wider than stock,
so there will be less room to release the clutch.,
first measure the clutch disc thickness.
NOTE now is a good time to remove the hard line/ flex line that goes to the slave,
and replace it with w flexible SS hose,
this makes bleeding the clutch easy and will give maximum throw to the system.
Awesome tips guys, I�ll let you know how I make out and post picts later to help everyone. Oh, I know what i was going to ask, for those (including my 928 service workshop manual (8 red binders worth) that do tap in the dowels, I assume you have to pull them back out with pliers or vice grips later before installing new clutch because they are basically guide pins? This is of course assuming mine still has any as some things seem missing on my car. lol.
let me tell you how fun it was removing the passenger side exhaust header to get the clutch cover to drop because PO made ones that cover up this access. No wonder the clutch was never serviced! The joy of owning a car model that was unloved and this cheap up until the last 5 years. So many corners cut, so many Frankenstein fix jobs.
UGH! I�m stuck on the front coupling being stuck! Both pinch
bolts are completely out and the front collar is loose and spins around (good) but the rear collar doesn�t spin and seems stuck and the coupling itself doesn�t want to move! Anyone ever have a stuck coupling? There is no good way to grab it or lever it. Rear collar and pinch bolt by transmission appear good and not shifted. I�ll remove and torque it later.
Ideas in front coupling removal - I mean pushing it towards back of car?


 07-03-2015, 10:50 PM