Introduction - Brian 944
 01-07-2006, 11:26 AM
#1
Instructor
Thread Starter
Join Date: Jan 2006
Location: Ottawa
Posts: 243
Likes: 0
Received 0 Likes
on
0 Posts
Hello, Some of you might have seen me at the AUTOBAHN.com
I have edited the first post to bring it up to date with 2012.
I decided to make an account here as well to learn as much and help as much as I can in regards the the 944 that I am working on.
The 944 has been sold to a happy buyer, I simply did not have the time to work on two cars.
The other car, the first one I started to modify has evolved quite a bit.
you can see it in great detail at www.mp5t.com
The Worlds Only 180 MPH Protege 5.
100% Stand Alone Haltech Sport 1000
Running Sequential Injection And Direct Fire AEM CDI Ignition.
Self Taught, Designed, Built From Scratch, Self Installed, Self Tuned.
Many Mistakes, Many Hours, Many Successes
MP5T has been My School since 2002, and Class is still in!
- Forged Engine
Mazda FS 2.0L Aluminum Head / Iron Block
Pauter Rods
Arias Pistons 8.5:1
Rotating Balance
Alignhoned
Steed Speed T3 Manifold
Garrett GT3071 0.63 BB Turbo
Tial 38mm V Band Liquid Cooled Waste Gate
Tial 50mm �Q� Blow Off Valve
505 Intake manifold with Velocity Stacks, BBK Mustang 65mm TB
- Engine Management
Haltech PS1000 Standalone ECU
Custom Trigger (36-1+1)
1000 cc injectors
Sequential Injection
Direct Fire AEM CDI COP conversion
IQ3 Digital Display Solution
- Fully Custom Transmission
PAR Straight Cut Gears Set Specified Ratios
1st 2.500, 78 Km/h @ 7000
2nd 1.550, 126Km/h @ 7000
3rd 1.100, 178km/h @ 7000
4th 0.725, 265Km/h @ 7000
5th 0.625 325Km/h @ 7000
FDr 4.105
Quaife ATB Limited Slip Diff
SPEC Stage IIIr Disk
SPEC Stage IIIr Pressure Plate
SPEC 6.8 Lb Flywheel
- Brakes
K-Sport 14″ 8 Piston Brake System
K-Sport Hydraulic Hand brake
- Suspension
K-Sport RR Aluminum Coil Over suspension
AWR 21mm Antisway
AWR Adjustable Endlinks
AWR Trailing Arm
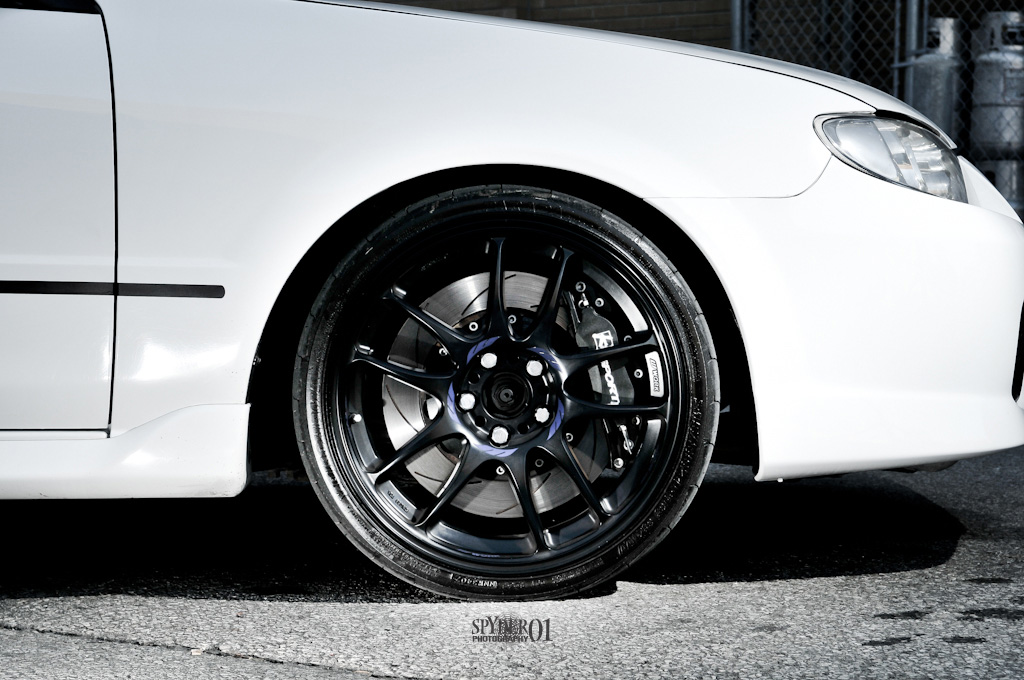
- Rims and Tires
WORK Emotion Kai 7076 Forged Aluminum Rims 18�7
Yokohama PARADA SPEC2 215/35/18
- Exterior
Full OEM JDM Mazda SPORT 20 Conversion
Full Weight Reduction


I have edited the first post to bring it up to date with 2012.
I decided to make an account here as well to learn as much and help as much as I can in regards the the 944 that I am working on.
The 944 has been sold to a happy buyer, I simply did not have the time to work on two cars.
The other car, the first one I started to modify has evolved quite a bit.
you can see it in great detail at www.mp5t.com
The Worlds Only 180 MPH Protege 5.
100% Stand Alone Haltech Sport 1000
Running Sequential Injection And Direct Fire AEM CDI Ignition.
Self Taught, Designed, Built From Scratch, Self Installed, Self Tuned.
Many Mistakes, Many Hours, Many Successes
MP5T has been My School since 2002, and Class is still in!
- Forged Engine
Mazda FS 2.0L Aluminum Head / Iron Block
Pauter Rods
Arias Pistons 8.5:1
Rotating Balance
Alignhoned
Steed Speed T3 Manifold
Garrett GT3071 0.63 BB Turbo
Tial 38mm V Band Liquid Cooled Waste Gate
Tial 50mm �Q� Blow Off Valve
505 Intake manifold with Velocity Stacks, BBK Mustang 65mm TB
- Engine Management
Haltech PS1000 Standalone ECU
Custom Trigger (36-1+1)
1000 cc injectors
Sequential Injection
Direct Fire AEM CDI COP conversion
IQ3 Digital Display Solution
- Fully Custom Transmission
PAR Straight Cut Gears Set Specified Ratios
1st 2.500, 78 Km/h @ 7000
2nd 1.550, 126Km/h @ 7000
3rd 1.100, 178km/h @ 7000
4th 0.725, 265Km/h @ 7000
5th 0.625 325Km/h @ 7000
FDr 4.105
Quaife ATB Limited Slip Diff
SPEC Stage IIIr Disk
SPEC Stage IIIr Pressure Plate
SPEC 6.8 Lb Flywheel
- Brakes
K-Sport 14″ 8 Piston Brake System
K-Sport Hydraulic Hand brake
- Suspension
K-Sport RR Aluminum Coil Over suspension
AWR 21mm Antisway
AWR Adjustable Endlinks
AWR Trailing Arm
- Rims and Tires
WORK Emotion Kai 7076 Forged Aluminum Rims 18�7
Yokohama PARADA SPEC2 215/35/18
- Exterior
Full OEM JDM Mazda SPORT 20 Conversion
Full Weight Reduction
Last edited by Brian 944; 05-02-2012 at 09:03 AM.
 01-07-2006, 11:28 AM
#2
Instructor
Thread Starter
Join Date: Jan 2006
Location: Ottawa
Posts: 243
Likes: 0
Received 0 Likes
on
0 Posts
Here is an intro of the 944 Project..
It's mostly in pieces now, but this summer I had a blast with it. It's such a great car with classic lines and great performance.
Ok, Basically the Protege Project know as MP5T has more than lived up to my hopes. The Car Feels like a street Legal Go-Kart. It looks the way I want and it Just plainly makes me happy to drive. So A New Project is Born.
The Basic Goal is a 300 KM/H Car. It's geared for Top Speed, something I miss in the Protege. The P5 is stellar on the 1/4 or the street, but it's just not fast on the highway. 220 Km/h feels like it's going to Rev to destruction.
E-Bay is the Devil. I have already bought over 20 Things for the car. I will reserve some spots and fire up some sub heading for the diferent projects just like the MP5T Rebuild.
here is a GOAL picture of what I would like the car to end up looking like..

After Cleaning up the 944 it was a great looking car. With over 290,000 Km on the Engine and Tranny. It was time for some TLC.
.jpg)
I removed the entire Fan Blower, A/C. Heater Core today. Saved so much weight and the enire dash is empty less the structire. A Swag place to hide some No2.
The day ended with two full size garbage cans full and 10 items being posted on E-Bay.
I can't wait till the motor and Paint are done, This car will boot on the highway effortlessly.
Ok, Need new fenders for the new 944 Turbo Front that has arrived. The sides are slightly diferent. So I started to pull the shizzy appart. I'm going to get the parts painted seperately off of the car and then assemble them later.
Here is how it looks now. The Car is up and stripped. The Engine is ready to be removed from the car and the tranny is going to be sold for a 1989 944 Turbo Tranny which has much taller gearing.
I'm going to keep the "Widebody" kit but there was some rust it seems behind it. It's ready for a good dose of Sandblast, Prime, Paint, Clear.
.jpg)
.jpg)
.jpg)
.jpg)
.jpg)
.jpg)
It's mostly in pieces now, but this summer I had a blast with it. It's such a great car with classic lines and great performance.
Ok, Basically the Protege Project know as MP5T has more than lived up to my hopes. The Car Feels like a street Legal Go-Kart. It looks the way I want and it Just plainly makes me happy to drive. So A New Project is Born.
The Basic Goal is a 300 KM/H Car. It's geared for Top Speed, something I miss in the Protege. The P5 is stellar on the 1/4 or the street, but it's just not fast on the highway. 220 Km/h feels like it's going to Rev to destruction.
E-Bay is the Devil. I have already bought over 20 Things for the car. I will reserve some spots and fire up some sub heading for the diferent projects just like the MP5T Rebuild.
here is a GOAL picture of what I would like the car to end up looking like..
After Cleaning up the 944 it was a great looking car. With over 290,000 Km on the Engine and Tranny. It was time for some TLC.
I removed the entire Fan Blower, A/C. Heater Core today. Saved so much weight and the enire dash is empty less the structire. A Swag place to hide some No2.
The day ended with two full size garbage cans full and 10 items being posted on E-Bay.
I can't wait till the motor and Paint are done, This car will boot on the highway effortlessly.
Ok, Need new fenders for the new 944 Turbo Front that has arrived. The sides are slightly diferent. So I started to pull the shizzy appart. I'm going to get the parts painted seperately off of the car and then assemble them later.
Here is how it looks now. The Car is up and stripped. The Engine is ready to be removed from the car and the tranny is going to be sold for a 1989 944 Turbo Tranny which has much taller gearing.
I'm going to keep the "Widebody" kit but there was some rust it seems behind it. It's ready for a good dose of Sandblast, Prime, Paint, Clear.
01-07-2006, 11:28 AM
#3
Instructor
Thread Starter
Join Date: Jan 2006
Location: Ottawa
Posts: 243
Likes: 0
Received 0 Likes
on
0 Posts
Nov 21/05
I got some time to put the parts more or less where thy belong. I'm not going to get into much detail but you will get the basic point.
I'm totally impressed worth the Parts from GT-Racing, They are expensive, but the fit is great, they are strong and most important. They weigh close to nothing. The Nose panel is a bit stronger than the fenders, but I understand that it is the leading edge of the car and I'm happy that it is stronger at to cost of a bit of weight.
The Headlight conversion is just placed there. There is clear plastic the covers the bucket. I'm simply waiting on the 951 bumper shocks and then I'll fire it on the actual car for a better test. I do not think I'll be disappointed.

.jpg)
.jpg)
.jpg)
I got some time to put the parts more or less where thy belong. I'm not going to get into much detail but you will get the basic point.
I'm totally impressed worth the Parts from GT-Racing, They are expensive, but the fit is great, they are strong and most important. They weigh close to nothing. The Nose panel is a bit stronger than the fenders, but I understand that it is the leading edge of the car and I'm happy that it is stronger at to cost of a bit of weight.
The Headlight conversion is just placed there. There is clear plastic the covers the bucket. I'm simply waiting on the 951 bumper shocks and then I'll fire it on the actual car for a better test. I do not think I'll be disappointed.
01-07-2006, 11:29 AM
#4
Instructor
Thread Starter
Join Date: Jan 2006
Location: Ottawa
Posts: 243
Likes: 0
Received 0 Likes
on
0 Posts
Nov 24/05
SUPERCHARGER STUFF
Tonight I started to work out the location of the supercharger a bit better. As you can see, I have it hooked to the ceiling to support the weight until I get a bracket made. I will attach it to the motor mount and the engine block. The entire assembly will be able to move Front and back for fine adjustment. I need to keep the outlet straight up because of the way the oil is fed and retuned to the Supercharger. Once the supercharger is mounted, I will figure out where the alternator is going to go. One Problem at a time.
.jpg)
.jpg)
.jpg)
SUPERCHARGER STUFF
Tonight I started to work out the location of the supercharger a bit better. As you can see, I have it hooked to the ceiling to support the weight until I get a bracket made. I will attach it to the motor mount and the engine block. The entire assembly will be able to move Front and back for fine adjustment. I need to keep the outlet straight up because of the way the oil is fed and retuned to the Supercharger. Once the supercharger is mounted, I will figure out where the alternator is going to go. One Problem at a time.
01-07-2006, 11:29 AM
#5
Instructor
Thread Starter
Join Date: Jan 2006
Location: Ottawa
Posts: 243
Likes: 0
Received 0 Likes
on
0 Posts
Nov 27/05
Here is the basic idea for the 944 Fuel Delivery. The car is capable of unreal cornering that will only be better when it's 2100 Lbs. I have designed a system where the fuel will not slosh to one side during hard cornering. The 5 Gal will feed a 1 Gal with Double outlets. This will serve as a "fuel buffer".
During cornering even if the fuel in the 5 Gal is on the side of the tank, the 1 Gal will still be full. When the car goes level again, it will top up the 1 Gal.
The second Fuel tank is on the way with the Stainless Braided Fuel lines.
01-07-2006, 11:29 AM
#6
Instructor
Thread Starter
Join Date: Jan 2006
Location: Ottawa
Posts: 243
Likes: 0
Received 0 Likes
on
0 Posts
Nov 29/05
"Broken Record Brian..." I know. just wanted to post up some new pictures...
Ok, SO Here I finally have both together. I still can't believe the diference Bore Over Stroke makes in an Engine.
Mazda Piston -
4 Banger Small 2.0L Long Stroke
Porsche Piston -
4 Banger Large 2.5L Short Stroke
I believe that the Porsche piston is just unreal. I know that there is nothing Magic about the Word Porsche. The engine is still able to break, you can still kill it with PSI and Bad fuel management. I just think it's very cool how well it is designed to last and be driven hard.
.jpg)
.jpg)
.jpg)
"Broken Record Brian..." I know. just wanted to post up some new pictures...
Ok, SO Here I finally have both together. I still can't believe the diference Bore Over Stroke makes in an Engine.
Mazda Piston -
4 Banger Small 2.0L Long Stroke
Porsche Piston -
4 Banger Large 2.5L Short Stroke
I believe that the Porsche piston is just unreal. I know that there is nothing Magic about the Word Porsche. The engine is still able to break, you can still kill it with PSI and Bad fuel management. I just think it's very cool how well it is designed to last and be driven hard.
01-07-2006, 11:30 AM
#7
Instructor
Thread Starter
Join Date: Jan 2006
Location: Ottawa
Posts: 243
Likes: 0
Received 0 Likes
on
0 Posts
Dec 01/05
Rising Rate Fuel Pressure Regulator...
.jpg)
.jpg)
The name explains it all. The car runs completely stock untill boost is applied from the Supercharger. This device replaces the stock fuel pressure regulator and has a vac hose from the intake manifold hooked to it. When the boost crosses over 1 Vac, the fuel pressure starts to increase in the fuel rail.
Much like a toy supersoaker watergun. The more pressure you have in the tank, the more liquid comes out.
It is a reliable and inexpensive solution that many people use but should be limited to boost below 12 Psi.
It places a larger strain on the Fuel Pump which should be upgraded when this devide is used.
Rising Rate Fuel Pressure Regulator...
The name explains it all. The car runs completely stock untill boost is applied from the Supercharger. This device replaces the stock fuel pressure regulator and has a vac hose from the intake manifold hooked to it. When the boost crosses over 1 Vac, the fuel pressure starts to increase in the fuel rail.
Much like a toy supersoaker watergun. The more pressure you have in the tank, the more liquid comes out.
It is a reliable and inexpensive solution that many people use but should be limited to boost below 12 Psi.
It places a larger strain on the Fuel Pump which should be upgraded when this devide is used.
Trending Topics
01-07-2006, 11:30 AM
#8
Instructor
Thread Starter
Join Date: Jan 2006
Location: Ottawa
Posts: 243
Likes: 0
Received 0 Likes
on
0 Posts
Dec 02/05
I got the Oil Filter Adaptor for the Supercharger.
It's designed to sit between the Filter and the block. It has three threaded holes in it for Oil Pressure, Oil Temperature and Oil Feed for a Turbo.
I will probably only be running the one hole to feed oil to the supercharger for now...
.jpg)
.jpg)
.jpg)
I got the Oil Filter Adaptor for the Supercharger.
It's designed to sit between the Filter and the block. It has three threaded holes in it for Oil Pressure, Oil Temperature and Oil Feed for a Turbo.
I will probably only be running the one hole to feed oil to the supercharger for now...
.jpg)
.jpg) 01-07-2006, 11:31 AM
01-07-2006, 11:31 AM
#10
Instructor
Thread Starter
Join Date: Jan 2006
Location: Ottawa
Posts: 243
Likes: 0
Received 0 Likes
on
0 Posts
Dec 03/05
Decided to get the first look into the Eyes of my new Monster..
Check it out.
The Gt-Racing Headlight conversion takes some fitment with the new Finerglass Parts the I have now. I will be a bit of work bit will be KILLER looing when done..
.jpg)
.jpg)
.jpg)
Decided to get the first look into the Eyes of my new Monster..
Check it out.
The Gt-Racing Headlight conversion takes some fitment with the new Finerglass Parts the I have now. I will be a bit of work bit will be KILLER looing when done..
01-07-2006, 11:31 AM
#11
Instructor
Thread Starter
Join Date: Jan 2006
Location: Ottawa
Posts: 243
Likes: 0
Received 0 Likes
on
0 Posts
Dec 09/05
Done for the night but here is the progress.
The Cam Box was purged, oiled and wrapped to keep it free of **** until Saturday.
The Threads were prepped for the Cambox and the valve train was coated in oil and then with a shop vac, I made sure that any dust and **** was removed with the coating of oil. I'm going to repeat this before it gets assembly lube and then closed up for good..
.jpg)
.jpg)
Done for the night but here is the progress.
The Cam Box was purged, oiled and wrapped to keep it free of **** until Saturday.
The Threads were prepped for the Cambox and the valve train was coated in oil and then with a shop vac, I made sure that any dust and **** was removed with the coating of oil. I'm going to repeat this before it gets assembly lube and then closed up for good..
01-07-2006, 11:31 AM
#12
Instructor
Thread Starter
Join Date: Jan 2006
Location: Ottawa
Posts: 243
Likes: 0
Received 0 Likes
on
0 Posts
Dec 09/05
Ok, so I should have stopped as I was planning to but I had all the parts, tools and felt like doing it.
It was real important that the cam was times with the pistons. I would like to underscore this to all that will try it. It is an interference engine. IE: The Valves can strike the piston if the timing is off.
So, after cleaning all the internal parts of the Cam Box, and the top of the head, I fired some heavy 20W50 on as an assembly lubricant, used the Shop Vac to suck it with any dust or crud that had collected on the parts. Then coated all the parts in the Cam Box and Re-installed the lifters in the exact order they were removed from the Box in the Fall. That way, the wear patterns and the adjustments that were made will still be accurate.
The Cam Box gasket was oiled and then Bolts were left at 20 NM.
I'm real happy with the outcome. Next, Water Pump and Timing Belt.
.jpg)
.jpg)
.jpg)
Ok, so I should have stopped as I was planning to but I had all the parts, tools and felt like doing it.
It was real important that the cam was times with the pistons. I would like to underscore this to all that will try it. It is an interference engine. IE: The Valves can strike the piston if the timing is off.
So, after cleaning all the internal parts of the Cam Box, and the top of the head, I fired some heavy 20W50 on as an assembly lubricant, used the Shop Vac to suck it with any dust or crud that had collected on the parts. Then coated all the parts in the Cam Box and Re-installed the lifters in the exact order they were removed from the Box in the Fall. That way, the wear patterns and the adjustments that were made will still be accurate.
The Cam Box gasket was oiled and then Bolts were left at 20 NM.
I'm real happy with the outcome. Next, Water Pump and Timing Belt.
01-07-2006, 11:32 AM
#13
Instructor
Thread Starter
Join Date: Jan 2006
Location: Ottawa
Posts: 243
Likes: 0
Received 0 Likes
on
0 Posts
Dec 12/05
More work on the intake Manifold. Took it back to nothing cause I was unhappy with the small pits in the Aluminium. You can see than most of the raised parts have been ground flat!
Work In Progress...
.jpg)
More work on the intake Manifold. Took it back to nothing cause I was unhappy with the small pits in the Aluminium. You can see than most of the raised parts have been ground flat!
Work In Progress...
01-07-2006, 11:32 AM
#14
Instructor
Thread Starter
Join Date: Jan 2006
Location: Ottawa
Posts: 243
Likes: 0
Received 0 Likes
on
0 Posts
Dec 13/05
I think I hit the Intake manifold from 10% to 90% Today. Holy crap, it's a very intricate design and hard to get into all the areas with any type of power tool, so my hand is the "Power Tool"
Check It Out..
It's once again not finished and probably will **** me off till it's finally bolted to the engine..
.jpg)
.jpg)
.jpg)
I think I hit the Intake manifold from 10% to 90% Today. Holy crap, it's a very intricate design and hard to get into all the areas with any type of power tool, so my hand is the "Power Tool"
Check It Out..
It's once again not finished and probably will **** me off till it's finally bolted to the engine..
01-07-2006, 11:32 AM
#15
Instructor
Thread Starter
Join Date: Jan 2006
Location: Ottawa
Posts: 243
Likes: 0
Received 0 Likes
on
0 Posts
Dec 14/05
Hit The mani with the polish wheel again one last time, Made a big diference. I attahced the throtle body with a new seal and new bolts. The Location for the new badging was selected as well..
.jpg)
.jpg)
.jpg)
Hit The mani with the polish wheel again one last time, Made a big diference. I attahced the throtle body with a new seal and new bolts. The Location for the new badging was selected as well..