My 1967 912 Build Thread

 02-28-2014, 10:26 AM
#182
Professor of Pending Projects
Rennlist Member
Rennlist Member
Thread Starter
Ha! I wish!
I was going to use my cheap Harbor Freight MIG welder (no gas tank), but the guys on the 912bbs forum have convinced me to use one with gas. So using a friend's setup (better brand MIG, large argon gas tank, etc.)...
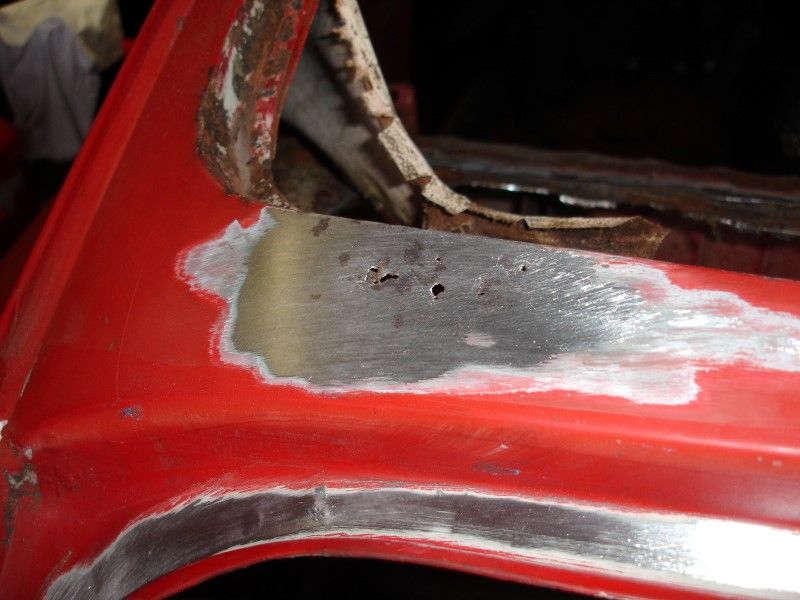
To finish the rear window area, I will need to get (or make) a metal brake/bender (might just buy a cheap one from HF...), I also need to repair a few areas with small patches.
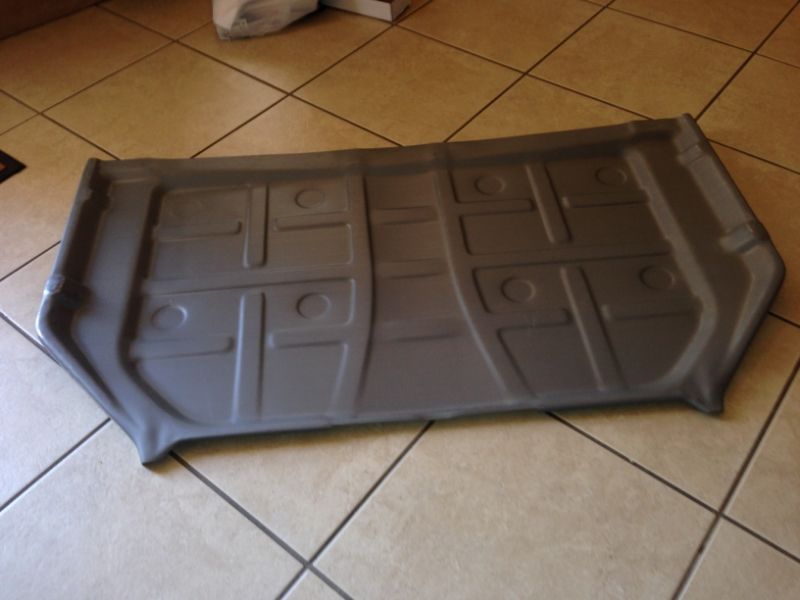
Rear floor pan section arrives today.
Looking at some projects from other folks... if I am taking out the floor to replace, and I know that I have to replace the outer right rocker panel, best to do it now as well... so ordering that today. That should take care of all metal needing replacement.
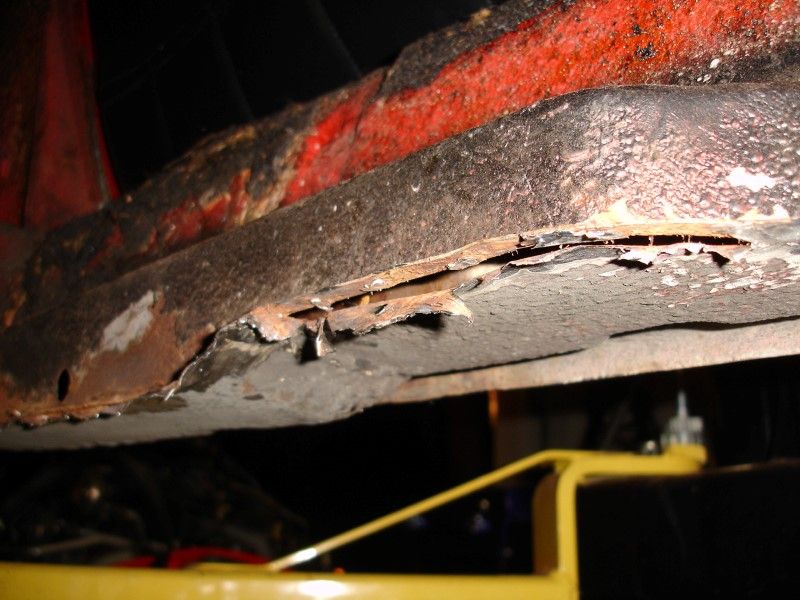
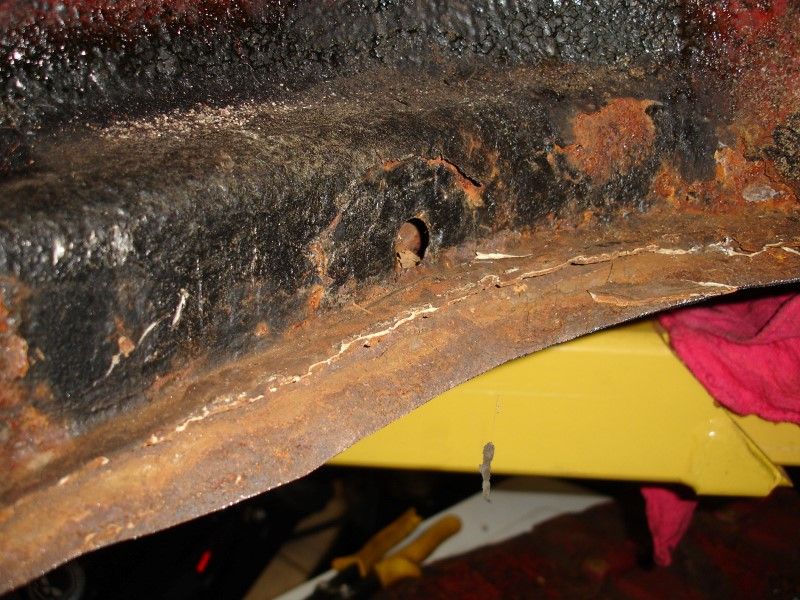
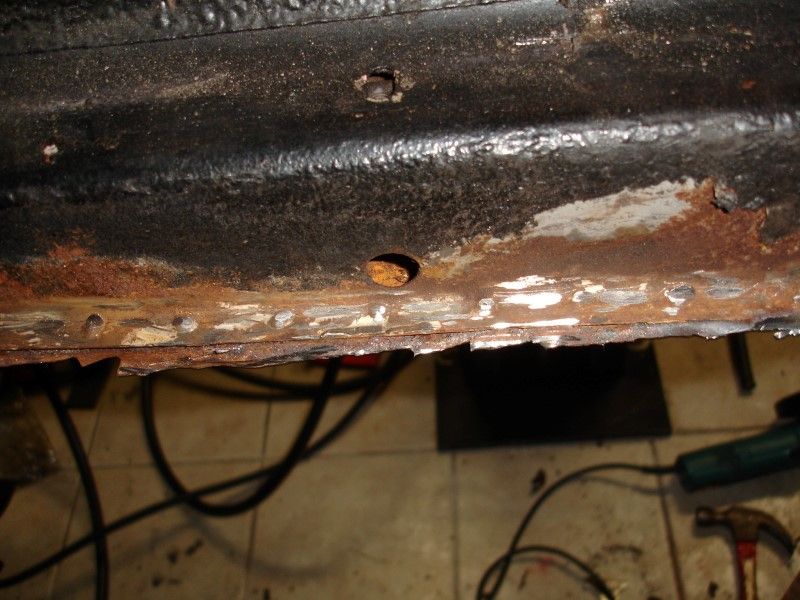
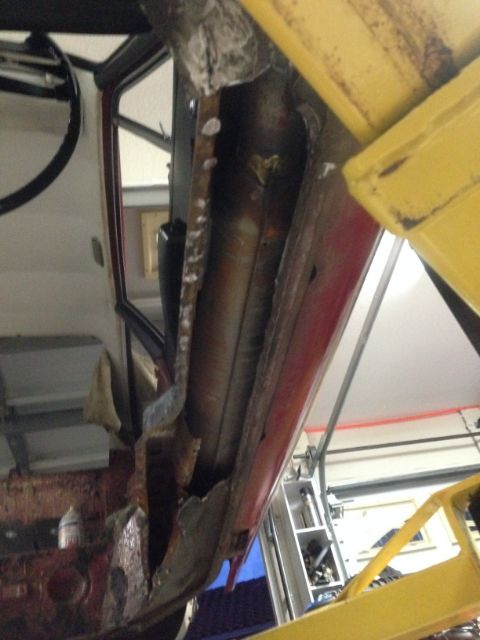
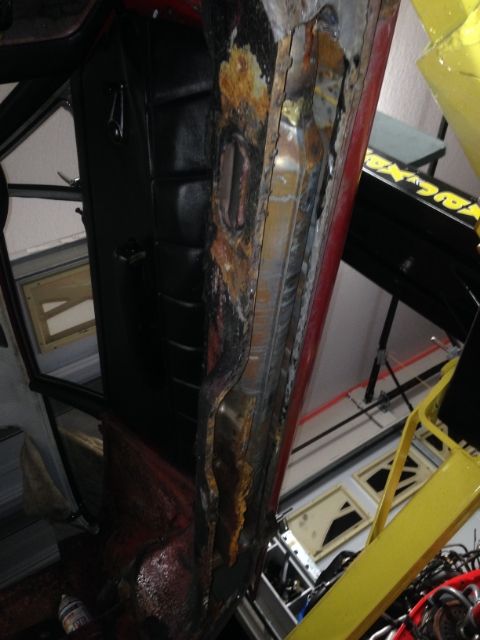
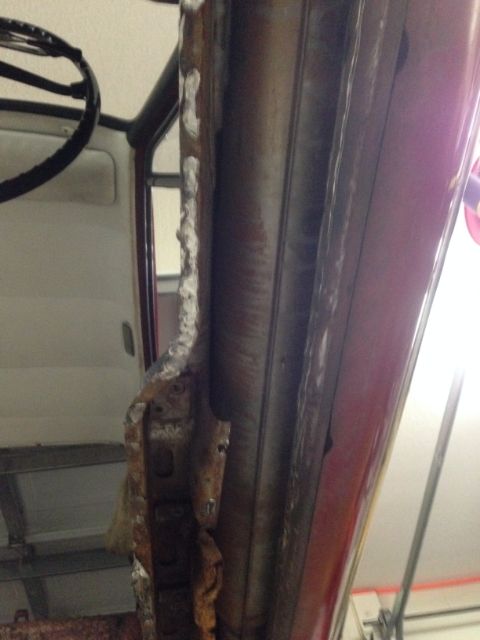
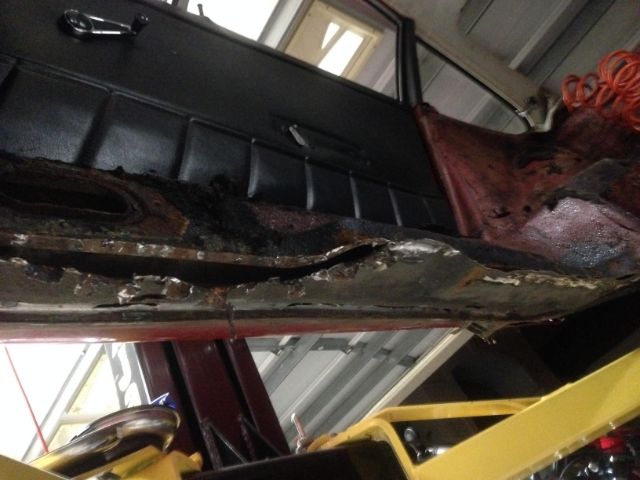
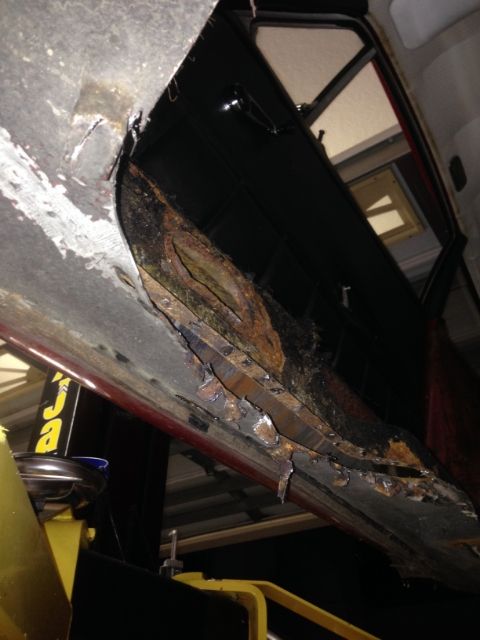
Because of some rust found on bottom of the rear window frame, my idea of being able to repair the rusted areas without touching the outside of the car, no longer holds... Another reason to replace the outer rocker panel section now...
I was going to use my cheap Harbor Freight MIG welder (no gas tank), but the guys on the 912bbs forum have convinced me to use one with gas. So using a friend's setup (better brand MIG, large argon gas tank, etc.)...
To finish the rear window area, I will need to get (or make) a metal brake/bender (might just buy a cheap one from HF...), I also need to repair a few areas with small patches.
Rear floor pan section arrives today.
Looking at some projects from other folks... if I am taking out the floor to replace, and I know that I have to replace the outer right rocker panel, best to do it now as well... so ordering that today. That should take care of all metal needing replacement.
Because of some rust found on bottom of the rear window frame, my idea of being able to repair the rusted areas without touching the outside of the car, no longer holds... Another reason to replace the outer rocker panel section now...
Last edited by Wachuko; 02-28-2014 at 11:57 AM.
02-28-2014, 11:23 AM
#183
Professor of Pending Projects
Rennlist Member
Rennlist Member
Thread Starter
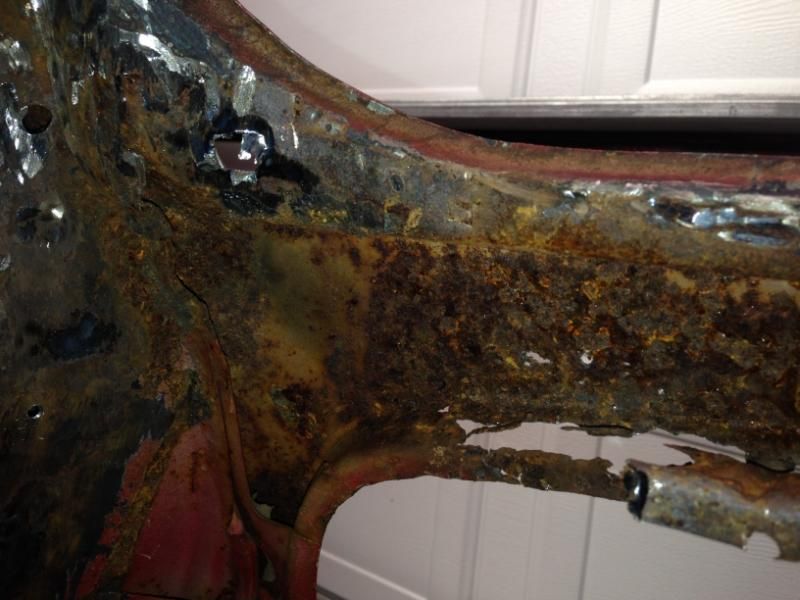
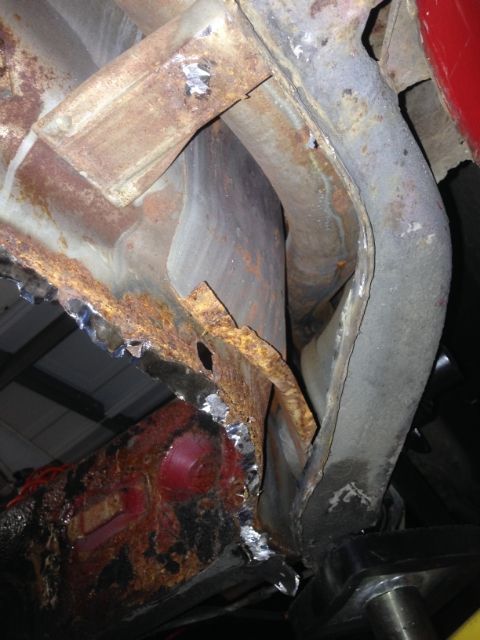
After looking at that lower left corner from the inside, I also ordered the replacement sheet metal for it... I was going to have one heck of a time trying to repair it...
02-28-2014, 10:24 PM
#184
Professor of Pending Projects
Rennlist Member
Rennlist Member
Thread Starter
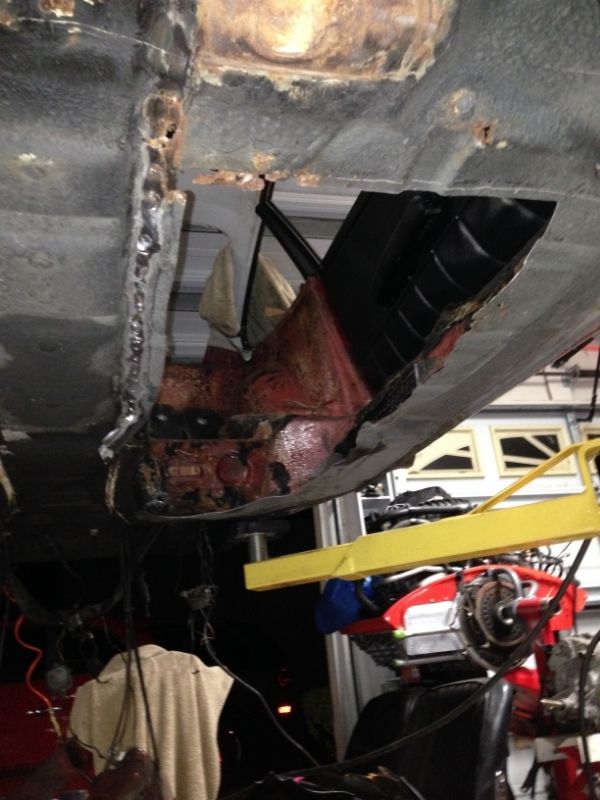
Started to cut the floor...
Wife: "in the garage again??! Let's have some wine..."
Me: But I am in the middle of...%^&*&^$%*
Wife: "What??"
Me: Yes dear....
 More tomorrow...
Wife: "in the garage again??! Let's have some wine..."
Me: But I am in the middle of...%^&*&^$%*
Wife: "What??"
Me: Yes dear....
More tomorrow...
Last edited by Wachuko; 03-01-2014 at 12:41 AM.
03-01-2014, 01:47 PM
#185
Professor of Pending Projects
Rennlist Member
Rennlist Member
Thread Starter
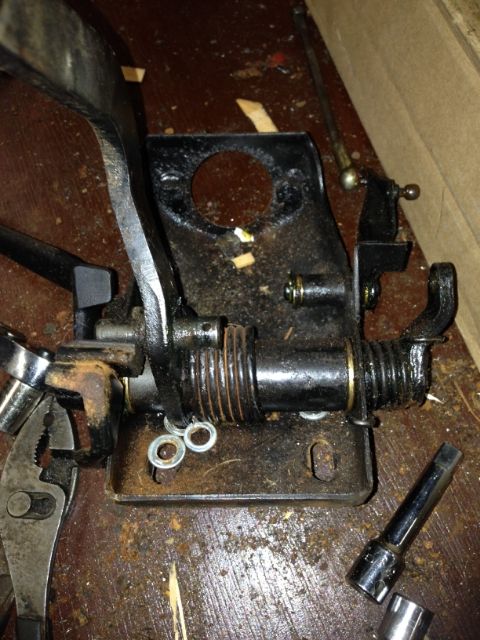
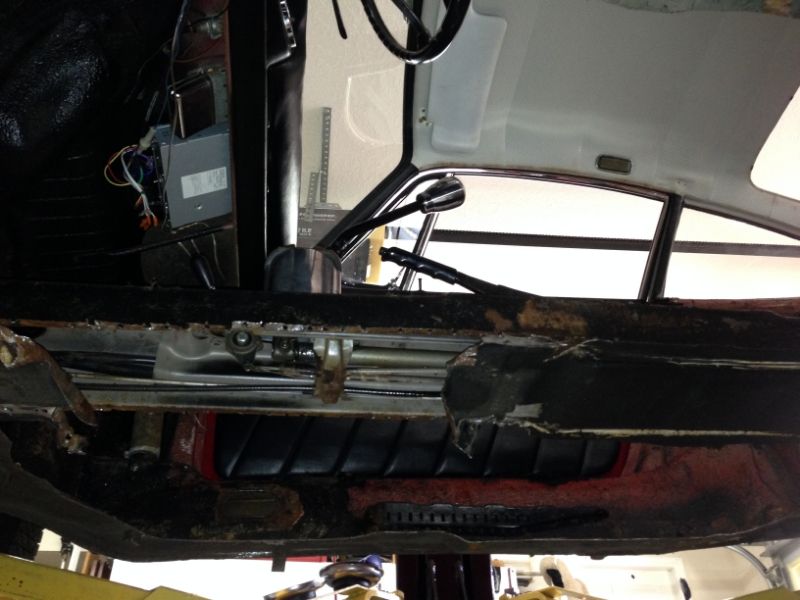
Pedal cluster removed...
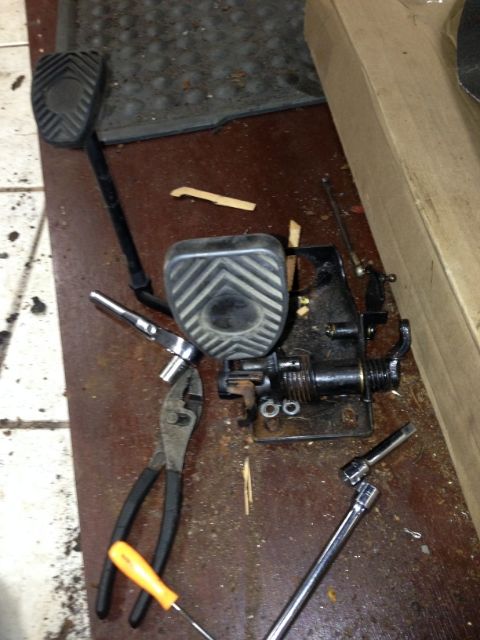
Looks to be in great condition. I will clean, paint, grease and put it aside for when it is time to reinstall...
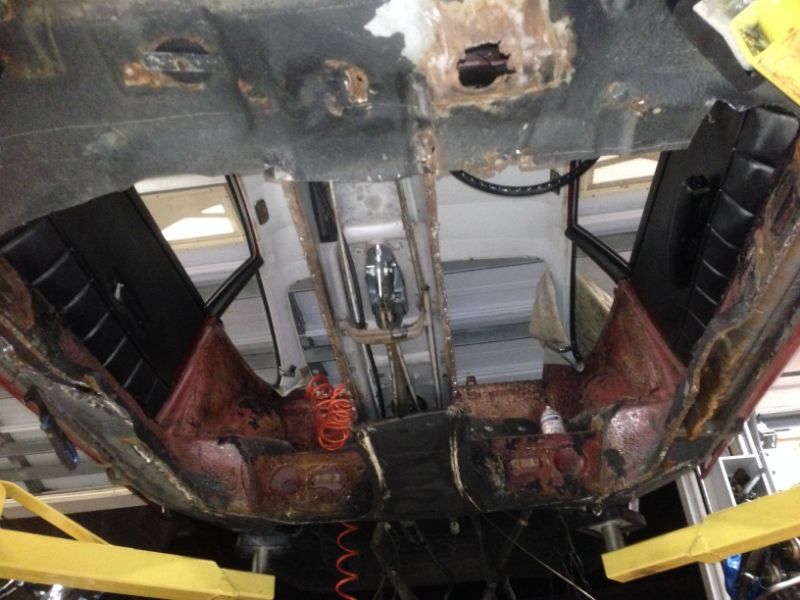
Just keep cutting, just keep cutting, cutting cutting...
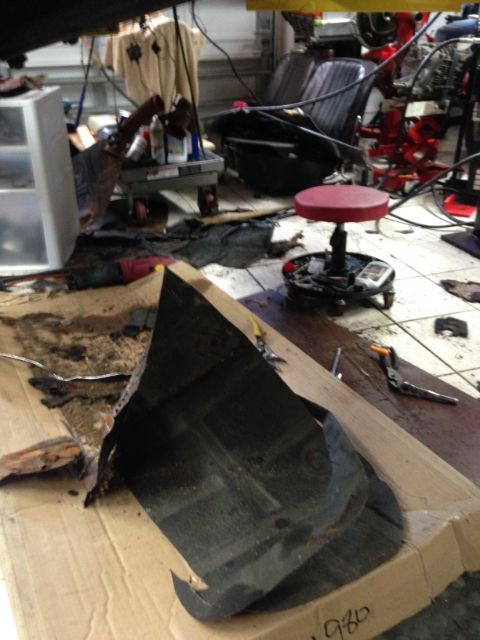

Condition of the center tunnel is impressive for such an old car. Metal looks new, zero rust.
Looks to be in great condition. I will clean, paint, grease and put it aside for when it is time to reinstall...
Just keep cutting, just keep cutting, cutting cutting...
Condition of the center tunnel is impressive for such an old car. Metal looks new, zero rust.
 03-02-2014, 10:25 PM
#187
Professor of Pending Projects
Rennlist Member
Rennlist Member
Thread Starter
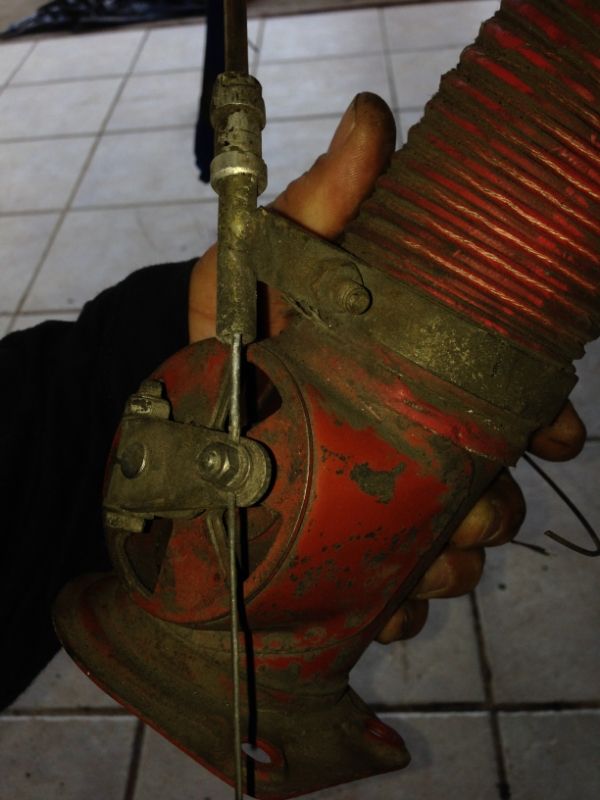
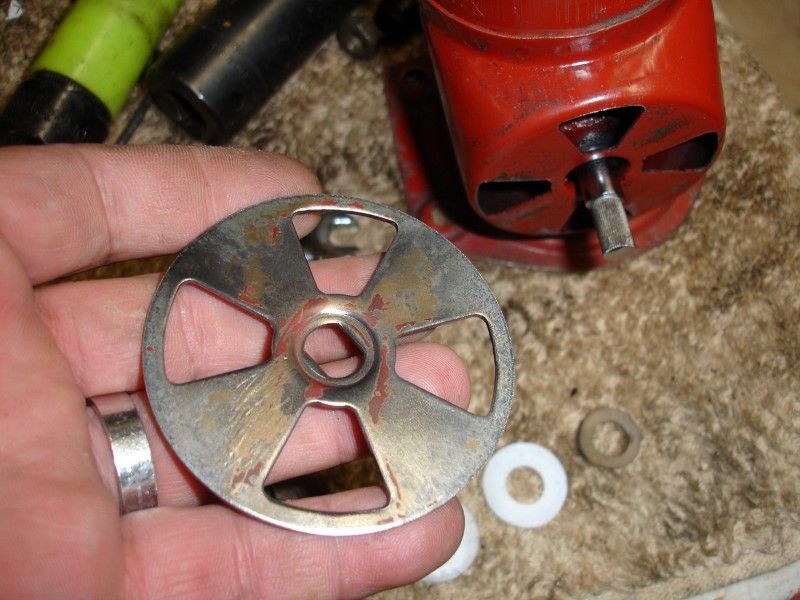
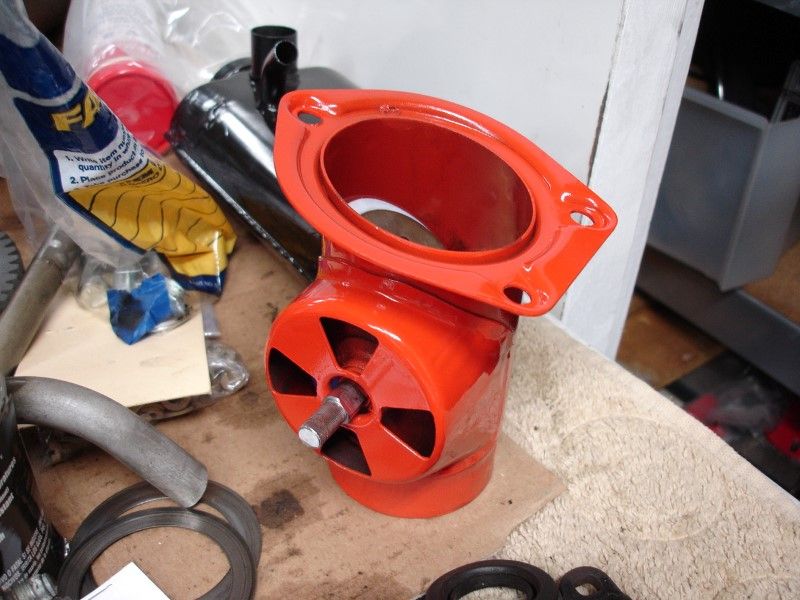
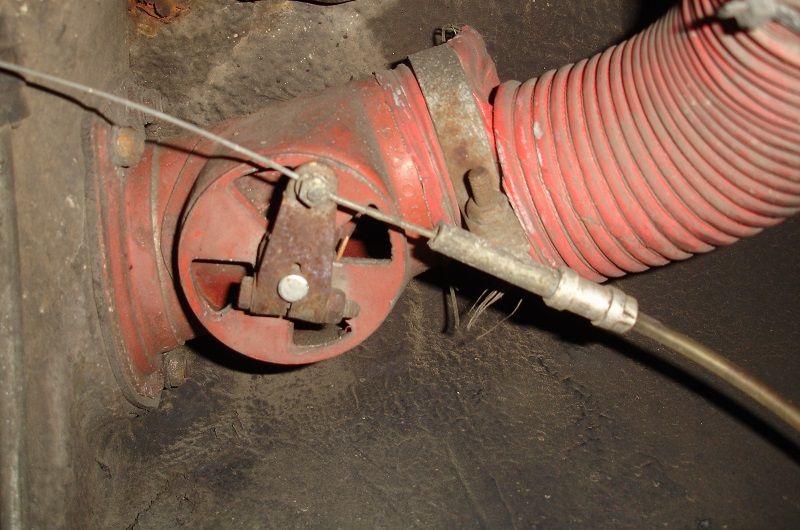
Garage was off-limits today... but managed to get something at least done... One of the heater controls. These are in very good condition, and after cleaning I thought about leaving them alone. But since I had the orange paint that I am using for the front strut assembly...I figured, why not at least paint them so they all look the same...
Before:
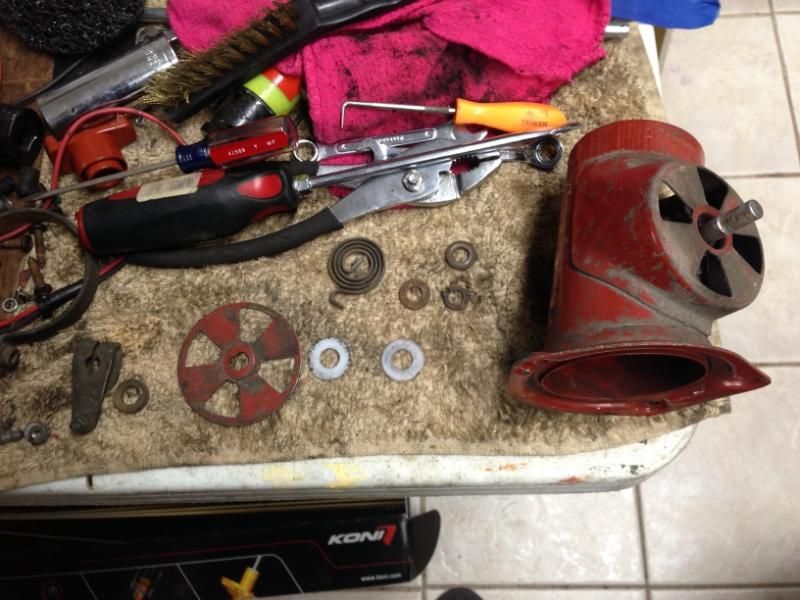
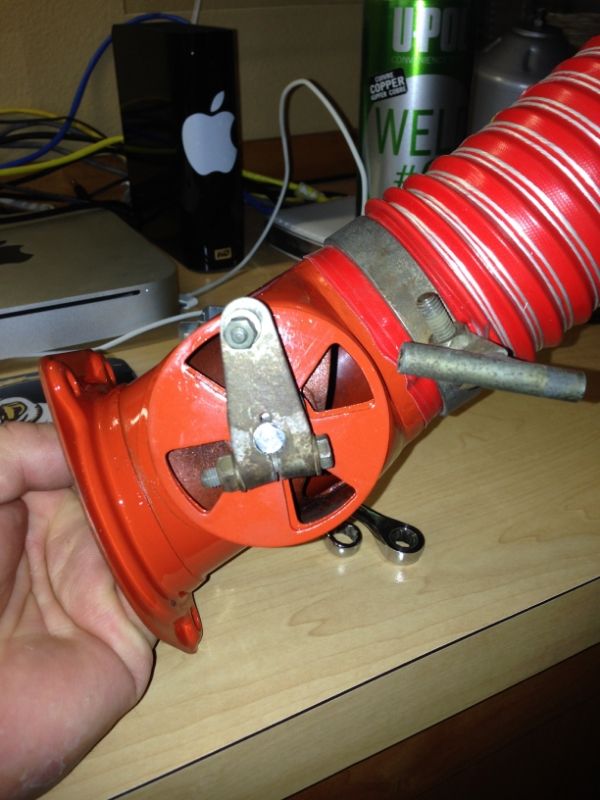
After cleaning:
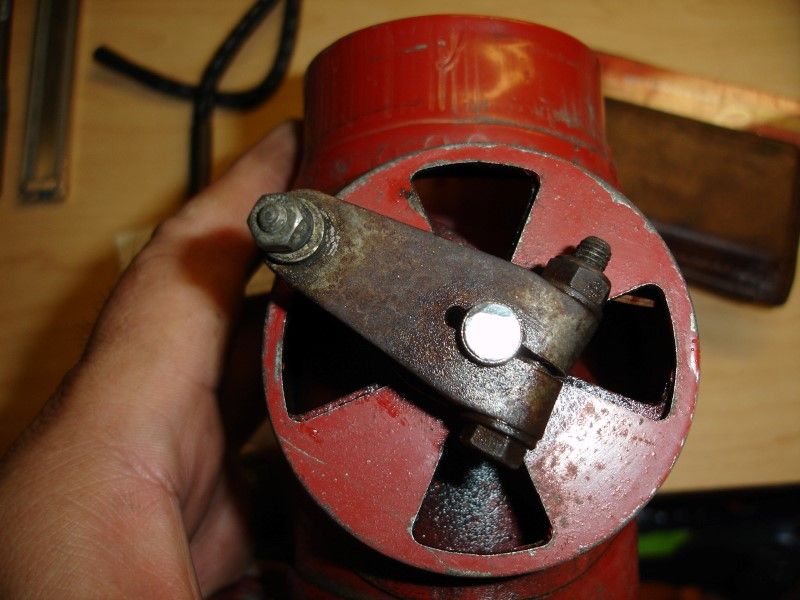
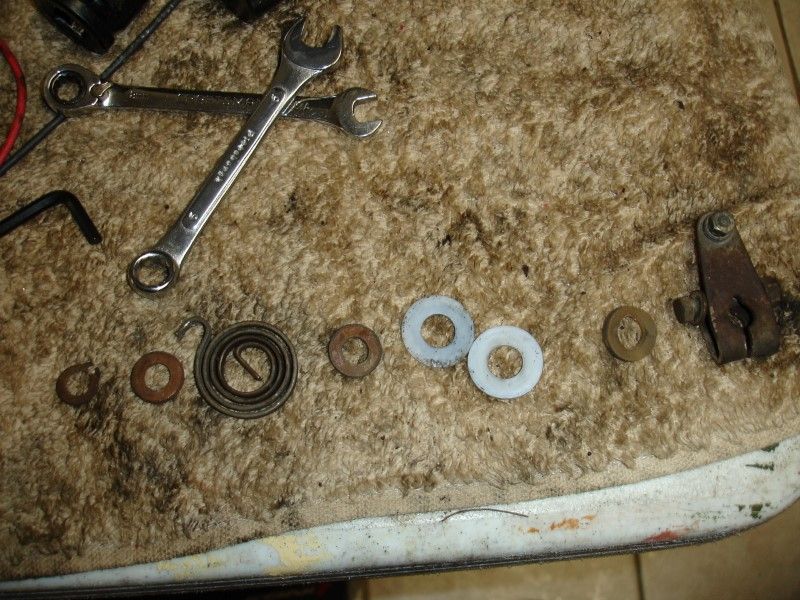
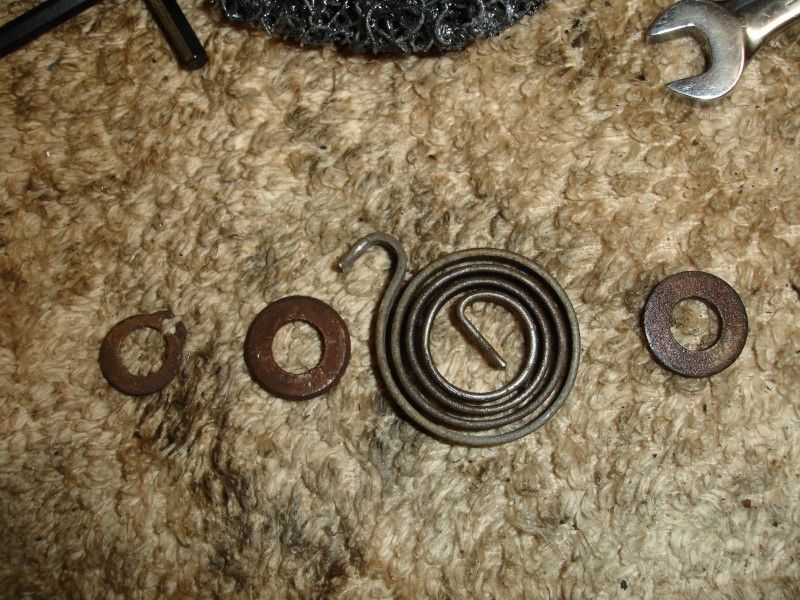
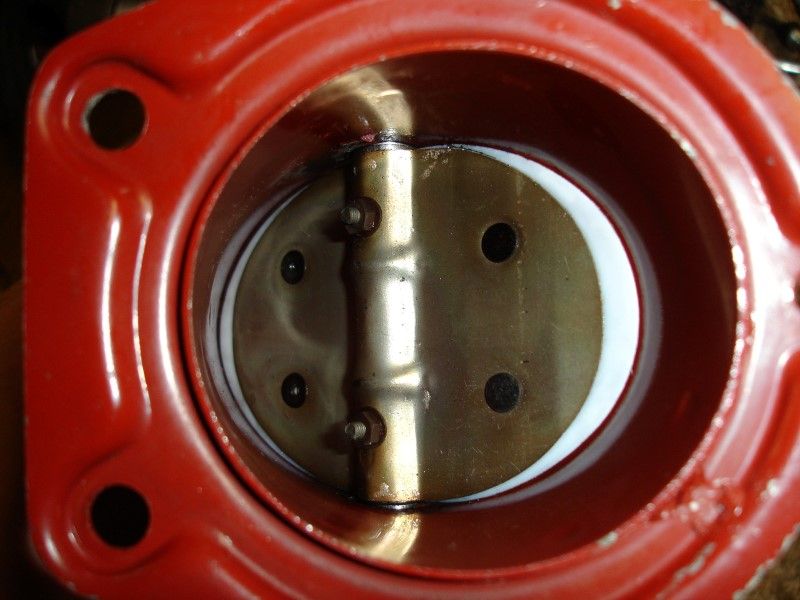
Once taken apart, cleaned the wheel, brushed the washers and other small parts with a bronze brush.. and started to paint it... I did not touch the inside, I covered both ends to avoid paint getting there, it looked new inside so why bother to deal with that...
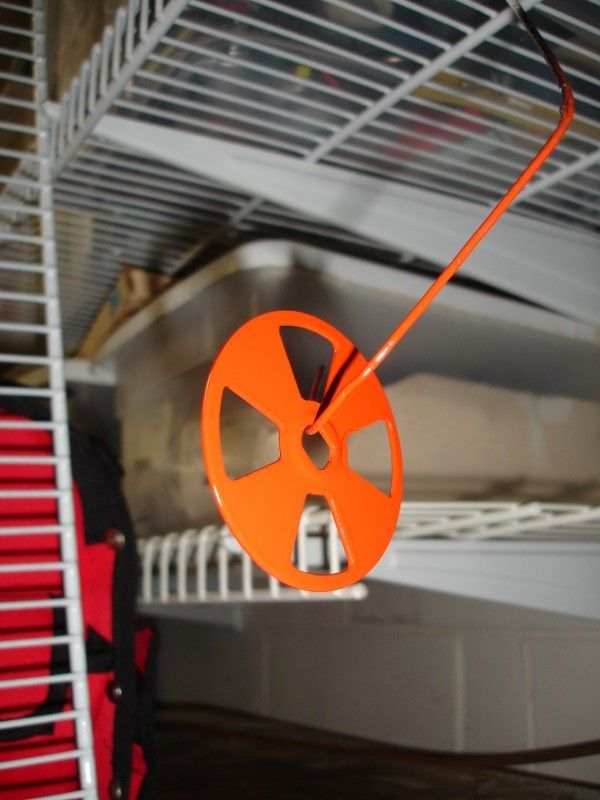
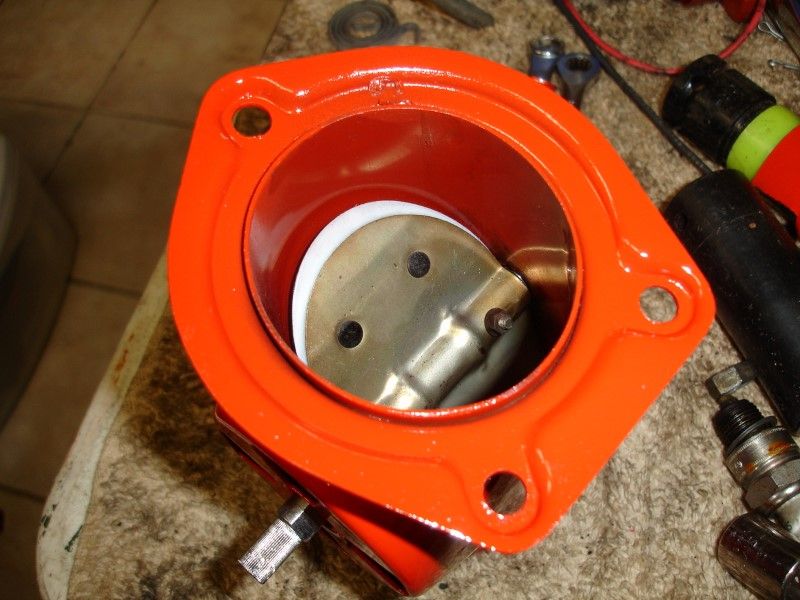
The blue you see inside is tape that I used to avoid overspray to get to the internal flap...
Ready to be assembled again once it completely dries...

Before:
After cleaning:
Once taken apart, cleaned the wheel, brushed the washers and other small parts with a bronze brush.. and started to paint it... I did not touch the inside, I covered both ends to avoid paint getting there, it looked new inside so why bother to deal with that...
The blue you see inside is tape that I used to avoid overspray to get to the internal flap...
Ready to be assembled again once it completely dries...
03-03-2014, 10:04 AM
#188
Professor of Pending Projects
Rennlist Member
Rennlist Member
Thread Starter
For now I plan to just leave them as is. If I make another run to the plating shop, then I will have them plated. Or I will just paint them black. But they seem to be in good condition as is.
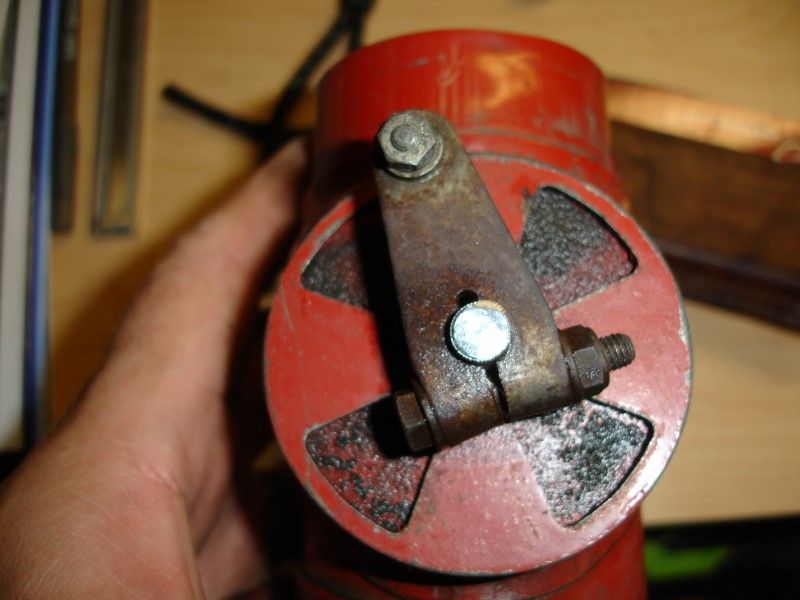
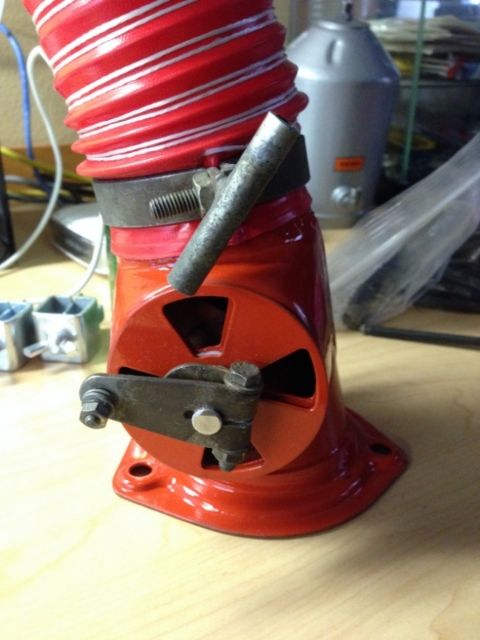
Final product:
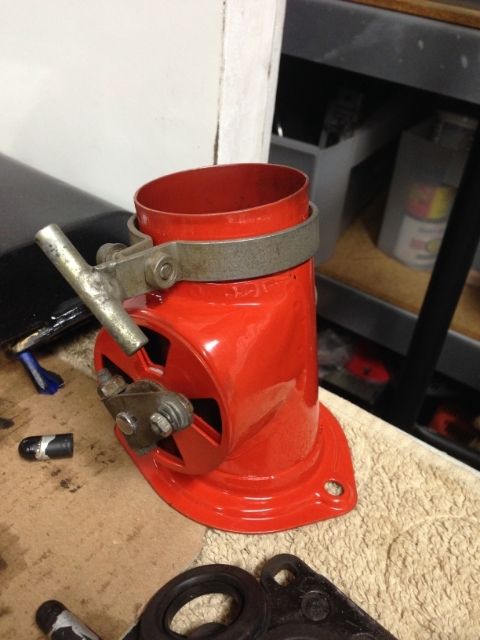
And now, rinse and repeat:
EDIT: Thank goodness for photos... I was going to find out when installing, but glad I caught it now and avoided the frustration... I had it with the wrong hose clamp and pointing in the wrong direction... this one is for the left side. Now corrected...
Final product:
And now, rinse and repeat:
EDIT: Thank goodness for photos... I was going to find out when installing, but glad I caught it now and avoided the frustration... I had it with the wrong hose clamp and pointing in the wrong direction... this one is for the left side. Now corrected...
Last edited by Wachuko; 03-03-2014 at 11:22 AM.
03-03-2014, 11:46 PM
#189
Professor of Pending Projects
Rennlist Member
Rennlist Member
Thread Starter
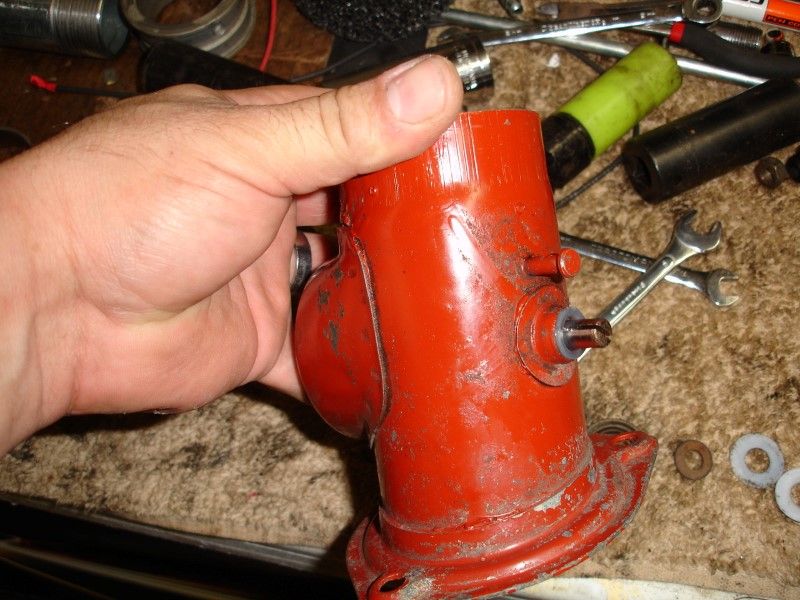
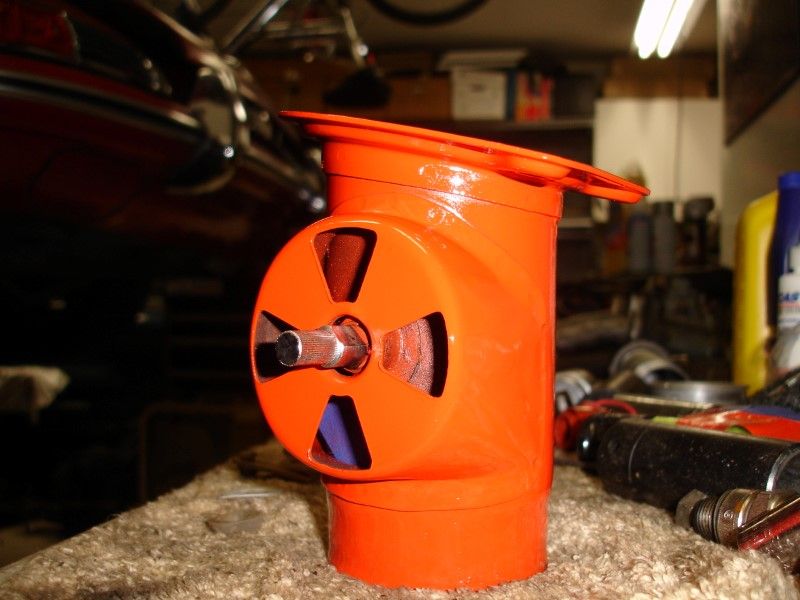
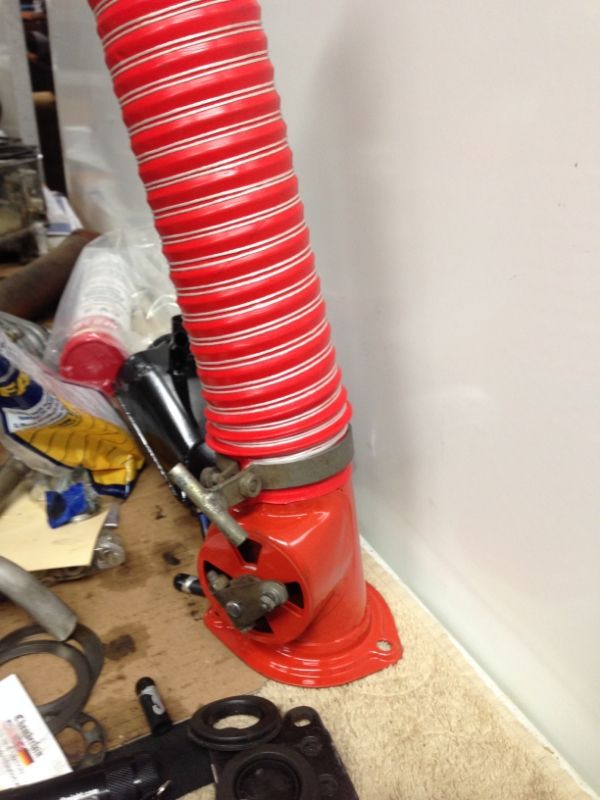
I finished the right side heater valve
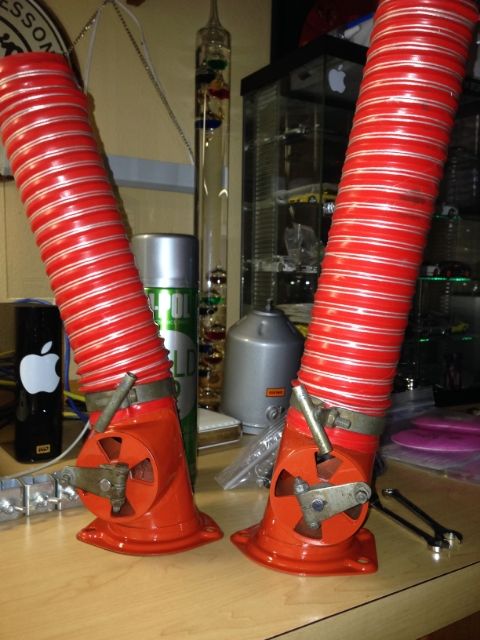
As you can see in this photo, outside color looks very close to original (I did not paint the inside, so that is the color it came with from the factory, unless someone replaced these in the past, which I doubt).

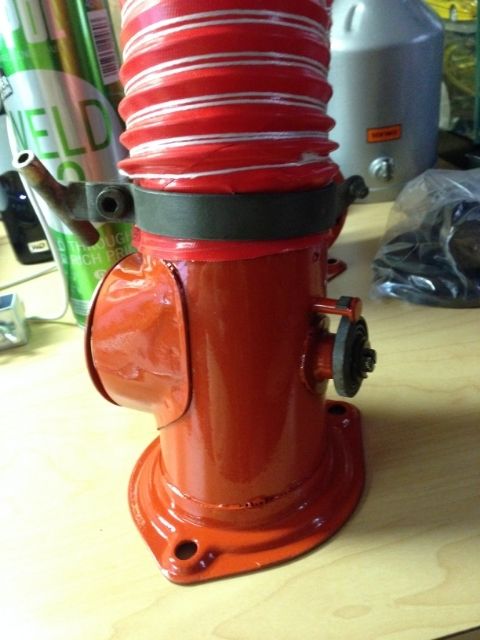
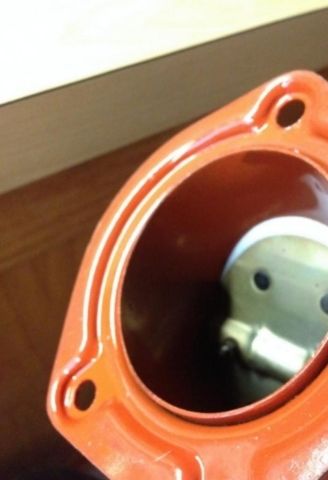
I am using the same color recommended for the shocks by Koni. Plasti-Kote 200 Chevrolet Orange Engine Enamel. That way, shocks and valves will look the same...
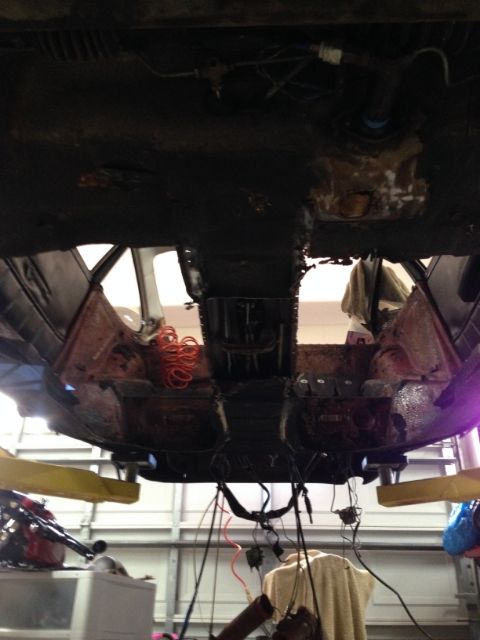
Also spent sometime with the removing of the floor... and as I am finding out, not a task that can be done quickly.
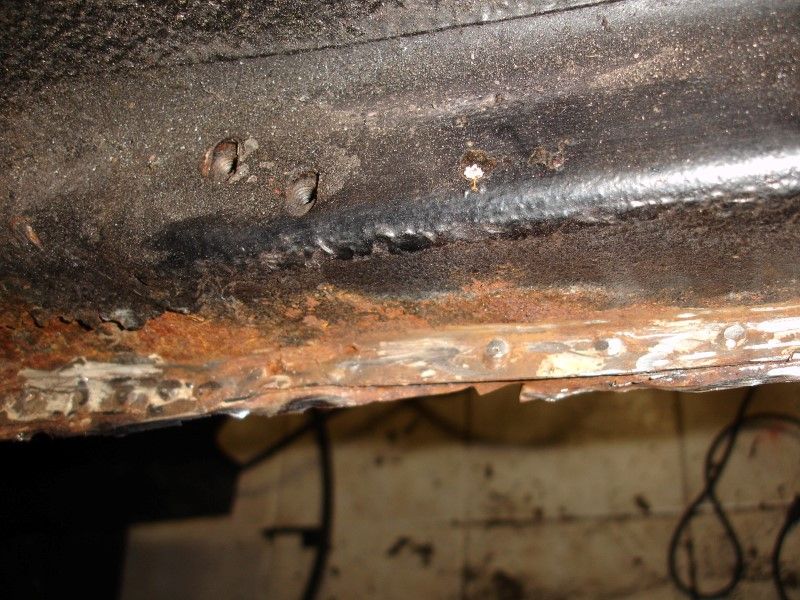
As suggested, I have been trying to avoid drilling the spot welds... I cleaned the area to see where the welds are:
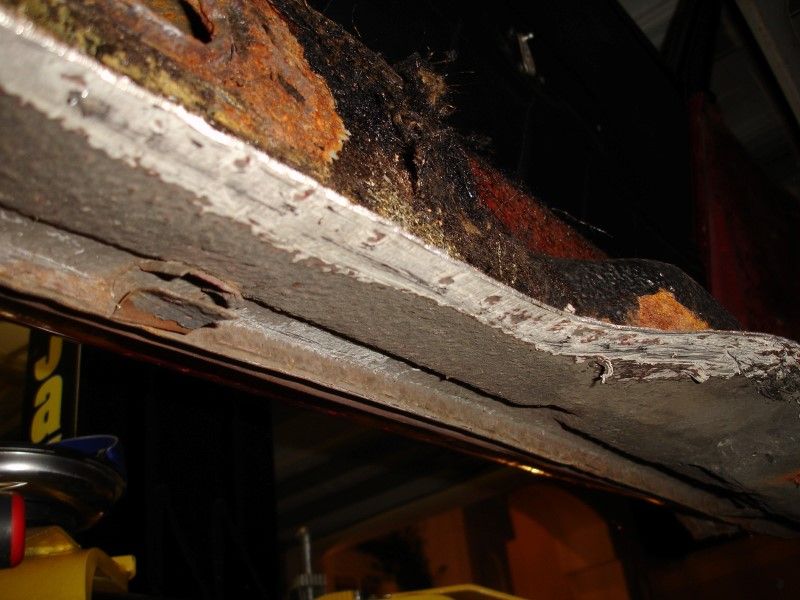
Then grind grind gring, and then, using a heavy duty metal scraper like this one:
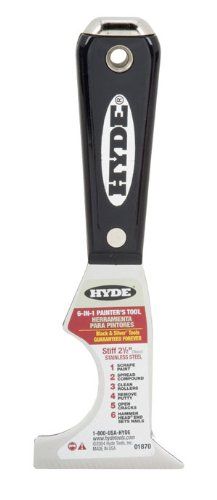
and a hammer, I separate the floor pan from the car...
The front section has been easier... still need to do the rear section, in there the welds are nasty... not really looking forward to that side...
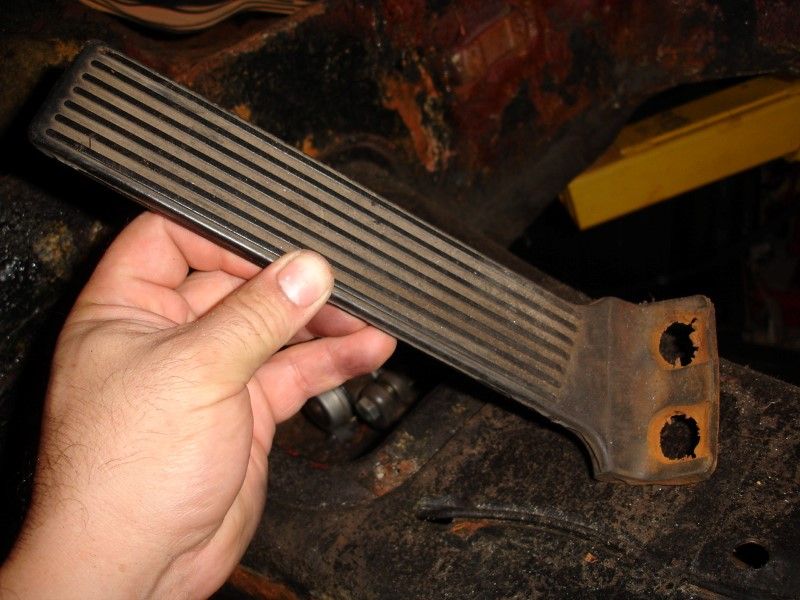
Throttle pedal is toast, new one on its way...
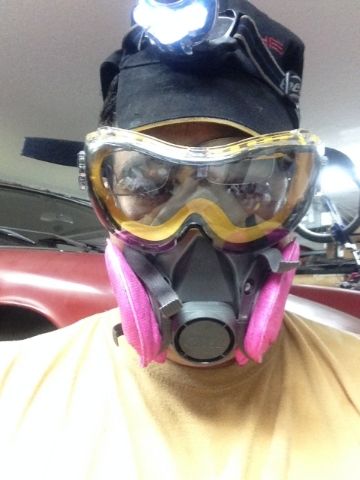
That is all for tonight, I need a bath after all that grind dust and crap got all over me...
As you can see in this photo, outside color looks very close to original (I did not paint the inside, so that is the color it came with from the factory, unless someone replaced these in the past, which I doubt).
I am using the same color recommended for the shocks by Koni. Plasti-Kote 200 Chevrolet Orange Engine Enamel. That way, shocks and valves will look the same...
Also spent sometime with the removing of the floor... and as I am finding out, not a task that can be done quickly.
As suggested, I have been trying to avoid drilling the spot welds... I cleaned the area to see where the welds are:
Then grind grind gring, and then, using a heavy duty metal scraper like this one:
and a hammer, I separate the floor pan from the car...
The front section has been easier... still need to do the rear section, in there the welds are nasty... not really looking forward to that side...
Throttle pedal is toast, new one on its way...
That is all for tonight, I need a bath after all that grind dust and crap got all over me...
Last edited by Wachuko; 03-04-2014 at 01:26 PM. Reason: Forgot the photo of the heater valves...
 03-04-2014, 11:19 AM
#191
Professor of Pending Projects
Rennlist Member
Rennlist Member
Thread Starter
03-04-2014, 05:17 PM
#192
Professor of Pending Projects
Rennlist Member
Rennlist Member
Thread Starter
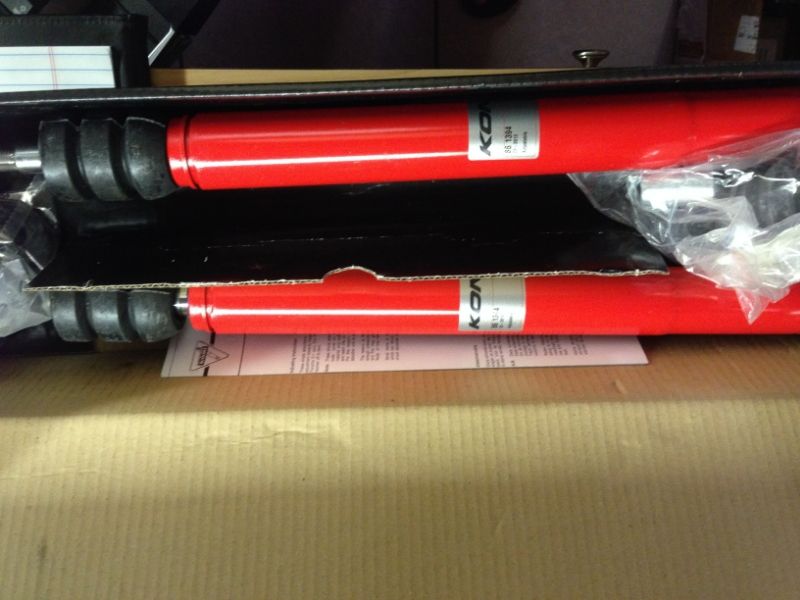
Front Koni inserts came in... best price I found was from AJ USA... I over paid for the rear shocks by not doing my homework, learned my lesson and did some research on the front units...
I will continue to work on removing the old floor tonight... after the floors are done I can work on getting the front suspension out and rebuilt.
I will continue to work on removing the old floor tonight... after the floors are done I can work on getting the front suspension out and rebuilt.
03-04-2014, 10:54 PM
#193
Professor of Pending Projects
Rennlist Member
Rennlist Member
Thread Starter
Spent a few hours in the garage tonight...
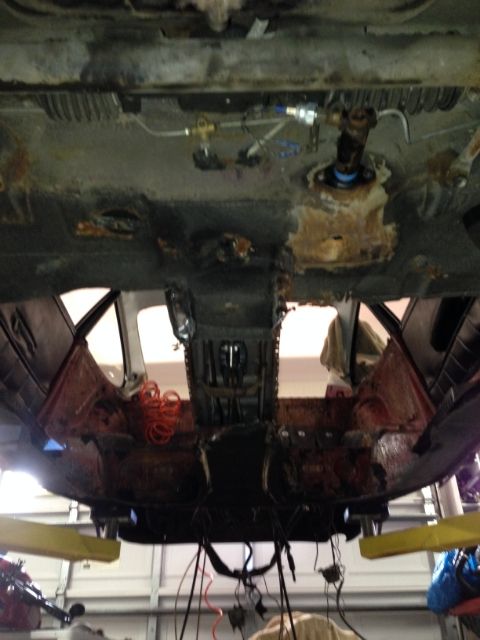
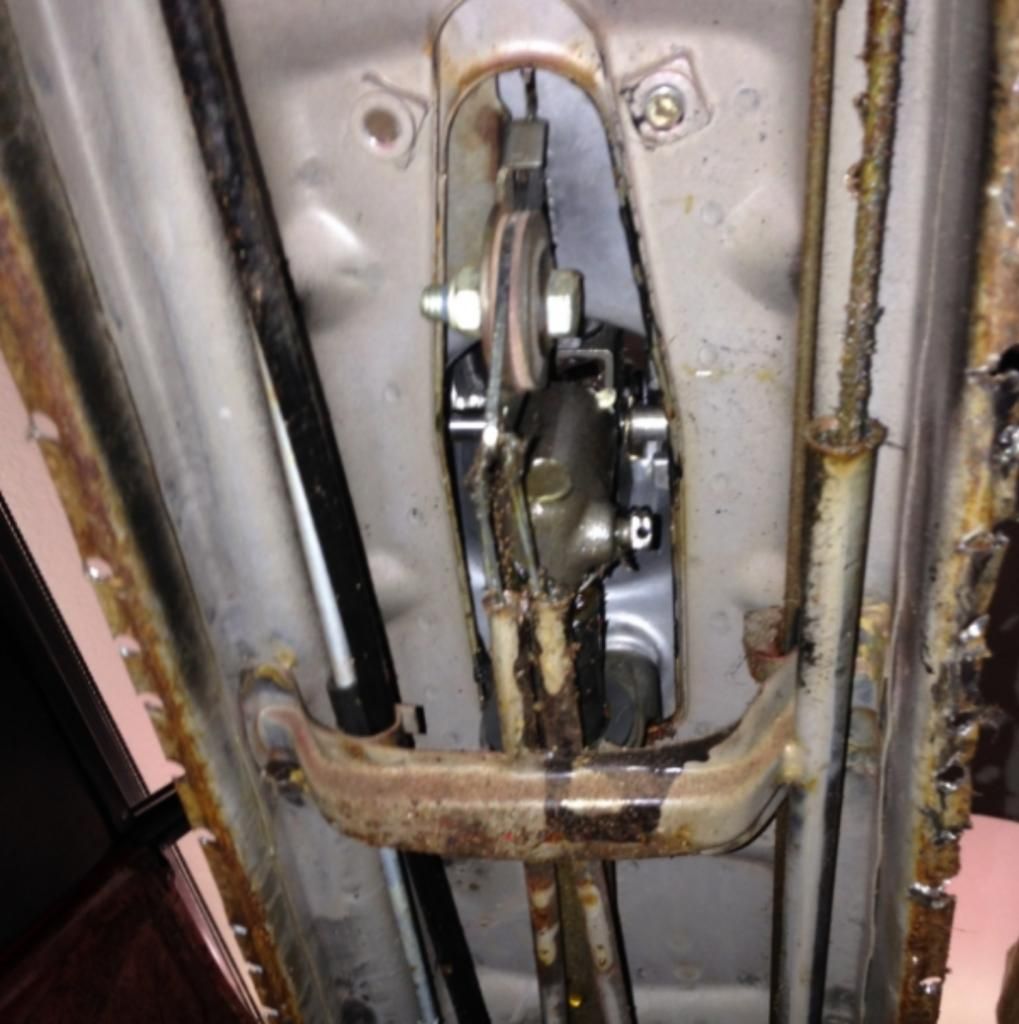
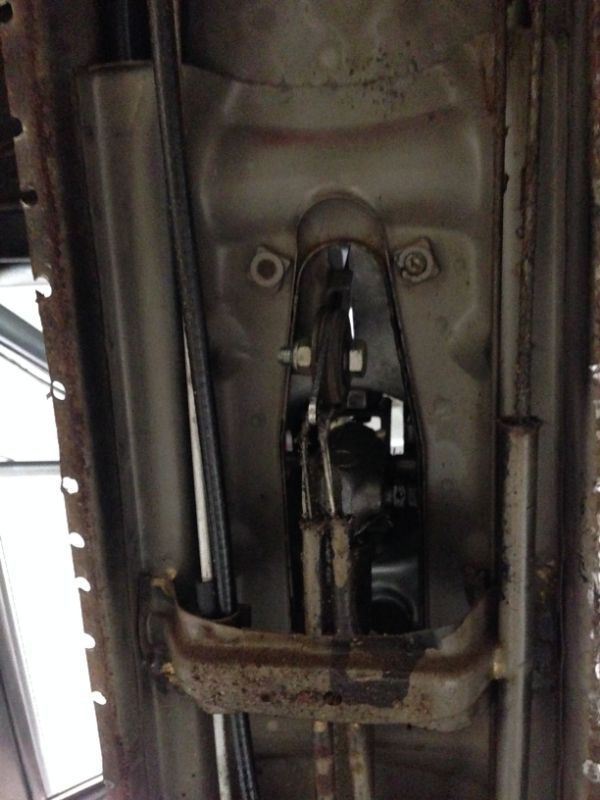
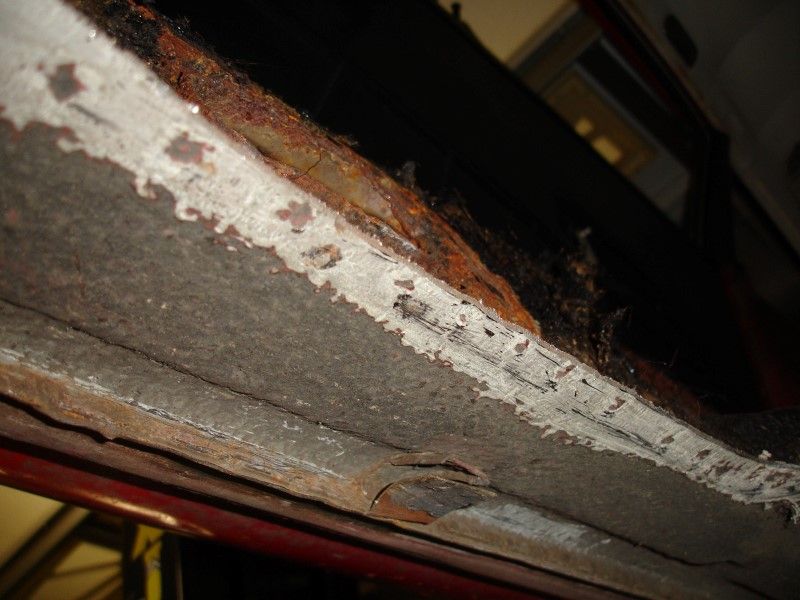
Continued to remove the floor... happy to see that the heater tube is in good condition...
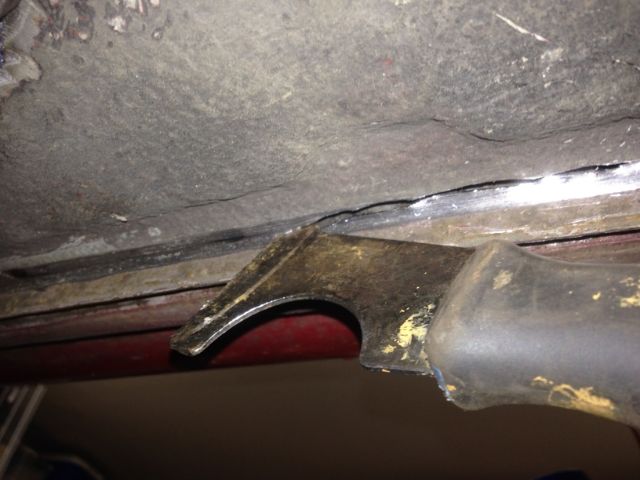
Jack point is also in good condition
I just grind the old metal close to the lip and then use the metal scraper to cut flush... later I will grind the old metal before welding the new floor...
On the inside, I grind the old metal to the point where it gets rid of the weld and starts getting to the stock metal base, then I use the metal scraper to separate the two... grind, whack, grind, whack some more... slow process...
Getting there...
Continued to remove the floor... happy to see that the heater tube is in good condition...
Jack point is also in good condition
I just grind the old metal close to the lip and then use the metal scraper to cut flush... later I will grind the old metal before welding the new floor...
On the inside, I grind the old metal to the point where it gets rid of the weld and starts getting to the stock metal base, then I use the metal scraper to separate the two... grind, whack, grind, whack some more... slow process...
Getting there...
03-05-2014, 01:50 PM
#194
Professor of Pending Projects
Rennlist Member
Rennlist Member
Thread Starter
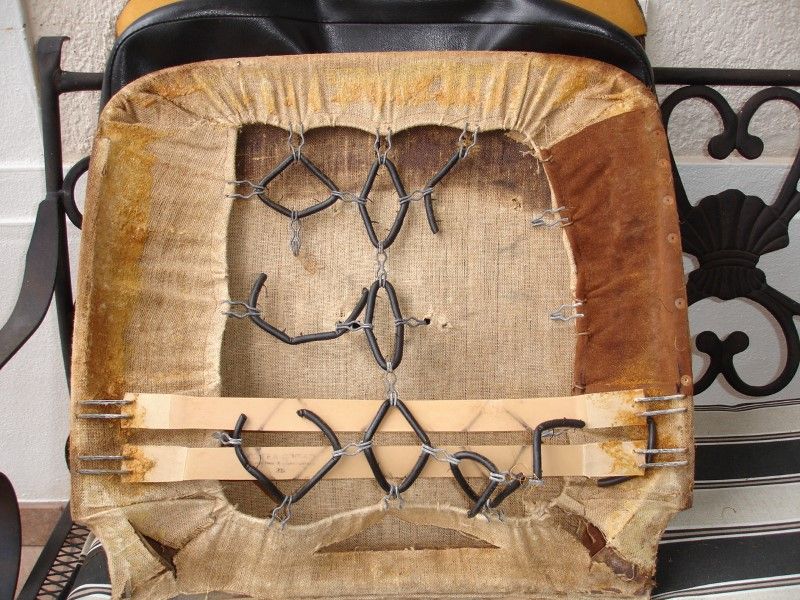
Some asked about the tabs for the headrest and took the time to take the seat apart and share photos... Need to weld one nut that holds one of the bolts of the side support, need all new rubber bands, pads, etc...
here are the photos:
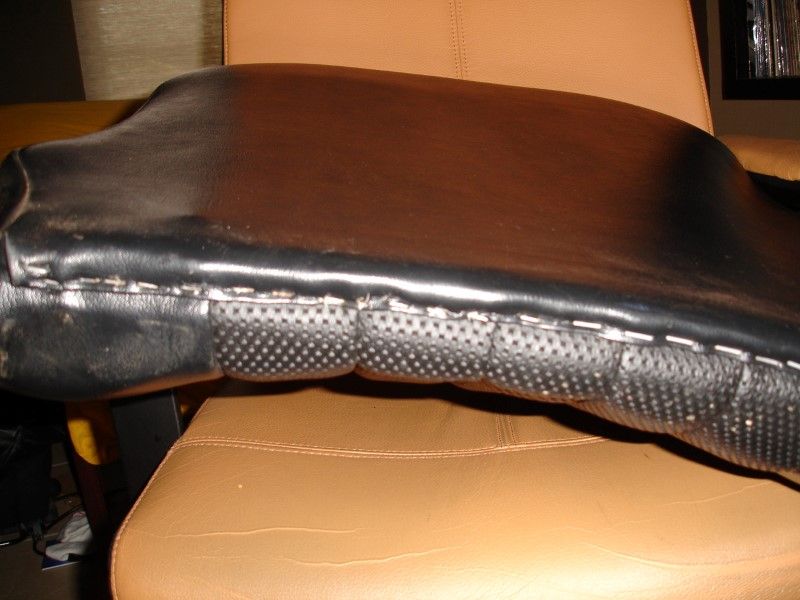
Vinyl cover removed, looking at the back of the seat backrest
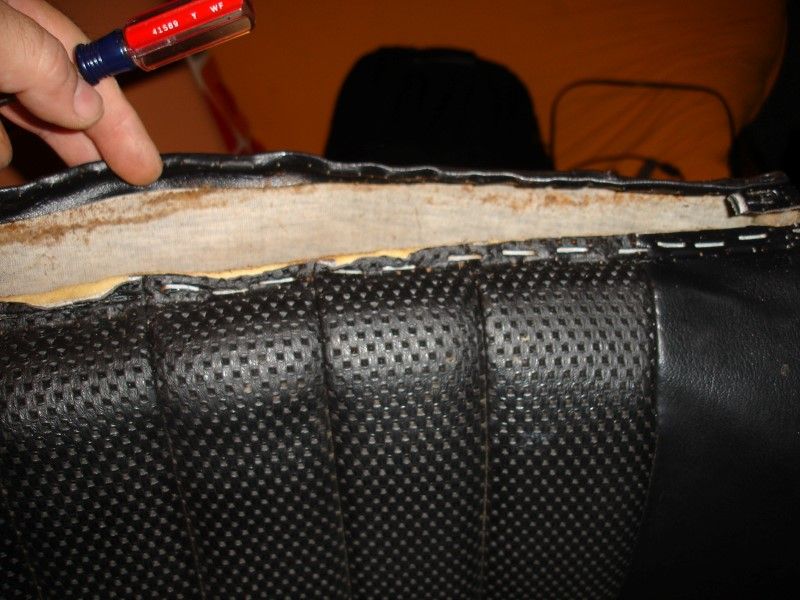
Pad removed, looking at the back of the seat backrest
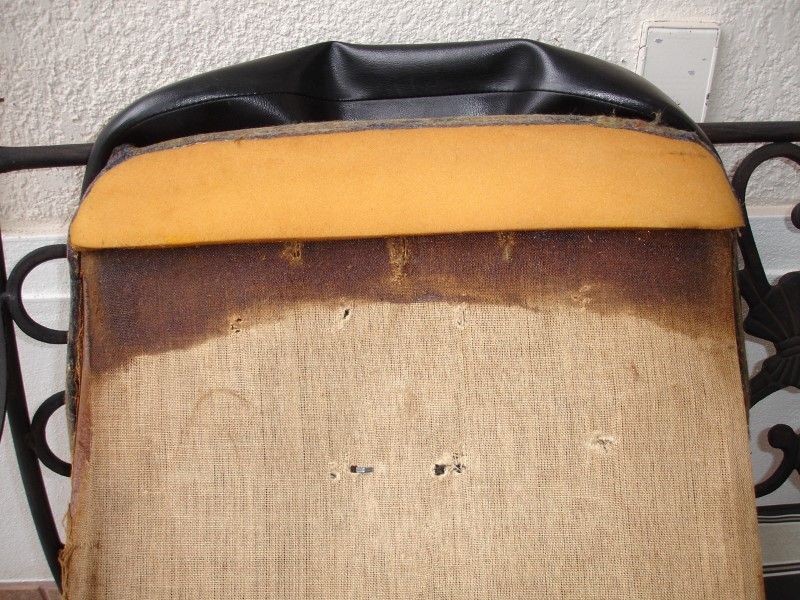
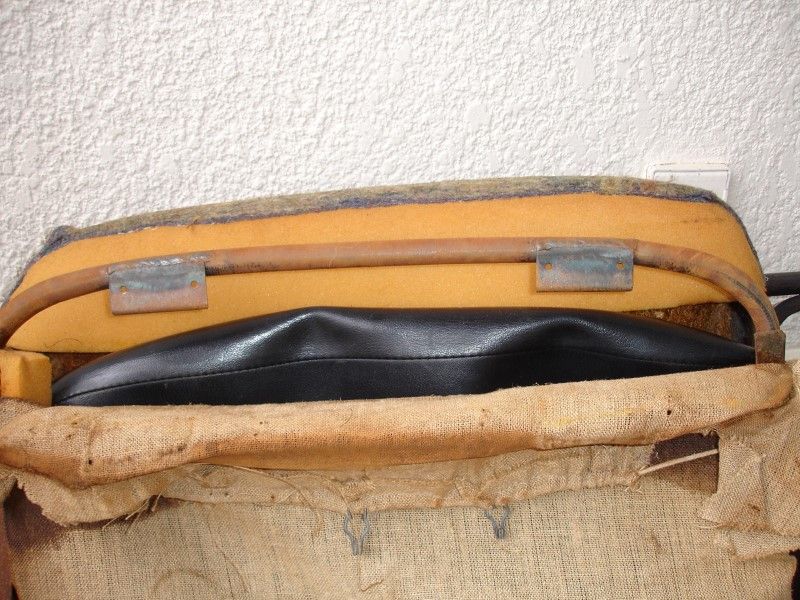
Looking at the other side
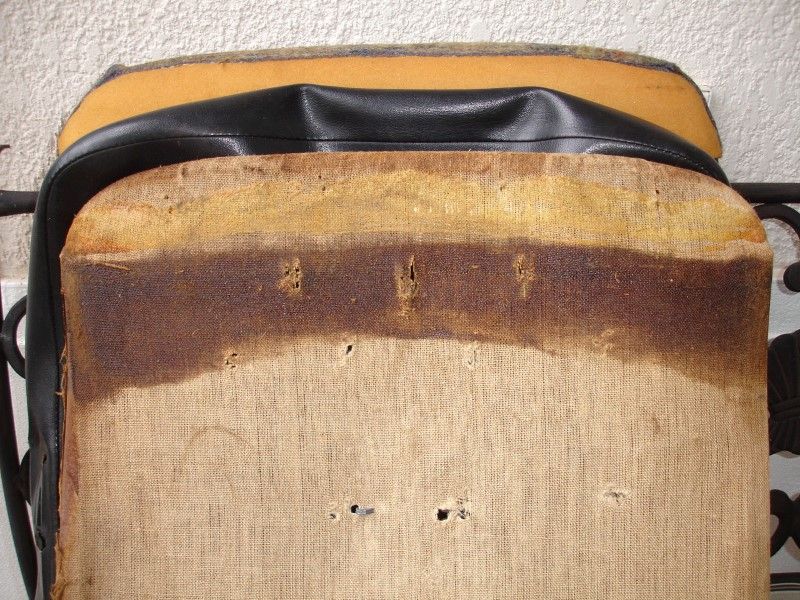
Whatchamacallit removed, looking at the back of the seat backrest
here are the photos:
Vinyl cover removed, looking at the back of the seat backrest
Pad removed, looking at the back of the seat backrest
Looking at the other side
Whatchamacallit removed, looking at the back of the seat backrest
03-05-2014, 06:28 PM
#195
Professor of Pending Projects
Rennlist Member
Rennlist Member
Thread Starter
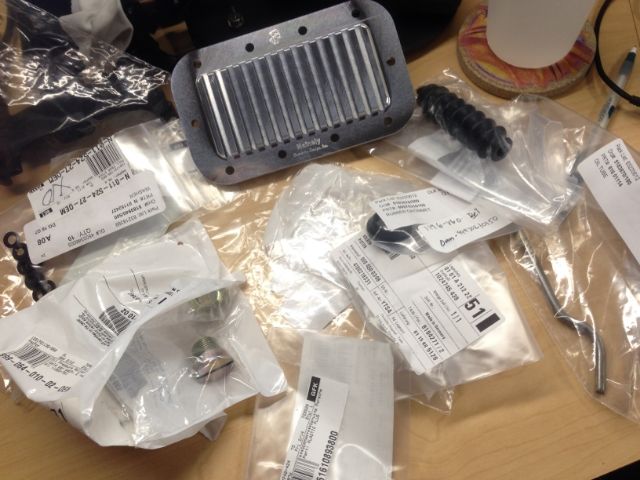
A few more parts for the engine rebuild came in...
And now, back to the garage to work on the removing of the floor pan...
And now, back to the garage to work on the removing of the floor pan...