Porsche 997: How to Replace Outer Tie Rods
The Porsche 997 is made for speed. Worn tie rods can mean bad news when you're going fast. Here's how to replace them.
This article applies to the Porsche 997 (2005-2012).
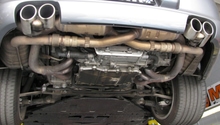
Your Porsche 997 doesn't have arms, but it does have a steering rack and tie rods which are somewhat like arms. If you imagine a person's arms stretching underneath your car, the steering rack would be like that person's shoulders, the inner tie rods like their arms, and the outer tie rods like their hands. If there's a bad joint anywhere in the system, you'll get weird noises and possibly poor handling.
If you think your tie rods need replacement, it's a simple matter to check. You shouldn't be able to wiggle your front tires left to right, as they'd move when steering, too much. If you can wiggle them, and especially if doing so produces a clunky creaky noise, you may have tie rod trouble.
Be aware that this process is going to necessitate an alignment. You're going to want to carefully, slowly drive to an alignment shop after you're done, or else risk tire wear and unpredictable handling.

Materials Needed
- Socket set
- Tie rod end remover
- Safe jacking equipment (jack, jack stands, chocks)
- A sharpie or other marking device
- Brake cleaner
Step 1 – Get rid of anything that looks like a pickle fork
A lot of people will tell you that in order to separate your tie rod end from your hub carrier, or "knuckle," you'll need what's called a "pickle fork." Those people also use gardening trowels to serve cake. Just as a garden trowel is going to smash up your cake, a pickle fork is going to wreck your tie rod end bushing boot, or worse, fall on your leg while you're trying to whack it into place and make you say nasty words. Maybe that's okay for people just whacking together a hunk of junk to get them down the road, but this is Porsche ownership.
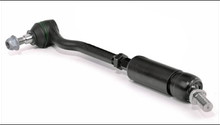
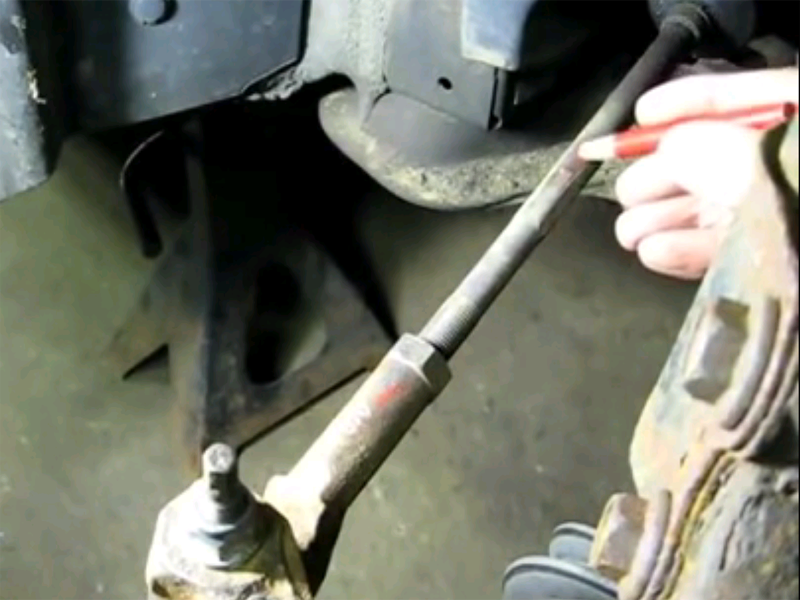
You can buy a tie rod end puller for around $40; get one of those. If you see anything lying around that looks like a pickle fork, grab it and chuck it into the scrap metal pile for recycling. An inexpensive tie rod end puller is pictured below.

Step 2 – Safely jack up your car and remove the front wheels
Loosen the lug nuts on your front wheels, then raise the car. Rest the car on jack stands and remove the tires.
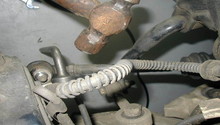
Once that's done, it's a good time to visually inspect the tie rod end's joint with the knuckle. If you wiggle the knuckle, do you see any play at the tie rod end? If so, you've definitely found the culprit and you can proceed. If not, you may have a steering rack or inner tie rod issue.
Pro Tip
Did you know your car has designated jacking points? That's so you don't punch through the floorboard with a jack, or accidentally crimp your rocker panels; either is bad news. Use the designated jacking points noted in your owner's manual.
(Related Article: How to Jack Up Your 997 - Rennlist.com)
Step 3 – Mark outer tie rod position
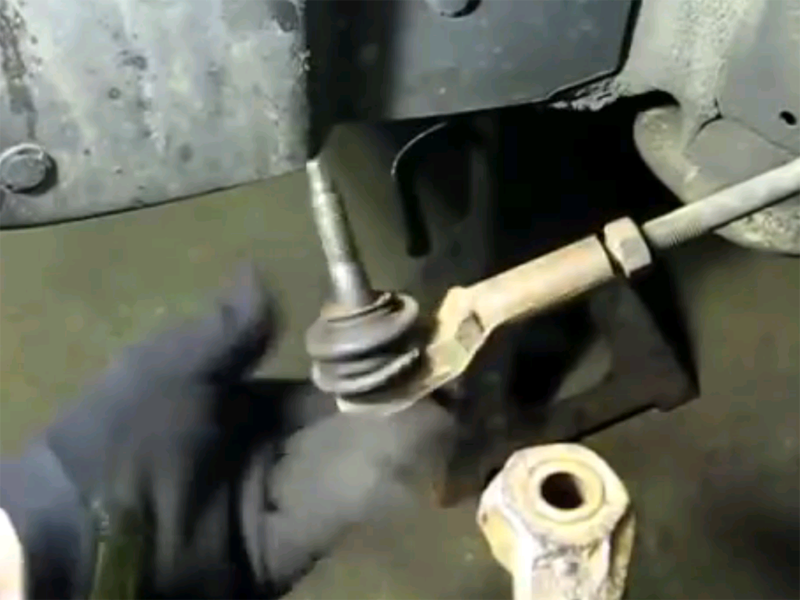
Your outer tie rod screws onto the inner tie rod to set what's called the car's "toe." This is what the kind folks at your local alignment shop do when they set up your car's alignment. Since you're not at an alignment shop, you're going to make a mark on the inner tie rod threads so when you put the new outer tie rod on it's in approximately the same location as the one being removed. Again, you're still going to want to visit an alignment shop after.
Use your marker to make said mark on your inner tie rod threads. You may need to use some brake cleaner on the area to help clear away grime first so you can see your mark.
Pro Tip
If you're lying on your back under the car, never spray the brake cleaner directly upward.
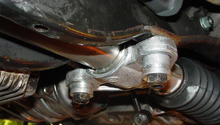
Step 4 – Remove old outer tie rod
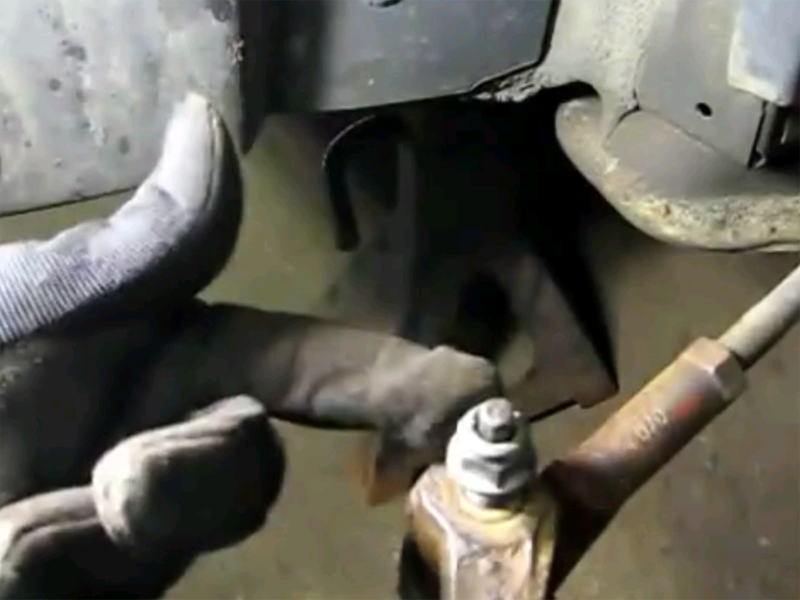
Loosen the tie rod end bolt, then use your tie rod end puller or removal tool to separate the tie rod end from the knuckle. Unscrew it from the inner tie rod.
Step 5 – Replace outer tie rod and get an alignment
Now you just need to replace the outer tie rod on the inner tie rod, being careful to screw it on such that it meets up with the mark you made in Step 3. Once that's done, connect it back up to the hub carrier. Replace your wheels, safely take the car off the jacks, and confirm that the play in the wheel is now gone. Safely drive at a cautious pace to your alignment shop and get them to properly align your car.
Related Discussions and Video
- Tie Rod DIY? - Rennlist.com
- Tie Rods - Rennlist.com
- How to Replace Outer Tie Rod Ends - Youtube.com