If your oil pump is shot in your Porsche 928, here's how to replace it. This article will guide you through the process of replacing the oil pump on your car, so continue reading.
By Jeffrey Smith - April 14, 2015
Contributors: John Pirtle, hessank
This article applies to the Porsche 928 (1978-1995).
The oil pump in your Porsche 928 is one of the most under-appreciated pieces of workmanship in the entire vehicle. It was meticulously engineered, and built tough. It should last the life of your engine. Changing the oil pump is not for the faint of heart. A lot of things have to come out of the engine bay just to get to it. You will basically be tearing apart the front of the engine. Although a novice can do this job, it is going to be much easier for someone who is considerably mechanically inclined, and if there is any doubt, having a professional do this job is highly recommended. If you want to save a ton of money, you can tackle this job yourself, but you will need to spend between 12 to 24 hours working on your car. Follow these steps to replace the entire fuel pump, but you can further save money by tearing the pump apart and replacing the bad components.
Materials Needed
Hydraulic floor jack and jack stands
Flat head screwdriver
Phillips head screwdriver
Catch pan
Coolant
Distilled water
1/2" ratchet and various sockets
WD-40
3/8" deep well metric socket set
Metric hex key set
8, 10, 13, 17 and 19mm wrenches
Flywheel lock (ID 9161/1)
Marker
Cotton cloths
Long crowbar
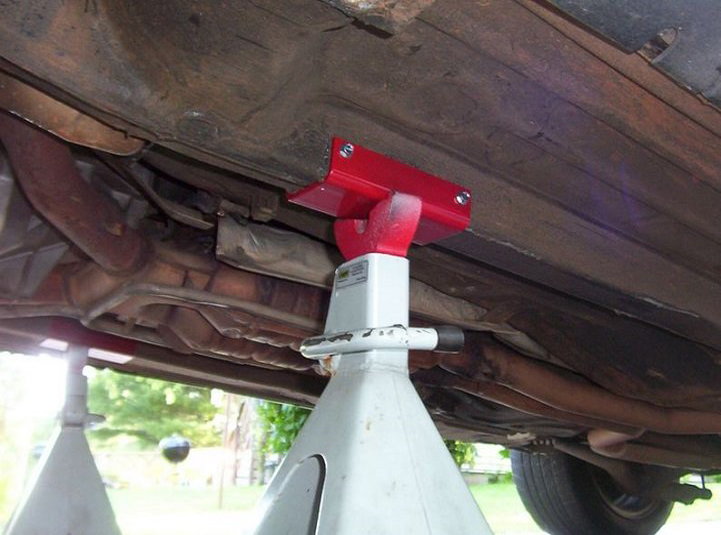
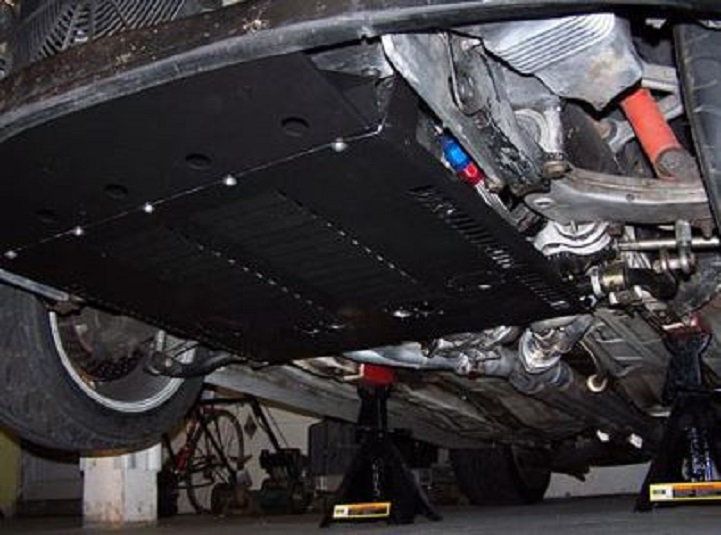
Step 1 – Lift the front end and remove belly pan (if applicable)
Raise the front of the car with a floor jack, and place jack stands.
Disconnect the battery.
If you have belly pans installed, remove them.
Figure 1. Raise the front end, and place jack stands at the proper locations.
Figure 2. Remove your belly pans if you have them installed.
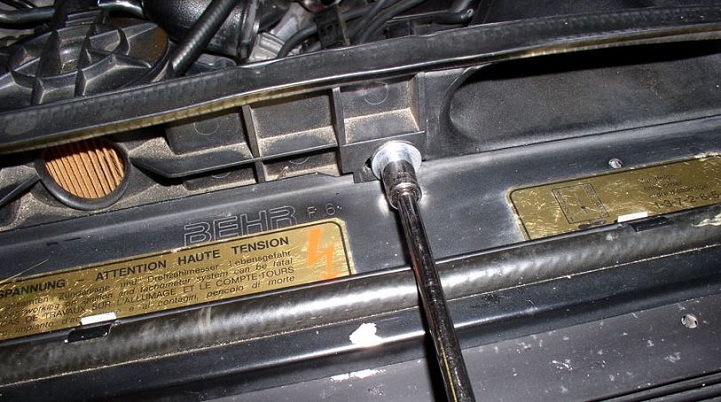
Use a flat head screwdriver to open the radiator drain cock, and drain the radiator fluid into a safe containment vessel. You will drain about 2.5 gallons.
Use a 13mm socket and ratchet to remove the left as well as the right side engine block drain plugs to drain about 1.5 gallons. Be careful to not strip these screws.
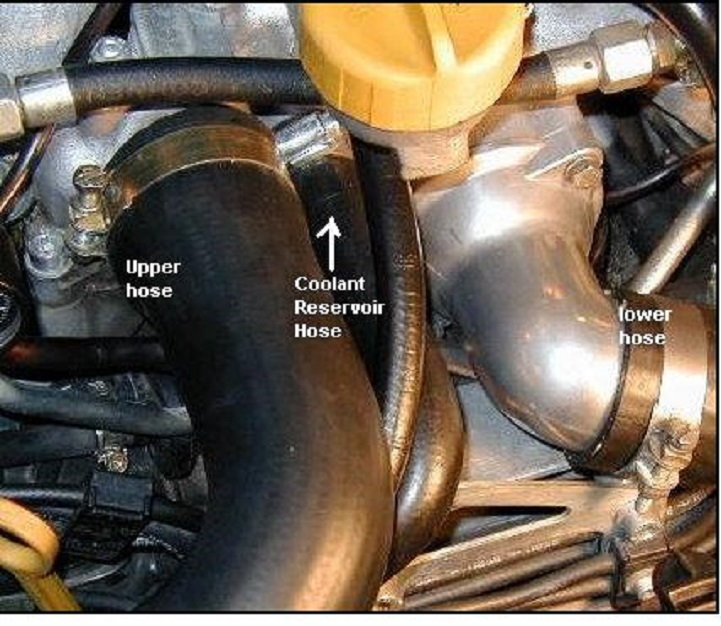
To remove the hoses:
Remove the air cleaner intake hoses.
Remove the upper and lower radiator hoses with 10mm wrench.
Replace the radiator drain cock as well as the two engine block drain plugs.
Figure 3. Remove the left and right drain plug screws to drain the remaining 1.5 gallons.
Figure 4. Remove hoses and replace drain plugs.
Step 3 – Disconnect fan and remove shroud
Unplug the electrical connectors from each of the two fans, and pull the wiring from the clips along the shroud.
Remove the jumper post cover as well as the clamp on the power steering reservoir.
Loosen and move aside the hose that goes from the air pump to the air filter.
There are only two screws to remove from the top of the fan shroud.
You should be able to remove the shroud at this point; however, you may need to loosen and push aside the oil cooler line, which runs along the left side of the radiator on the top. If you loosen this line, you must re-tighten it after you remove the shroud.
Figure 5. Remove the two 10mm bolts to remove the fan shroud.
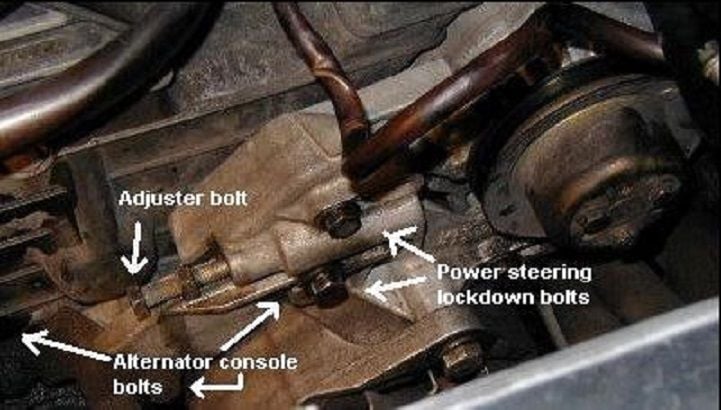
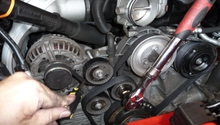
Step 4 – Remove alternator, power steering, air pump and A/C compressor belts
Use a 17mm wrench to loosen the alternator lock down bolt.
Loosen the adjuster with a 6mm hex key.
Remove the alternator belt.
Loosen the three 13mm bolts for the power steering pump.
Loosen the adjuster with a 13mm socket.
Remove the power steering belt.
Use a 13mm socket to loosen the air pump lock down bolt.
Use a 13mm wrench to loosen the adjuster nut.
Remove the belt.
Use a 17mm socket to loosen the A/C compressor lock down bolt.
Use a 13mm wrench to loosen the adjuster nut.
Remove the belt.
Figure 6. Remove the belts.
Pro Tip
Use a marker to label each belt as you remove them in order to keep them straight during re-installation. Also, now would be a good time to inspect each belt, and replace if needed.
Step 5 – Remove oil dipstick and plug wires
Remove the oil dipstick.
Mark the plug wires to the correct cylinders.
Unplug the wires and the bottom coil wire. Remove the plug wire loom with a 4mm hex key.
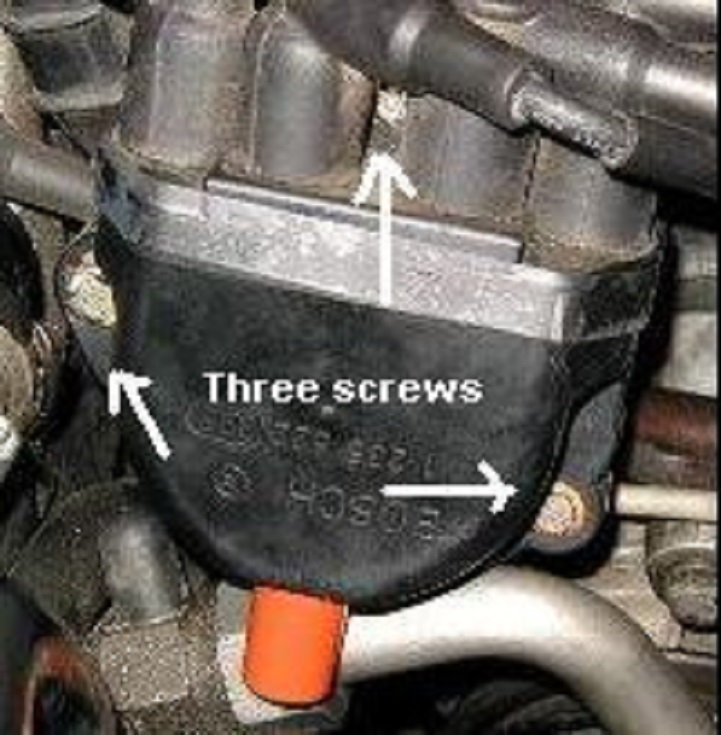
Use an 8mm socket to remove the three screws holding the distributors in place. Make sure to note which is which.
Figure 7. Keep track of the position of each screw when you remove them.
Step 6 – Remove timing belt covers and clutch slave cylinder (if applicable)
To remove timing belt covers:
Disconnect the belt tension sensor from the right timing belt cover.
Remove the oil dipstick guide from the timing belt cover.
Use a 10mm socket to remove both timing belt covers.
To remove clutch slave cylinder:
This applies to the five speed manual transmission cars only.
Remove the clamp on the clutch hose holder.
Remove the push rod.
Figure 8. The left side timing belt cover has three bolts, and the right has two.
Figure 9. For five speed manual transmissions, remove the clutch slave cylinder.
Pro Tip
Do not depress the clutch pedal once you have removed the slave cylinder.
Step 7 – Mark the camshaft pulley
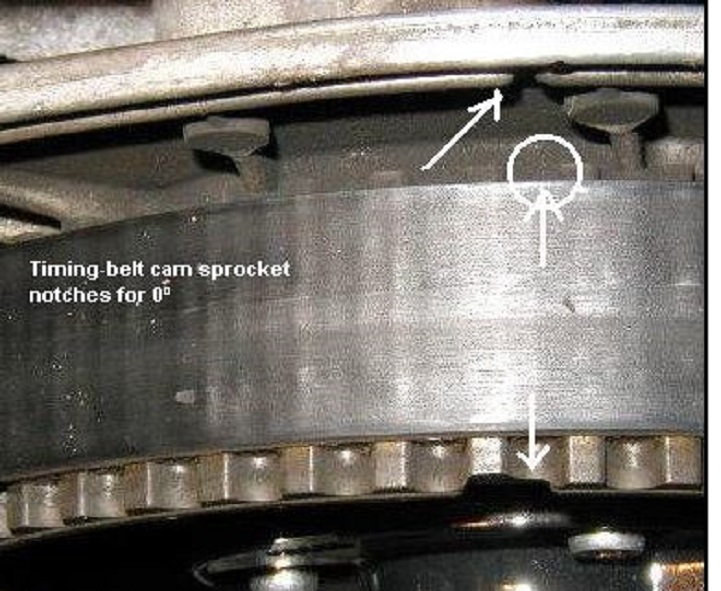
Use a 27mm socket to turn the crank bolt clockwise to the top dead center (0 degrees) on the crank pulley.
Check the notches on the back of the camshaft sprockets to ensure that they line up with the notches on the backing plates (when the crank is at top dead center).
Turn the crank clockwise to the 45 degree mark, and add marks to each camshaft pulley.
Pull the engine a couple more cranks (clockwise) to be sure that the 45 degree marks continue to line up.
Figure 10. Make sure that the 0 and 45 degree marks continue to line up.
Pro Tip
Never turn the crankshaft counterclockwise. It should always be turned clockwise.
Step 8 – Use the special flywheel tool
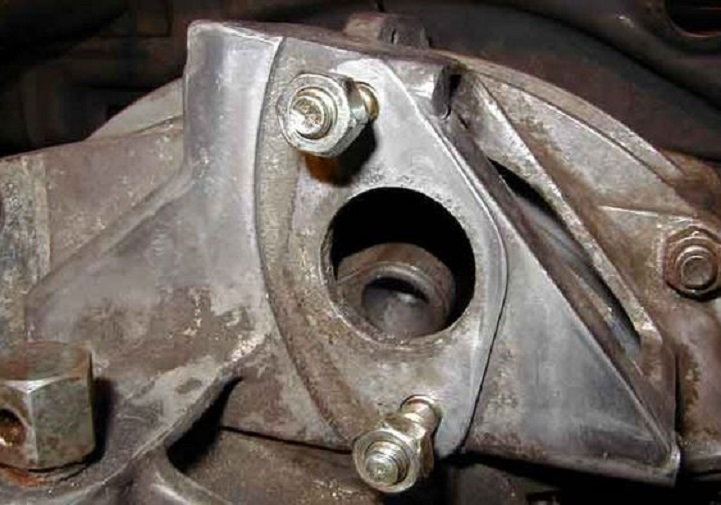
Use the 13mm bolts to mount where the slave cylinder was, and hold the flywheel lock (special tool ID 9161/1) to the crankshaft to prevent it from turning.
Remove the crankshaft bolt. This is to be torqued to 218 foot/pounds when it is re-installed.
Remove the pulleys, vibration damper, and collar.
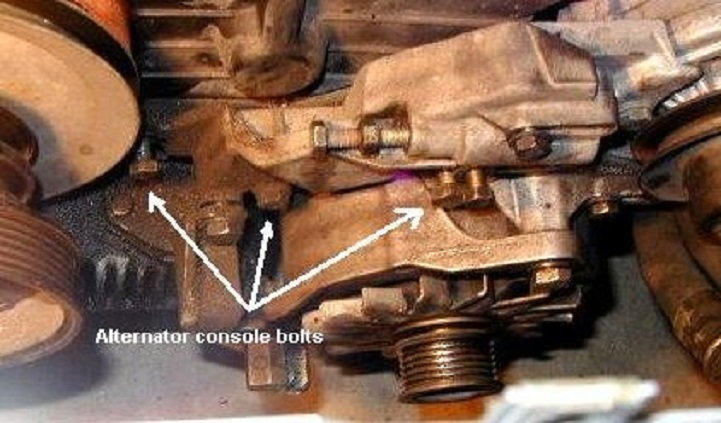
Loosen the 13mm (2) and 17mm bolts that hold the console alternator in place to make room for removing the center timing belt cover.
Figure 11. Loosen these three bolts to make more room to get the center timing cover off.
Step 9 – Disconnect several wiring harnesses and remove oil dipstick guide
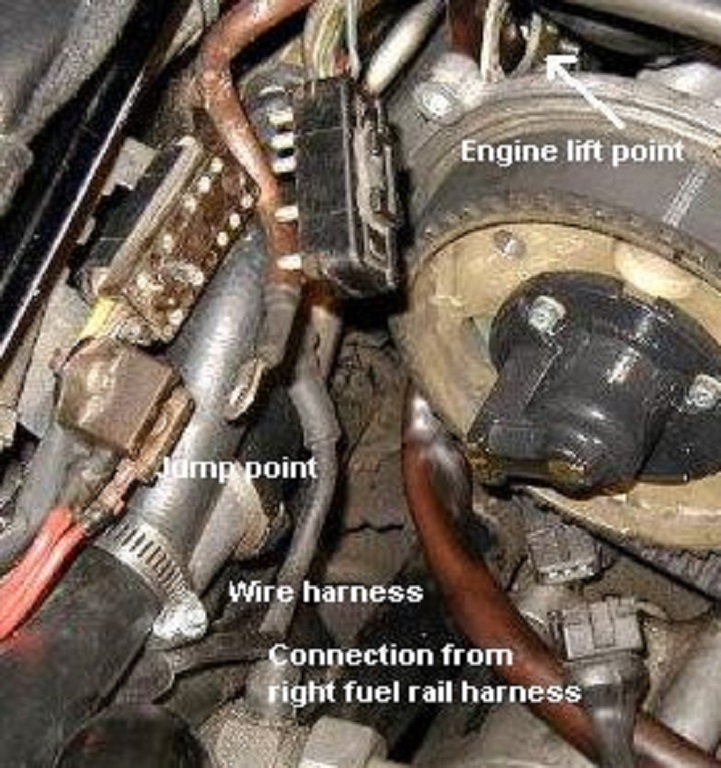
There is a long wiring harness that crosses the front of the engine. It goes from the alternator to the starter between the right and center timing belt covers. This harness splits into a smaller version by the left headlight, and runs under the right timing belt cover—through a connected bracket on the back of the cover—up to the jump point.
Disconnect the wiring harness under the right timing belt cover that goes back to the fuel rail.
Disconnect the A/C compressor signal wire.
Disconnect the harness wire that splits at the left headlight.
Disconnect the end of the harness at the jump point, and split the triangle connector in half with a flat head screwdriver.
Remove the screw-bolt that holds the harness bracket to the right side engine lift. This is nearly impossible but has to be done.
The wiring harness is now free, and can be removed from the front of the engine.
Carefully remove the oil dipstick guide. Plug the hole with a small bit of cotton cloth.
Figure 12. There are a ton of connection points for the wiring harnesses that need to be removed.
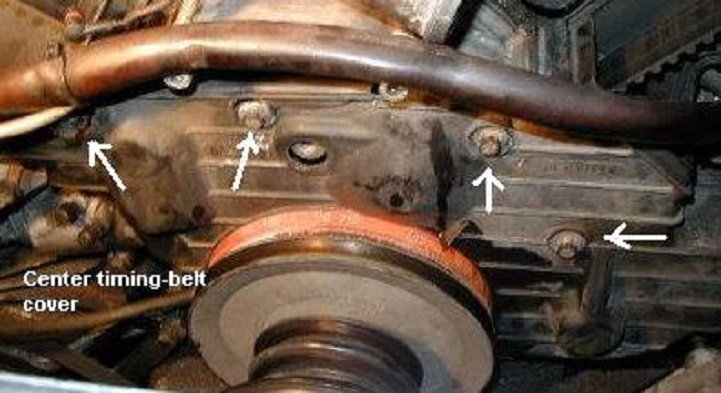
Step 10 – Remove center timing belt cover
Remove the 13mm bolt holding the timing belt tensioner.
Remove the three other 10mm bolts holding the cover in place.
Take care in removing the timing belt tension sensor.
Remove the cover.
Figure 13. Carefully disconnect the tension sensor before removing the center timing belt cover.
Step 11 – Remove the timing belt
Loosen the 13mm tensioner lock nut.
Turn the 17mm adjusting screw counterclockwise.
Use a Philips head screwdriver to remove the metal tensioner sensor strip that goes to the roller bracket.
Remove the timing belt from the right side first, over cylinders 1-4 camshaft sprocket, water pump sprocket, cylinders 5-8 camshaft sprocket, oil pump sprocket, and crankshaft sprocket.
Figure 14. Remove the timing belt.
Pro Tip
Be very careful when removing the timing belt tension sensor strip
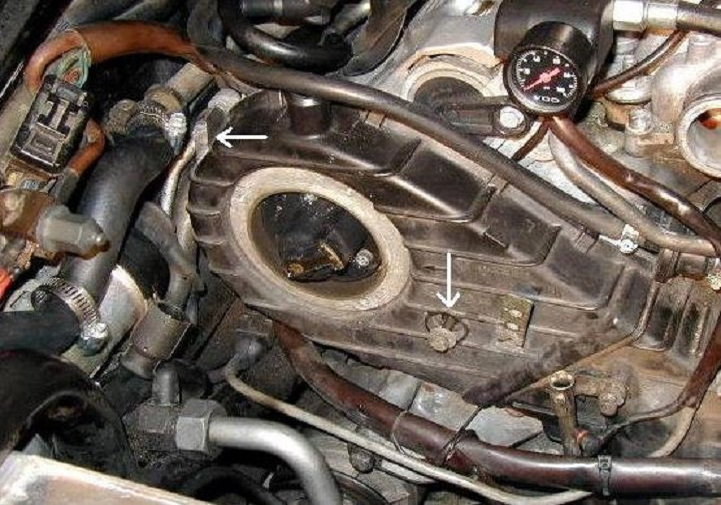
Step 12 – Remove the water pump
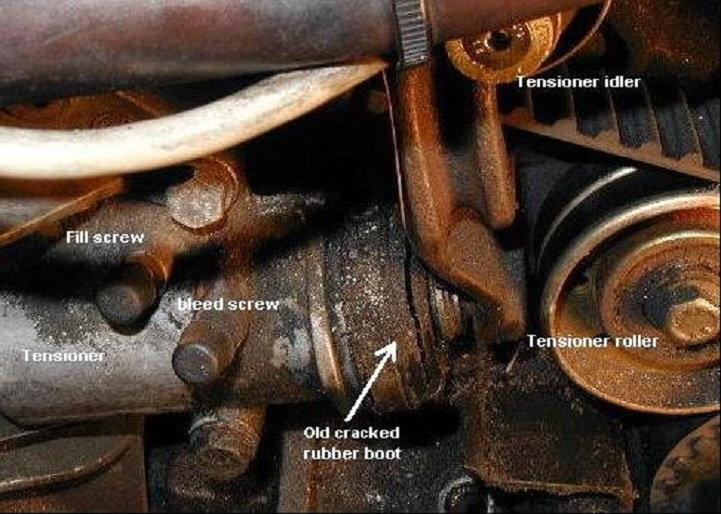
Remove the 19mm tensioner idle spindle nut from the water pump. Some coolant may drip, so make sure it does not get into the oil dipstick hole.
Loosen all fourteen 10mm bolts that mount the water pump. Loosen all of them first before removing them.
If the water pump doesn't come off the engine block easily, smack it with a wooden handle. Do not attempt to pry free the gasket holding the pump to the block.
Remove any gasket remnants from the engine block.
Figure 15. Remove the water pump.
Pro Tip
Be very careful when removing the water pump gasket to the engine block. The aluminum material can be easily gouged.
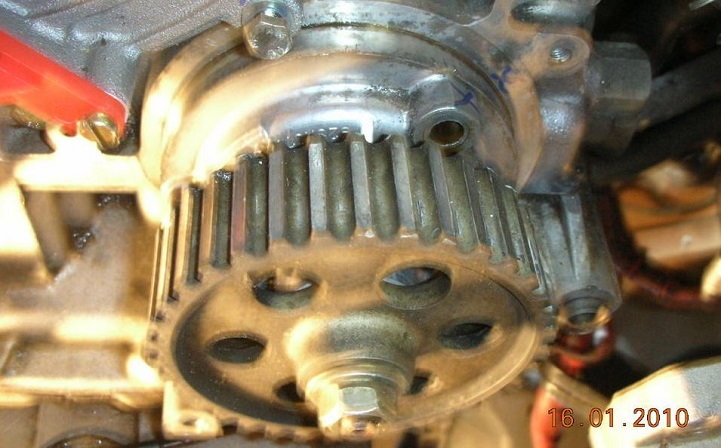
Step 13 – Replace water pump gear
Place the water pump gear (ONLY the gear) back on, and only hand tighten the bolt.
Figure 16. Replace the water pump gear for leverage.
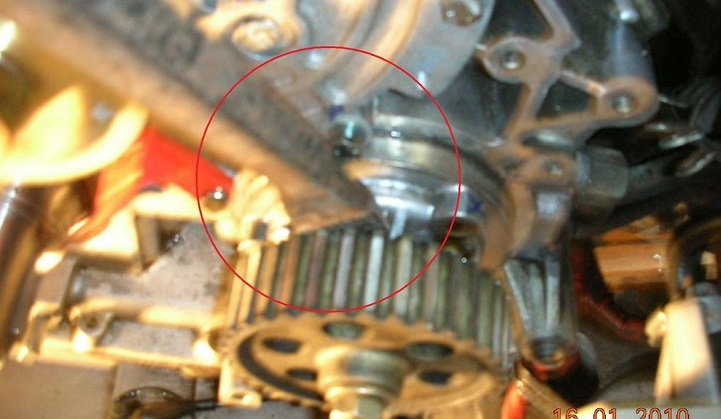
Step 14 – Pry out the oil pump and replace
Use a long crowbar between the gear and the oil pump. Use light pressure to pop out the oil pump.
If you are repairing the internals rather than replacing the entire pump, be prepared to catch the oil pump before it hits the floor.
You've reached and replaced the oil pump, so all that's left is to reassemble the front of the motor. No big deal!
Install your new water pump and gear (may as well replace while you're down here).
Replace the timing belt (again, while you're down here).
Re-install the timing belt cover.
Refit the various frontal wiring harnesses to their correct locations.
Line up and time the cam pulley.
Re-install your new slave cylinder.
Refit the plug wires and plugs to the top end.
Re-install and align all accessories, accessory pulleys and their related drive belts.
Refit all of the cooling components, and do not forget about the oil cooler lines if you disconnected them!
Refit all of the intake components.
Fill and bleed the cooling system.
Turn the car on, and let it get up to normal operating temperatures. Confirm that everything is working as it should.
Once this is complete, refit the belly pan, lower the car down, and take it for a test drive, watching your temperature gauges as well as listening for any unusual noises. If everything checks out, then you are done!
How to Replace Timing Belt and Water Pump
Dwayne
If and when it comes time to replace the timing belt in your Porsche 928, you'd be best served to also replace the car's water pump as it's fairly easy to access when ...
How to Replace Serpentine Belt
Replace an aging serpentine belt before it snaps, leaving your Carrera hot and bothered.
This article applies to the Porsche 997 (2005-2012).
The Porsche 997 only has one belt on the ...
How to Replace V Belts
Don't lose your cool, change those belts before they break.
This article applies to the Porsche 911 993 (1993-1998).
Changing the V belts on a 993 can be daunting. It's not the most fun of ...
How to Install a Supercharger Kit
Have an itch for more horsepower?
This article applies to the Porsche 993 (1993-1998).
For individuals looking to boost the performance of their Porsche 993, a supercharger kit is ...
How to Replace Spark Plugs
Richard Morris
Keep combustion efficiency at its maximum with a new set of spark plugs.
This article applies to the Porsche 993 (1993-1998).
The normally aspirated Porsche 993's flat six ...
How to Remove Fuel Tank
If your fuel tank is leaking, then it needs to be repaired or replaced. Thus, it needs to come out.
This article applies to the Porsche 928 (1979-1995).
Discovering you have a fuel leak is ...