When you click on links to various merchants on this site and make a purchase, this can result in this site earning a commission. Affiliate programs and affiliations include, but are not limited to, the eBay Partner Network.
I am having a really hard time tightening the bolt on the underdrive pulley. I tightened it to spec, 37 foot pounds if I recall. Then, instructions say to turn another 90 degrees. But I've only got about 20 degrees, with a little red Loctite as well. I have a plastic and rubber strap wrench. But it's not holding it all and I can't get the bolt tighten anymore. Any suggestions?
Did you get this solved? If you do not tighten it to Spec you will end up with a loose pulley which will cause you issues.
The boss on the engine case that you shaved down to fit the 4" pulley is actually used for holding the pulley in place. Put a big string punch through a hole in the pulley and into that boss. You will then be able to tighten to spec.
Thanks for the help on plumbing the heater lines, I followed the blue arrows.
Originally Posted by Andrew.M.***
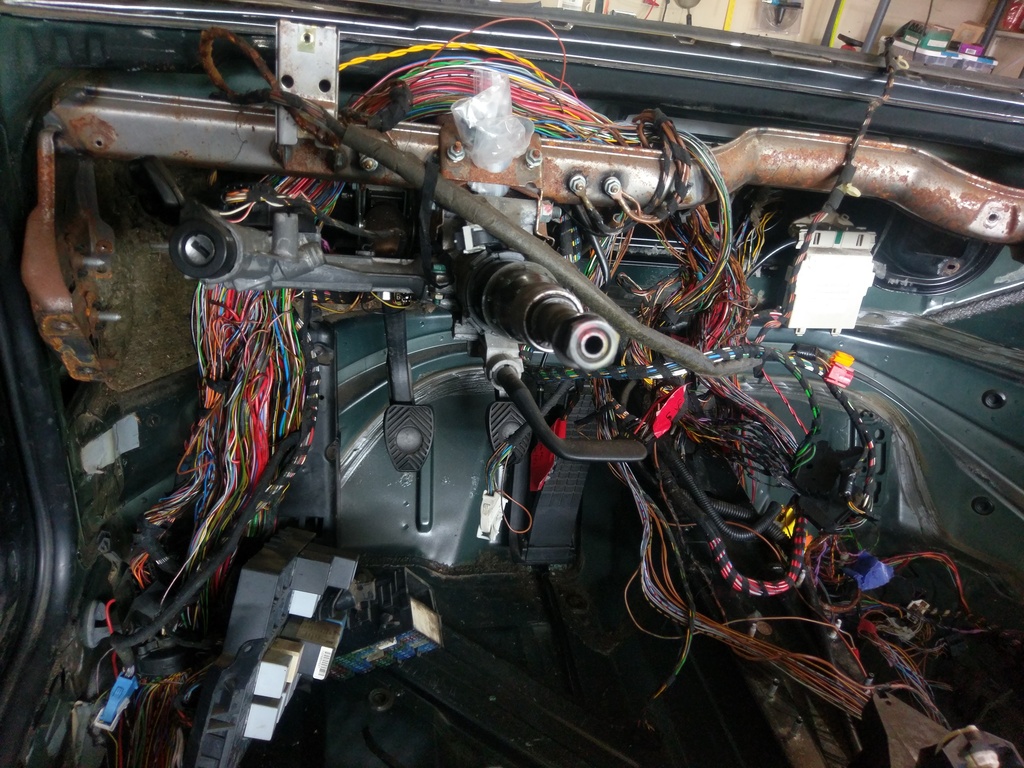
I'm starting on the wiring now and have started to unbundle and mark what I need to keep. As far as gauges and stuff - it looks like I've got three plugs on the back of the stock gauge cluster, hazard lights, plus headlights, plus steering wheel stalk for blinkers and wipers (both of which I'll keep functional). Is there anything else here that I would need from this area besides the crucial-obvious stuff like ignition?
Removing extra wiring is not as difficult as it might first seem. The basic idea is this. With all the unnecessary electrical components removed it is pretty easy to identify the connectors that are now extra. If you look at a connector closely you will see that most of the terminals have a single wire in the crimp. Some will have two, more about those later. You are trying to identify the wires that no longer connect to anything. Every long wire that is not connected can be shortened to a short wire that also not connected. It is as simple as that. The only gotcha is those terminals that have more than one wire crimped together. These crimps potentially form a circuit that might need to be preserved. Whenever I find two or more wires forming a circuit, I get the wiring diagram out and determine if the circuit needs to be preserved the old fashioned way. Truly, this is not as hard as it seems.
Another tip that makes this easier, is to disconnect the starter and connect a test light in its place. With every wire that you cut, I recommend checking that the light still illuminates. This simple step will keep you from messing up the immobilizer.
Finally every wire that is predominately red (red/black, red/blue, etc.) is a power wire. Some of these have power all the time, some have power when the ignition is on, and a few have power when the key is in the start position. These are fused (most of them) and are potentially useful to power all your many race car accessories. Keep all of these. I also hang on to the brown wires (ground) until I am certain that I won't need them.
If any of you want to come to Minnesota this next fall for a demonstration , PM me.
MJ, regarding using a light, spliced in place of the starter to check for immobilizer functionality, is checking the starter enough to make sure I haven't snipped something else critical?
I've heard of people just starting the car every few snipped wires to check, though that sounds like lots of unnecessary starts and engine wear.
I've accidently messed up the immobilizer and it's not a fun system to debug. When I had trouble, the immobilizer prevented the system from cranking. Begs the question if it (the immobilizer) would allow the starter to work, but prevent other systems from working. I don't think so, but I'm not positive.
I'm also not too concerned about accidentally disrupting a system outside of the immobilizer, as I can use normal diagnostics to find those problems. The immobilizer by design is very difficult to diagnose.
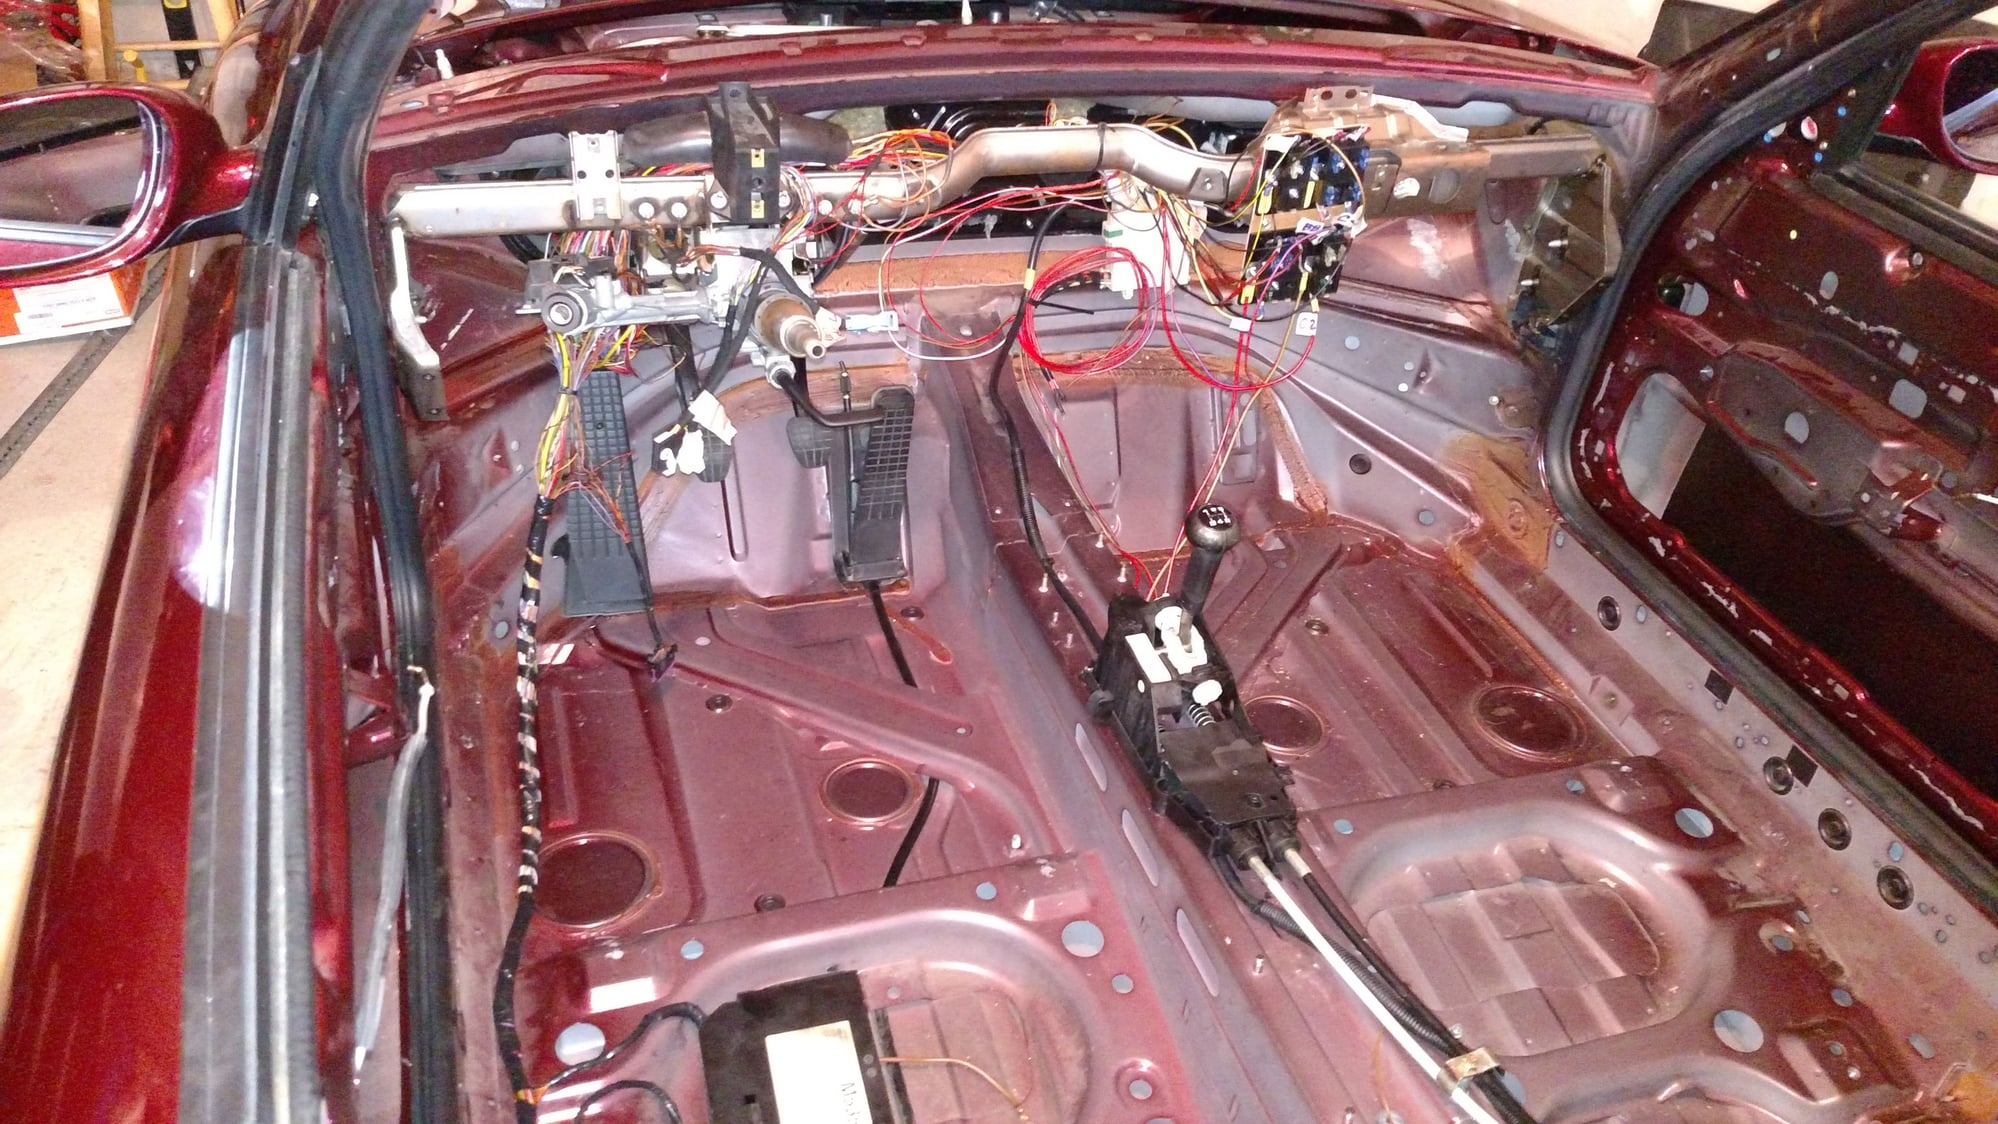
I'm down to unbundled wires, and now that I'm here, it really doesn't seem too bad.
From the front, I've removed the main stereo amp harness, but nothing else. Are there any other wires worth digging for up front?
To the back, I can't think of any major wire bundles worth hunting down, except whatever goes to the spoiler perhaps. Anything else here?
Regarding the immobilizer relocation and wire reduction, I found the following details in an older thread. Does it seem correct?
In all there are only 8 wires that, I believe, still need to be connected. When organized in the order, Terminal #, wire size (mm), color, where they go to, They are:
II/1, 2.5, Br. , Earth at GP7 (the big brown wire that bolts beside the box)
I/2, 0.35, Or/Bk, Diagnosis (the OBD plug)
I/3, 0.35, Bk/Rd, Signal transformer box (nearsteering column)
I/4, 0.35, Bk. , Signal transformer box
I/12, 0.35, Bk/Ye, Signal transformer box
I/16, 0.35, Or. , Fuse E1 (fuse box)
I/23, 0.50, Or/Wt, ECU term 88 "w" lead - diagnosis
I/36, 0.50, Bk/Br, Fuse B6 (fuse box)
If I am correct then the only one of these that needs to be extended to move the box is the orange and white wire running back to the ECU.
Looks familiar. Now you can start the process of eliminating the extra wiring. As I mentioned, for 99% of the wires it is not that difficult. Remember to watch for wires that form a circuit and keep testing the starter.
Don't forget to preserve a few of the power circuits that you come across.
This thread has been pretty helpful to me in getting started with my own Spec Boxster build so thought i should join the fray. I'm getting close to done with my wiring clean-up and going to cage builder next week. I wound up moving all of my remaining fuses to passenger airbag location and there was nothing left of the relay panel except for the fuel pump relay which I will mount somewhere behind the dash. I did some soldering to get rid of all of the connector terminals that were remaining in the relay block after removing all of the unneeded wires. I didn't take-on moving the immobilizer because it would have required a lot of cutting and soldering. I'll probably put it in a bag and zip tie it to the cage.
If possible, remove the engine and transmission. This also makes it easier to remove all the engine compartment insulation. I used a heat gun, rags, and welding gloves to remove the adhesive. Be careful, even with the gloves, I managed to burn myself.
Remove all the underbody panels and free up the many fuel, brake, and vacuum lines that are attached. This will make it much easier for your welder to avoid damaging them. Speaking from experience, it is easy to damage something in this area and easier still to miss that something was damaged (in my case the welder barely touched a brake line that, over time, started leaking)
Empty the gas tank, disconnect and use compressed air to blow out the fuel lines.
Use paint remover, not a grinder to remove paint before welding. The metal is thin enough and grinding makes the problem of getting a quality weld much more difficult.
Make sure that you tell the welder where to route the wires that go from front to rear. I wanted my wires routed so that they went in between the cage and the door sill.
If you are tall (like me), have your seat mounting all figured out so you can sit in the car and check for helmet clearance.
Make sure your welder understands how the seat belts are to be attached to the cage. Mine didn't and I had to return to get additional bars welded in to wrap the belts around.
If you are going to gut your doors, do that before cage construction.
Fabricating the plates that are to be welded to the car is the most challenging part of the job. I will post some photos of the ones my guy fabricated. Unfortunately he is out of the business now.
Have your fiberglass top handy for the welder. I had my guy weld in the DZUS fasteners to hold the top in place.
Advise the welder that it is likely that the paint/rust protection that is internal to the door posts etc. will catch fire and to be prepared.
My cage is built using chrommoly steel, but recent articles are now recommending DOM steel. I am not an expert in this area, but if I were building a cage today, I would investigate.
Also, there are lots of photos on the internet ... use them for ideas.
Regarding the cage, there are a few things that are legal that many folks don't do, but should:
1. horizontal bar at front of cage, behind the dash. You can then remove the factory bar.
2. bars from the front of the cage to the top of the front shock towers (where the struts attach). Useful in a frontal collision.
3. "FIA" bars: near-vertical bars at the front of the cage from the floor to the top bar. Keeps the front of the cage from collapsing on your head in a roll-over.
4. Weld the verticals to the chassis, especially along the windshield. Also across the top of the windshield.
5. Something to protect the feet from the front wheels in a front-on collision. Both longitudinally and laterally.
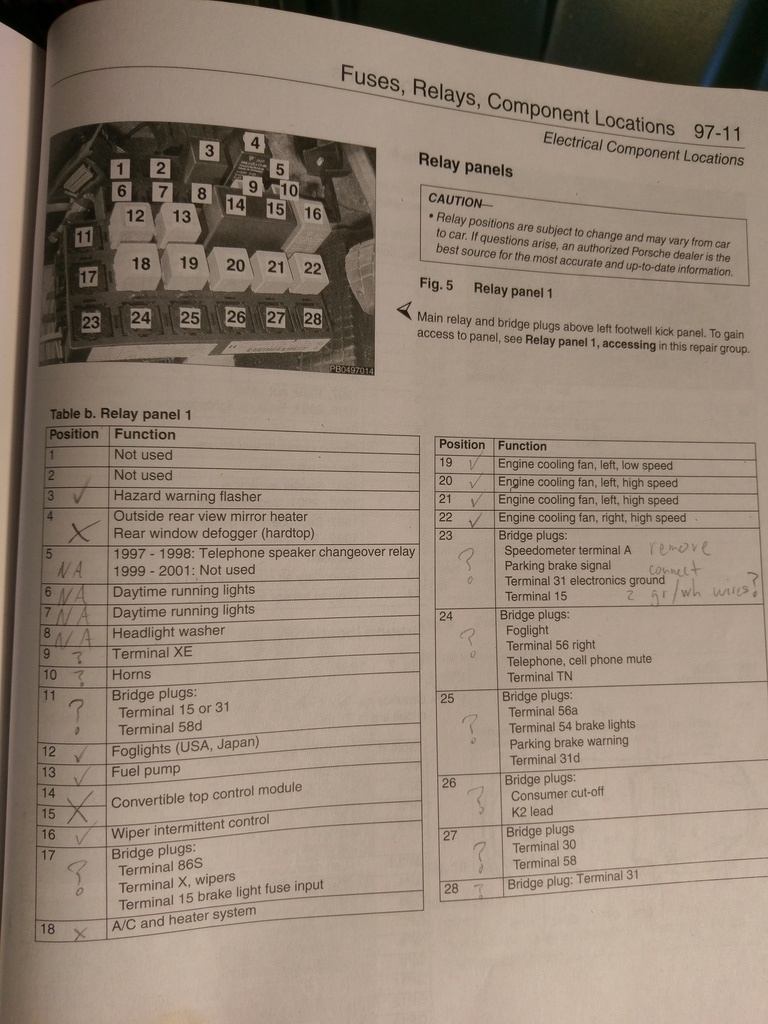
Thanks for the cage tips. That's of course next after wiring cleanup. Back to the wires. I've run out of misc plugs and wires that lead to nowhere. Now I'm at the relay panel and will soon move to fuses. Looking the diagrams, it looks like there's lots of junk here.
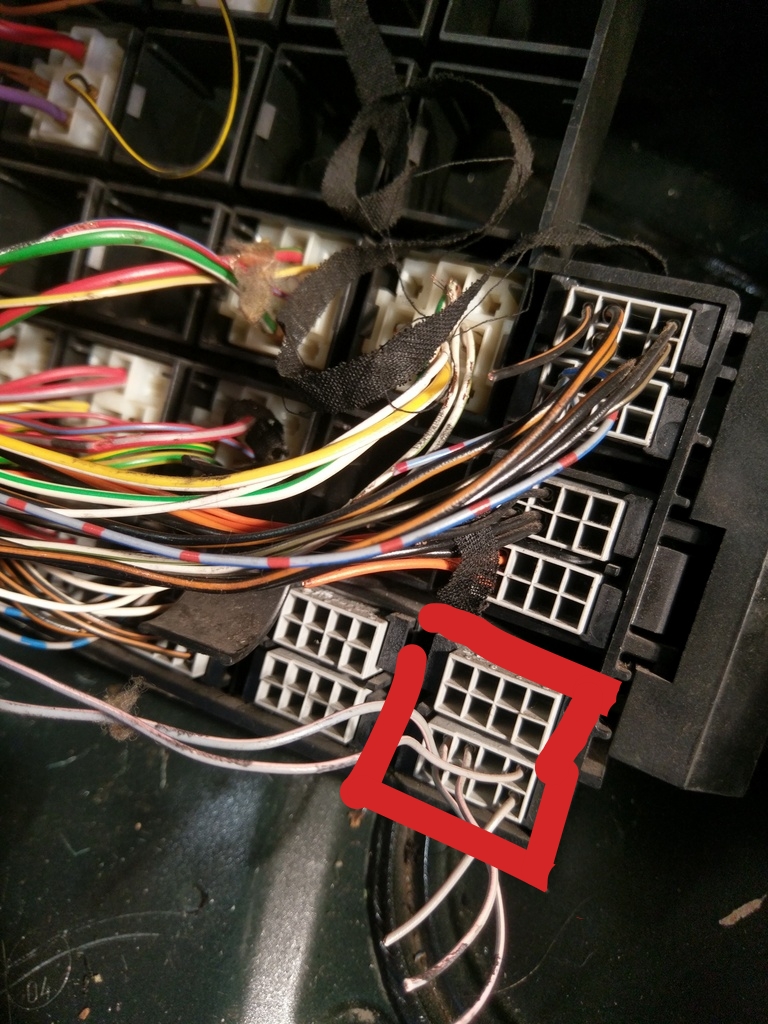
See the following relay diagram from with a few of my notes. #23 Bridge Plug has something to do with the speedometer. On the back of the that plug, there's only 2 wires left, same color (orange/gray), going in and out. For this and other Bridge Plugs, should I just leave them as is, or maybe remove the plug and connect the wires together?
Picture of the wires for #23 are below the following diagram.
On the bridge connectors, I had just a few left after I removed all of the wires I didn't need. For the ones that were remaining, I dis-assembled the bridge plug and looked at the back to verify which wires need to connect to each other and then soldered them together. Some of the bridge plugs have 8 slots but when you look at the back, the connections are 4 and 4. I can't remember for certain what I did with #23 but I'd suggest tracing the wires to see where they go and if you have wires going to instrument cluster or ECU then you should err on side of keeping them. Also, I found it useful to look at the terminal definitions that are written at the beginning of the wiring diagram section in the Bentley manual. Here are some other notes on what I did:
#3 I removed and disconnected the flasher and will re-connect to a separate on-off-on toggle switch for just the rear signals. IIRC rear turn signal wires are black/green and black/white.
#9 remove
#10 remove
#13 KEEP (the only relay you really need)
#16 I removed the intermittent relay but kept the wires and will wire directly to toggle switch for constant low speed wipers only.
#17 Keep and solder terminal 86S and terminal 15.
#19-22 I removed all of these and will wire #22 direct to a toggle switch. Left fan will be removed
#23-28 See notes at beginning - trace the wires, review the terminal definitions, and if in doubt keep/solder the connections.
If you remove all of the relays except #13 you will have a lot fewer wires left in the bridge plugs to solder if you choose to go that route. If you intend to move fuse panel you will have to do some soldering and once you start it's easy and quick to do the bridge plugs. Good Luck.
 07-18-2016, 09:42 AM


 , PM me.