Notices
928 Forum 1978-1995
Sponsored by:
Sponsored by: 928 Specialists

WTB: Flappy valve shaft plastic colllar

Thread Tools
 
Search this Thread
 
Old 11-20-2018, 12:29 PM
  #1  
Luis A.
Addict
Rennlist Member

Thread Starter
 
Luis A.'s Avatar
 
Join Date: Aug 2001
Location: Milwaukee, WI
Posts: 669
Received 26 Likes on 6 Posts
Default WTB: Flappy valve shaft plastic colllar

Hi guys, Doing an intake refresh and I forgot to take off the white plastic collar that sits on the bottom of the flappy shaft on my '88 S4. Of course, it is nowhere to be found at the PC's shop or anywhere in between.

Does someone have a parted car or intake that can sell me one. And also the shim/washer that sits on that end of the shaft.

Thanks in advance!
Luis
Old 11-20-2018, 01:28 PM
  #2  
ROG100
Basic Sponsor
Rennlist
Site Sponsor

 
ROG100's Avatar
 
Join Date: Jan 2003
Location: Double Oak, TX
Posts: 16,815
Received 830 Likes on 326 Posts
Default

Flappy Spring x1 928 110 658 01
Flappy Spacer x 2 928 110 650 00
Flappy Circlip x 1 N 012 439 2

I have the circlip & spring but the spacers are NLA - on the list for 3D printing
__________________

Does it have the "Do It Yourself" manual transmission, or the superior "Fully Equipped by Porsche" Automatic Transmission? George Layton March 2014

928 Owners are ".....a secret sect of quietly assured Porsche pragmatists who in near anonymity appreciate the prodigious, easy going prowess of the 928."


Old 11-20-2018, 01:33 PM
  #3  
Luis A.
Addict
Rennlist Member

Thread Starter
 
Luis A.'s Avatar
 
Join Date: Aug 2001
Location: Milwaukee, WI
Posts: 669
Received 26 Likes on 6 Posts
Default

Thanks Roger. Do the shims/washers that go on top and bottom have a part number? Don't see them either on the diagram or your listed numbers.

Does anyone have one on hand with some dimensions so I can try and shape one?

--->EDIT: I think what you are calling spacers is what I am calling shim/washer.

What about the plastic collar/spacer found only on the bottom of the shaft. Does that have a PN? Not on the diagrams.
Old 11-20-2018, 01:37 PM
  #4  
ROG100
Basic Sponsor
Rennlist
Site Sponsor

 
ROG100's Avatar
 
Join Date: Jan 2003
Location: Double Oak, TX
Posts: 16,815
Received 830 Likes on 326 Posts
Default

Flappy Spacer x 2 928 110 650 00 - these are the two spacers/washers you need - currently NLA
Old 11-20-2018, 01:51 PM
  #5  
Luis A.
Addict
Rennlist Member

Thread Starter
 
Luis A.'s Avatar
 
Join Date: Aug 2001
Location: Milwaukee, WI
Posts: 669
Received 26 Likes on 6 Posts
Default

Thanks Rog but I want to be clear that what I am mostly looking for is a plastic ring that acts as some sort of spacer and found only on one side, the bottom, and is hidden from view until you remove the spring. The spacers you provided the part number for are very thin washers, almost like a shim.
Old 11-20-2018, 01:56 PM
  #6  
ROG100
Basic Sponsor
Rennlist
Site Sponsor

 
ROG100's Avatar
 
Join Date: Jan 2003
Location: Double Oak, TX
Posts: 16,815
Received 830 Likes on 326 Posts
Default

Here are pictures of the plastic spacers and the torsion spring - hope that helps.

Old 11-20-2018, 01:59 PM
  #7  
Rob Edwards
Archive Gatekeeper
Rennlist Member
 
Rob Edwards's Avatar
 
Join Date: Sep 2002
Location: Irvine, CA
Posts: 17,315
Received 2,555 Likes on 1,235 Posts
Default

Just so we're all on the same page, which # piece are you looking for?

Old 11-20-2018, 02:05 PM
  #8  
GT6ixer
Race Car
 
GT6ixer's Avatar
 
Join Date: Mar 2016
Location: Gig Harbor. WA
Posts: 4,144
Received 782 Likes on 382 Posts
Default

Roger, Rob. Either of those spacers are a slam dunk for 3D printing. I could have a prototype for either of you to check out next week if, Rob, you could scan these.
Old 11-20-2018, 02:32 PM
  #9  
karl ruiter
Rennlist Member
 
karl ruiter's Avatar
 
Join Date: Jan 2003
Location: Honolulu and sometimes L.A.
Posts: 3,338
Received 183 Likes on 120 Posts
Default

I would lean a little bit more towards turning them on a lathe than 3D printing, if they need to fit tightly in the bore and have a smooth running surface on the shaft. I guess you could print them and then run a drill bit through the center and spin them in something to sand the outer surface.
Old 11-20-2018, 02:45 PM
  #10  
Luis A.
Addict
Rennlist Member

Thread Starter
 
Luis A.'s Avatar
 
Join Date: Aug 2001
Location: Milwaukee, WI
Posts: 669
Received 26 Likes on 6 Posts
Default

OK that pic makes it easier. I am missing #2, which is the same as #7. And also #1, which looked to me when I removed them, the same as #3 and #6.

Nate: I don't believe the plastic spacers would need to have the intricate pattern on the back, as seen in #2. It looks to me like a flat surface there would pose no detriment to the functioning of the shaft. Then it should be fairly simple to 3D print, no?
Old 11-20-2018, 02:51 PM
  #11  
Luis A.
Addict
Rennlist Member

Thread Starter
 
Luis A.'s Avatar
 
Join Date: Aug 2001
Location: Milwaukee, WI
Posts: 669
Received 26 Likes on 6 Posts
Default

Originally Posted by karl ruiter
I would lean a little bit more towards turning them on a lathe than 3D printing, if they need to fit tightly in the bore and have a smooth running surface on the shaft. I guess you could print them and then run a drill bit through the center and spin them in something to sand the outer surface.
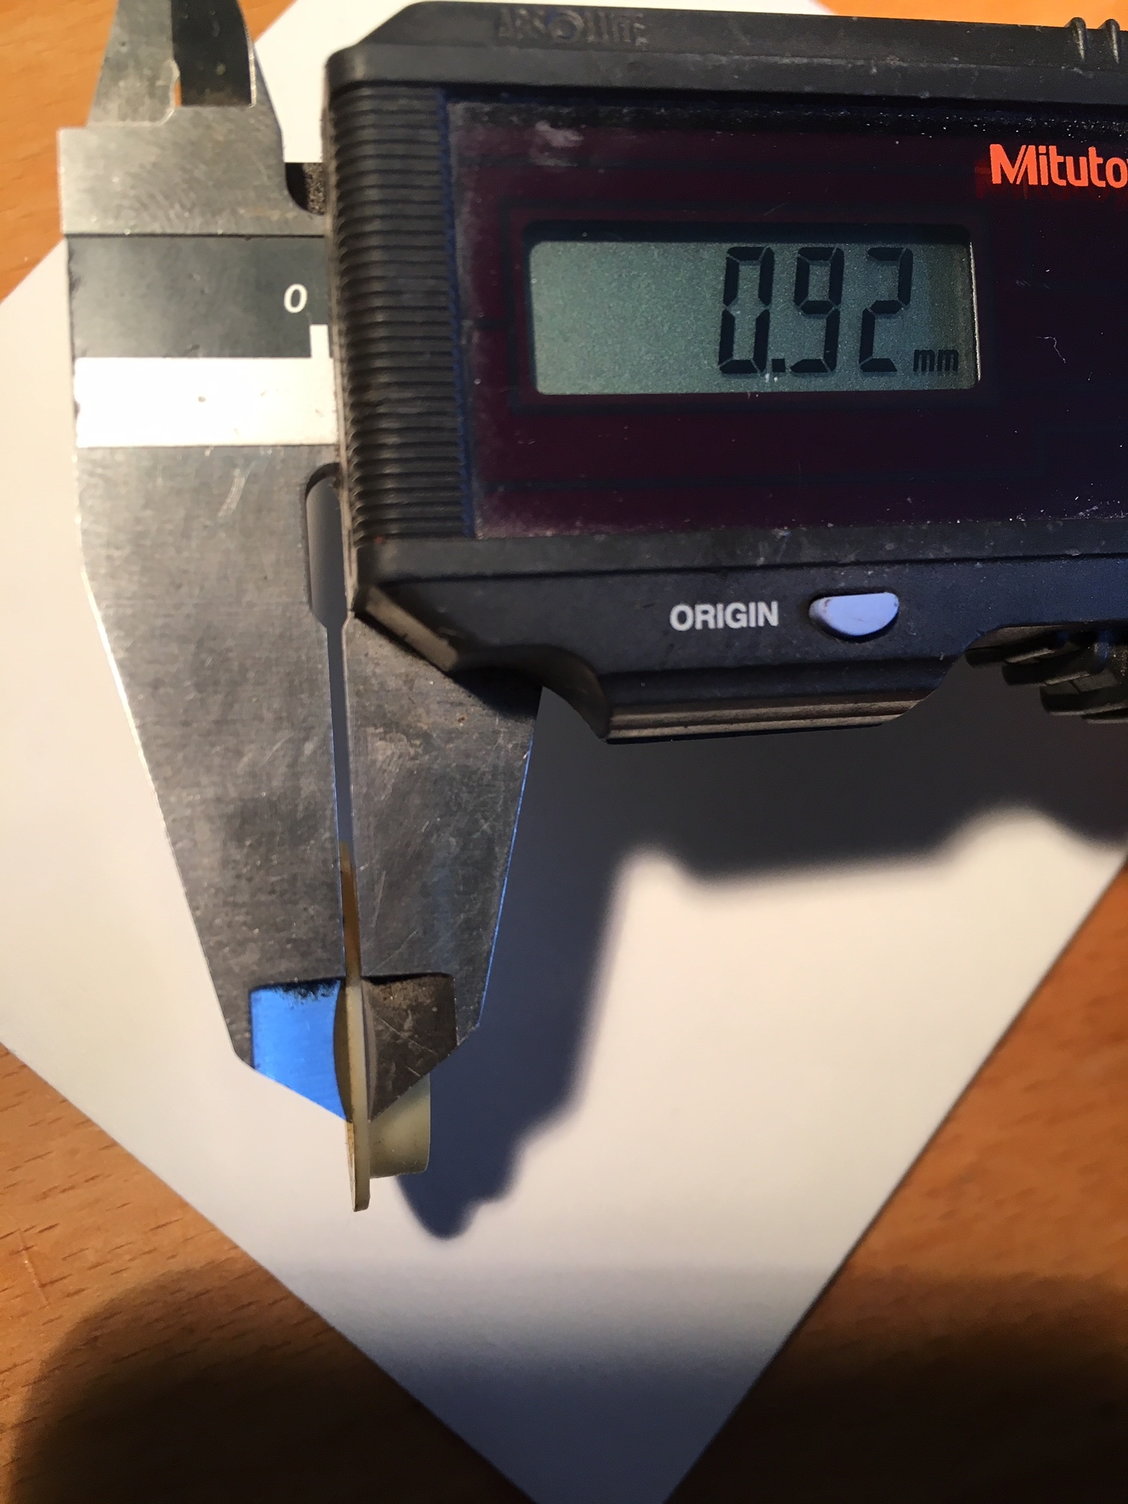
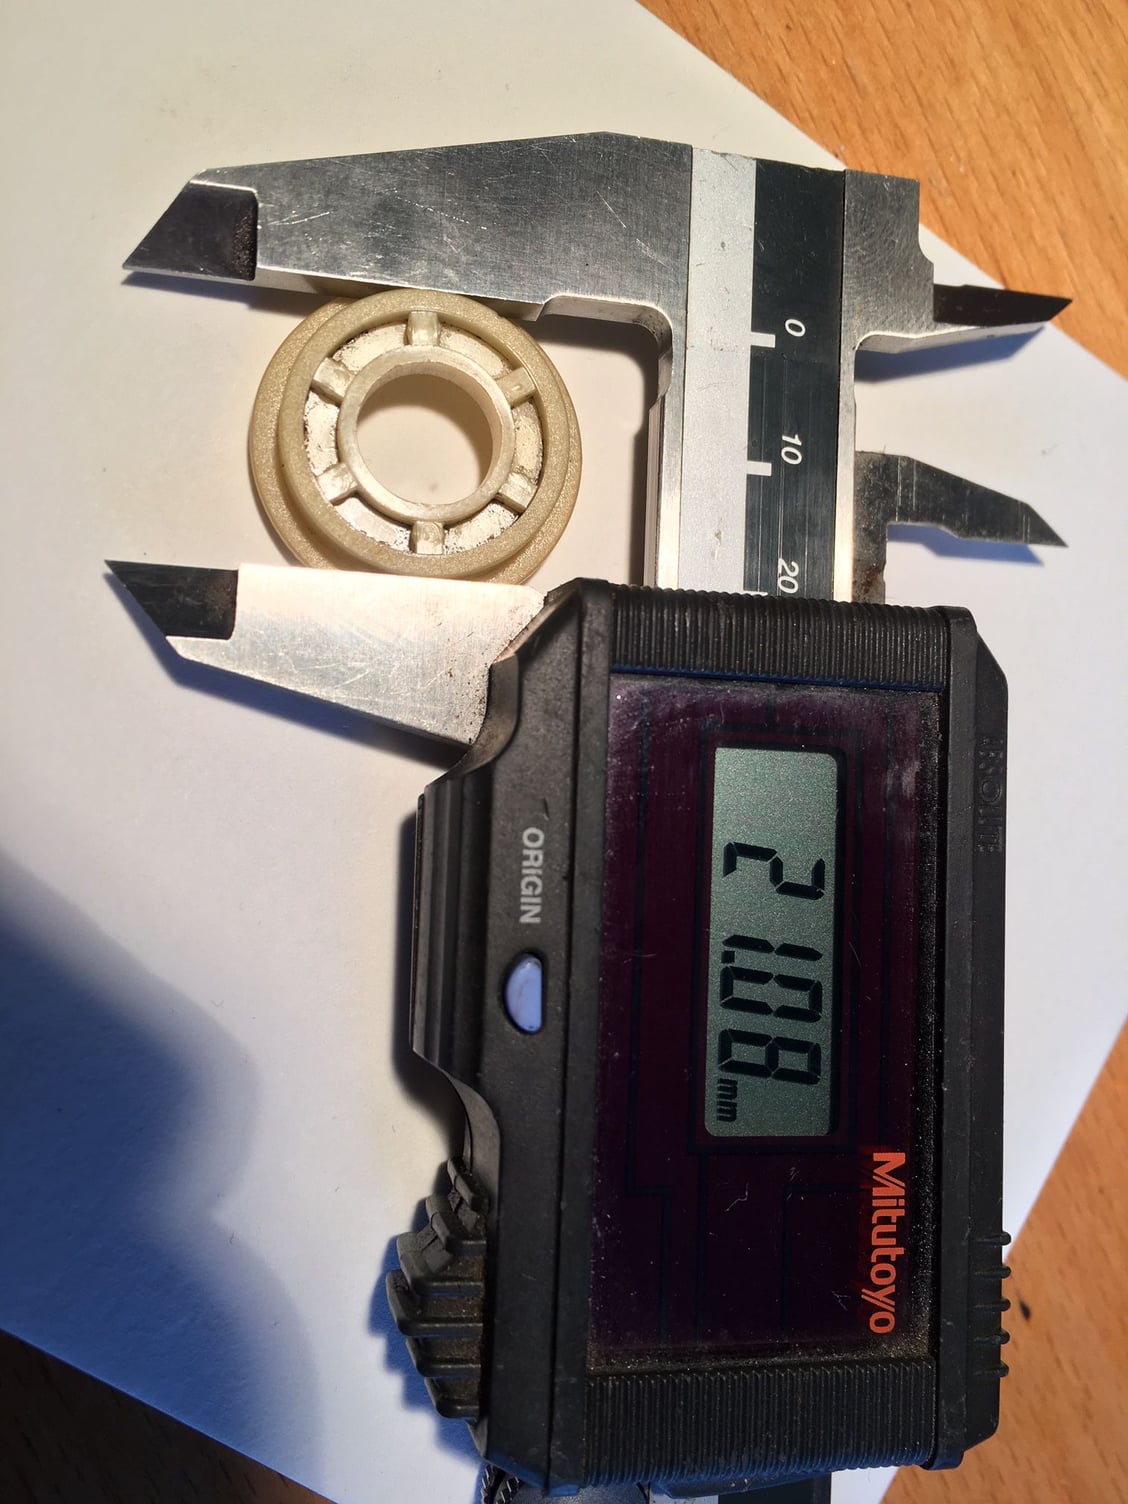
Karl, The spacers' only 'critical' dimension is the ID where the shaft fits. Take a look at them here. They just are placed one against the other and the OD loosely (if that) contains the spring within the 'spool' the spacers form (Dwayne's pic).

Old 11-20-2018, 03:01 PM
  #12  
ROG100
Basic Sponsor
Rennlist
Site Sponsor

 
ROG100's Avatar
 
Join Date: Jan 2003
Location: Double Oak, TX
Posts: 16,815
Received 830 Likes on 326 Posts
Default

There is the problem and as I said the parts are NLA. If we could get a sample part we could have them made. Maybe Mr. Edwards has the dimensions.
Old 11-20-2018, 03:15 PM
  #13  
Rob Edwards
Archive Gatekeeper
Rennlist Member
 
Rob Edwards's Avatar
 
Join Date: Sep 2002
Location: Irvine, CA
Posts: 17,315
Received 2,555 Likes on 1,235 Posts
Default

I've got a couple here, will scan them and send to Nate.
Old 11-20-2018, 03:23 PM
  #14  
Luis A.
Addict
Rennlist Member

Thread Starter
 
Luis A.'s Avatar
 
Join Date: Aug 2001
Location: Milwaukee, WI
Posts: 669
Received 26 Likes on 6 Posts
Default

Here the dimensions of mine. Needless to say since I am the instigator of this project I am willing to put up some funding to get it done... (sorry for the huge pics...)

Thank you all!


Last edited by Luis A.; 11-20-2018 at 03:24 PM. Reason: removed redundant pic
Old 11-20-2018, 03:31 PM
  #15  
ROG100
Basic Sponsor
Rennlist
Site Sponsor

 
ROG100's Avatar
 
Join Date: Jan 2003
Location: Double Oak, TX
Posts: 16,815
Received 830 Likes on 326 Posts
Default

Nate - I will take 100 please


Quick Reply: WTB: Flappy valve shaft plastic colllar


All times are GMT -3. The time now is 04:29 PM.