When you click on links to various merchants on this site and make a purchase, this can result in this site earning a commission. Affiliate programs and affiliations include, but are not limited to, the eBay Partner Network.
Use the hole, as leverage, to get a punch in, and try to crack that bond btwn the female threads, and your bolt. Think of it like busting out concrete. Make a small hole, undermine underpan, then you have relief, to start with a sledge. If you can strike the punch, and get some movement (bending inward/unscrewing) then you can start prying. Without first getting that relief, it's not going to pry out with a pic.
The angles I estimated, were hoping to hit it at such of an angle, that it tries to loosen, while your trying to push it inward. That may not be possible from your access. Regardless, use whatever angle you can, which will either push/distort it inward, or loosen. If you MAY be striking it harder into female thread crest, bad angle. :-). Come on, do it!!!!! Sounds like "Arnold".
The angles I estimated, were hoping to hit it at such of an angle, that it tries to loosen, while your trying to push it inward. That may not be possible from your access. Regardless, use whatever angle you can, which will either push/distort it inward, or loosen. If you MAY be striking it harder into female thread crest, bad angle. :-). Come on, do it!!!!! Sounds like "Arnold".
Yeah I like this idea. Any thoughts on the idea of a file or burr grinder to try to split the 'meat' down the middle?
Its wierd, I've still not seen much in the way of threads. I feel like the thin section should be very close, if not into the threads, but I feel like I should be seeing them.
Another thought. Heating the remaining bolt may not be so bad. Although it'll expand, it'll soften, and you may have a better chance striking it inward, while doing so. If none of this yields anything, then grind the bulk of meat away, and try prying again.
A small, triangular cross-section jeweler's file should do the trick. Just keep it vertical and check often to determine when you break through. Even if you should nick the threads, it's no big deal.
The more of the meaty section you grind out, the less tension and stability the remnance will have.
Sorry, I thought you had removed some of the external threads from the bore, so it was only a matter of picking the remaining external threads out of the internal threads.
I admit to not being able to see existing internal threads on the thin side, but thought it was just the photo. So there have been no external threads removed from this bore at this point?
If this is the case, try to even things out with a carbide grinding tool. A long reach tool may be necessary to reach completely through the bore.
Optimal for stability purposes, is a long enough bit to bottom out in the drill chuck, and just reach past the bore at the other end.
High grade US made bits are always preferable and will hold their edge throughout the job, but are pricier. China crap, is just that.
It also seems that we have yet to establish if we have drilled into the existing internal threads. If this is the case, the rest of the work is moot. EDIT ...And its time for a time-sert.
A time-sert is preferable to a helicoil, especially in this application of higher torque requirements.
Another thought. Heating the remaining bolt may not be so bad. Although it'll expand, it'll soften, and you may have a better chance striking it inward, while doing so. If none of this yields anything, then grind the bulk of meat away, and try prying again.
I'm scared to heat it. I imagine scorch marks, melting cosmoline, fires that require a fire extinguisher at my elbow. Yikes!
The more of the meaty section you grind out, the less tension and stability the remnance will have.
Sorry, I thought you had removed some of the external threads from the bore, so it was only a matter of picking the remaining external threads out of the internal threads.
I admit to not being able to see existing internal threads on the thin side, but thought it was just the photo. So there have been no external threads removed from this bore at this point?
If this is the case, try to even things out with a carbide grinding tool. A long reach tool may be necessary to reach completely through the bore.
Optimal for stability purposes, is a long enough bit to bottom out in the drill chuck, and just reach past the bore at the other end.
High grade US made bits are always preferable and will hold their edge throughout the job, but are pricier. China crap, is just that.
It also seems that we have yet to establish if we have drilled into the existing internal threads. If this is the case, the rest of the work is moot.
A time-sert is preferable to a helicoil, especially in this application of higher torque requirements.
I watched along the way as I was drilling and never saw threads. It seems like that side should be at the threads or very close. Could I have drilled through them without seeing them on that thin side? It seems like if I had gone through to the internal threads that I'd see evidence of the shank being gone on that side, there would be a visible edge right?
What do you mean that the rest of the work is moot if the internal threads have been drilled?
If heat is out you can also use cold
I use Loctite Freeze & Release, it's advertized to lower temp to -45F, it comes in a spray can, I get it at a local Kaman Industrial distribution center, They are also a great resource for replacement mono-*****
If heat is out you can also use cold
I use Loctite Freeze & Release, it's advertized to lower temp to -45F, it comes in a spray can, I get it at a local Kaman Industrial distribution center, They are also a great resource for replacement mono-*****
Wonder if you could get a little canister of liquid nitrogen, maybe one of those wart removers, and get the same result?
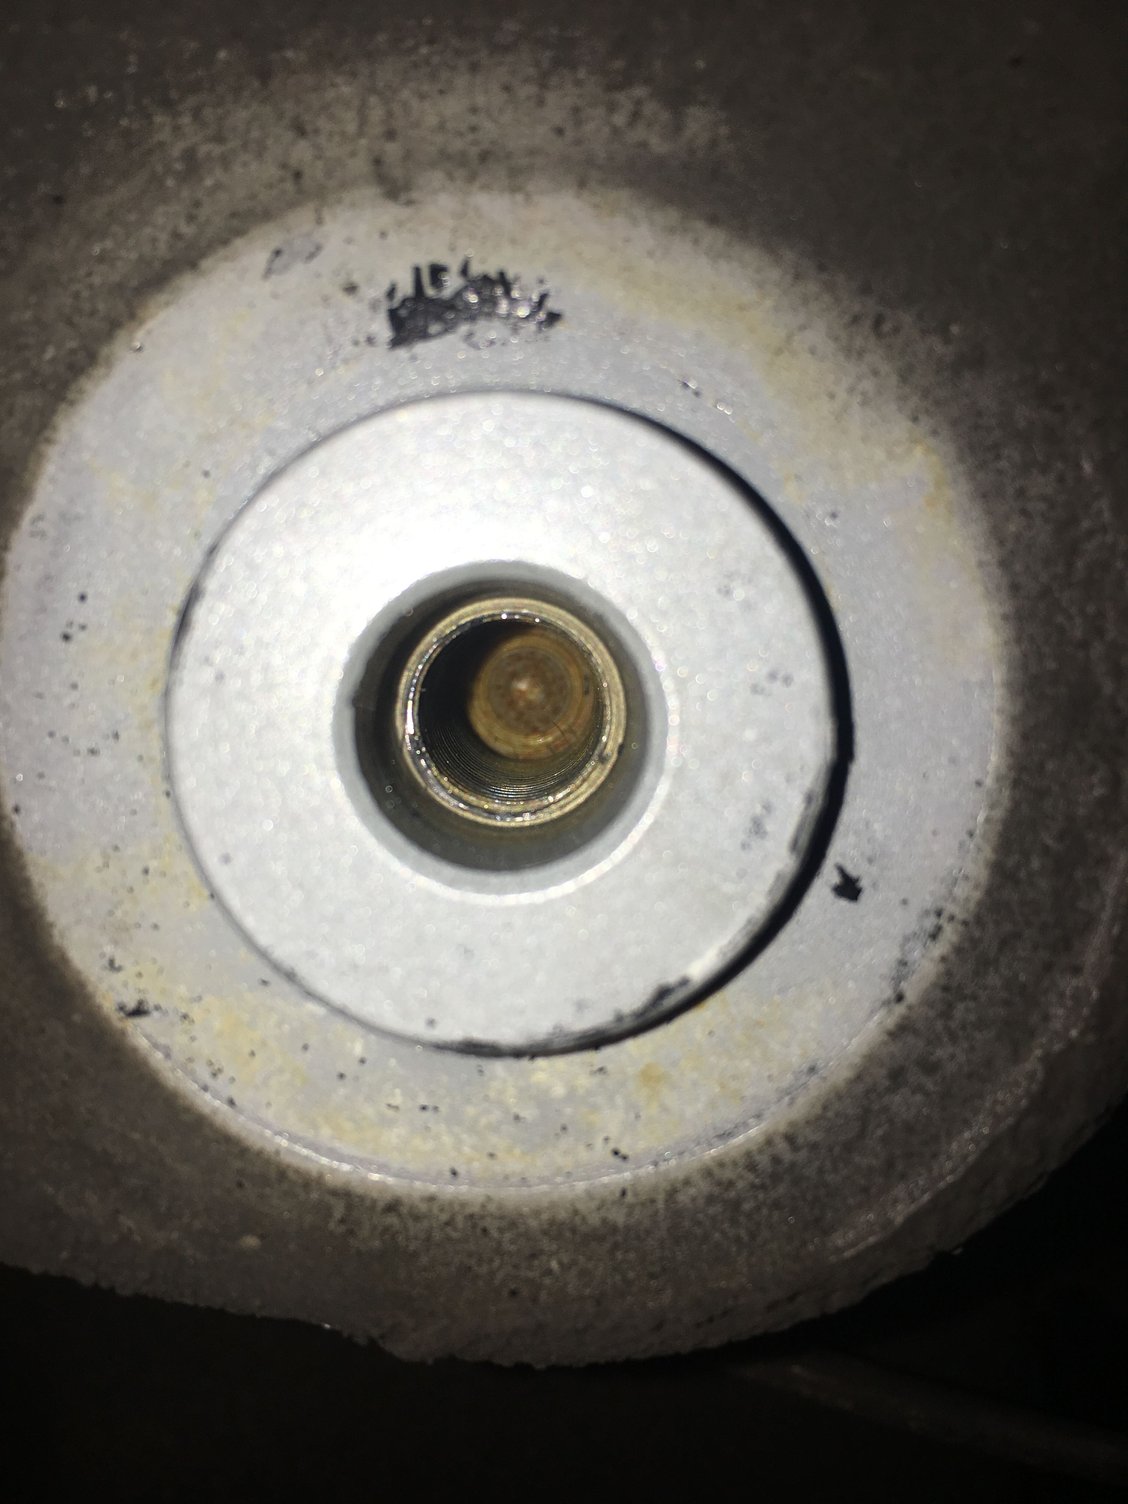
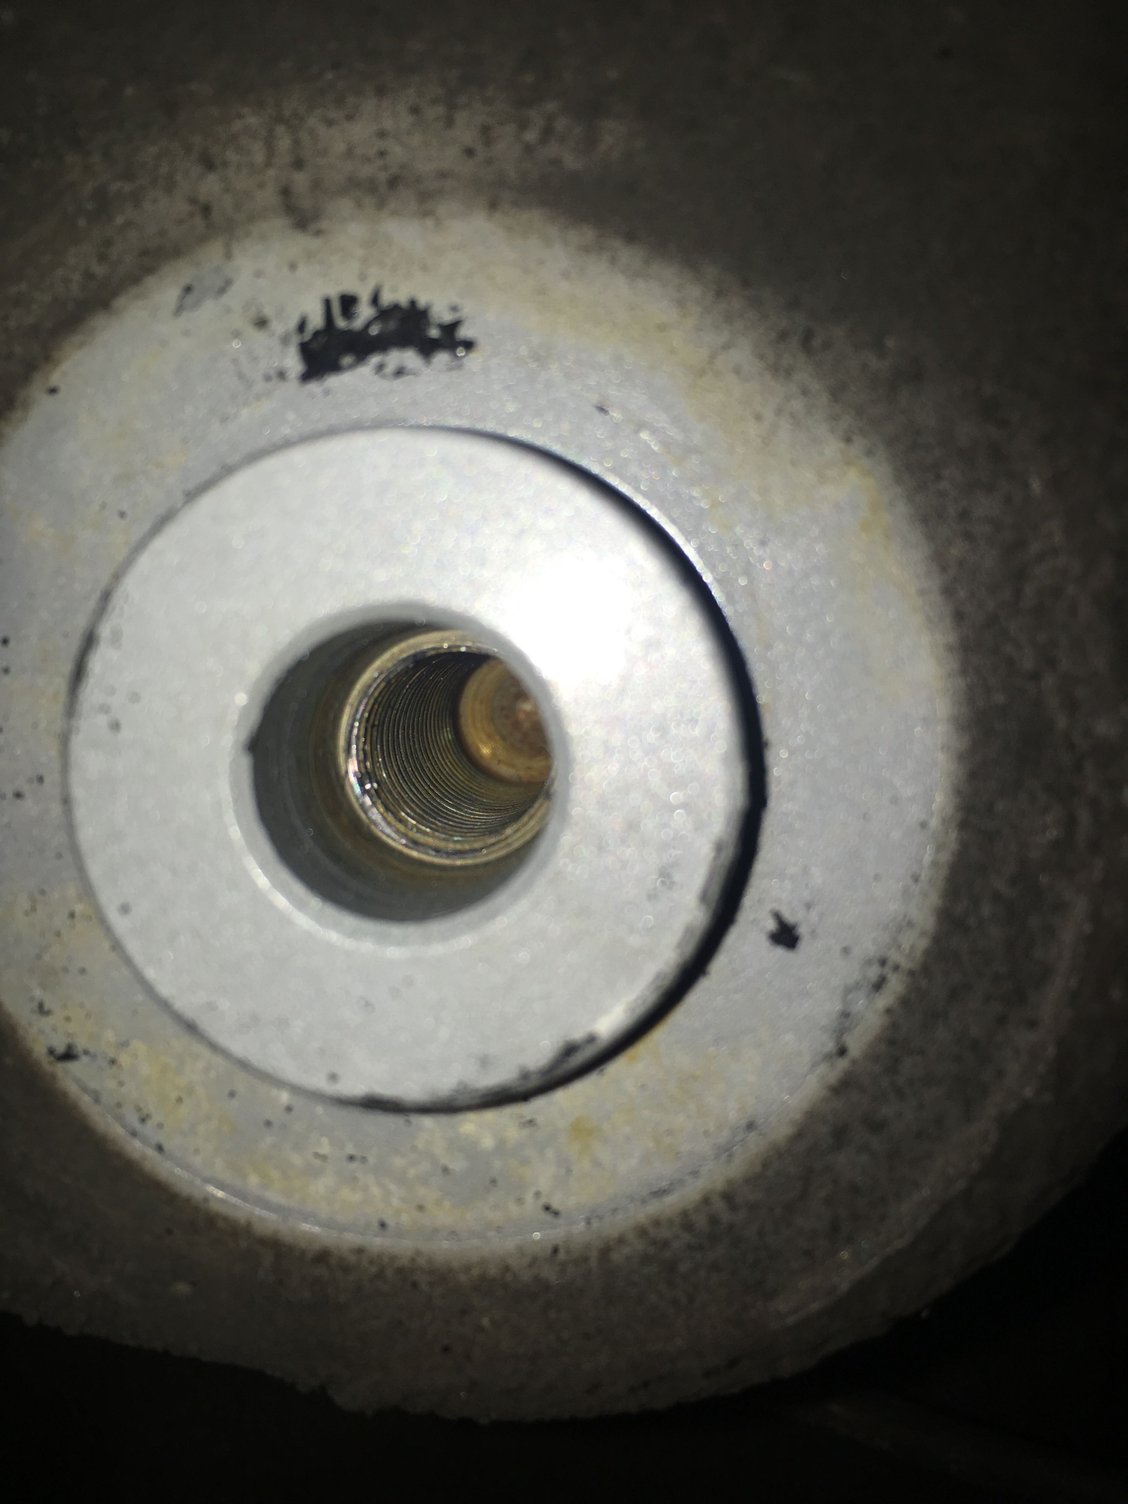
Here are some pictures of the other hole, the one in good shape. If I compare to the drilled side I think that the thin part is in fact drilled through the threads. So I have 'meat' on one side, and drilled to outer diameter on the other. That's what it looks like to me anyway.
Wow, I feel for you. You've done a great job of drilling out the bolt. I can offer several things. First off, use Kroil to saturate the threads. My experience is that it is superior to PB Blaster. Unfortunately, you cannot get it from any retail stores like Ace or an auto parts store.
Second, it appears that you may have opened up your hole to the point of drilling out the female threads.
You may be at the point, where the installation of a Timecert is the proper way to repair the hole. To do this, you would drill out the hole oversized which will collapse the remaining bolt, which can then be picked out or collapsed with a thin punch. Once all the remaining material is removed, you can drill out the hole to clean up the area and to a size that will accept a Timecert. Once that hole is drilled, then tap the hole for the Timecert. Install the Timeccert and you are done.
At this juncture, your most agonizing decision may be to give up on saving the existing threads and salvage the threaded area with a Timecert. Do not attempt a Helicoil since they are inferior to a Timecert.
Examining the pictures carefully and zooming in I think that there is a section of the female threads drilled out. Its actually easier to see this in the pictures than in real life. To me it looks like about 1/4 of the circumference has the threads drilled out.
How would I drill this so that the rest of the 'meaty' section comes out?
It seems like the next bit size up would just follow the existing hole and I would start digging deeper into the wall of the thin section.
I'm OK with using a timecert, to all indications it sounds like it is as strong or stronger than the original threads.
Do the best you can. If you fukc it up, use a timesert. You need to get a hole all the way through to use the easy-out. By your photos I don't think you have pooched the threads yet.


 01-22-2017, 05:20 PM